-
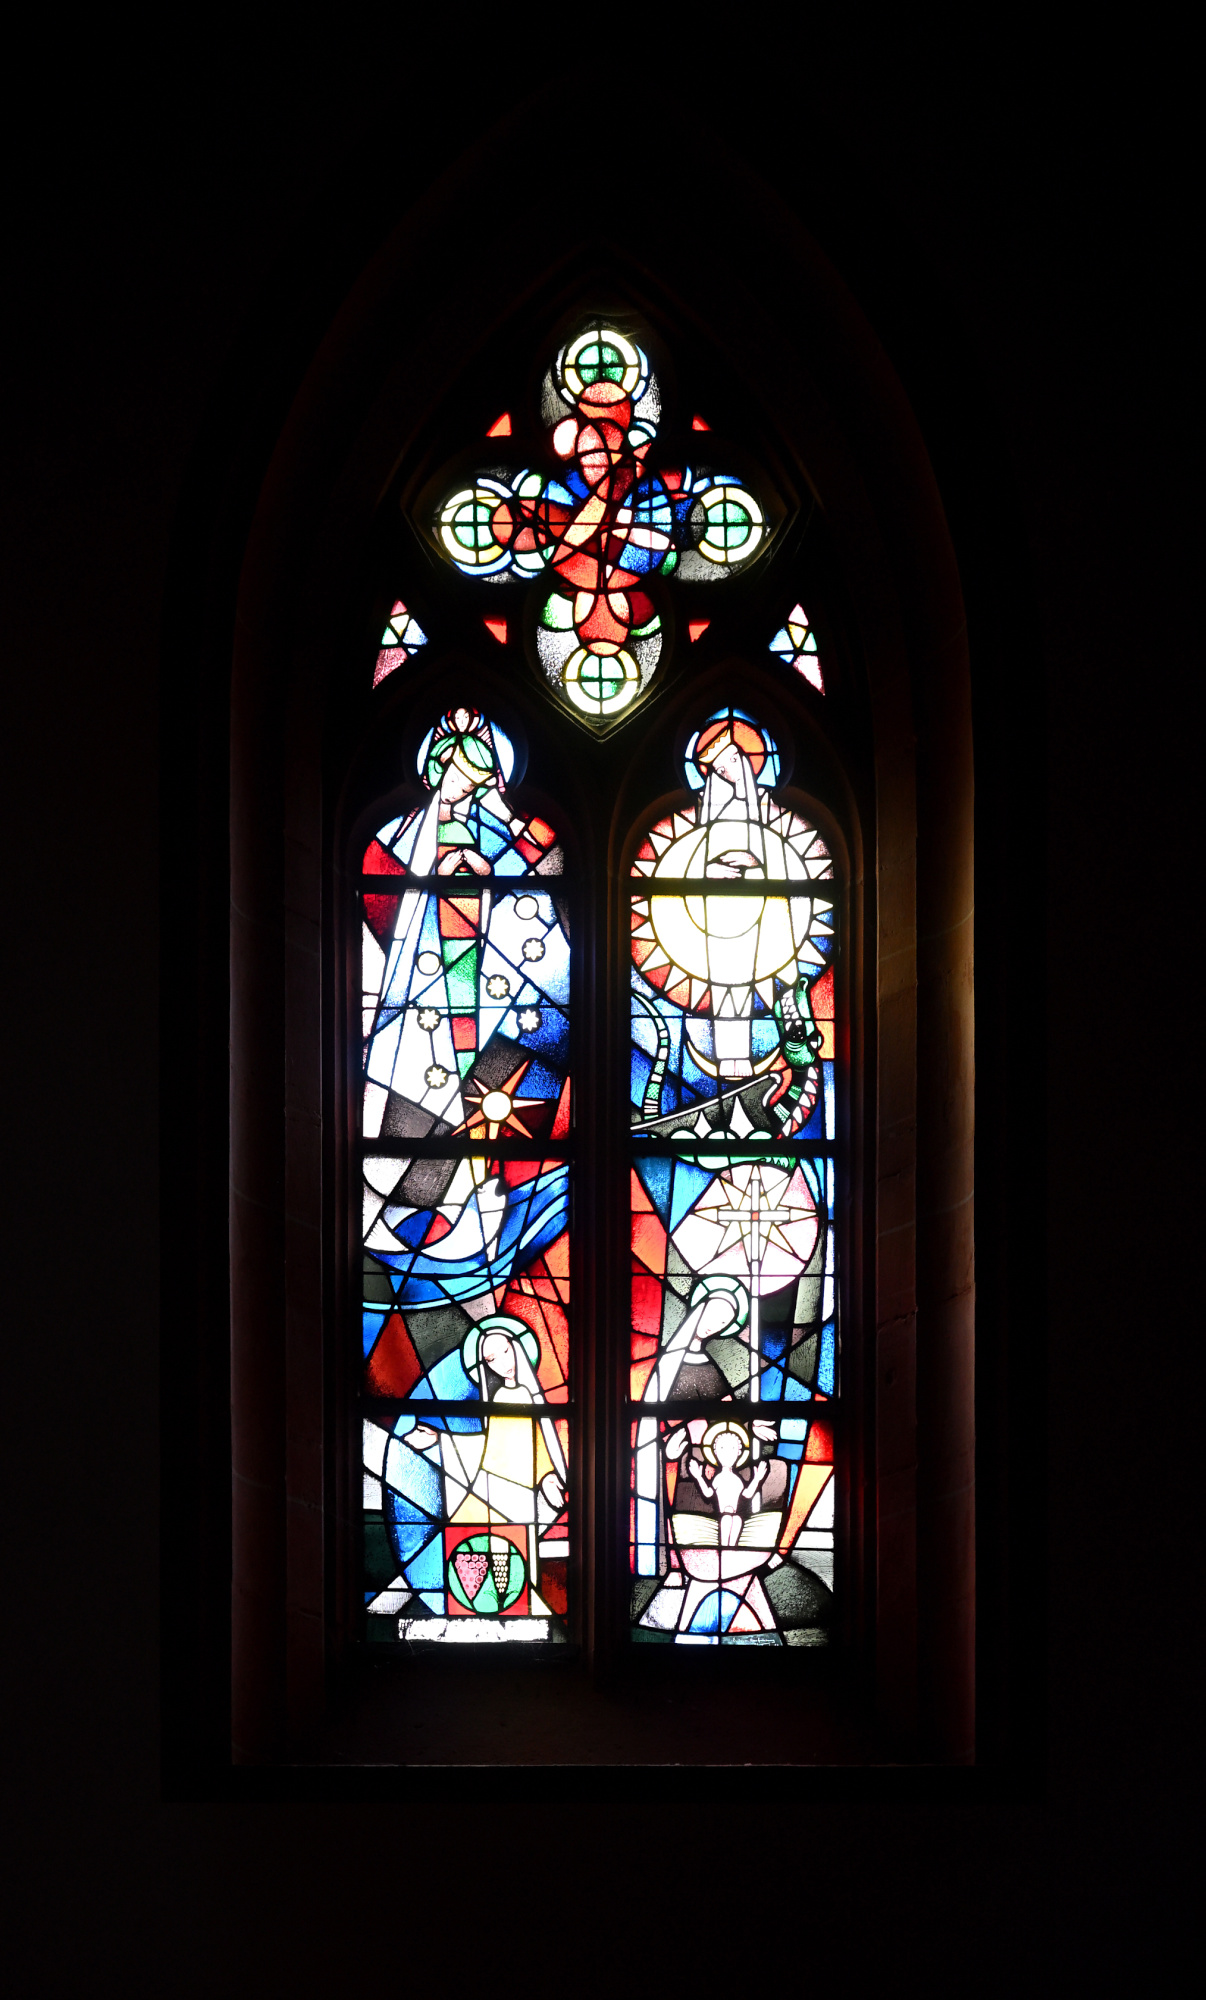
Chagall Fenster der Stephanskirche in Mainz
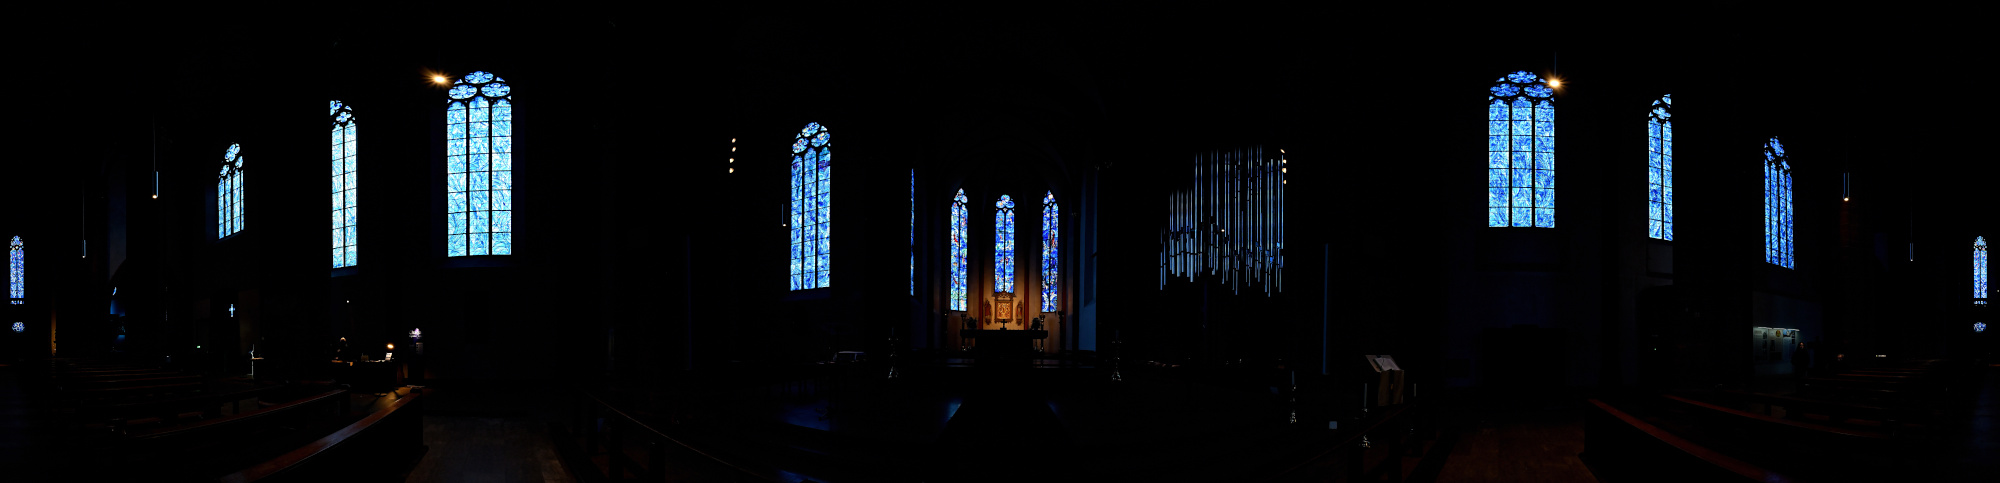
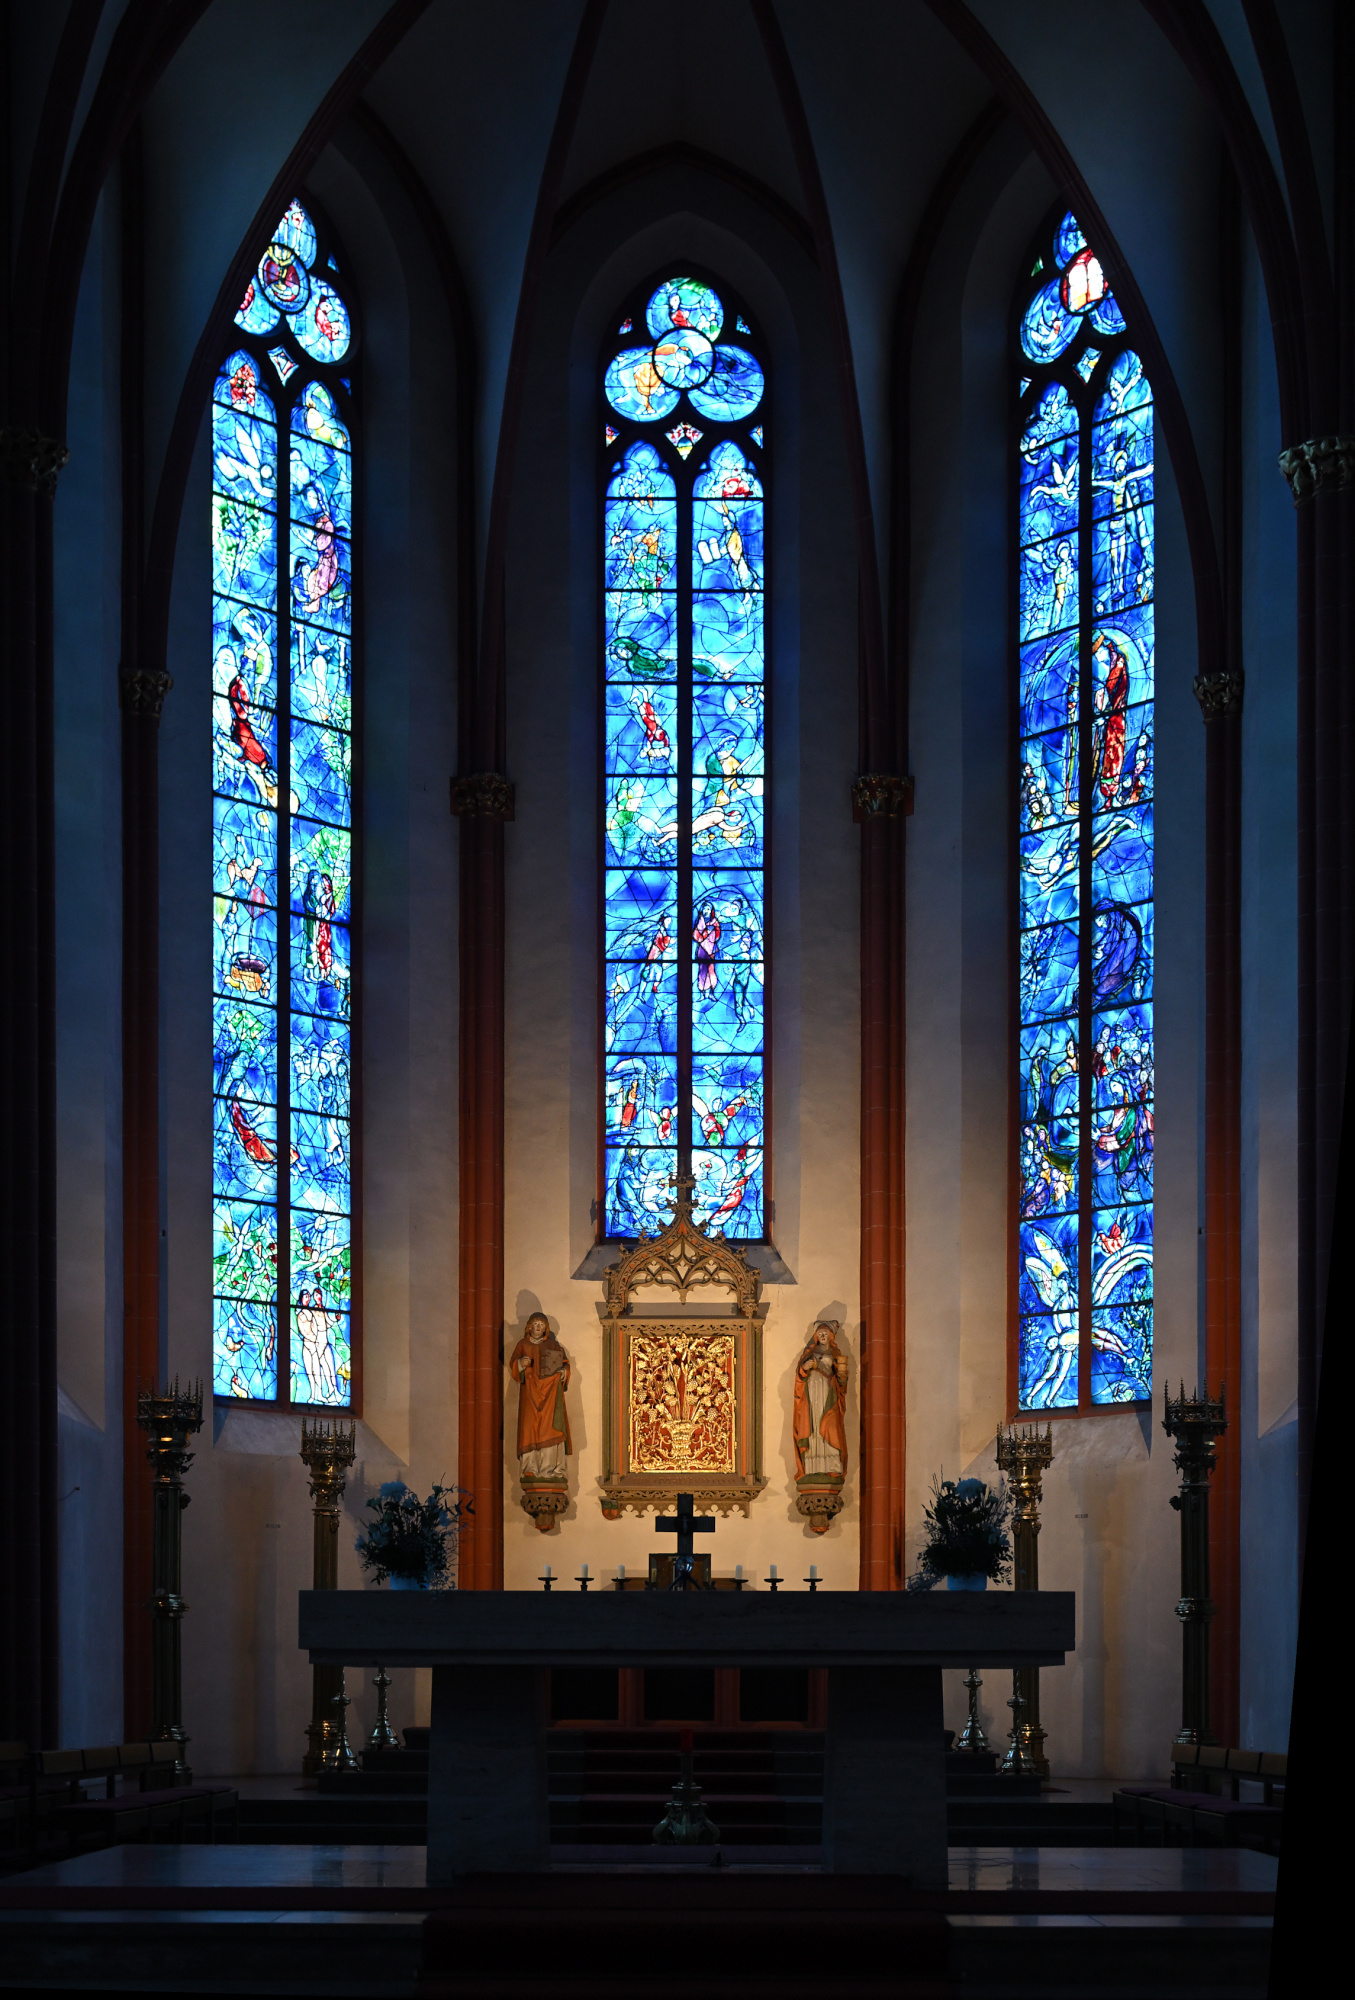
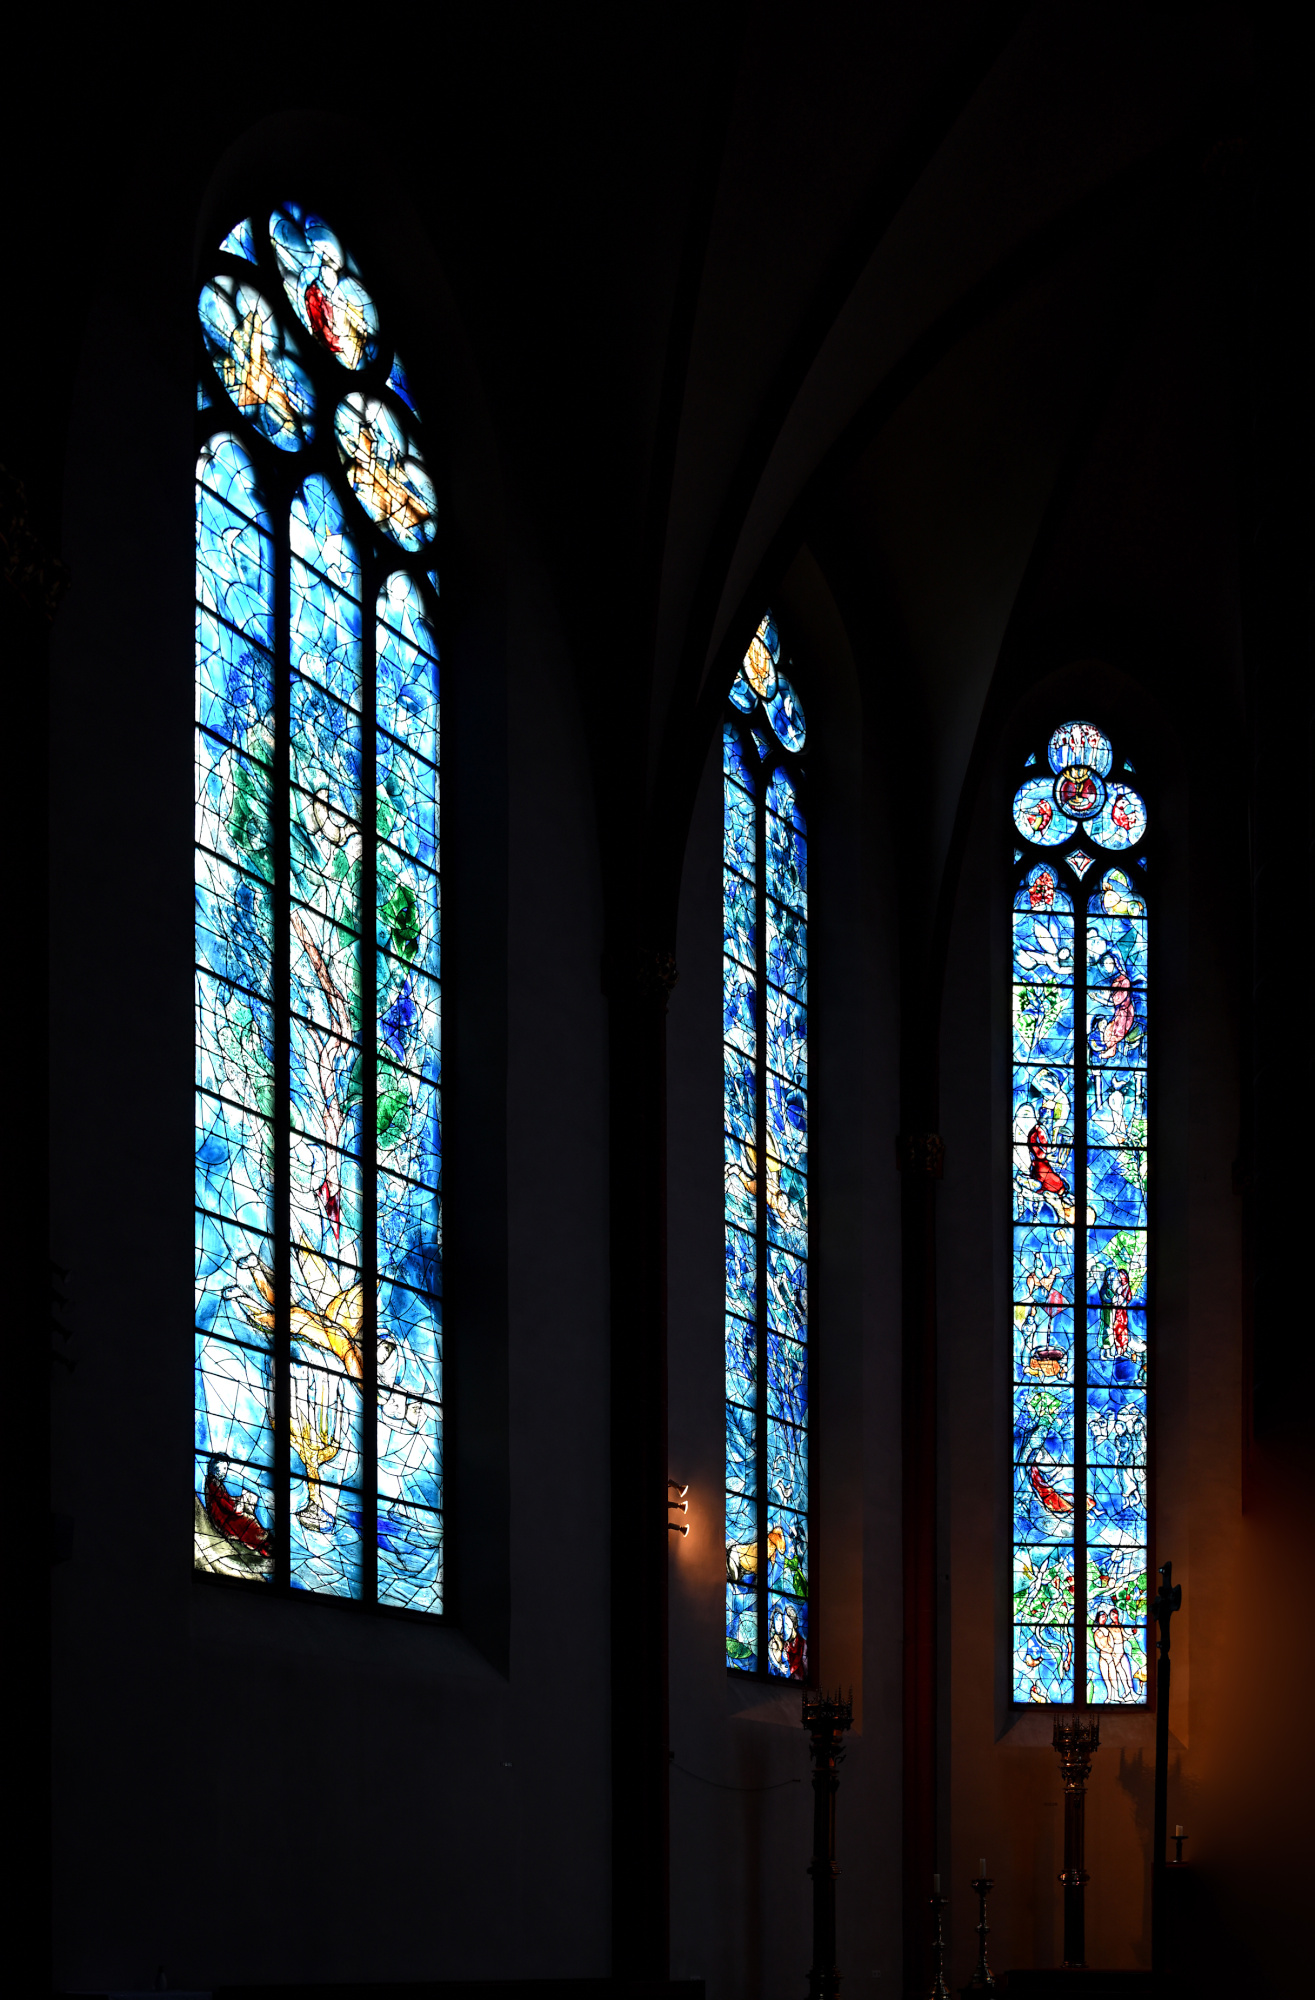
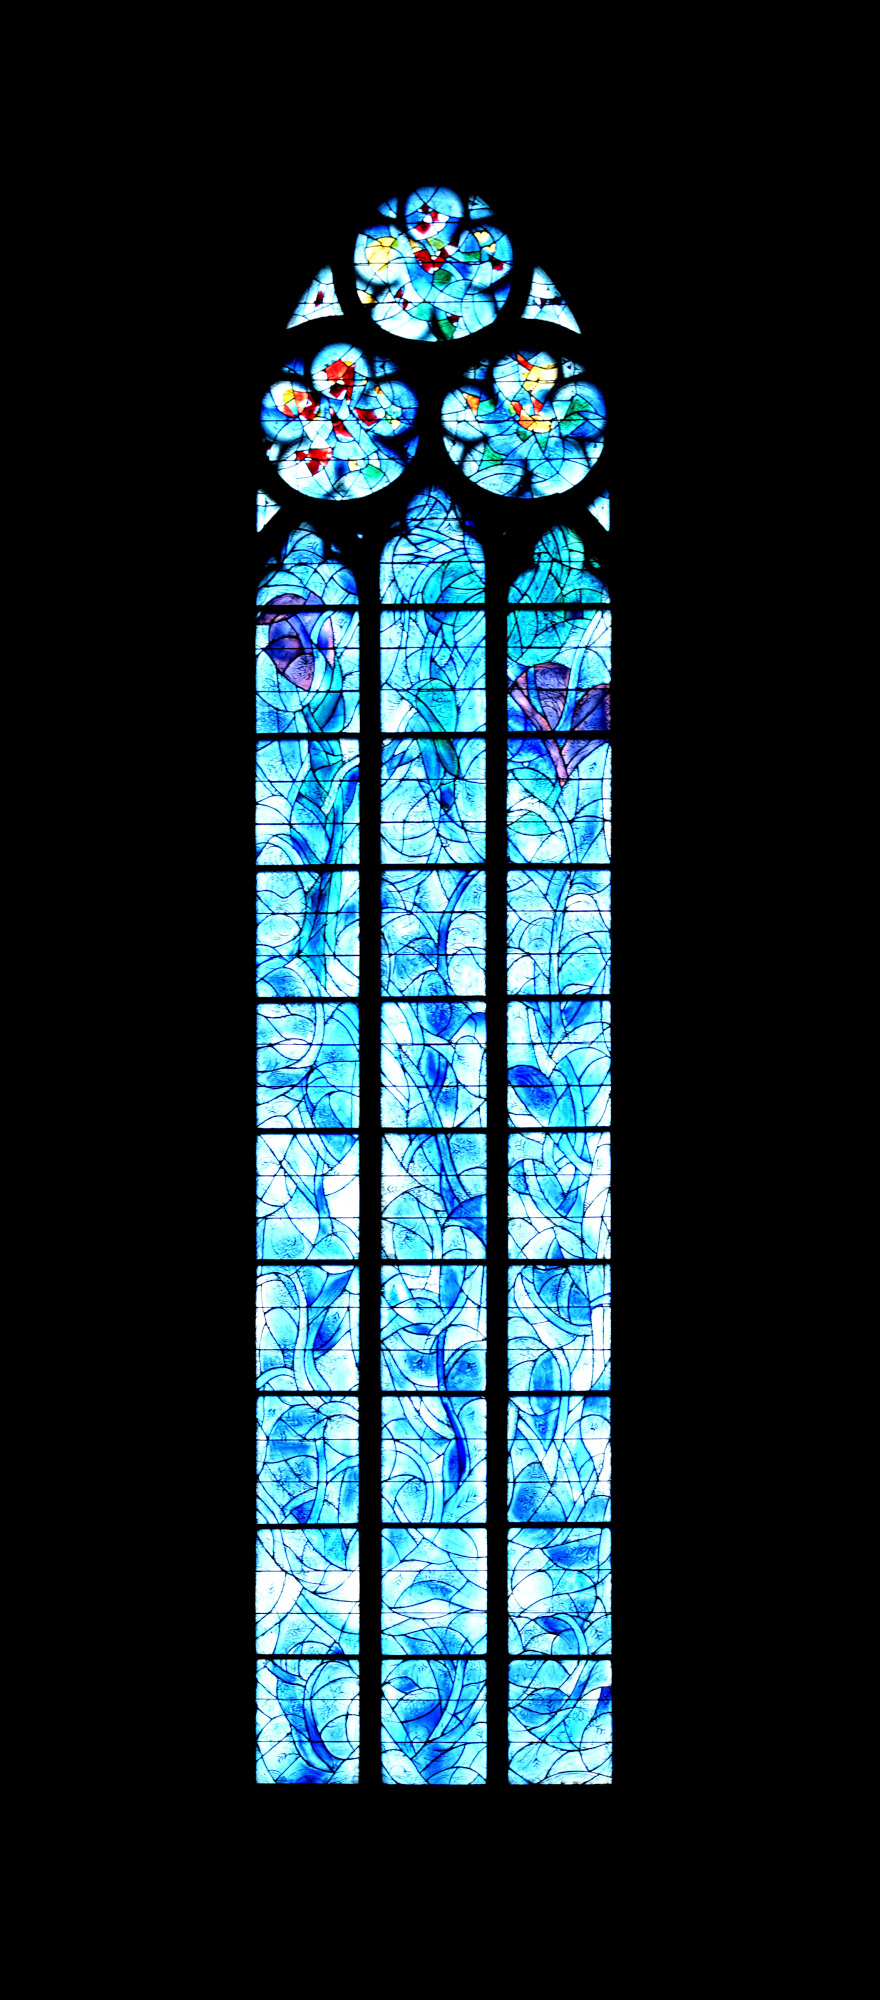
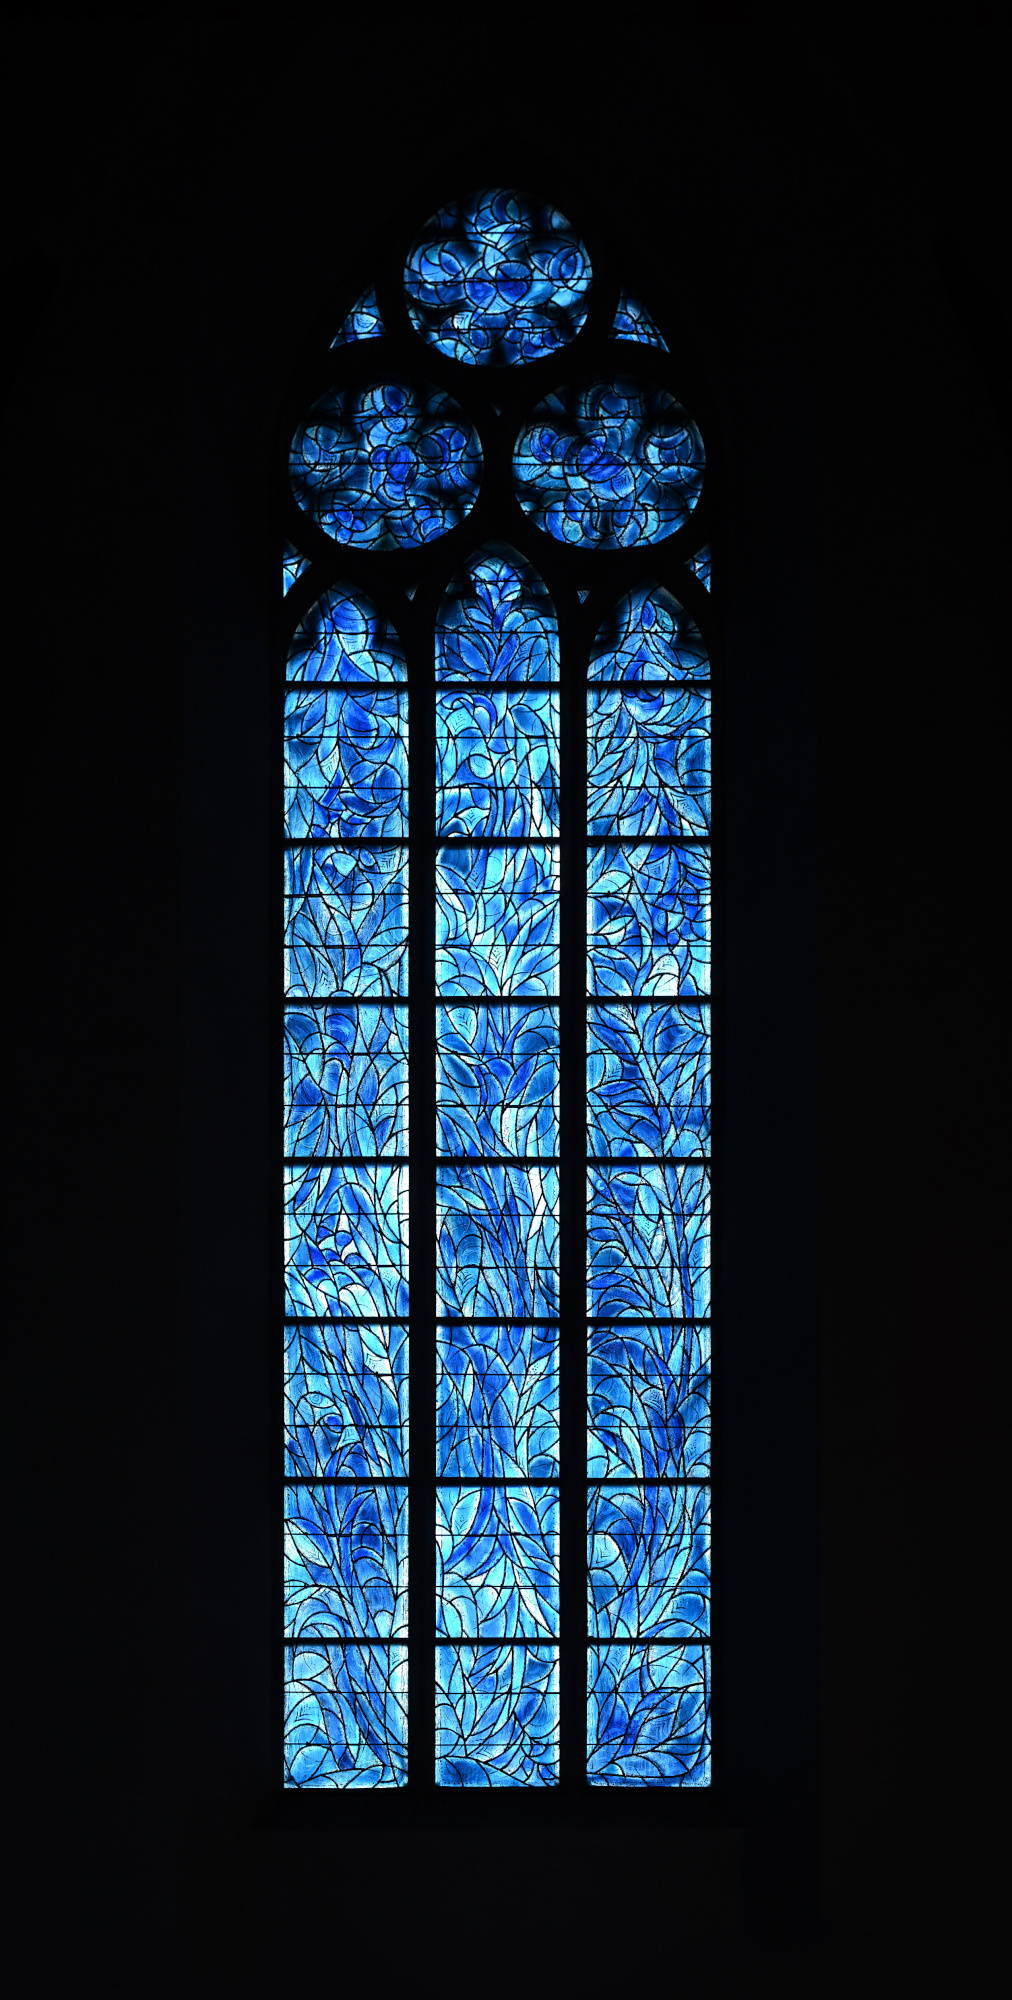
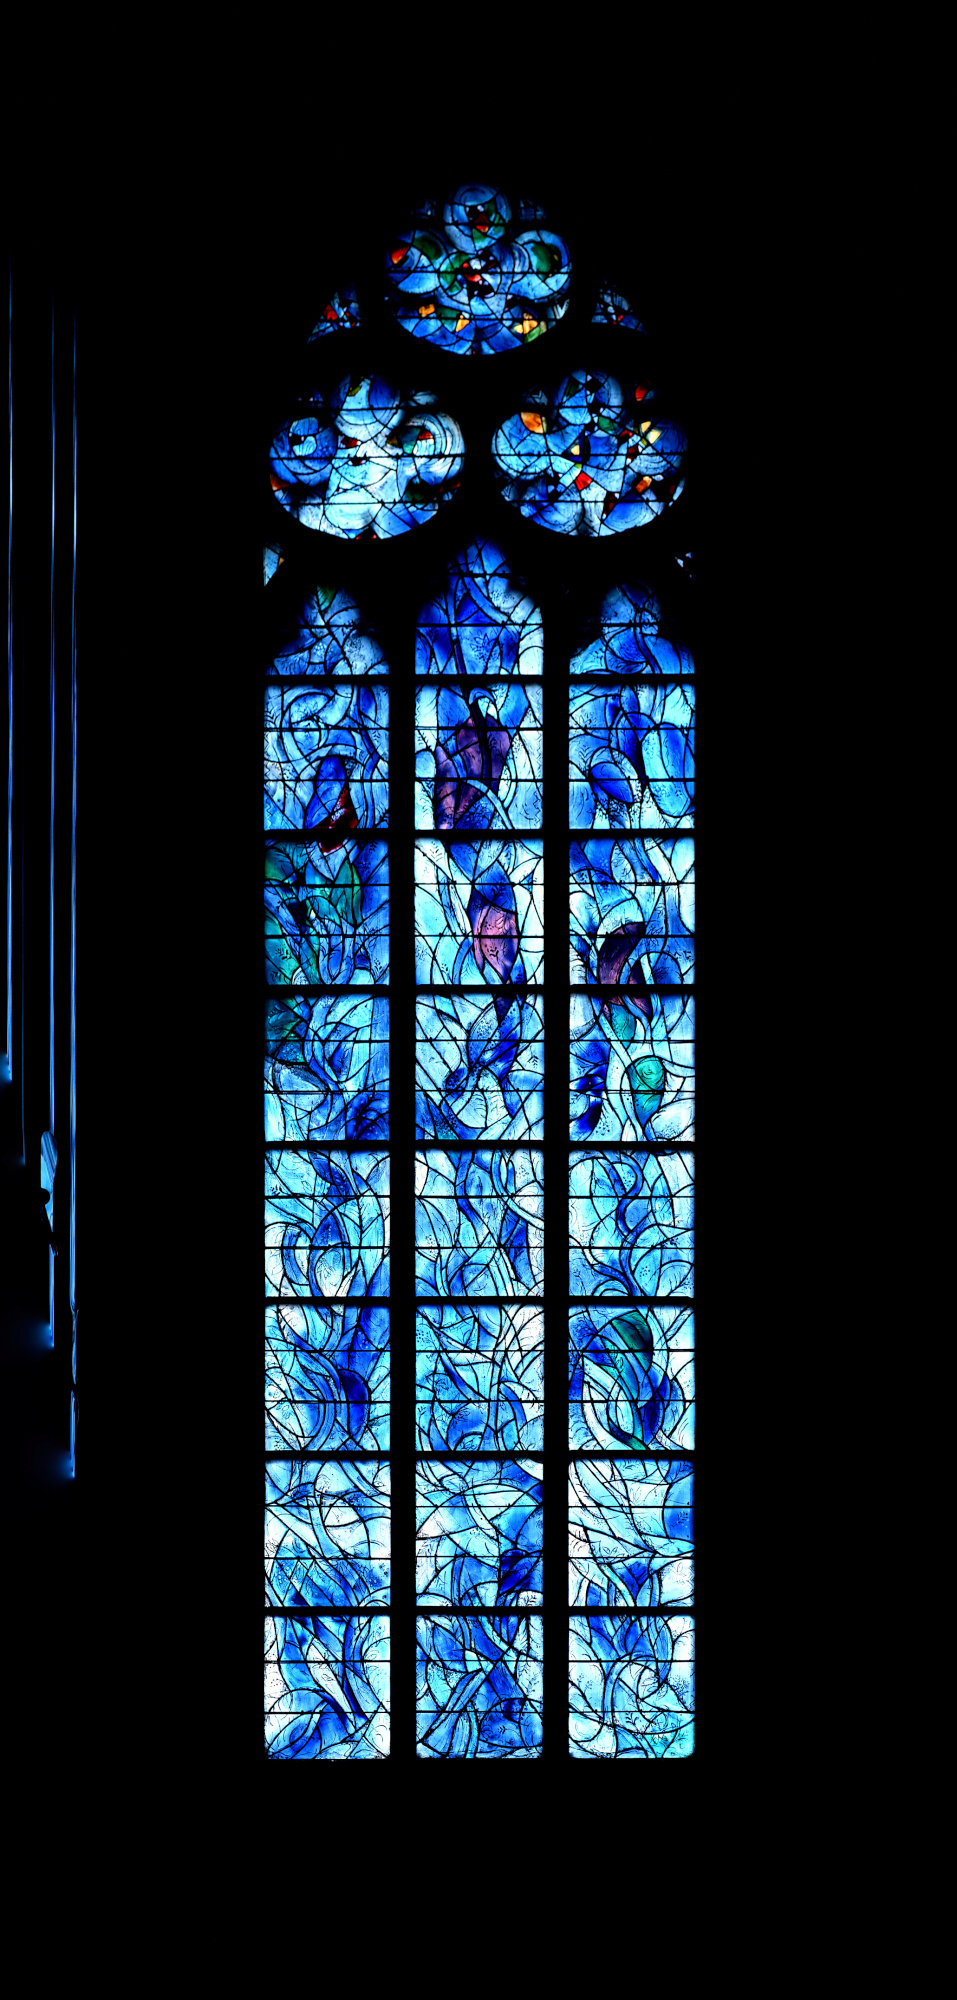
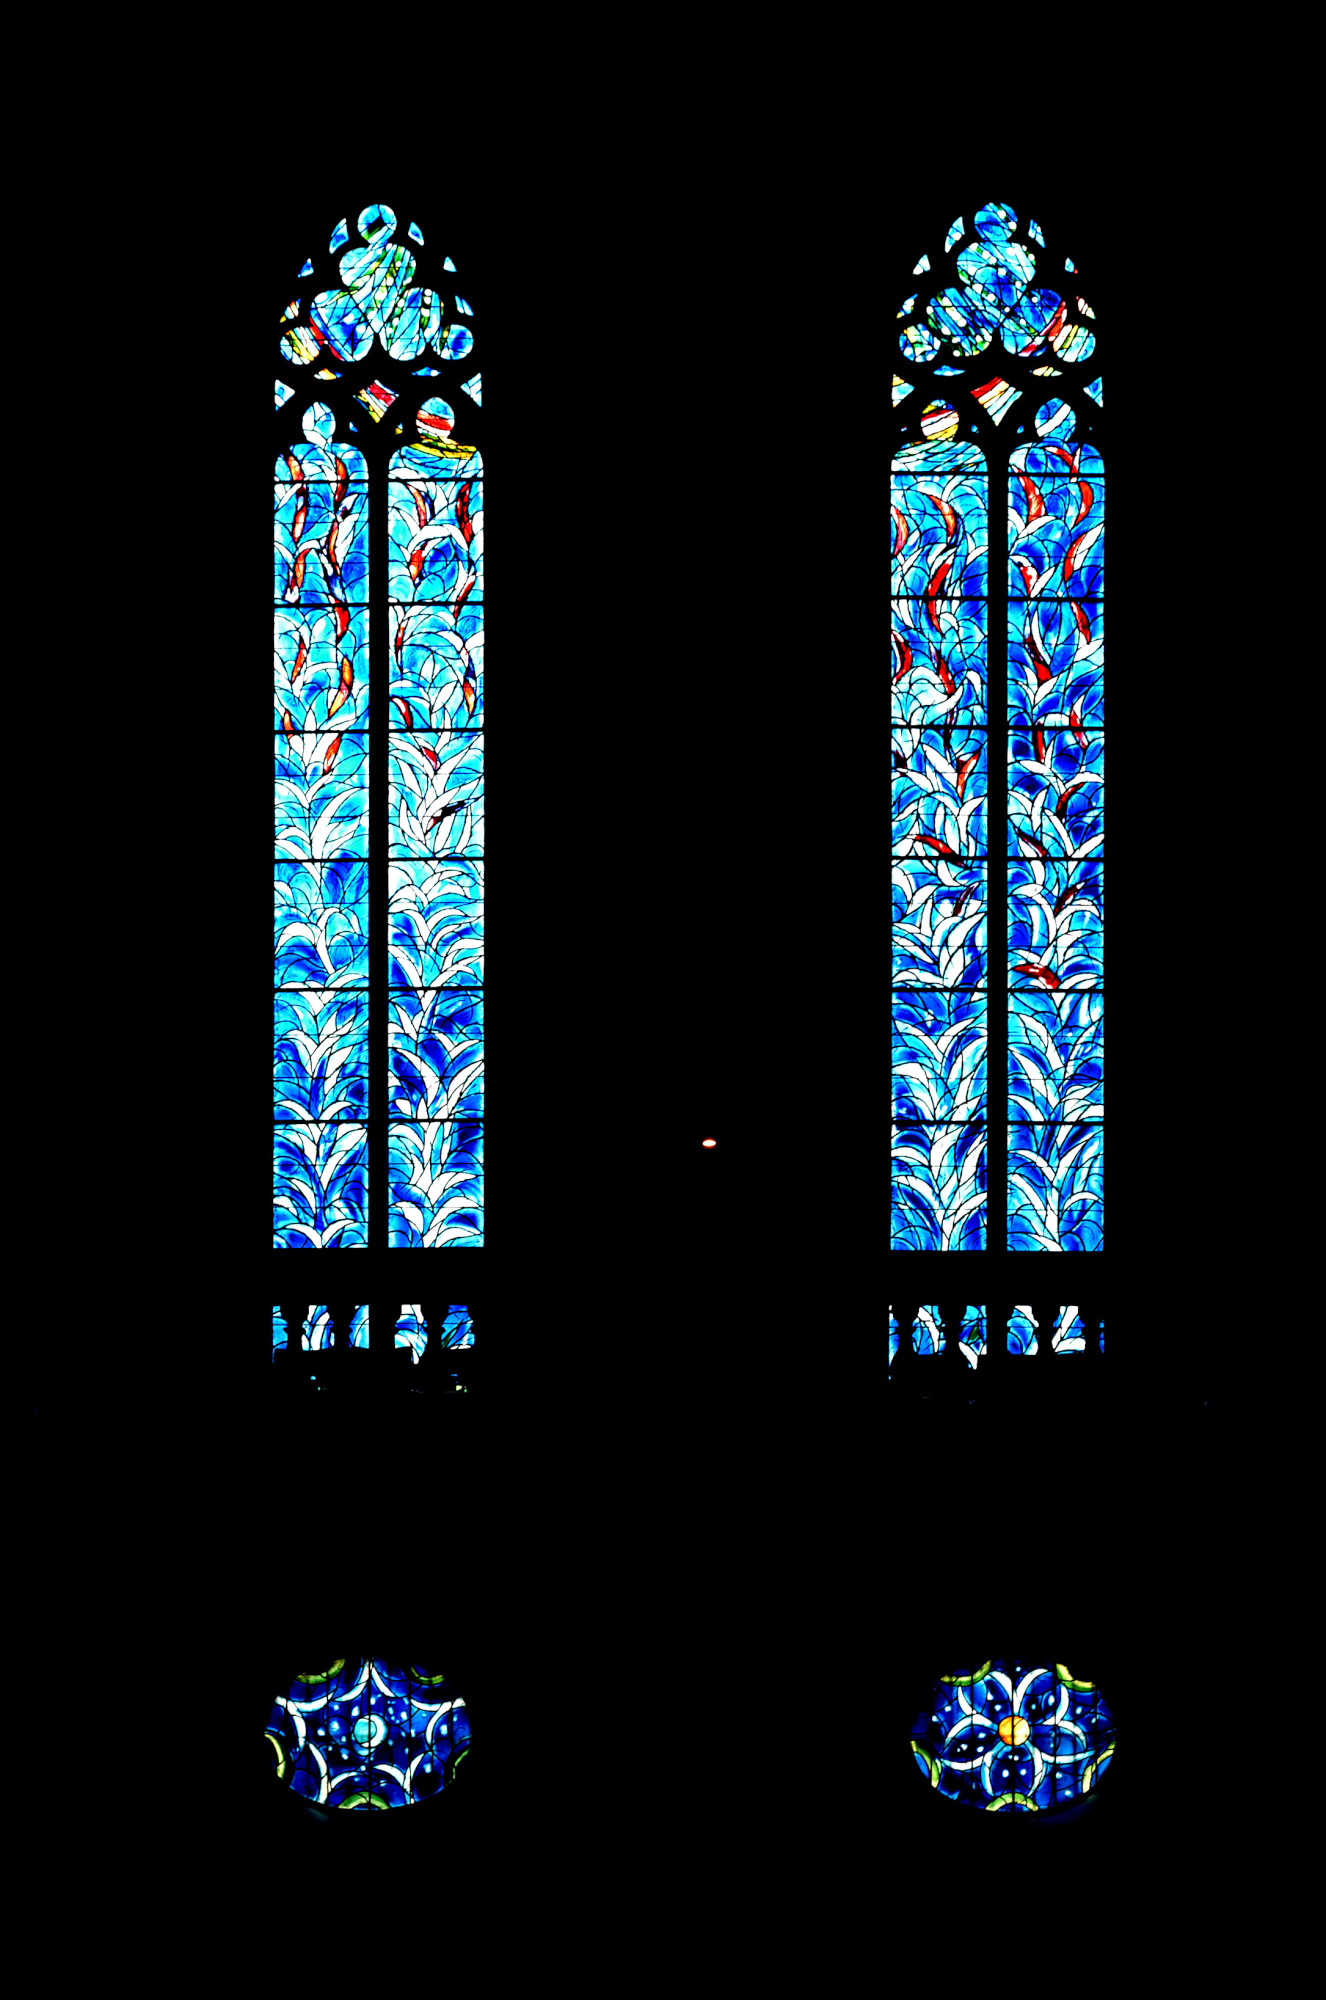
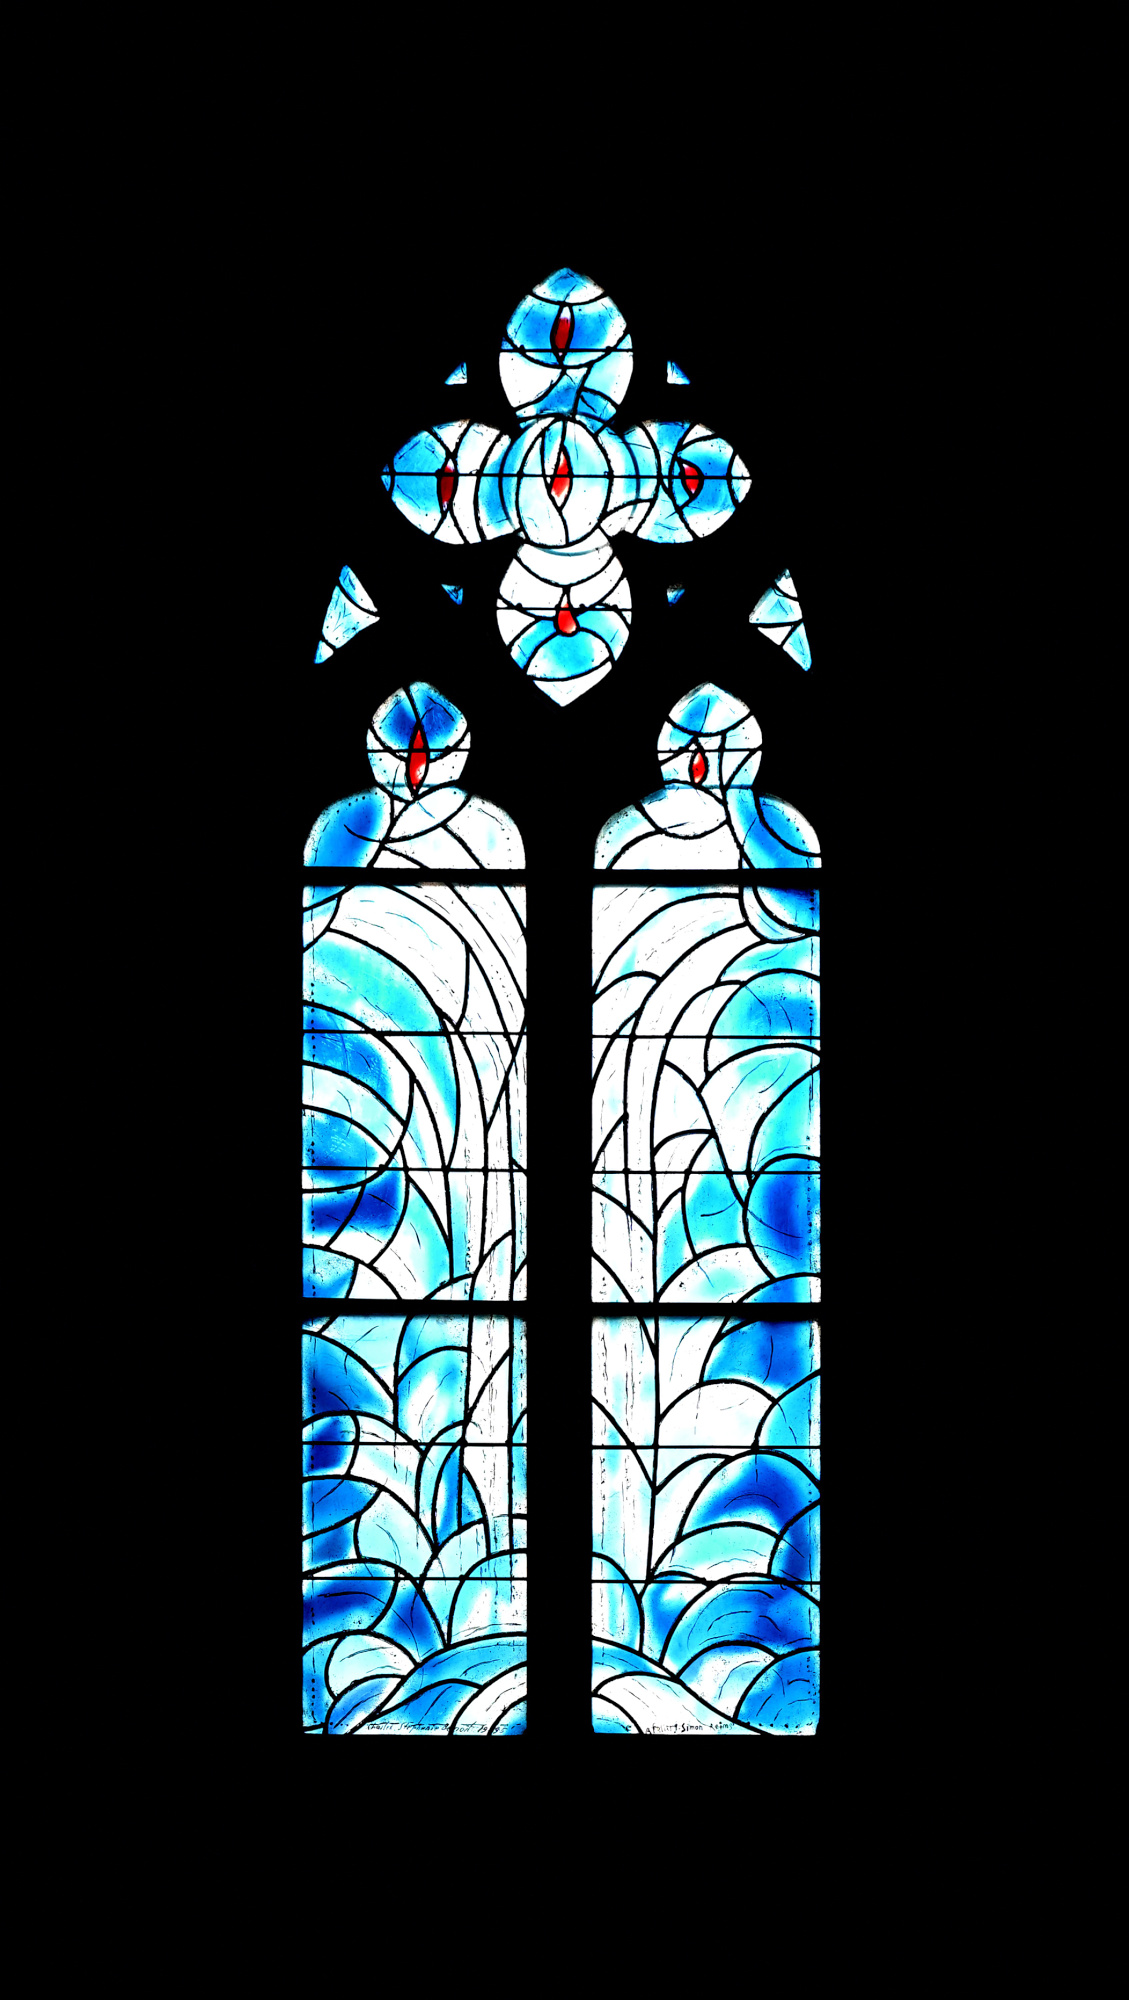
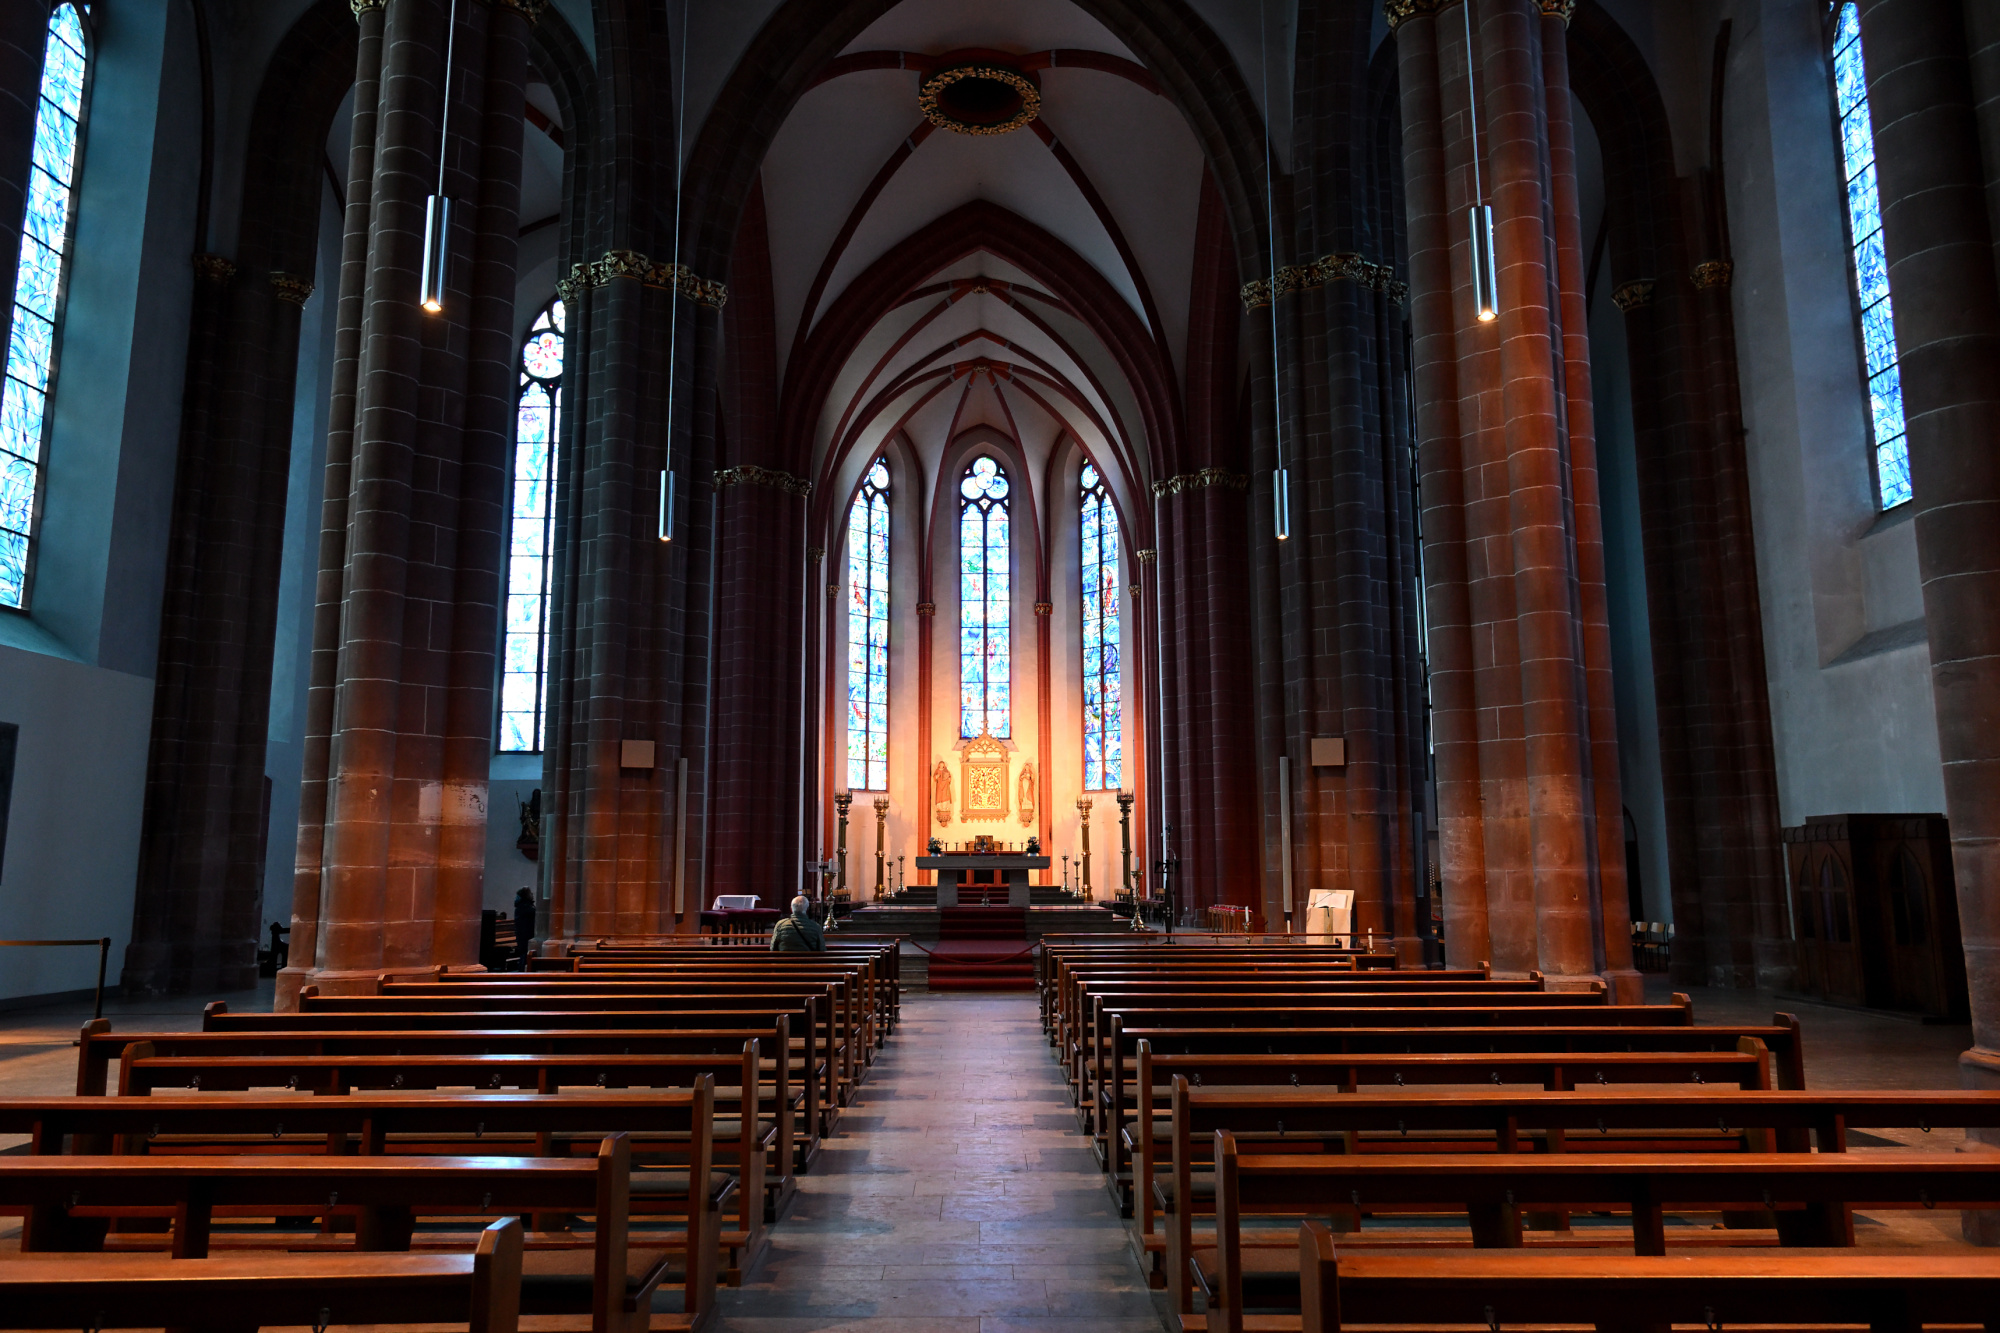
Chagall-Fenster im Chor
Die Fenster der Stephanskirche wurden von Marc Chagall gestaltet und prägen den gesamten Raum. Das tiefe Blau und die warmen Farbtöne fangen das Licht auf eine Weise ein, die sofort eine besondere Ruhe entstehen lässt. Beim Betreten der Kirche verändert sich die Wahrnehmung fast unmerklich, doch sehr deutlich. Farbe, Licht und Stille verbinden sich zu einem Moment, der lange nachwirkt.
Chagall begann in der zweiten Hälfte der 1970er Jahre damit, für die Stephanskirche Fenster zu entwerfen, damals bereits fast neunzig Jahre alt. Das erste Fenster wurde 1978 eingebaut und war ursprünglich als einzelnes Werk gedacht. Doch er arbeitete weiter. Bis zu seinem Tod 1985 schuf Chagall insgesamt neun Fenster für den vorderen Teil der Kirche. Chagall entwarf die Glasgemälde und führte auch die Schwarzlotmalerei eigenhändig aus. Seine Arbeit verstand er als Zeichen der jüdisch-deutschen Aussöhnung. Nach seinem Tod wurde die Arbeit an den weiteren Fenstern in St. Stephan von Charles Marq fortgesetzt.
Das tiefe Blau, das seine Arbeiten auszeichnet, verändert den ganzen Raum. Das Licht wird weicher, die Farben wirken fast schwebend, und die Kirche bekommt eine Ruhe, die man sofort spürt.
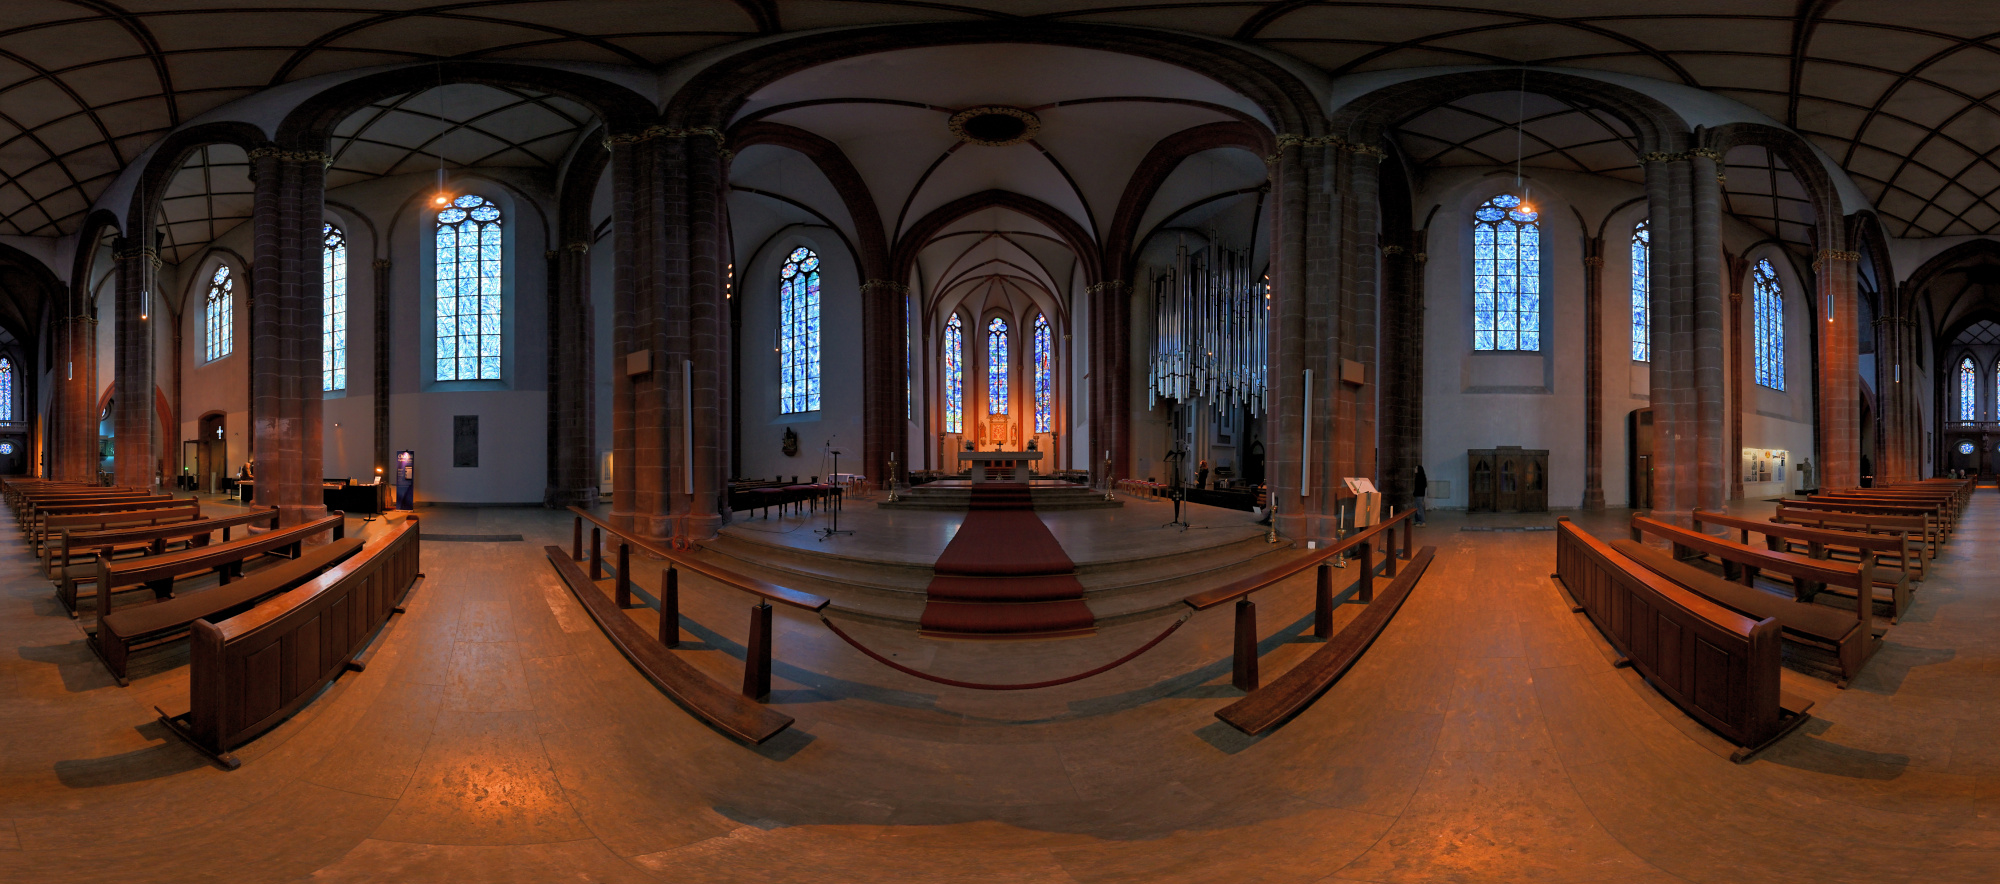
360°-Ansicht aller Fenster, 1/40s f/2 ISO 640/29°
1/50s f/3,5 ISO 800/30° 16-50mm f/2,8 VR f=32mm/48mm
1/25s f/4 ISO 400/27° 16-50mm f/2,8 VR f=22mm/33mm
1/20s f/2,8 ISO 250/25° 16-50mm f/2,8 VR f=38mm/57mm

1/30s f/2,8 ISO 250/25° 16-50mm f/2,8 VR f=31mm/46mm
1/30s f/4,5 ISO 400/27° f=13mm
1/25s f/4 ISO 250/25° 16-50mm f/2,8 VR f=30mm/45mm
1/13s f/3,5 ISO 400/27° 16-50mm f/2,8 VR f=41mm/61mm
1/40s f/3,2 ISO 800/30° 16-50mm f/2,8 VR f=50mm/75mm
1/50s f/3,5 ISO 800/30° 16-50mm f/2,8 VR f=50mm/75mm
Interaktives Panorama Chagall Fenster der Stephanskirche 1
1/50s f/2 ISO 200/24° f=7,5mm

Interaktives Panorama Chagall Fenster der Stephanskirche 2
1/50s f/2 ISO 250/25° f=7,5mm

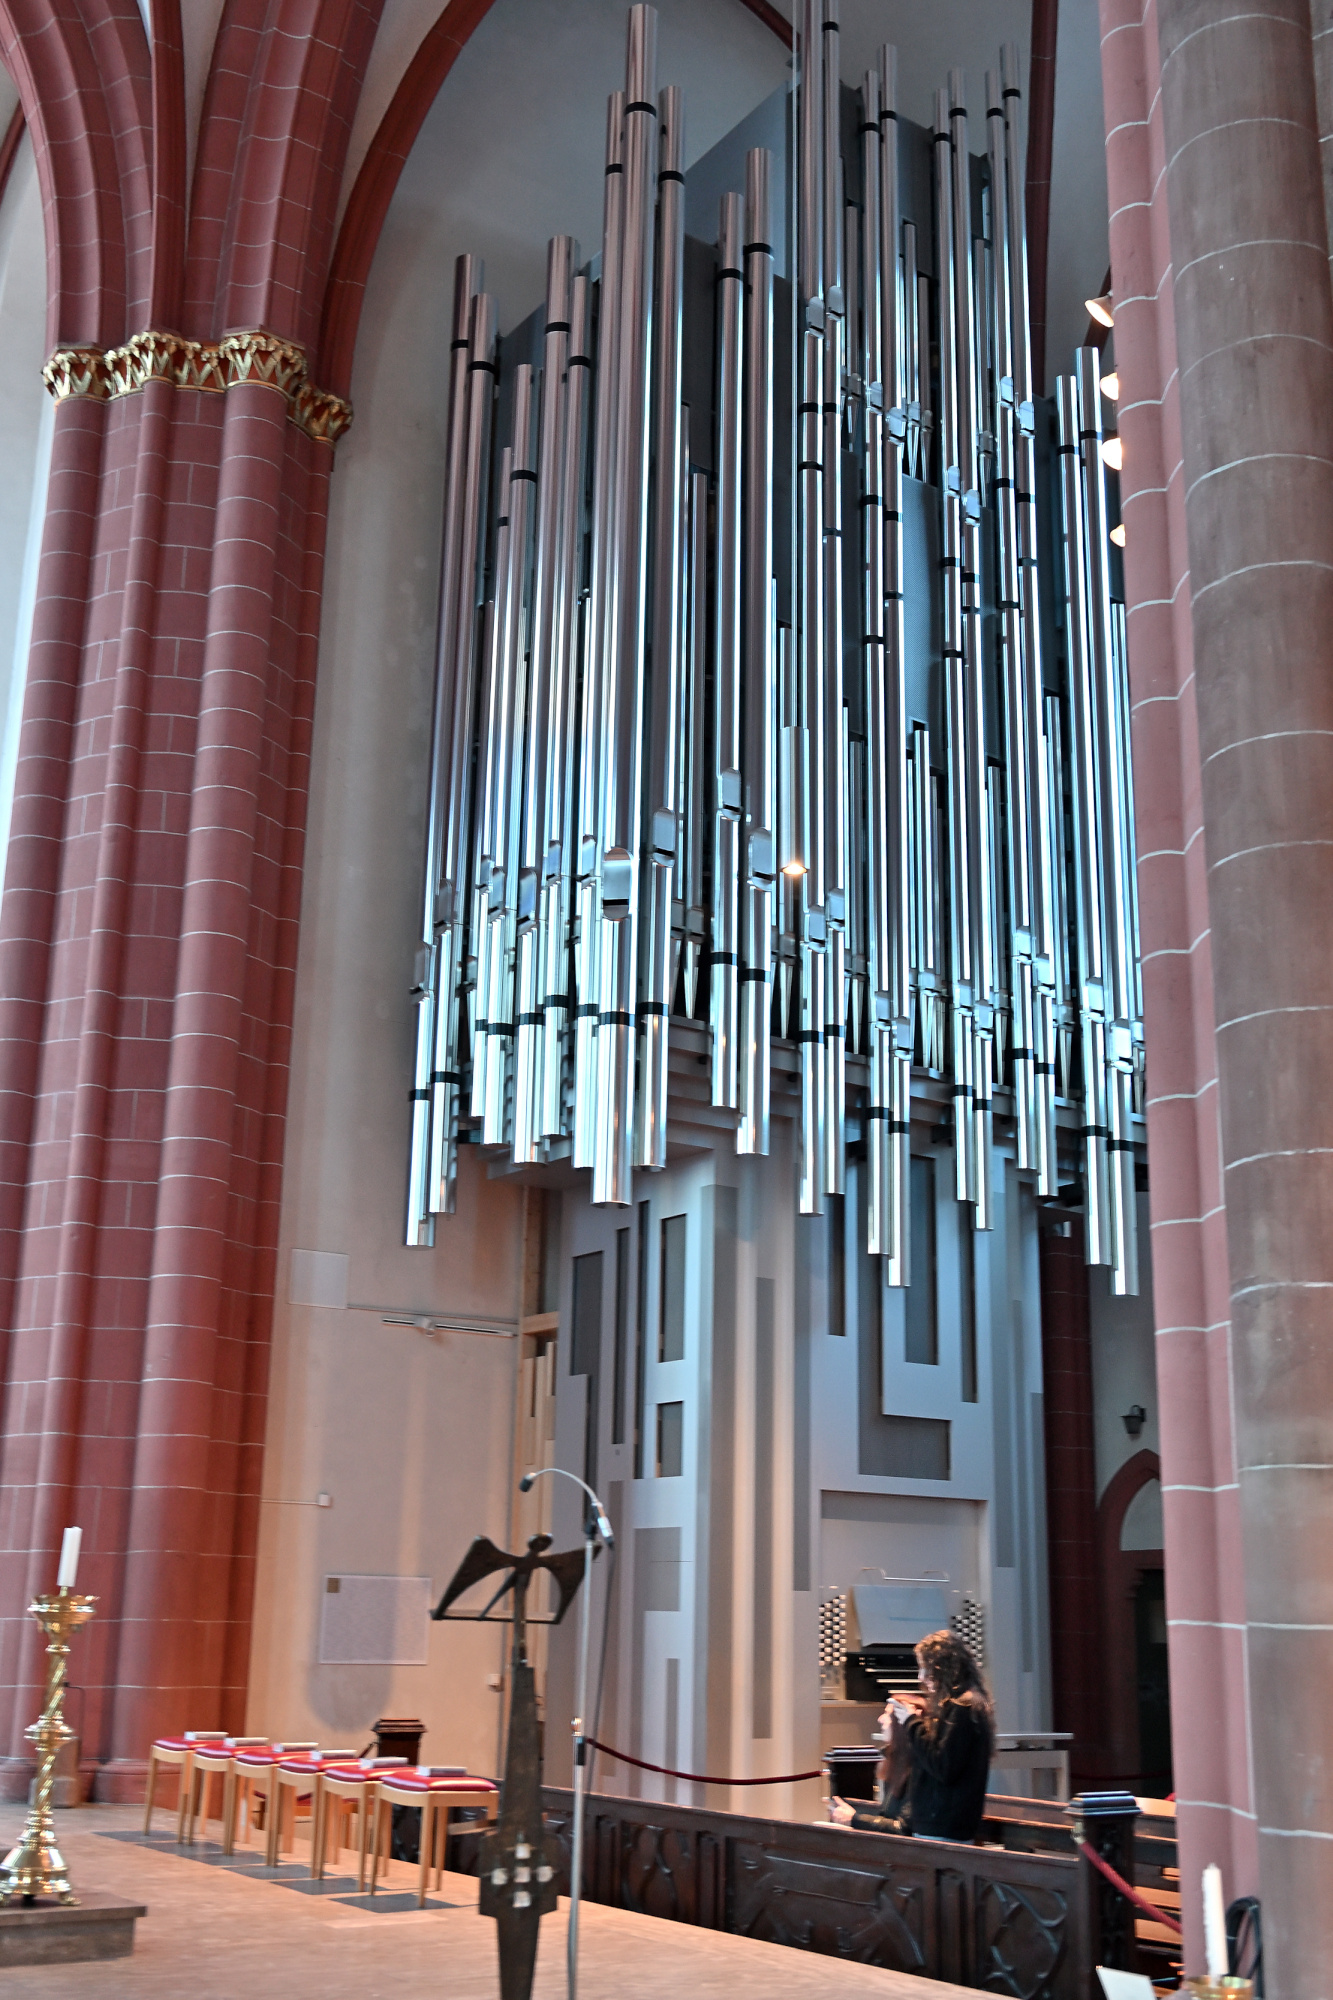
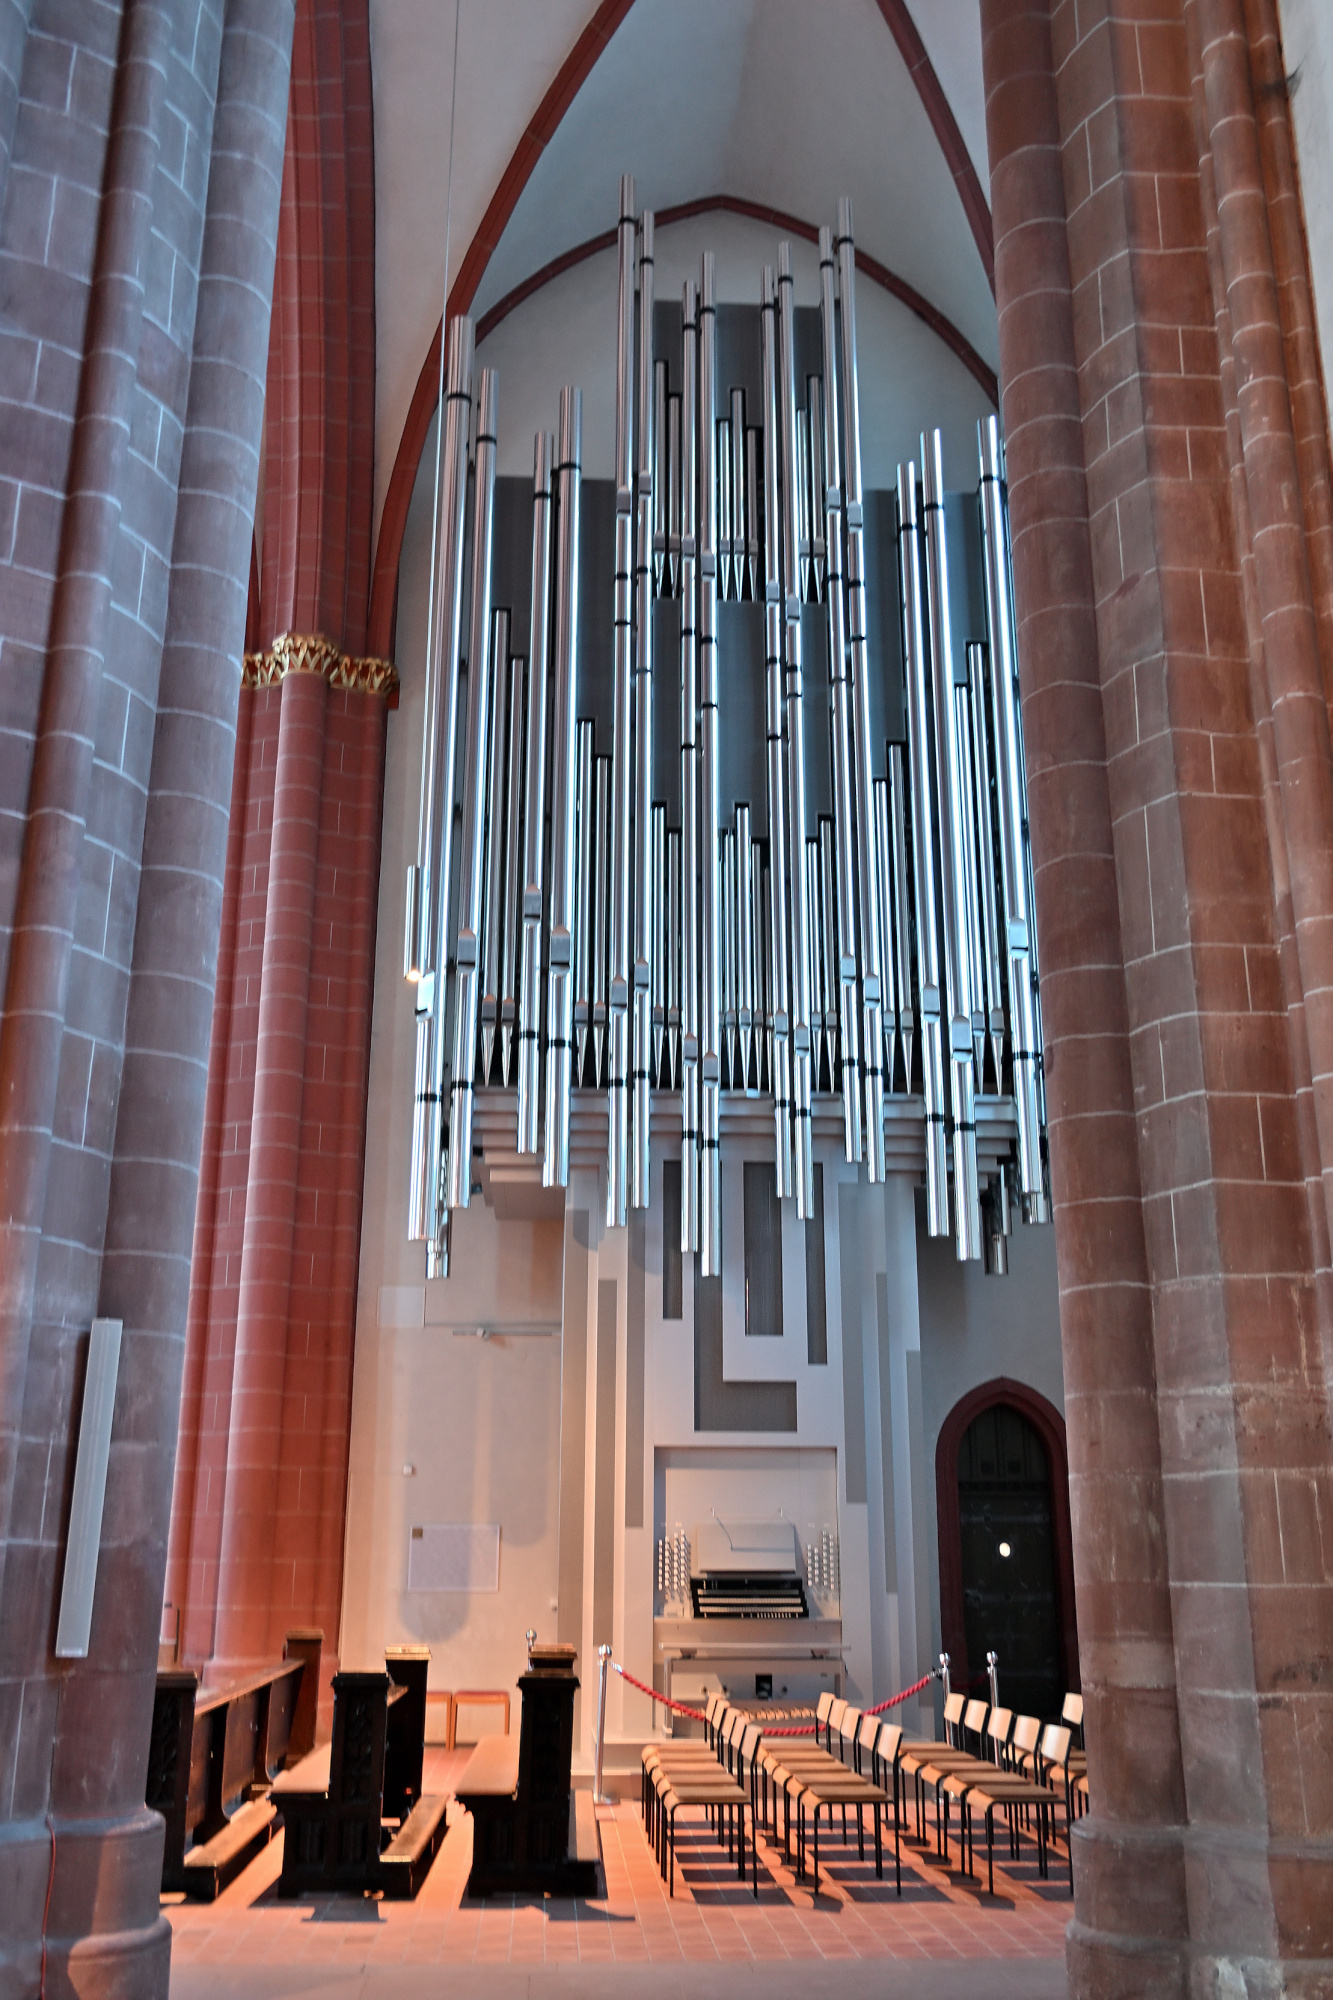
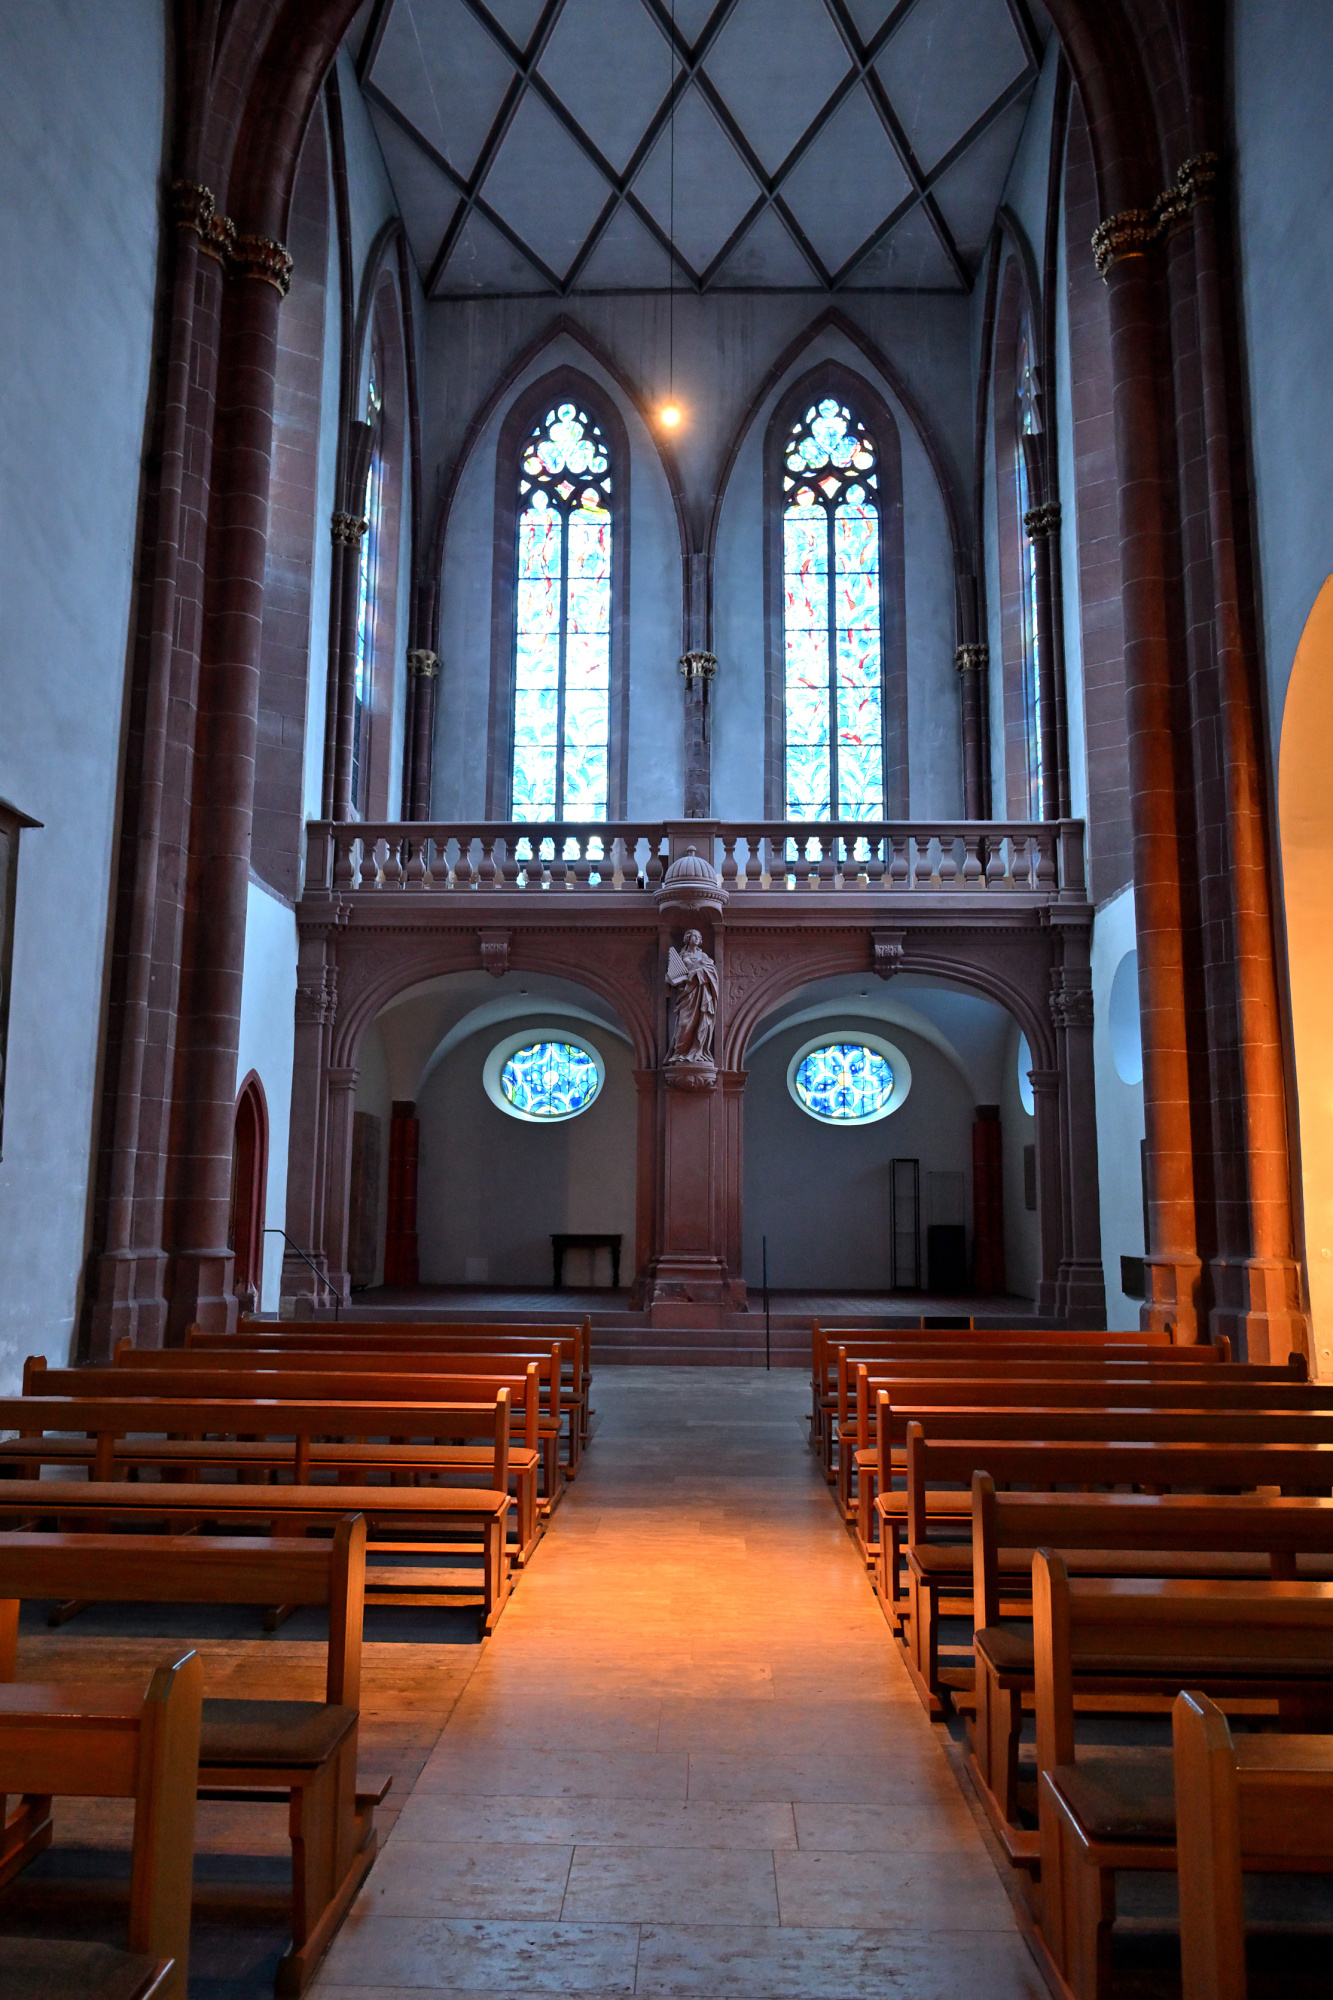
Klais-Orgel im St Stephan, Klang trifft Licht
Die heutige Orgel der Stephanskirche wurde von der Werkstatt Klais aus Bonn gebaut und im Jahr 2013 eingeweiht. Sie entstand nach einem Wettbewerb, bei dem der Entwurf von Klais überzeugte, weil er sich bewusst an der Architektur und am Licht der Kirche orientiert. Die metallischen Flächen der Orgel nehmen die Farben der Chagall Fenster auf und spiegeln sie im Raum wider.
Das Instrument besitzt drei Manuale und Pedal sowie 47 Register und wurde so konzipiert, dass es den weiten Kirchenraum mühelos füllt. Die schlanke Bauweise lässt die Orgel fast wie eine Skulptur wirken, die sich nach oben öffnet und den Raum nicht dominiert, sondern begleitet.
Hier wurde eine längere Belichtungszeit mit niedrigem ISO verwendet, aber die Bildstabilisierung konnte das nicht ganz ausgleichen.
0,3s f/3,5 ISO 400/27° 16-50mm f/2,8 VR f=24mm/36mm
0,4s f/2,8 ISO 250/25° 16-50mm f/2,8 VR f=20mm/30mm
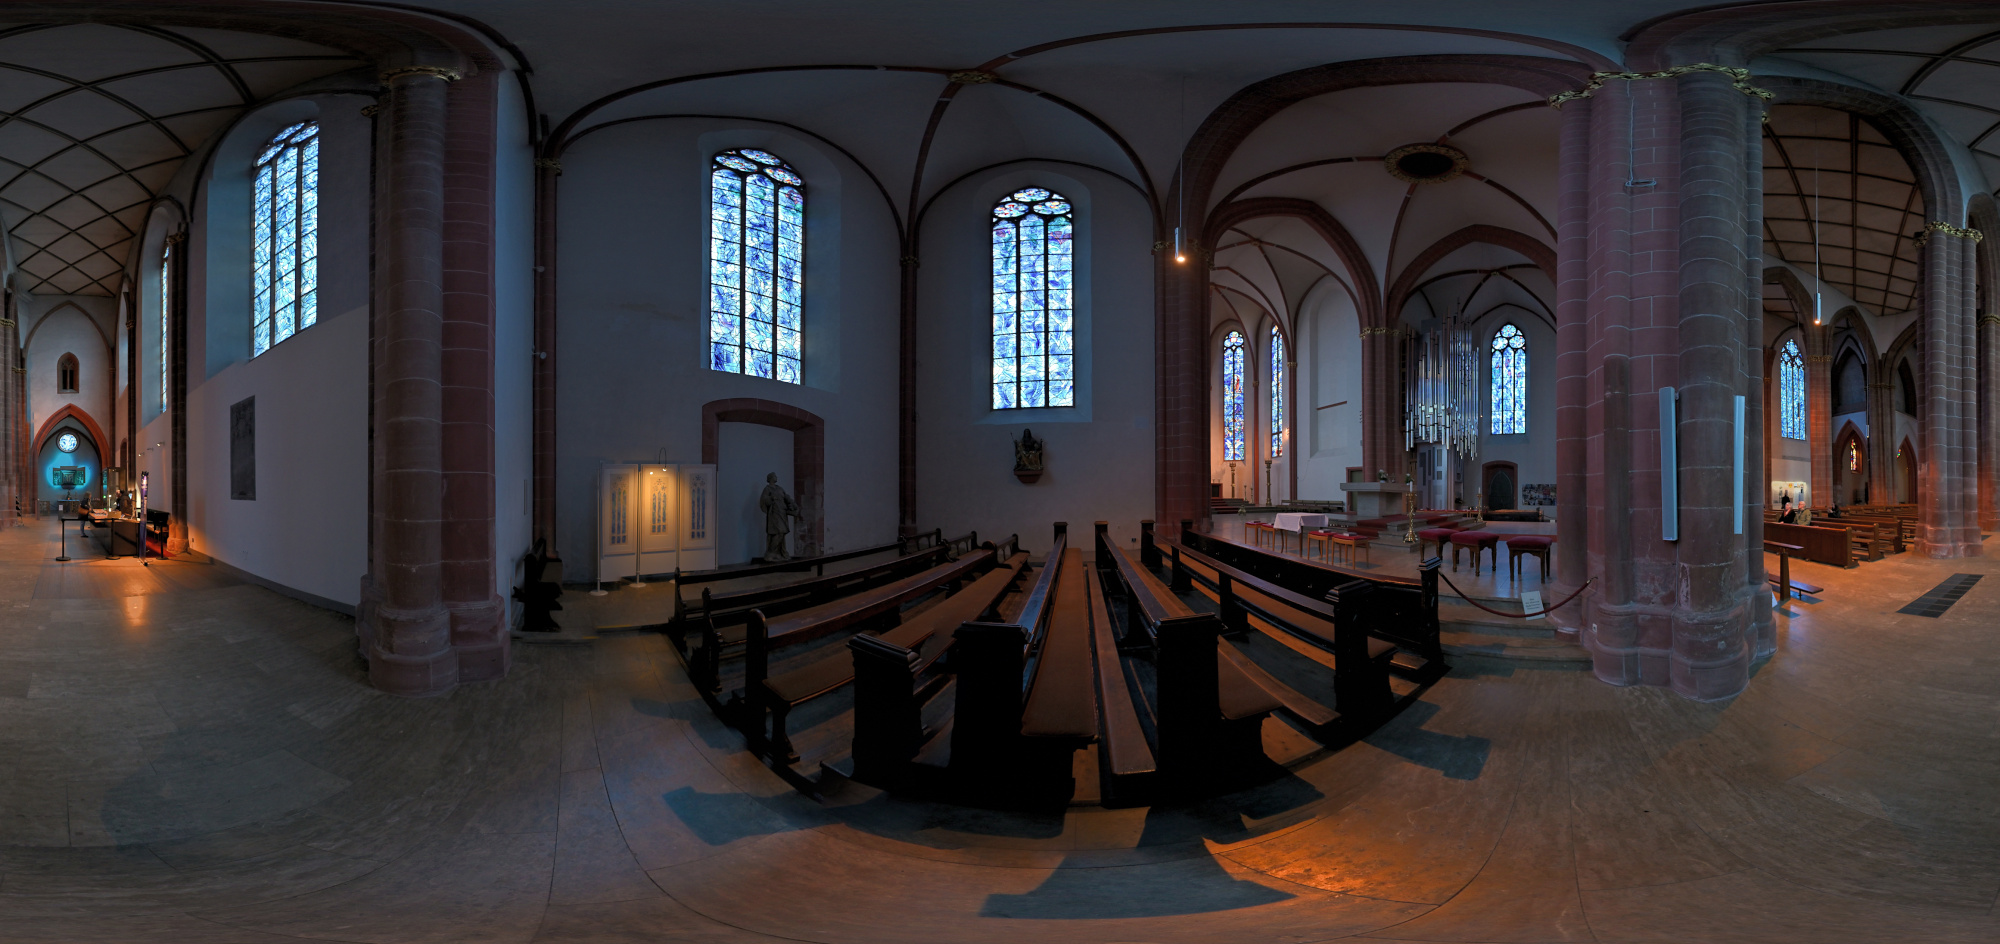
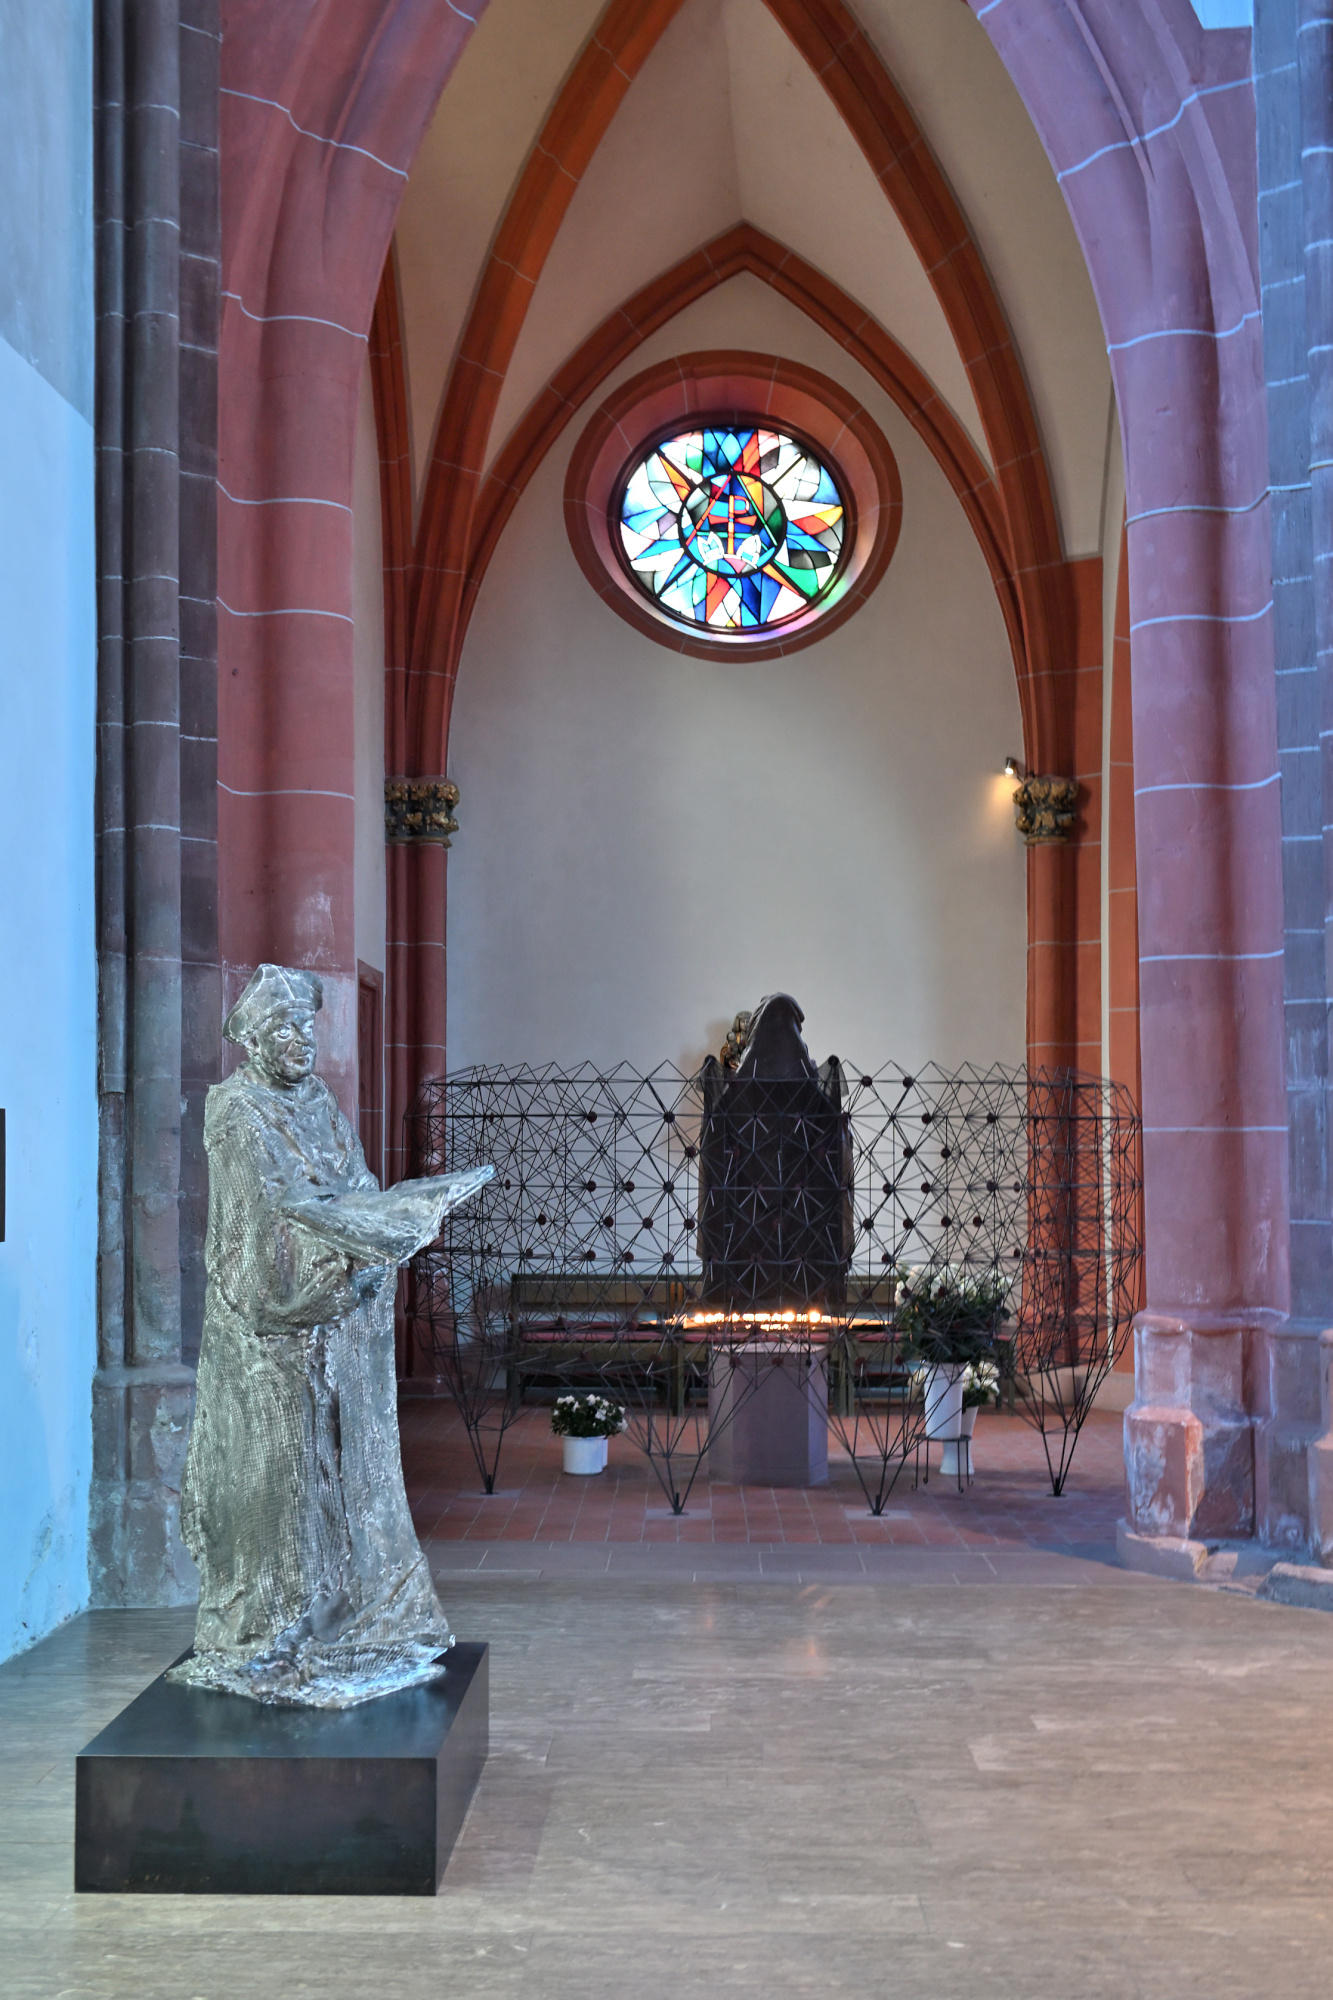
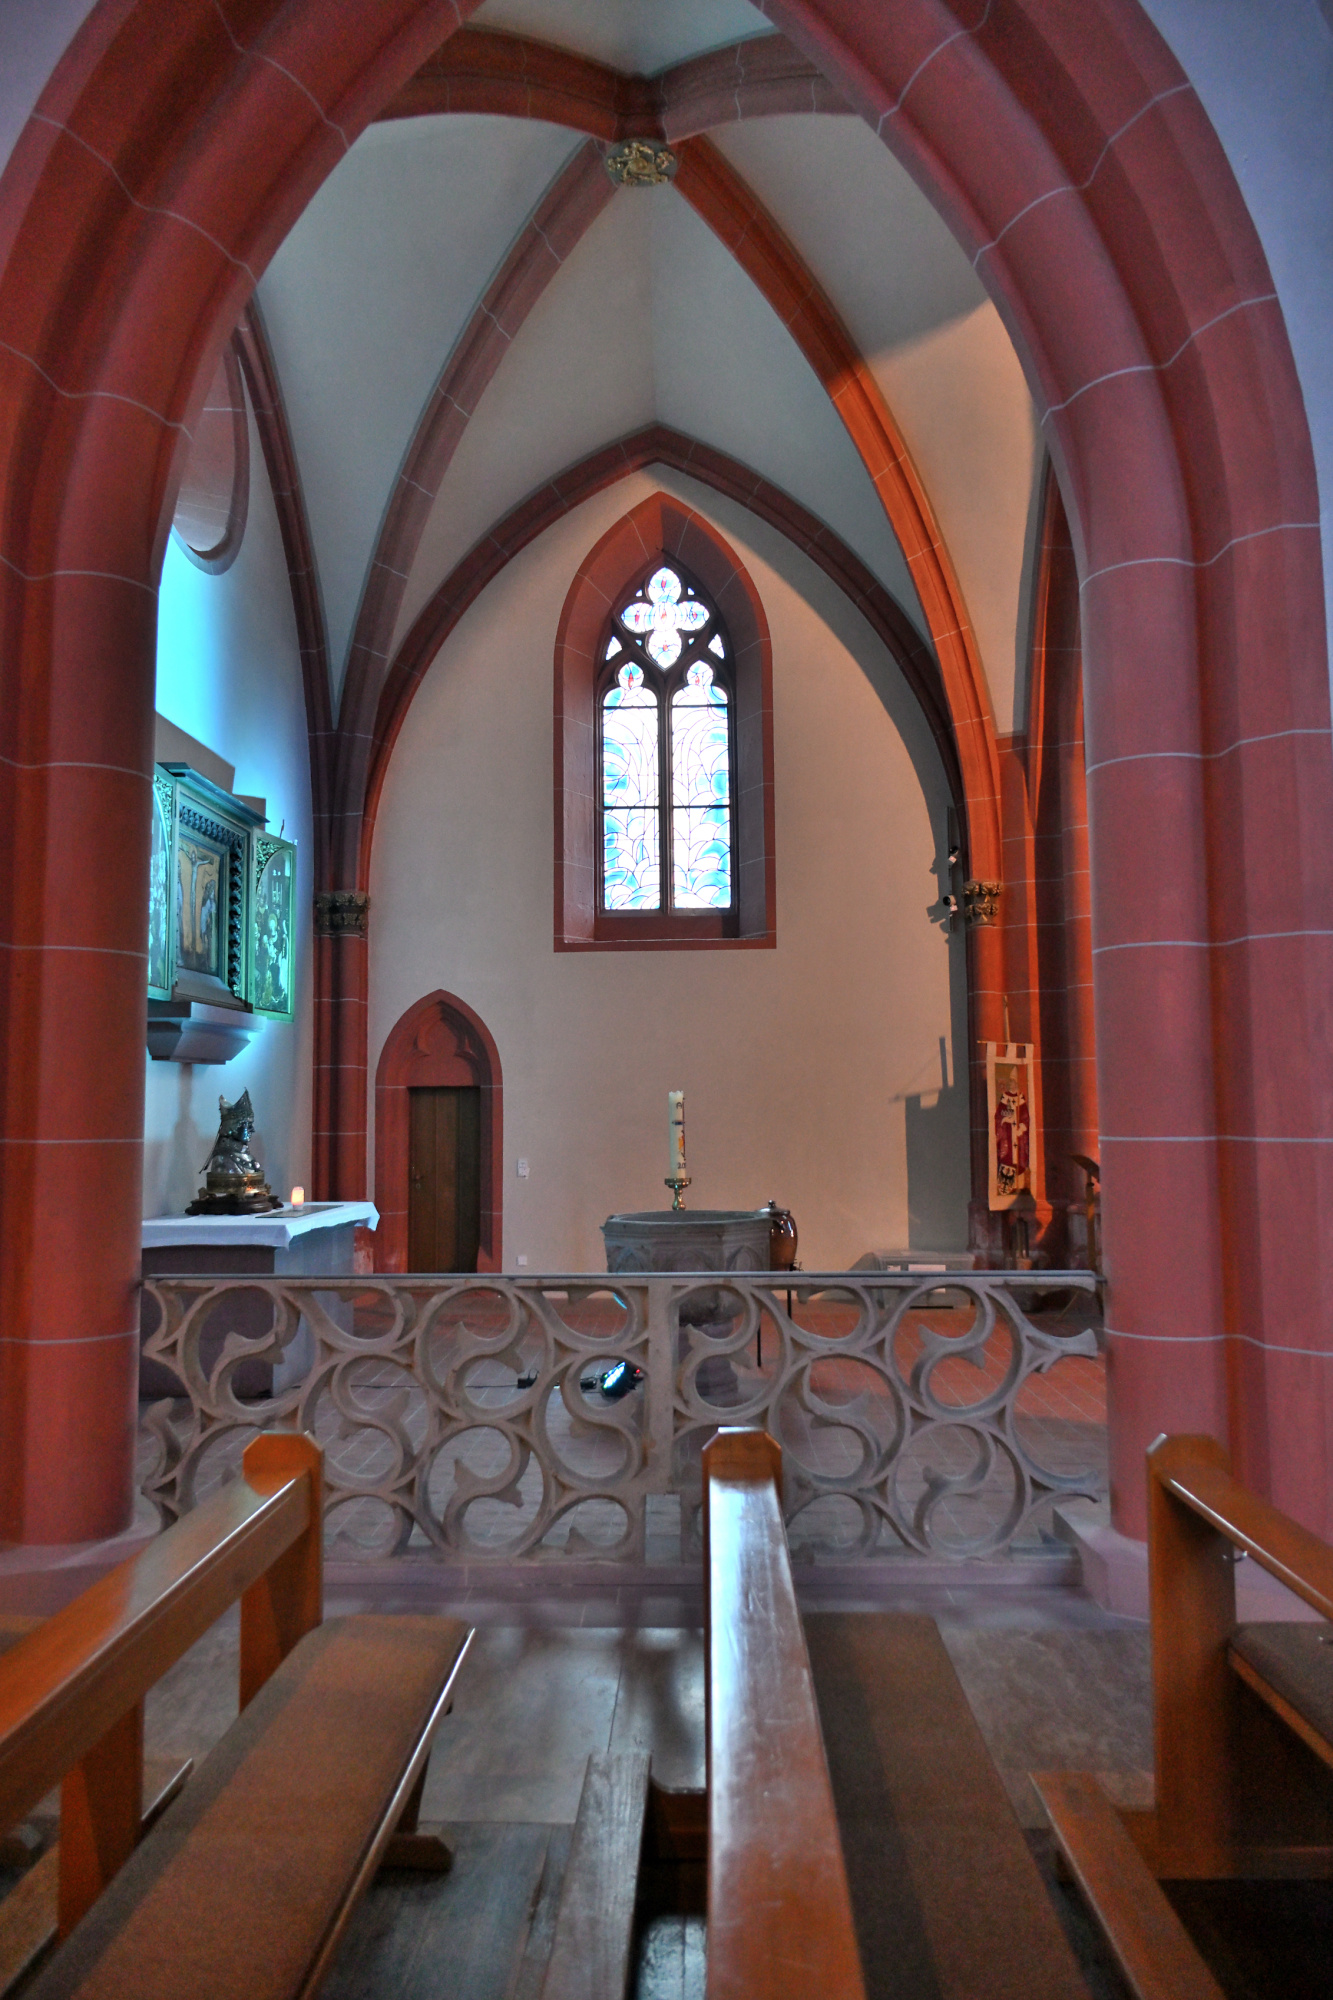
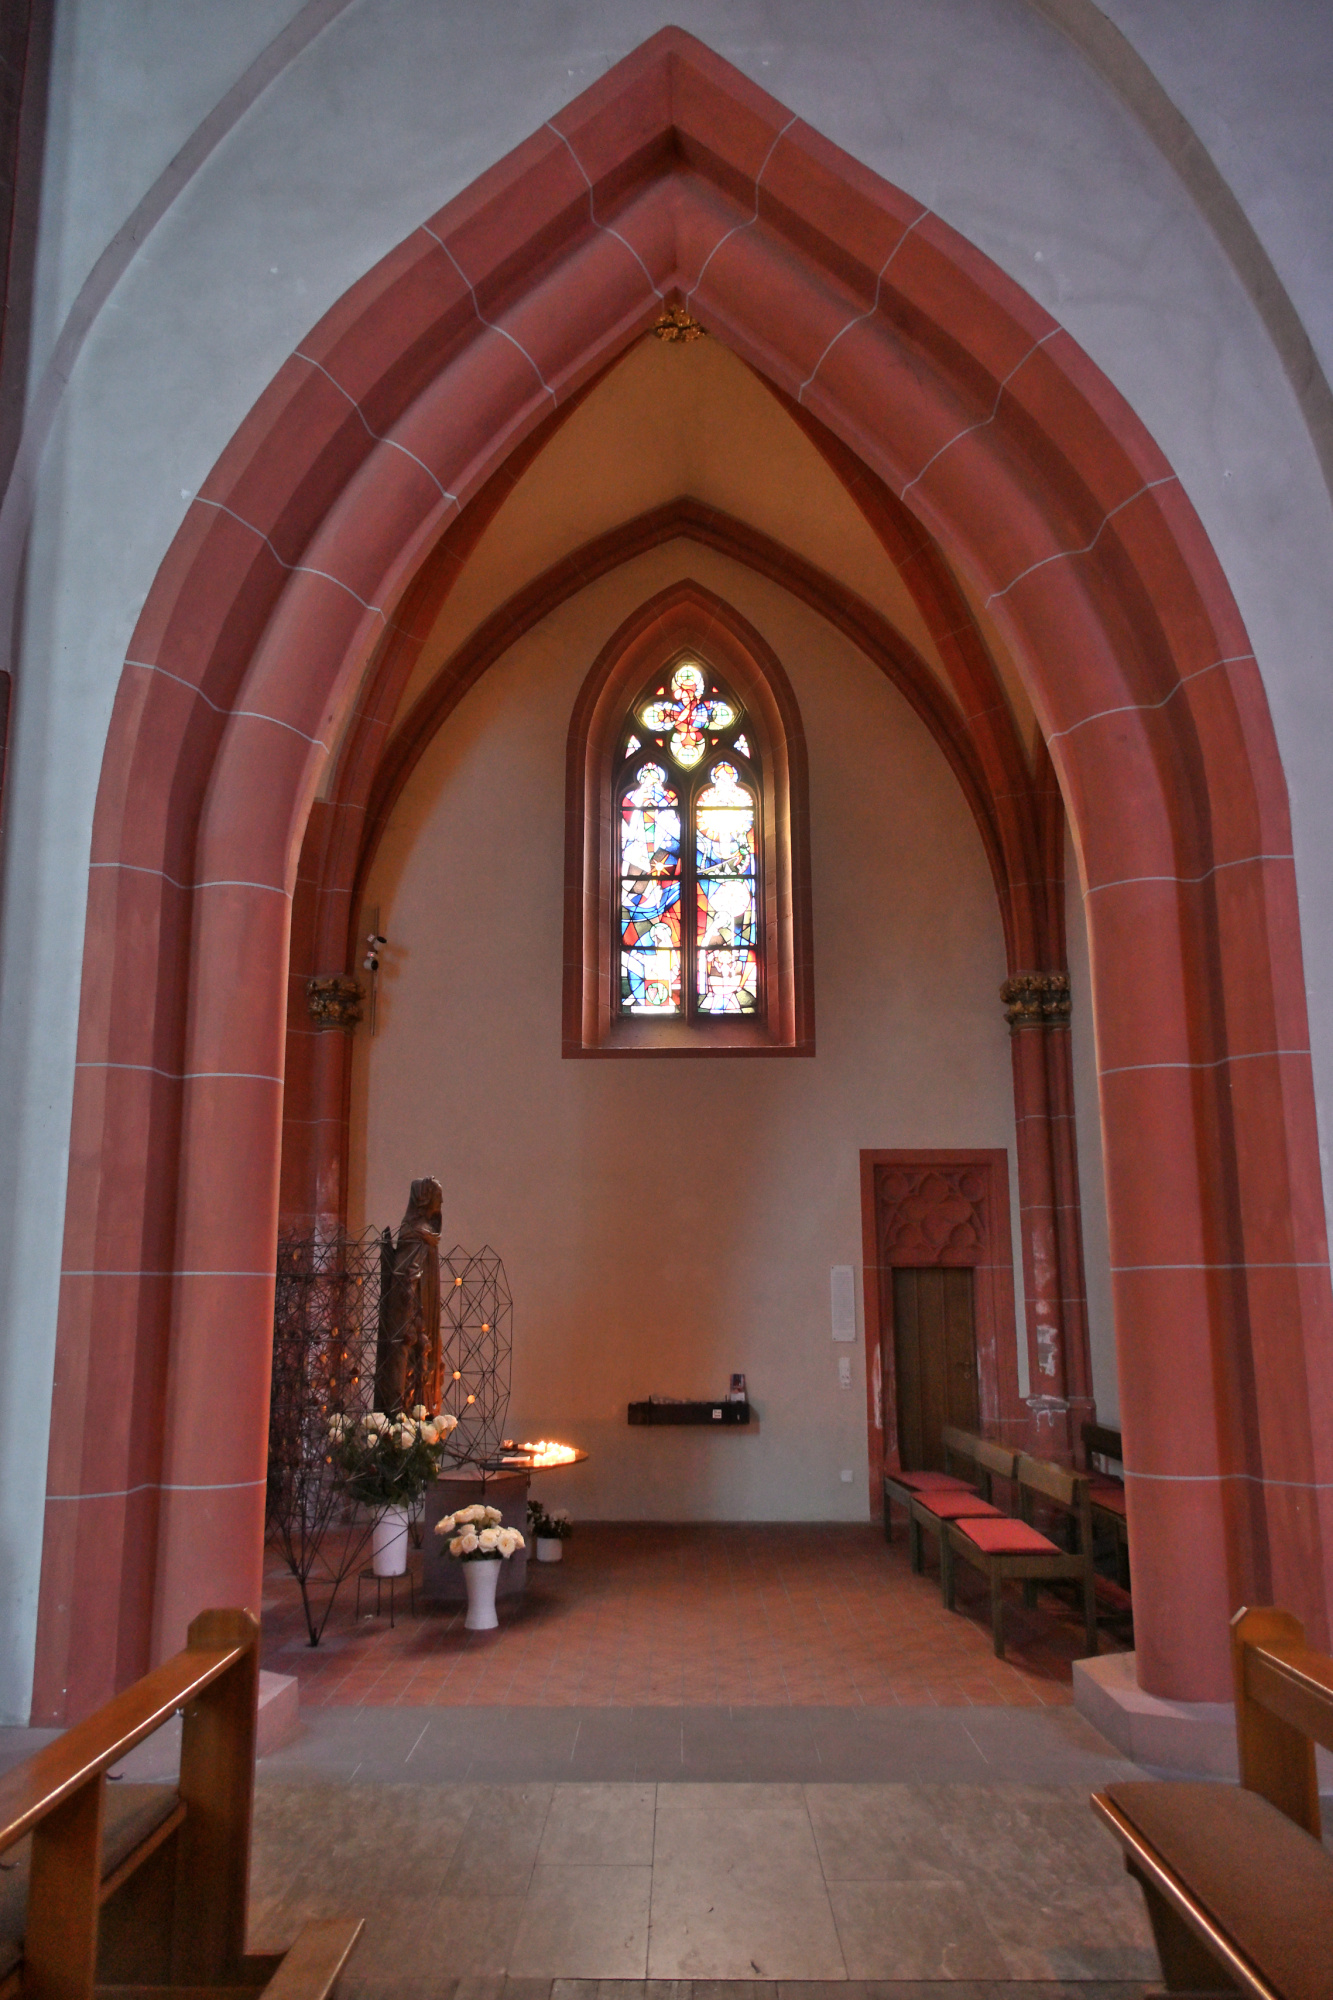
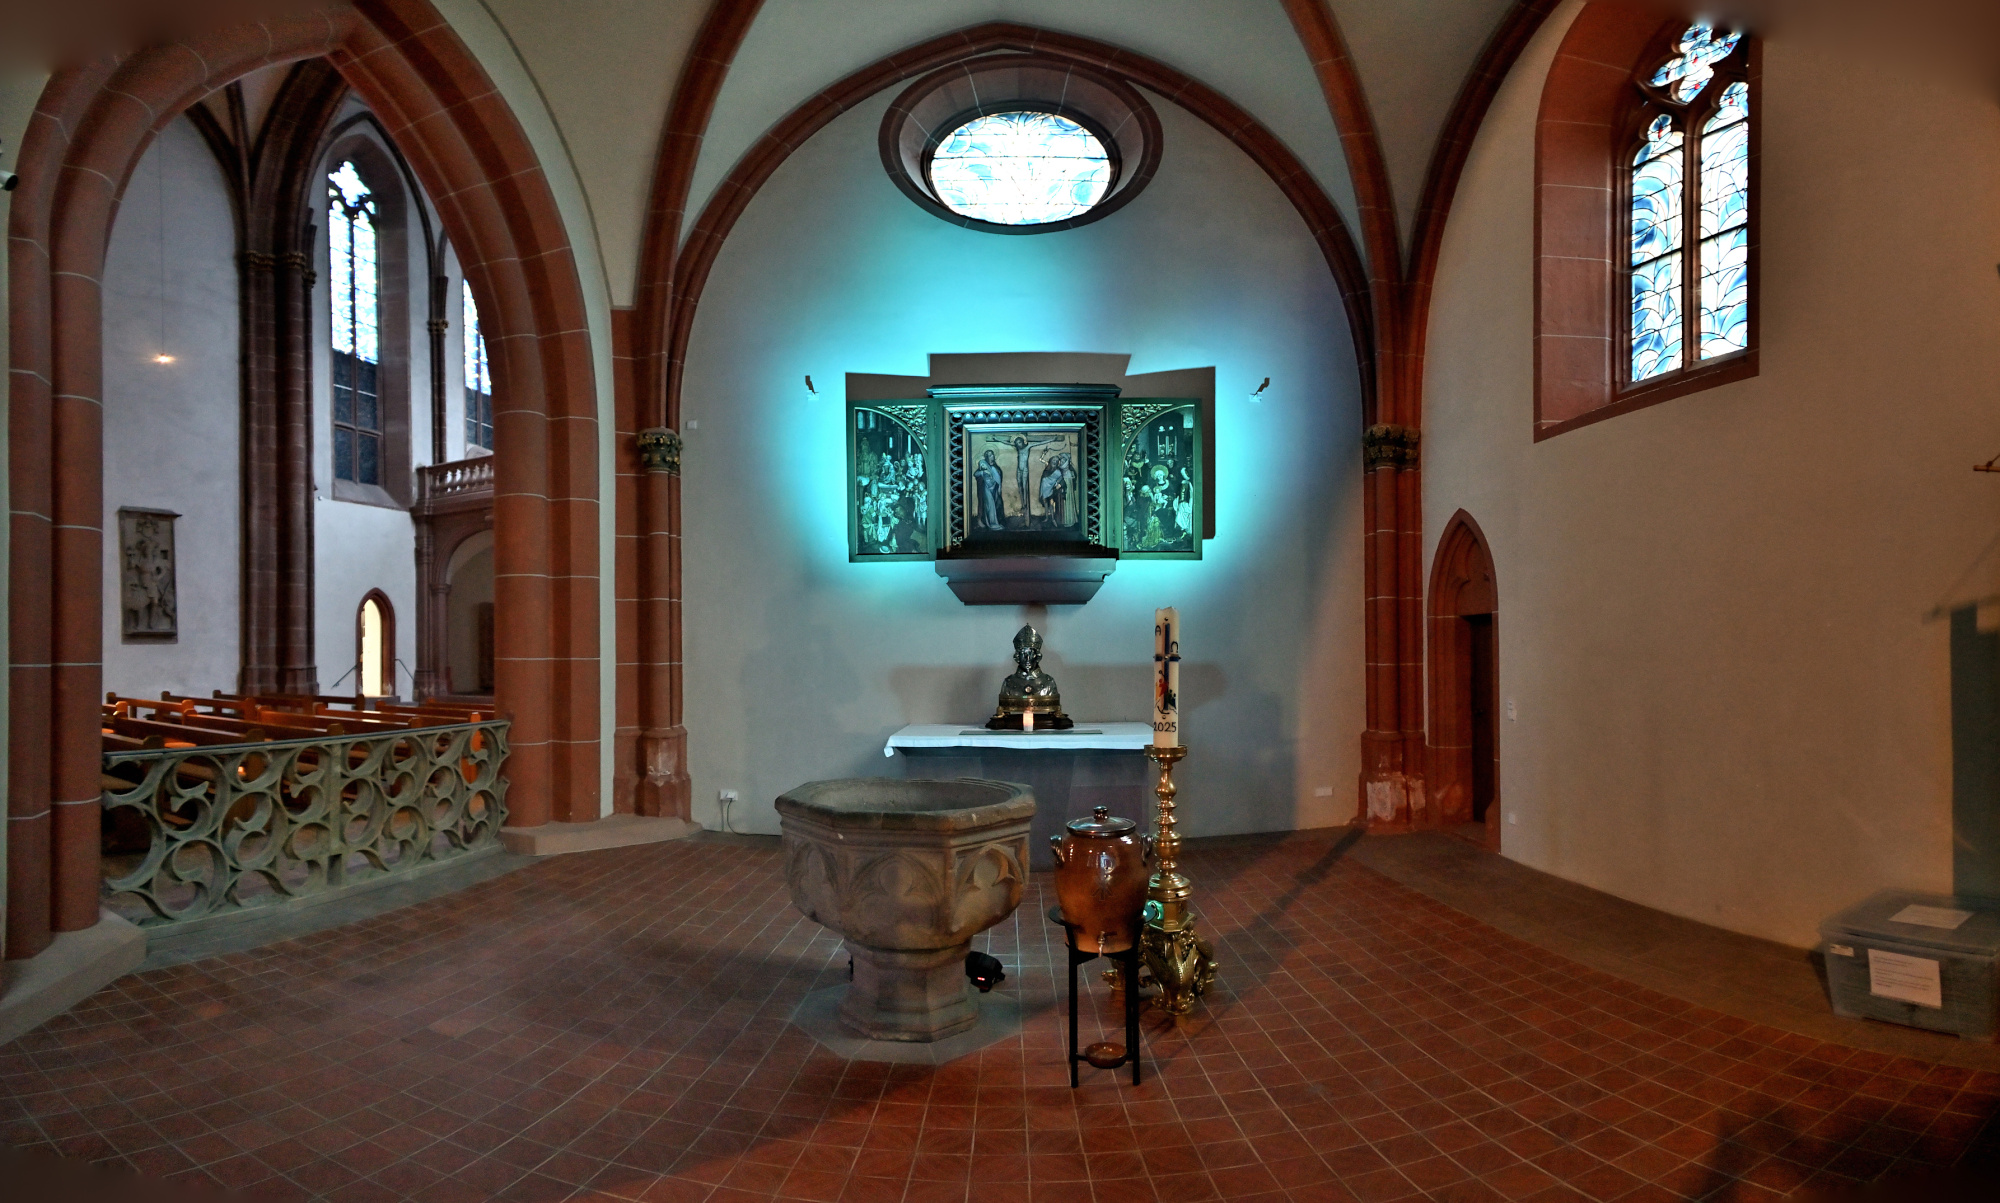
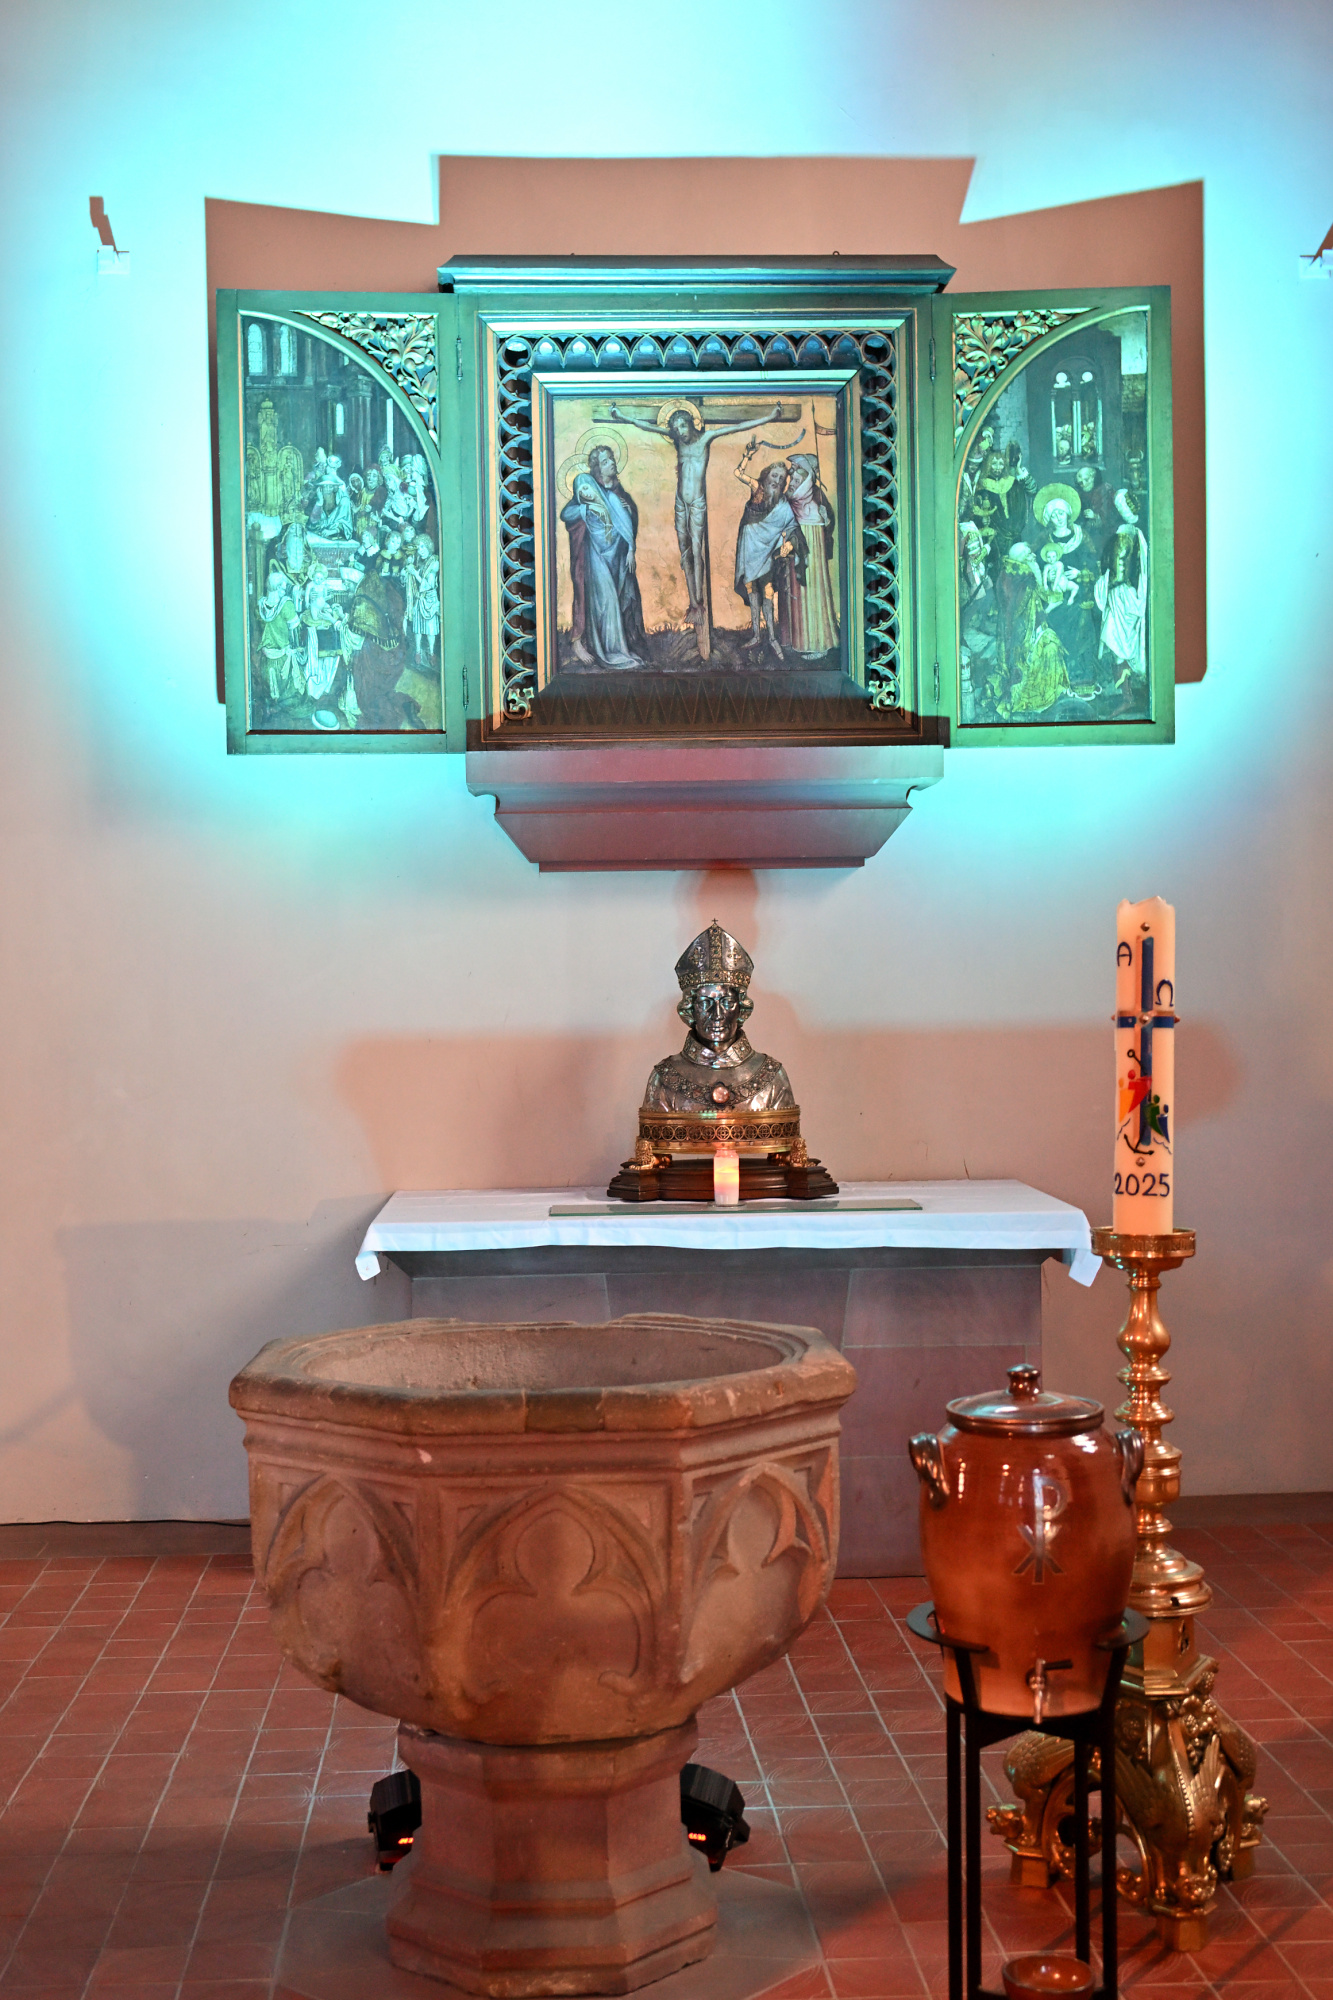
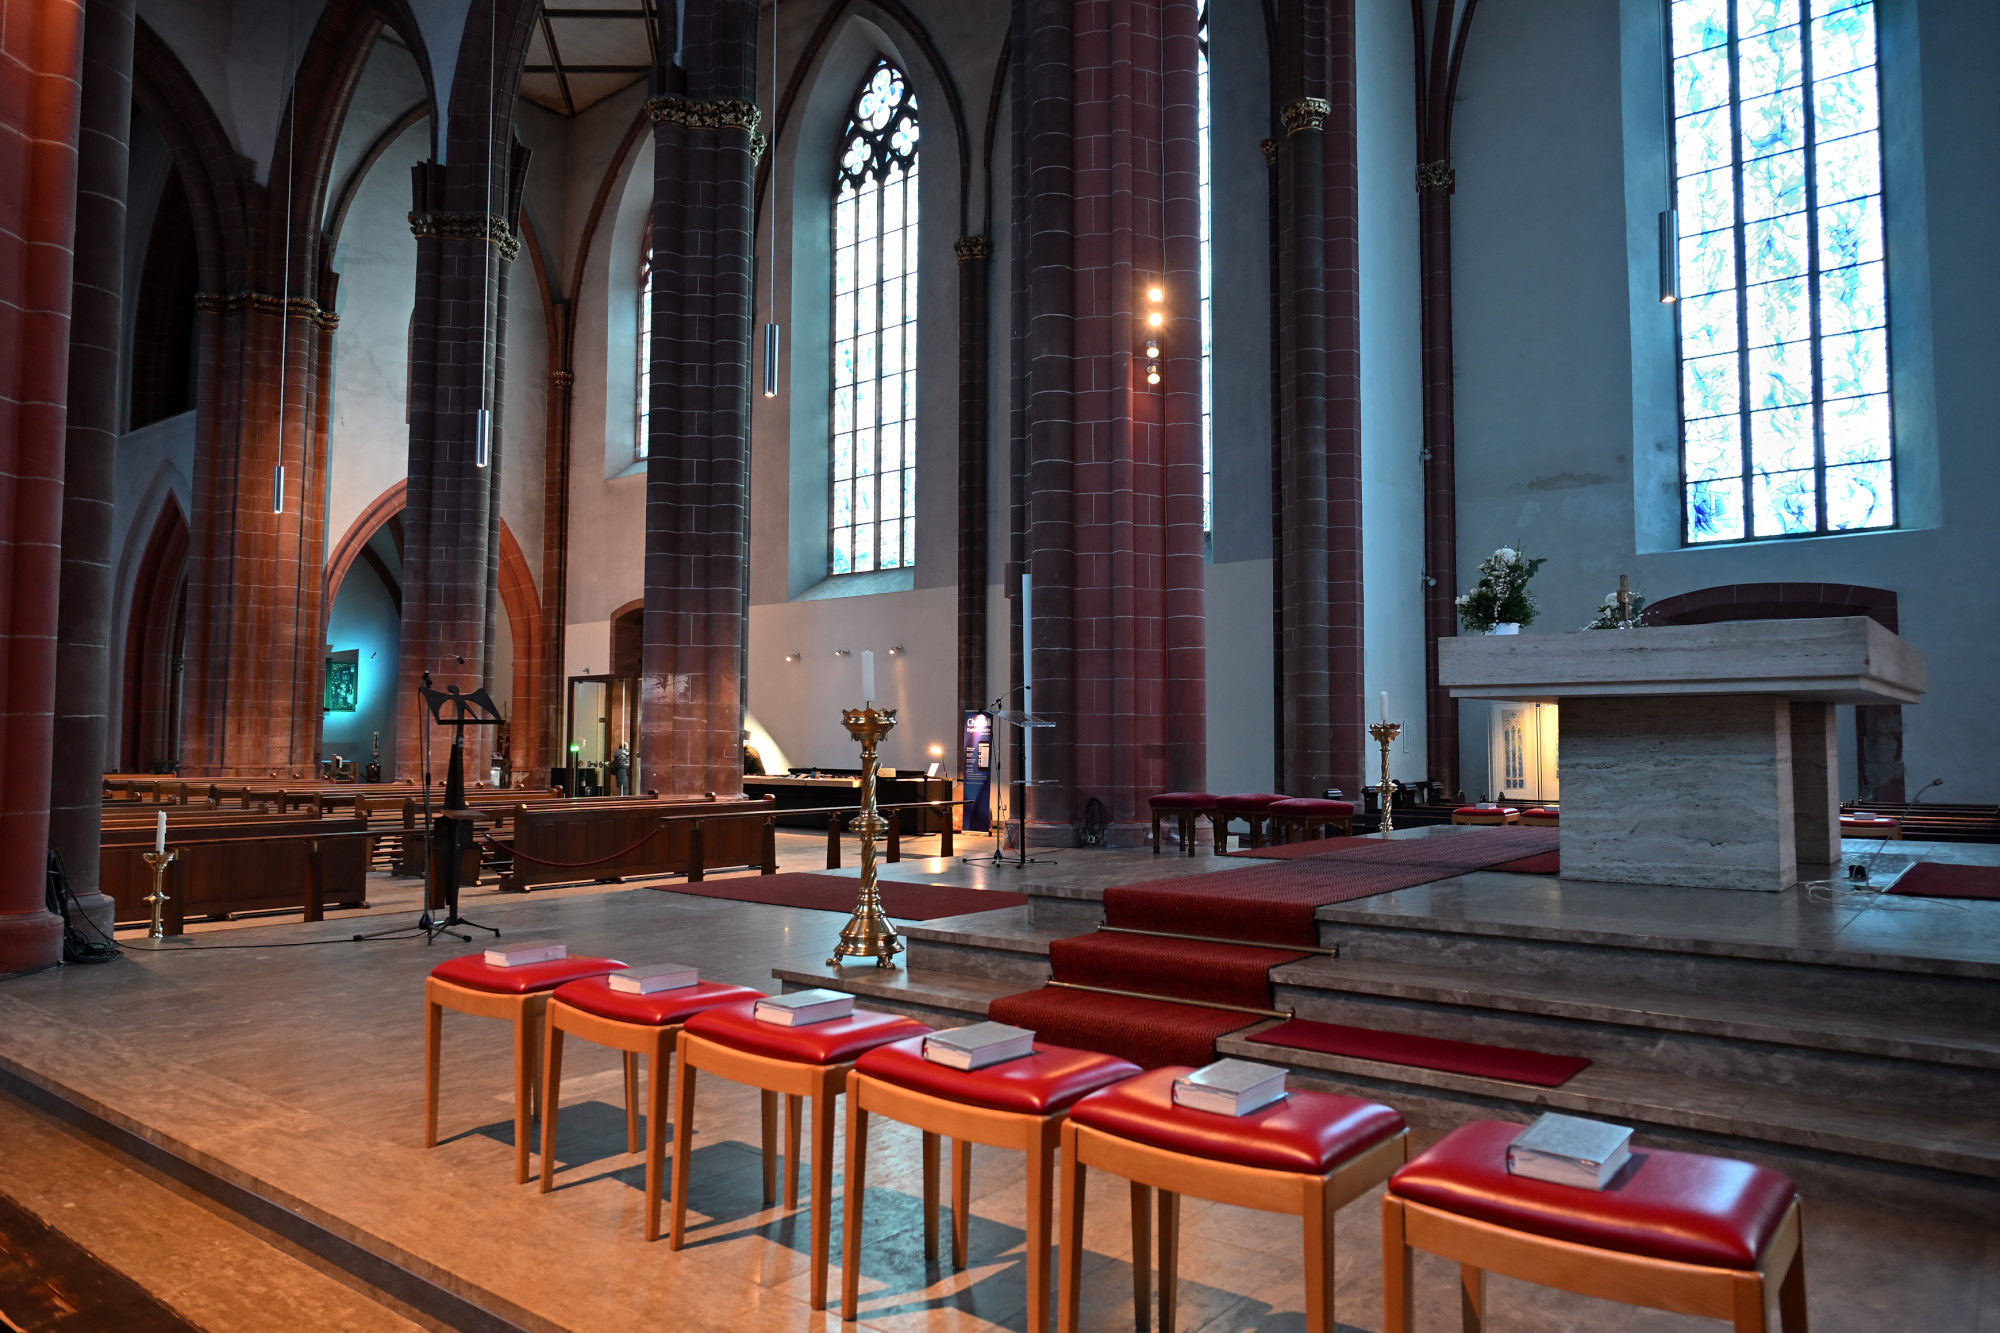
Innenraum der Stephanskirche
1/5s f/2,8 ISO 800/30° 16-50mm f/2,8 VR f=16mm/24mm

1/30s f/2,8 ISO 800/30° 16-50mm f/2,8 VR f=50mm/75mm
0,3s f/3,5 ISO 1000/31° 16-50mm f/2,8 VR f=26mm/39mm
1/25s f/2,8 ISO 800/30° 16-50mm f/2,8 VR f=16mm/24mm
1/25s f/2,8 ISO 800/30° 16-50mm f/2,8 VR f=16mm/24mm
1/50s f/5,6 ISO 640/29° f=7,5mm
1/8s f/3,5 ISO 1000/31° 16-50mm f/2,8 VR f=28mm/42mm
1/13s f/3,5 ISO 1000/31° 16-50mm f/2,8 VR f=16mm/24mm
1/15s f/3,5 ISO 1000/31° 16-50mm f/2,8 VR f=16mm/24mm
1/5s f/3,5 ISO 400/27° 16-50mm f/2,8 VR f=16mm/24mm
1/25s f/4 ISO 1000/31° 16-50mm f/2,8 VR f=16mm/24mm
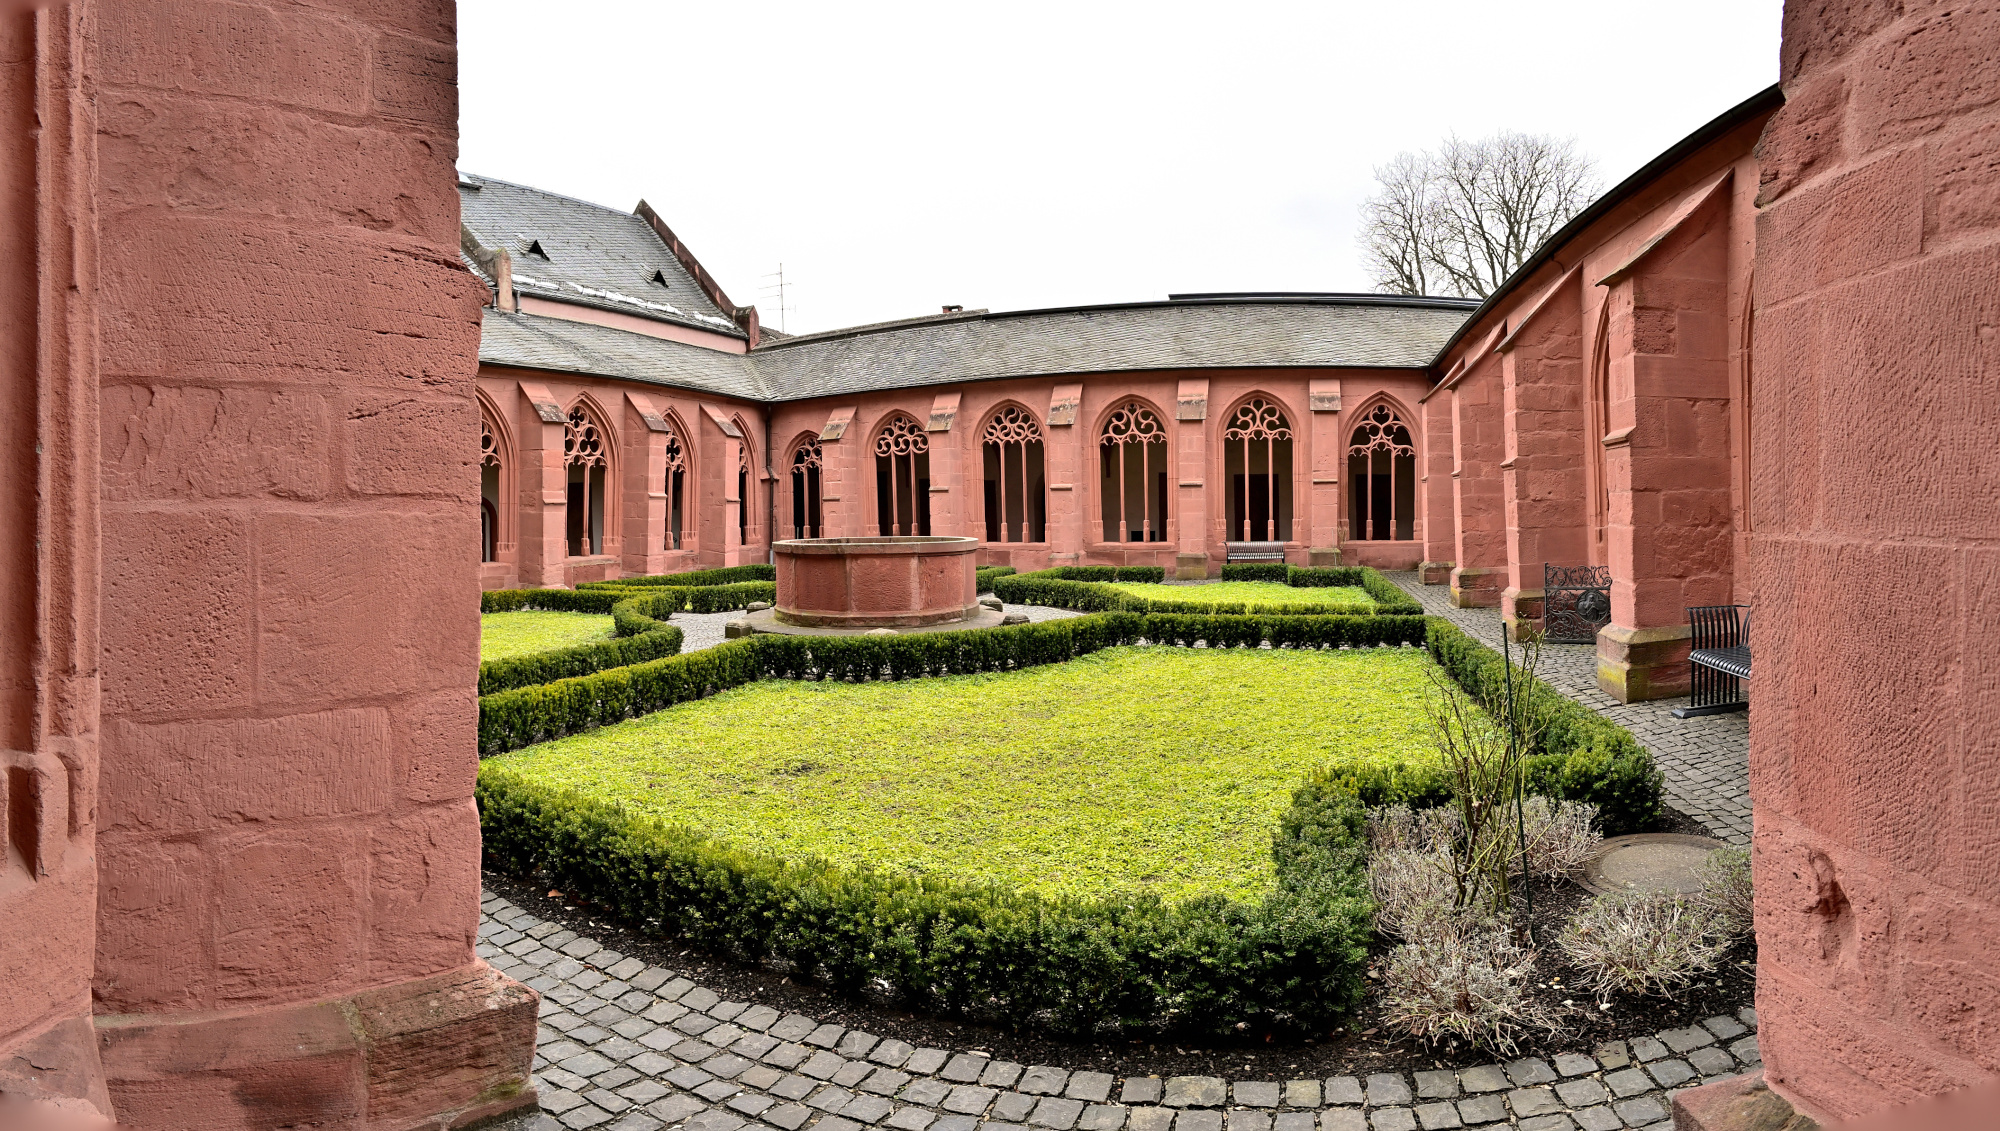
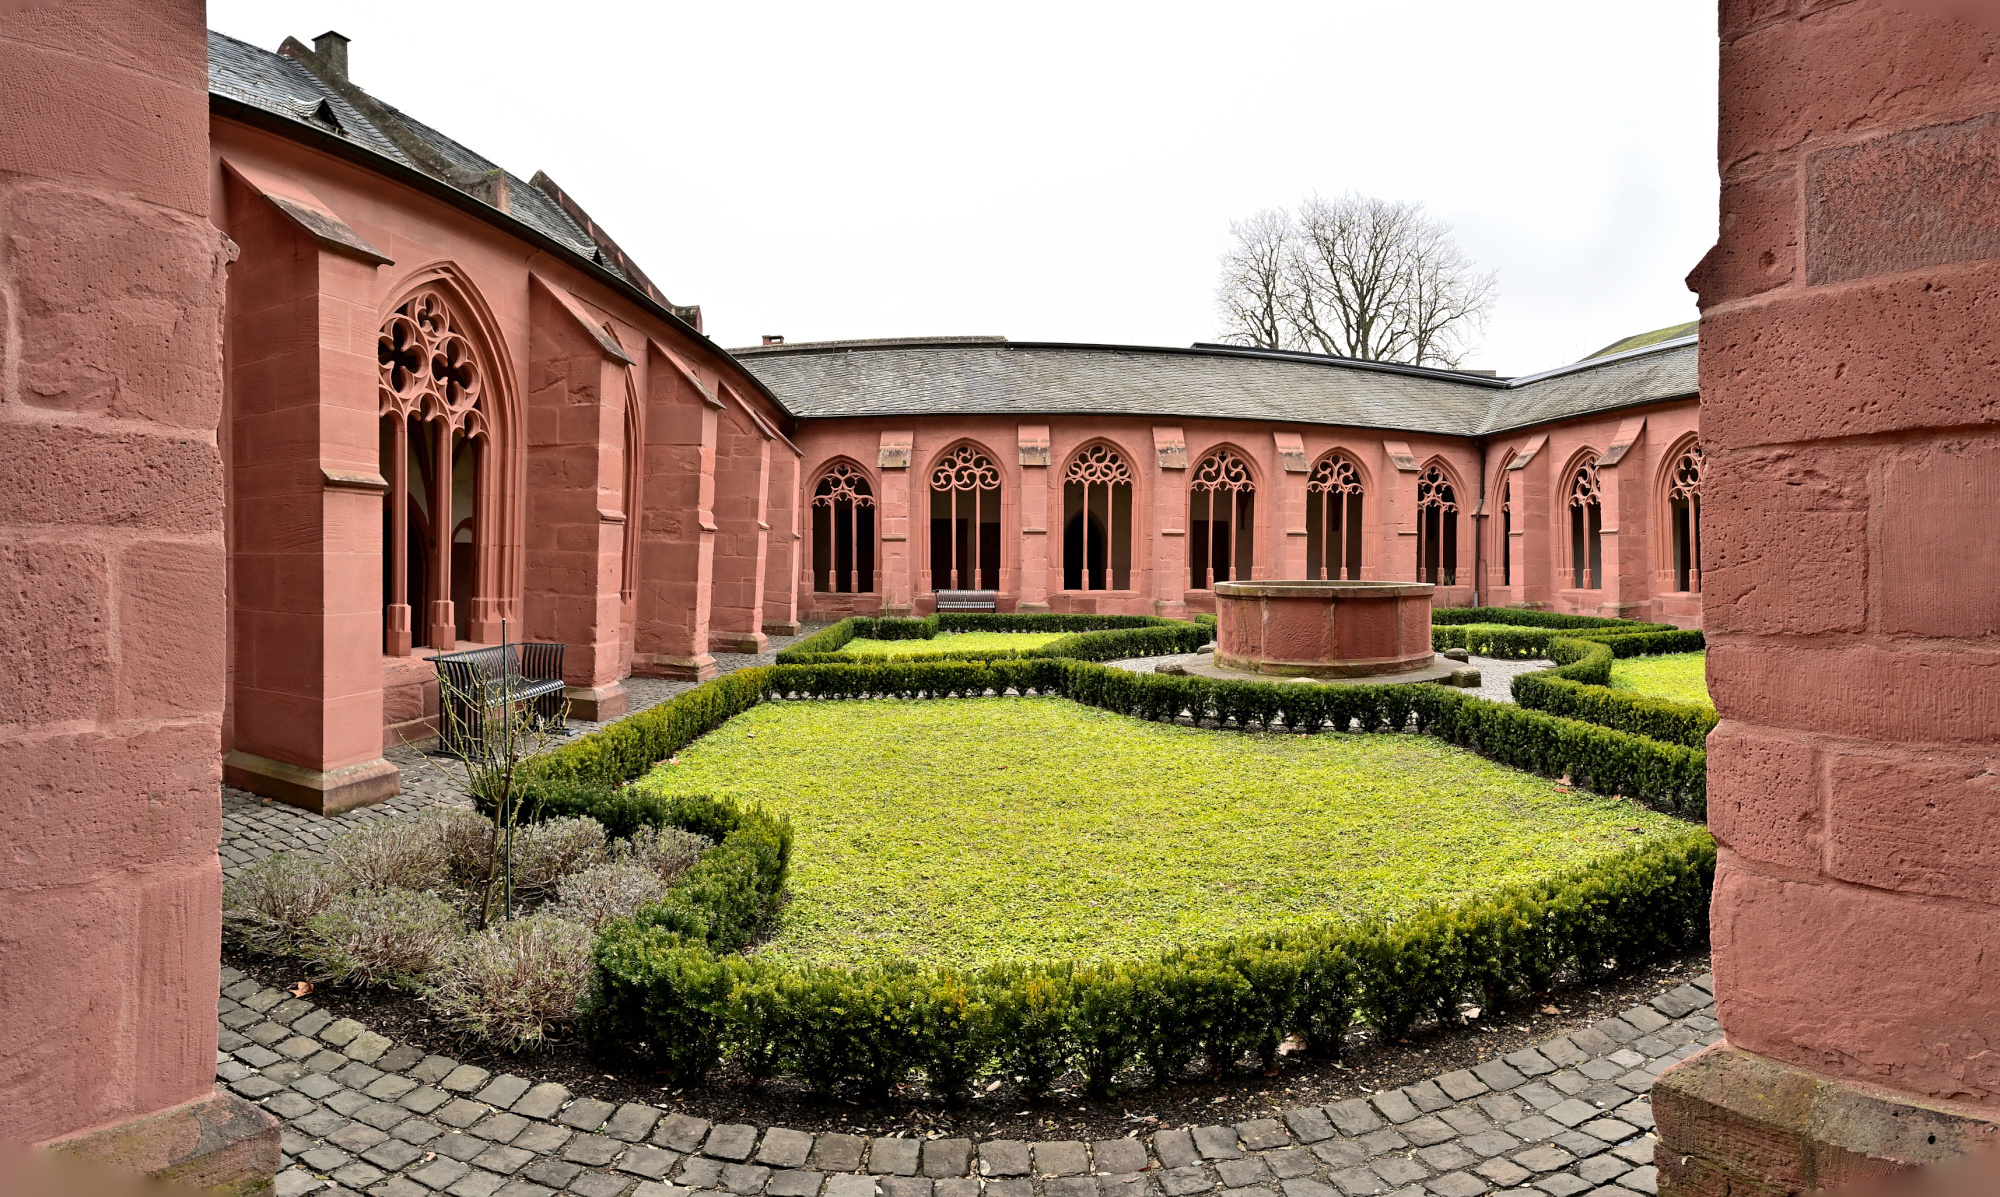
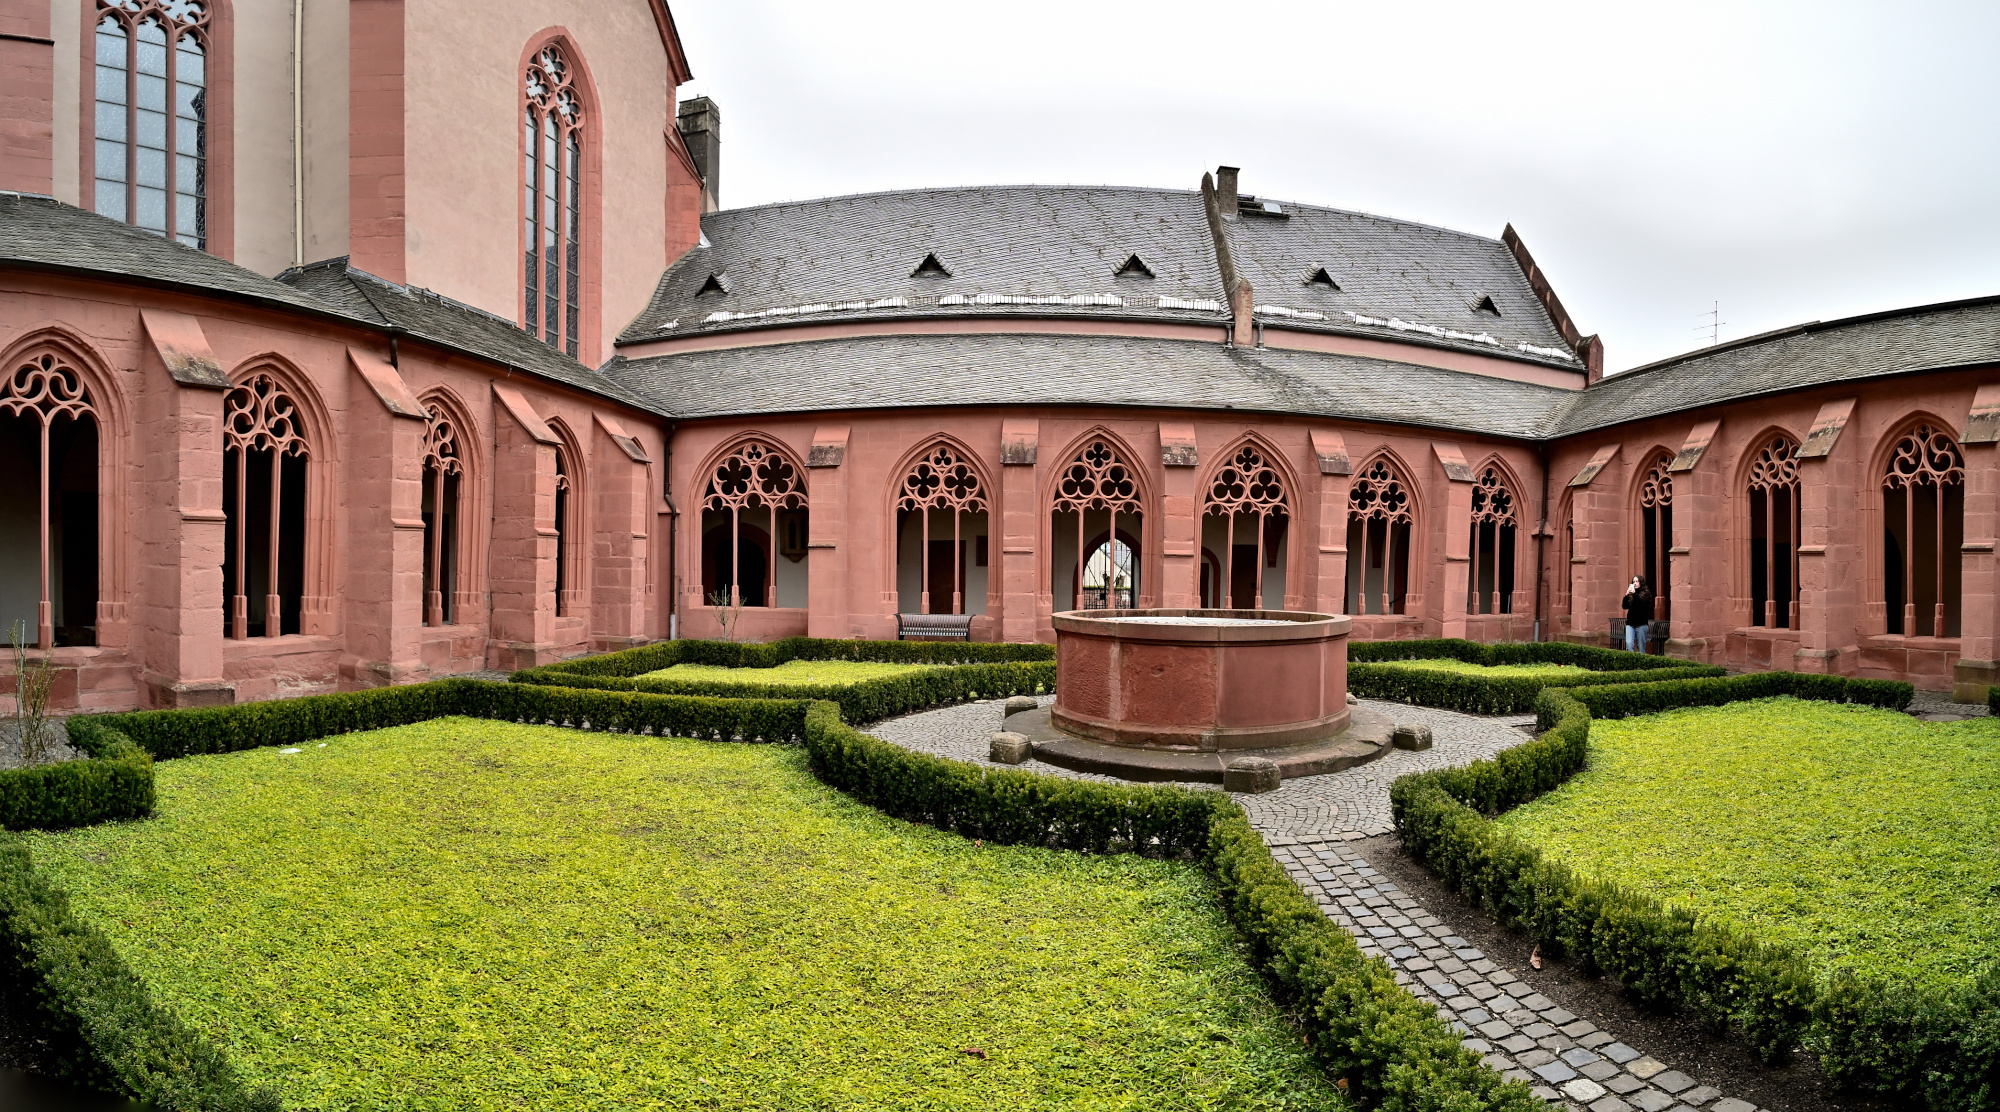
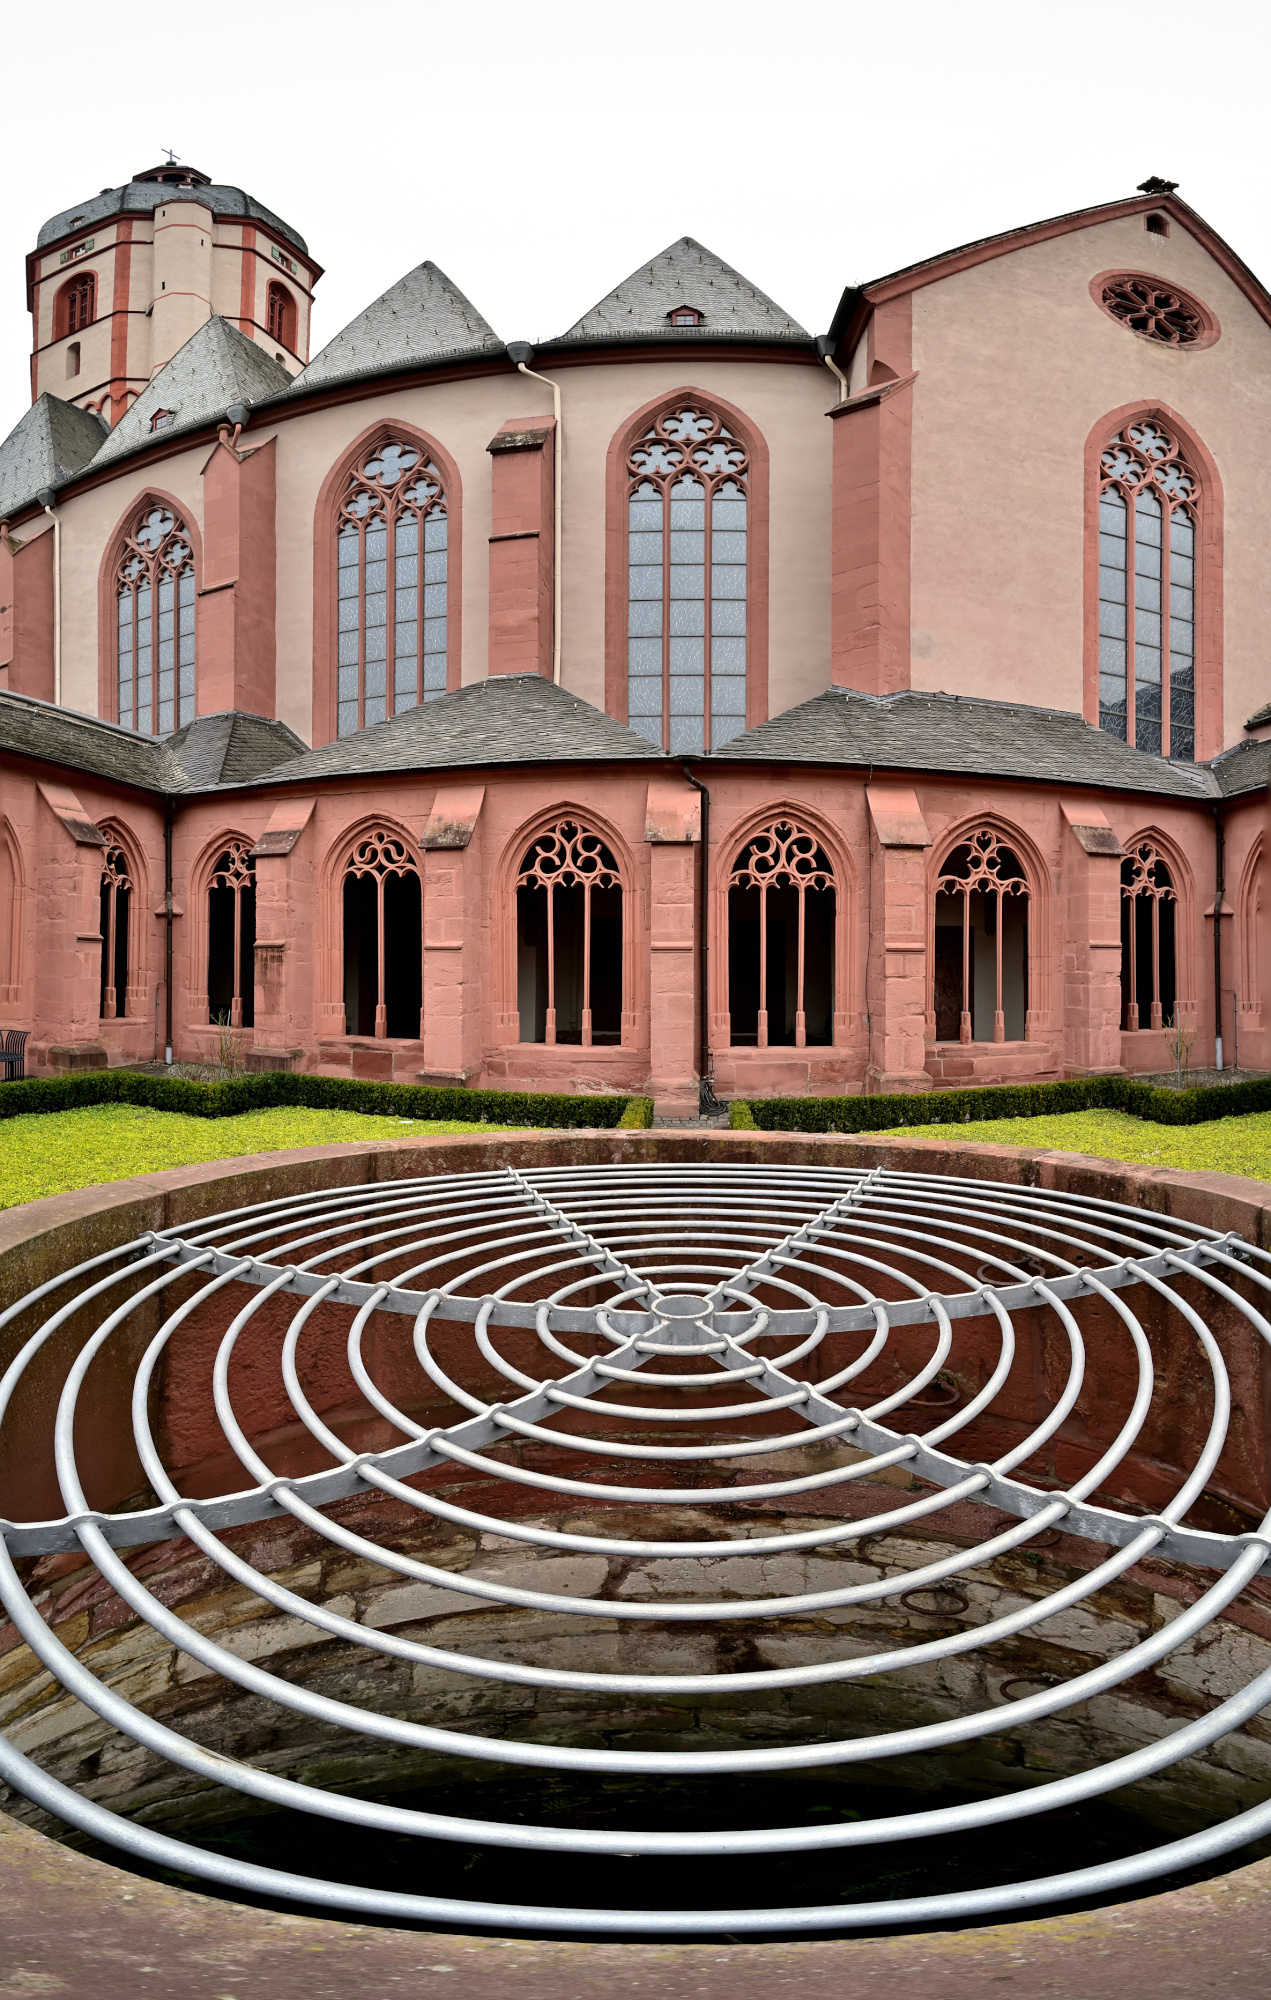
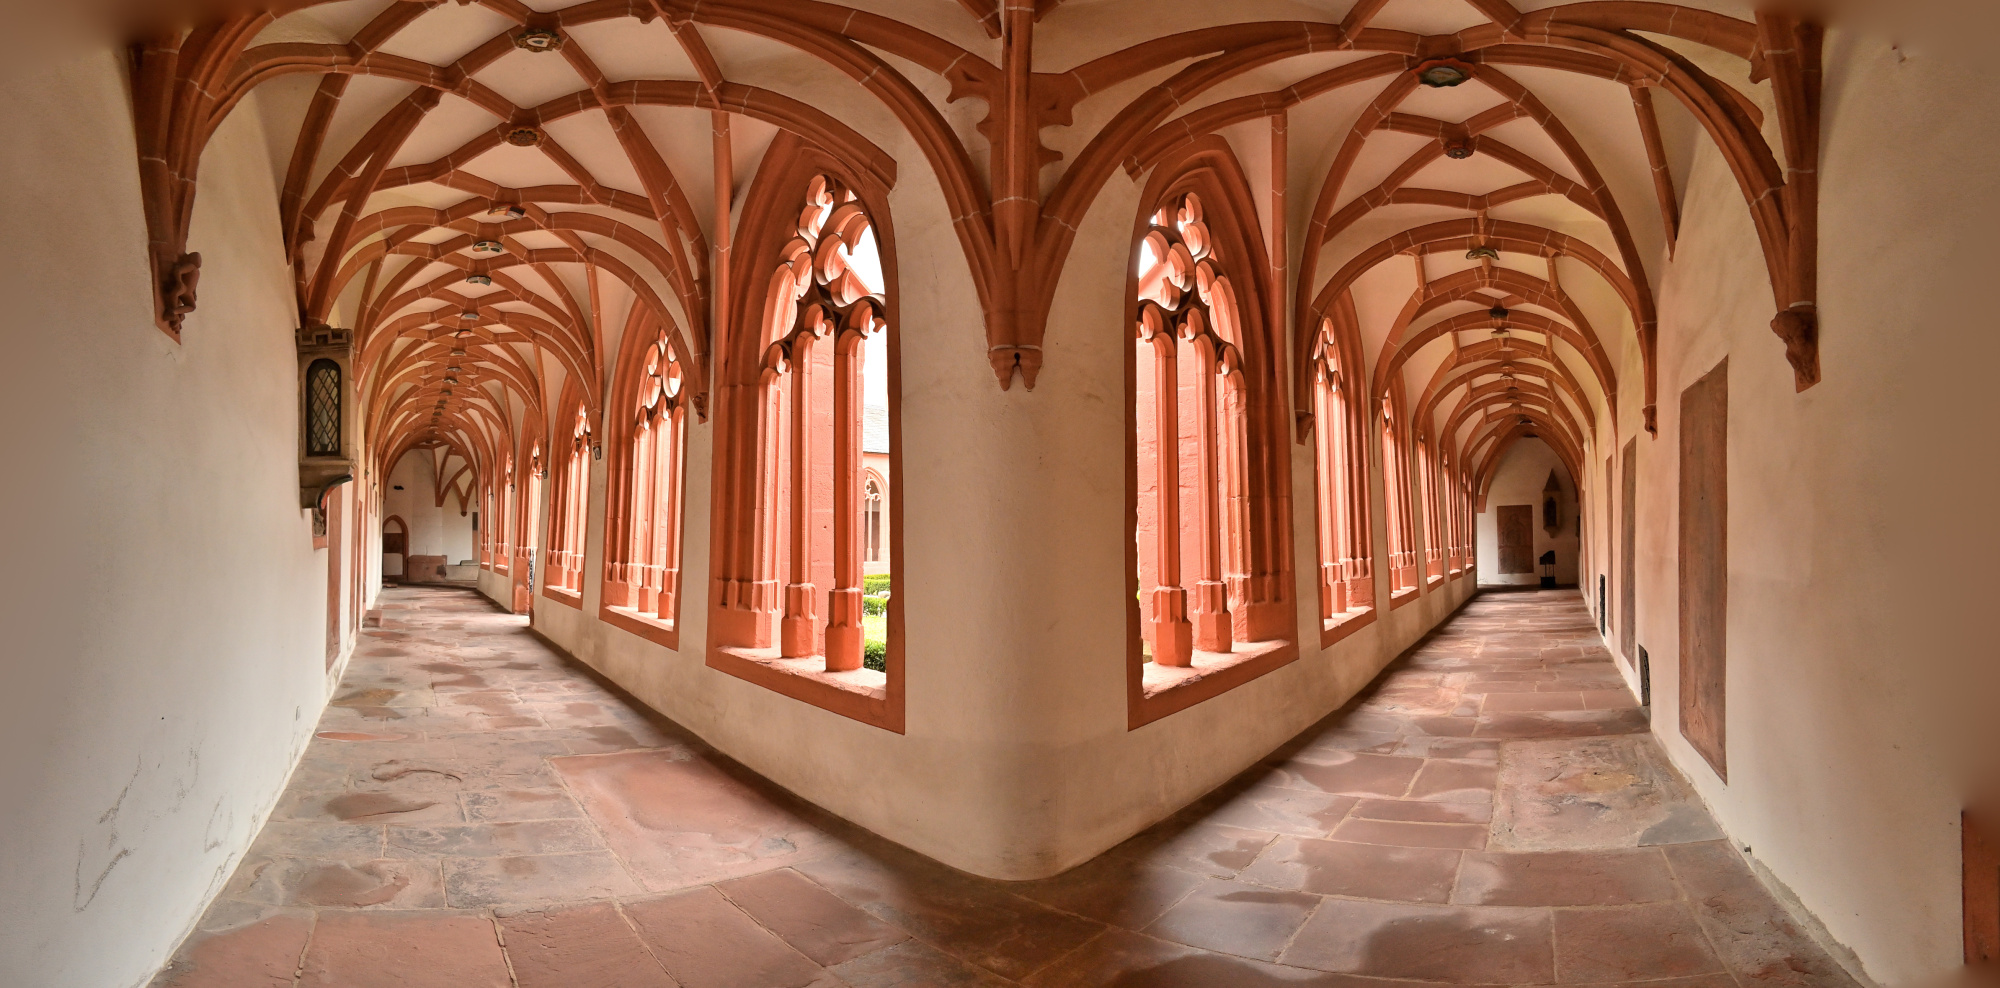
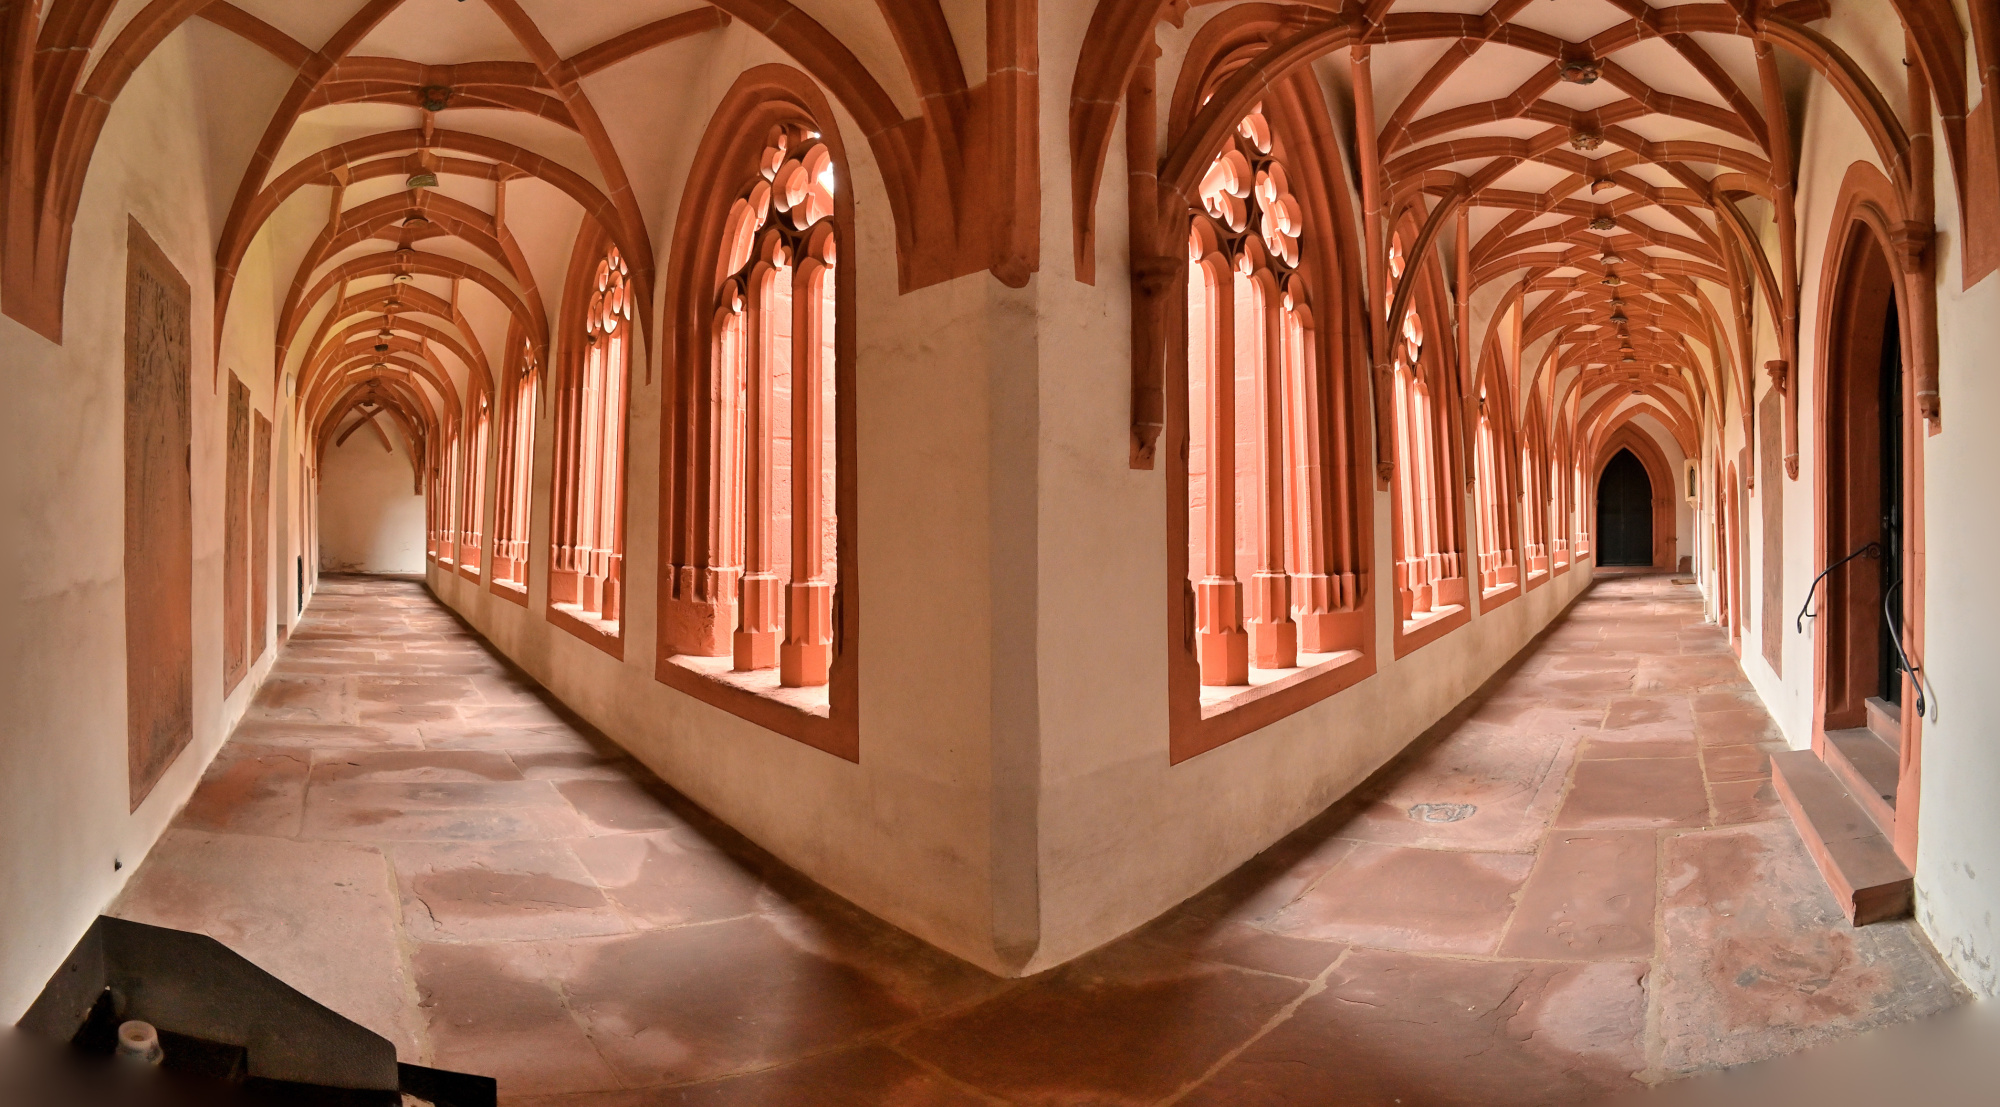
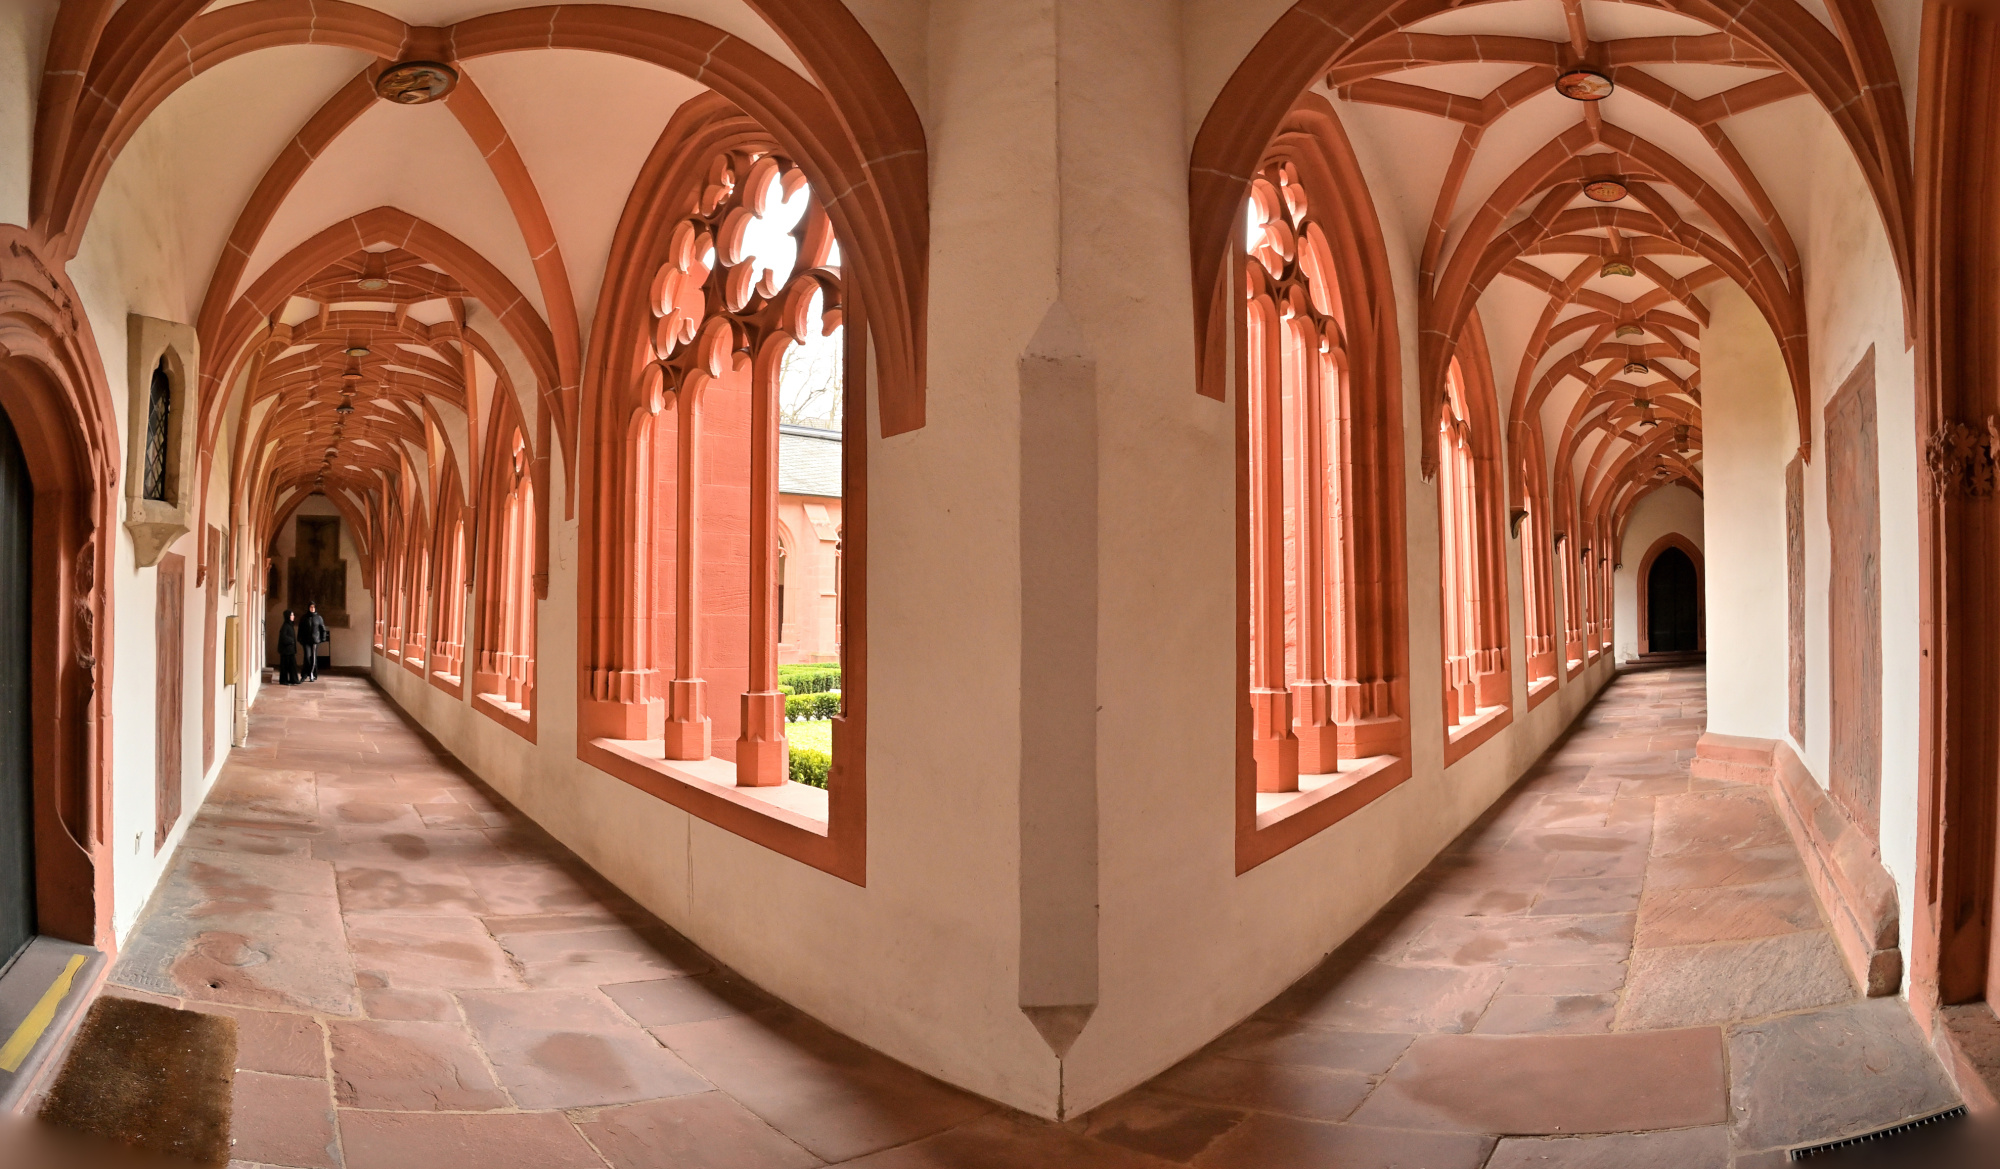
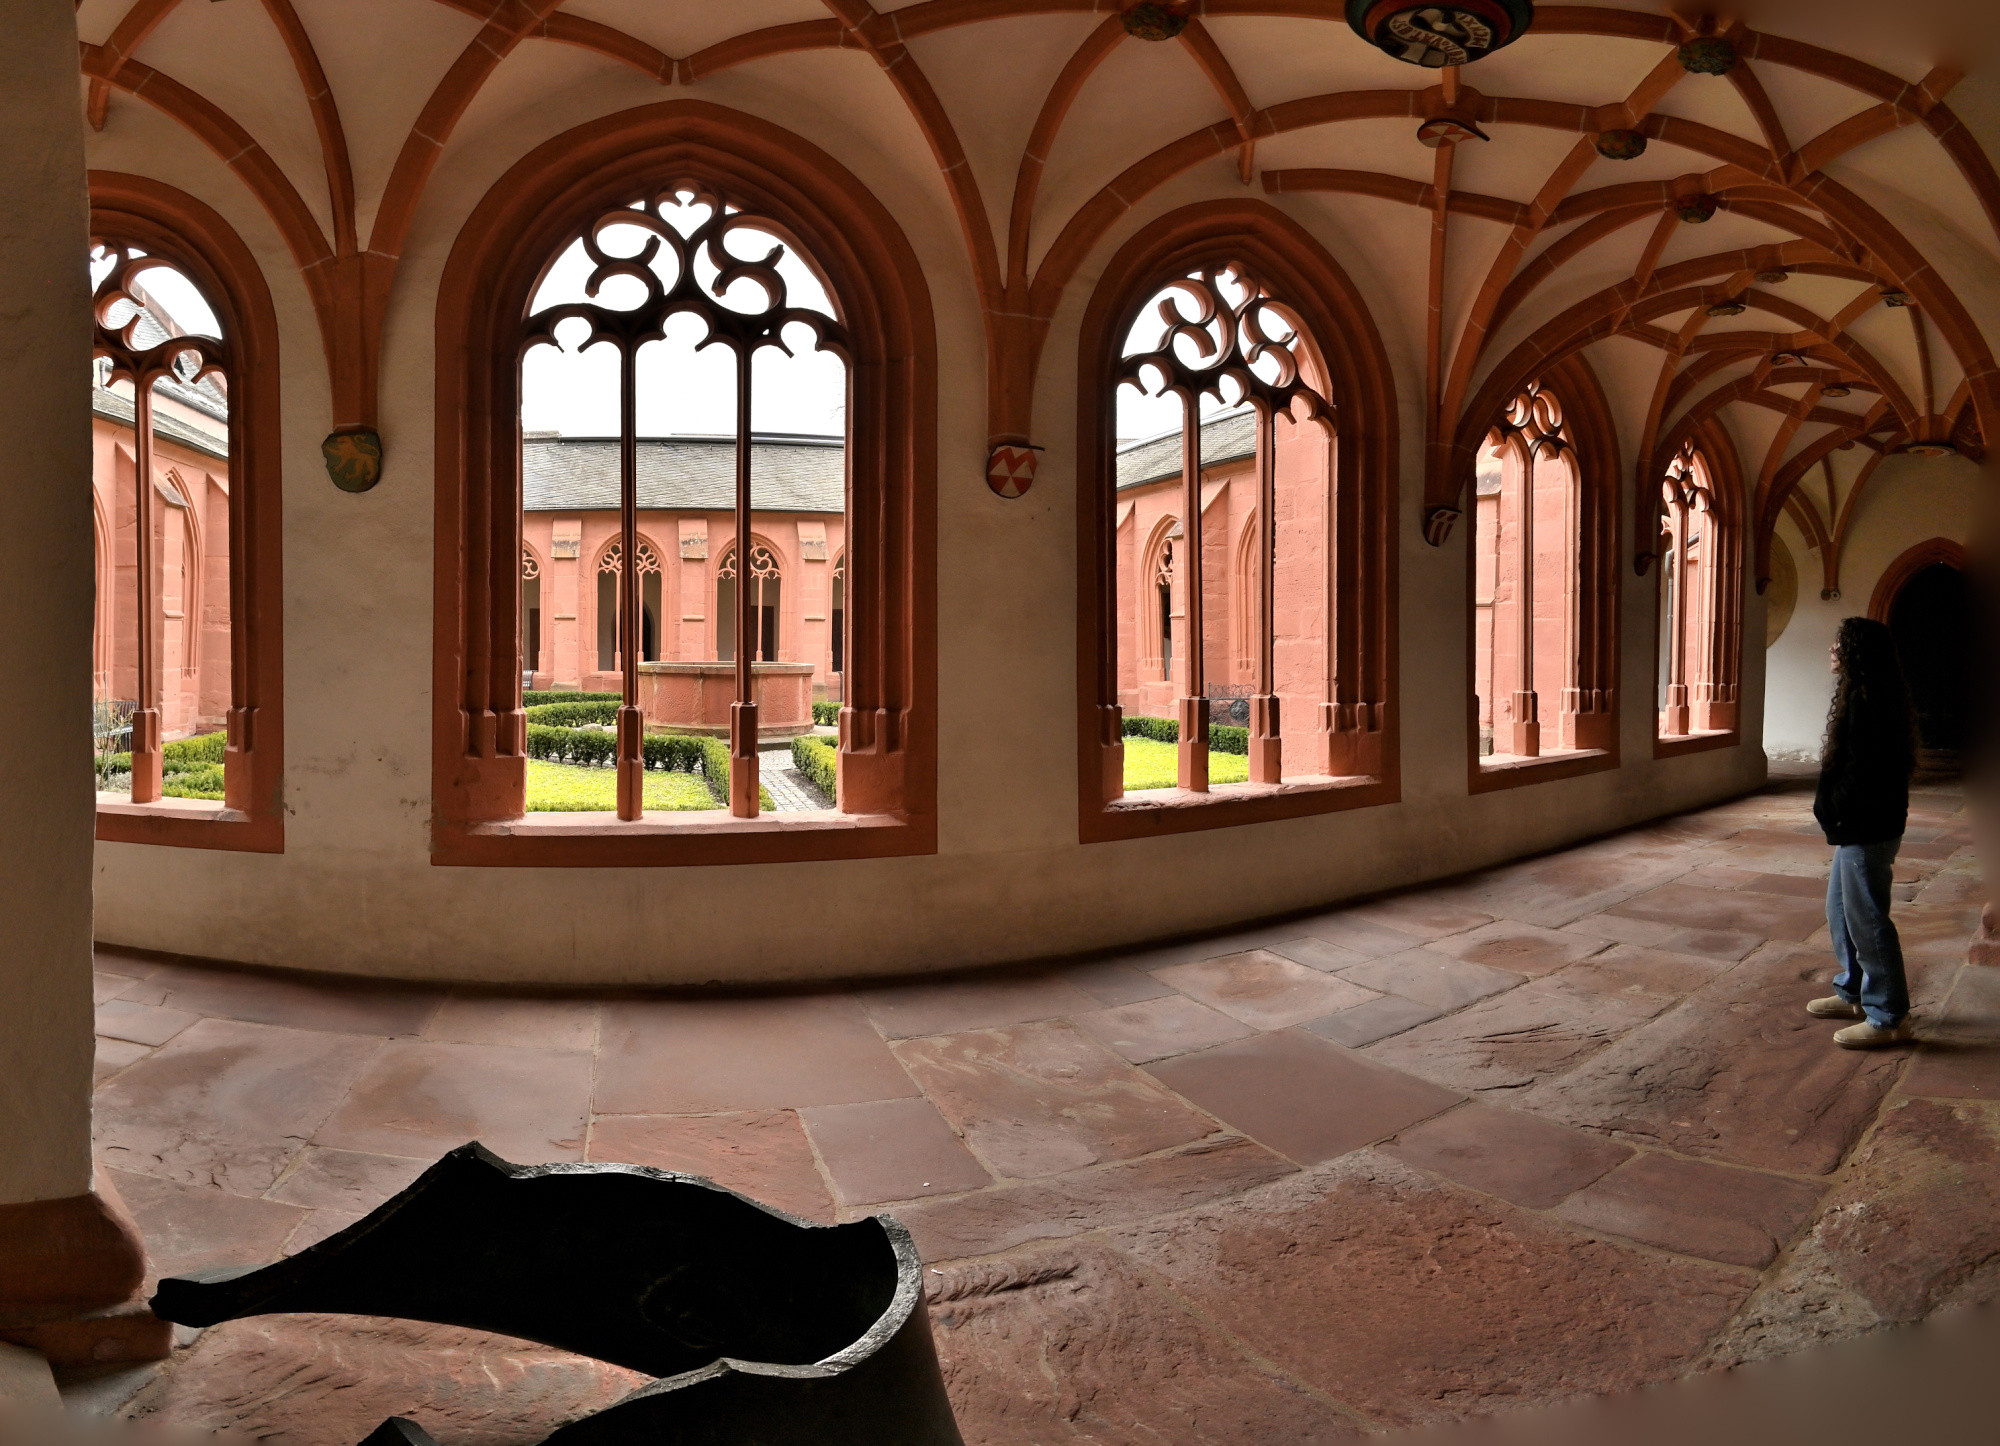
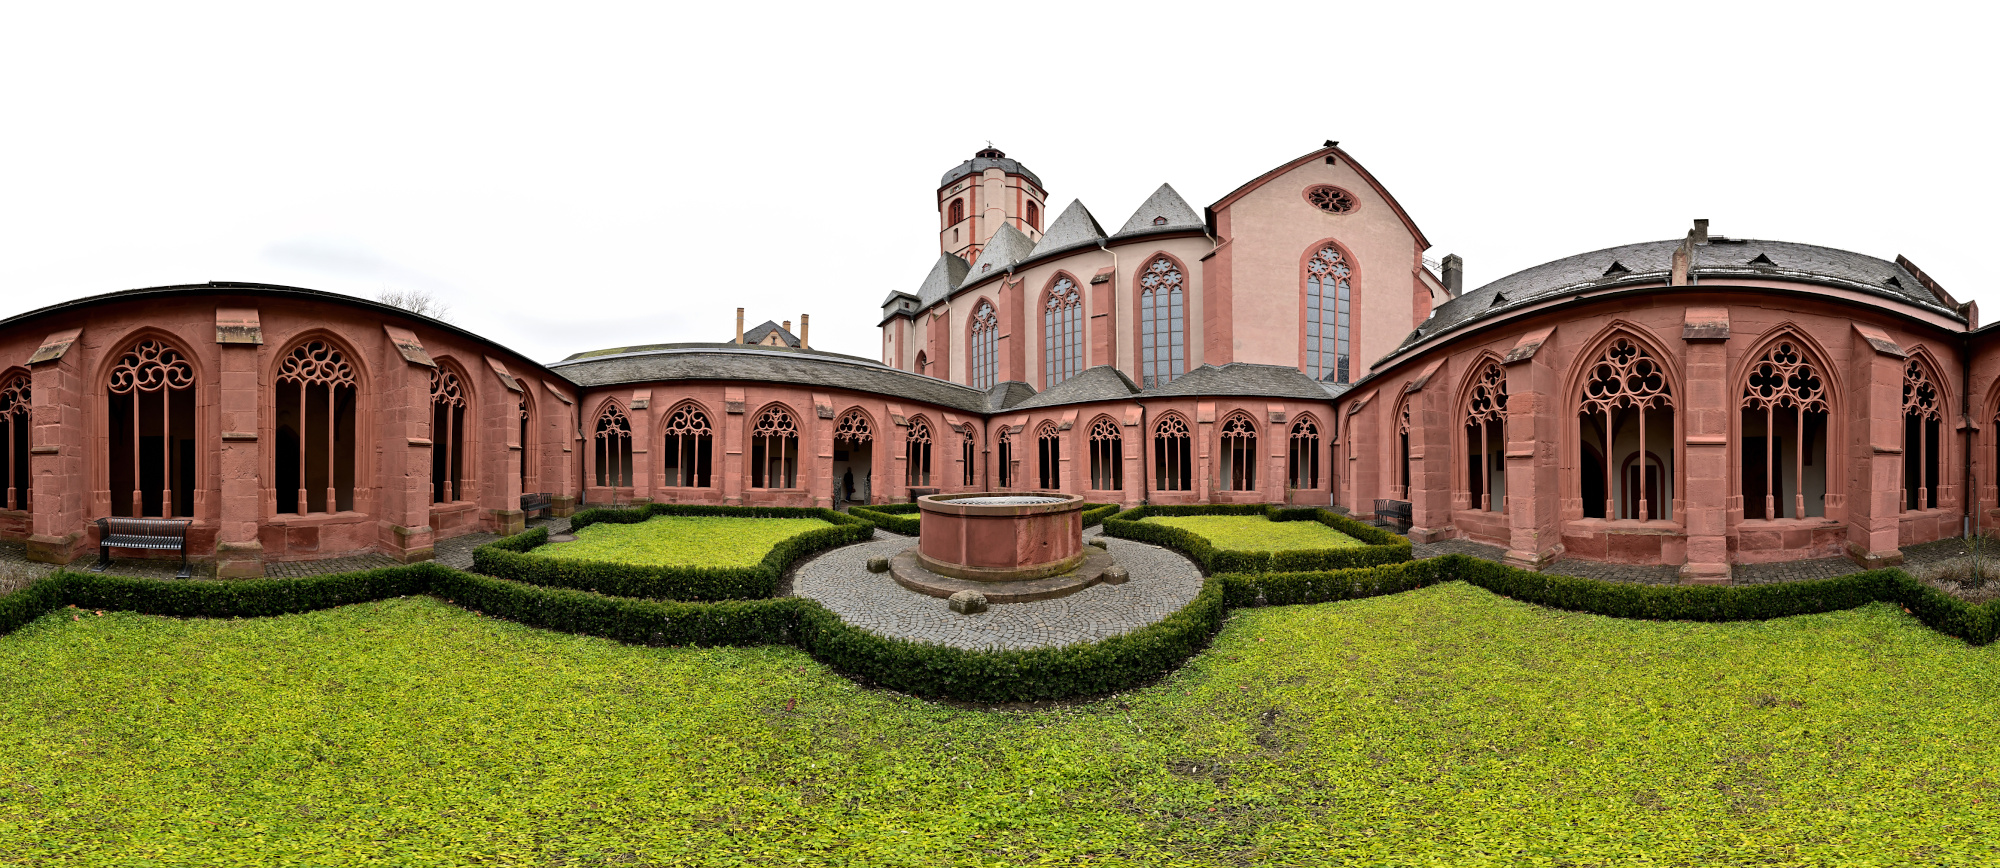
Kreuzgang der Stephanskirche
Der Kreuzgang der Stephanskirche gehört zu den spätgotischen Anlagen der Stadt und wurde im Jahr 1499 vollendet. Er entstand rund eine Generation nach dem Bau der Kirche und wurde von den Stiftsherren in Auftrag gegeben, die damit einen geschützten, ruhigen Bereich an der Südseite der Kirche schufen.
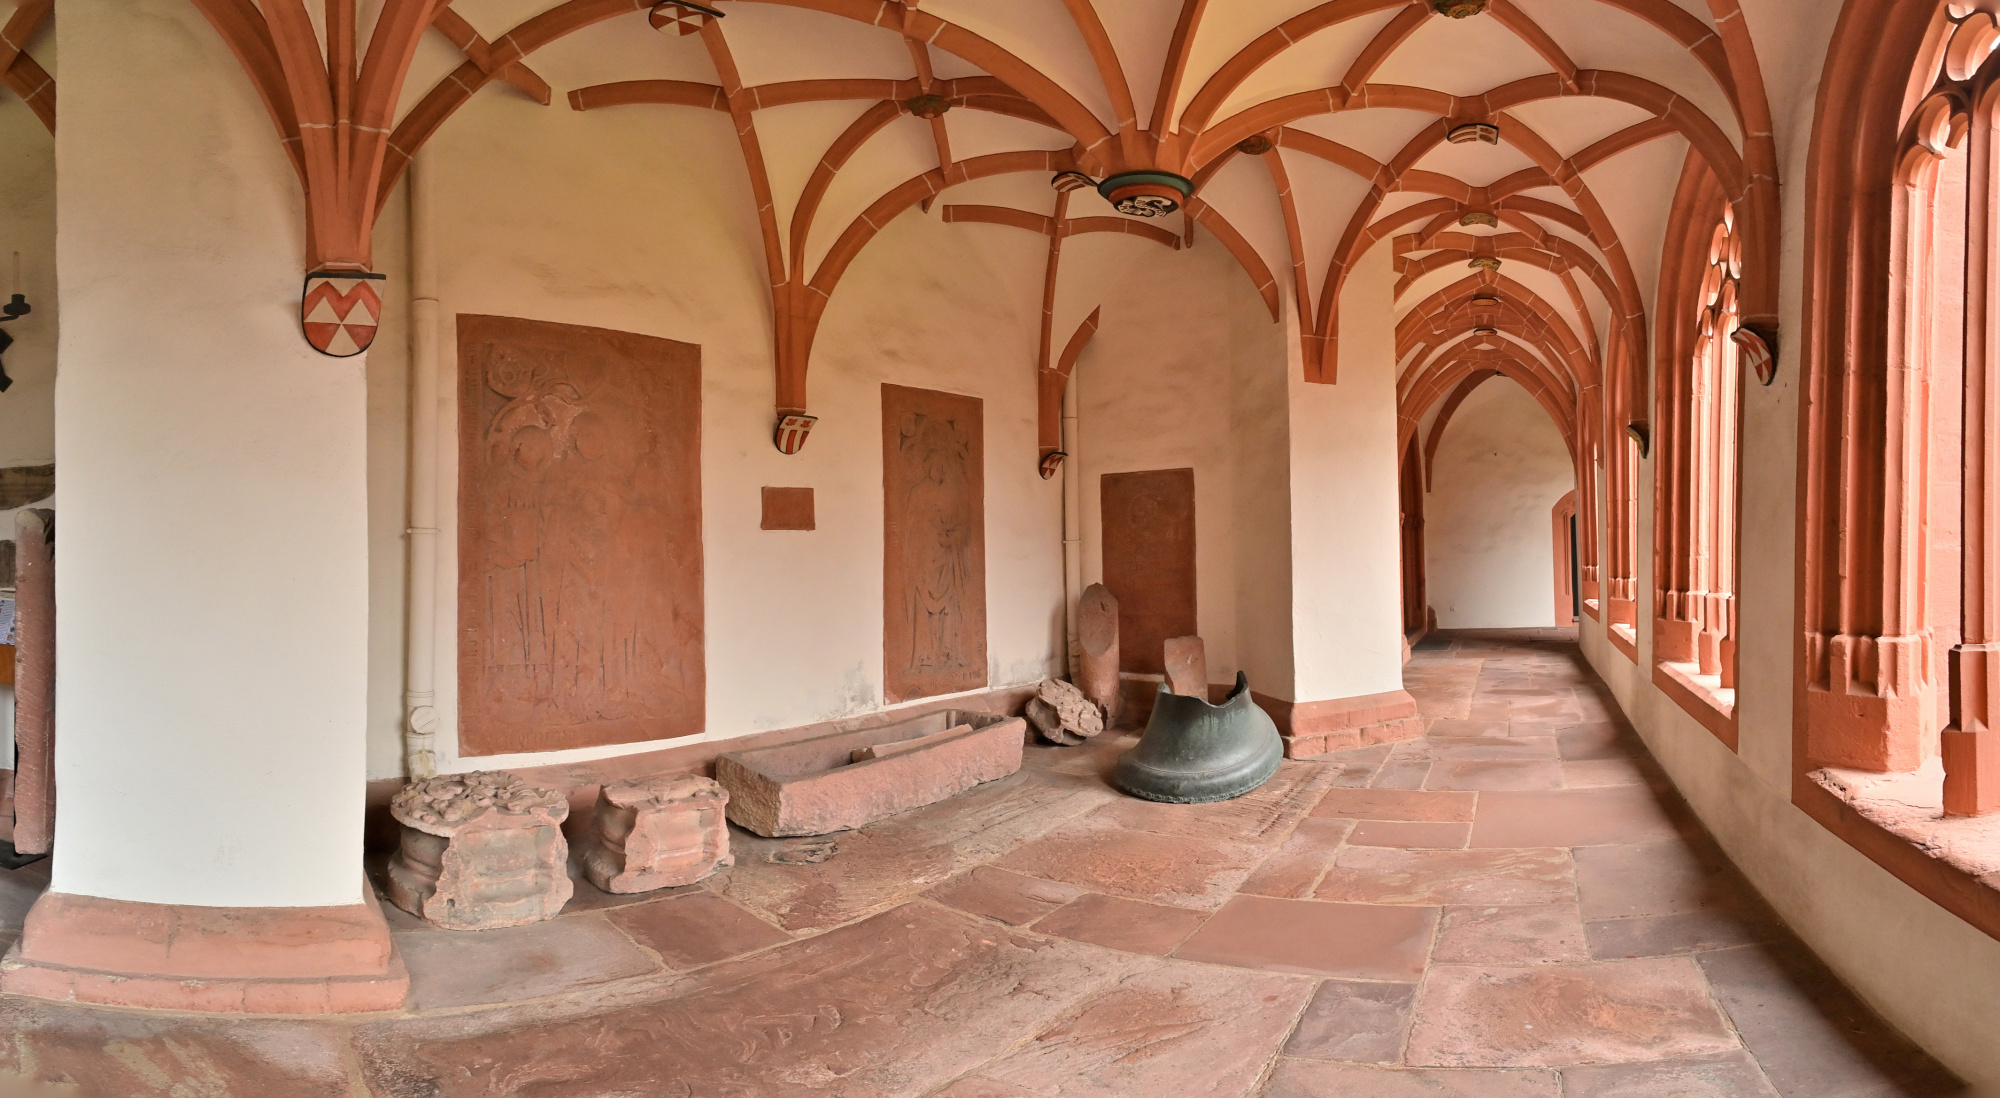
Die Anlage zeigt bis heute viele Spuren ihrer langen Geschichte. An den Wänden stehen zahlreiche Grabplatten, von denen die älteste aus dem Jahr 1048 stammt. Sie wurden im 19. Jahrhundert aus der Kirche hierher gebracht, um sie besser zu erhalten.
Auch der Kapitelsaal gehört zu diesem Ensemble. Seine Mittelsäule wurde bereits um das Jahr 780 geschaffen und später als Abgabe an das Stift übergeben, bevor sie hier ihren Platz fand.
Der Kreuzgang wurde im Laufe der Jahrhunderte mehrfach beschädigt, unter anderem durch die Explosion eines Pulverturms im Jahr 1857 und später im Zweiten Weltkrieg. Zwischen 1968 und 1971 wurde er sorgfältig wiederhergestellt.
Heute wirkt der Innenhof trotz seiner Geschichte leicht und offen. Wer dort entlanggeht, spürt die Ruhe des Ortes und die vielen Schichten der Vergangenheit, die sich in den Mauern gesammelt haben.
1/40s f/5,6 ISO 100/21° f=7,5mm
1/40s f/5,6 ISO 100/21° f=7,5mm
1/60s f/5,6 ISO 100/21° f=7,5mm
1/50s f/5,6 ISO 100/21° f=7,5mm
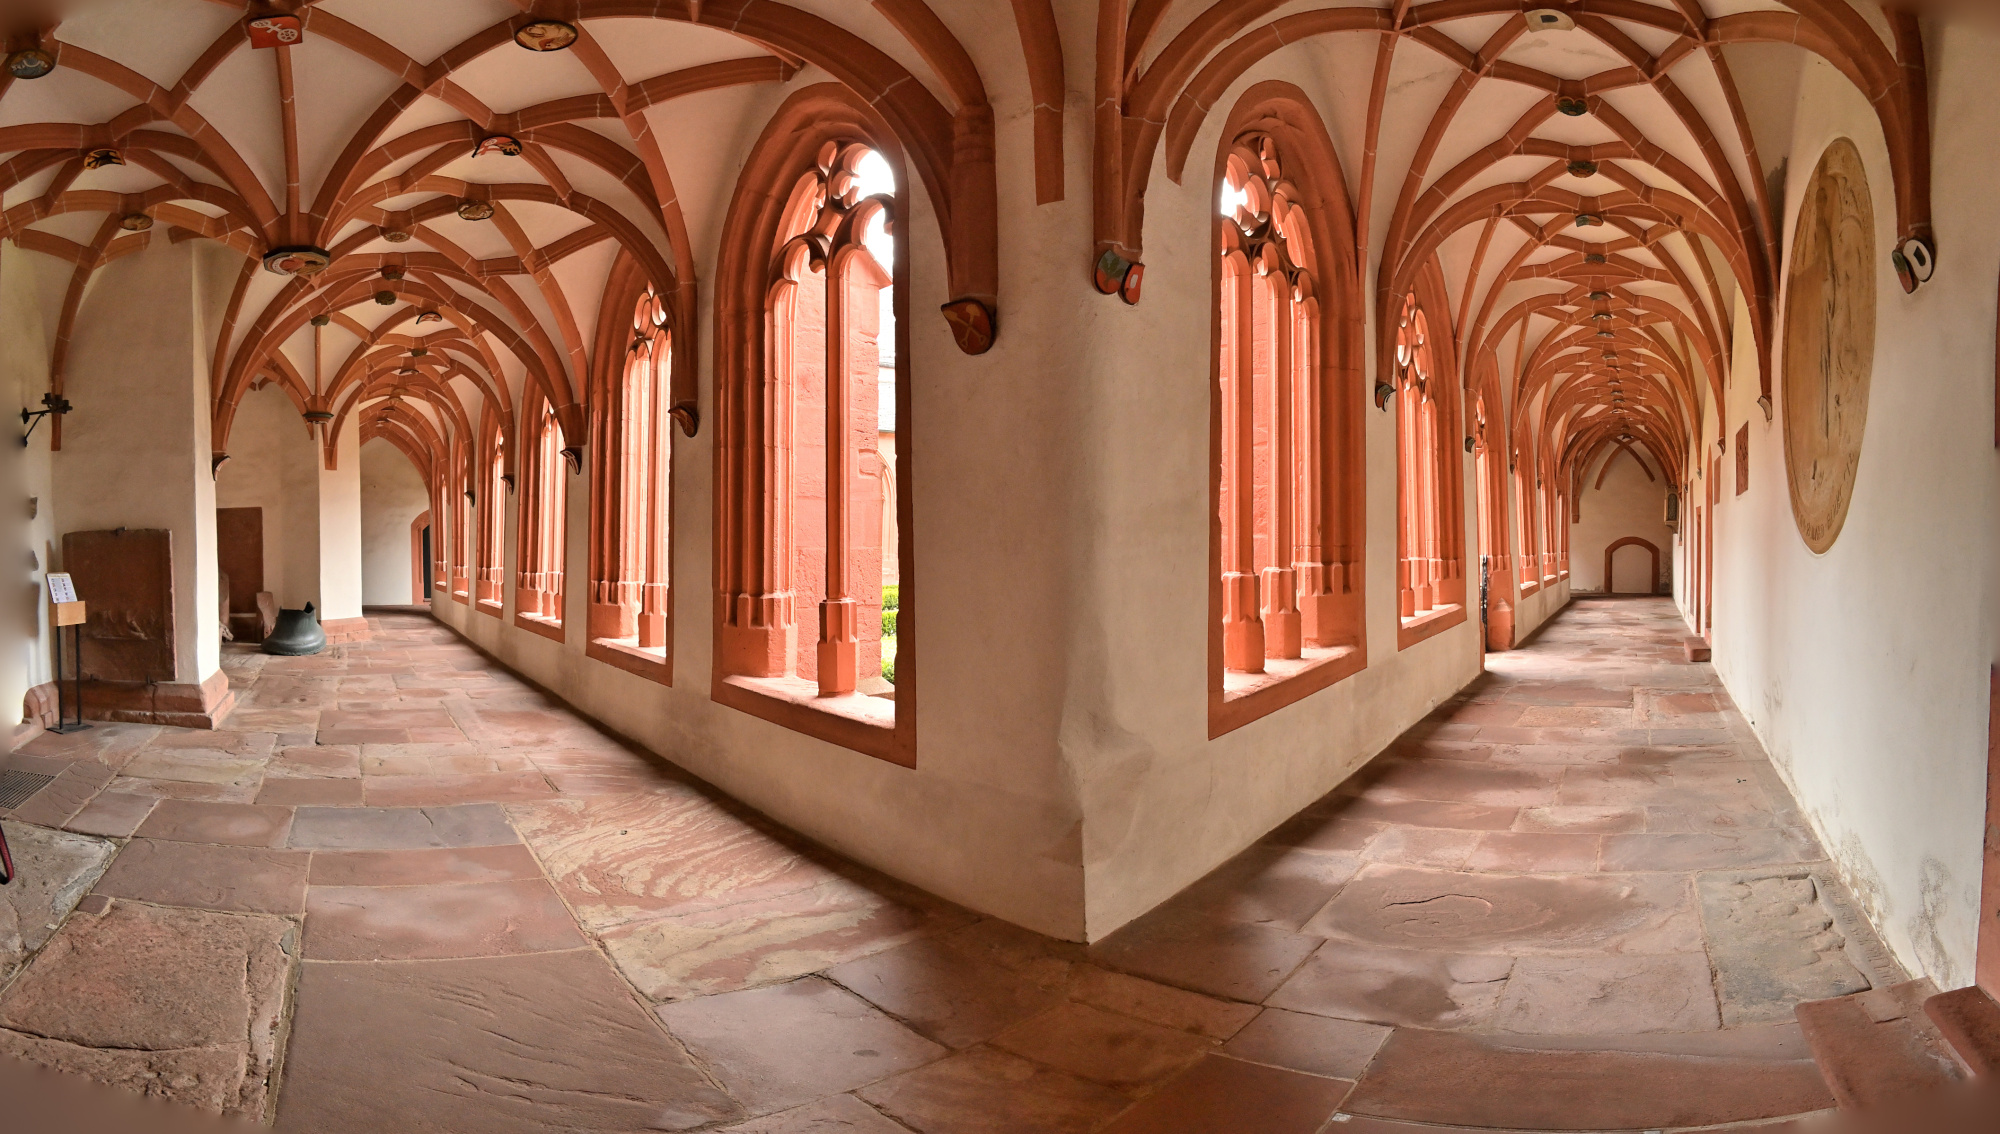
Kreuzgang-Ecken
1/40s f/5,6 ISO 640/29° f=7,5mm
1/40s f/5,6 ISO 640/29° f=7,5mm
1/40s f/5,6 ISO 640/29° f=7,5mm
1/40s f/5,6 ISO 640/29° f=7,5mm
Kreuzgang-Eckpanorama

1/40s f/5,6 ISO 640/29° f=7,5mm
1/40s f/5,6 ISO 100/21° f=7,5mm
1/40s f/5,6 ISO 2000/34° f=7,5mm

Interaktives Panorama Kreuzgang 1 360x180
1/50s f/2 ISO 100/21° f=7,5mm

Interaktives Panorama Kreuzgang 2 360x180

1/50s f/2 ISO 100/21° f=7,5mm

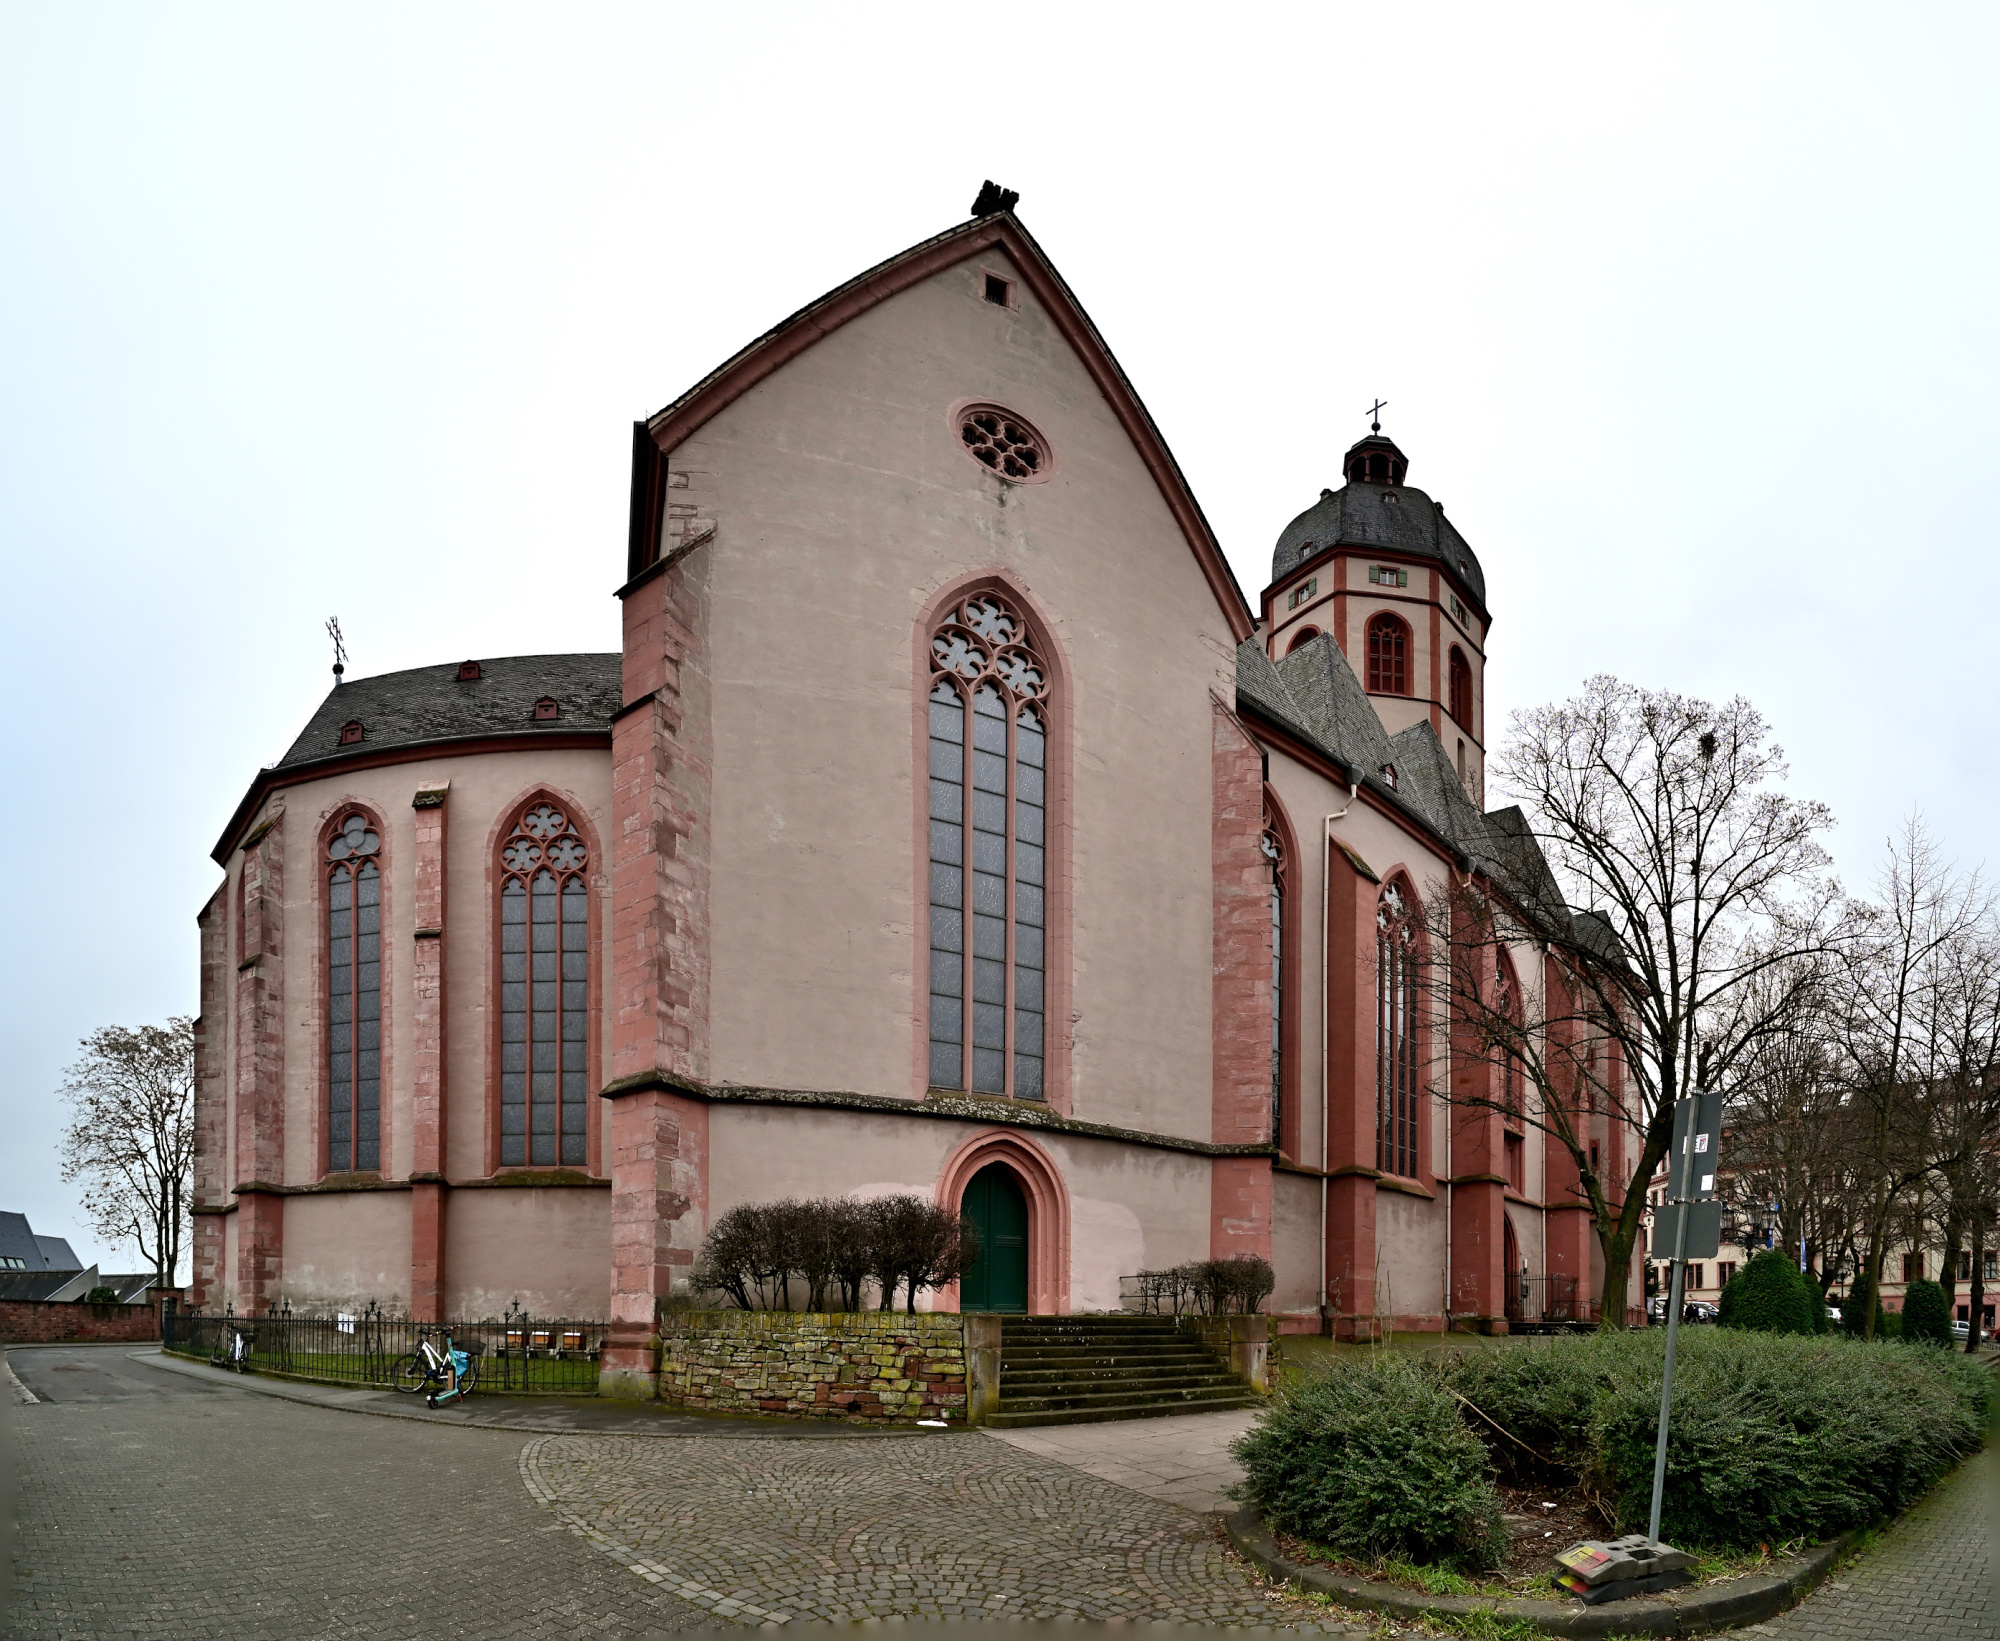
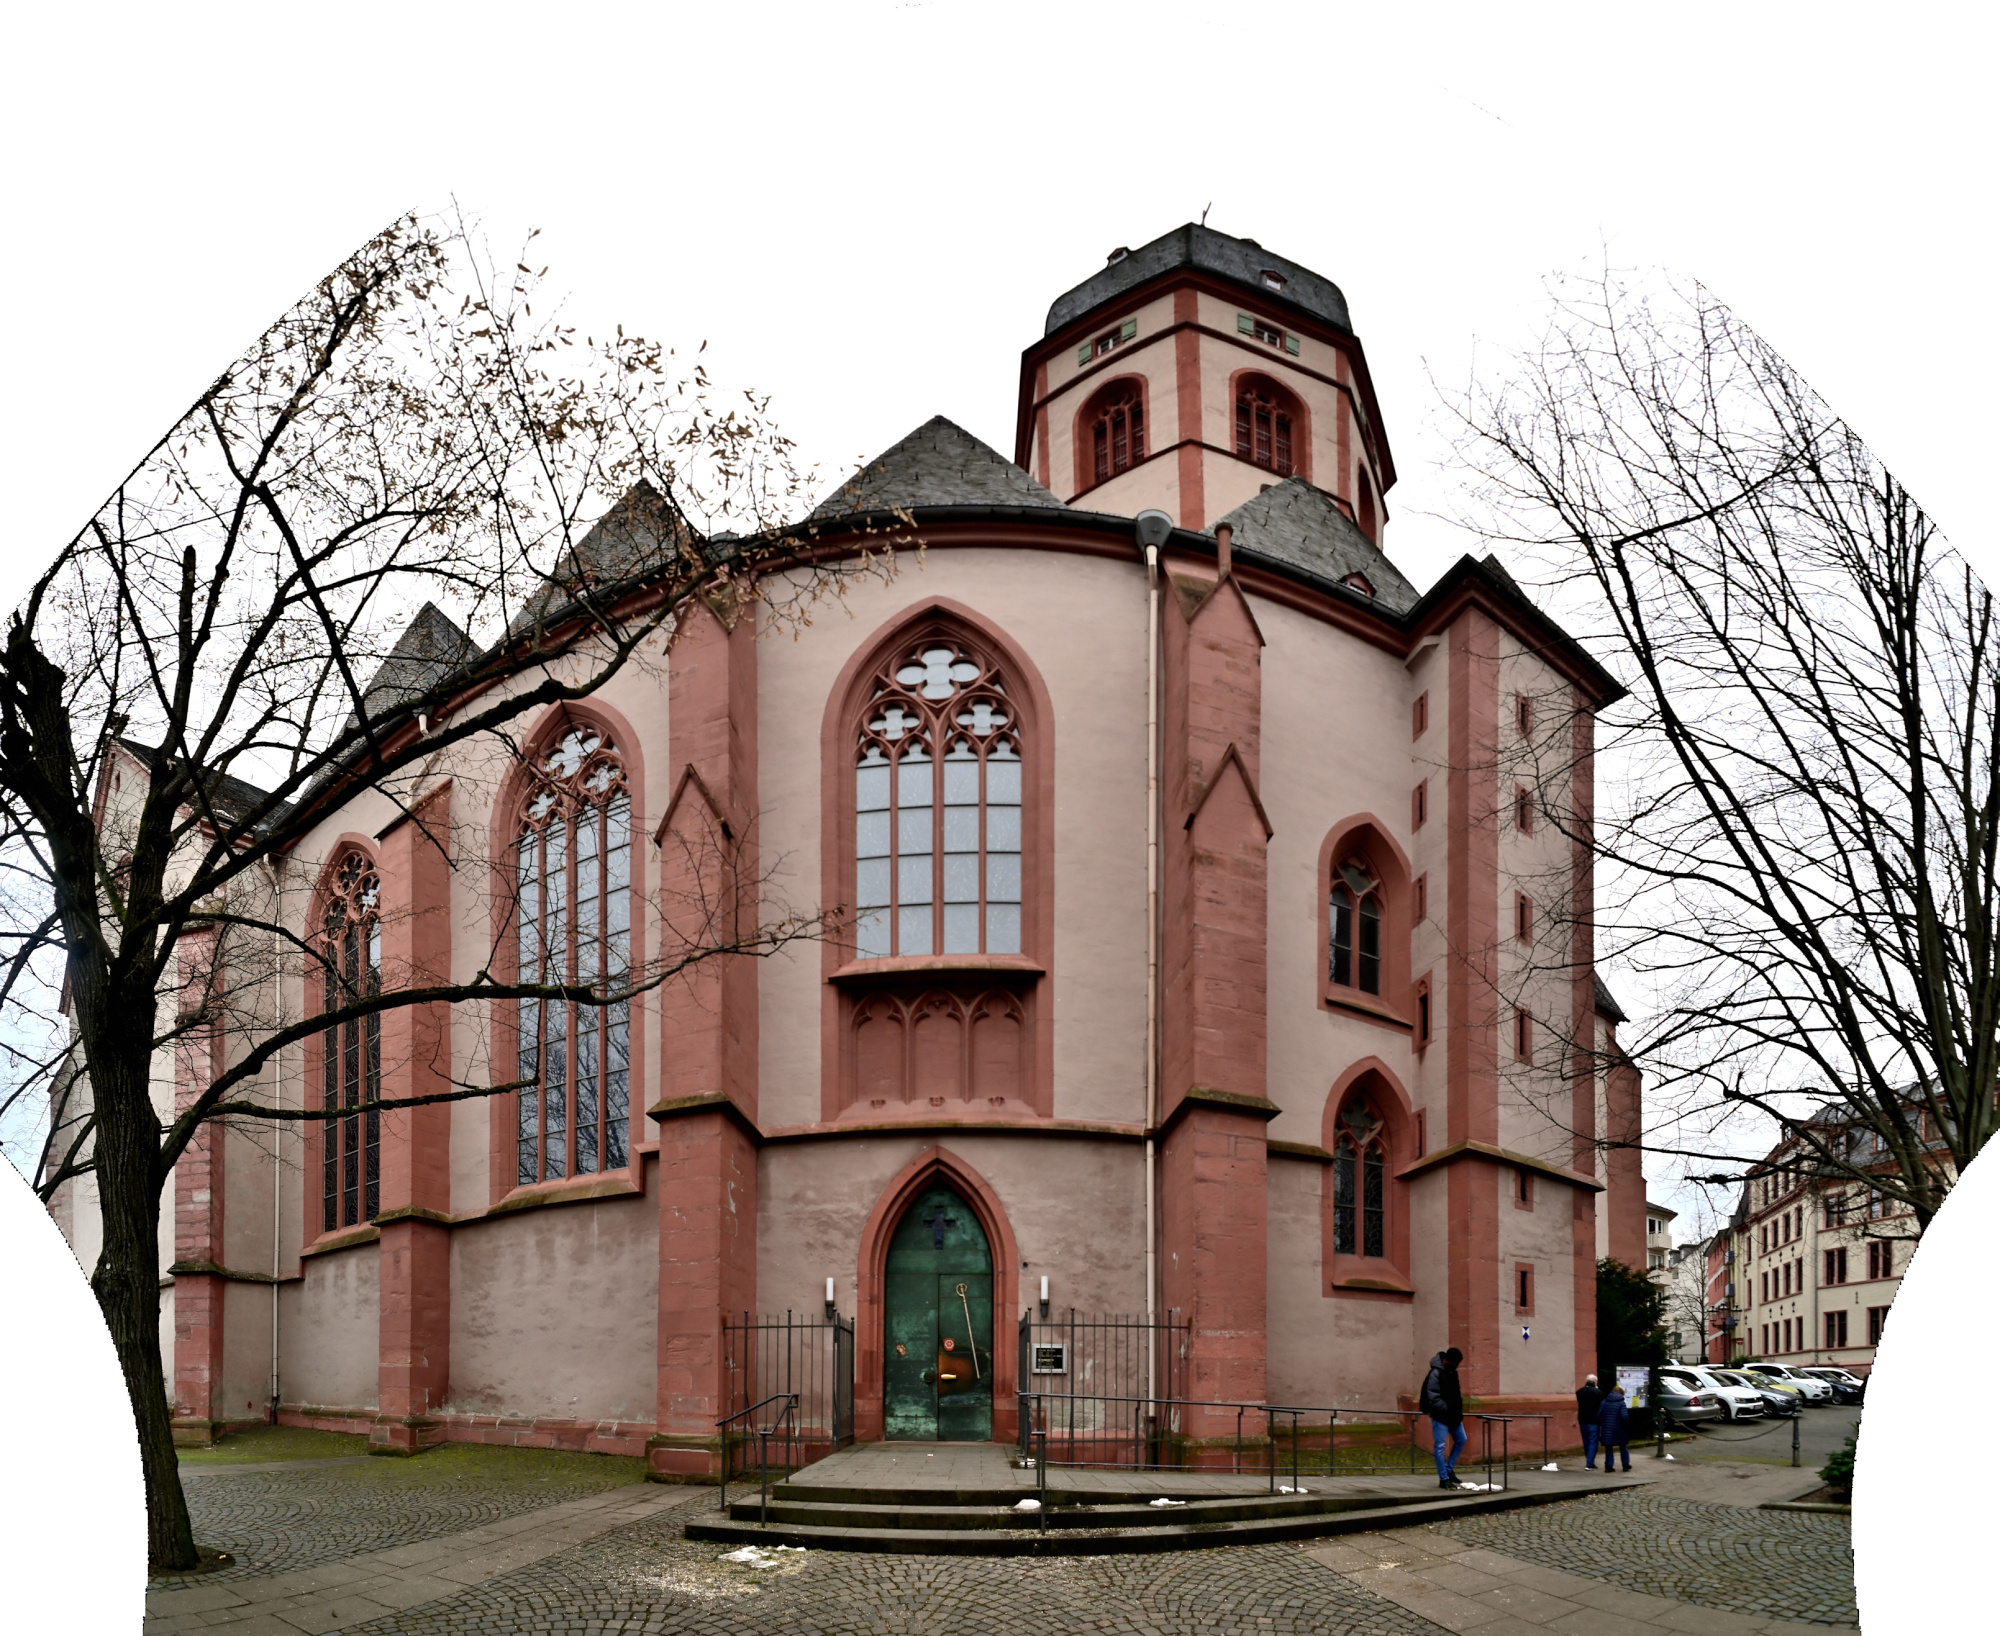
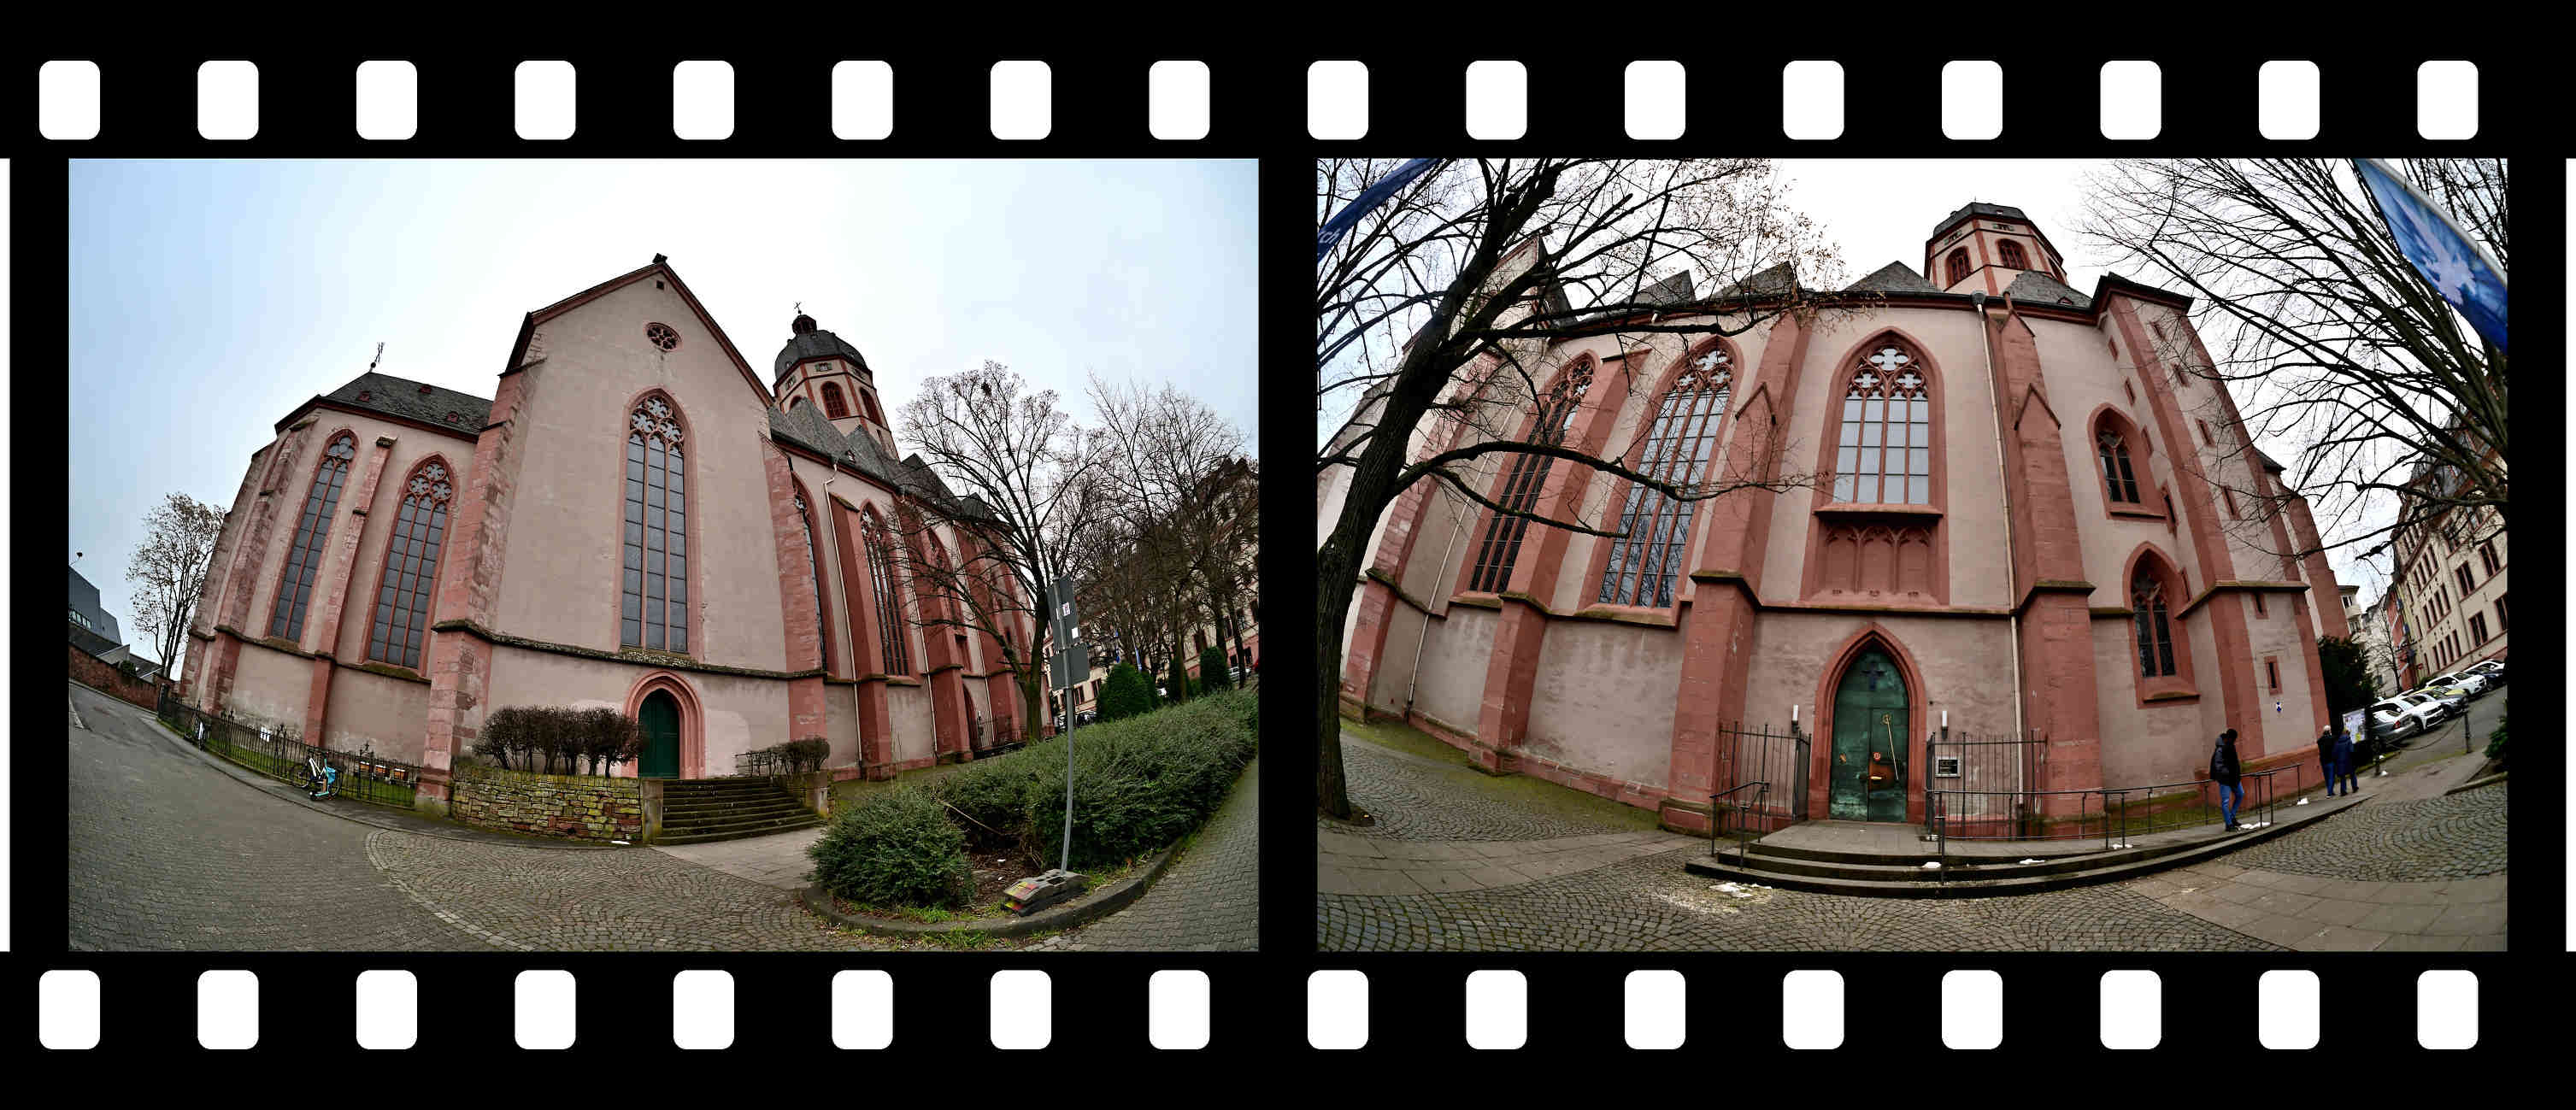
Außenansicht
1/160s f/5,6 ISO 100/21° f=7,5mm
1/100s f/5,6 ISO 100/21° f=7,5mm
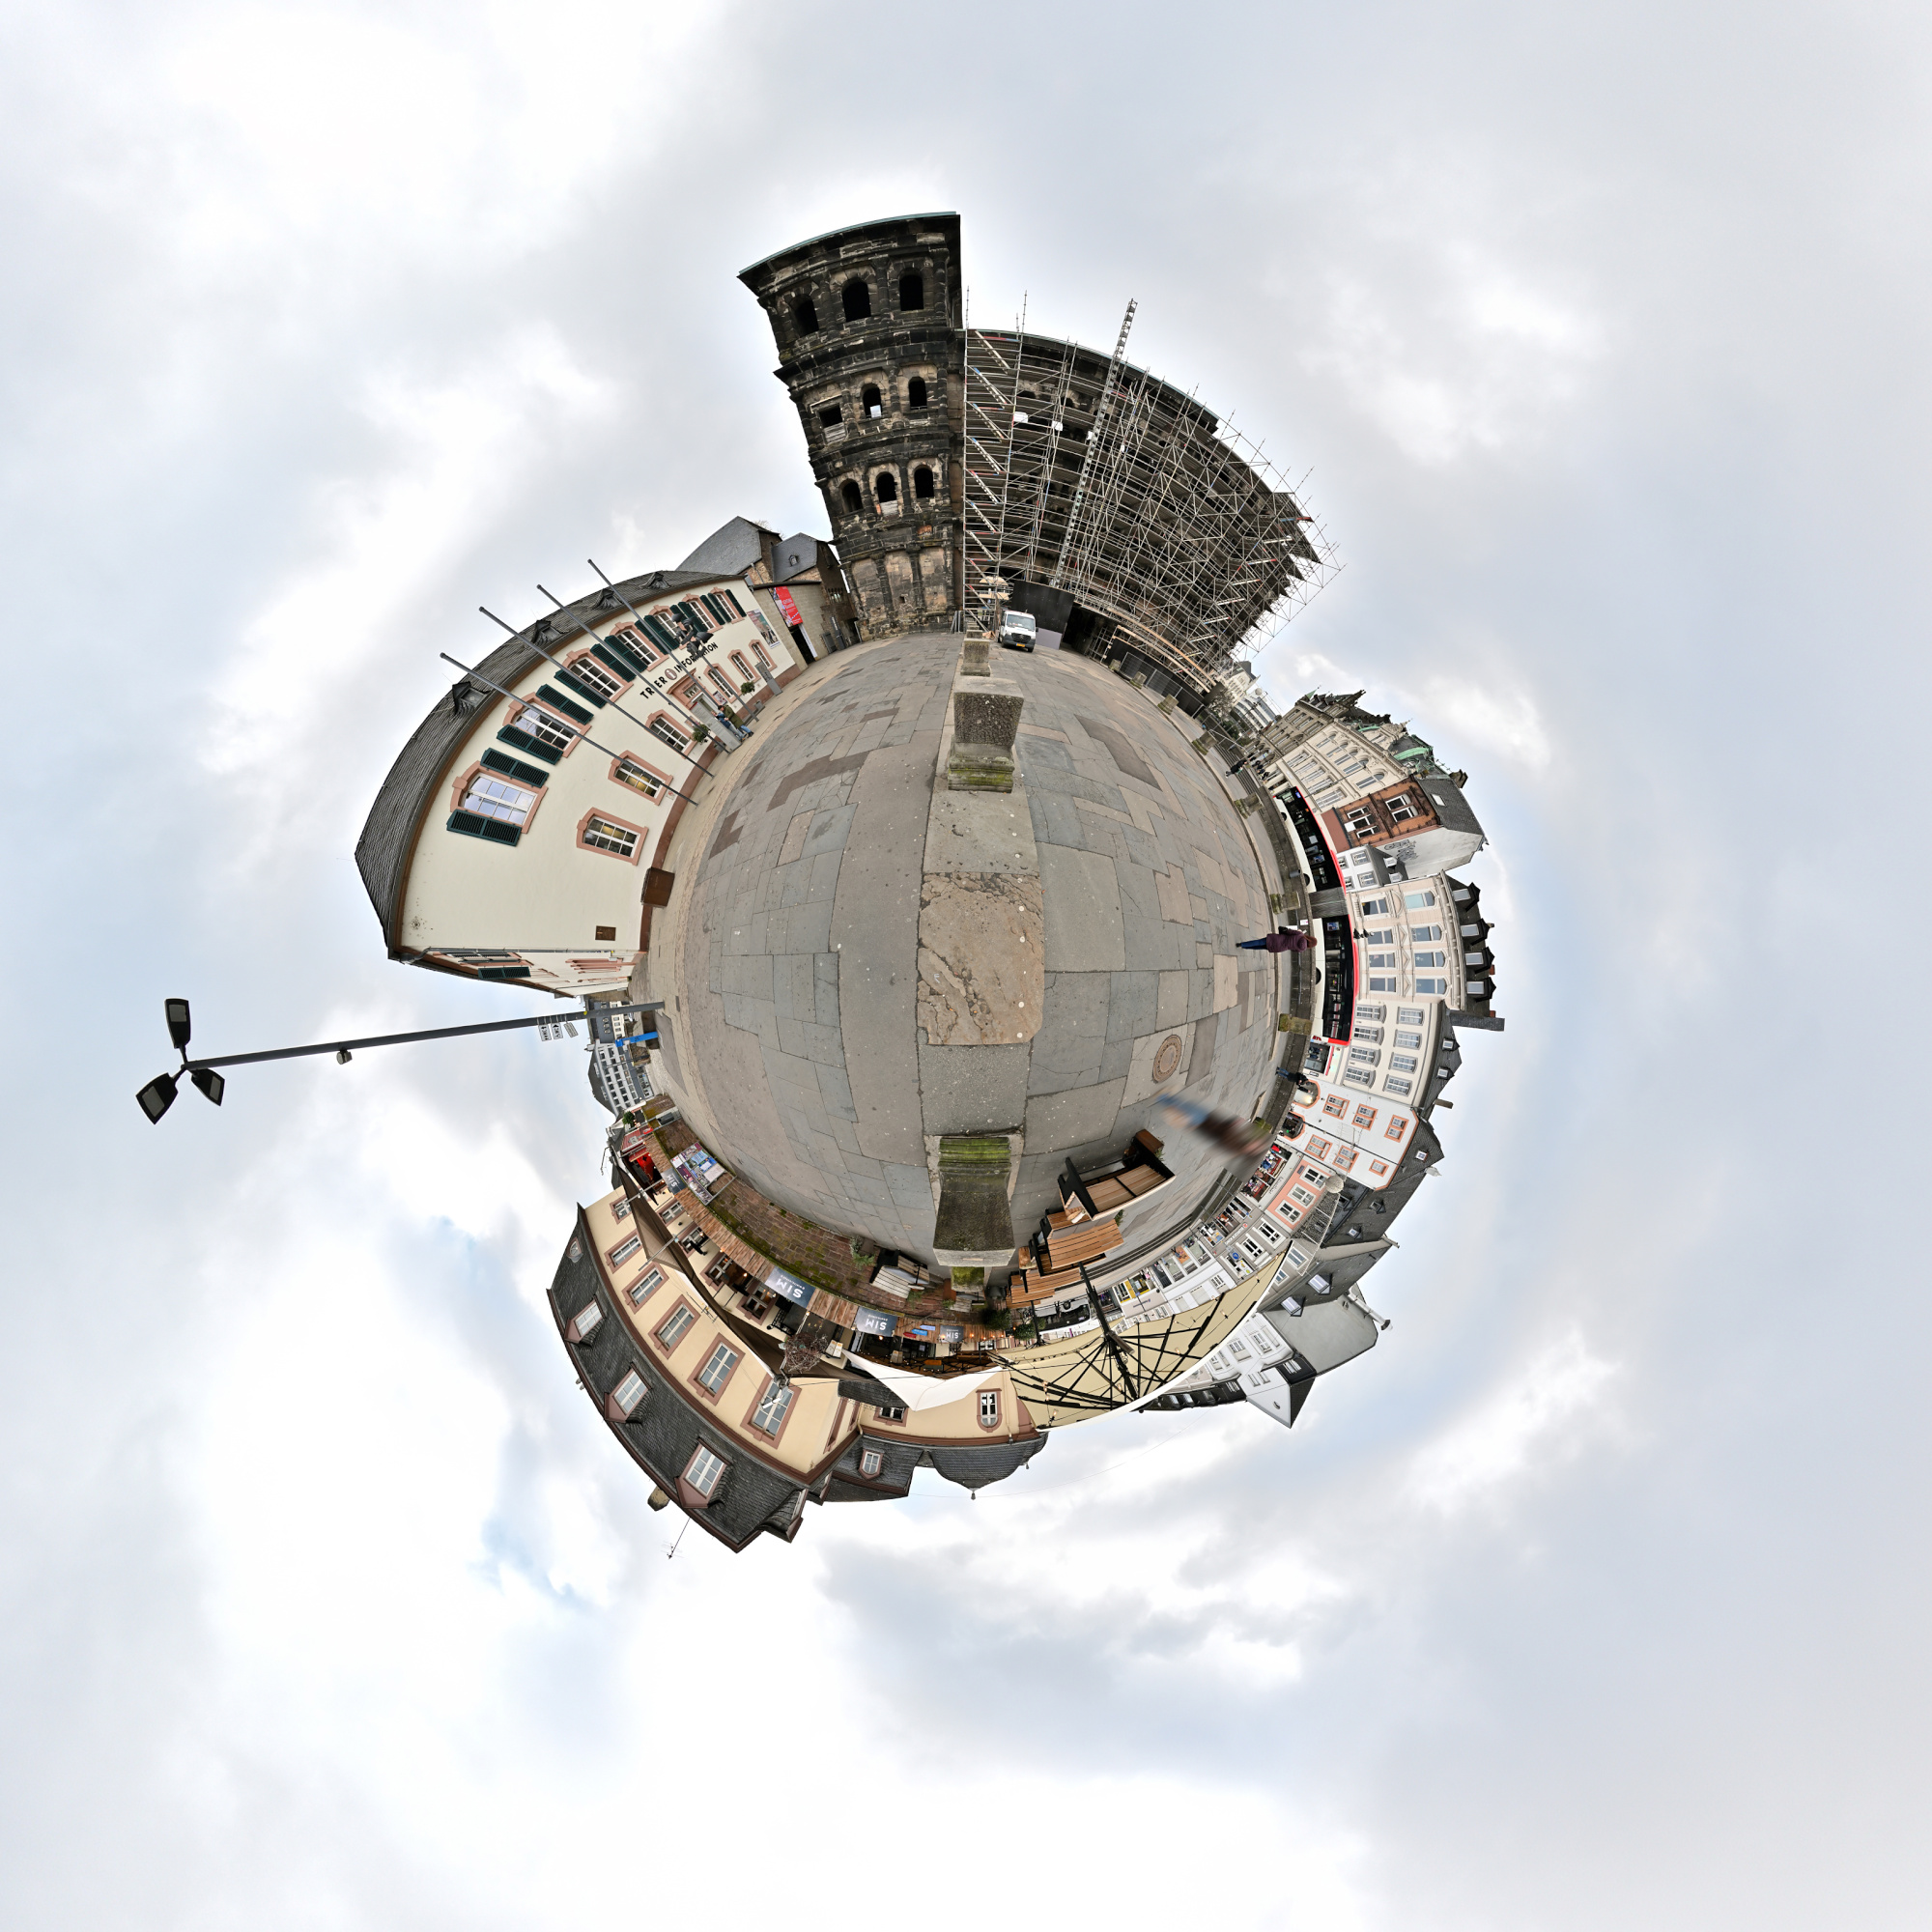
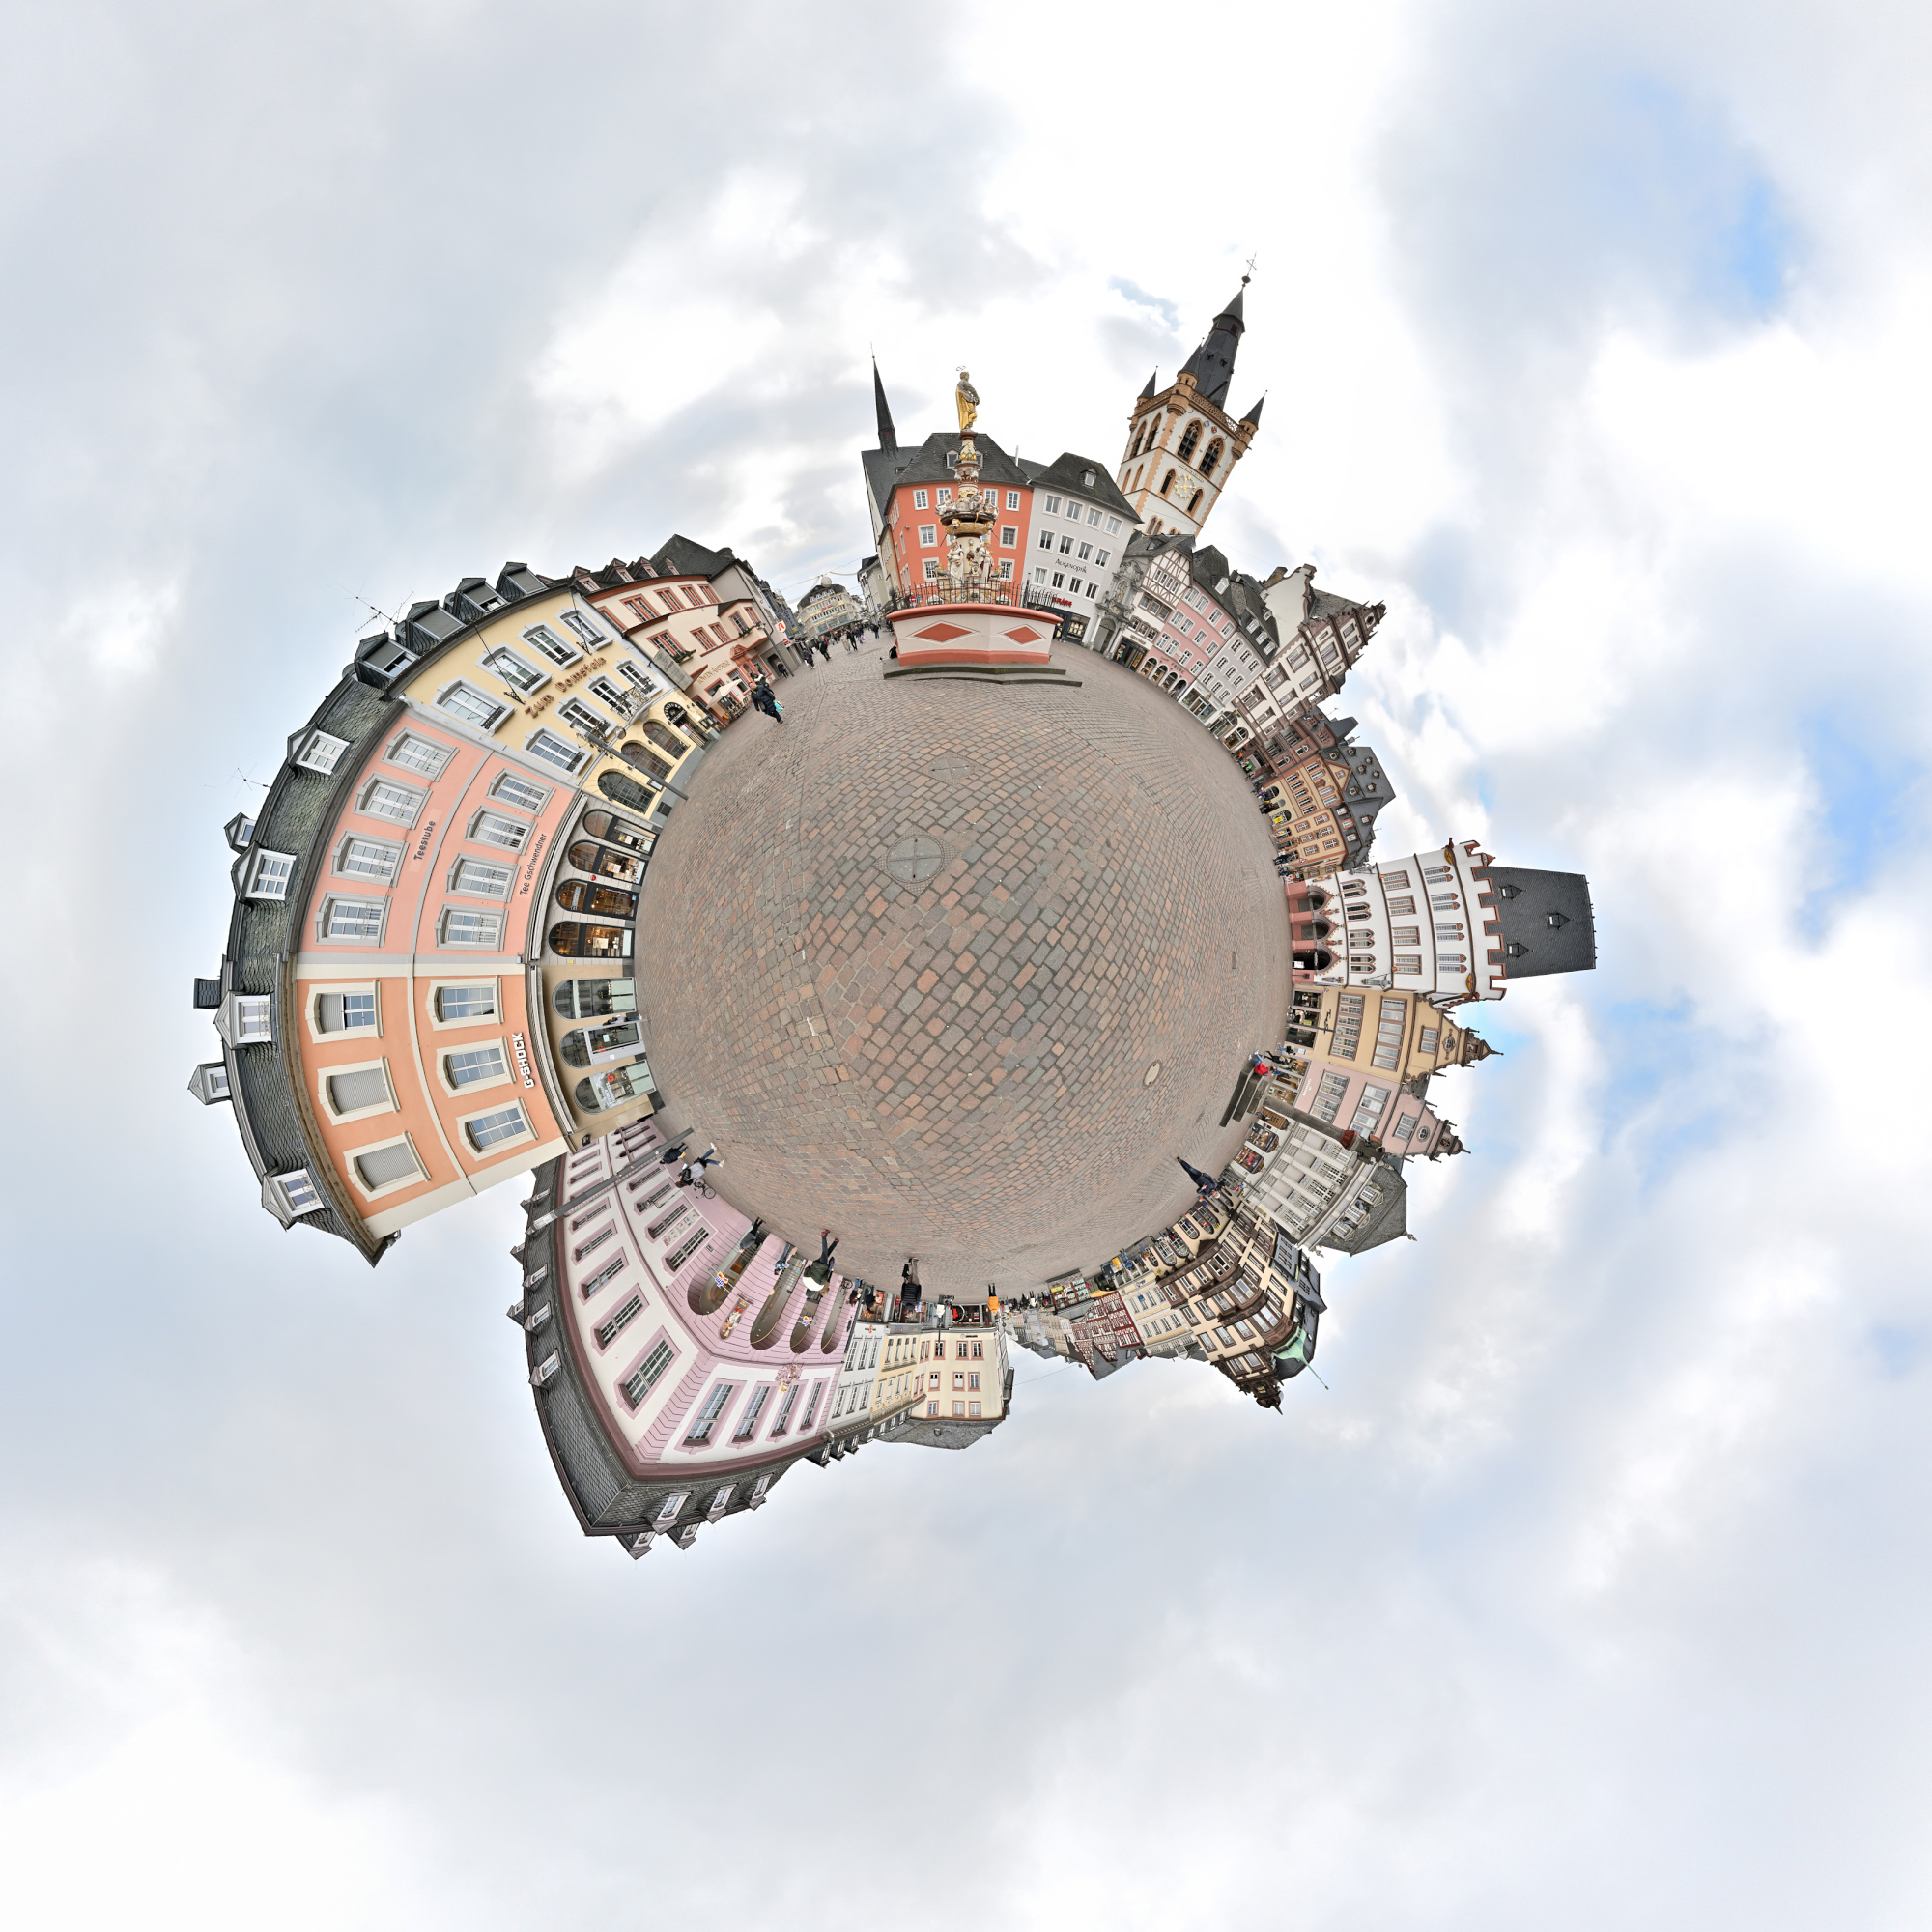
Mercator-Projektionen von:
-
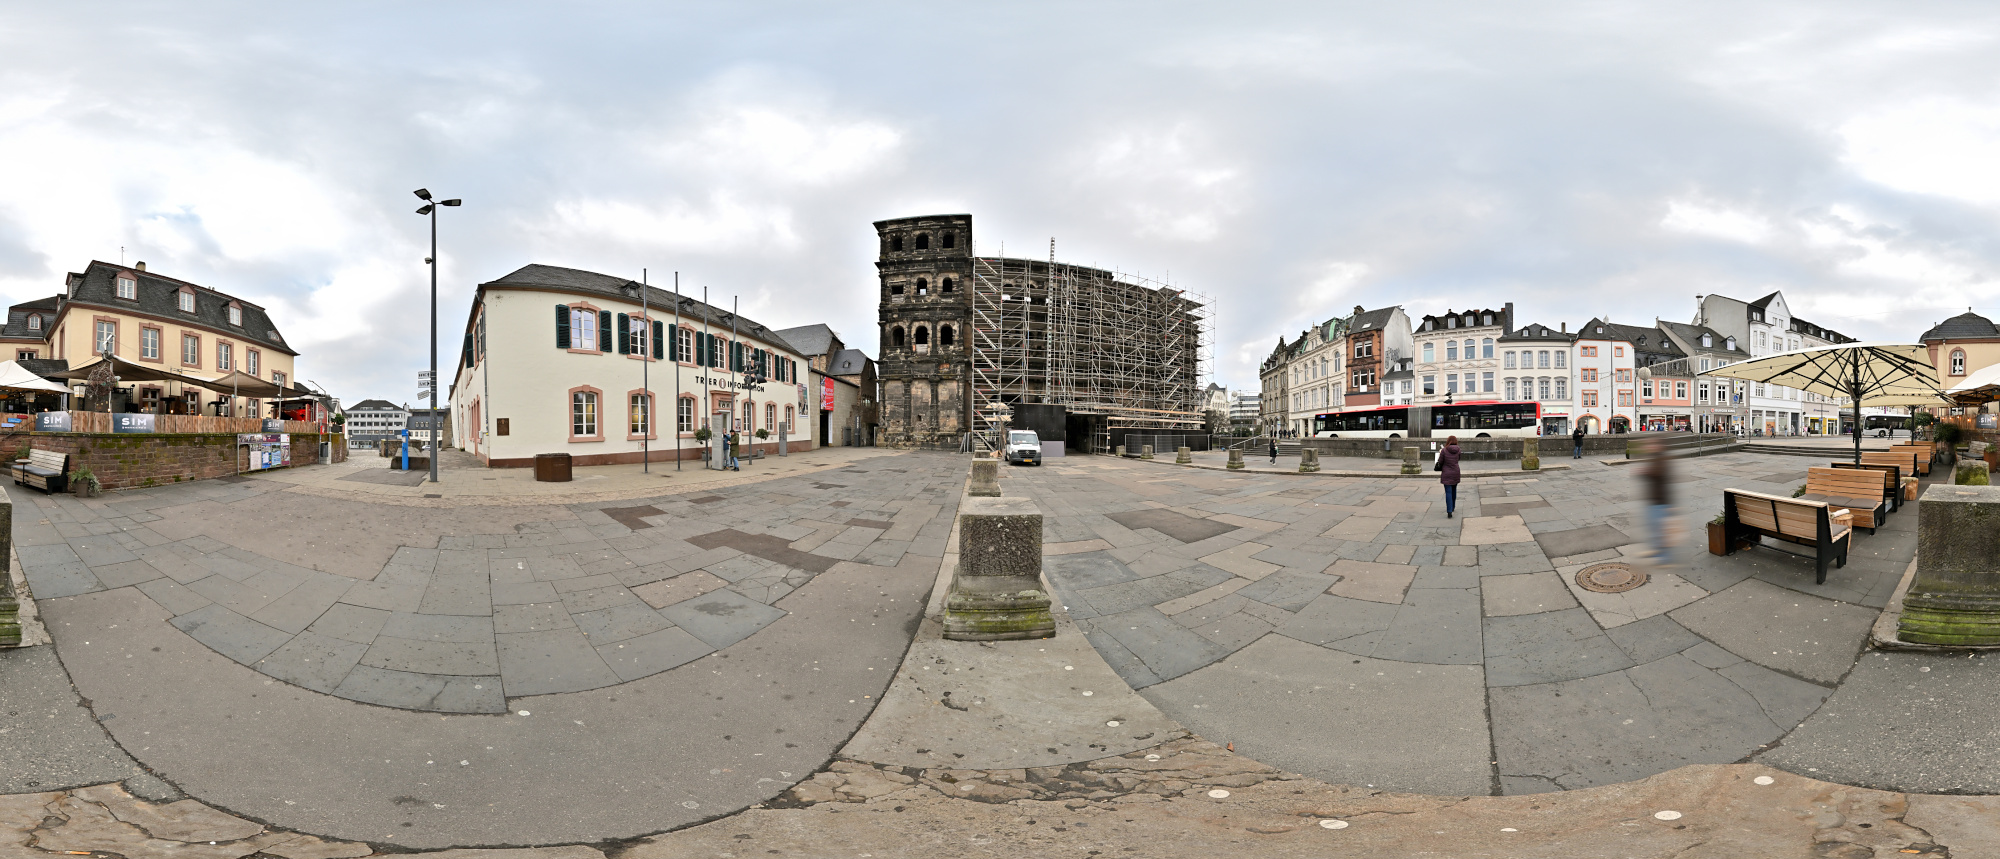
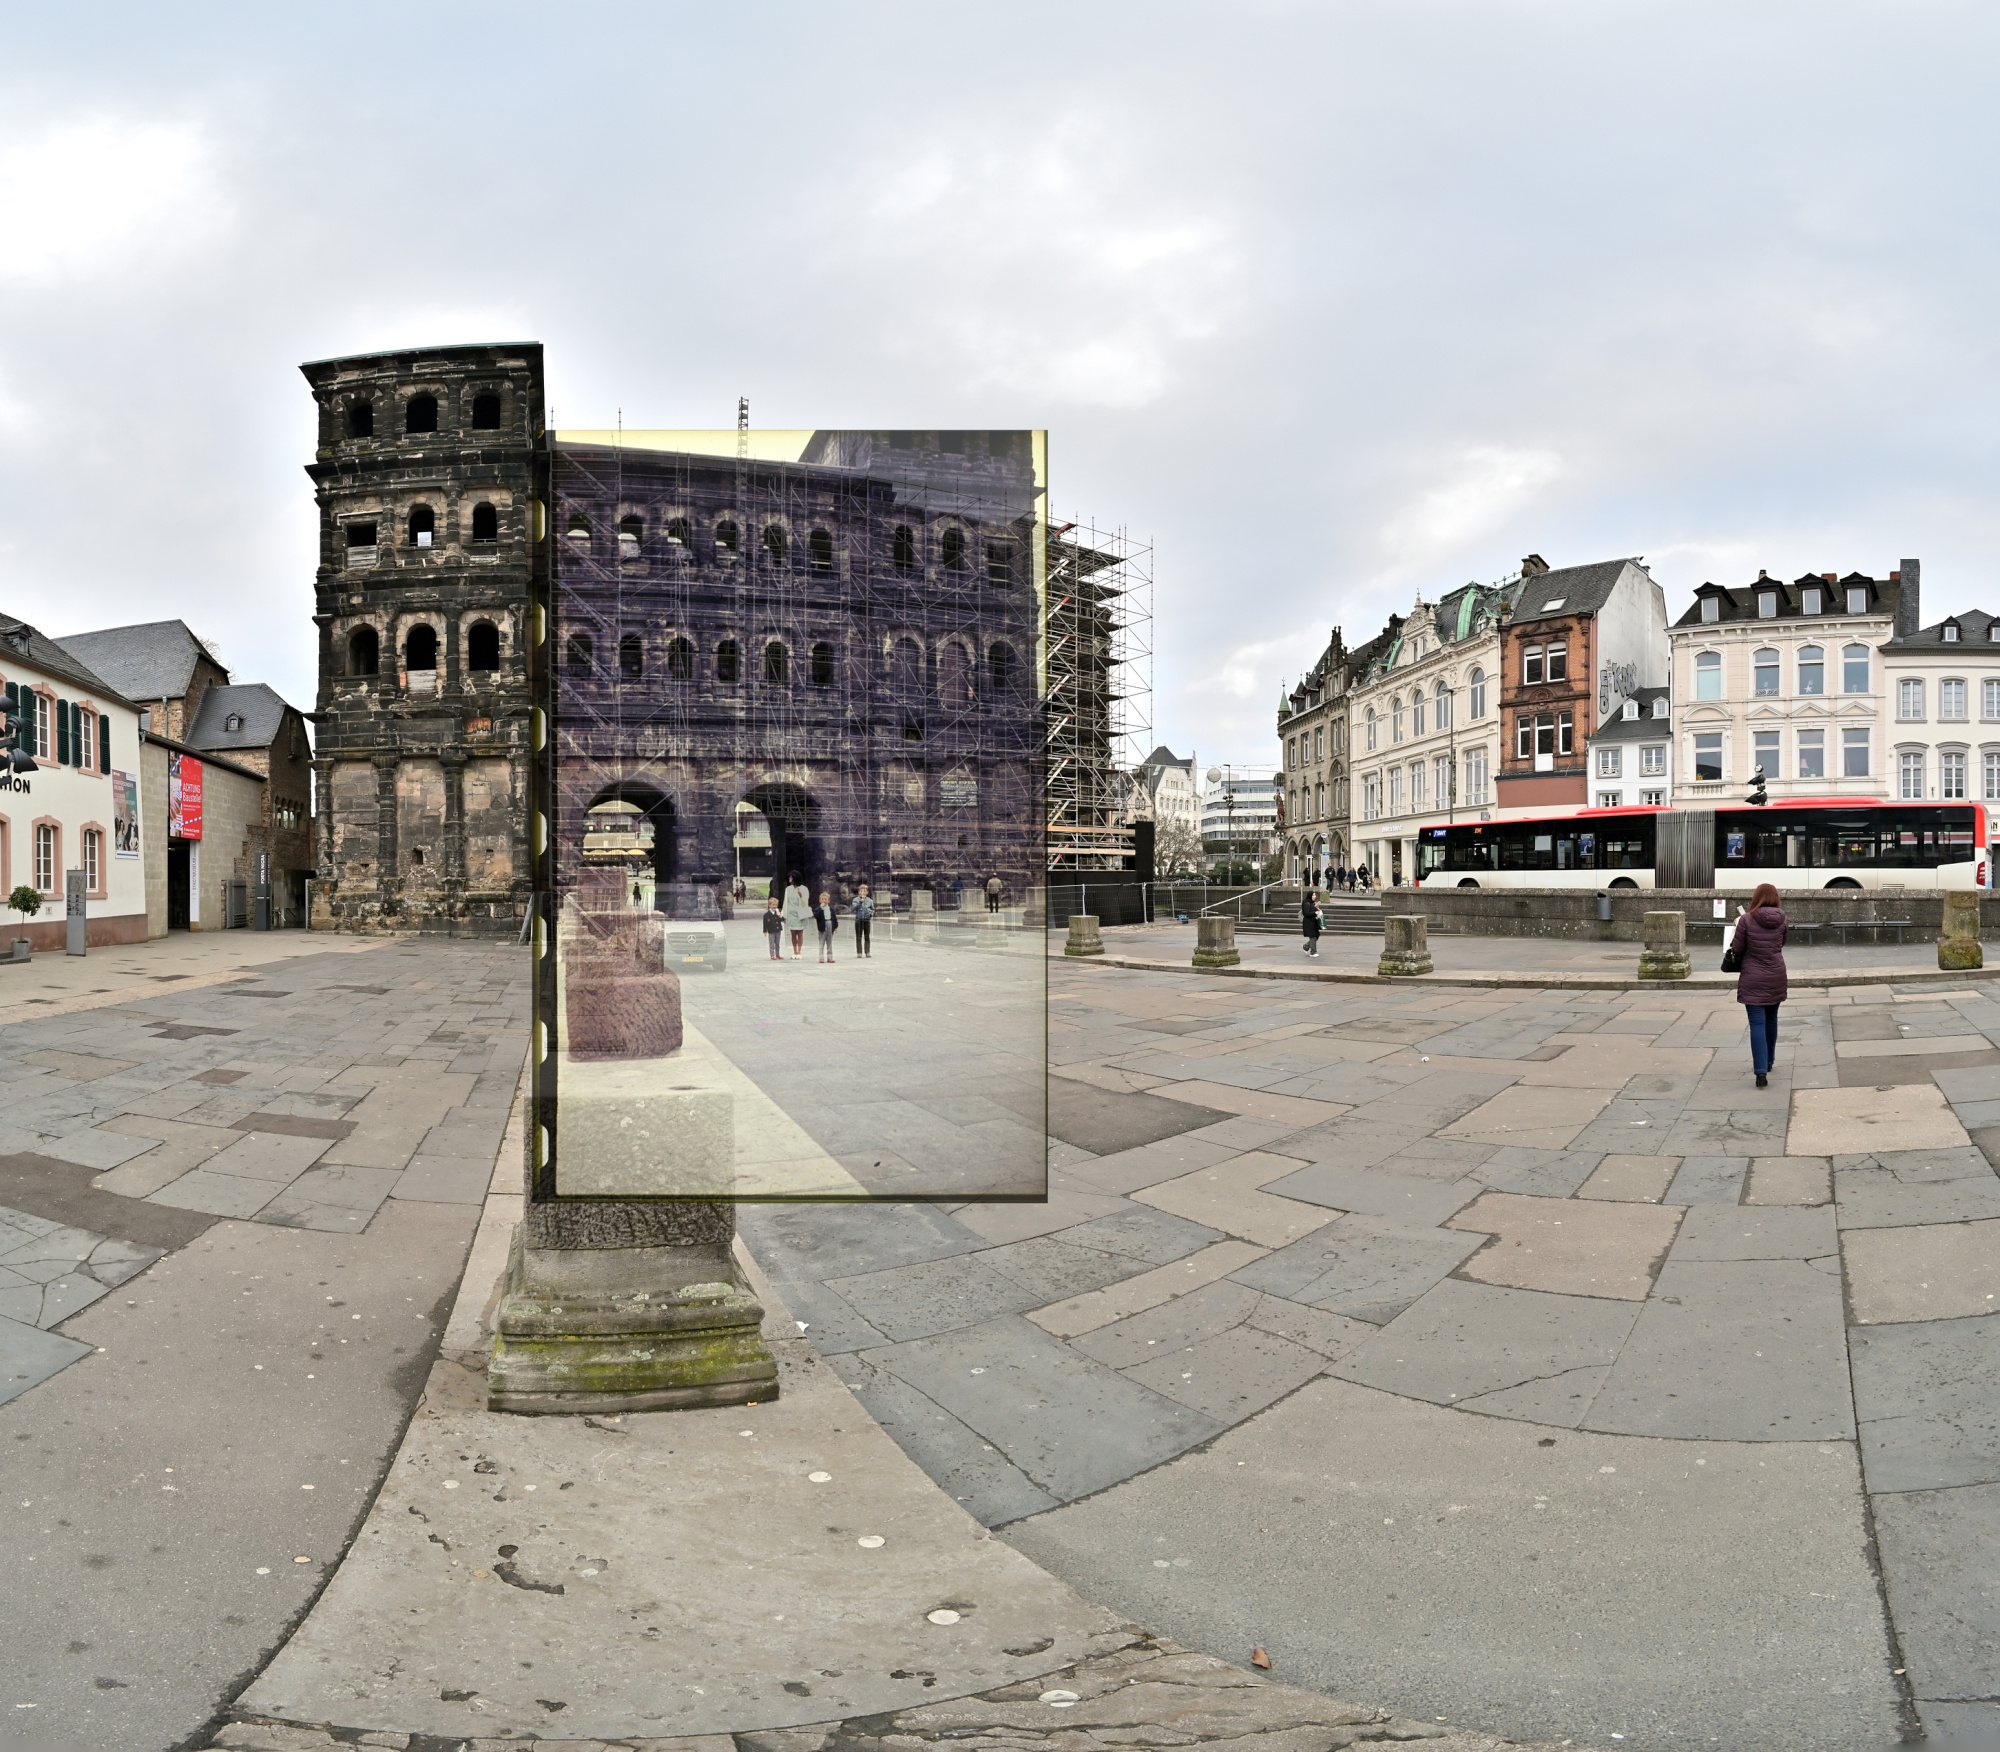
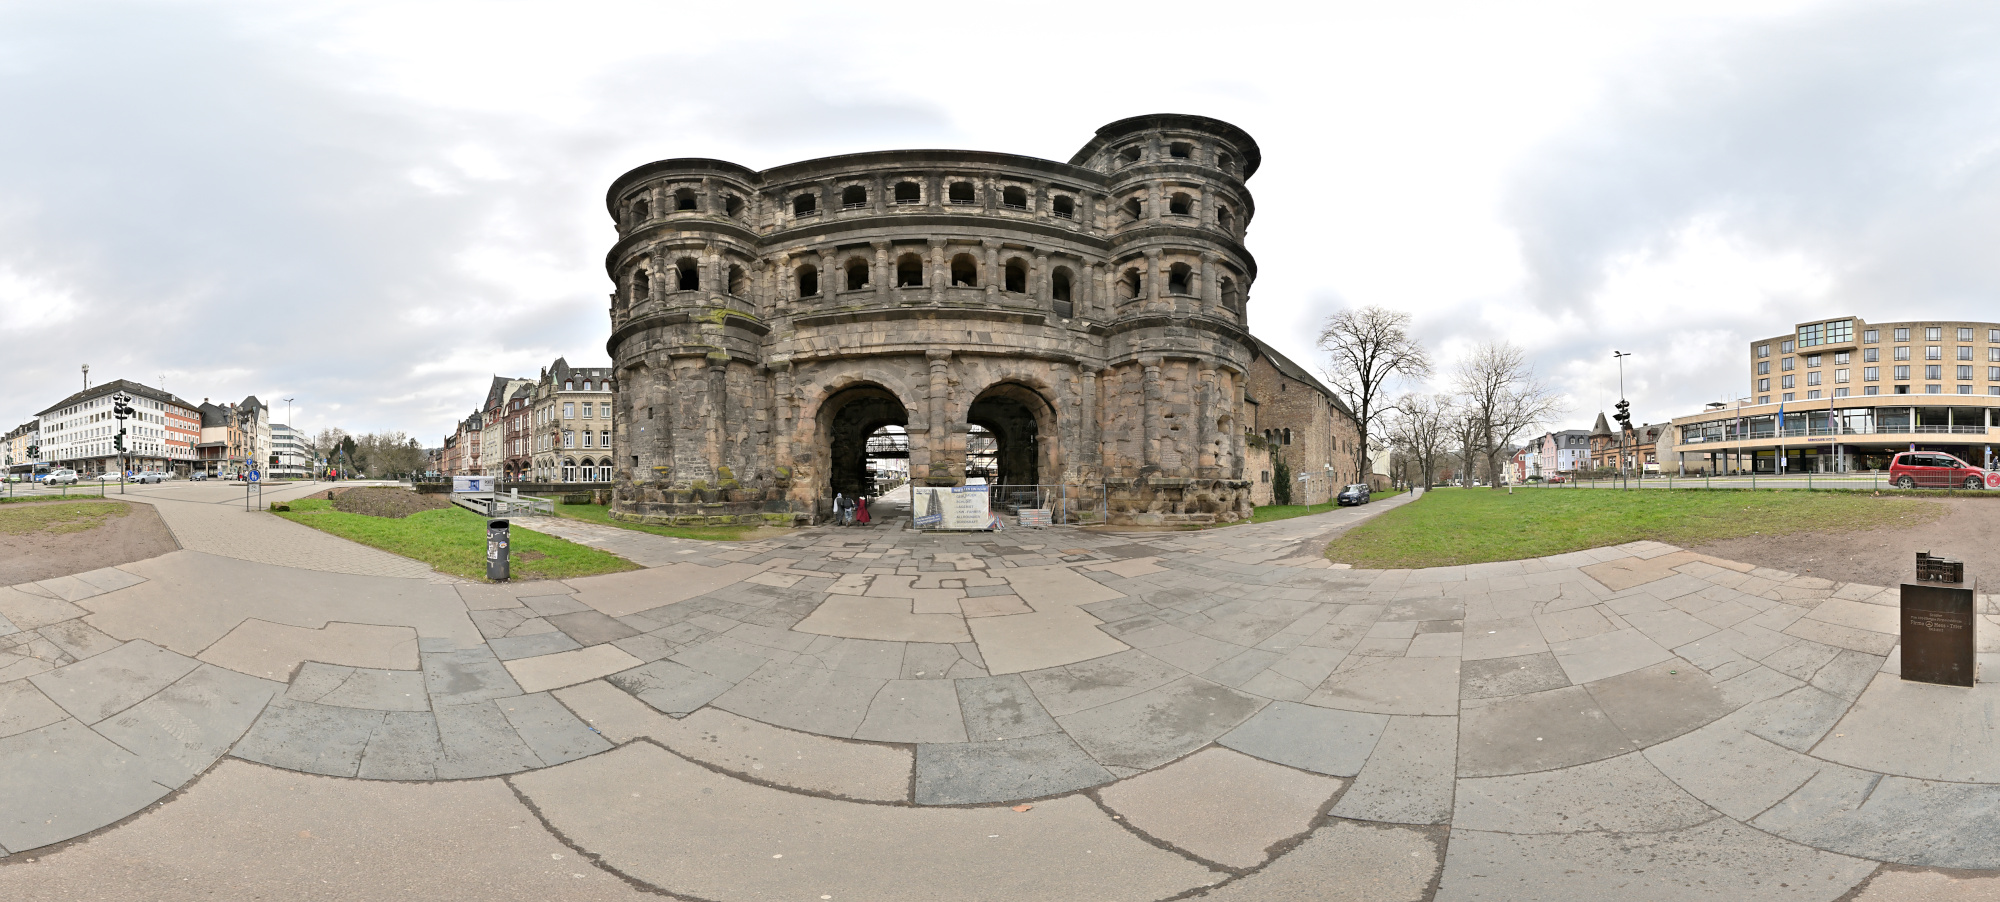
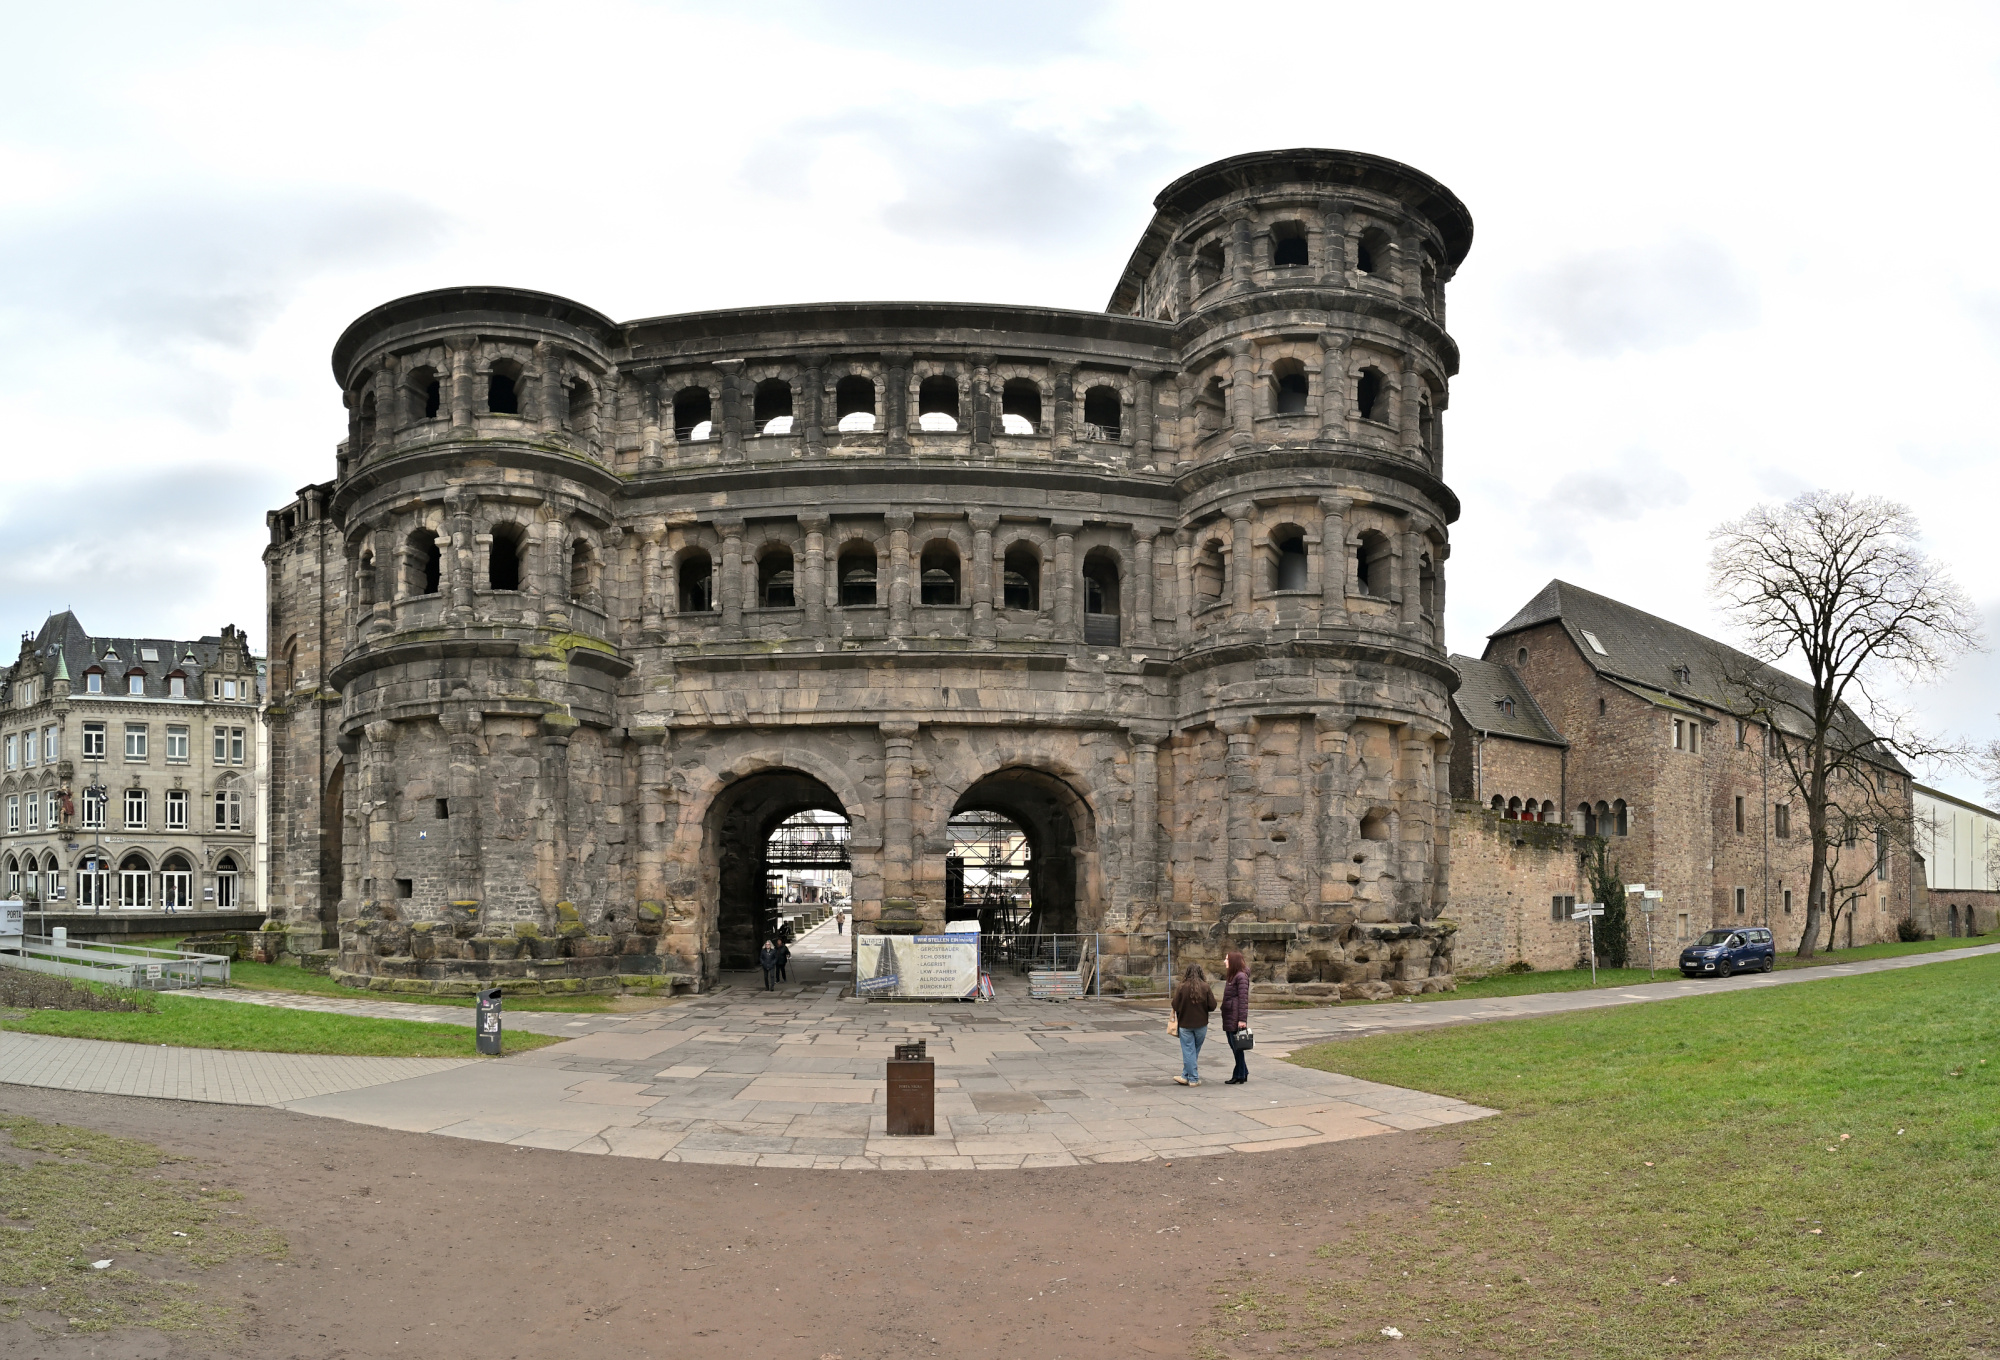
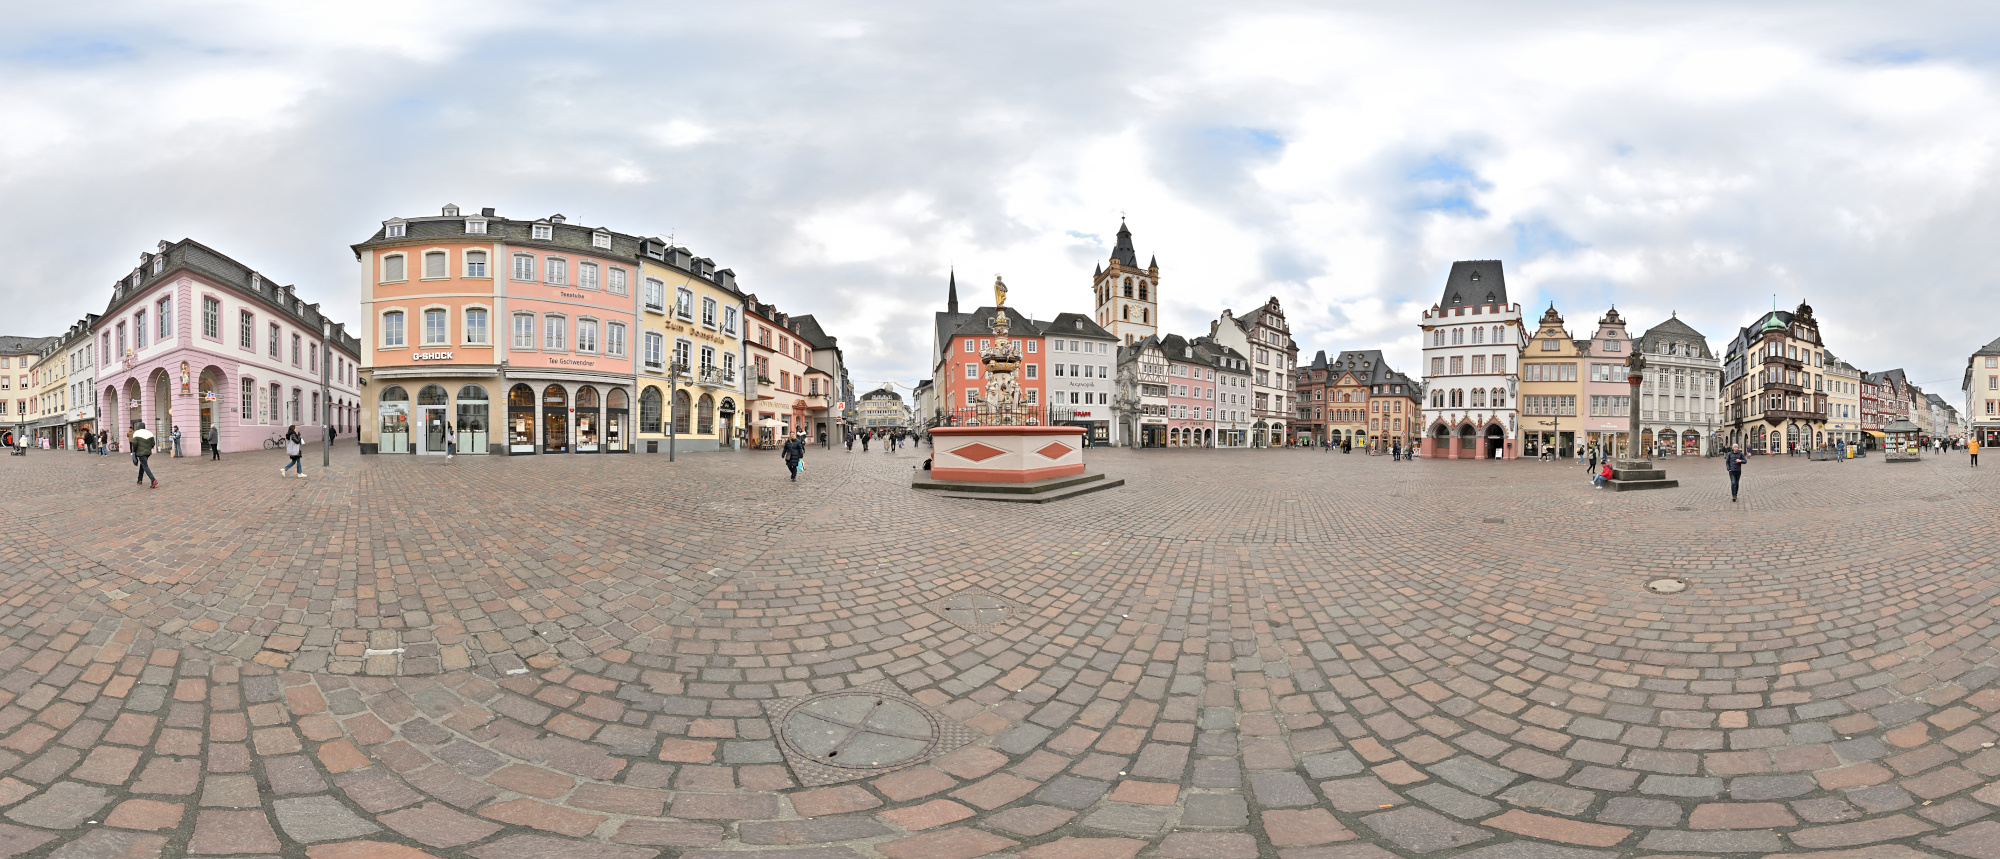
Porta Nigra, Trier
Die Porta Nigra in Trier stammt aus der römischen Zeit und wurde im zweiten Jahrhundert nach Christus als Stadttor der damaligen Stadt Augusta Treverorum errichtet. Sie gilt als das am besten erhaltene römische Stadttor nördlich der Alpen. Der Bau besteht aus großen Sandsteinquadern, die ohne Mörtel gesetzt wurden und bis heute einen geschlossenen, massiven Eindruck vermitteln.
Der Name Porta Nigra, das schwarze Tor, entstand erst im Mittelalter und bezieht sich auf die im Laufe der Zeit nachgedunkelte Oberfläche des Steins. Im elften Jahrhundert wurde das Bauwerk zu einer Kirche umgebaut, was maßgeblich zu seinem Erhalt beigetragen hat. Erst im neunzehnten Jahrhundert ließ Napoleon die späteren Anbauten wieder entfernen und den römischen Zustand weitgehend herstellen.
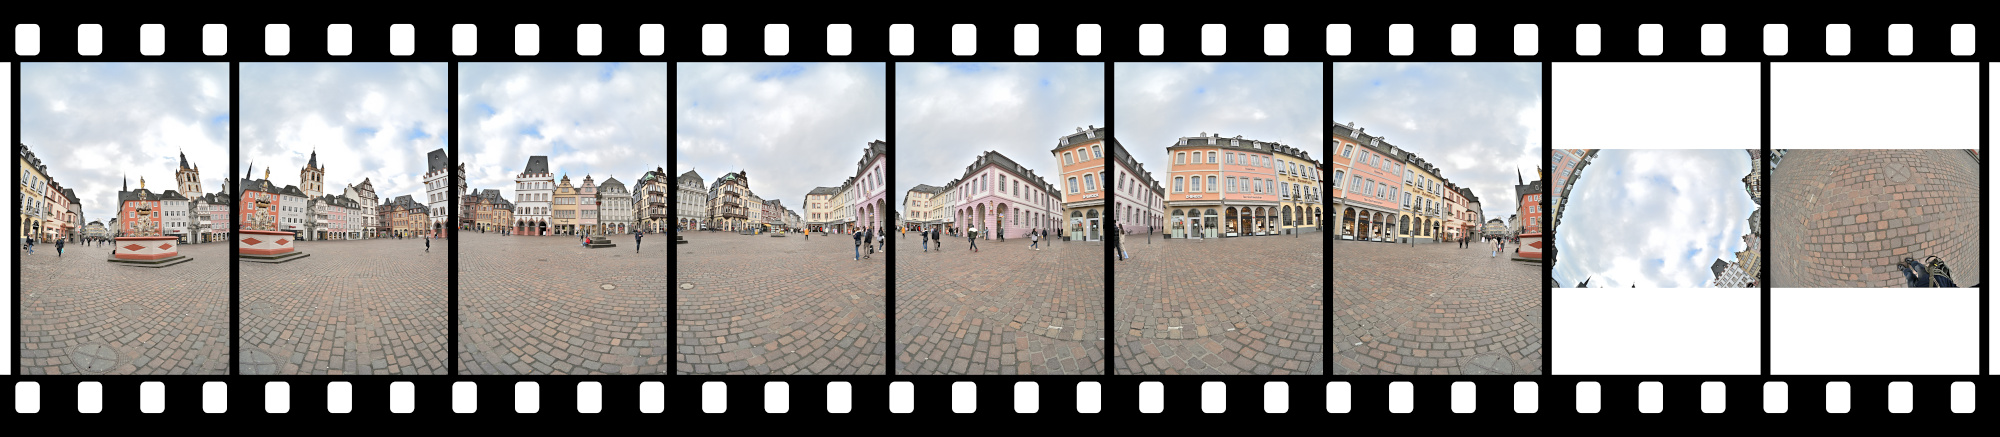
Das Panorama zeigt die Porta Nigra im Zusammenhang mit der heutigen Stadt Trier, während die beiden Einzelaufnahmen den Blick auf Struktur, Proportionen und Details des Bauwerks lenken. So wird sichtbar, wie selbstverständlich dieses römische Bauwerk noch immer Teil des Stadtbildes ist.
Interactive Panorama Porta Nigra
1/200s f/5,6 ISO 100/21° f=7,5mm
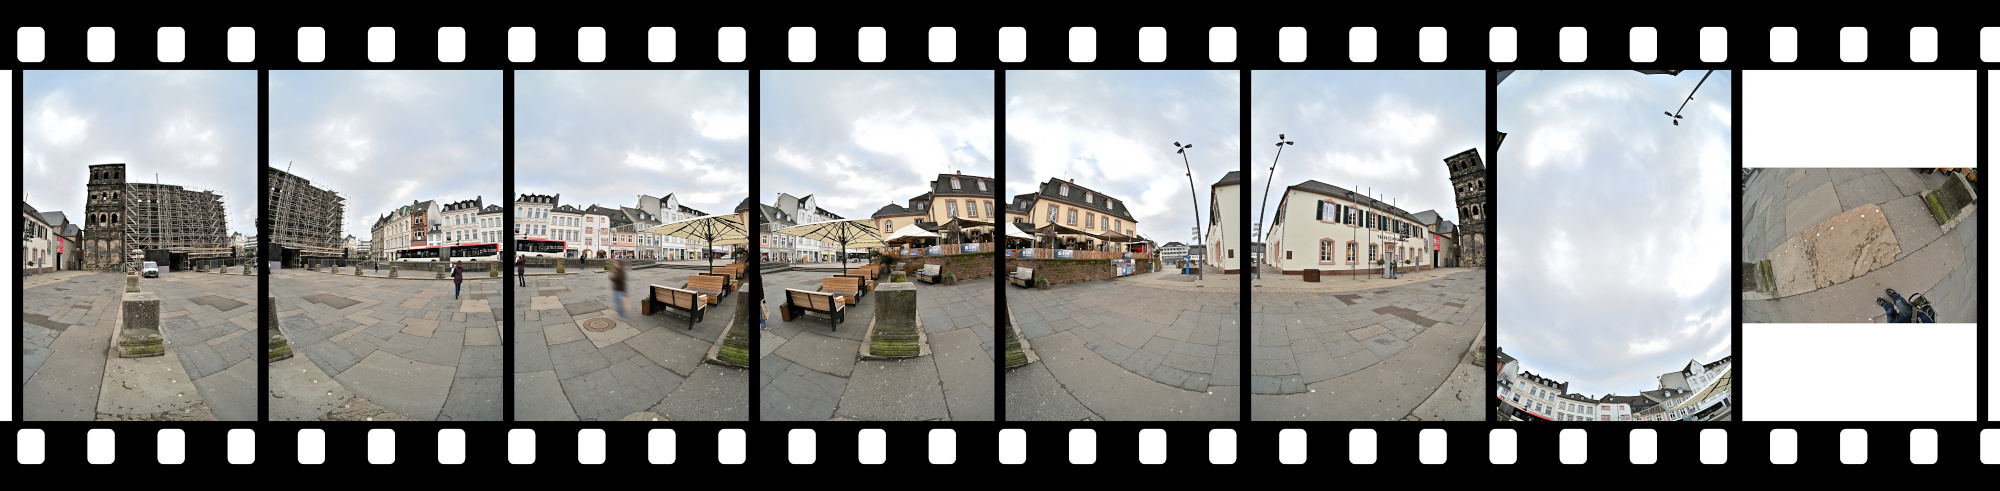
Ein Ausschnitt aus dem heutigen Panorama der Porta Nigra ist mit einer älteren Aufnahme aus dem Familienalbum kombiniert. Der Blick von früher liegt im aktuellen Bild und markiert dieselbe Stelle zu einer anderen Zeit.
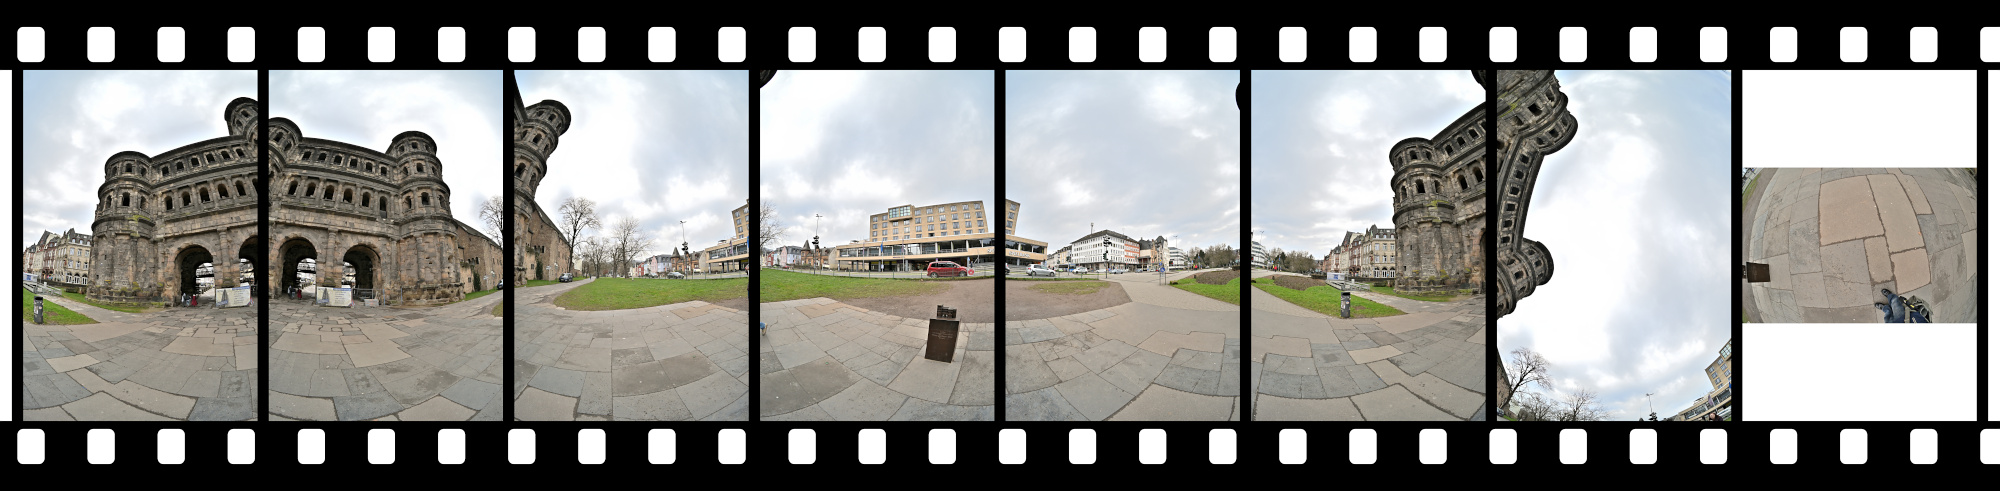
Die Feldseite der Porta Nigra ist hier als Breitbild zu sehen. Geplant war ein vollständiges 360×180-Panorama, geblieben ist dieser Blick auf die Rückseite. Nicht jedes Panorama wird eines, der Ort bleibt aber derselbe.
Außerdem war das Wetter nicht ideal. Die Belichtung lässt sich ändern, das Wetter nicht.
1/160s f/5,6 ISO 100/21° f=7,5mm
Und direkt in Fußnähe steht der Petrusbrunnen auf dem Hauptmarkt. Er wurde 1595 vom Bildhauer Hans Ruprecht Hoffmann errichtet und zählt zu den bedeutenden Renaissancebrunnen der Stadt. Bekrönt wird er von der Figur des heiligen Petrus, dem Schutzpatron Triers, ergänzt durch Darstellungen der vier Kardinaltugenden.
Interactive Panorama Petrusbrunnen 360x180
1/250s f/5,6 ISO 100/21° f=7,5mm
-
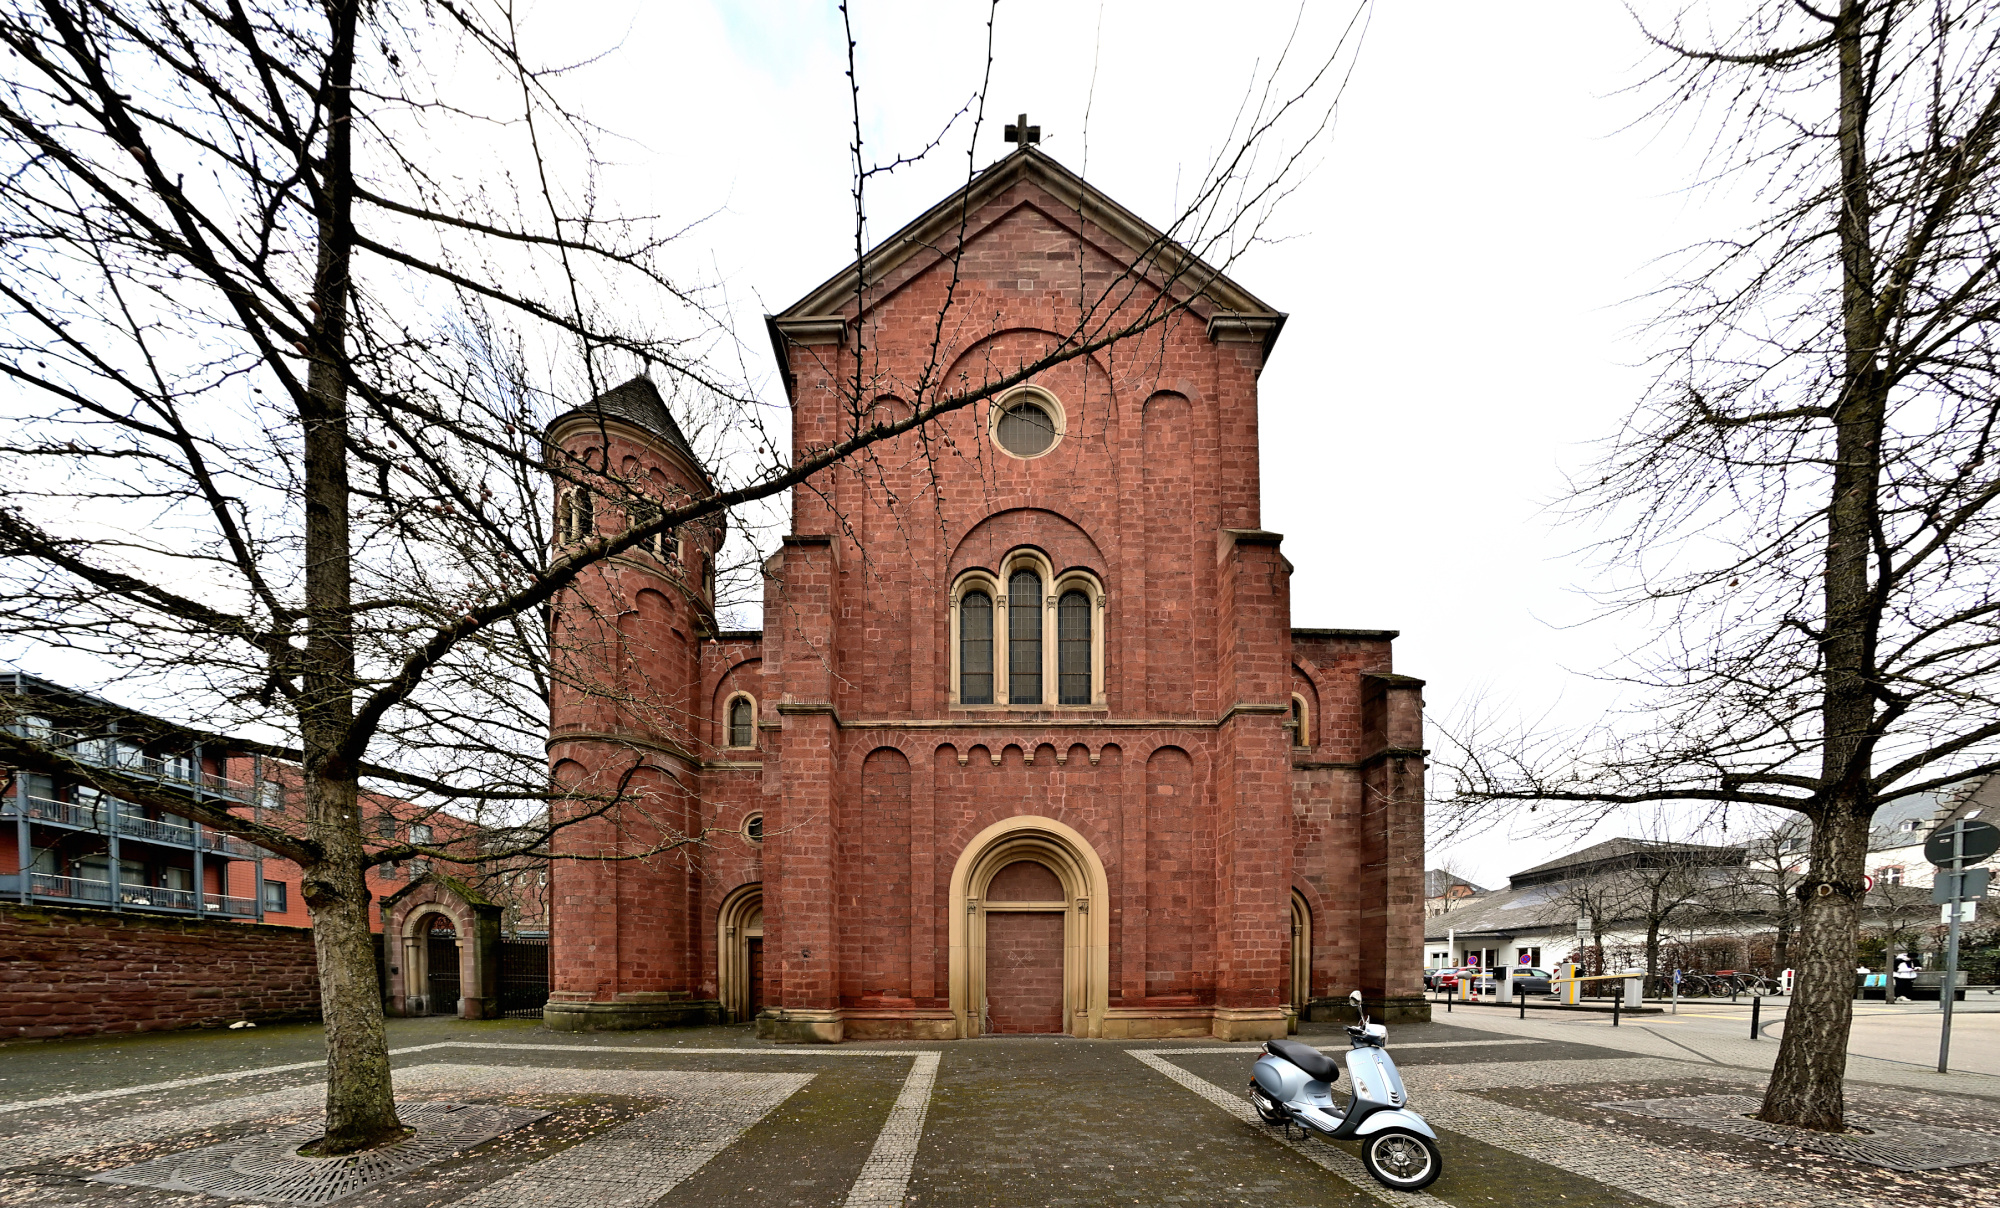
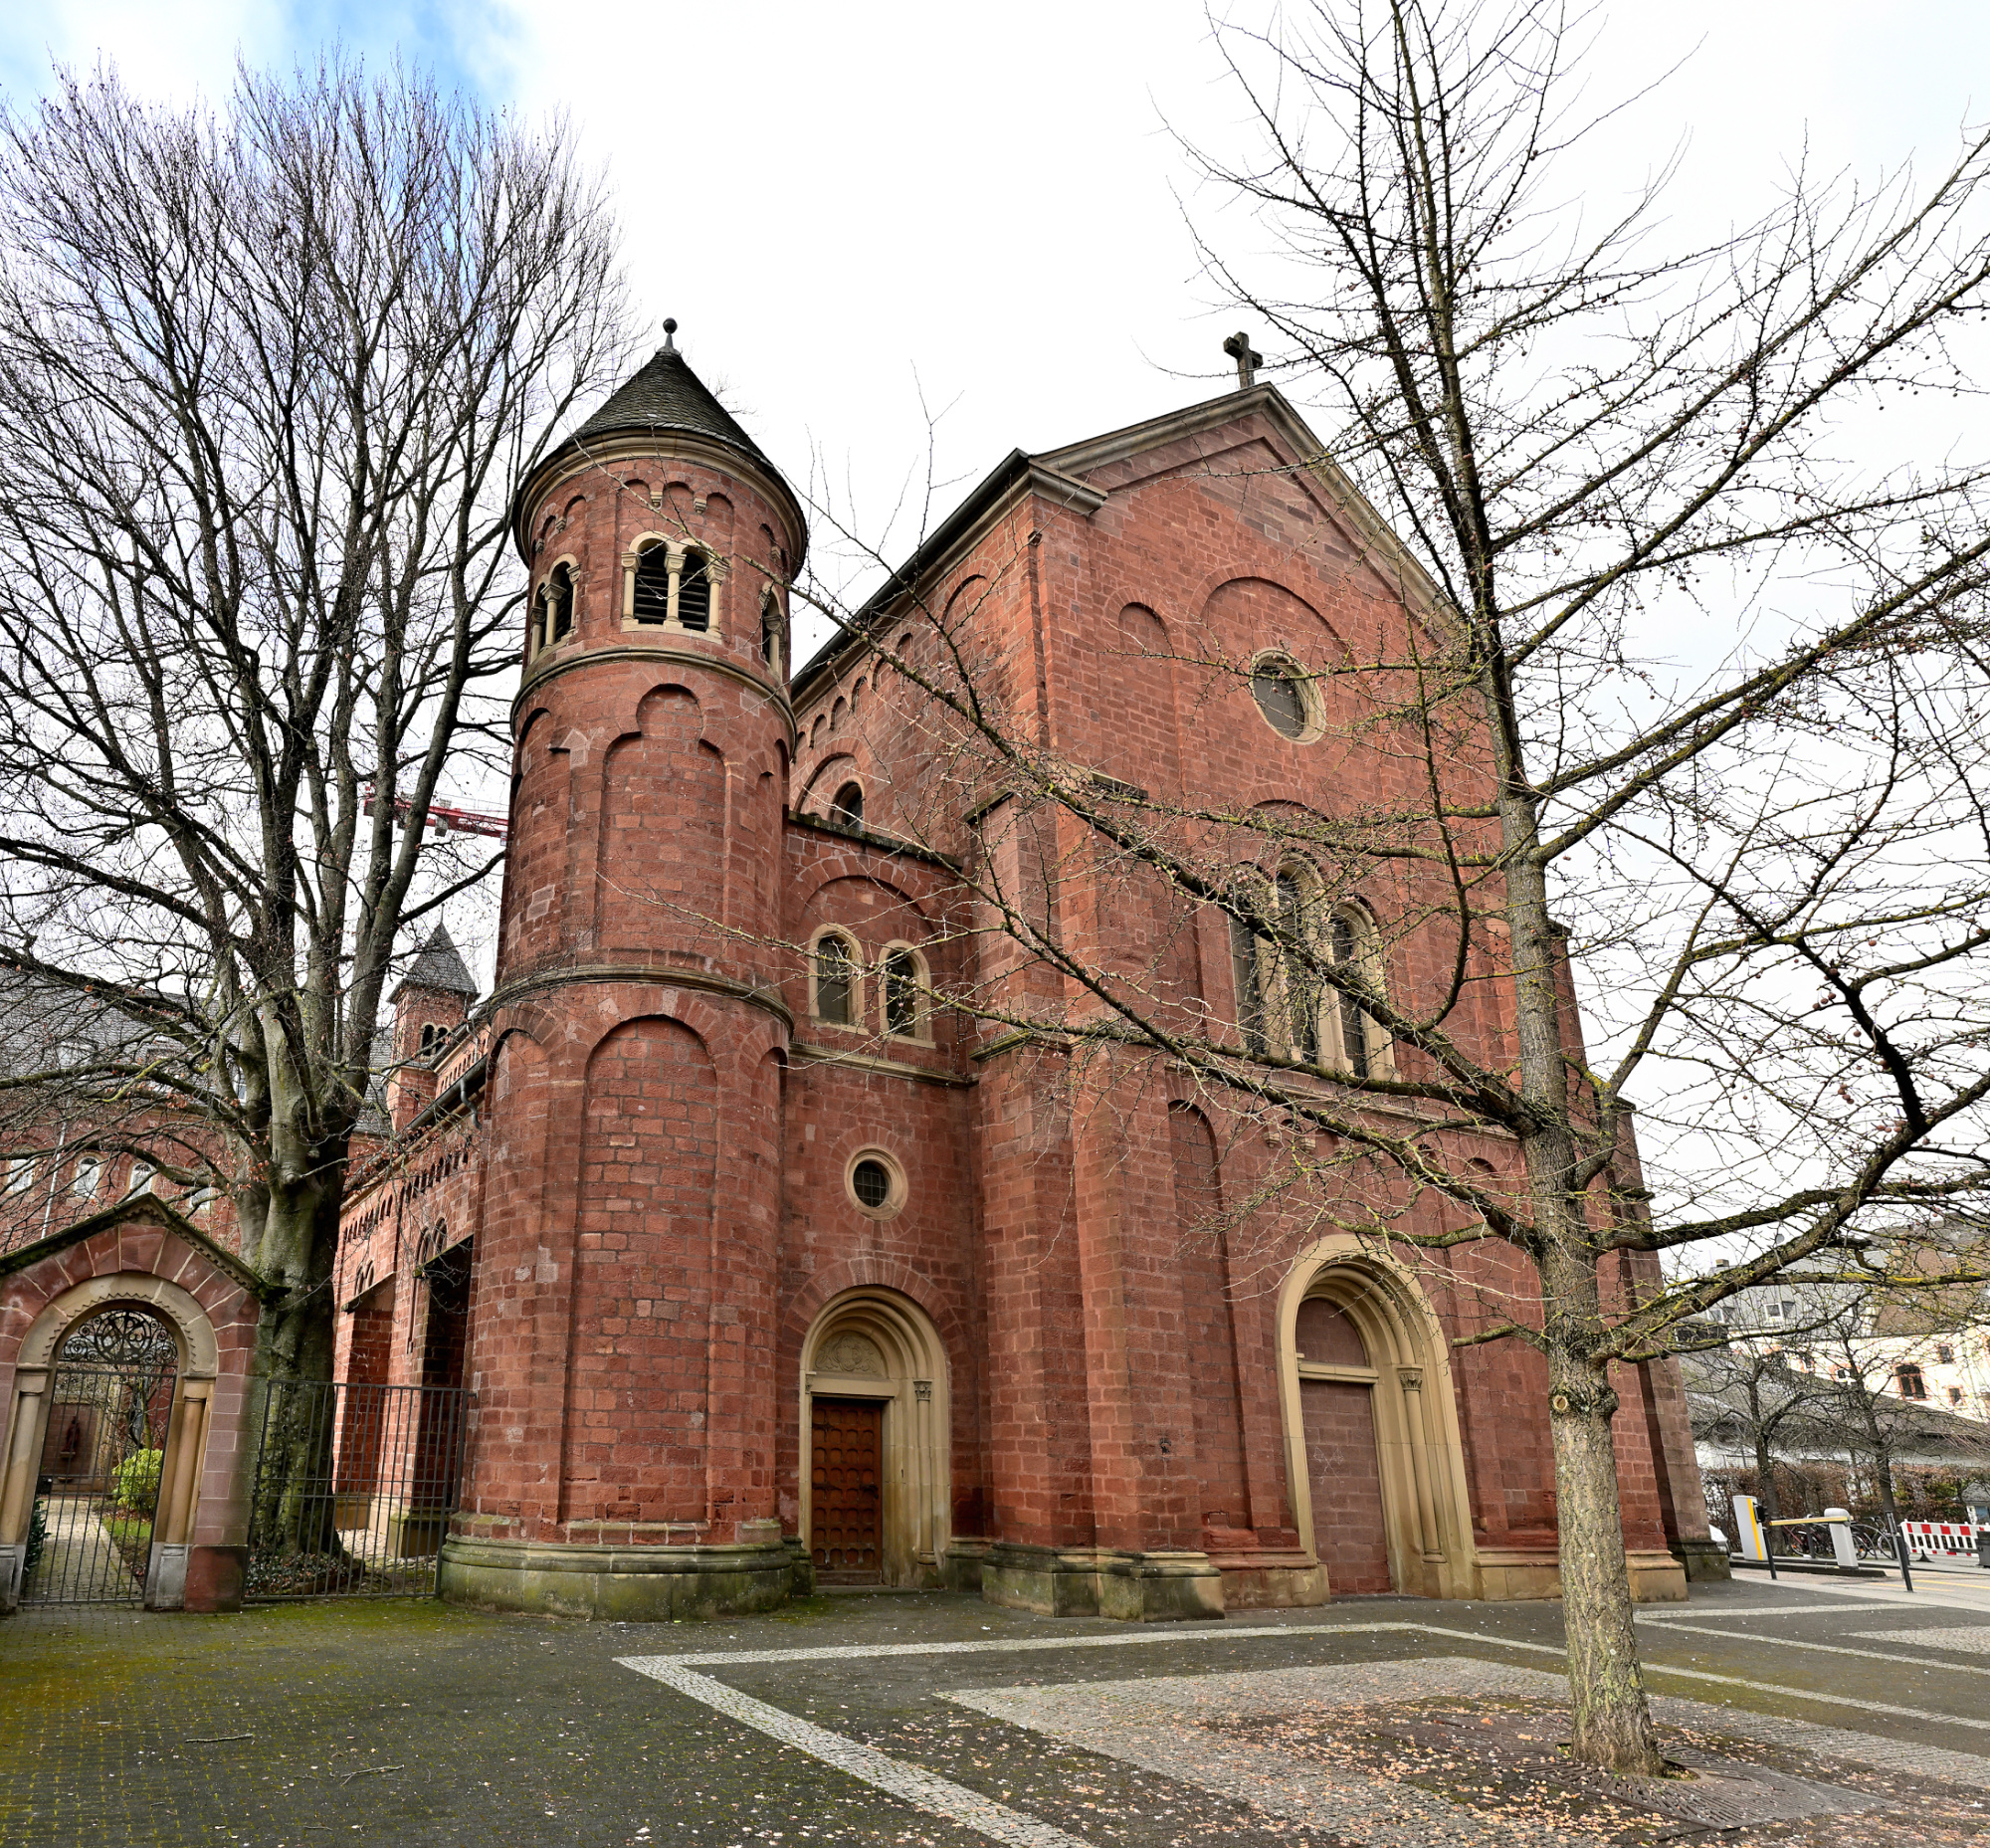
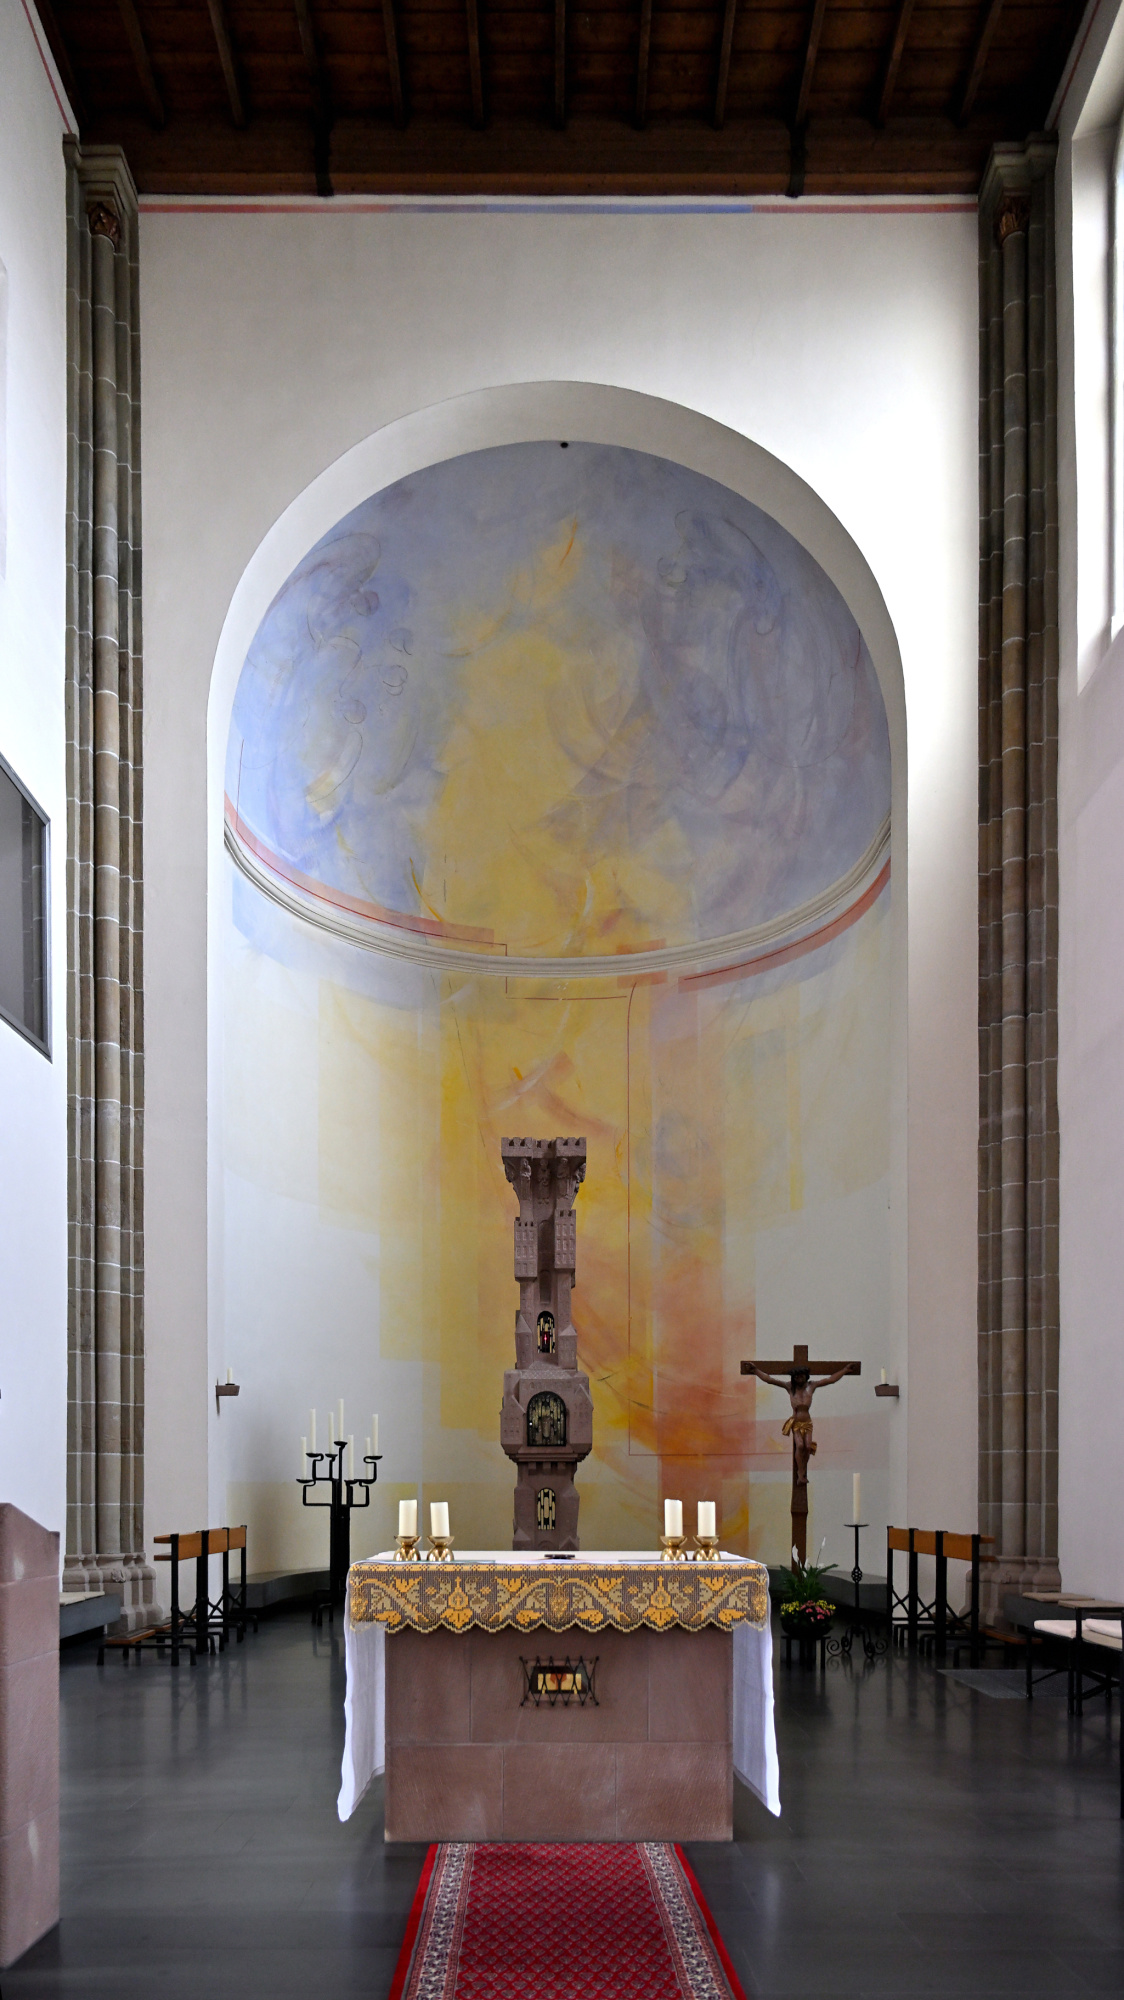
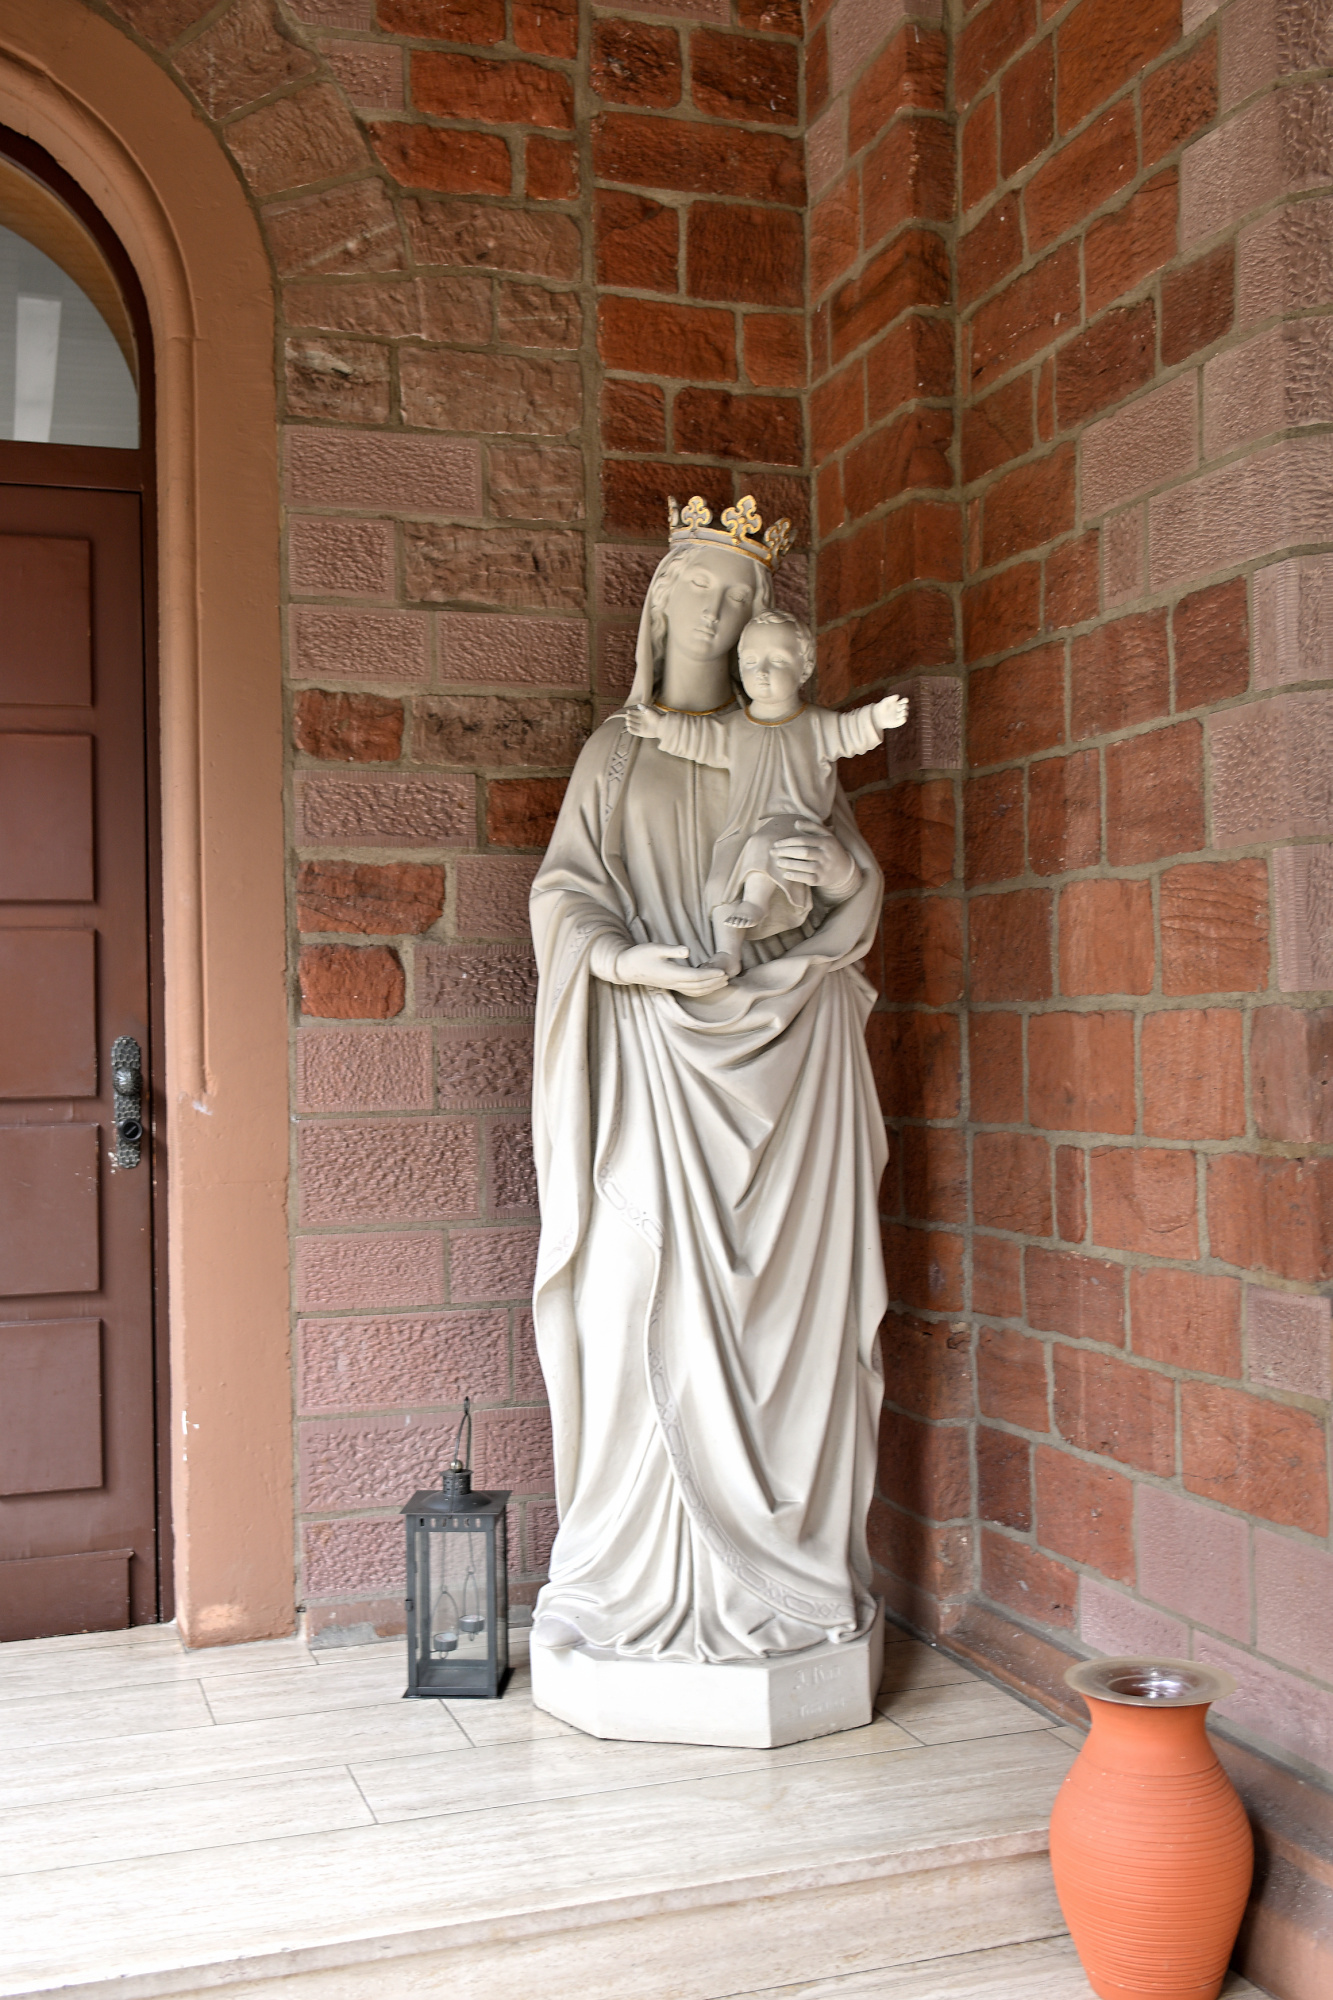
Kloster Sankt Josef, Trier
Eine Fahrt über die Hunsrückhöhenstraße führt uns zum Kloster Sankt Josef.
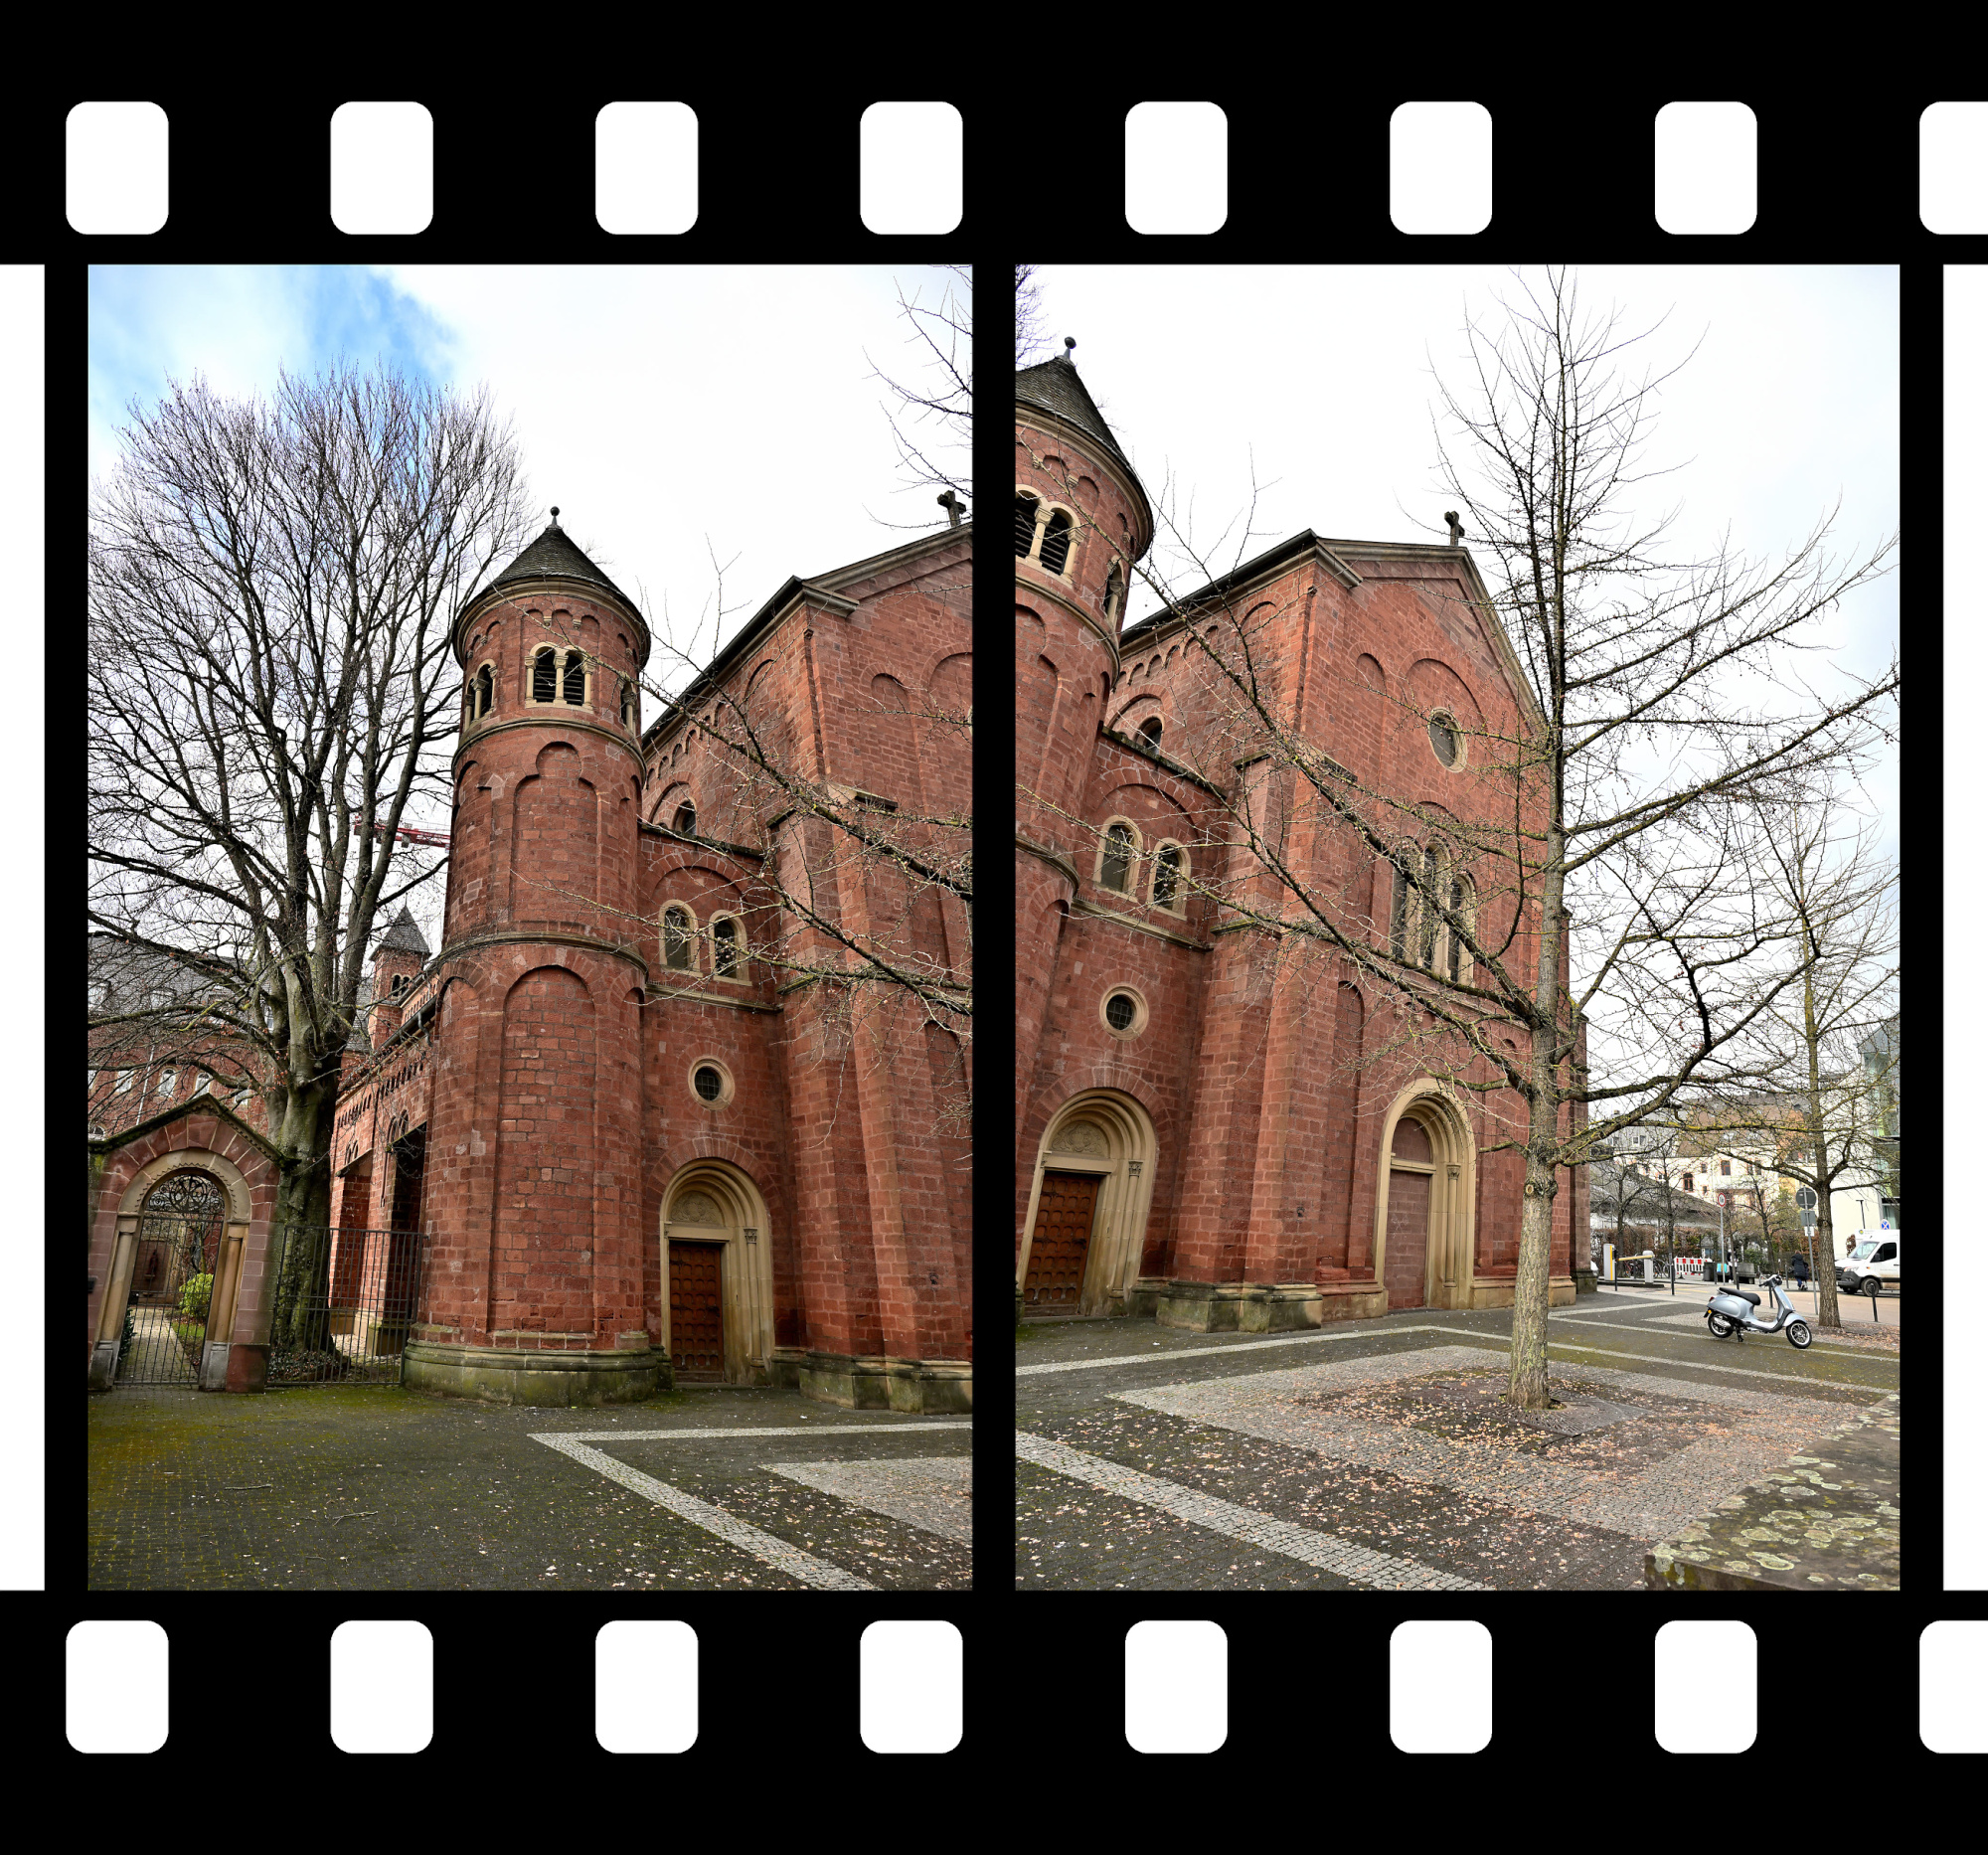
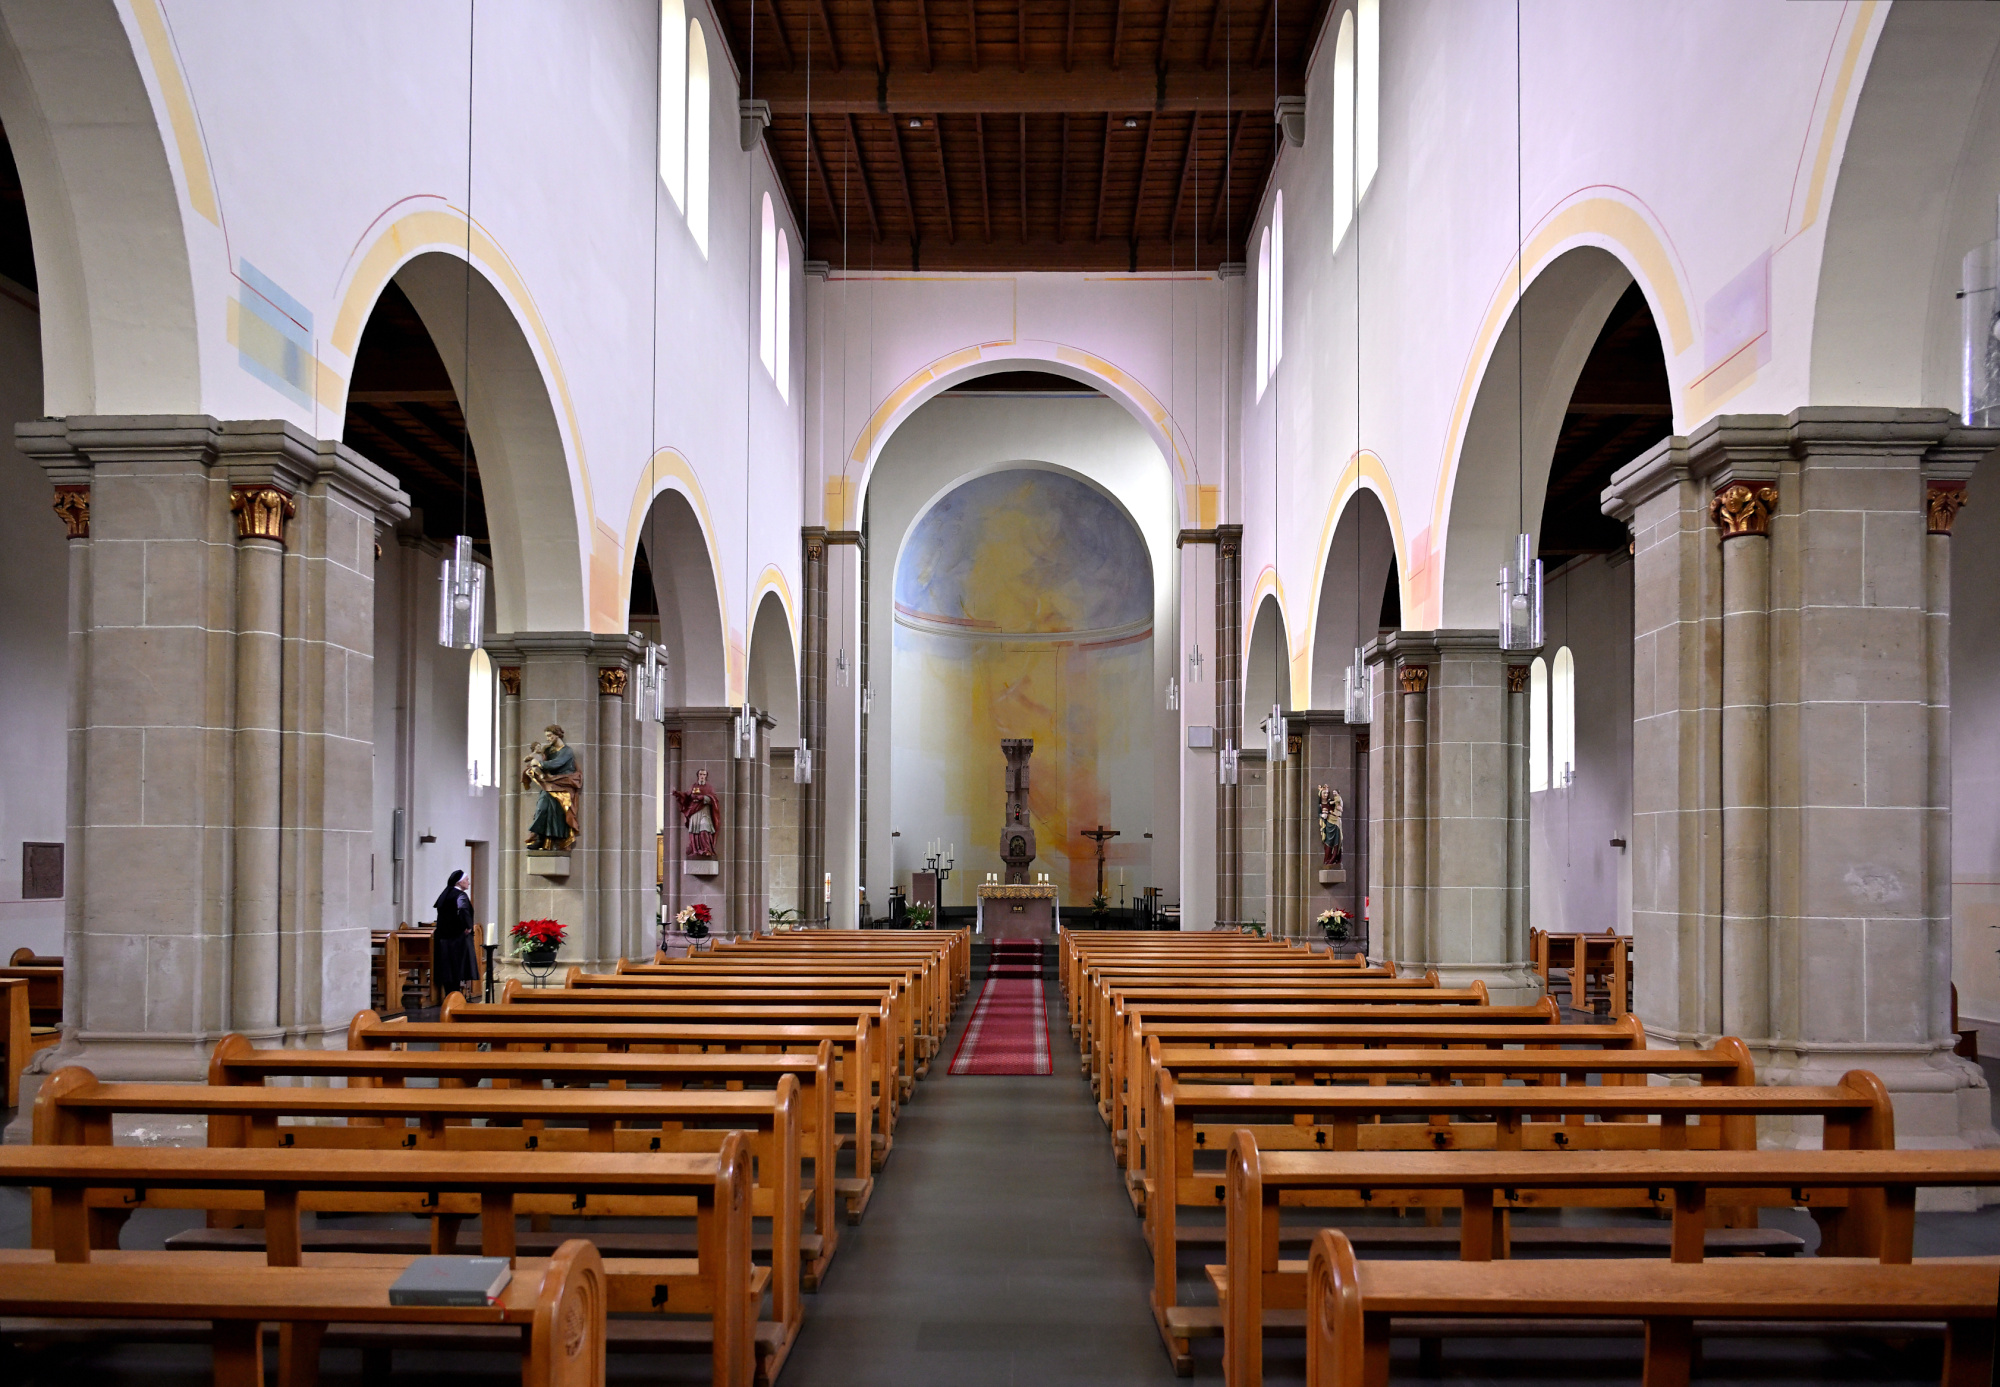
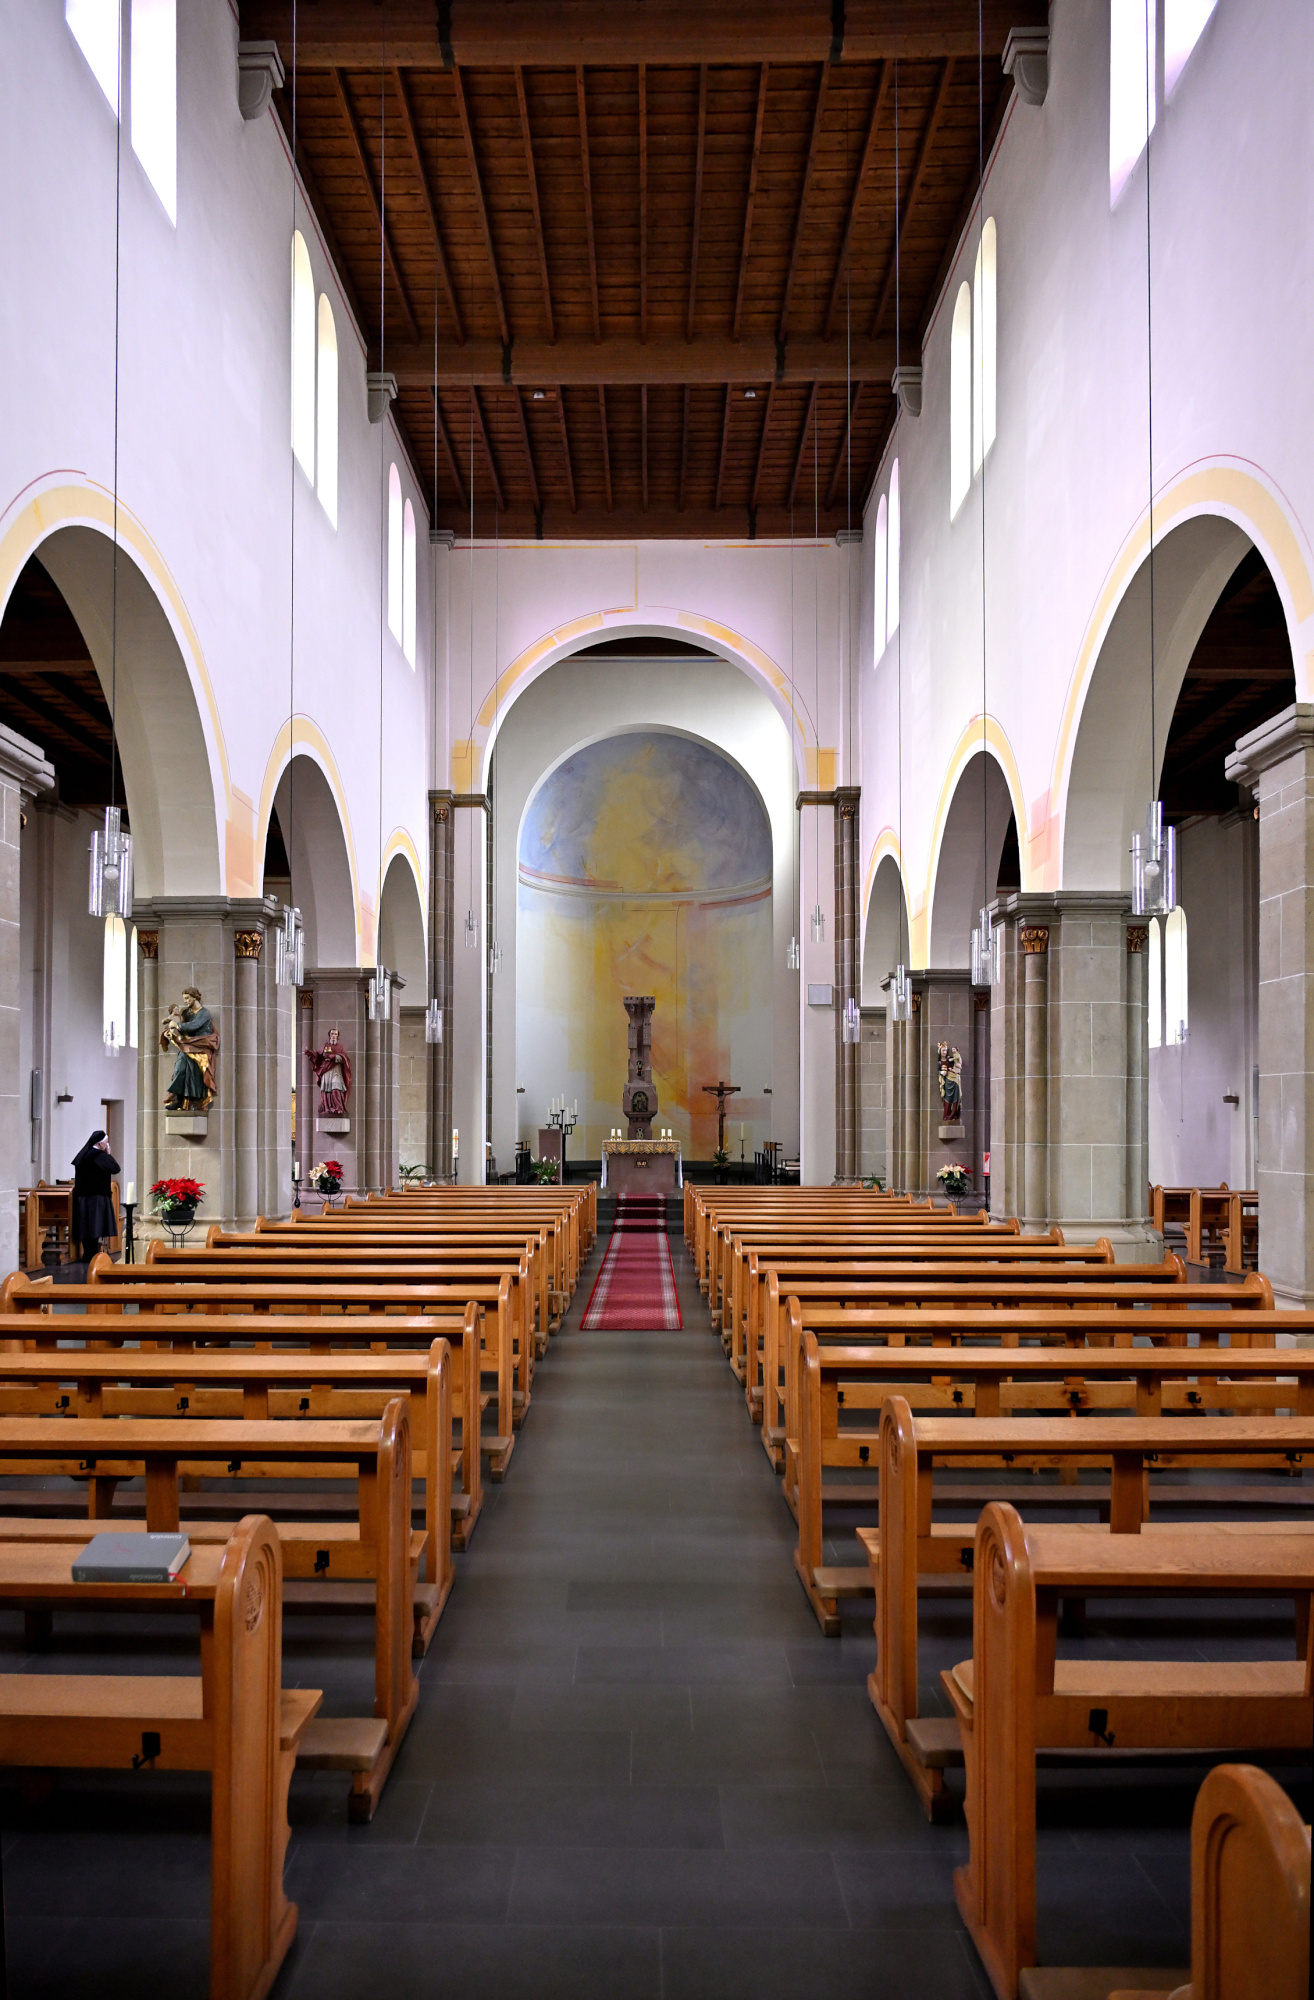
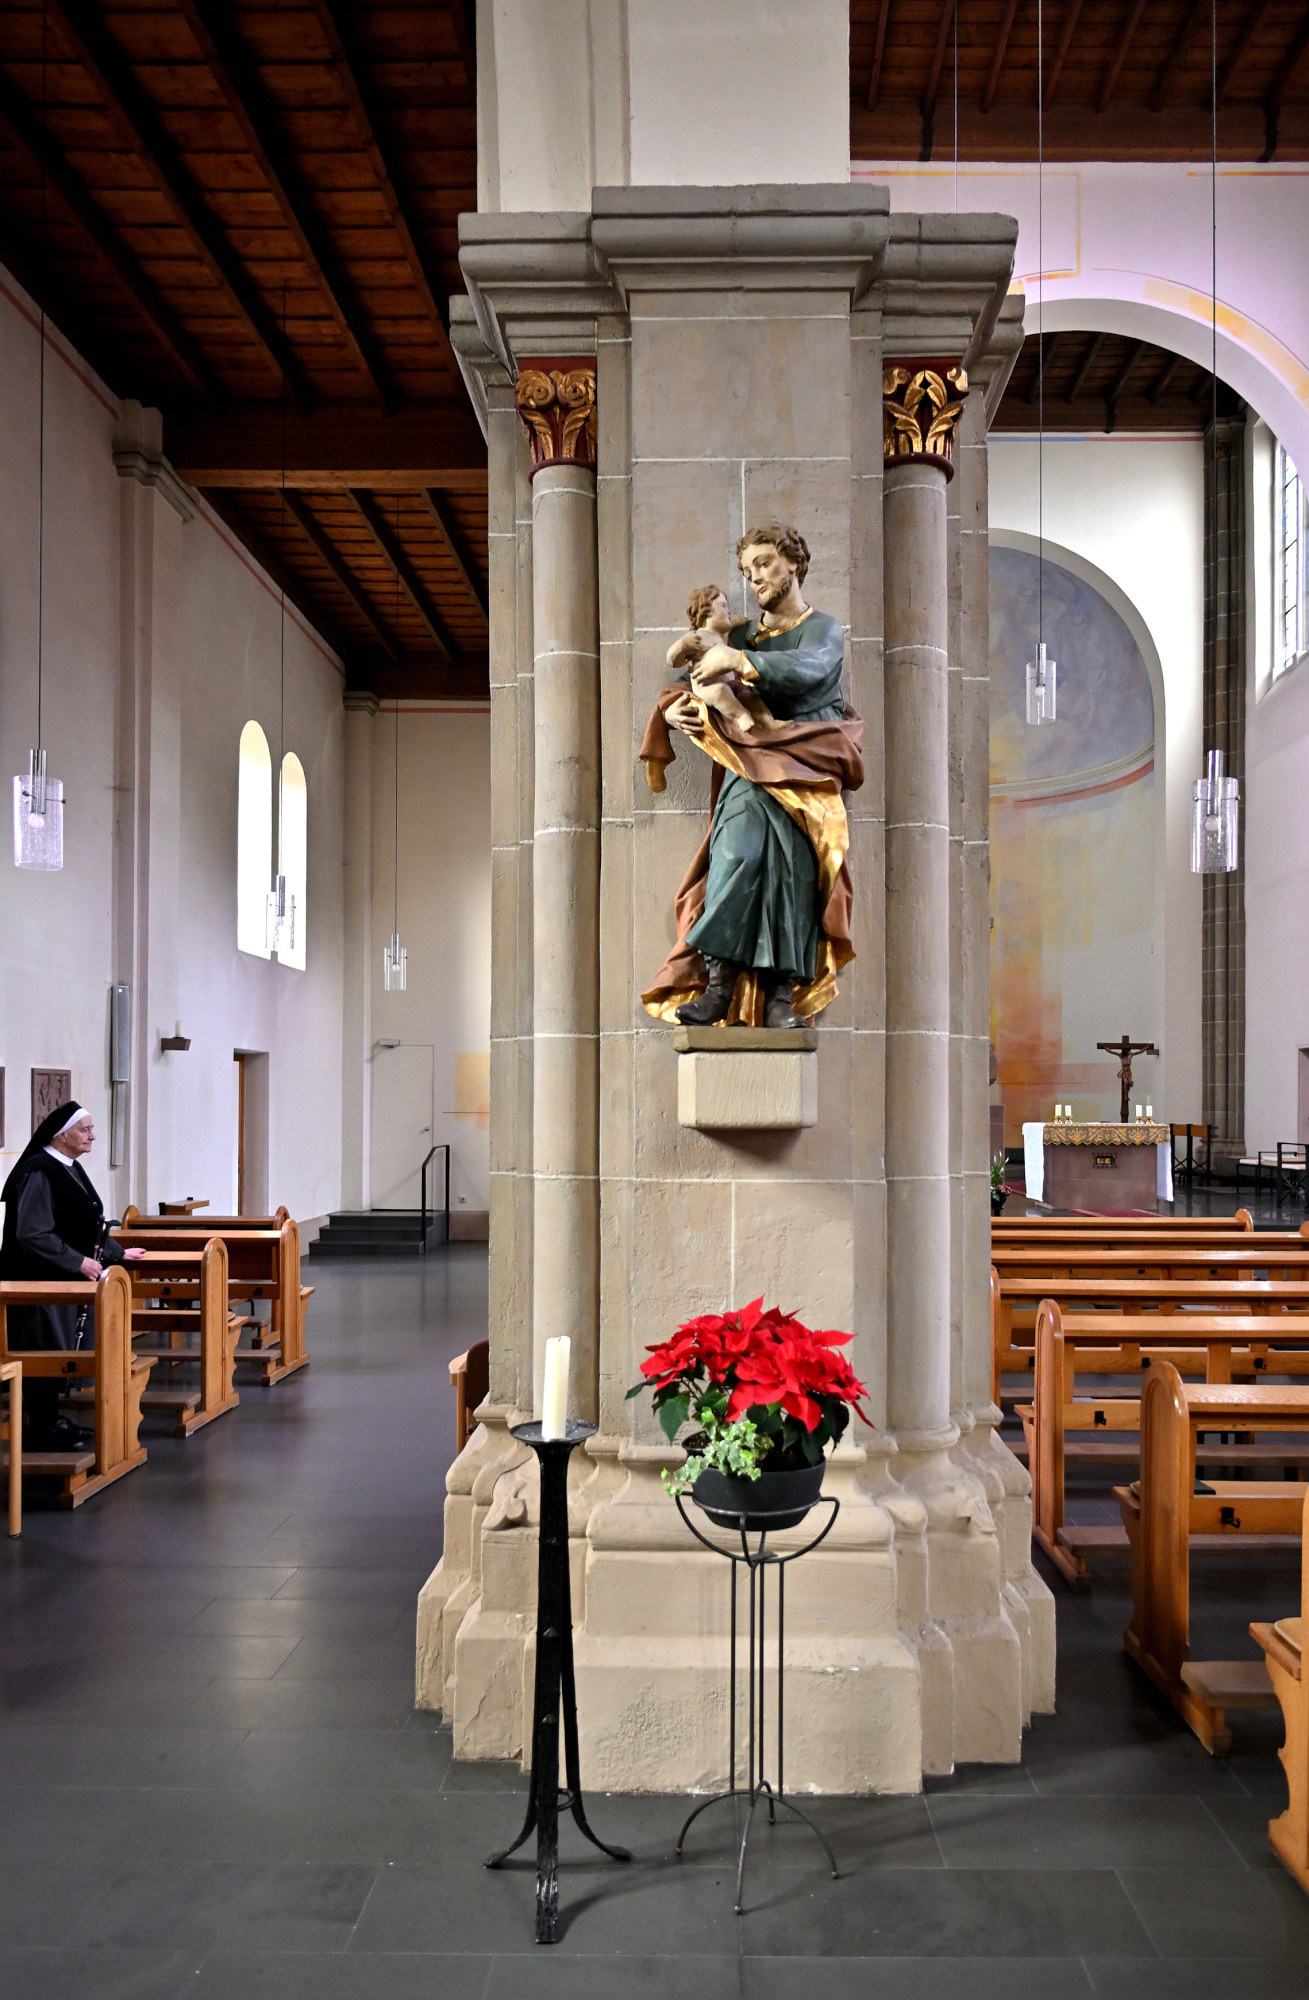
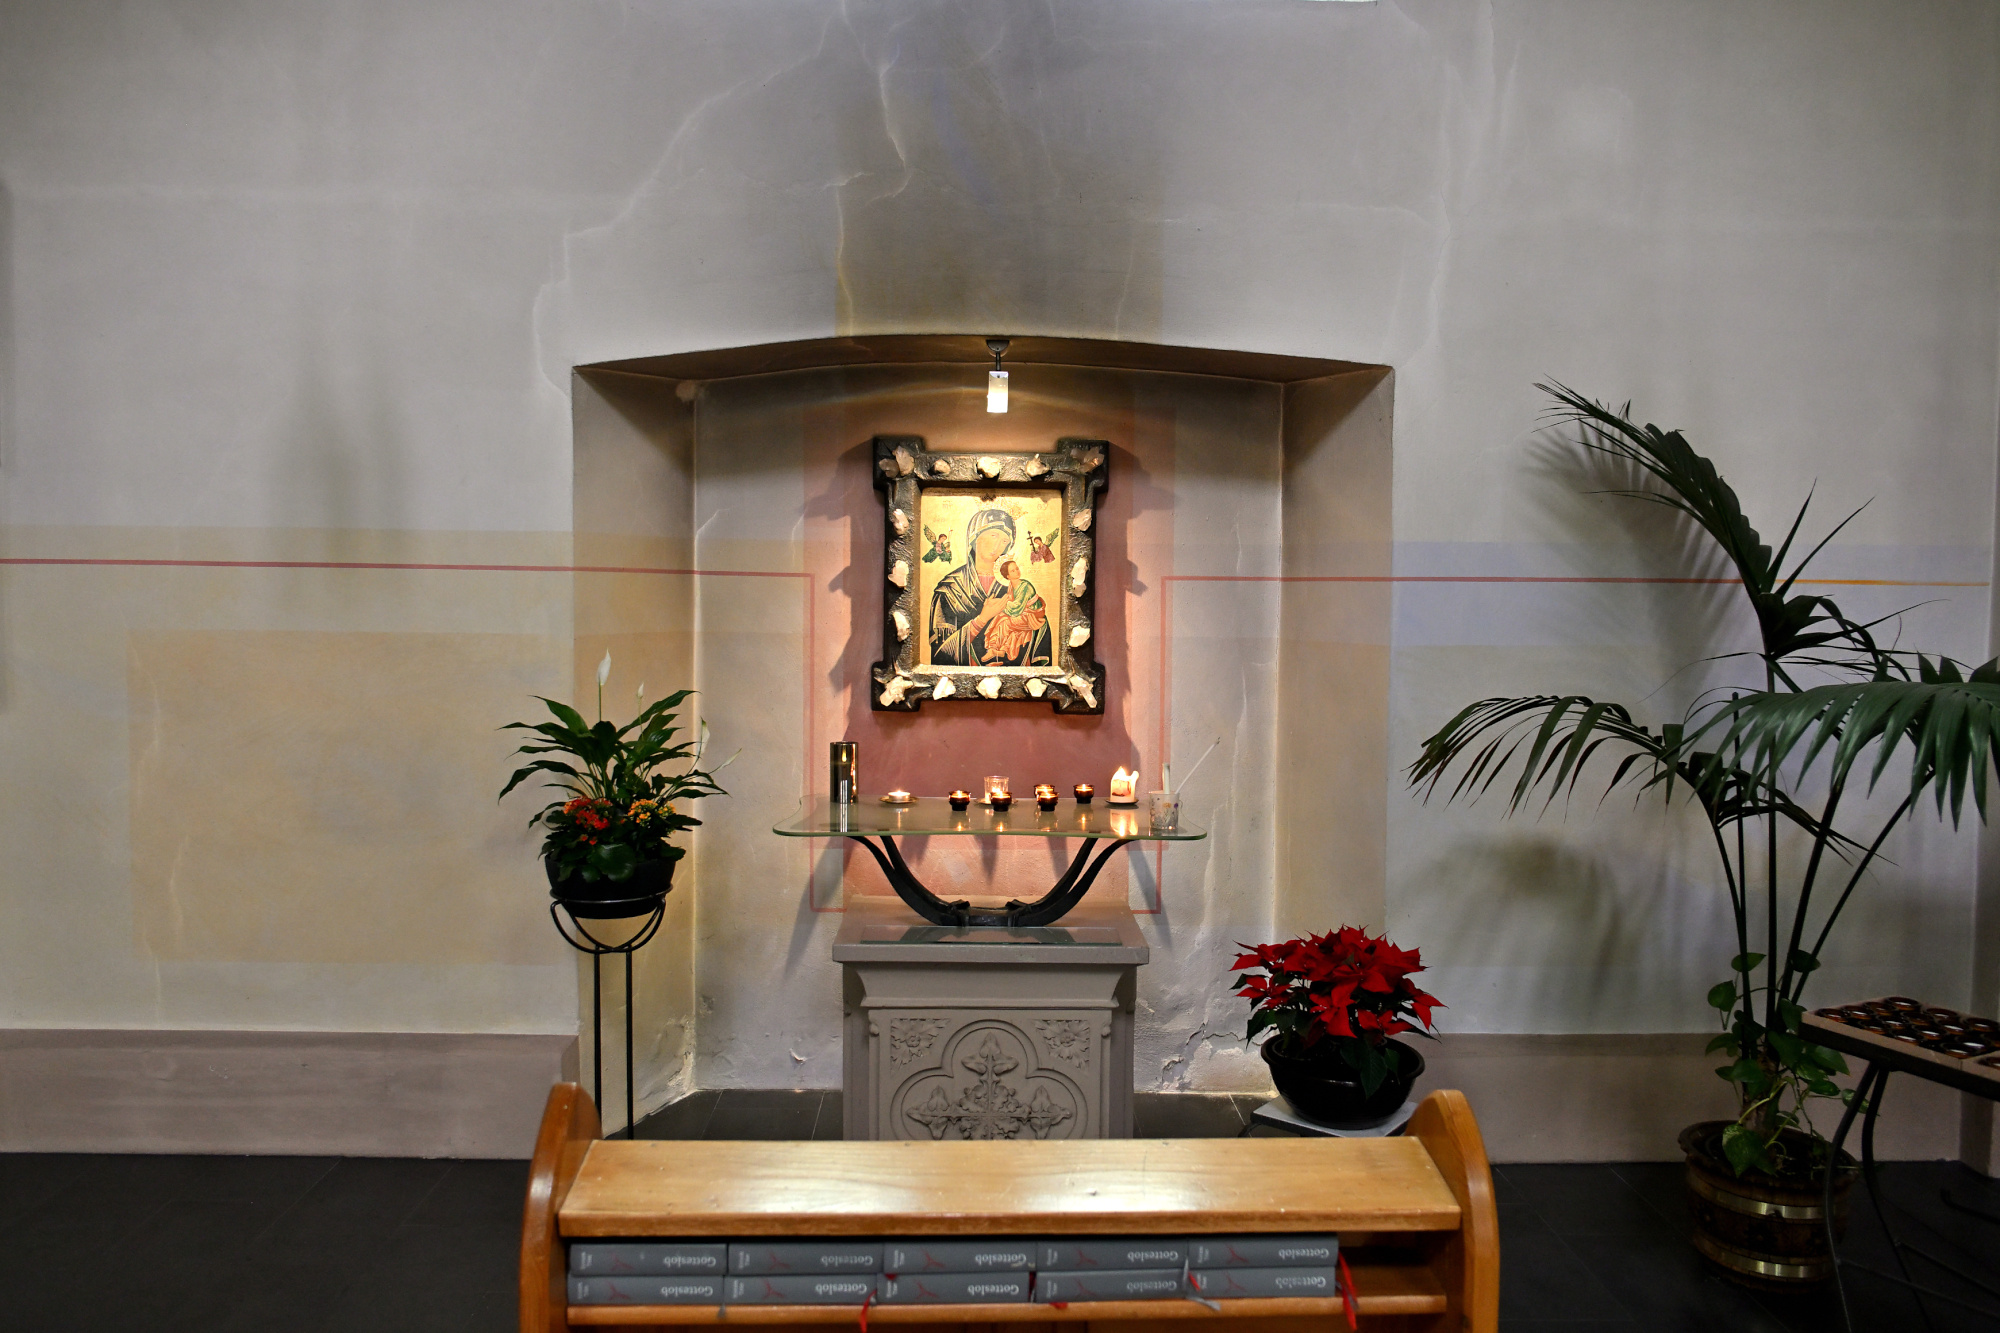
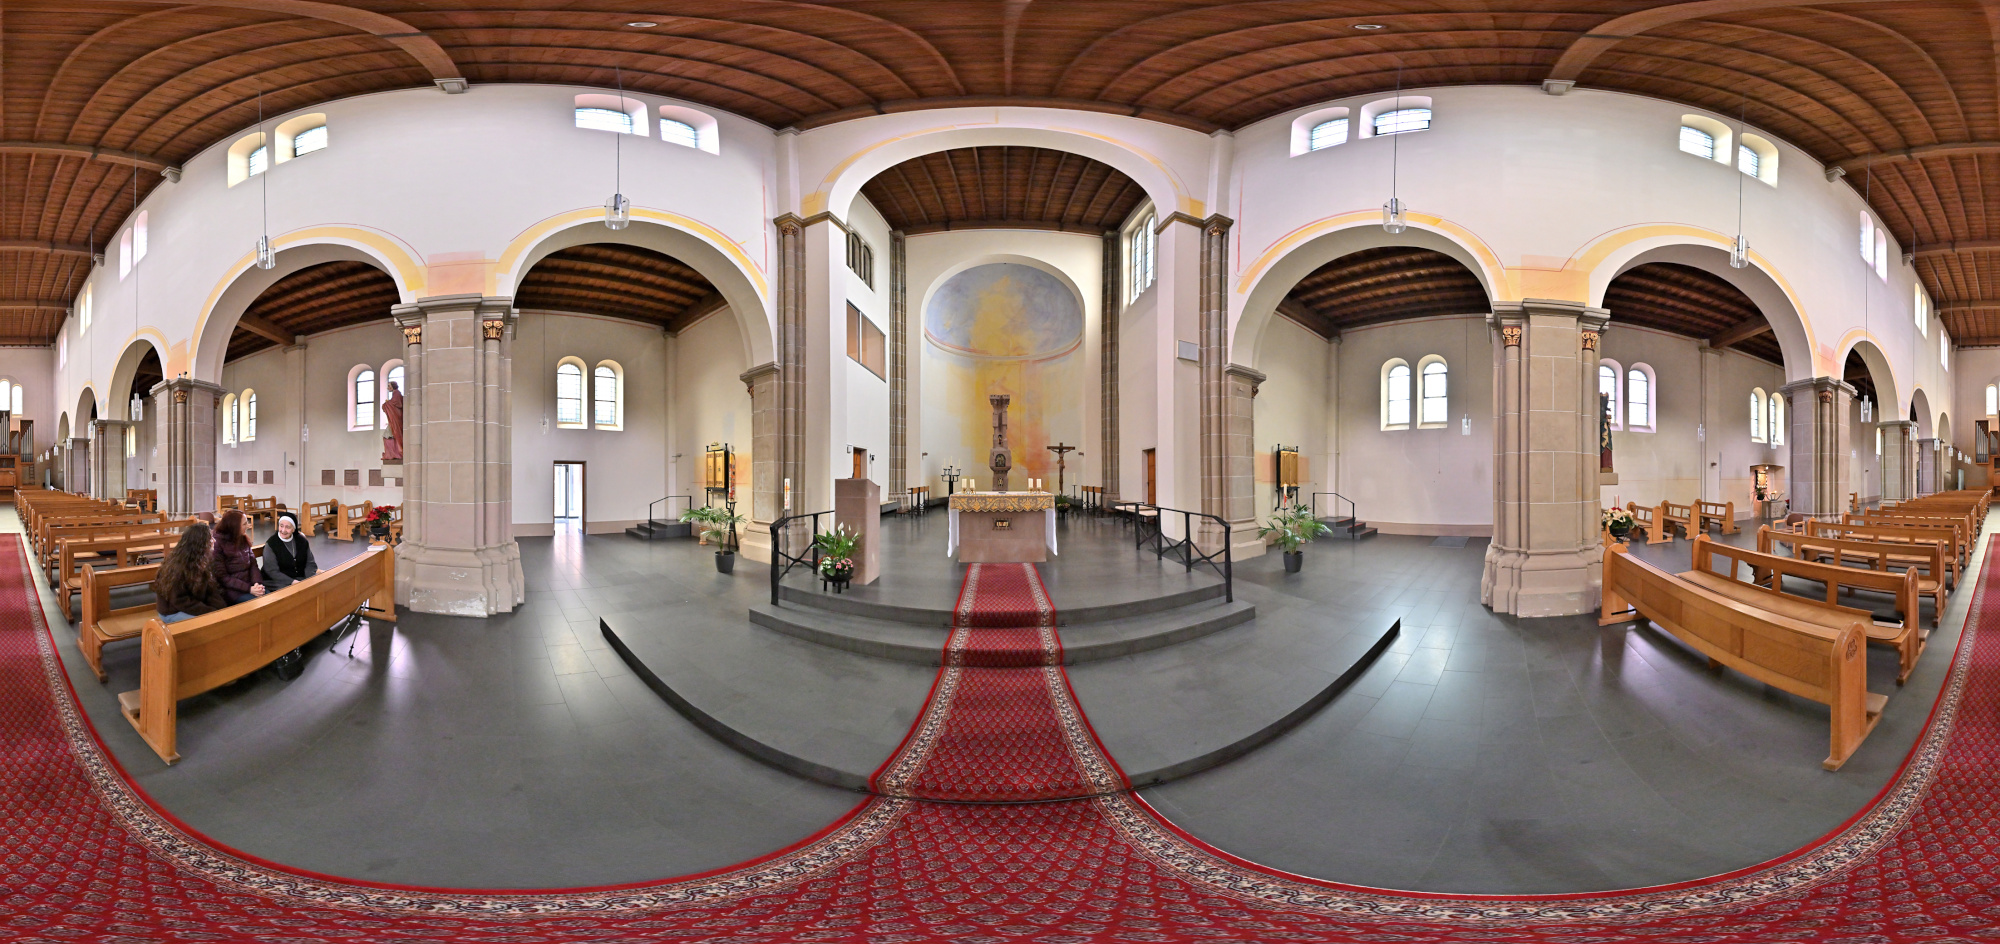
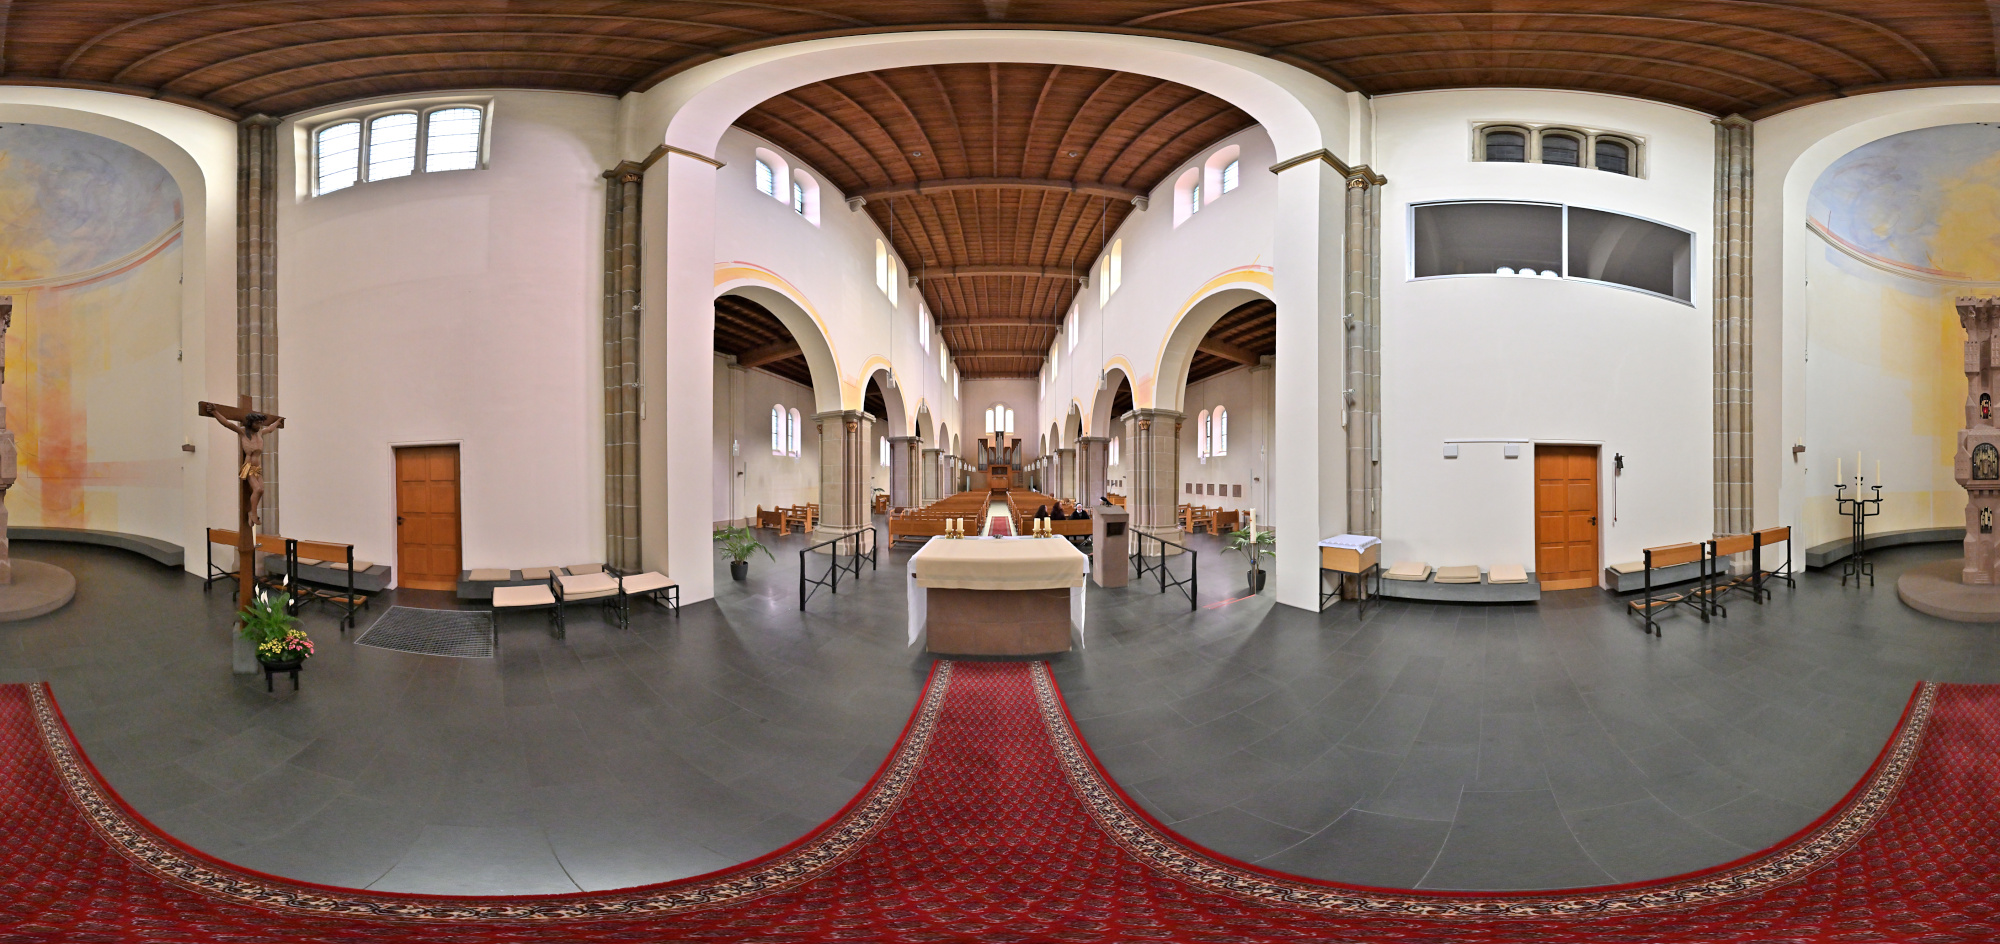
Das ehemalige Redemptoristenkloster Sankt Josef in Trier zeigt eine klare neuromanische Formensprache aus rotem Sandstein. Charakteristisch sind die rundbogigen Fensterreihen und die ausgewogene Gliederung der Fassaden, die dem Bau eine ruhige und konzentrierte Wirkung geben. Die Kirche war ursprünglich als dreischiffige Pfeilerbasilika mit Kreuzgewölben konzipiert und erhielt nach Kriegszerstörungen schlichte Flachdecken, wodurch der Innenraum heute heller und zurückhaltender wirkt. Markante Elemente wie die Chorflankentürme und die runden Ecktreppentürme an der Ostseite prägen bis heute das Erscheinungsbild.
Seit den siebziger Jahren wird der Klosterkomplex vom Orden der Borromäerinnen als geistliches und gemeinschaftliches Zentrum geführt.
1/100s f/4 ISO 100/21° f=7,5mm
1/125s f/6,3 ISO 100/21° 16-50mm f/2,8 VR f=16mm/24mm
1/30s f/2,8 ISO 800/30° 16-50mm f/2,8 VR f=16mm/24mm
1/30s f/2,8 ISO 800/30° 16-50mm f/2,8 VR f=16mm/24mm
1/30s f/2,8 ISO 800/30° 16-50mm f/2,8 VR f=17mm/26mm
1/20s f/2,8 ISO 800/30° 16-50mm f/2,8 VR f=17mm/26mm

1/25s f/2,8 ISO 800/30° 16-50mm f/2,8 VR f=17mm/26mm
1/20s f/2,8 ISO 800/30° 16-50mm f/2,8 VR f=17mm/26mm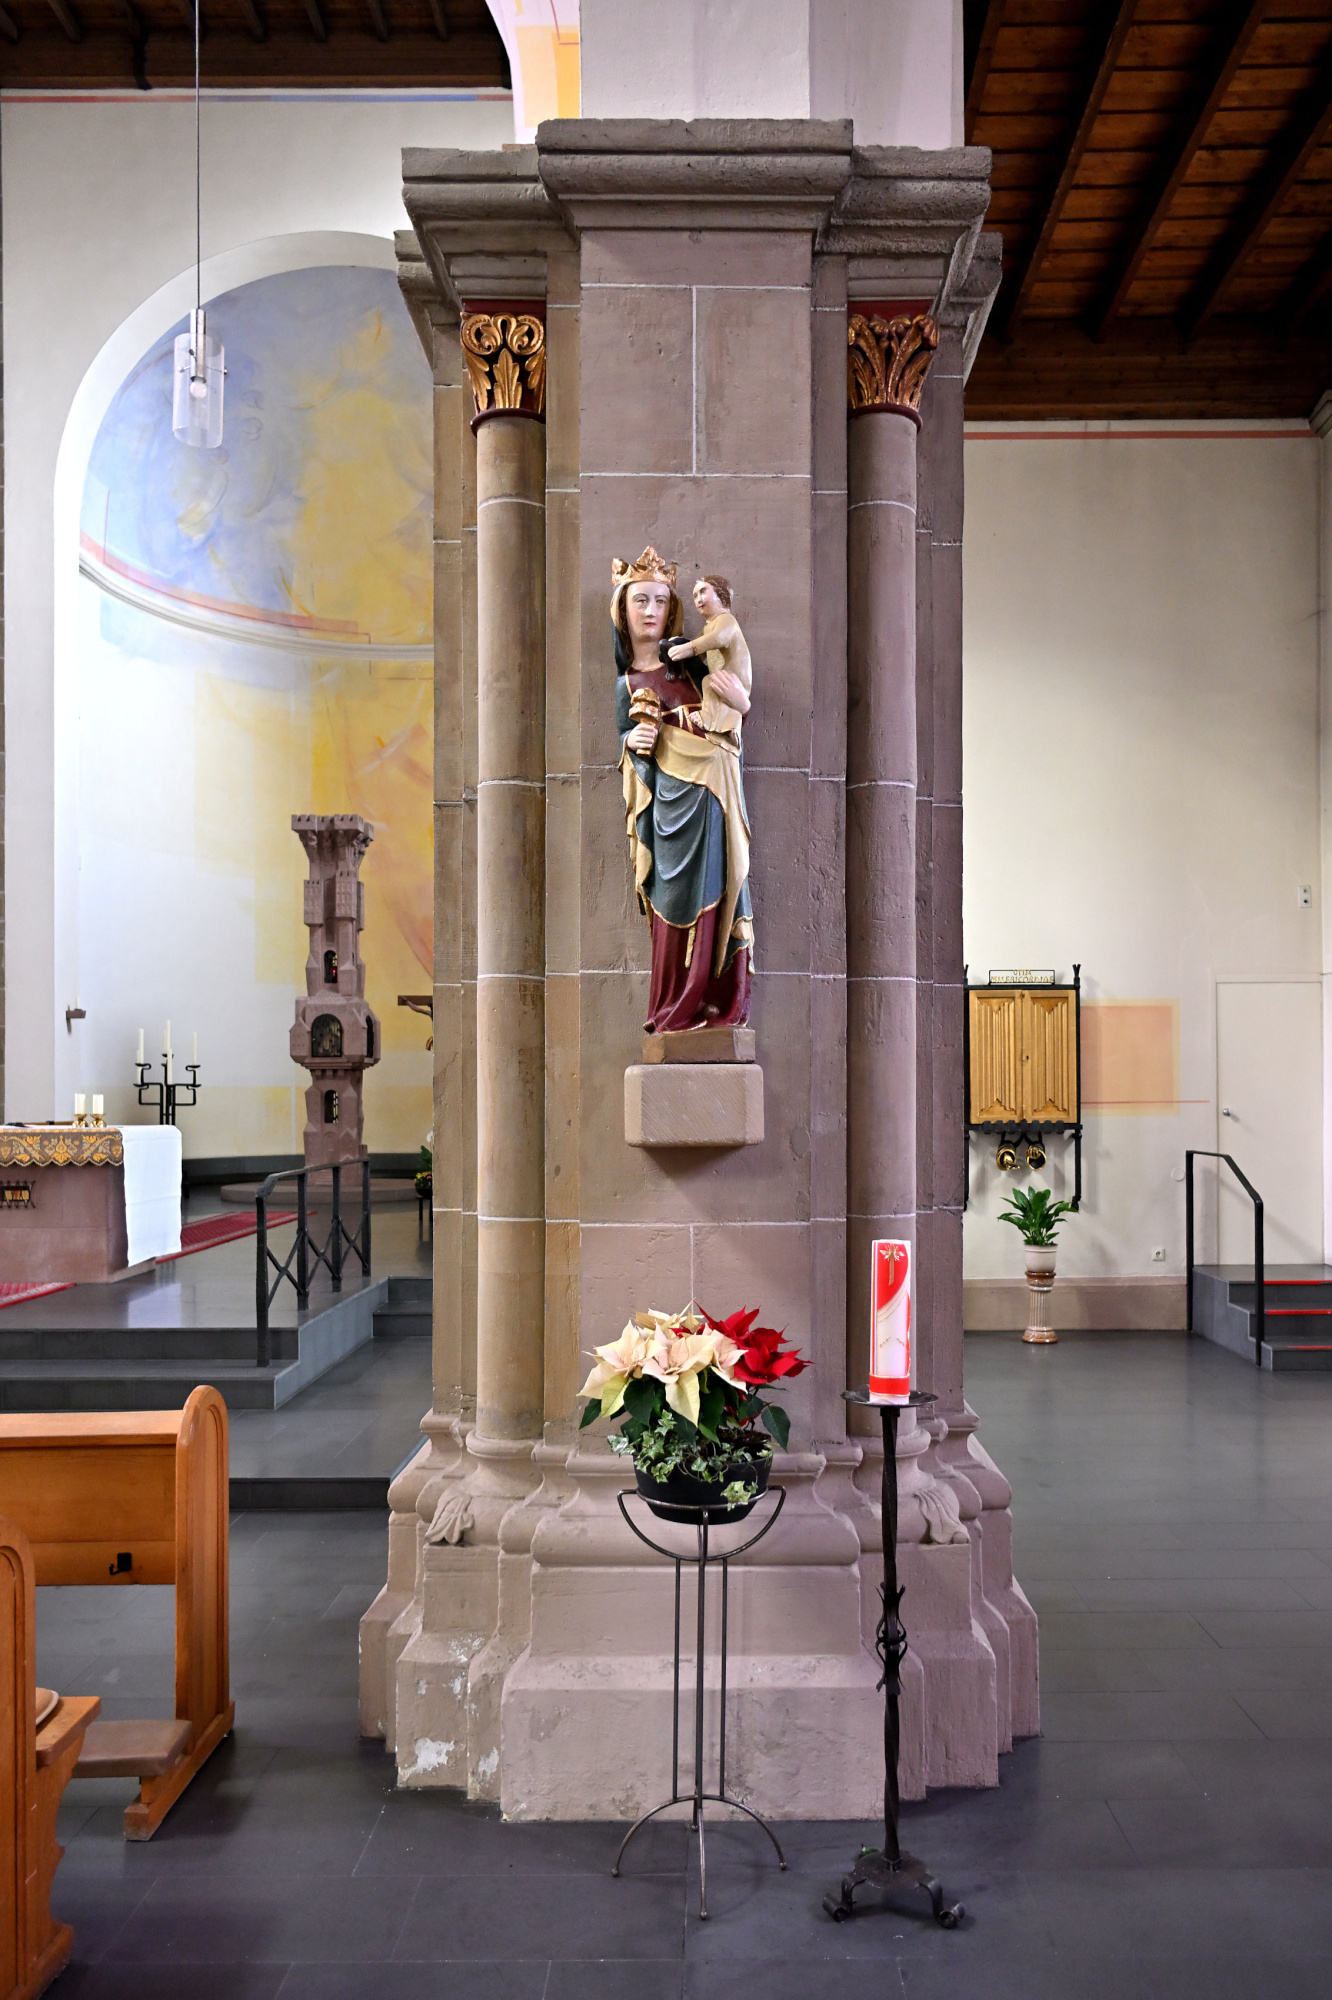
1/40s f/3,2 ISO 800/30° 16-50mm f/2,8 VR f=17mm/26mm
1/15s f/2,8 ISO 100/21° 16-50mm f/2,8 VR f=24mm/36mm
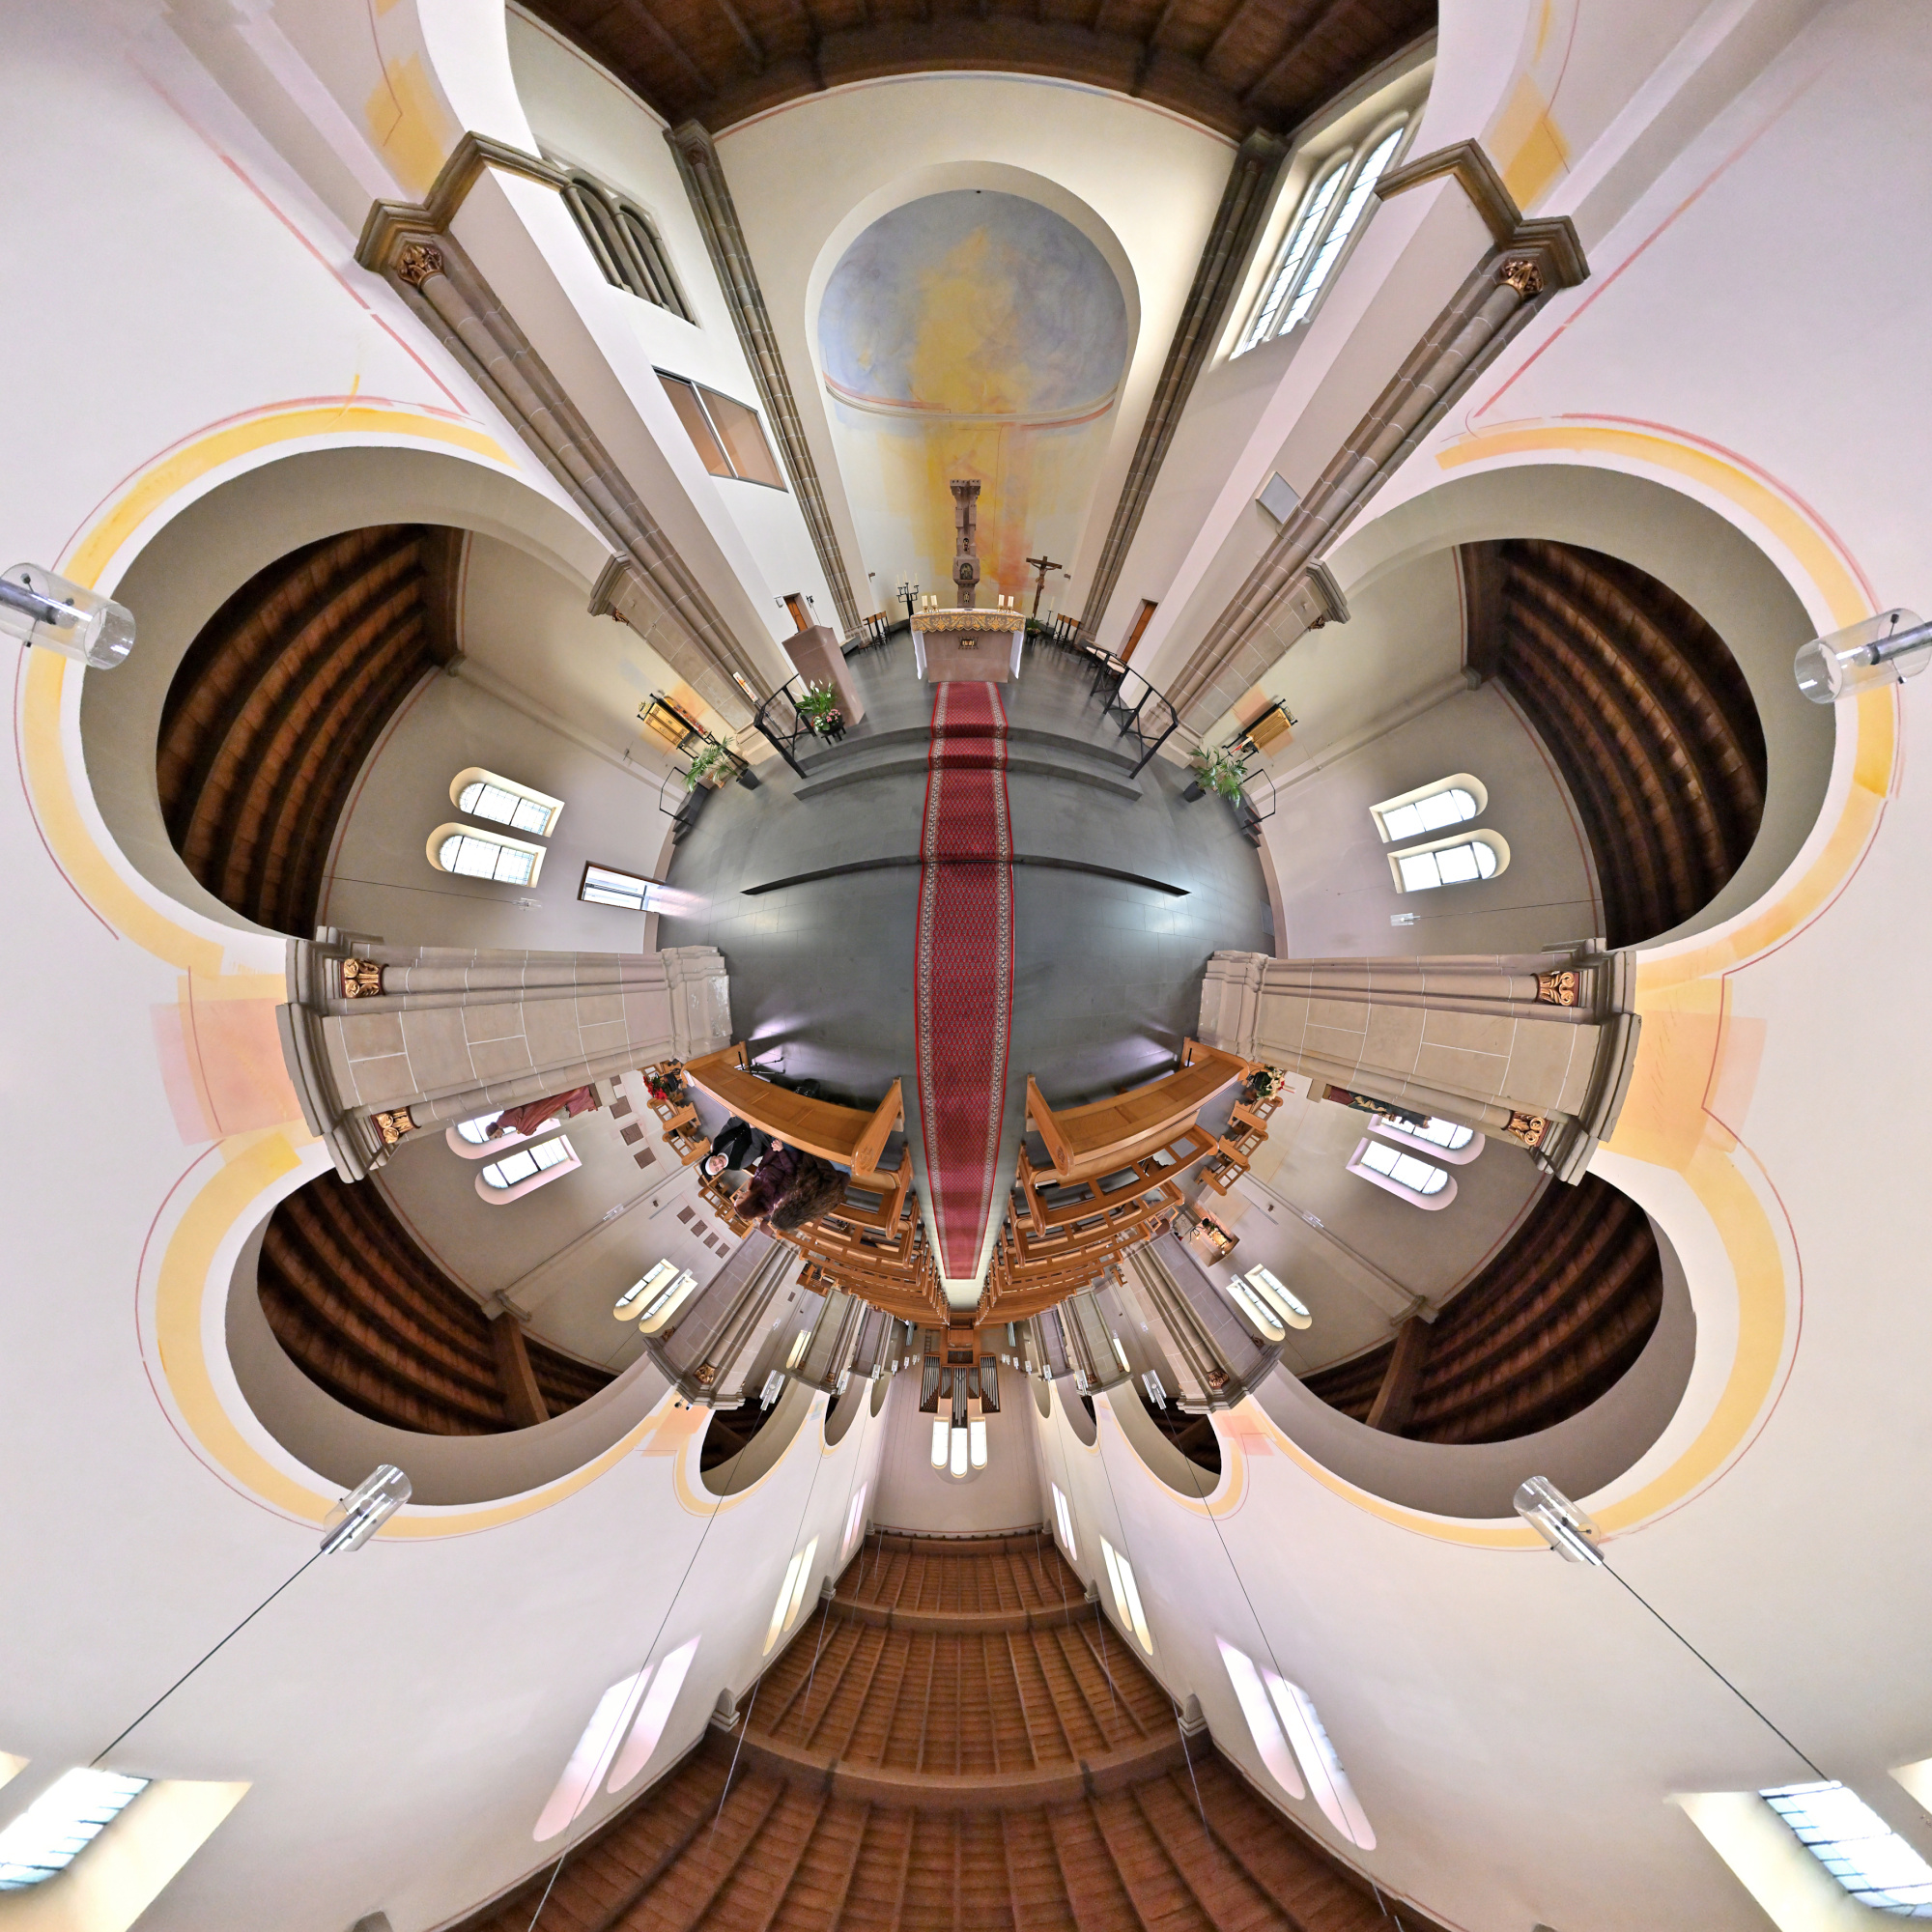
Interaktives Panorama Sankt Josef 1
1/50s f/4 ISO 2000/34° f=7,5mm

Interaktives Panorama Sankt Josef 2
1/50s f/4 ISO 2000/34° f=7,5mm

1/125s f/2,8 ISO 2500/35° 16-50mm f/2,8 VR f=16mm/24mm

Zum Ende des Tages machen wir uns auf den Weg zurück.
A drive along the Hunsrückhöhenstraße takes us to the Monastery of Saint Josef.
The former Redemptorist monastery Saint Josef in Trier displays a clear Neo Romanesque architectural style made of red sandstone. Characteristic features include the rows of round arched windows and the balanced structure of the facades, which give the building a calm and focused appearance. The church was originally designed as a three aisled pillar basilica with cross vaults and received plain flat ceilings after war damage, giving the interior a brighter and more restrained atmosphere today. Distinctive elements such as the choir flank towers and the round stair towers on the east side continue to shape its appearance.
Since the nineteen seventies the monastery complex has been run by the Sisters of Saint Charles Borromeo as a spiritual and communal center.
1/100s f/4 ISO 100/21° f=7,5mm
1/125s f/6,3 ISO 100/21° 16-50mm f/2,8 VR f=16mm/24mm
1/30s f/2,8 ISO 800/30° 16-50mm f/2,8 VR f=16mm/24mm
1/30s f/2,8 ISO 800/30° 16-50mm f/2,8 VR f=16mm/24mm
1/30s f/2,8 ISO 800/30° 16-50mm f/2,8 VR f=17mm/26mm
1/20s f/2,8 ISO 800/30° 16-50mm f/2,8 VR f=17mm/26mm
1/25s f/2,8 ISO 800/30° 16-50mm f/2,8 VR f=17mm/26mm
1/20s f/2,8 ISO 800/30° 16-50mm f/2,8 VR f=17mm/26mm
1/40s f/3,2 ISO 800/30° 16-50mm f/2,8 VR f=17mm/26mm
1/15s f/2,8 ISO 100/21° 16-50mm f/2,8 VR f=24mm/36mm
Interactive Panorama Saint Josef 1
1/50s f/4 ISO 2000/34° f=7,5mm
Interactive Panorama Saint Josef 2
1/50s f/4 ISO 2000/34° f=7,5mm
1/125s f/2,8 ISO 2500/35° 16-50mm f/2,8 VR f=16mm/24mm
At the end of the day we make our way back.
-
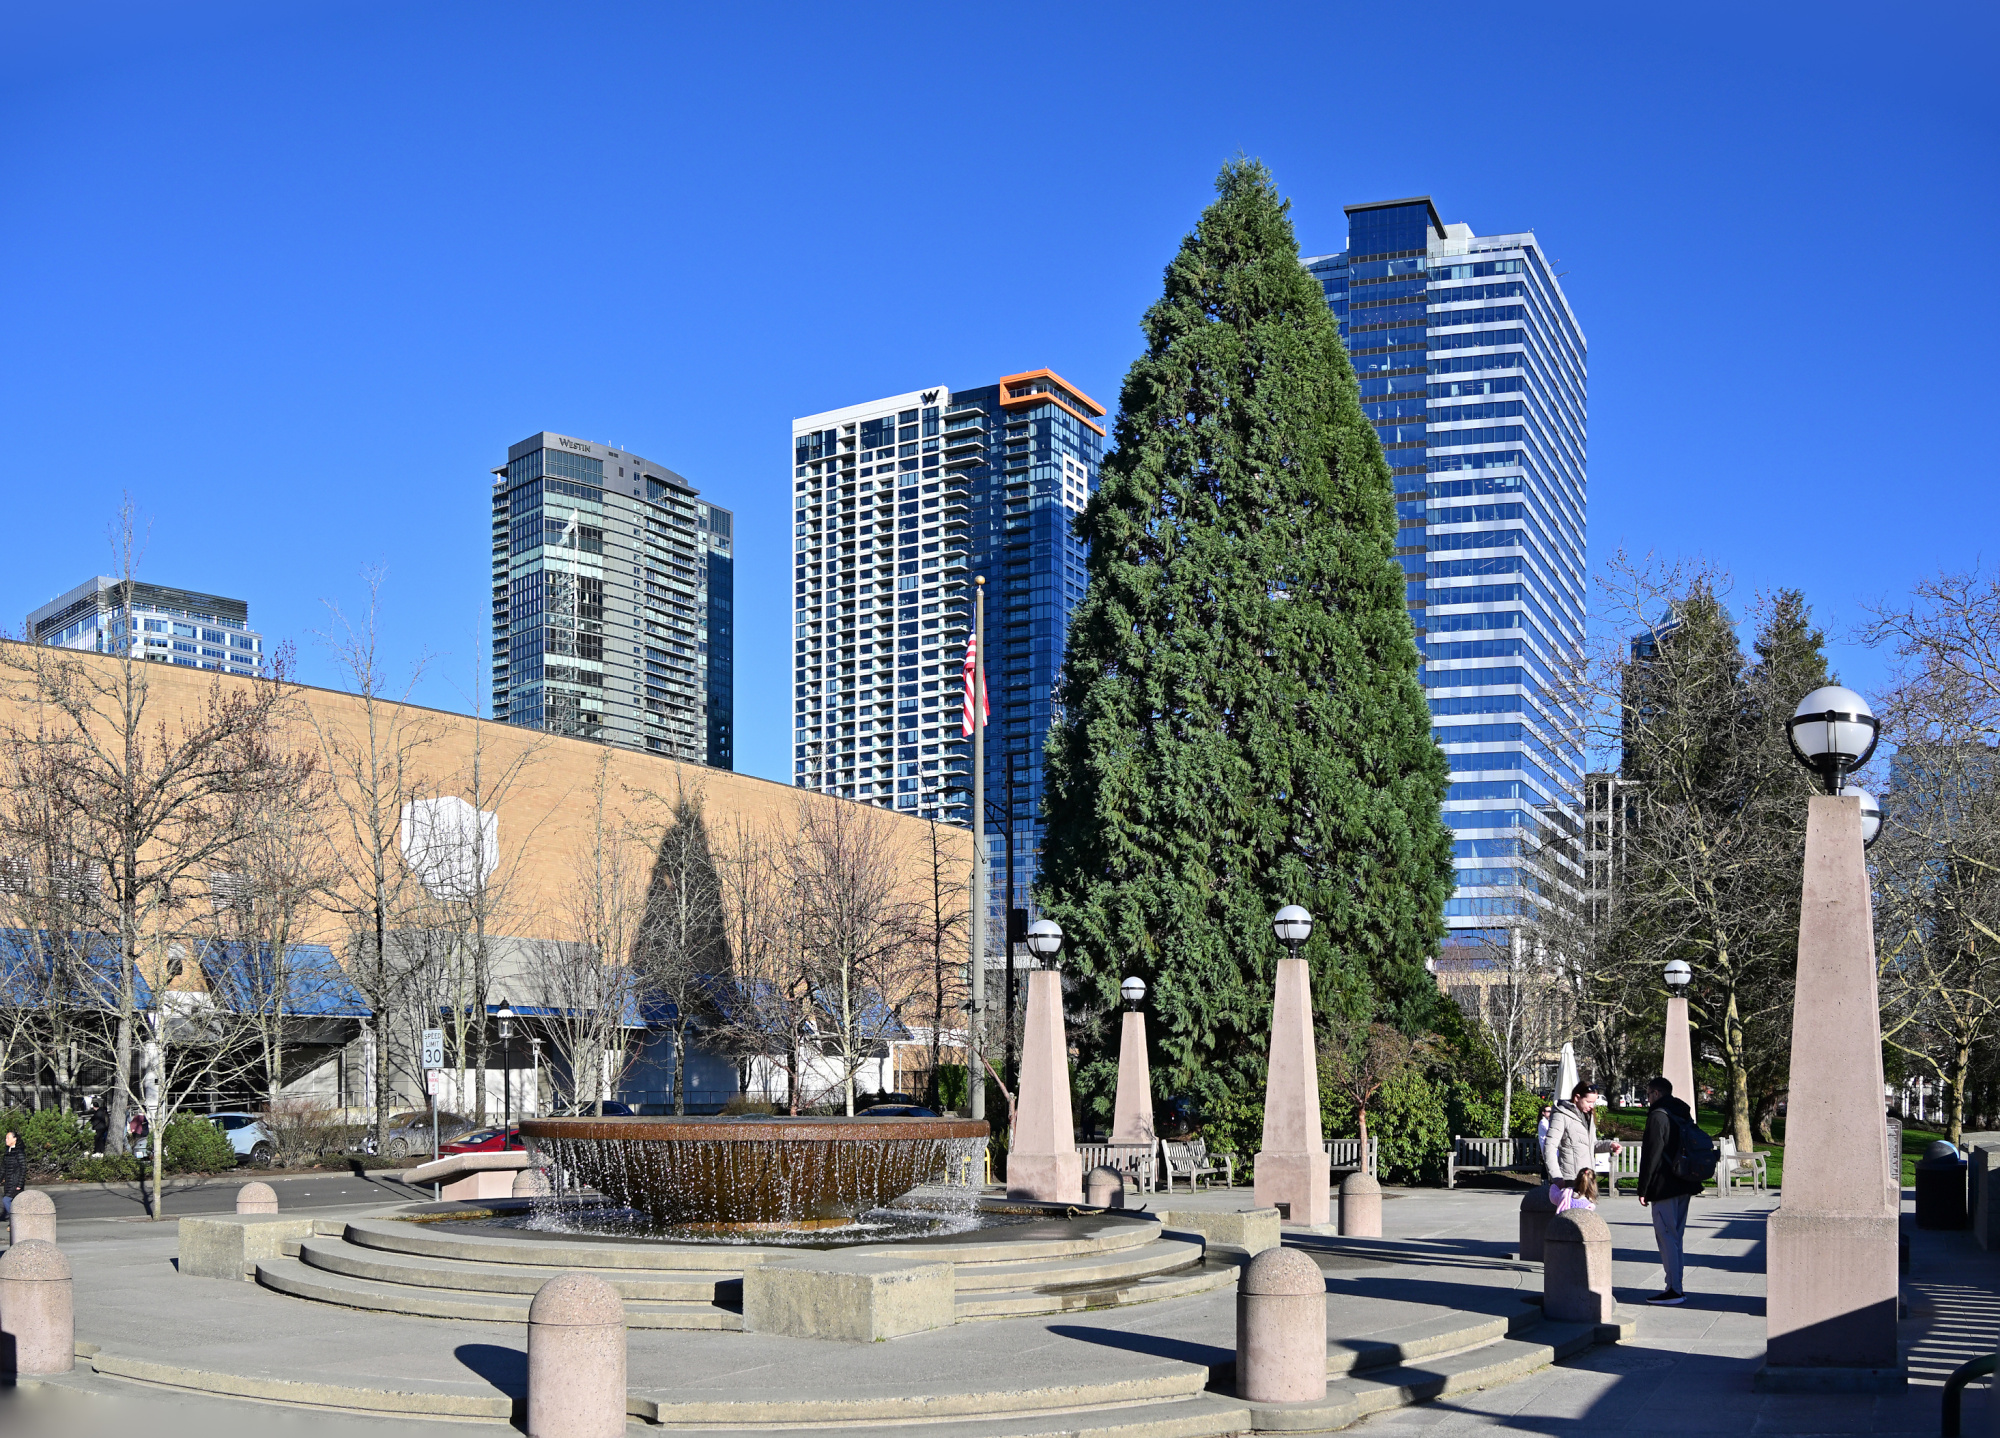
Bellevue Downtown Park
A short walk through the Bellevue Downtown Park.
Entrance of the Bellevue Downtown Park
Bellevue apparently keeps the largest Christmas tree all year.
1/800s f/5,6 ISO 100/21° 18-140mm f/3,5-6,3 VR f=18mm/27mm
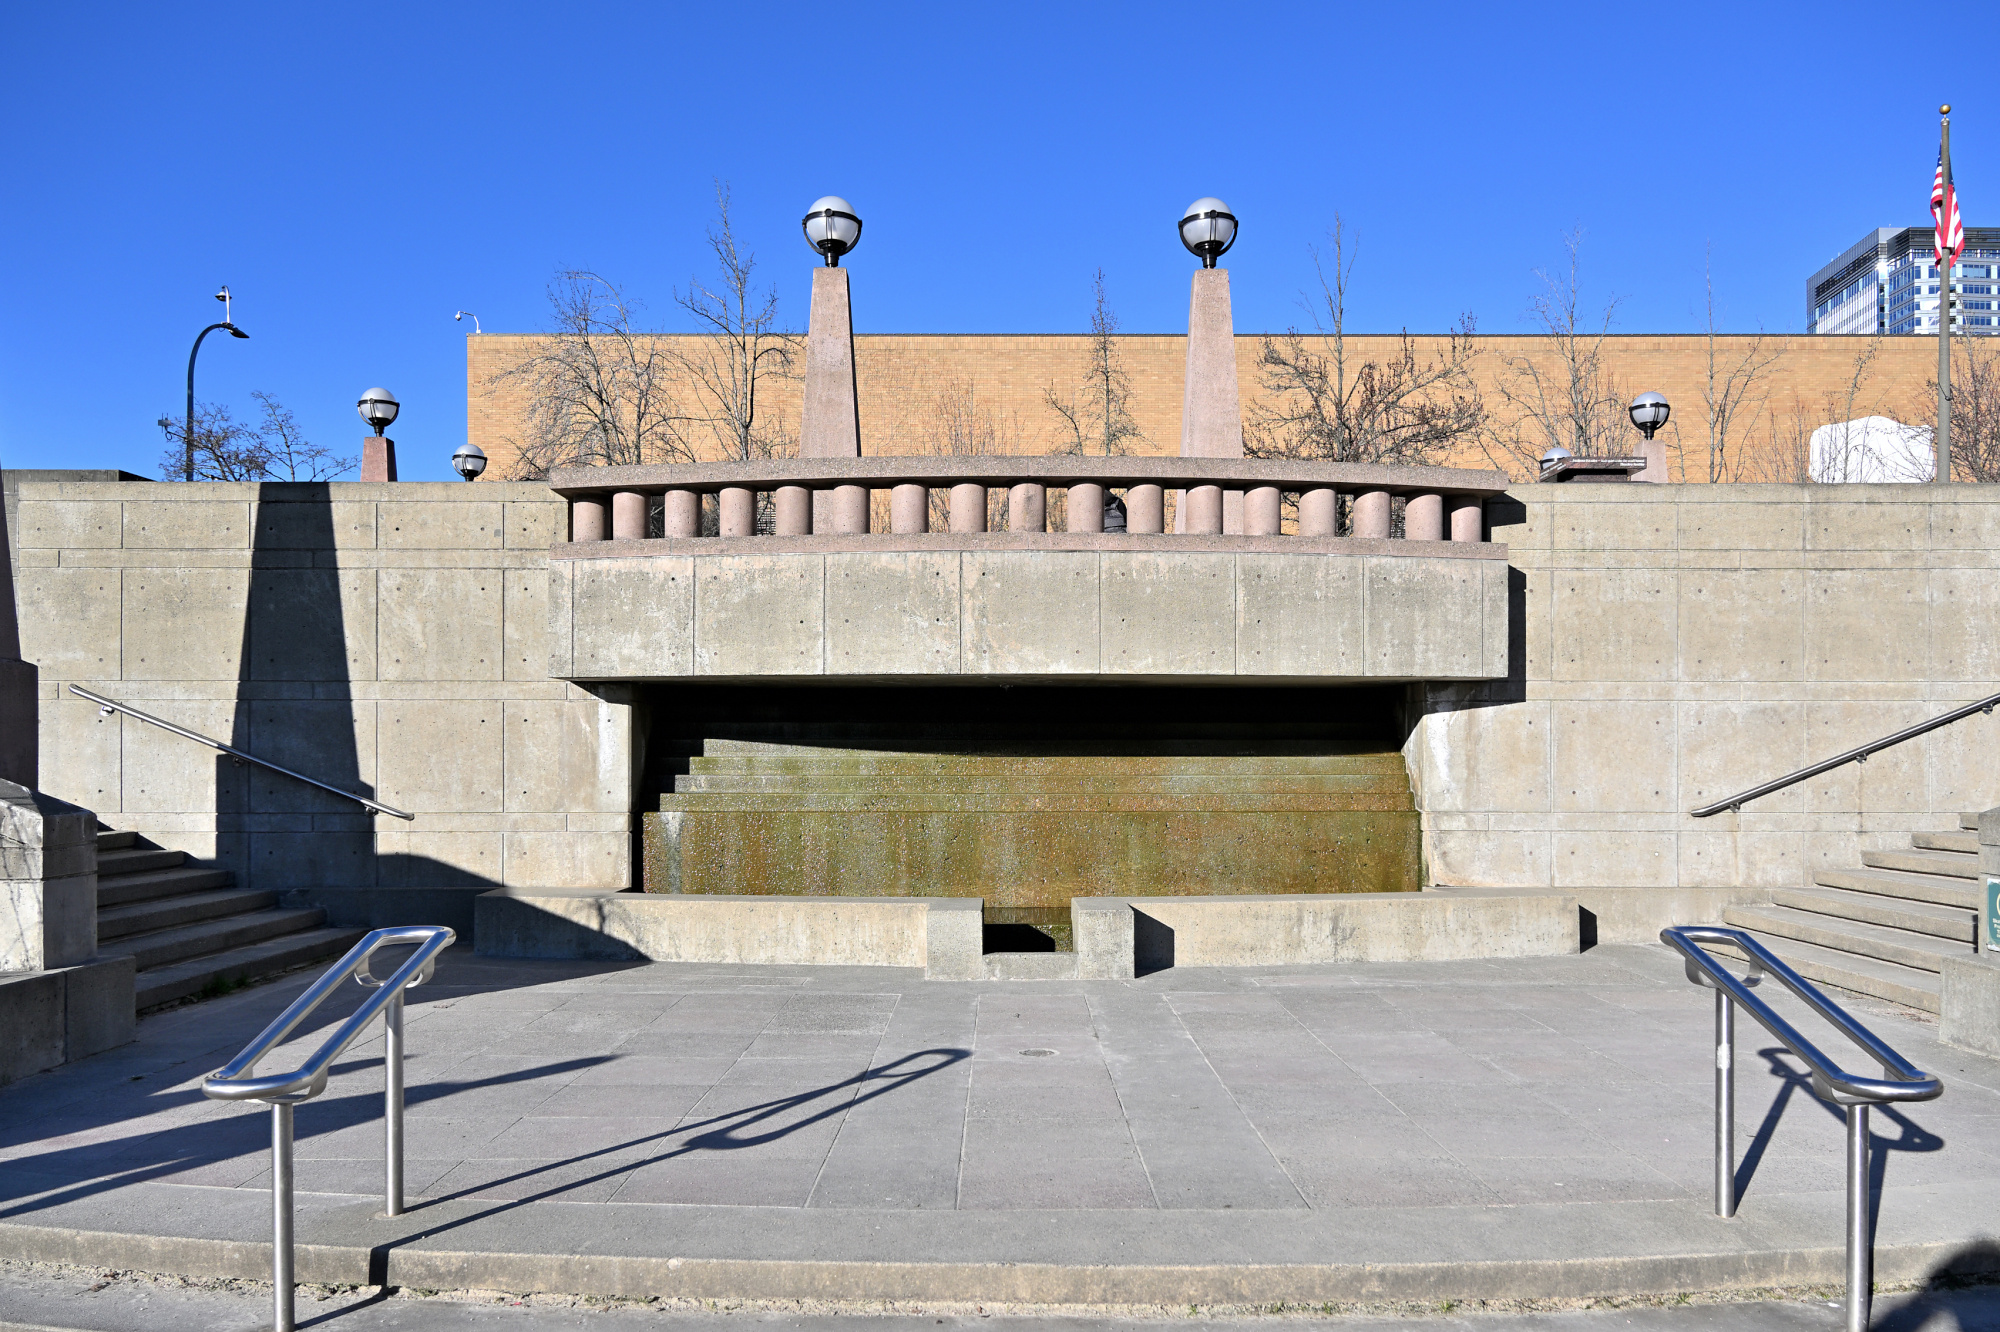
At The Fountain
The place was lively, though the frame suggests otherwise. A quiet trick of timing made it possible.
1/800s f/5,6 ISO 100/21° 18-140mm f/3,5-6,3 VR f=18mm/27mm
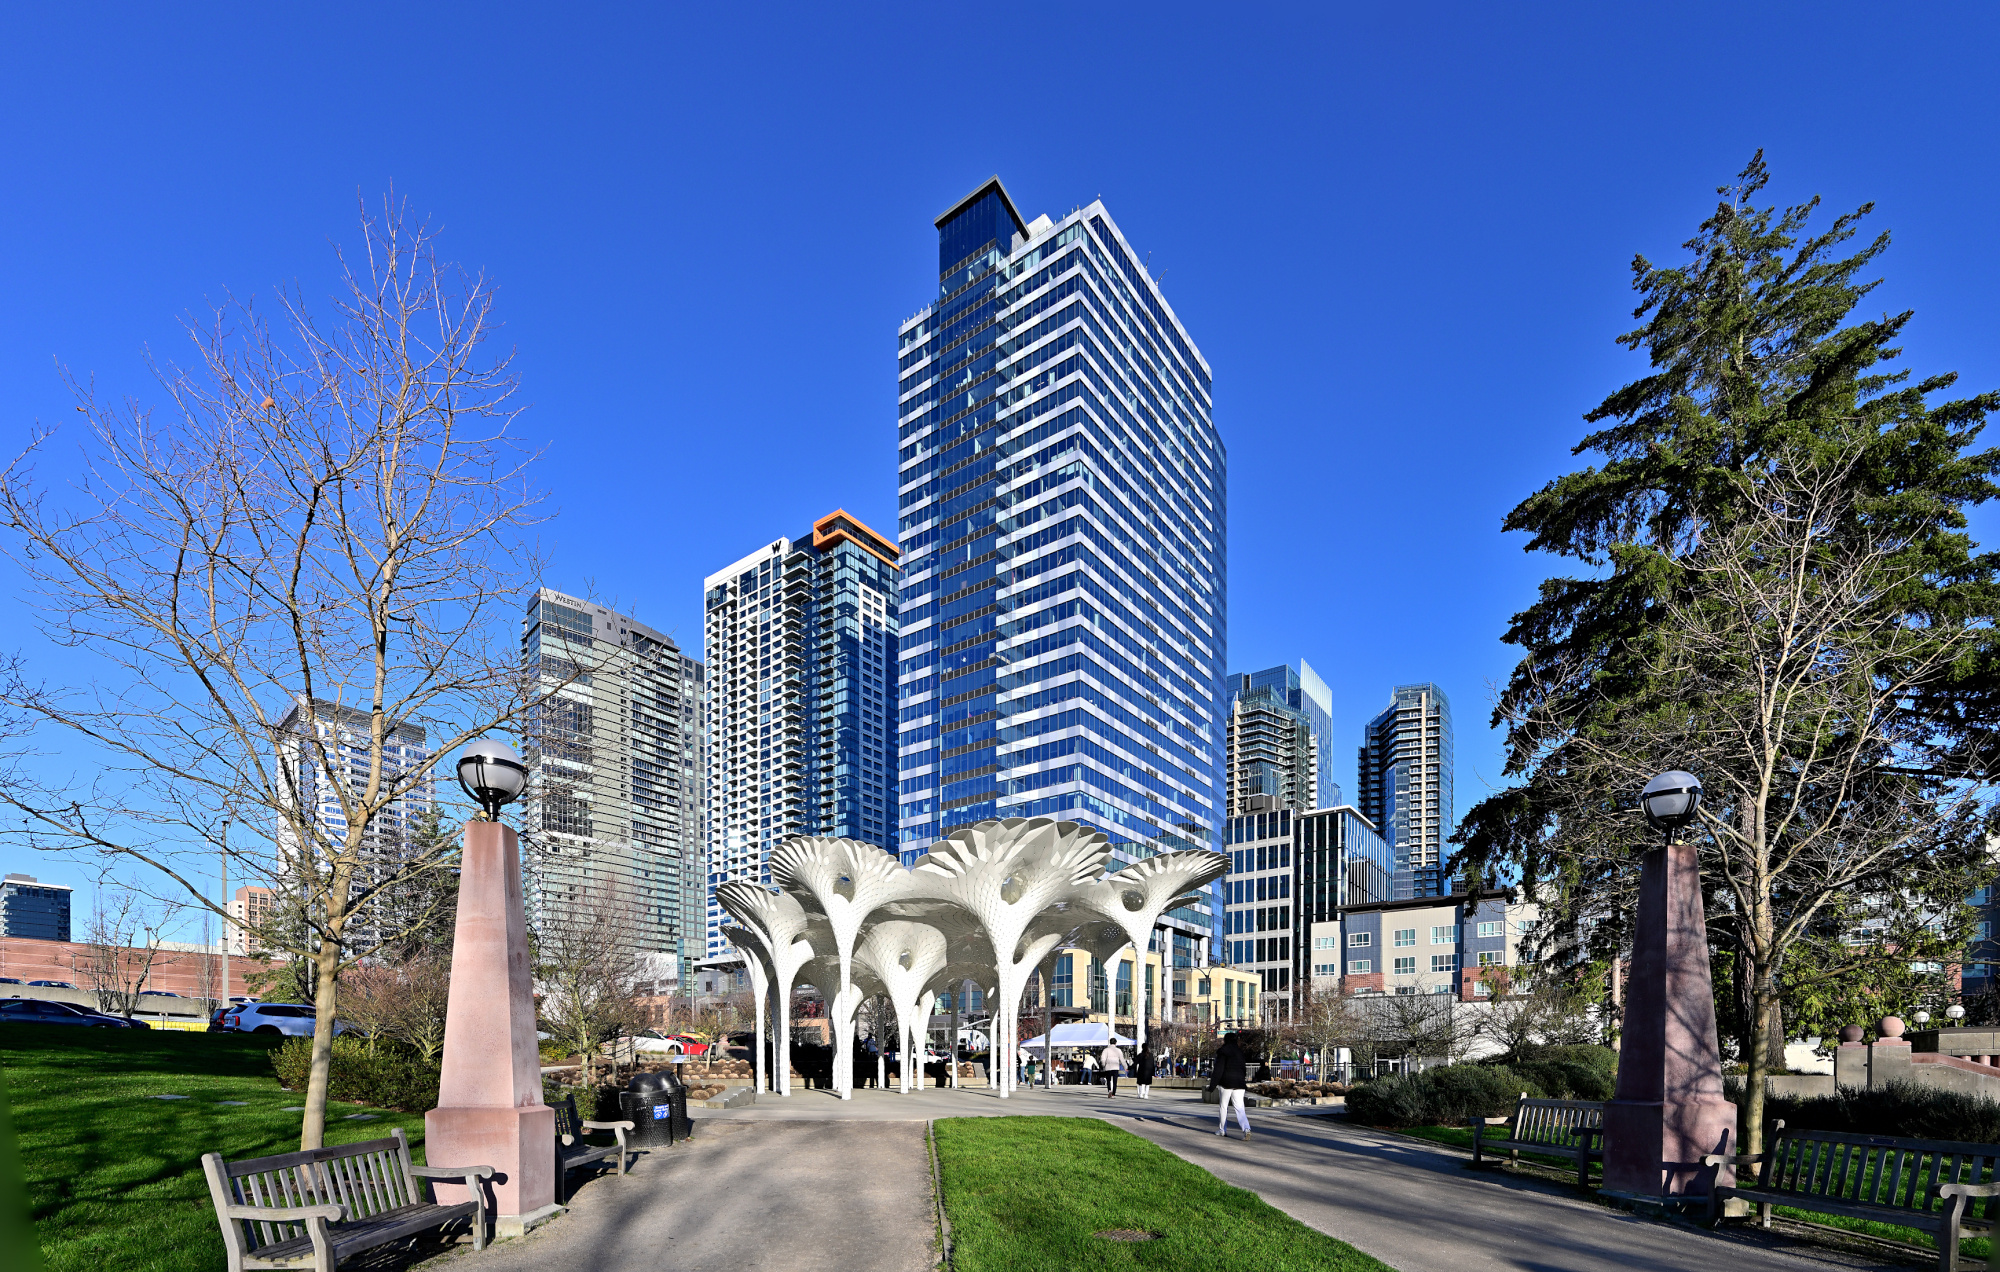
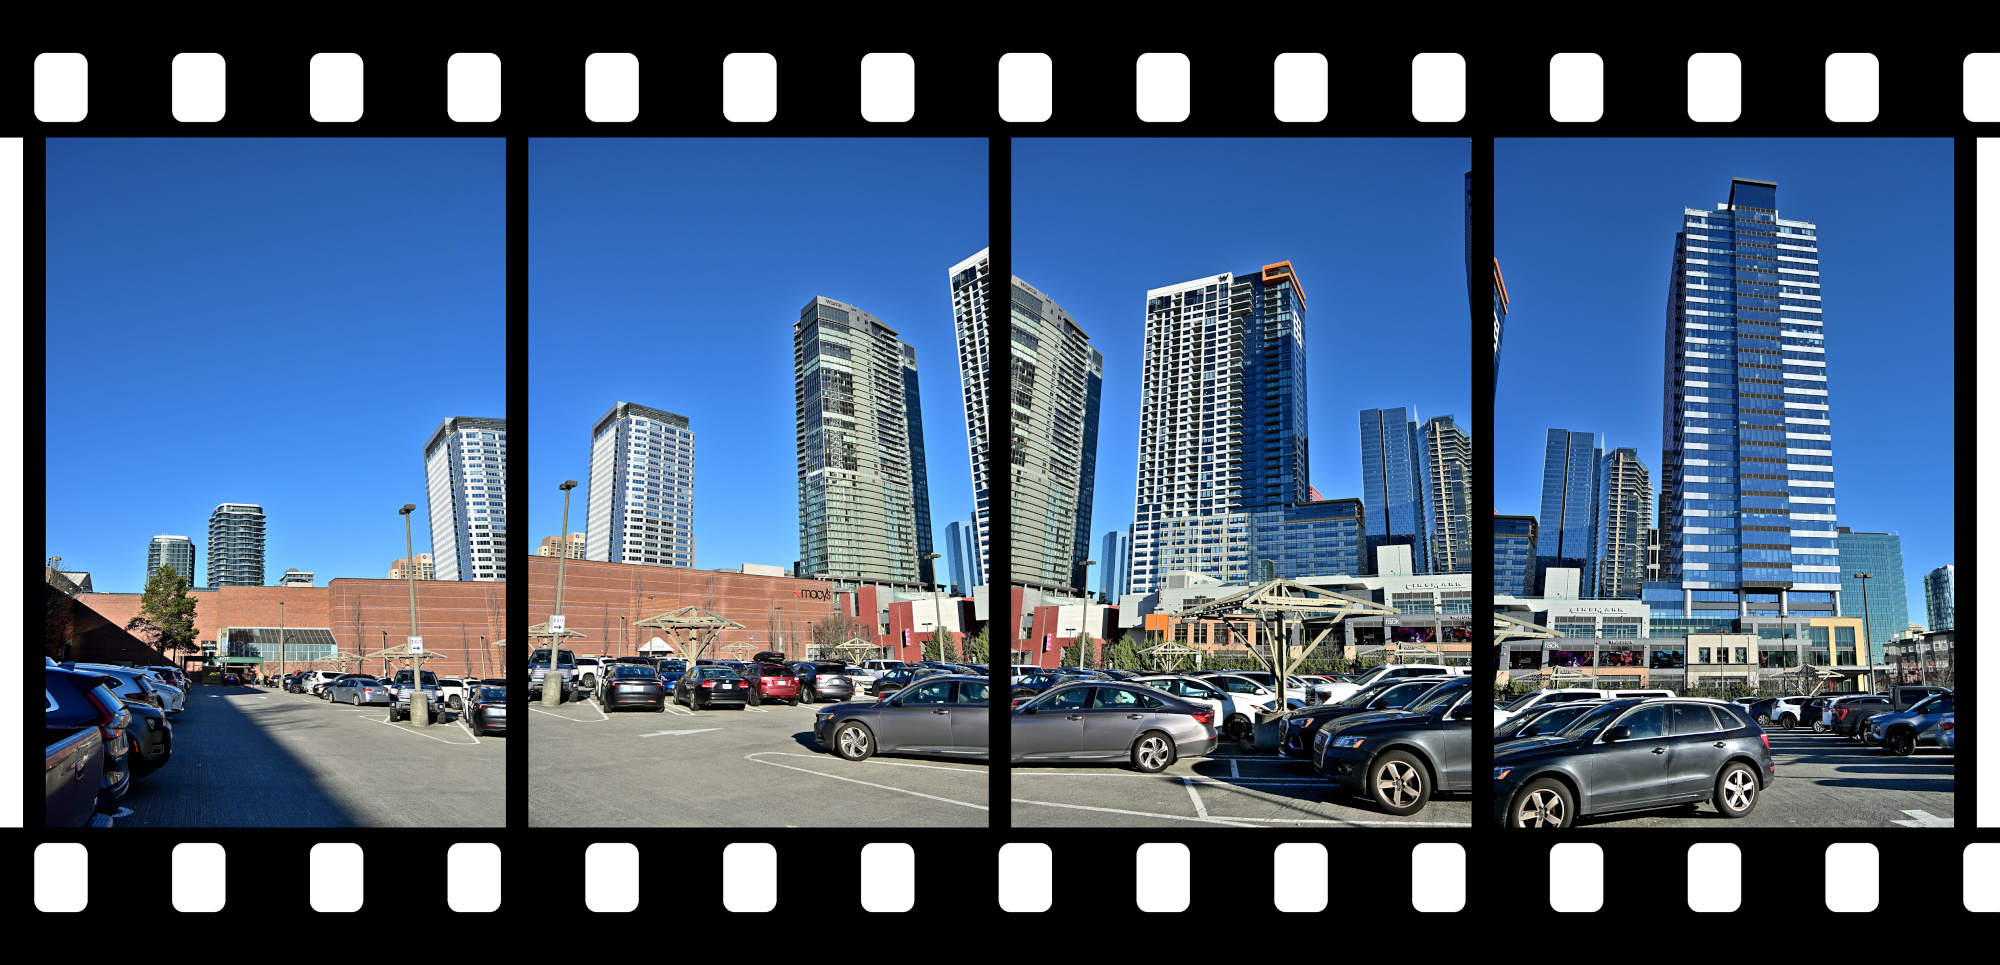
View to Downtown Bellevue
A calm view of a busy city arranged as if waiting for its next frame.
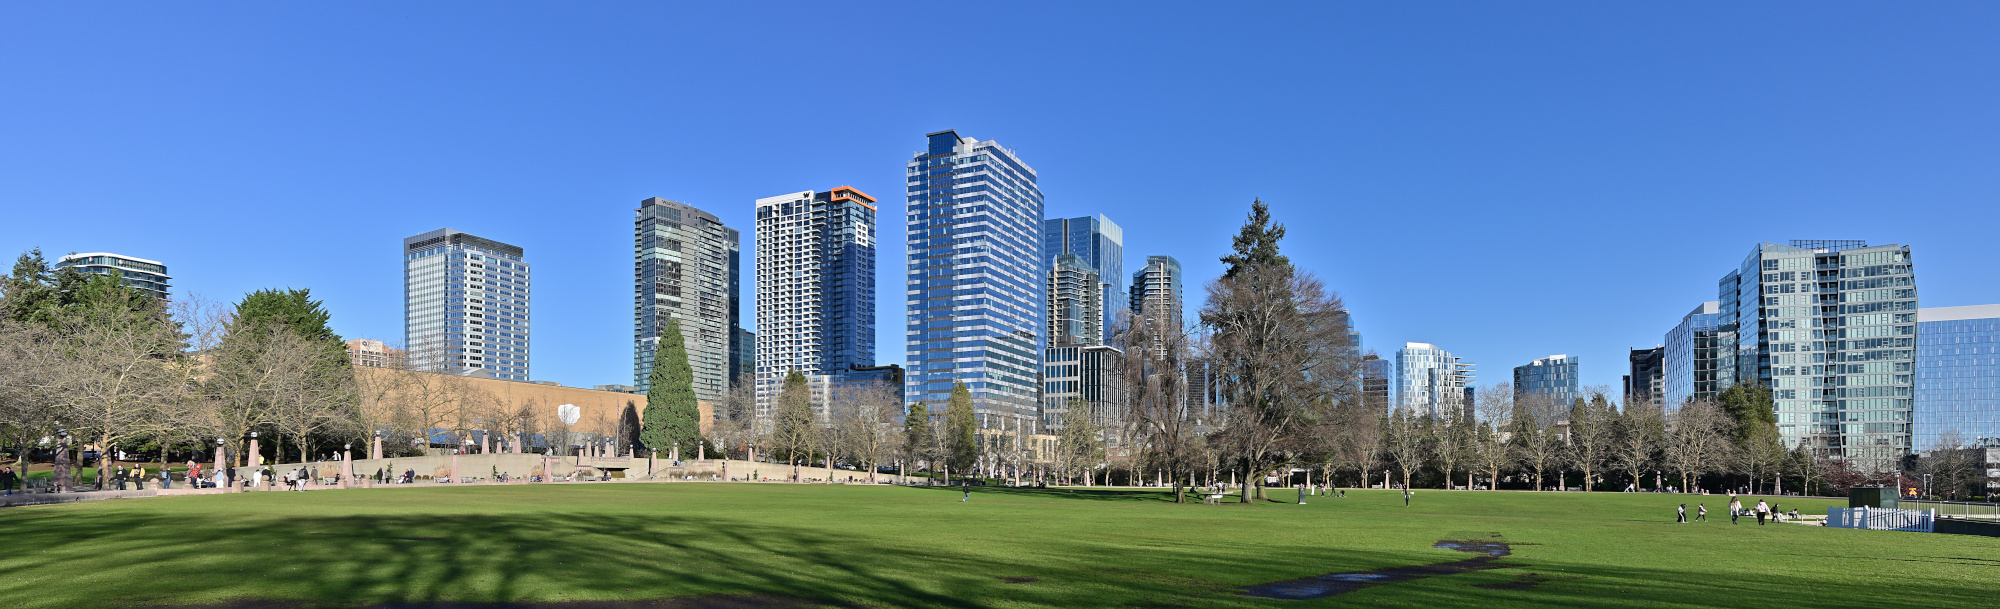
1/320s f/9 ISO 100/21° 18-140mm f/3,5-6,3 VR f=22mm/33mm
Bellevue Ice Skating Arena
A quiet scene around the arena, everything held in a clear winter light.
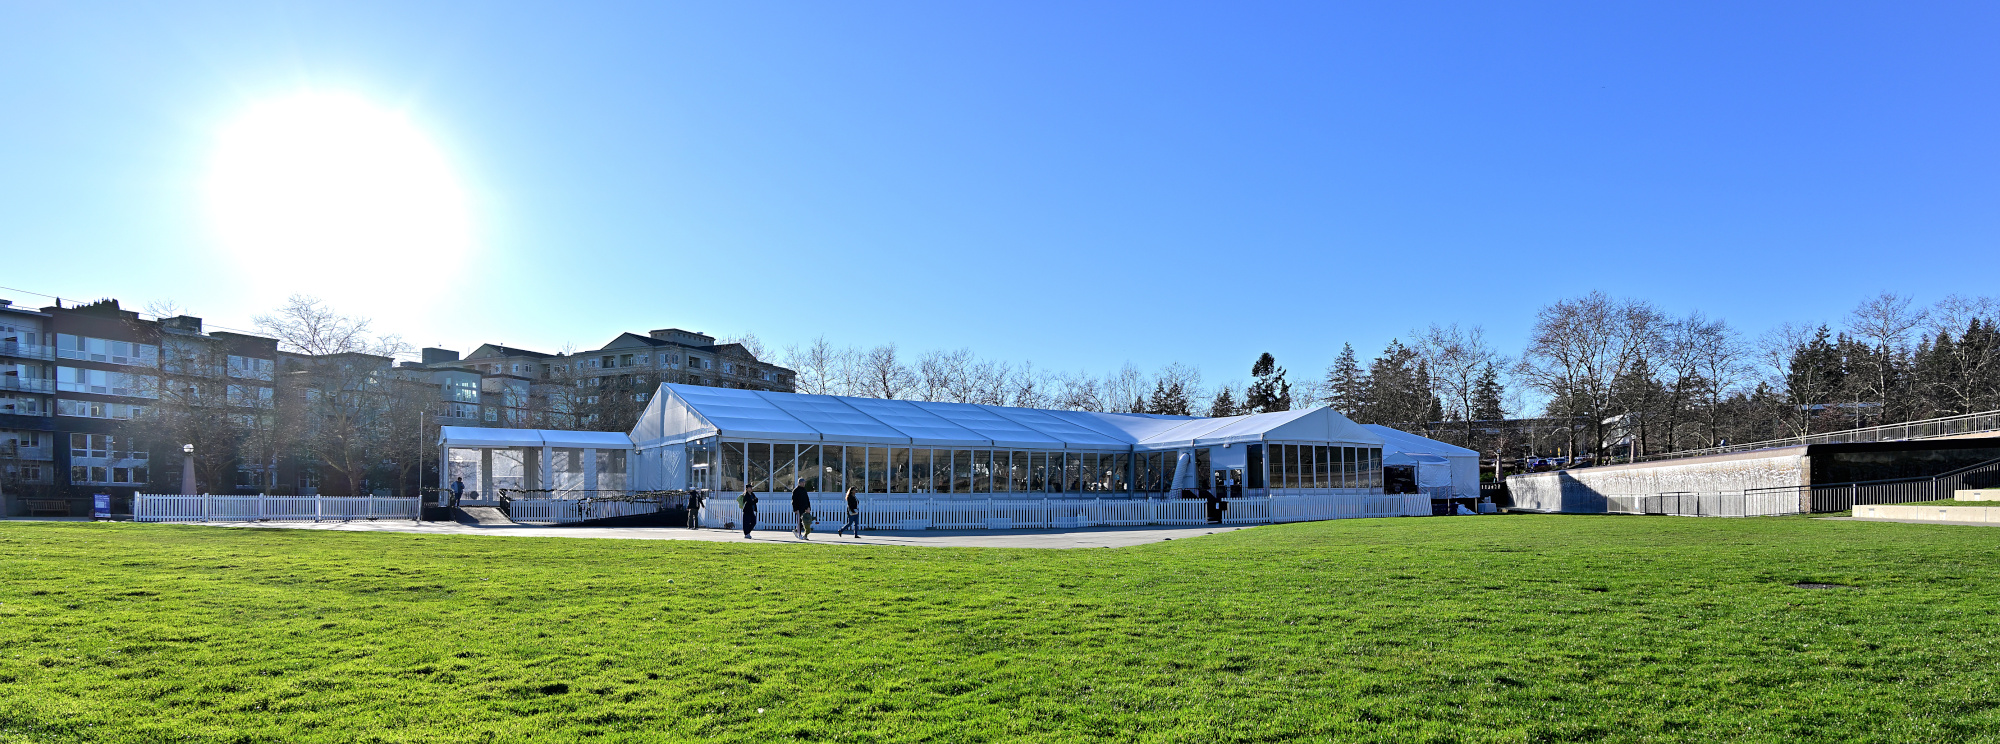
1/200s f/7,1 ISO 100/21° 18-140mm f/3,5-6,3 VR f=18mm/27mm
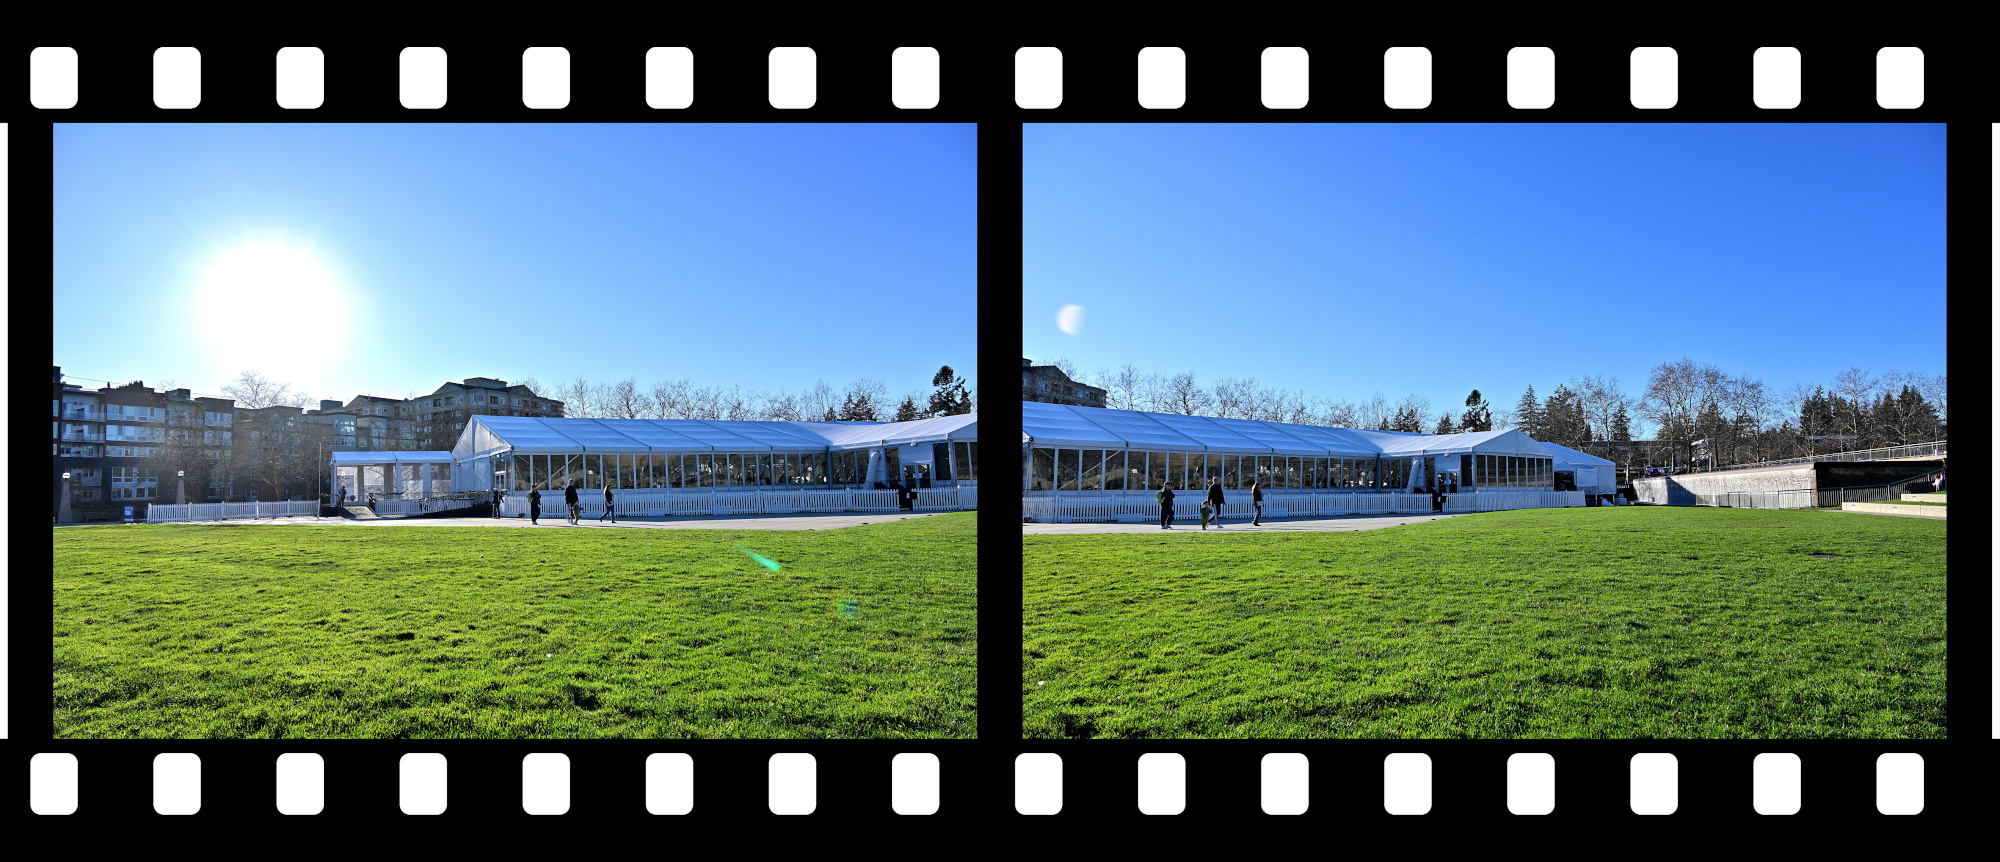
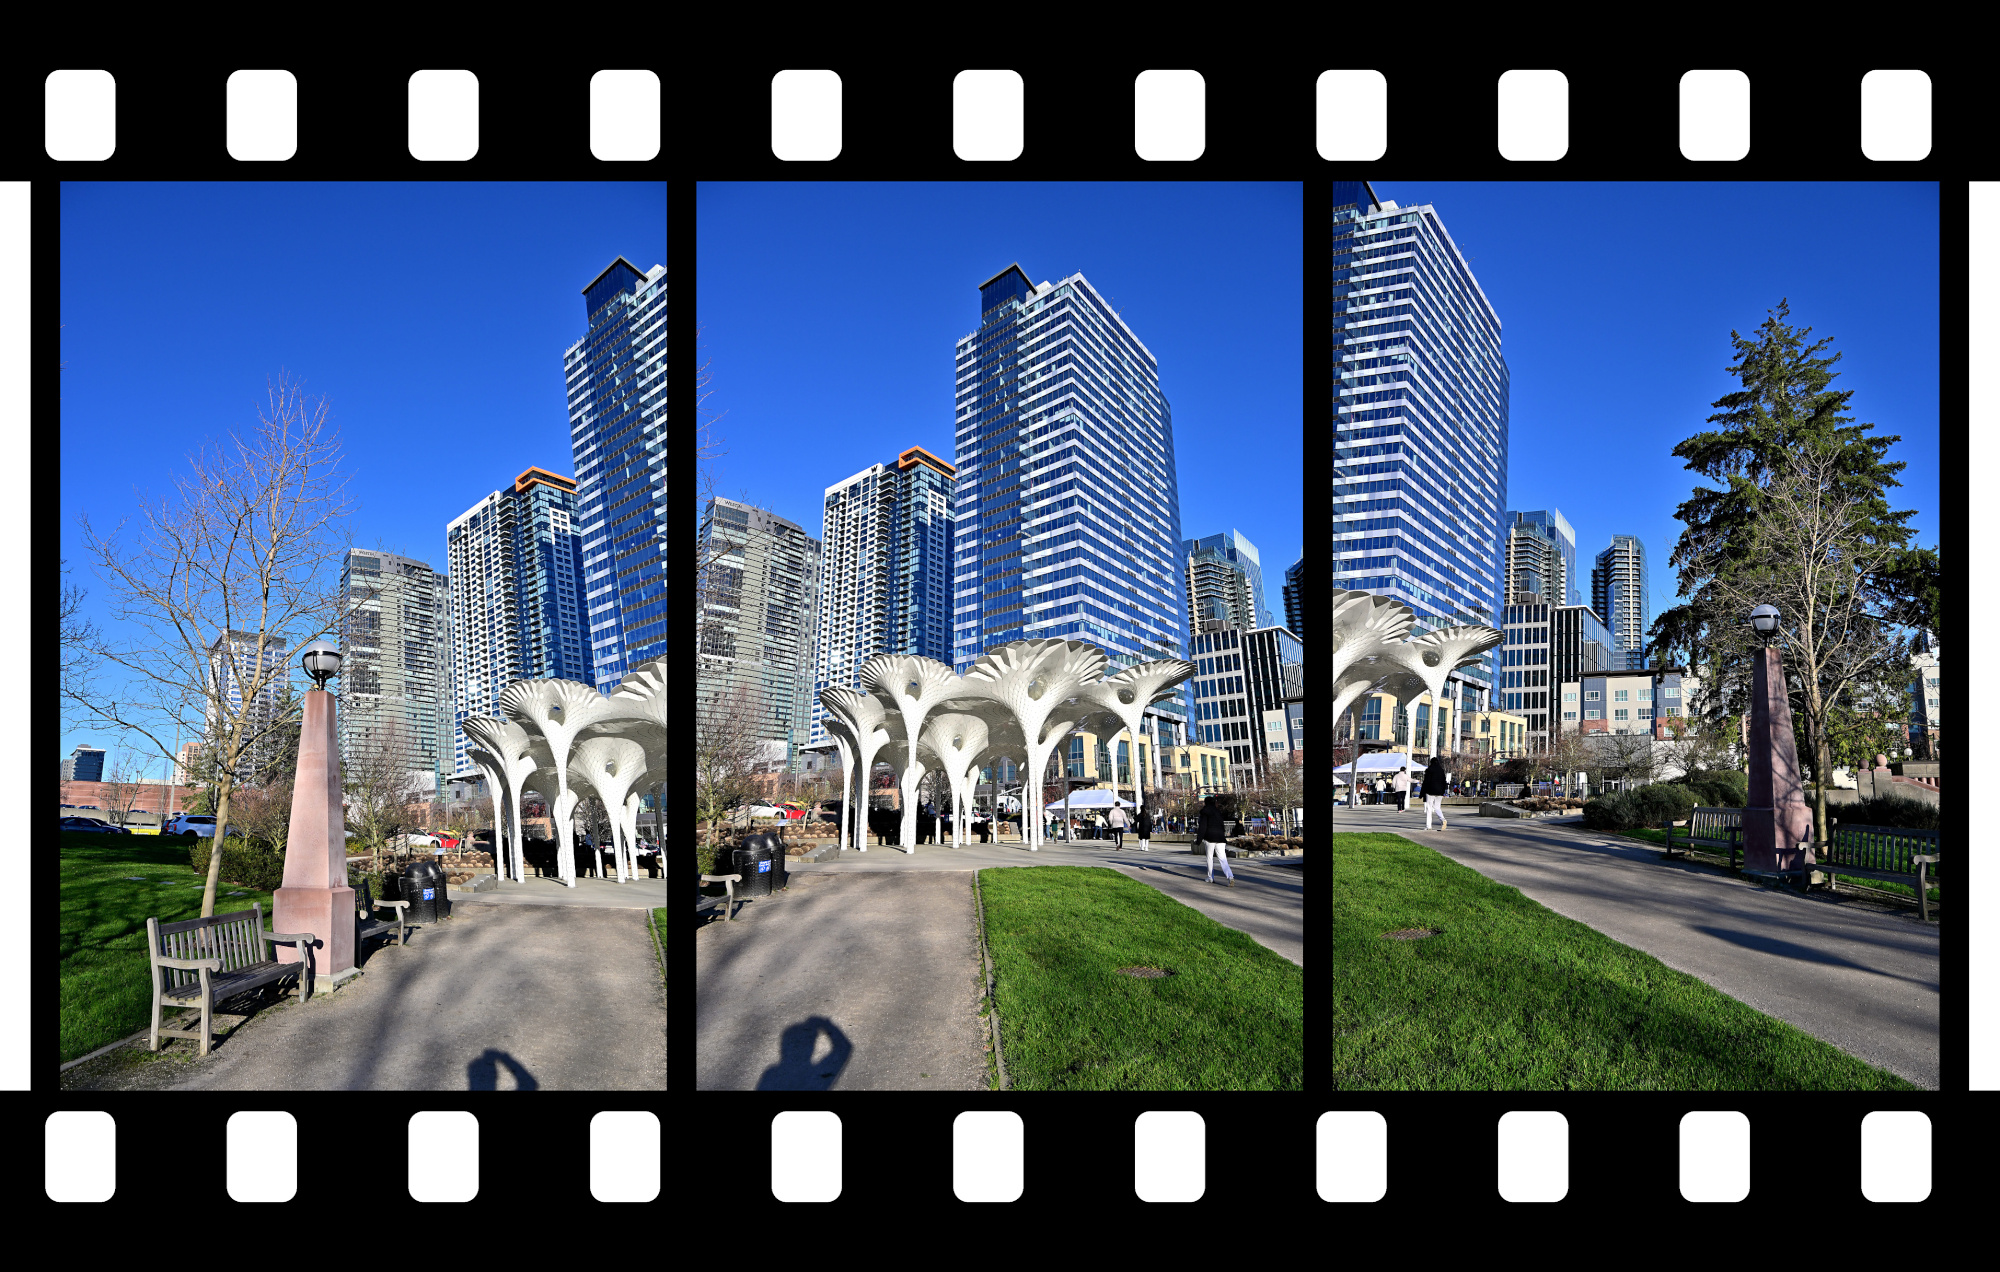
Views from the Walking Path
1/250s f/8 ISO 100/21° 18-140mm f/3,5-6,3 VR f=38mm/57mm
Watched closely under Tiny Director Protocol, a silhouette with the calm presence of an agent making sure the panorama was in order1.
1/500s f/6,3 ISO 100/21° 18-140mm f/3,5-6,3 VR f=140mm/210mm
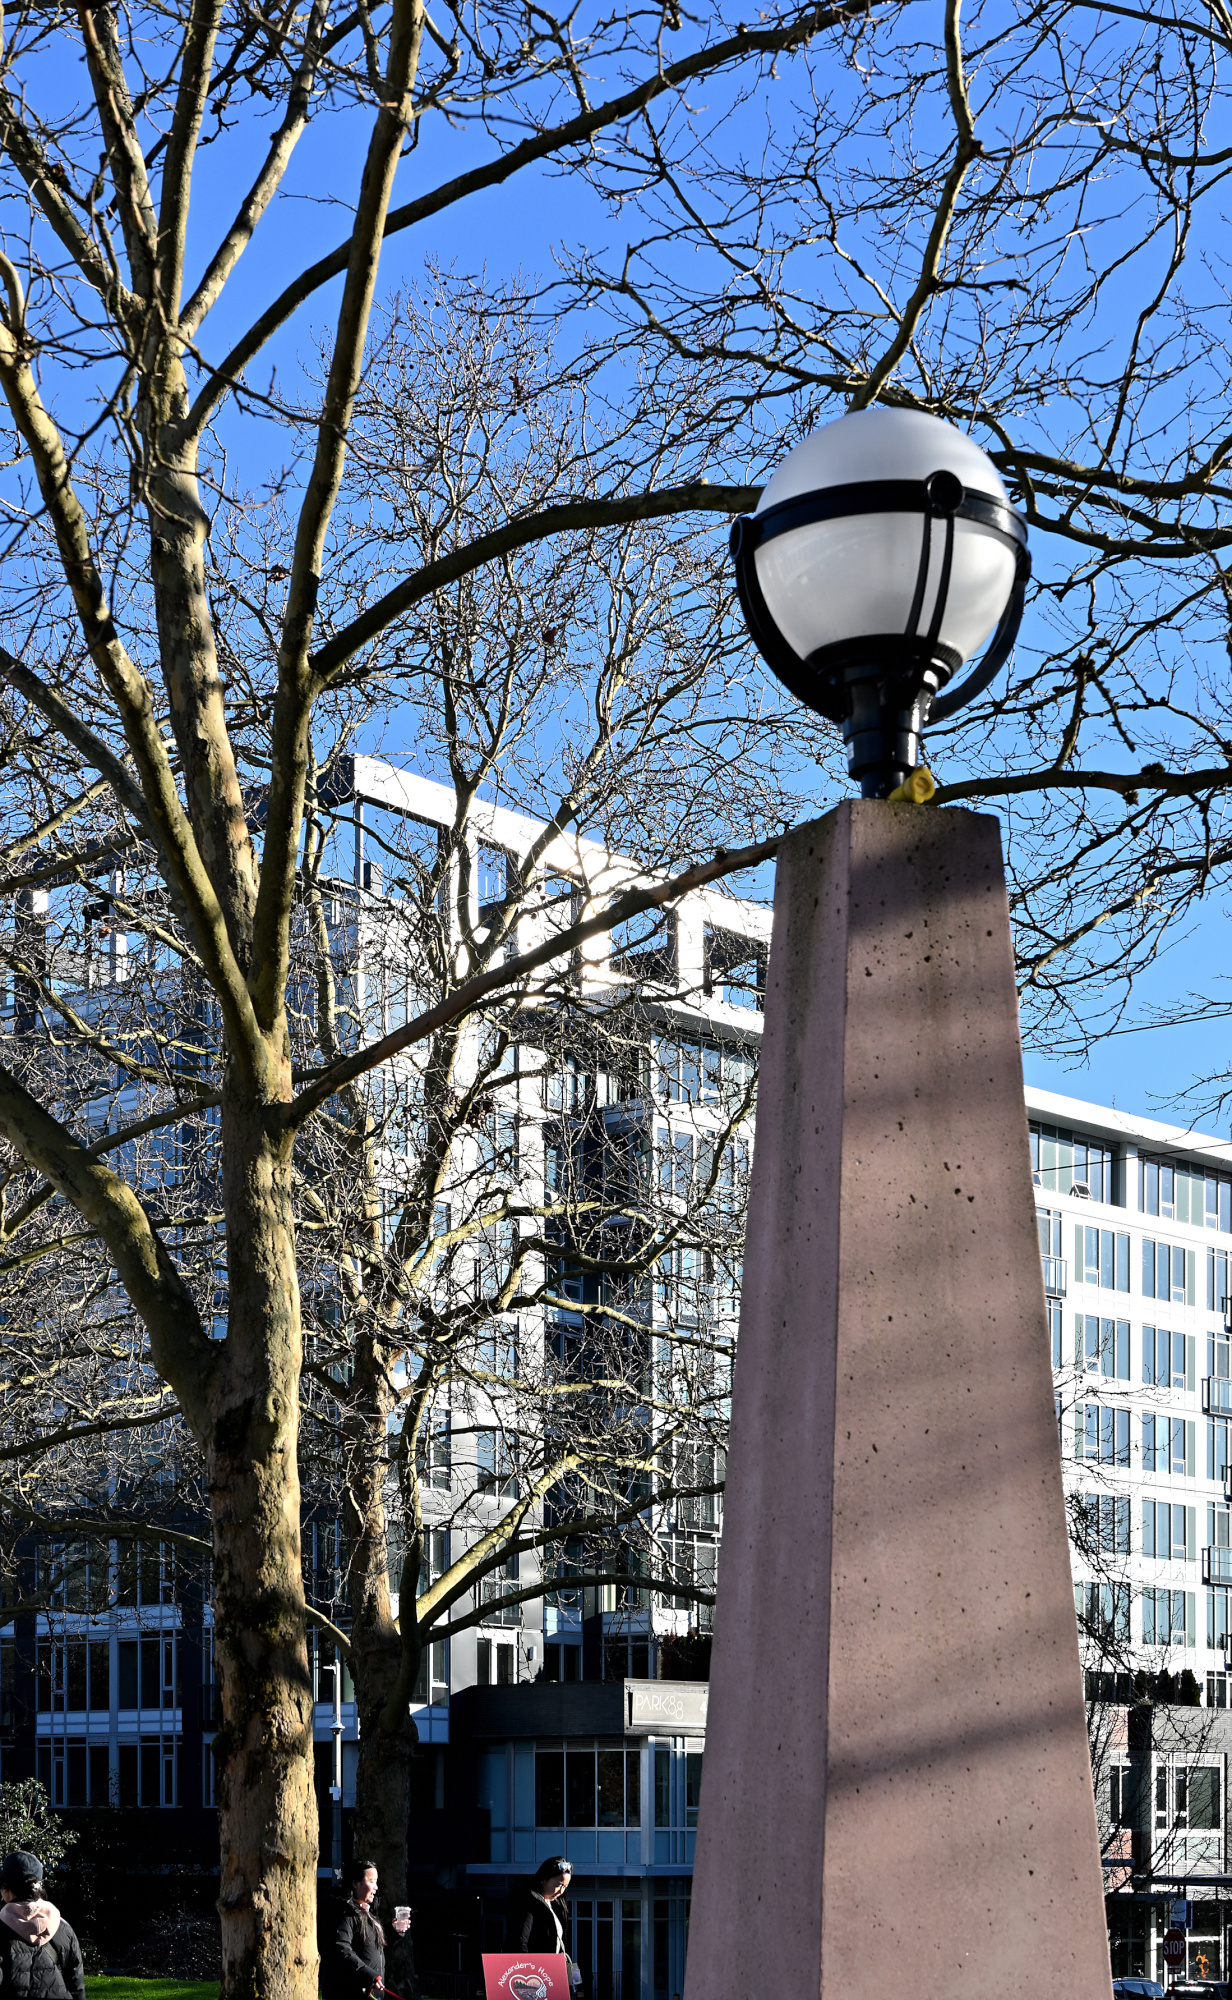
Piloti Scupture2
Geometry and shade, stitched into a brief vertical view.
1/250s f/8 ISO 100/21° 18-140mm f/3,5-6,3 VR f=18mm/27mm
Piloti scupture taken with two vertical aligned pictures.
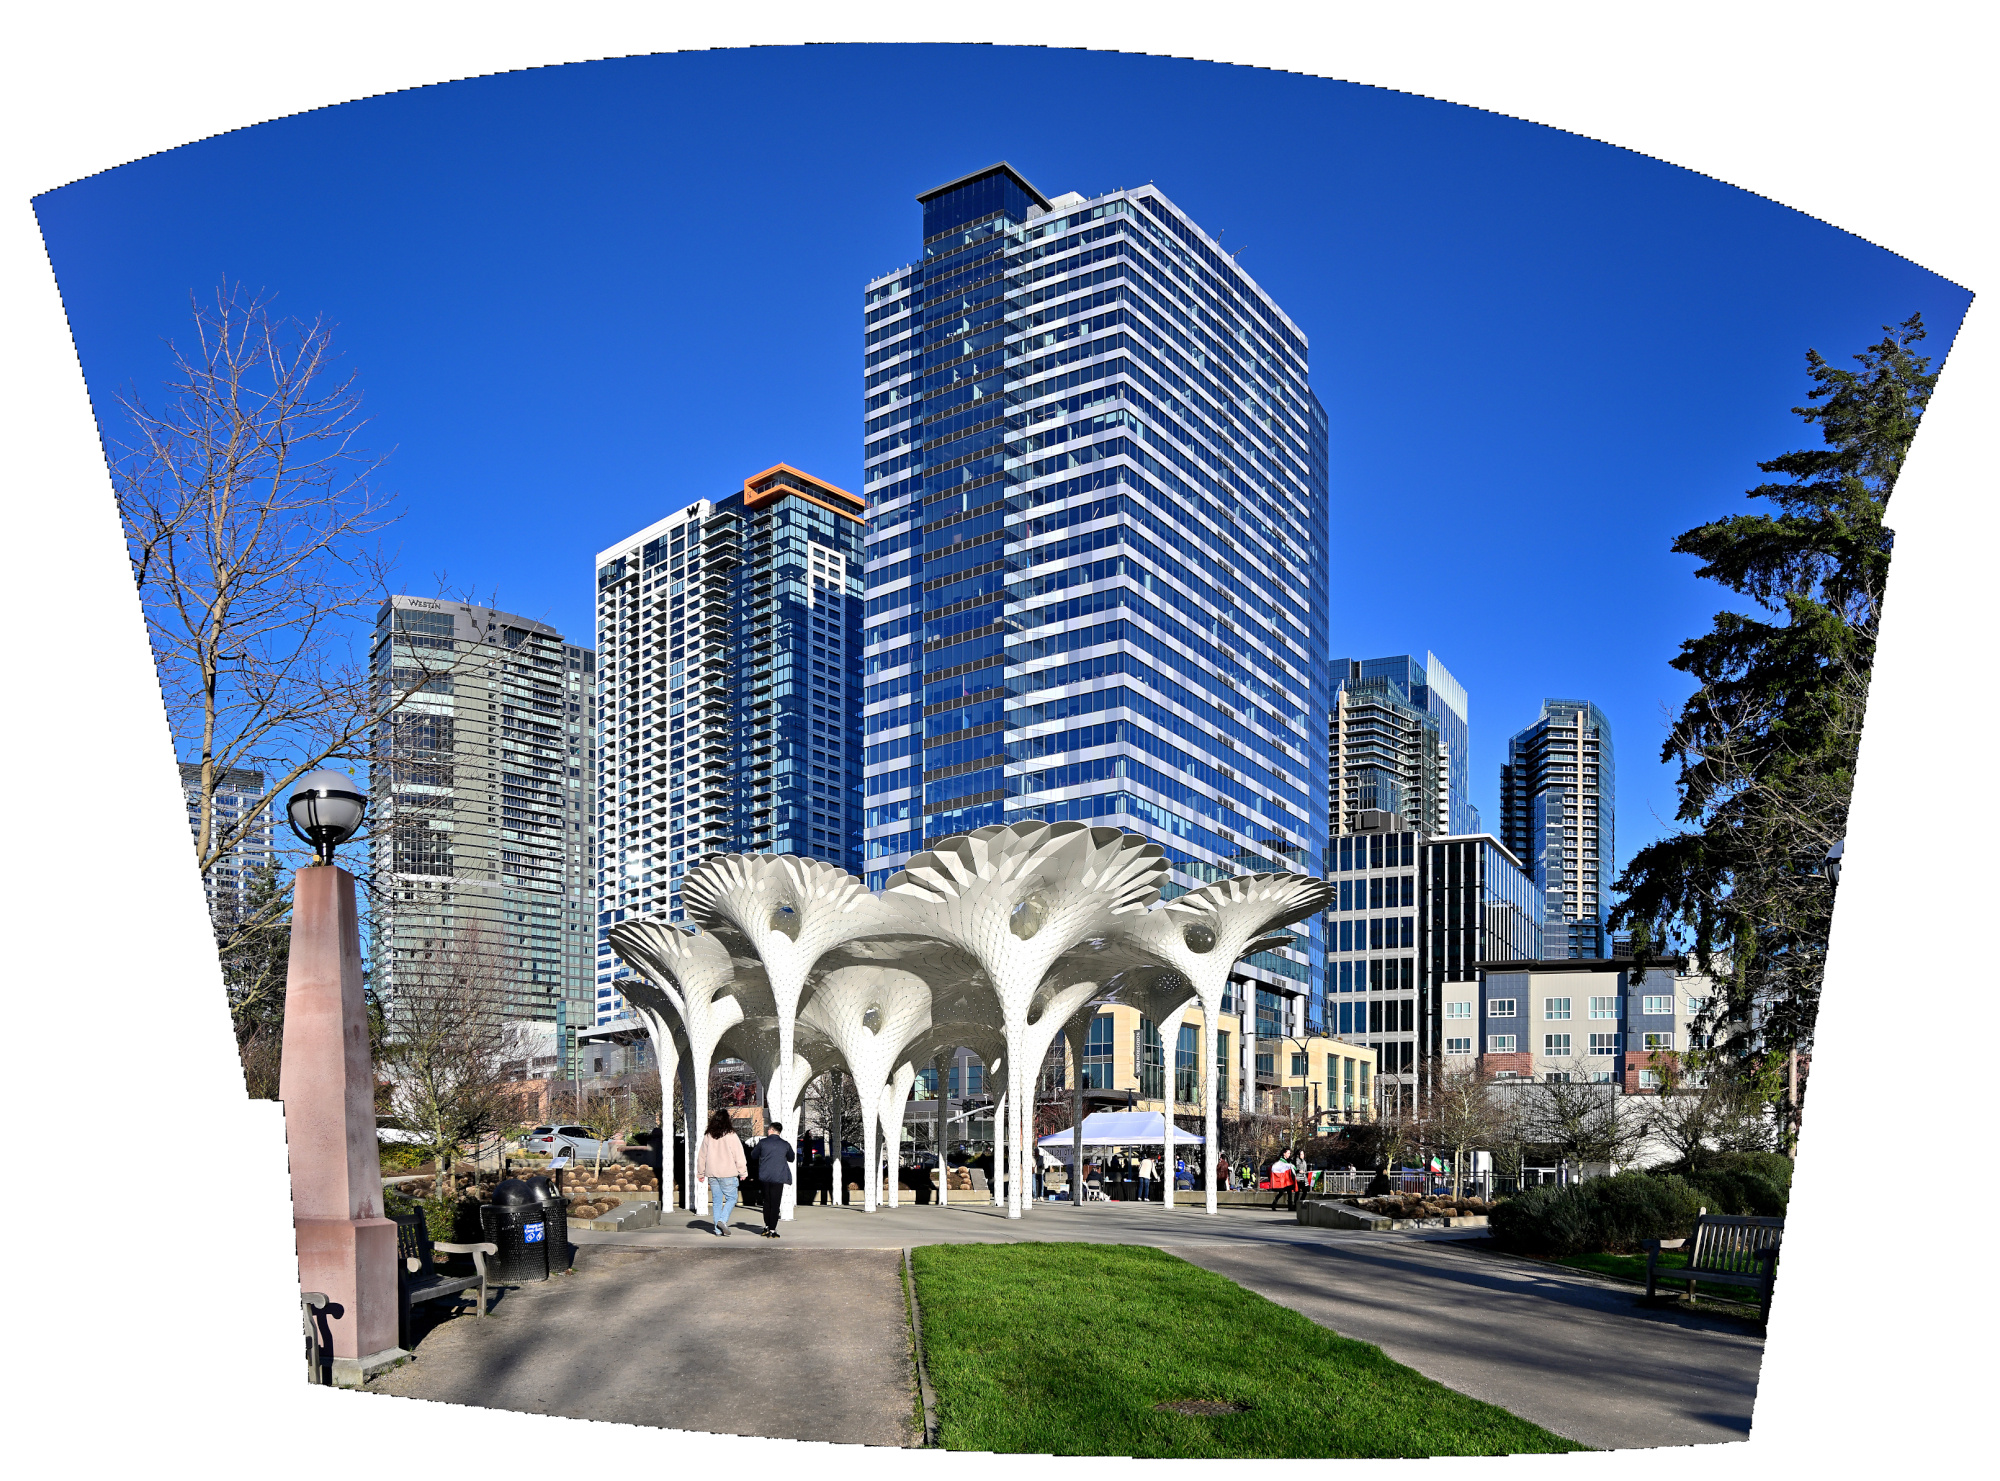
1/320s f/9 ISO 100/21° 18-140mm f/3,5-6,3 VR f=18mm/27mm

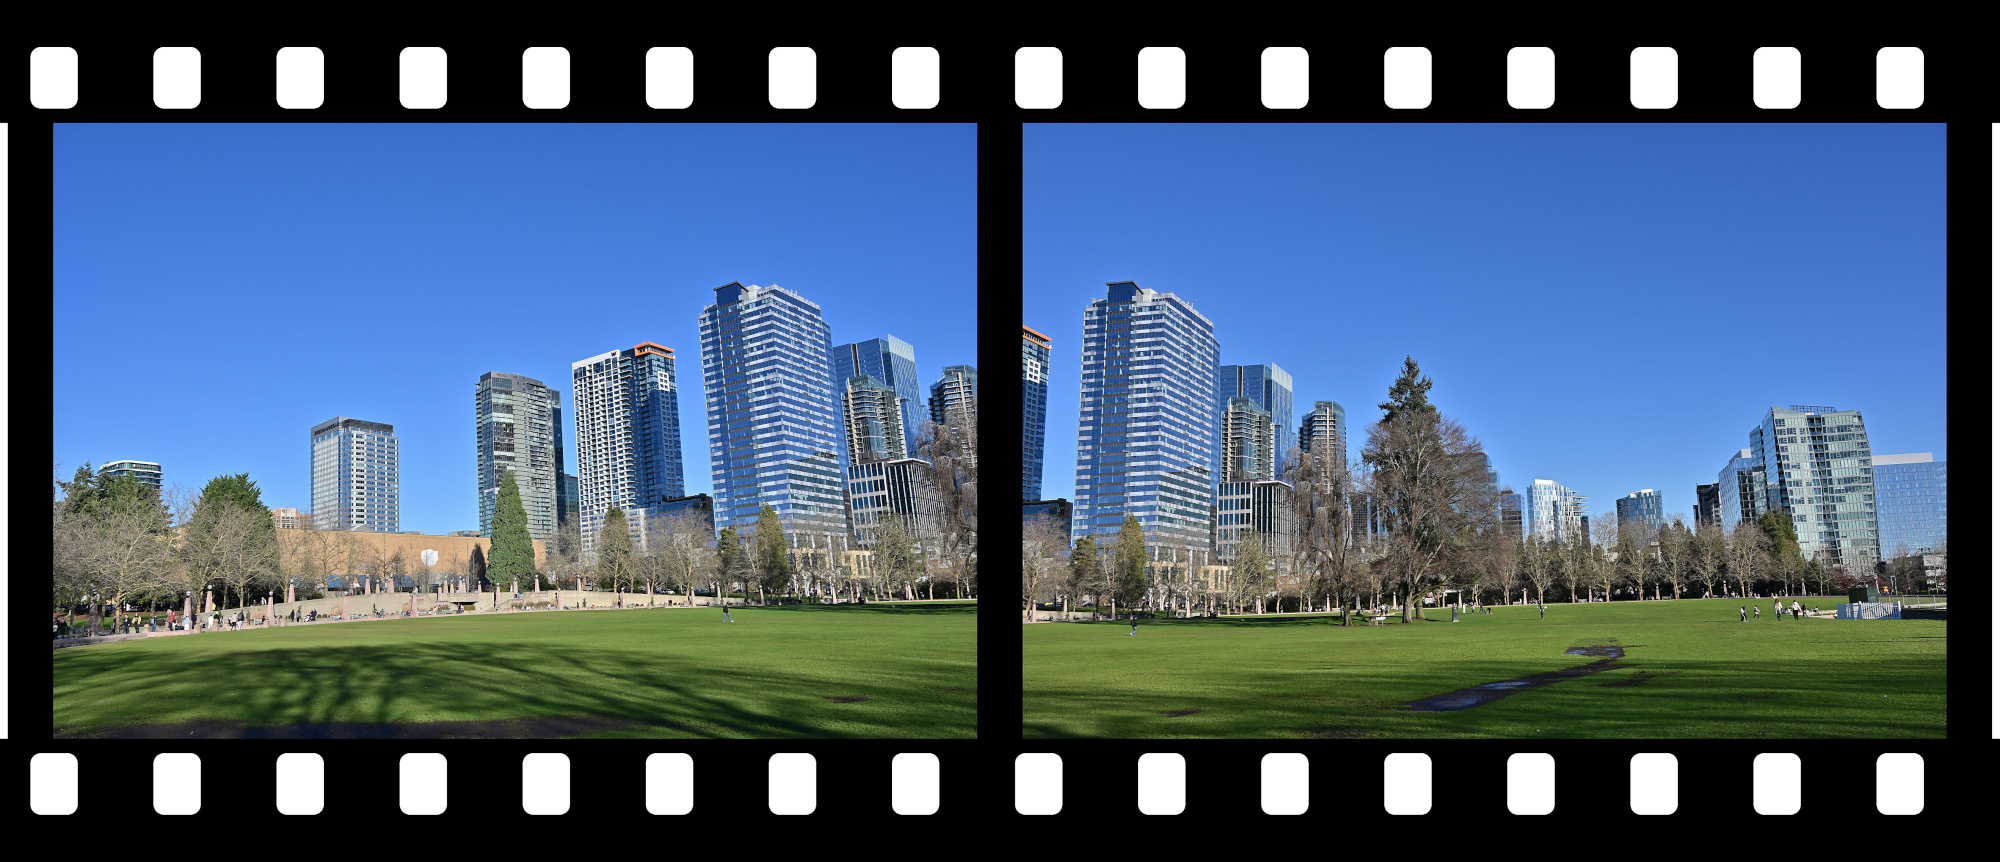
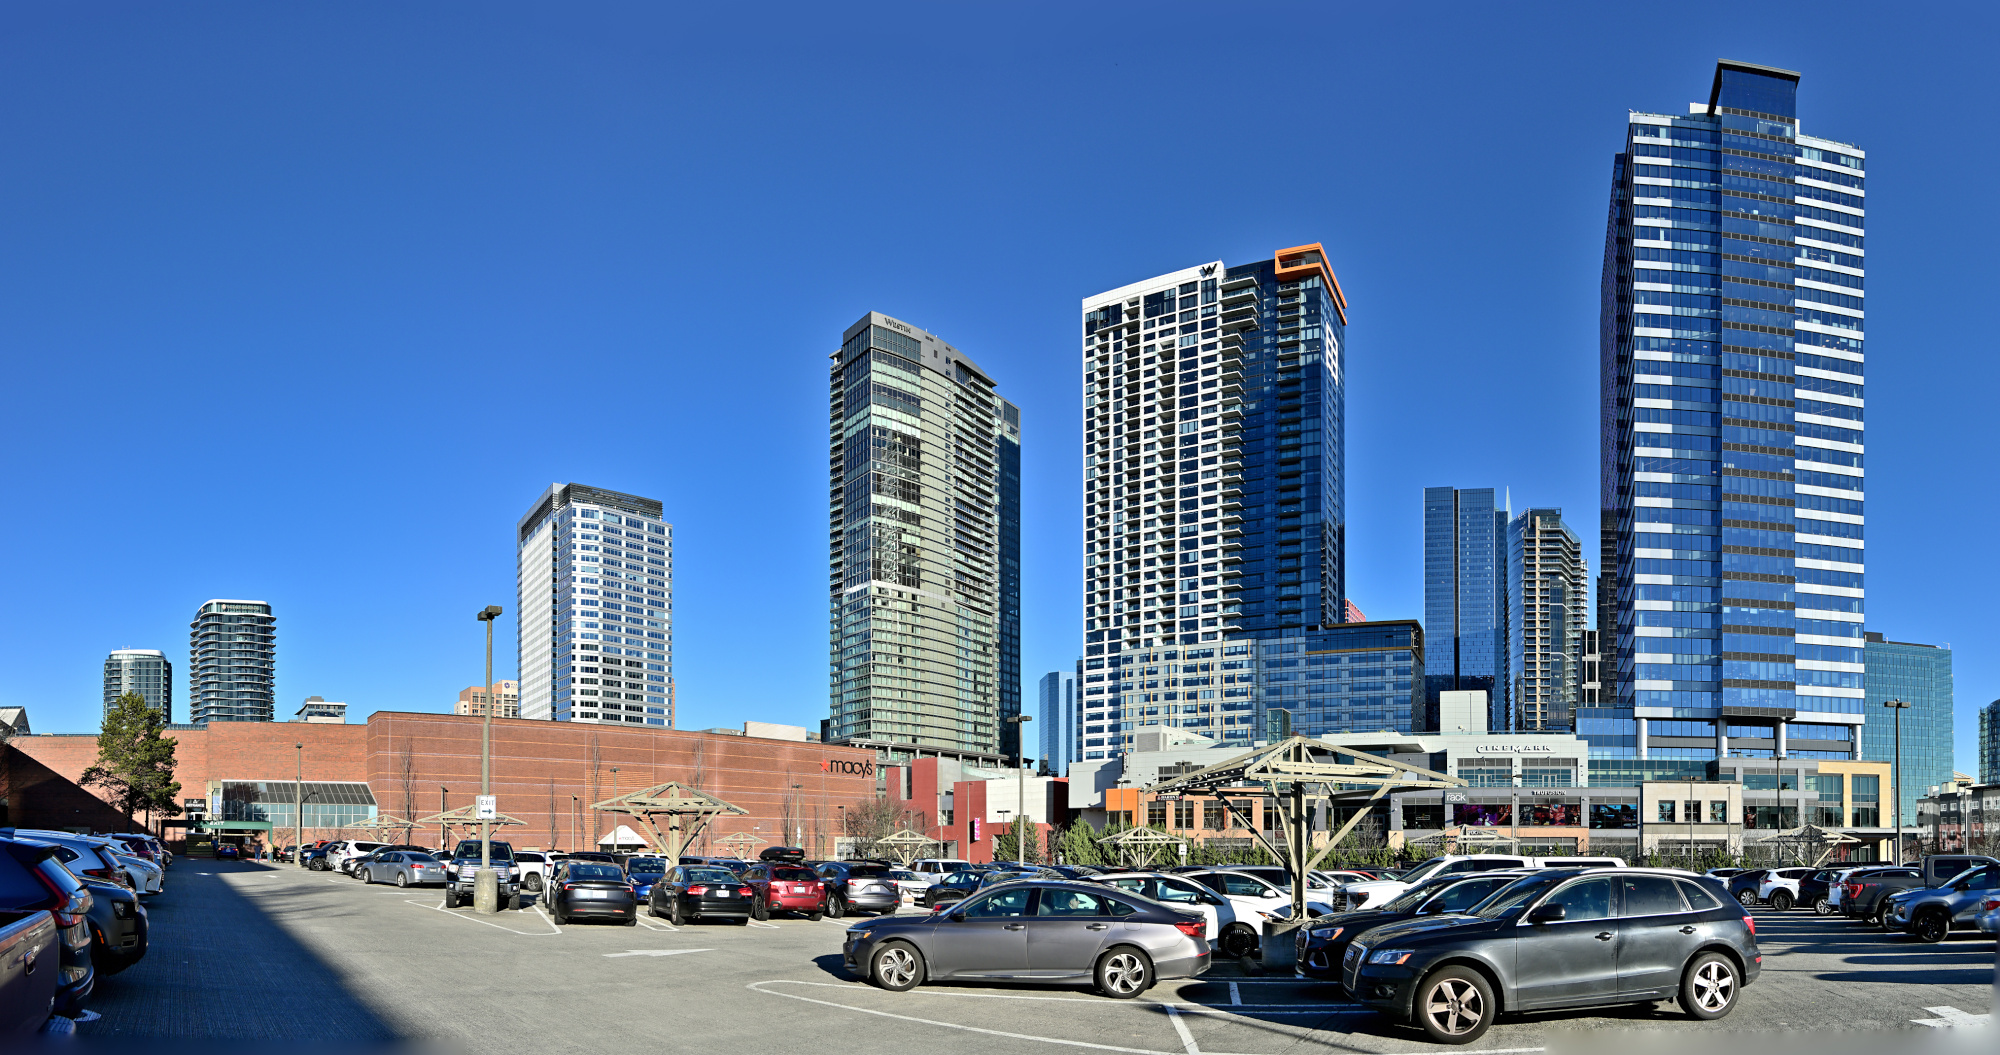
Back at the Bellevue Square
A clear sweep across the skyline, settling the scene before the light shifted again.
1/800s f/5,6 ISO 100/21° 18-140mm f/3,5-6,3 VR f=21mm/31mm
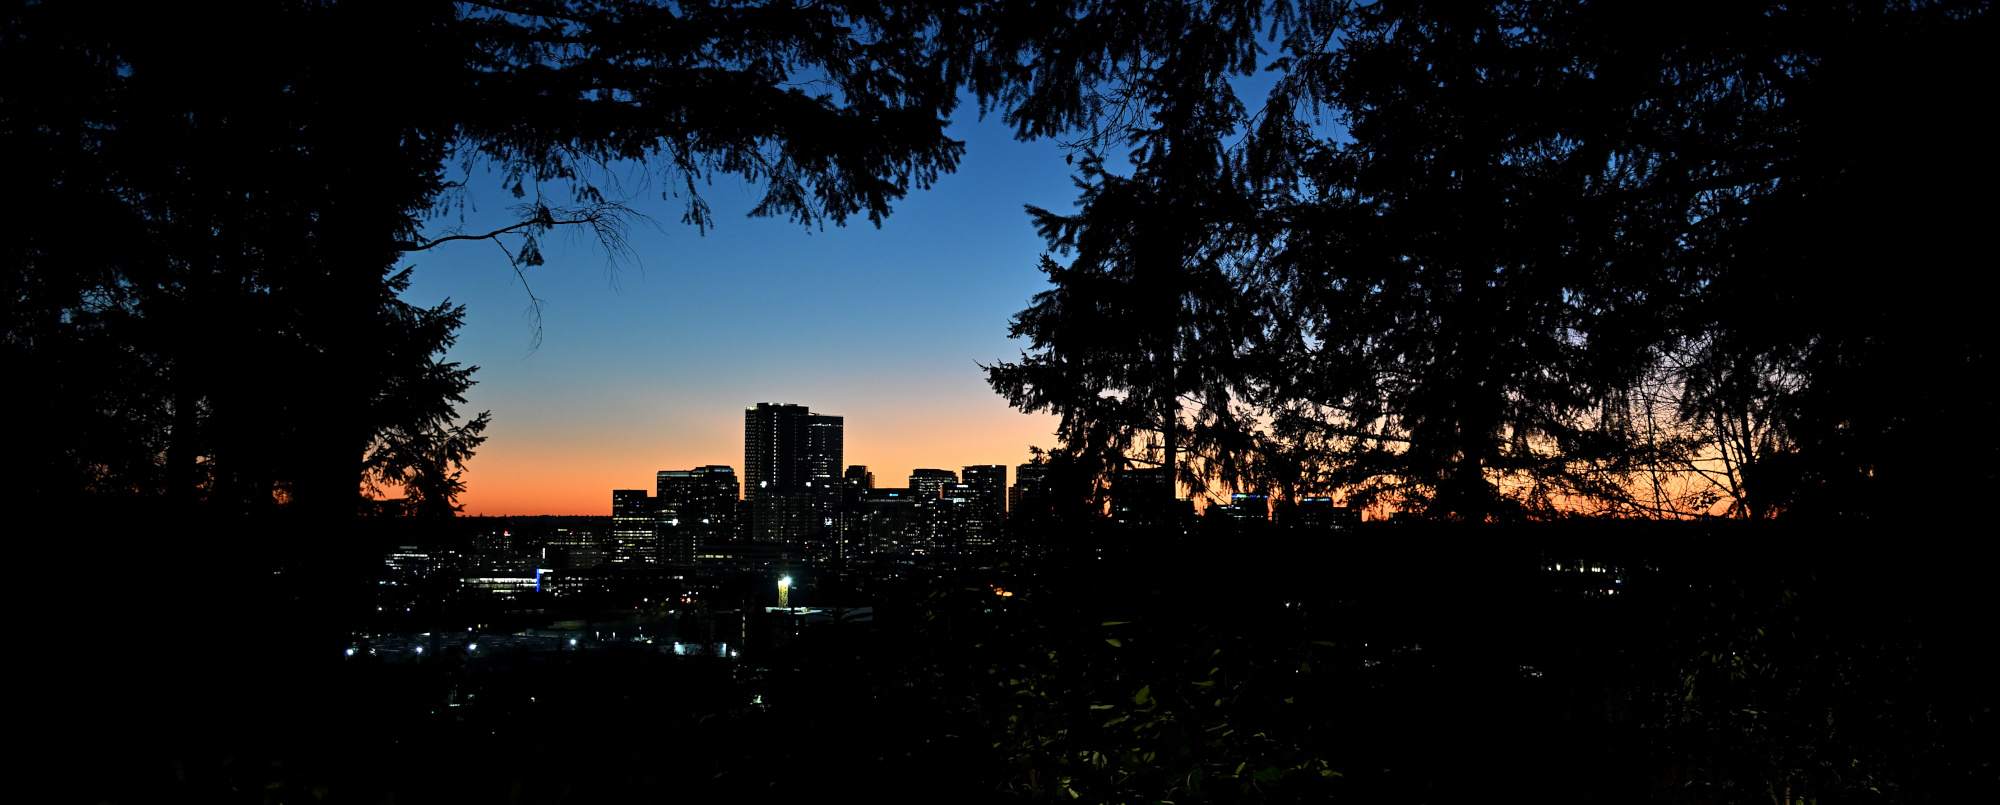
The Last Frame
And the sunny day ended quietly over Downtown Bellevue.
1/30s f/3,2 ISO 640/29° 16-50mm f/2,8 VR f=25mm/38mm
See also panoramas from the Bellevue Downtown Park in 2025
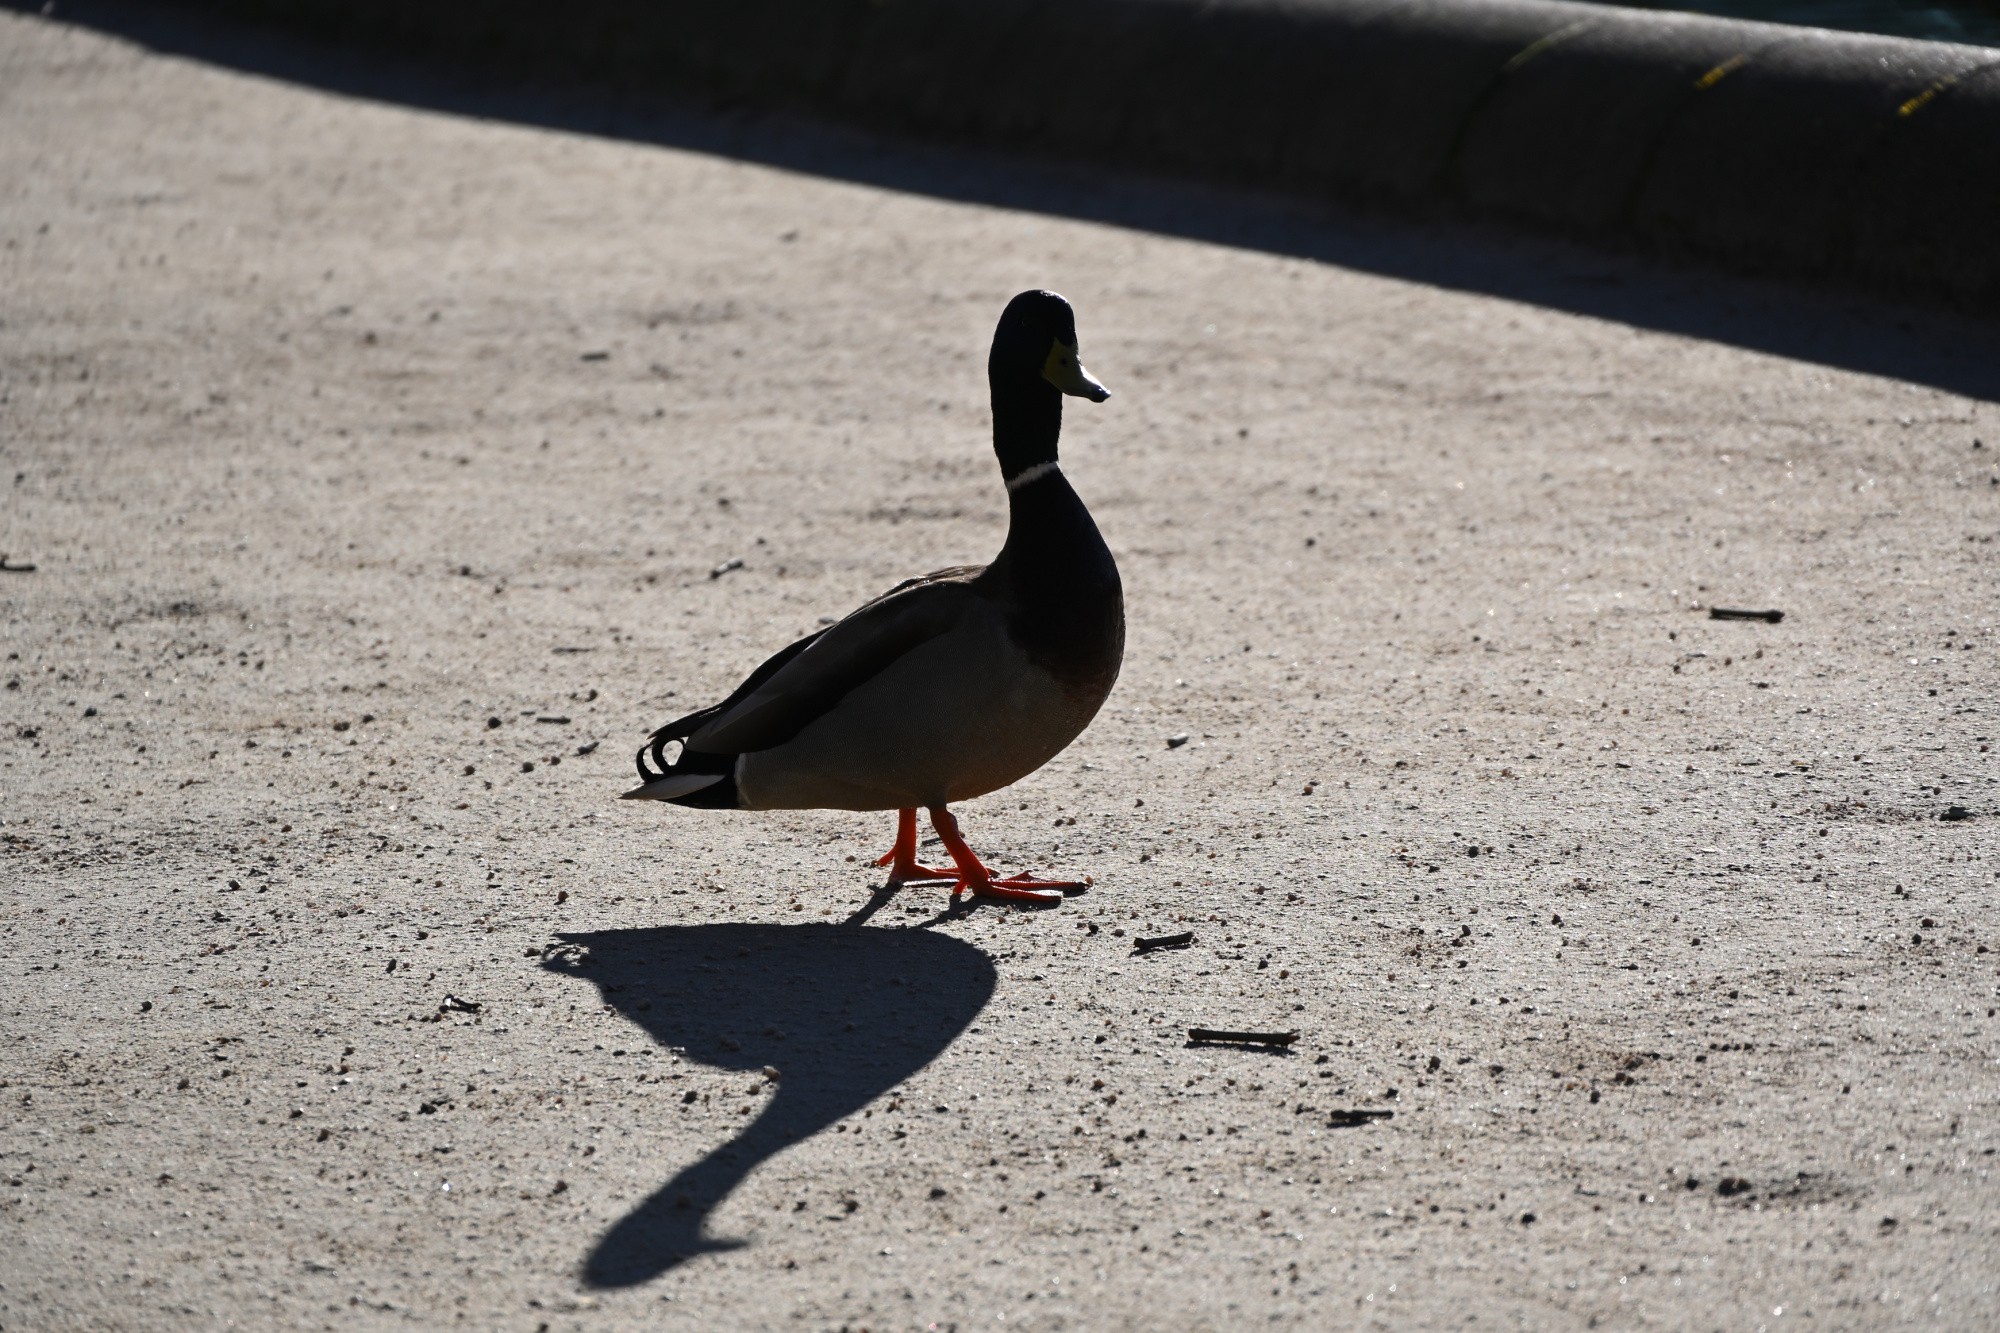
-
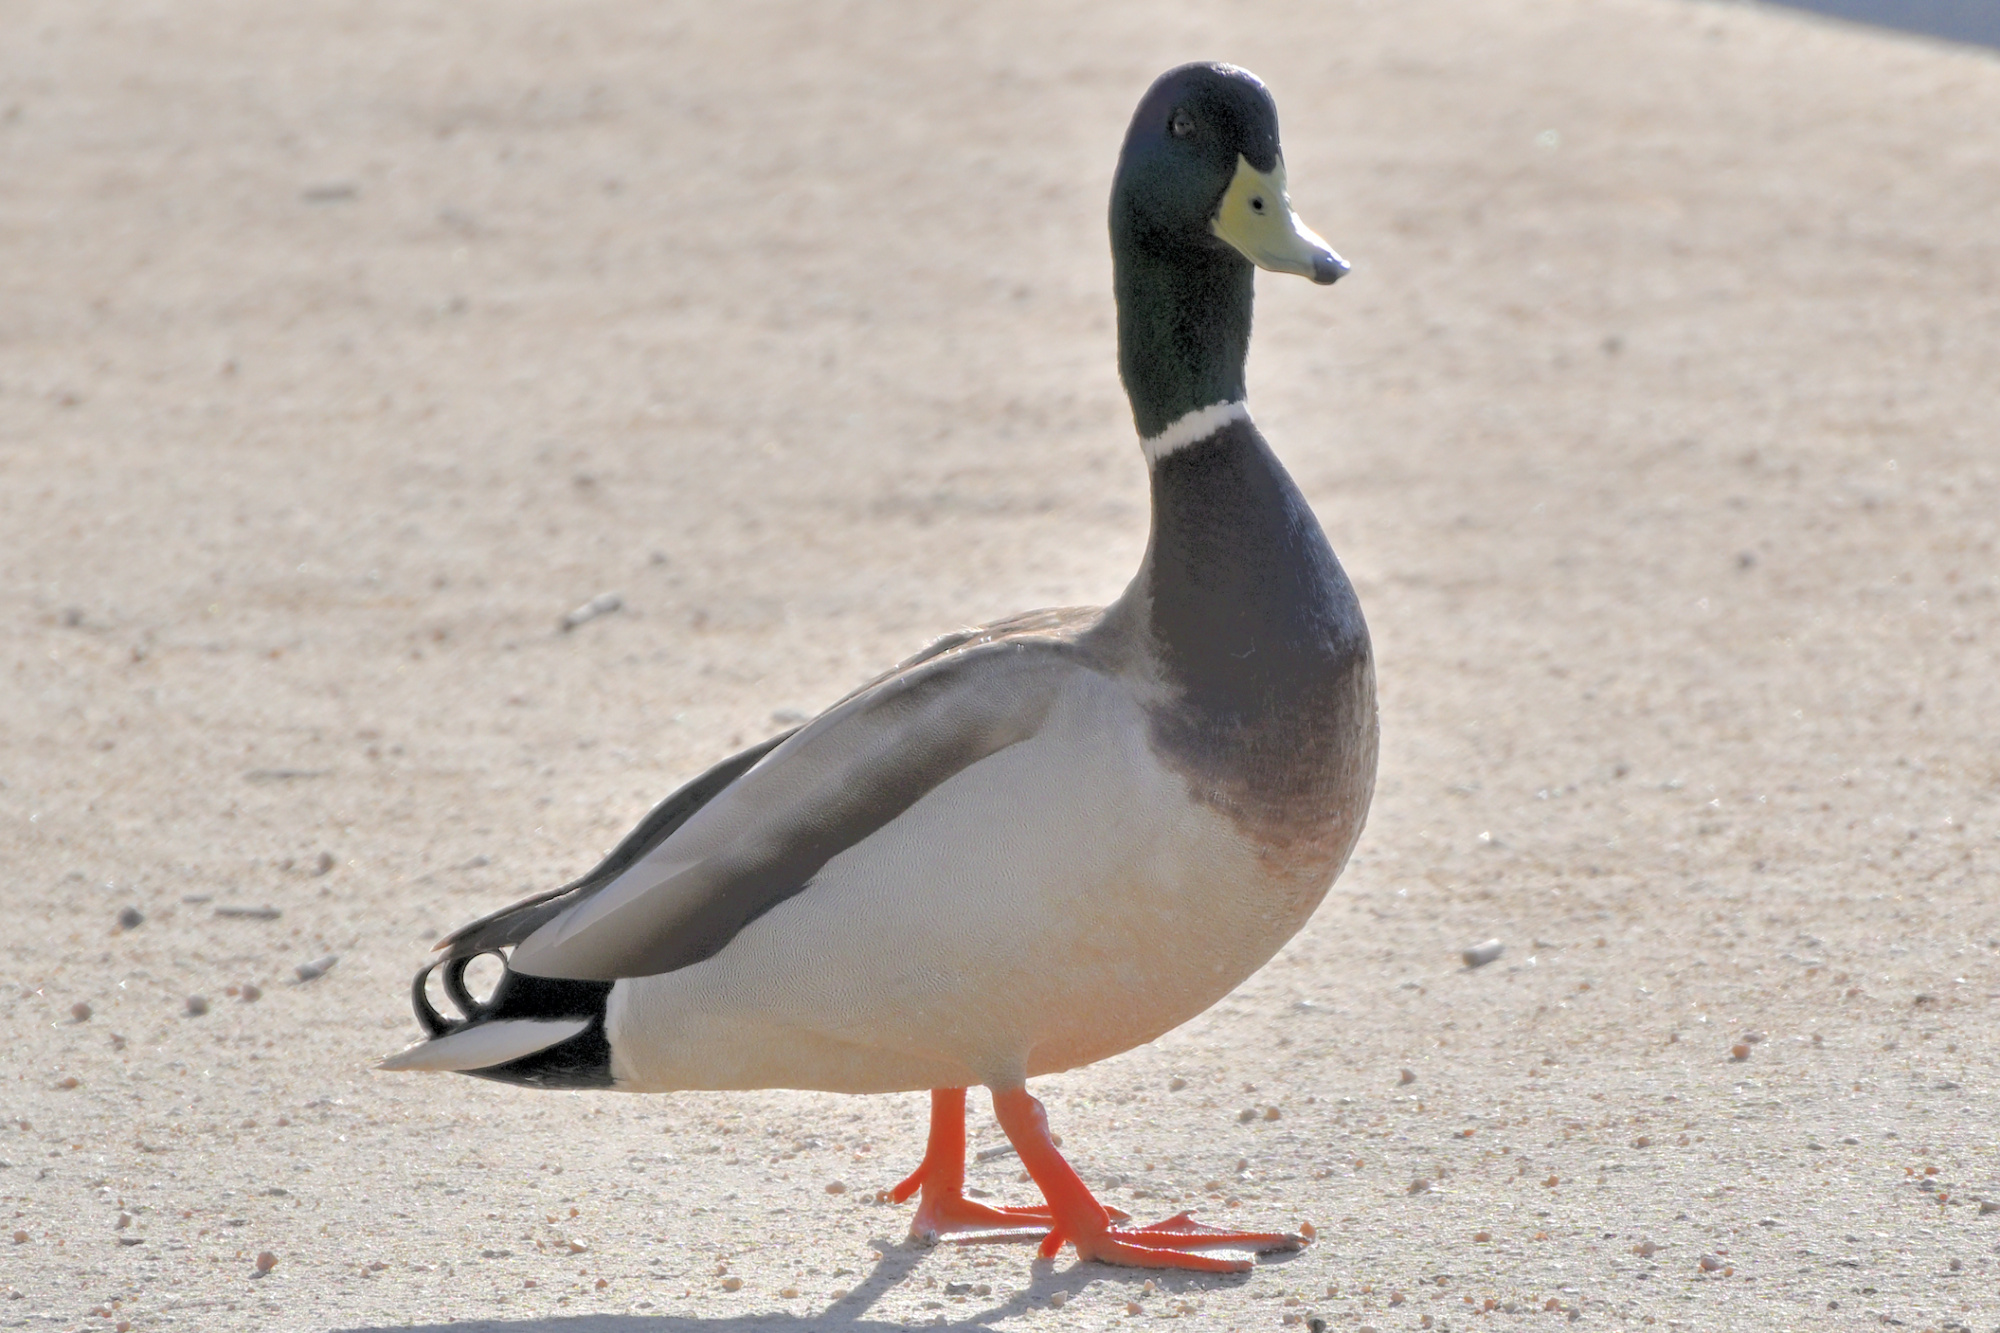
With Gaze Vector Analysis the observer was identified as Agent Ducky.
ADK 07, internal
Field Operative for the Panorama Supervision Unit
Special focus on persistent observation
Eyes on scene, confirmation by Gaze Vector Analysis
Identity confirmed as Agent Ducky
Tiny Director Protocol first noted during the prior observation. ↩
-
-
Winter Escape in Sarasota
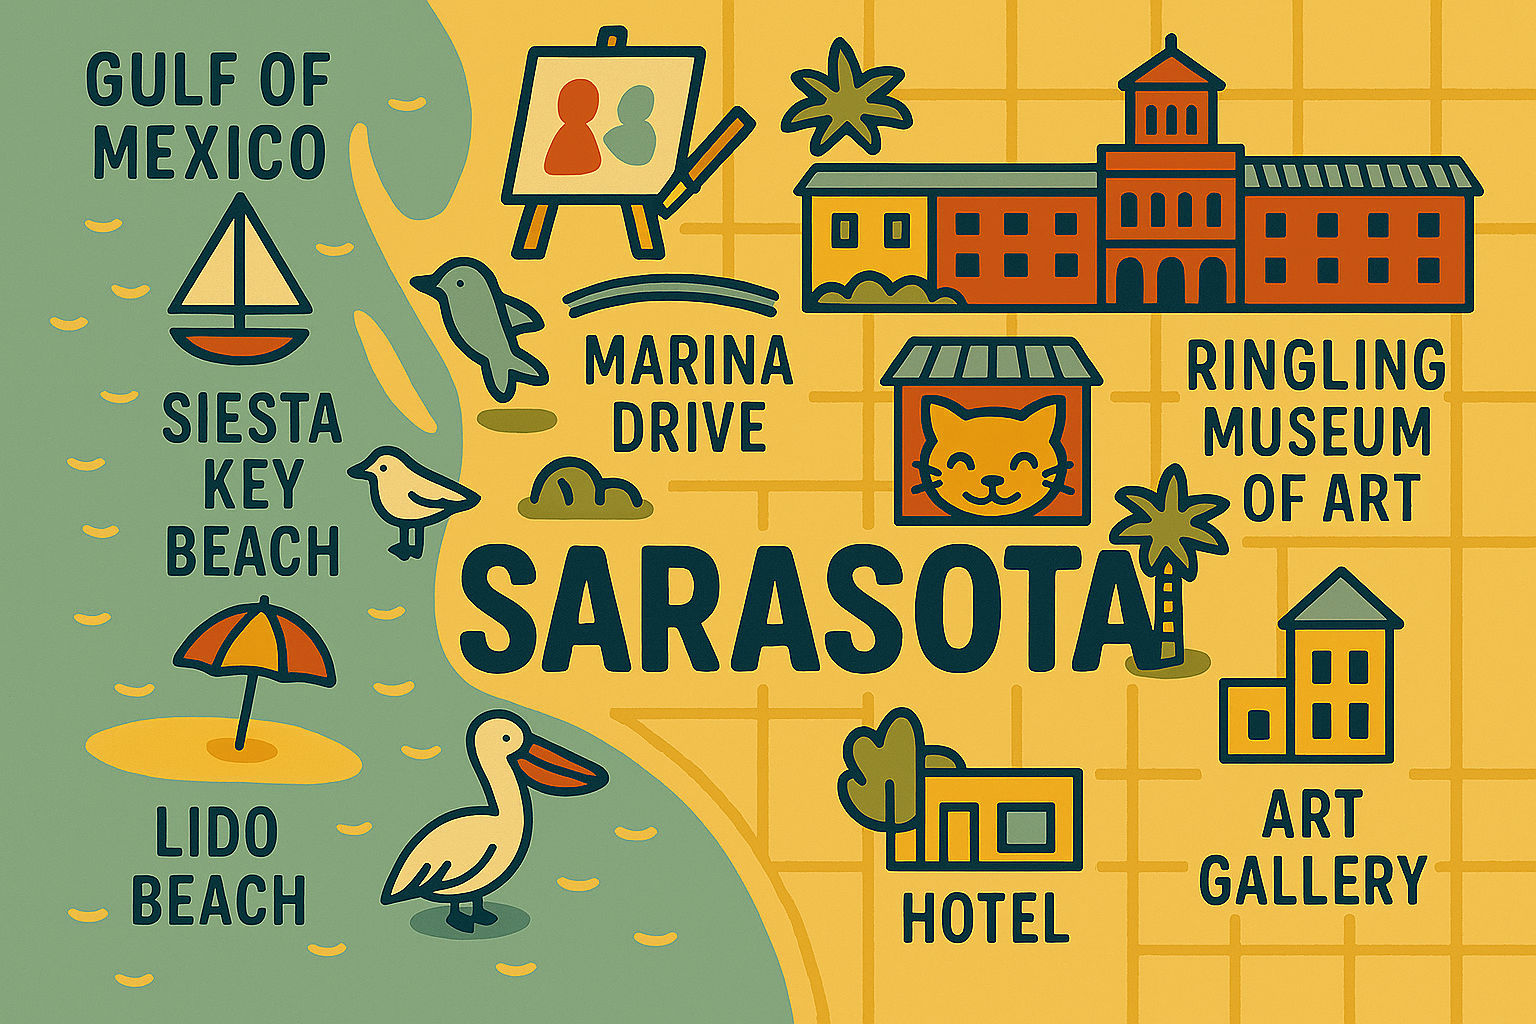
Sarasota is a coastal city in Southwest Florida on the Gulf of Mexico. The horizon opens to the west, the afternoon light settles low across the water, and shallow tides draw long arcs along the coast. North is the Tampa Bay area, while to the south the beaches open into clear water and soft light.
It is a place that opens fully only in a wide view, and the panoramas from those days capture a completeness that no simple photograph can match.
A panorama brings the whole scene into the picture instead of only the view in front of you.
- Art Ovation Hotel
- The Jumping Fish
- Gulfstream Park
- Marina Drive
- War Memorial
- Five Points Roundabout
- Siesta Key Beach
- Bayfront Park
- Milan Art Gallery
- Katy's Cat Cafe
- Farmers Market
- Ringling Museum of Art
- Coquina Beach
- Lido Beach
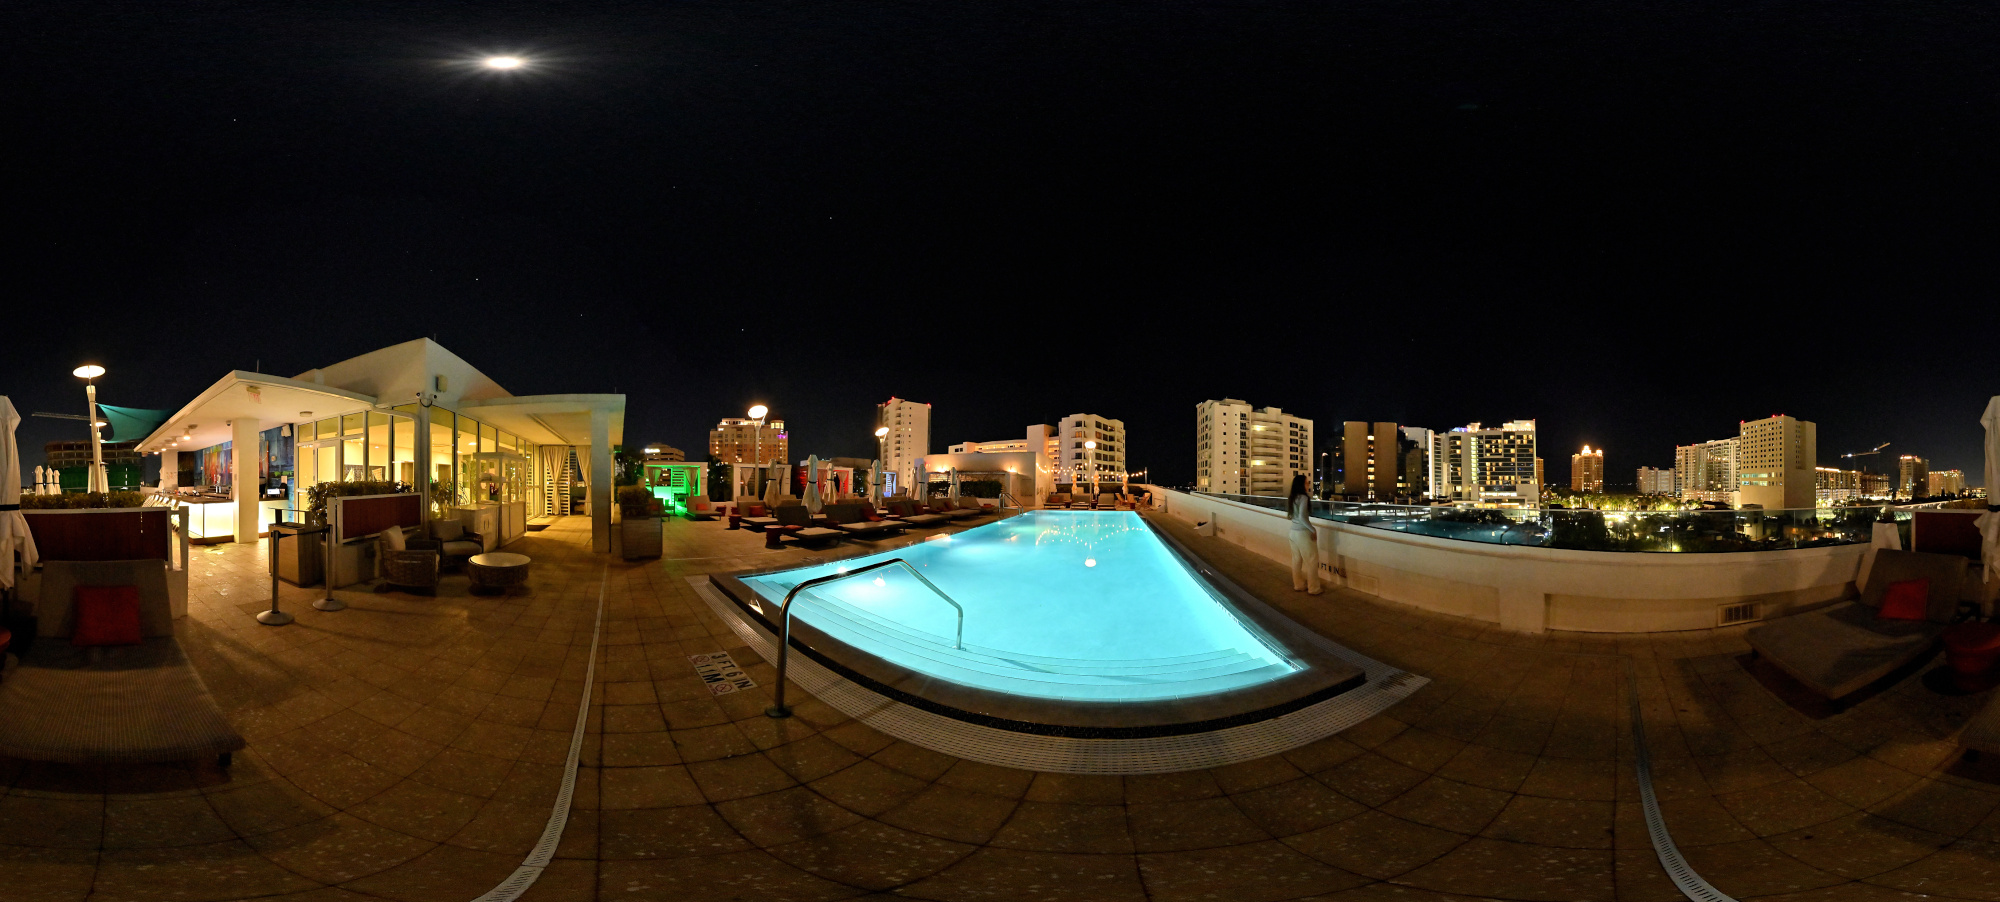
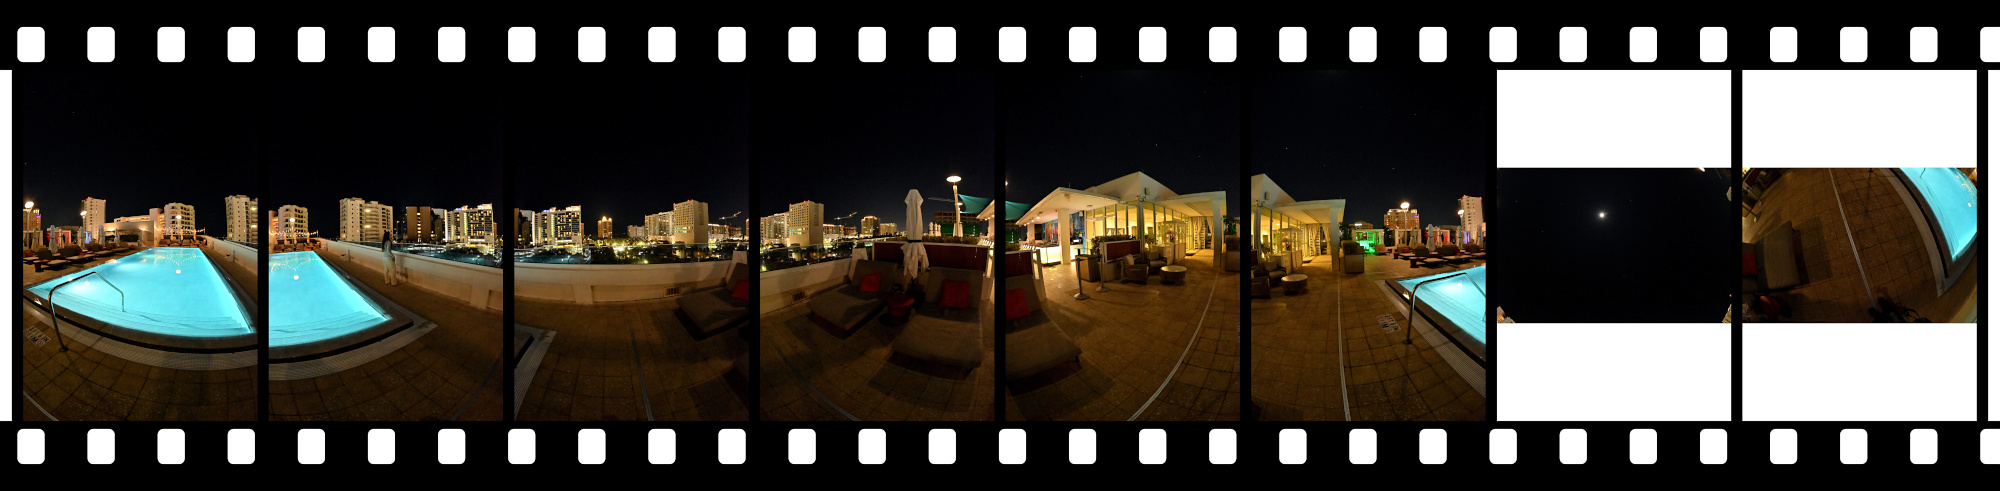
Art Ovation Hotel
An evening with a clear sky and a full moon above the rooftop pool marked the beginning of a winter escape in Sarasota, a quiet moment that shaped the days ahead.
Interactive Panorama Rooftop Pool
1/10s f/5,6 ISO 2500/35° f=7,5mm
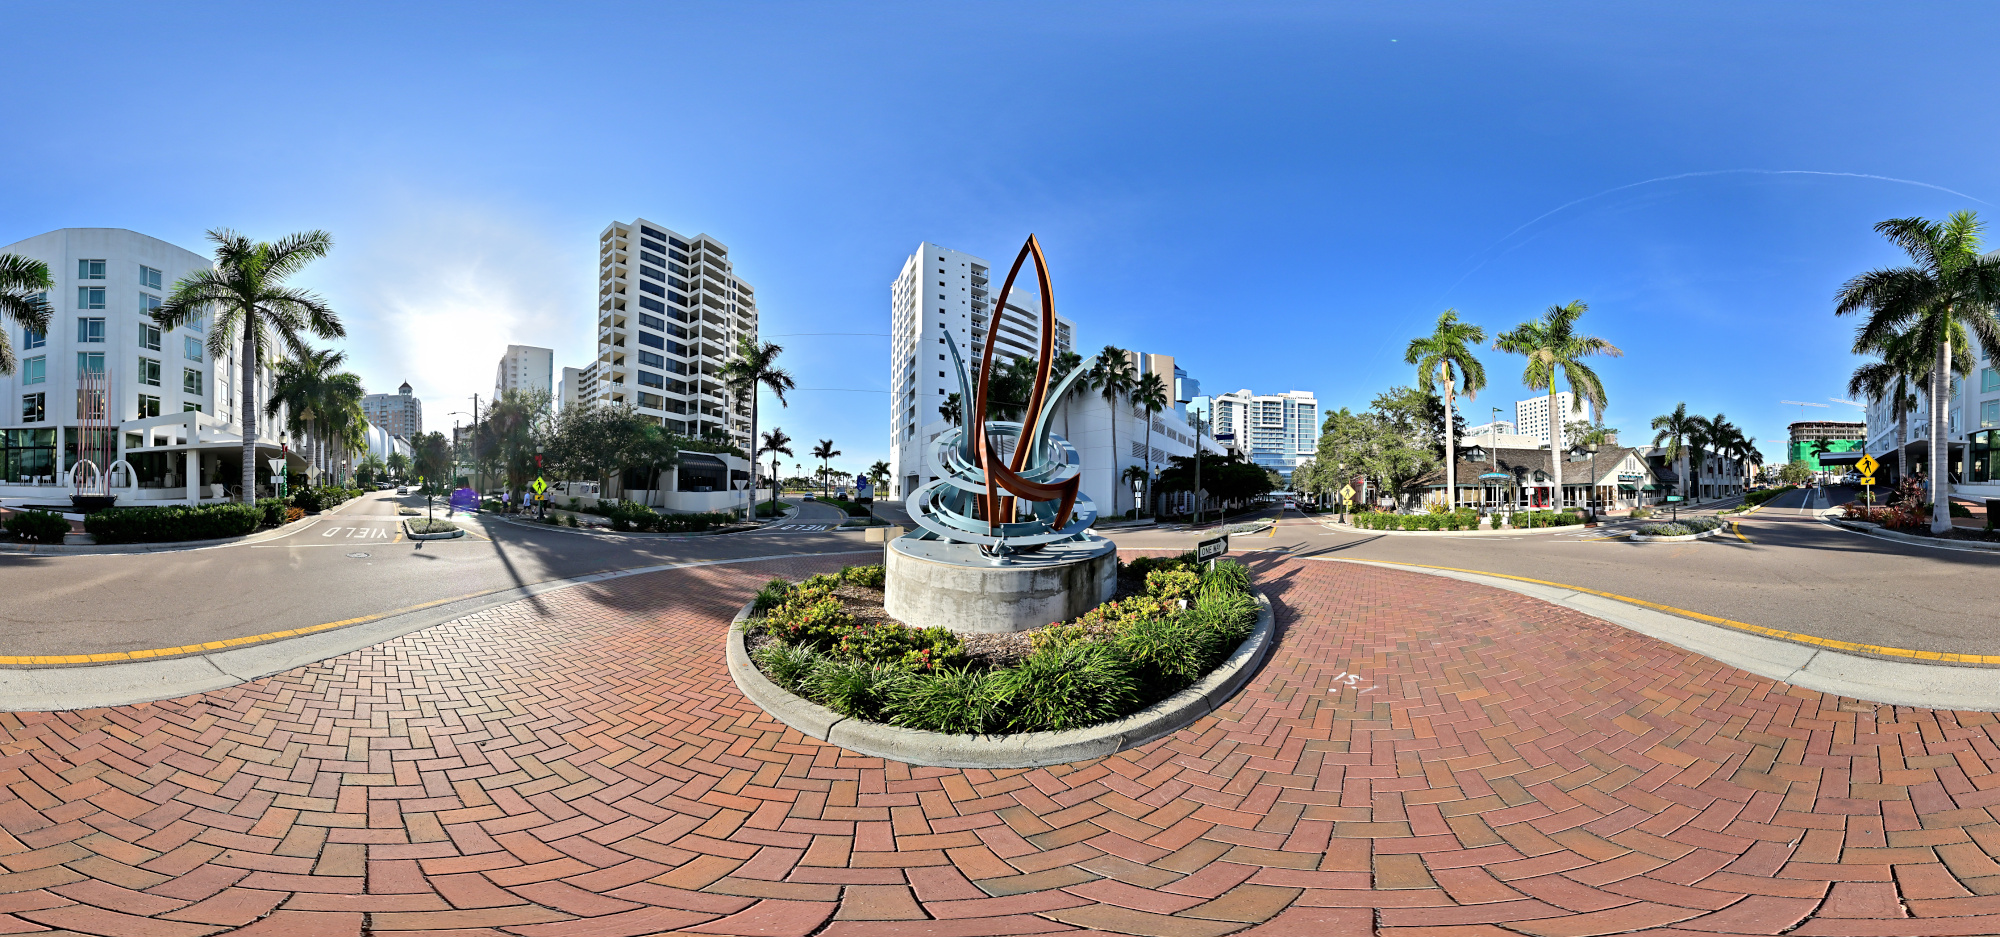
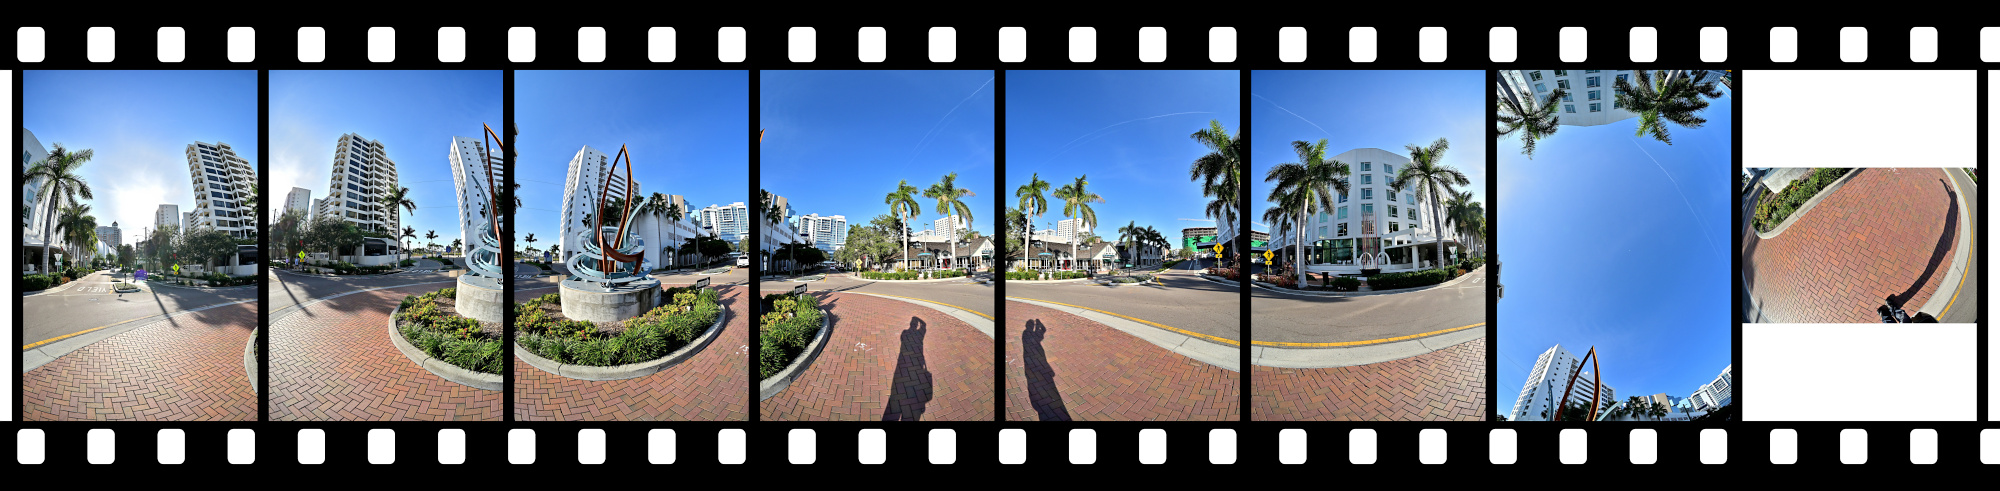
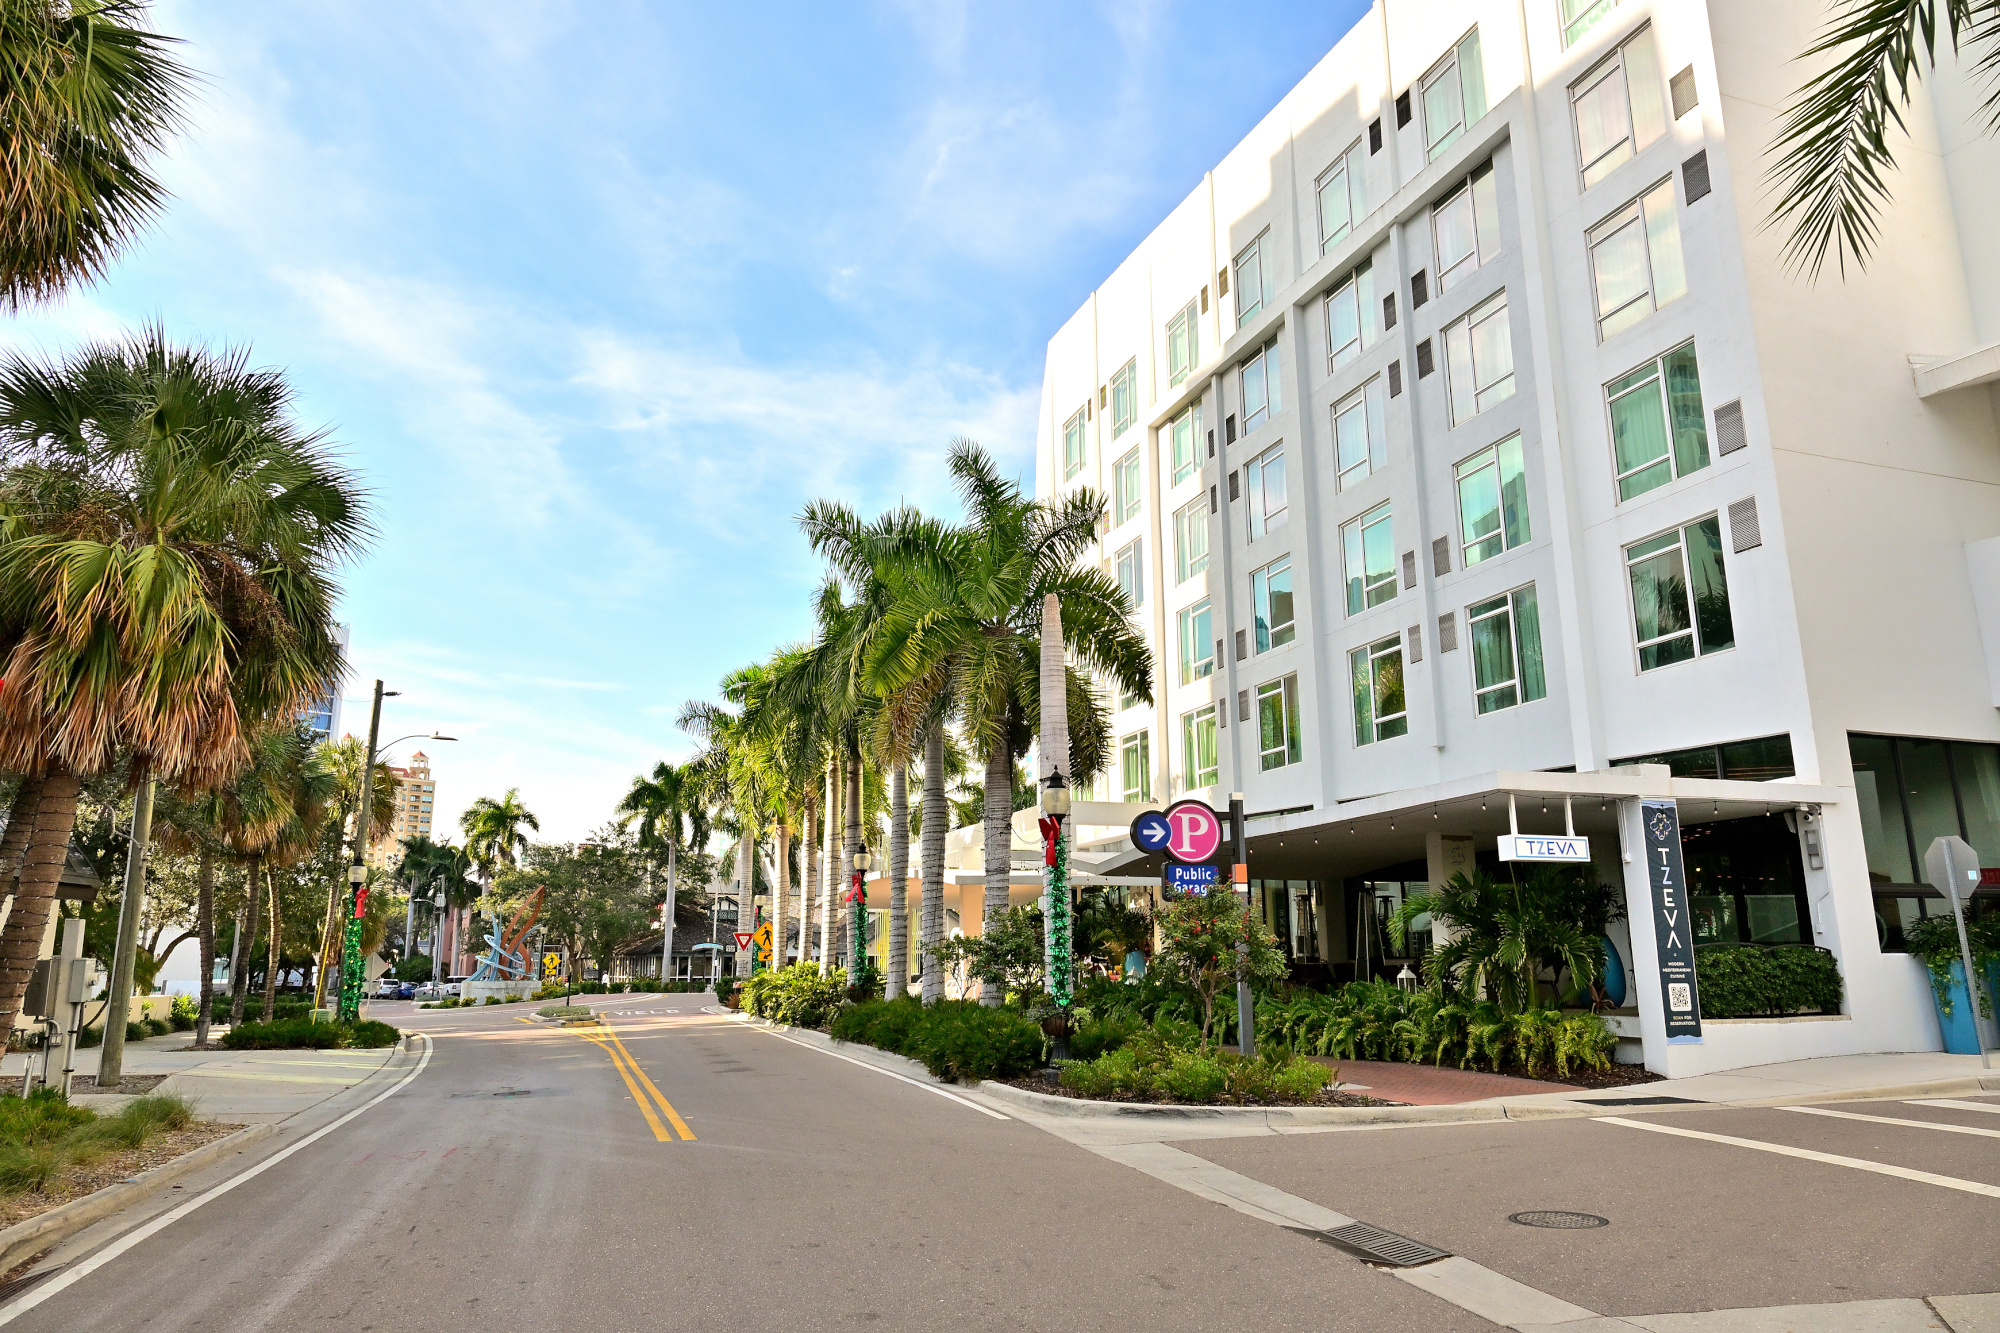
The Jumping Fish
A morning view with The Jumping Fish sculpture in the first sunlight, a small piece of Sarasota art set in the roundabout near our hotel.
Interactive Panorama The Jumping Fish
1/800s f/5,6 ISO 100/21° f=7,5mm
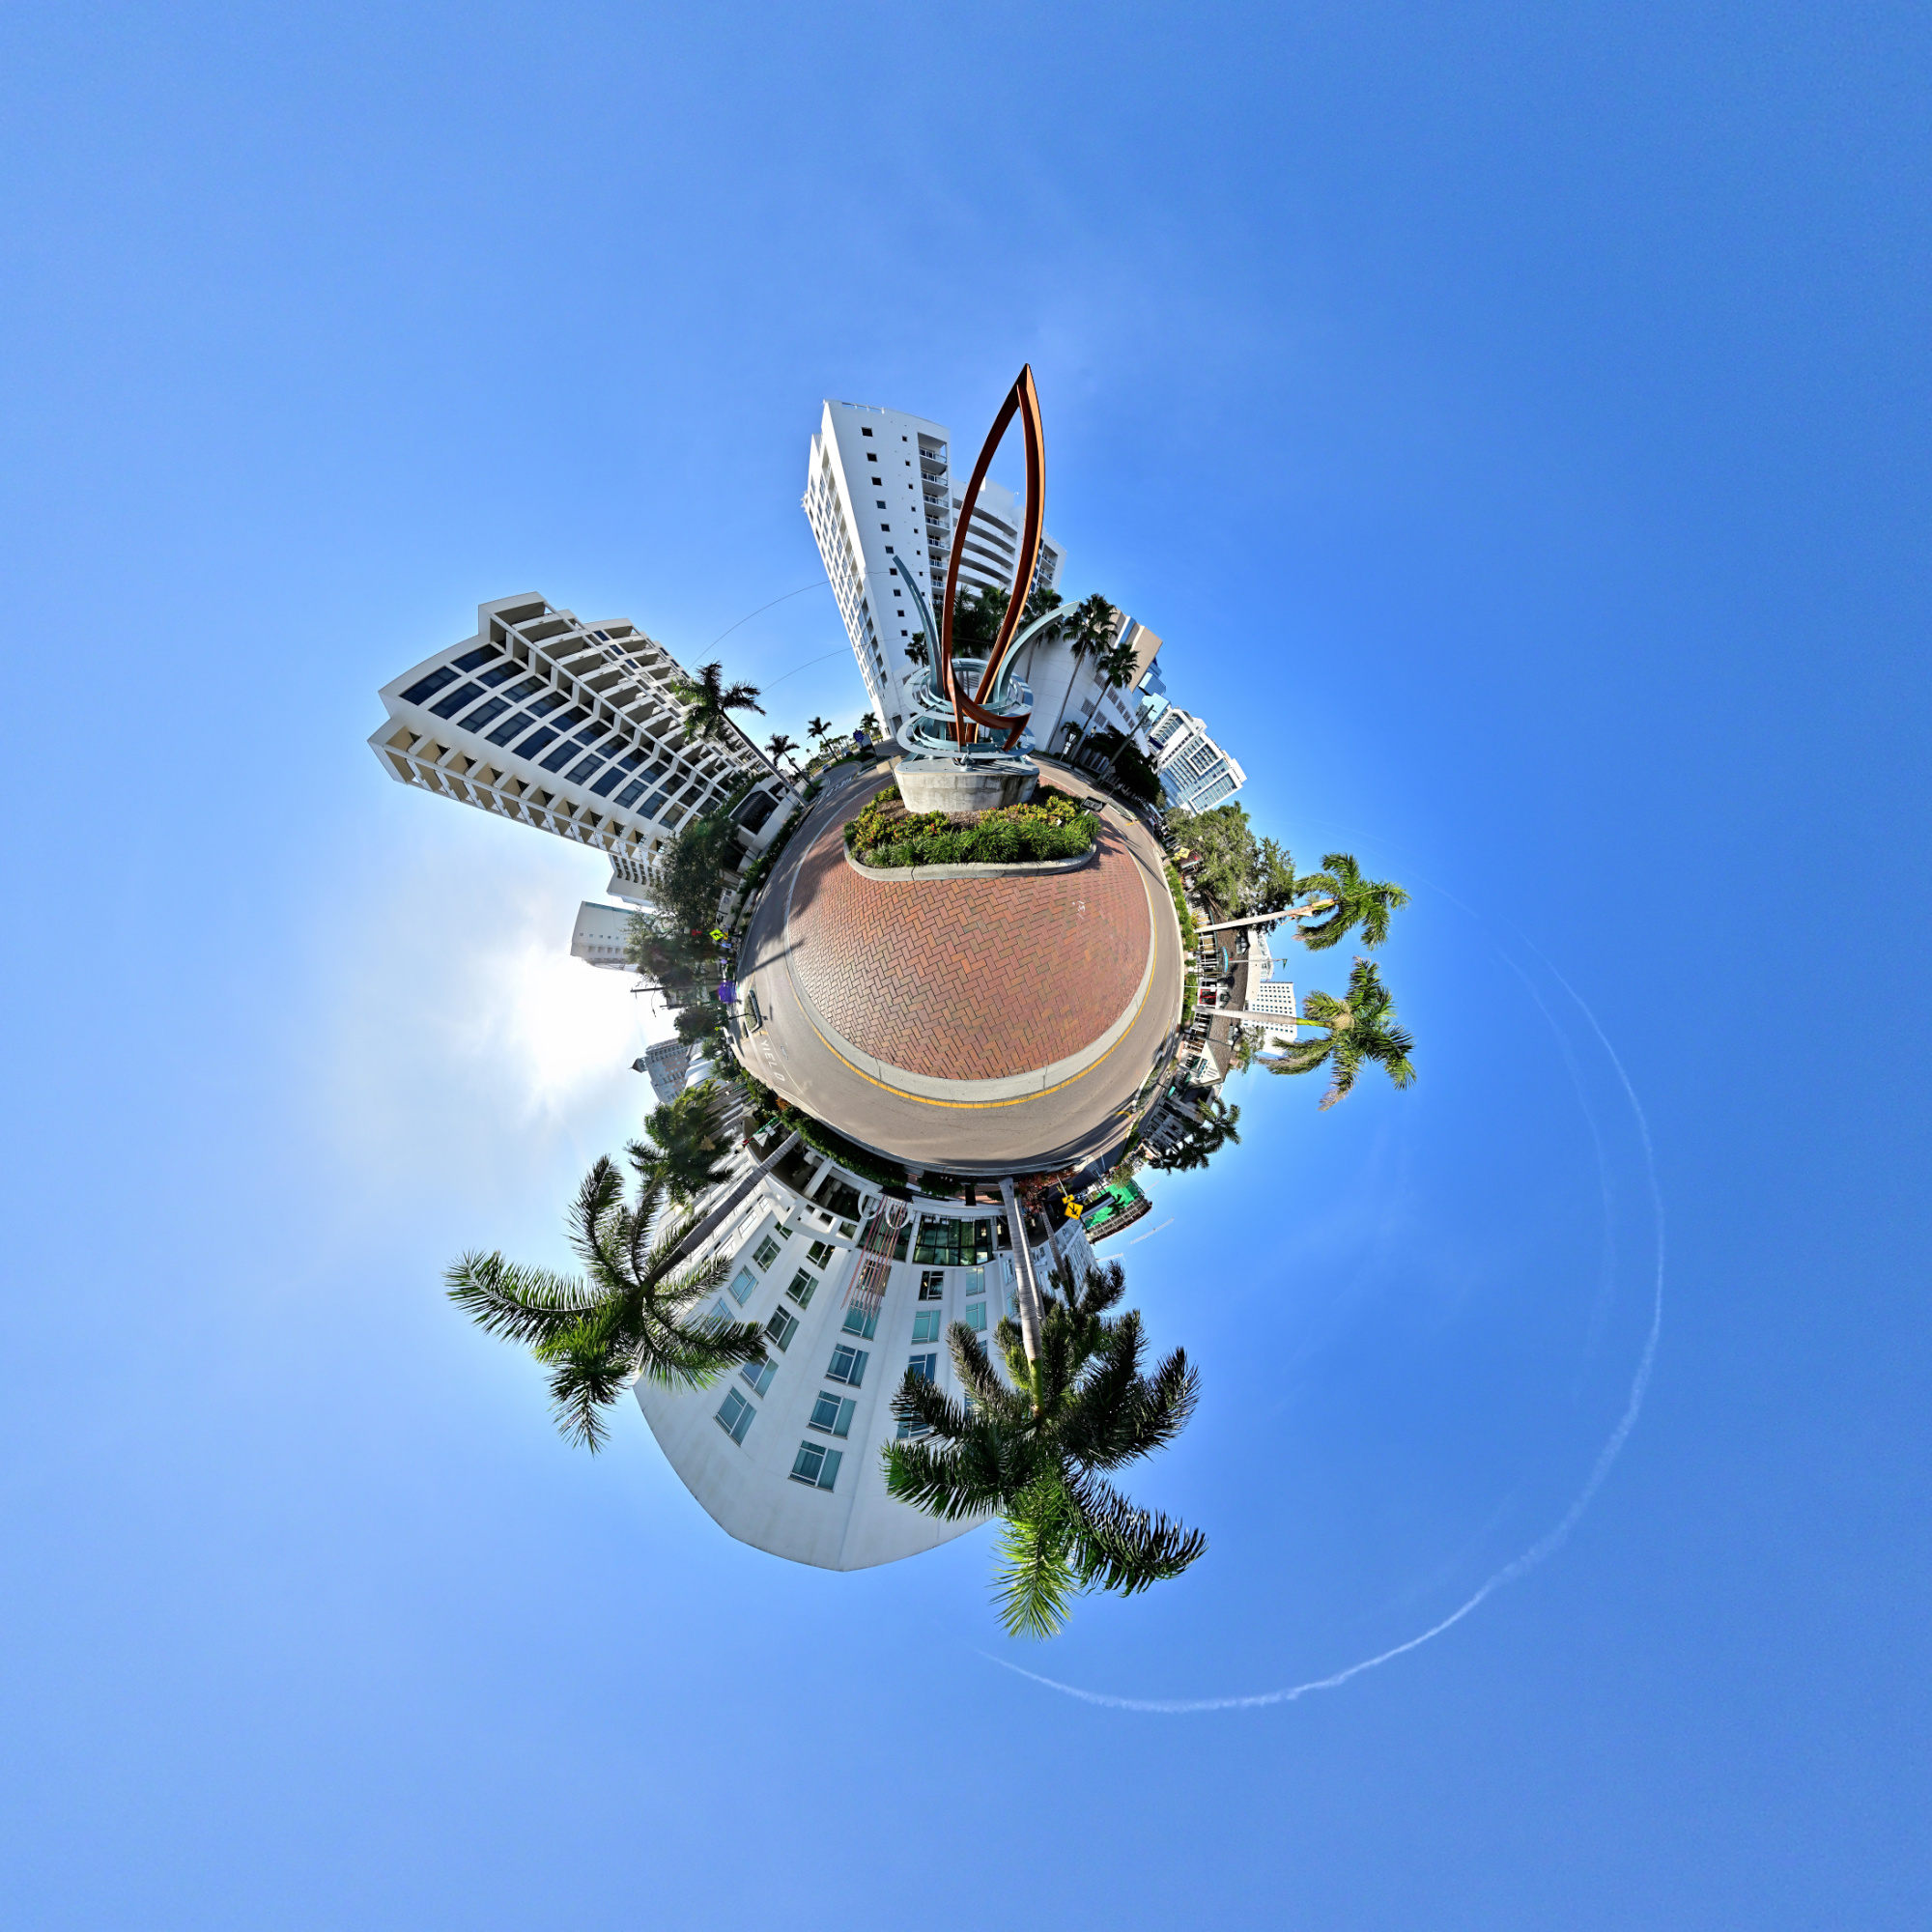
Afternoon streetview approaching The Jumping Fish roundabout.
1/500s f/8 ISO 250/25° 16-50mm f/2,8 VR f=16mm/24mm
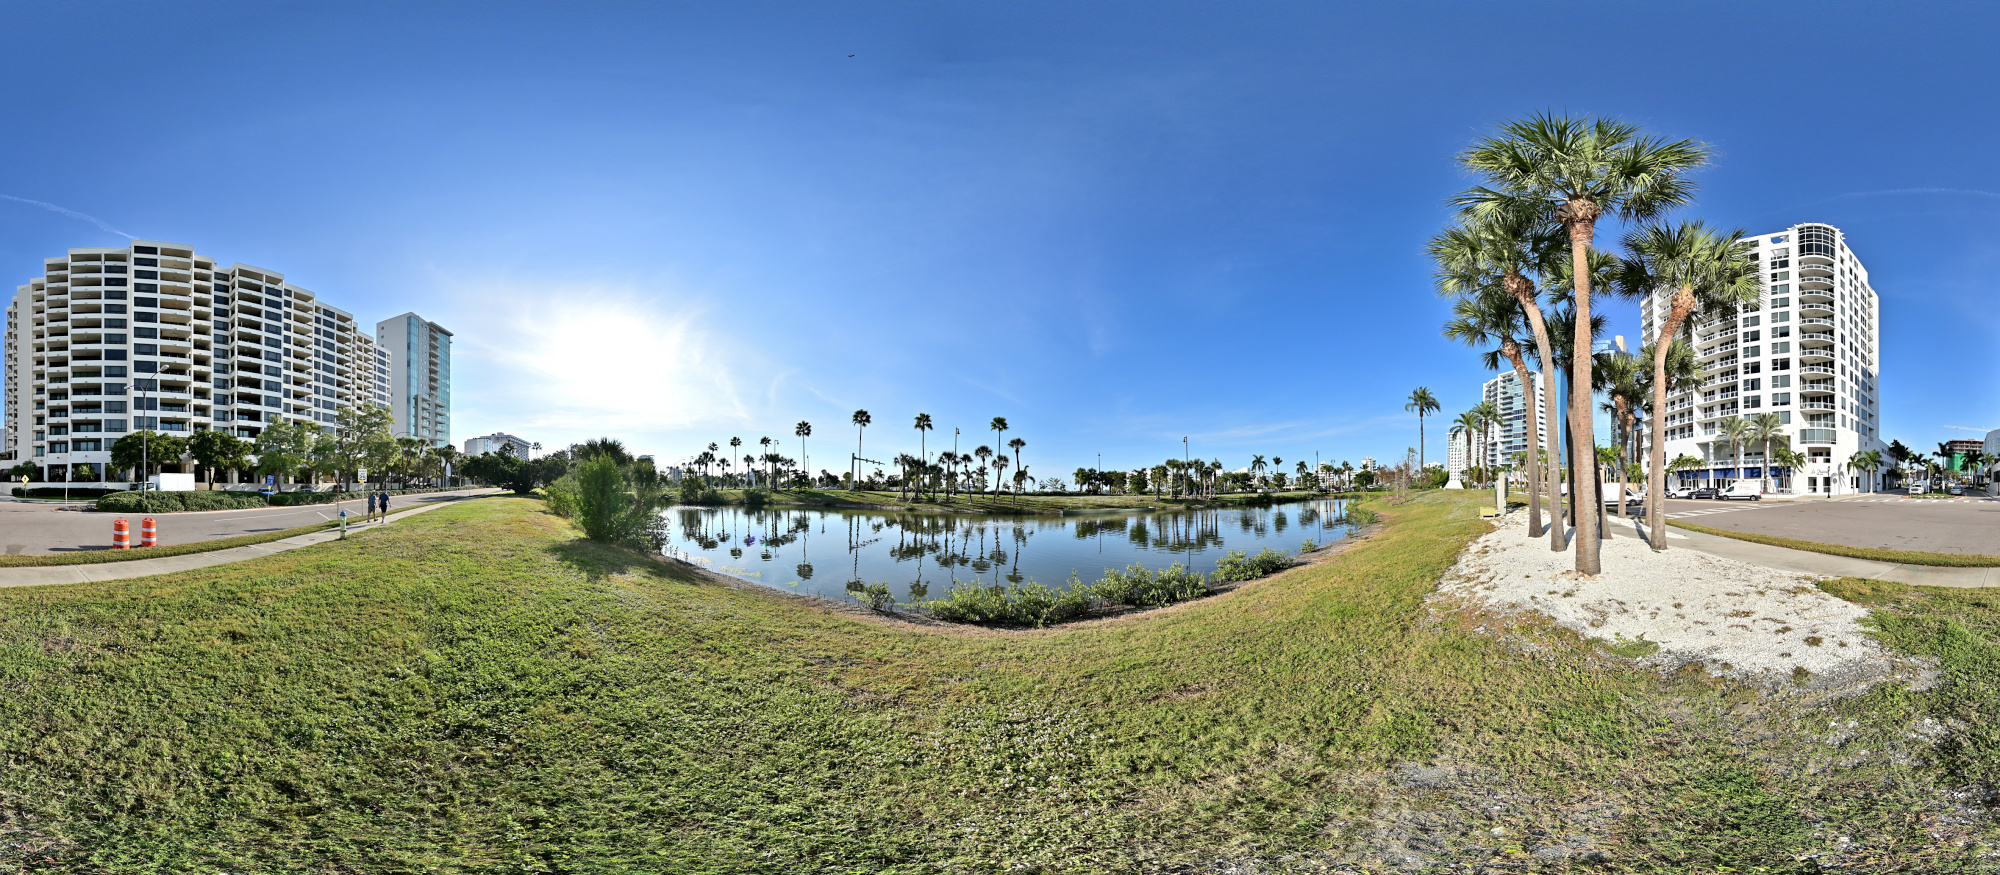
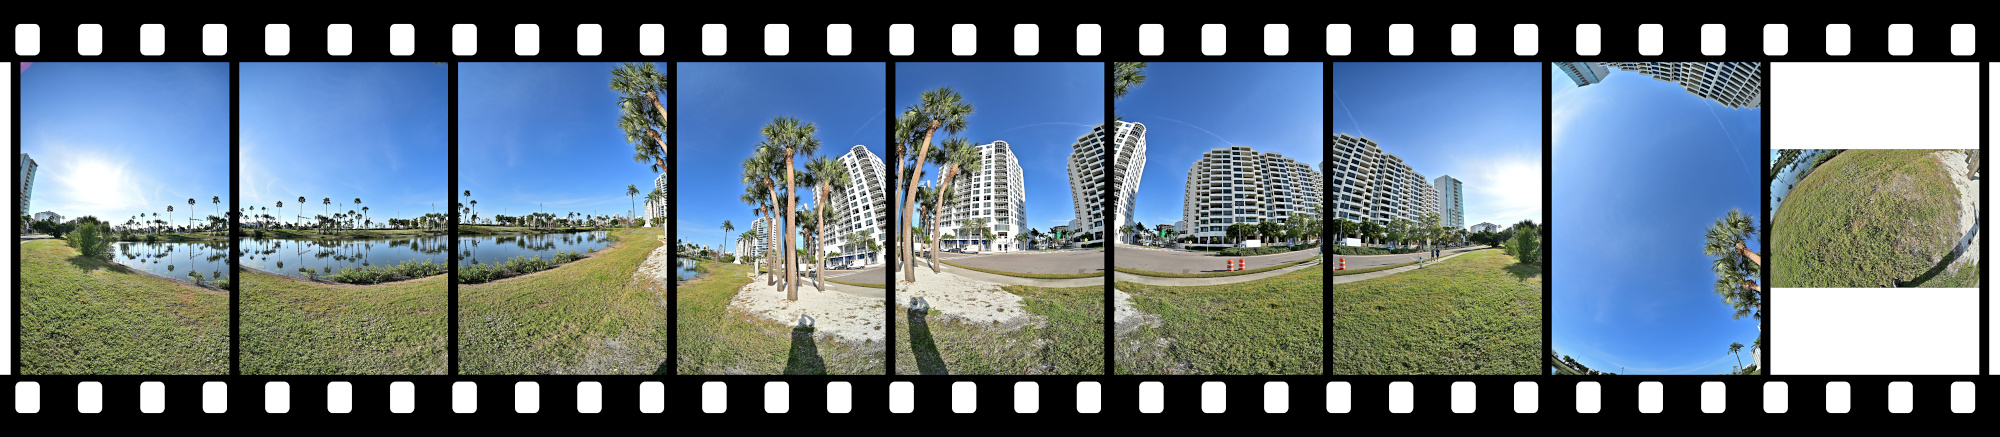
Gulfstream Park
Gulfstream Park sits between the waterfront and downtown, a small strip of green that links the marina area with the city streets. The pond in the center gives the park its quiet character, with a few paths and patches of shade that slow the pace for a moment. It is a simple space, but it fits naturally into Sarasota's mix of water, traffic, and public art.
Interactive Panorama Gulfstream Park
1/800s f/5,6 ISO 100/21° f=7,5mm
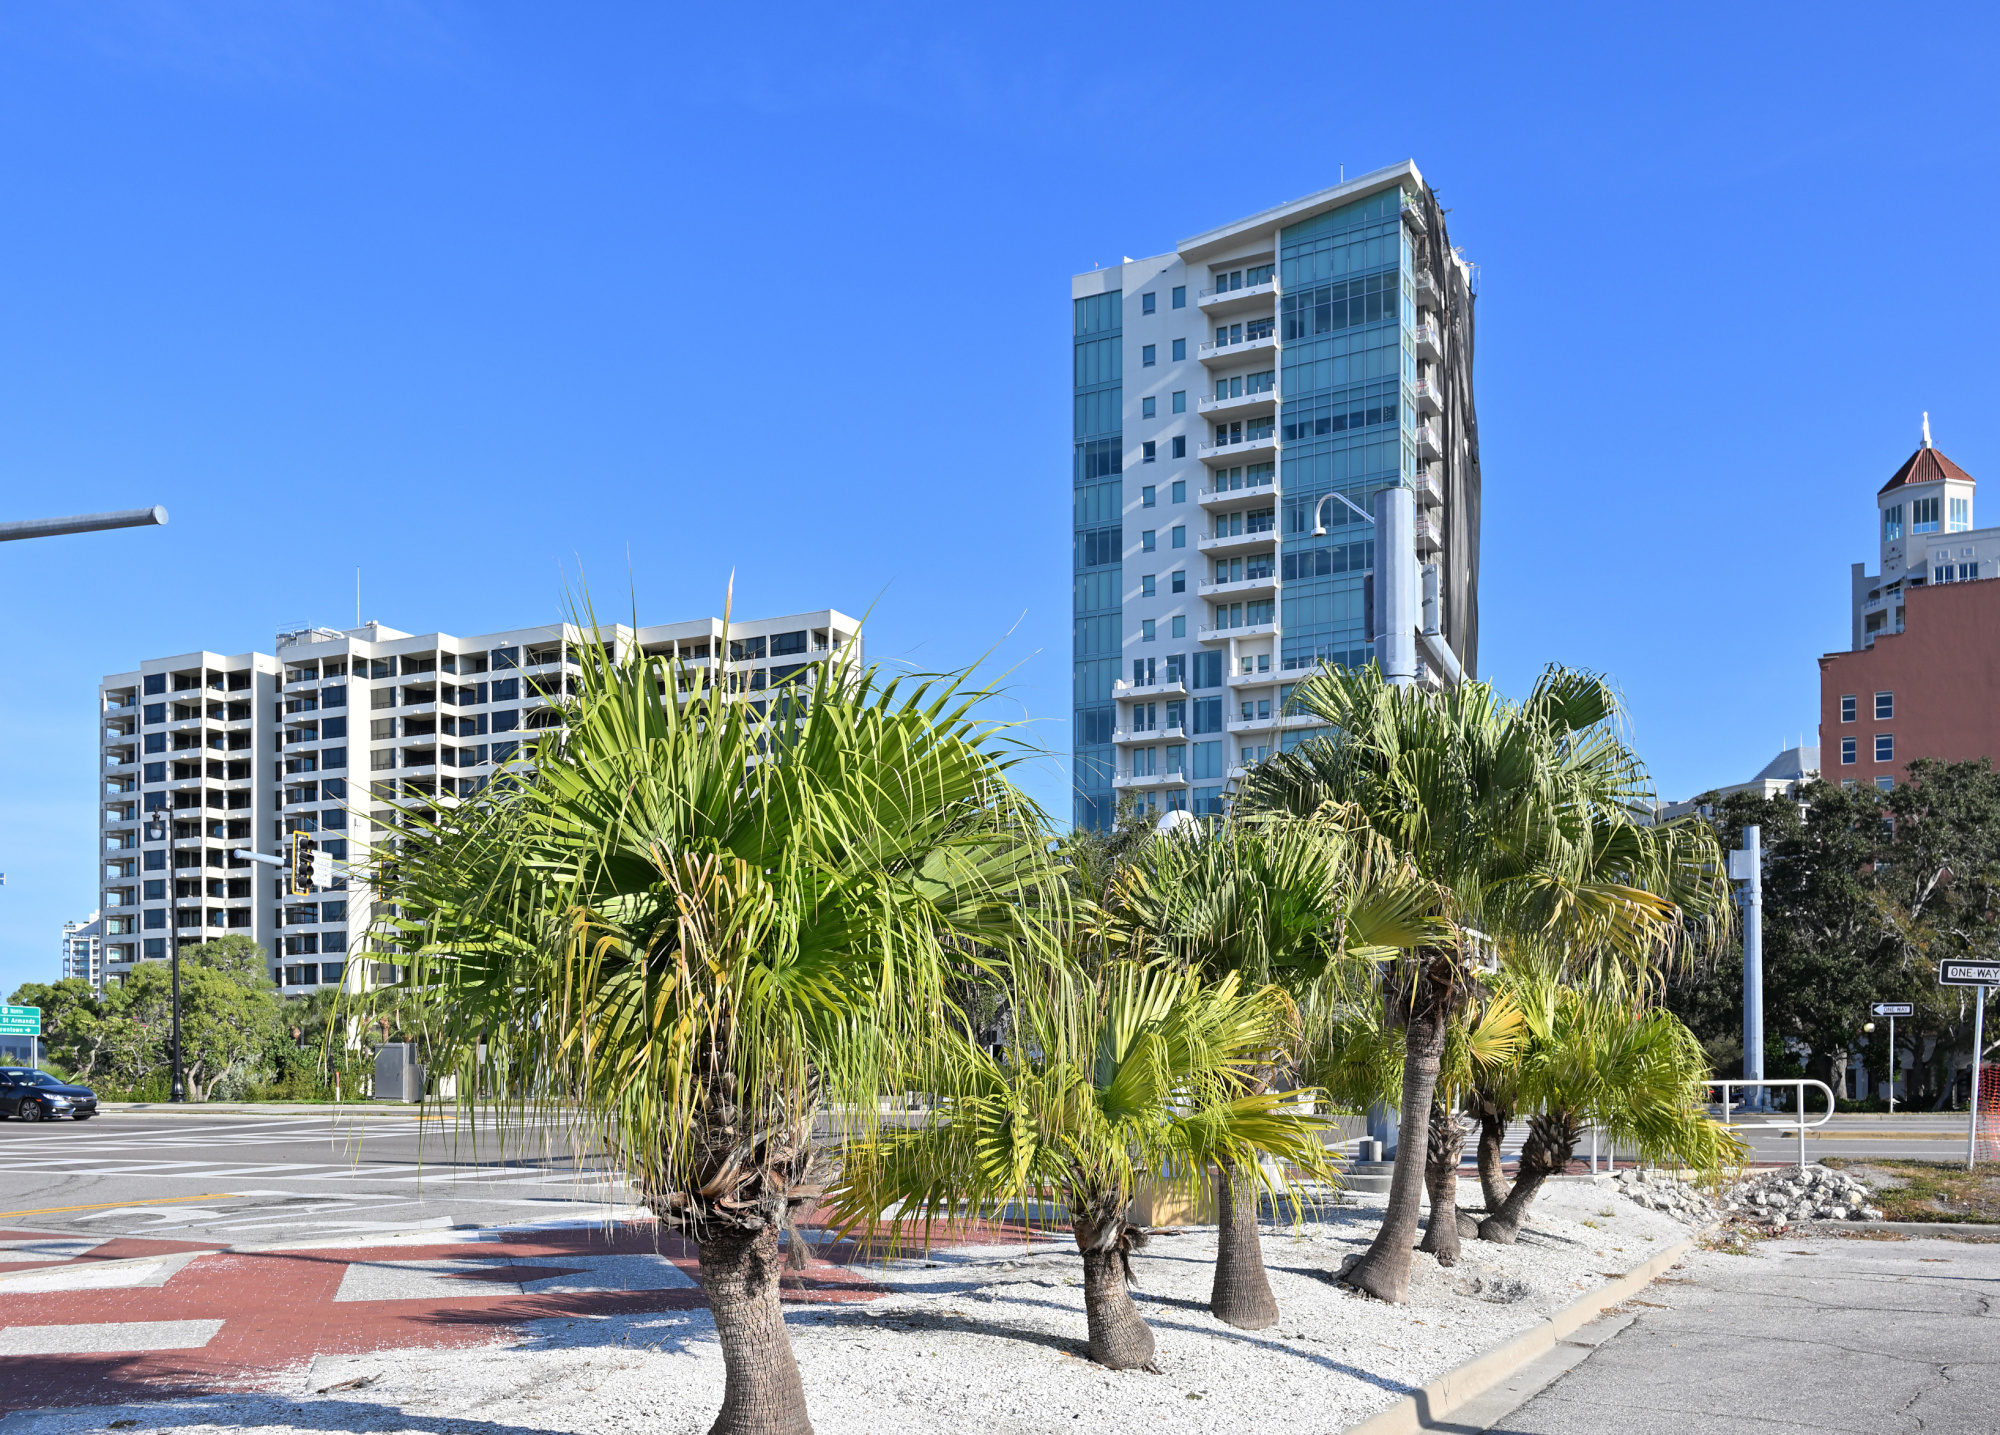
Marina Drive
Marina Drive runs just behind Gulfstream Park and borders the marina itself. It is a short stretch where boats, water, and the edge of downtown meet. Palm trees everywhere.
1/500s f/8 ISO 100/21° f=17mm/18mm

1/400s f/7,1 ISO 100/21° f=21mm
Interactive Panorama Marina Drive
1/1250s f/5,6 ISO 100/21° f=7,5mm

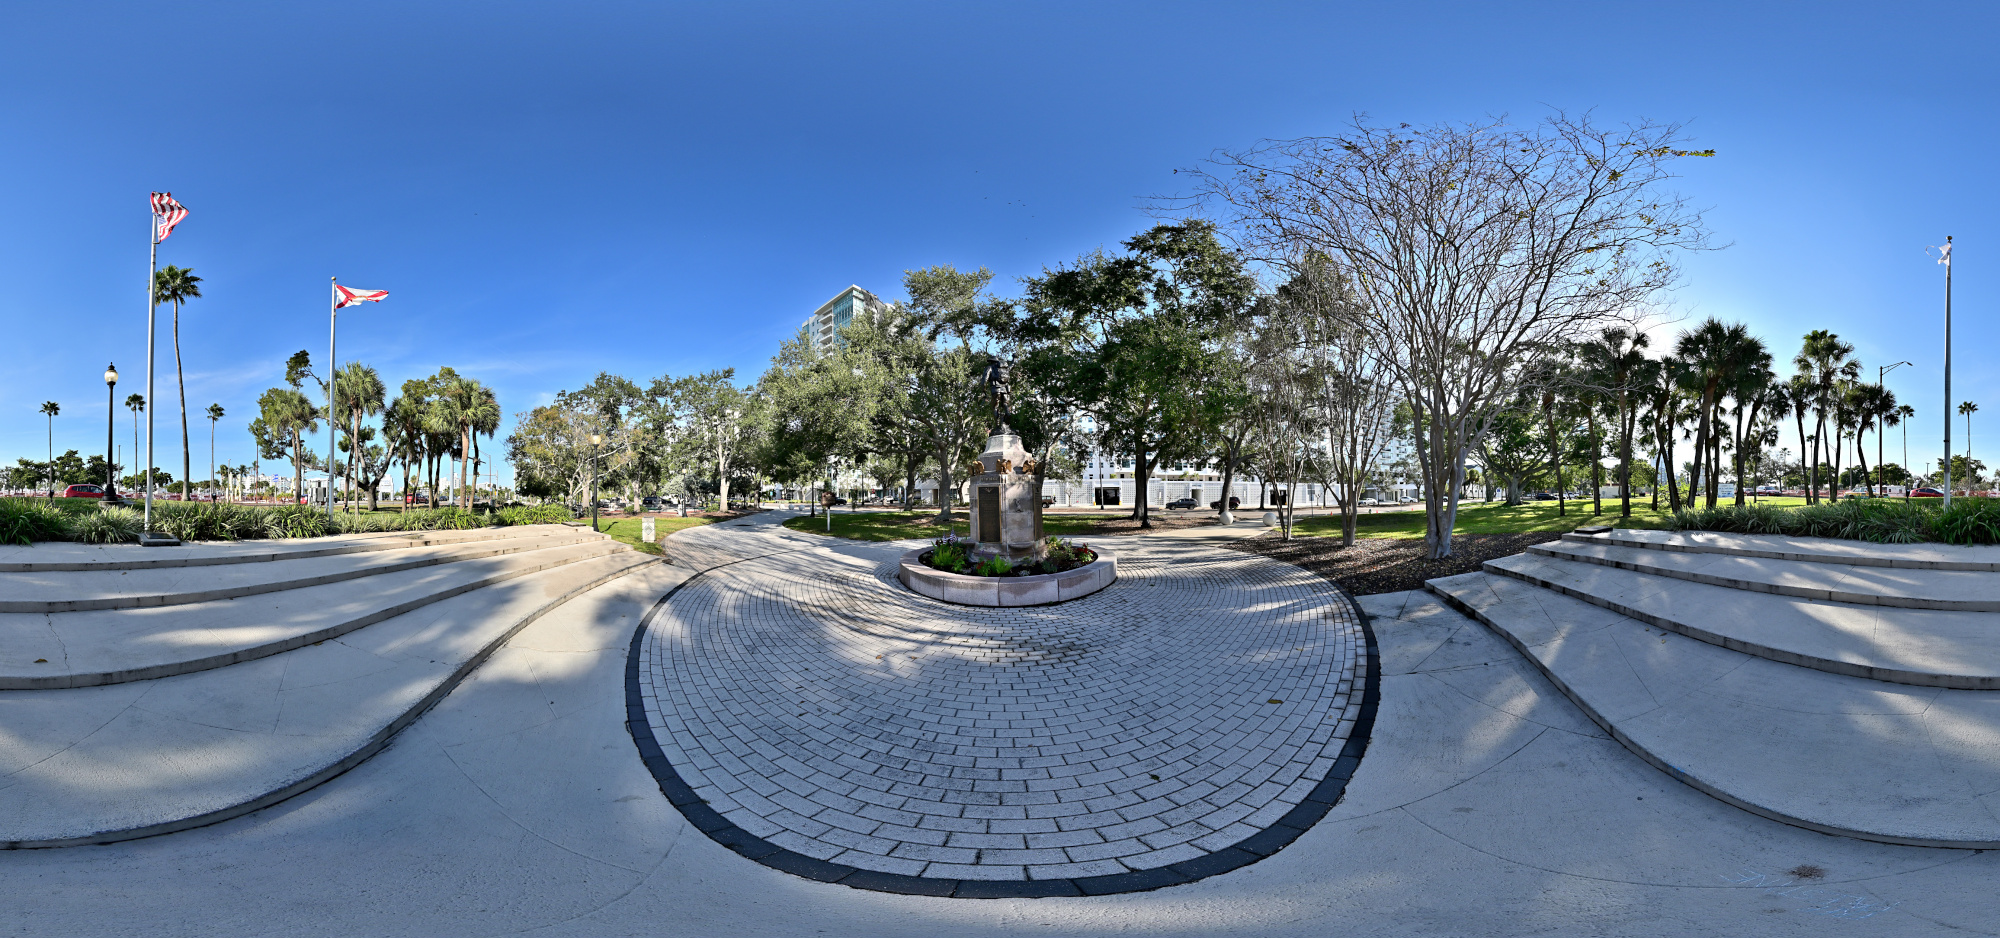
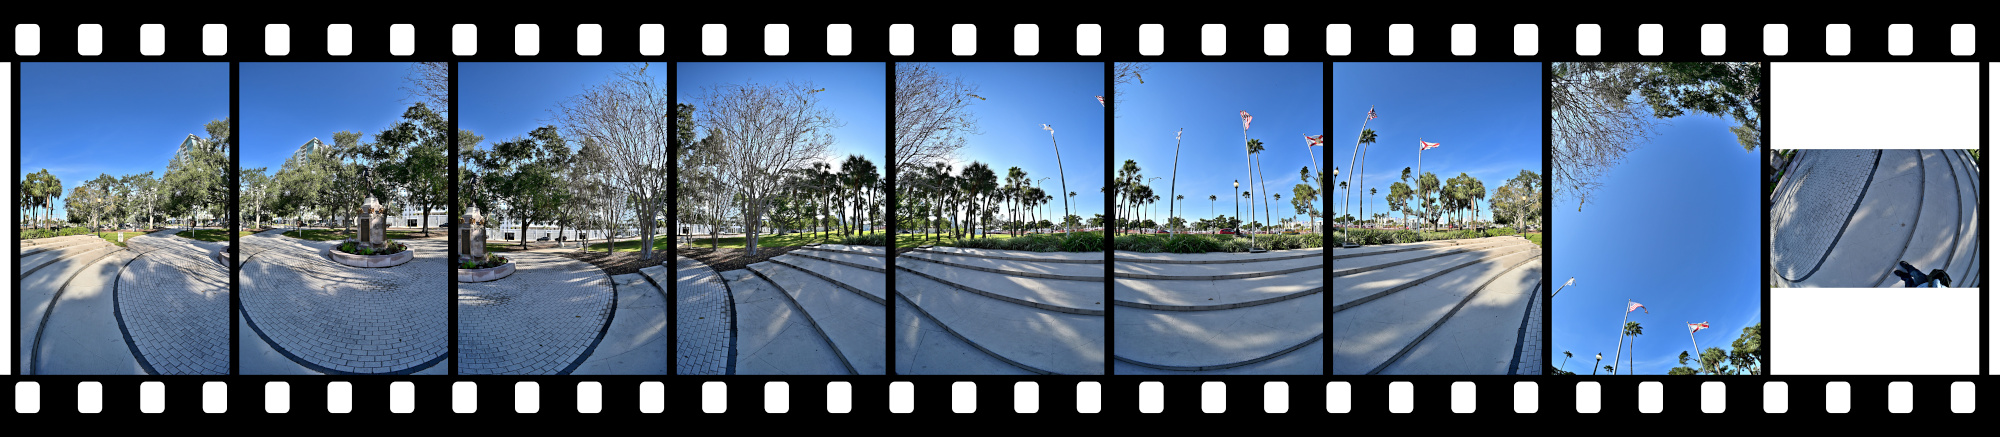
War Memorial
The War Memorial stands at the edge of J.D. Hamel Park, marking Sarasota's tribute to residents who served in World War I and the conflicts that followed. The bronze Doughboy figure adds a direct link to the era, reproduced from a 1920 design and placed here after a later restoration. It is a small but steady presence on the bayfront, easy to pass but worth a quiet look.
Interactive Panorama War Memorial
1/800s f/5,6 ISO 100/21° f=7,5mm
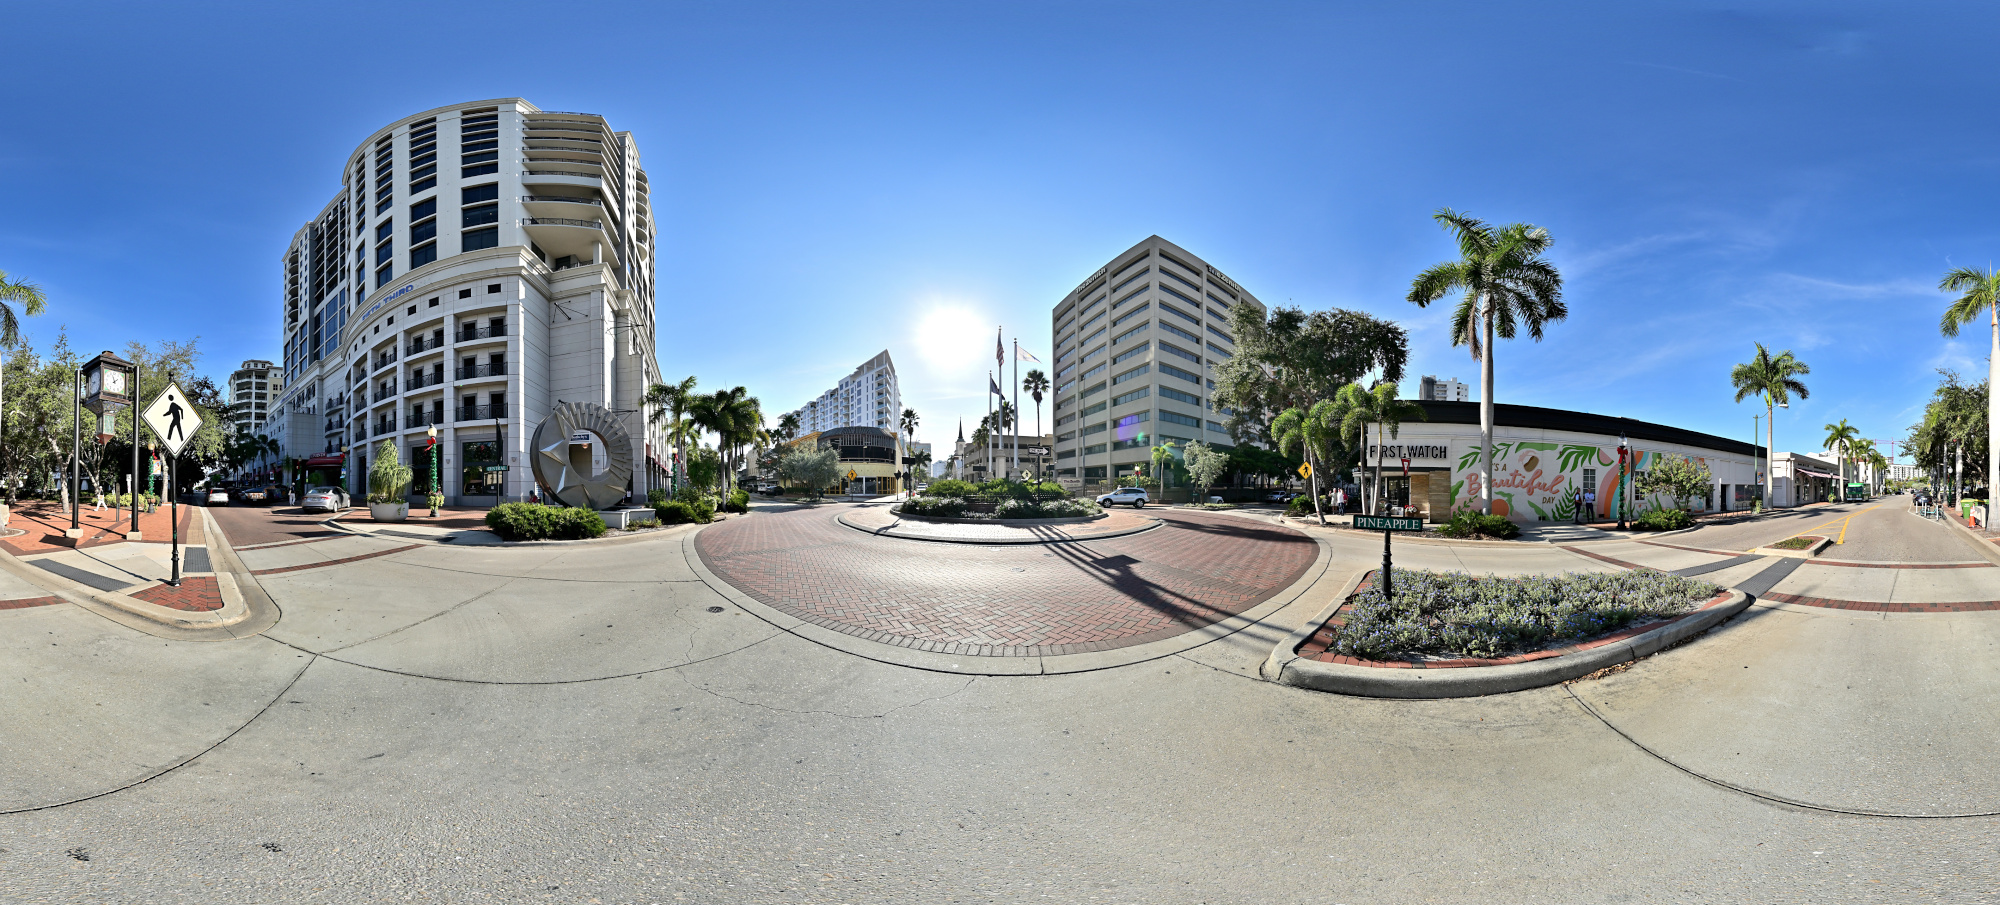
Five Points Roundabout
The Five Points Roundabout sits at the center of downtown and pulls several streets into one compact junction. Traffic moves steadily around it, framed by shops, cafés, and a bit of midday noise. It is one of those places where you notice how close the city, the bayfront, and the quieter neighborhoods actually are.
Interactive Panorama Five Points Roundabout
1/1000s f/5,6 ISO 100/21° f=7,5mm

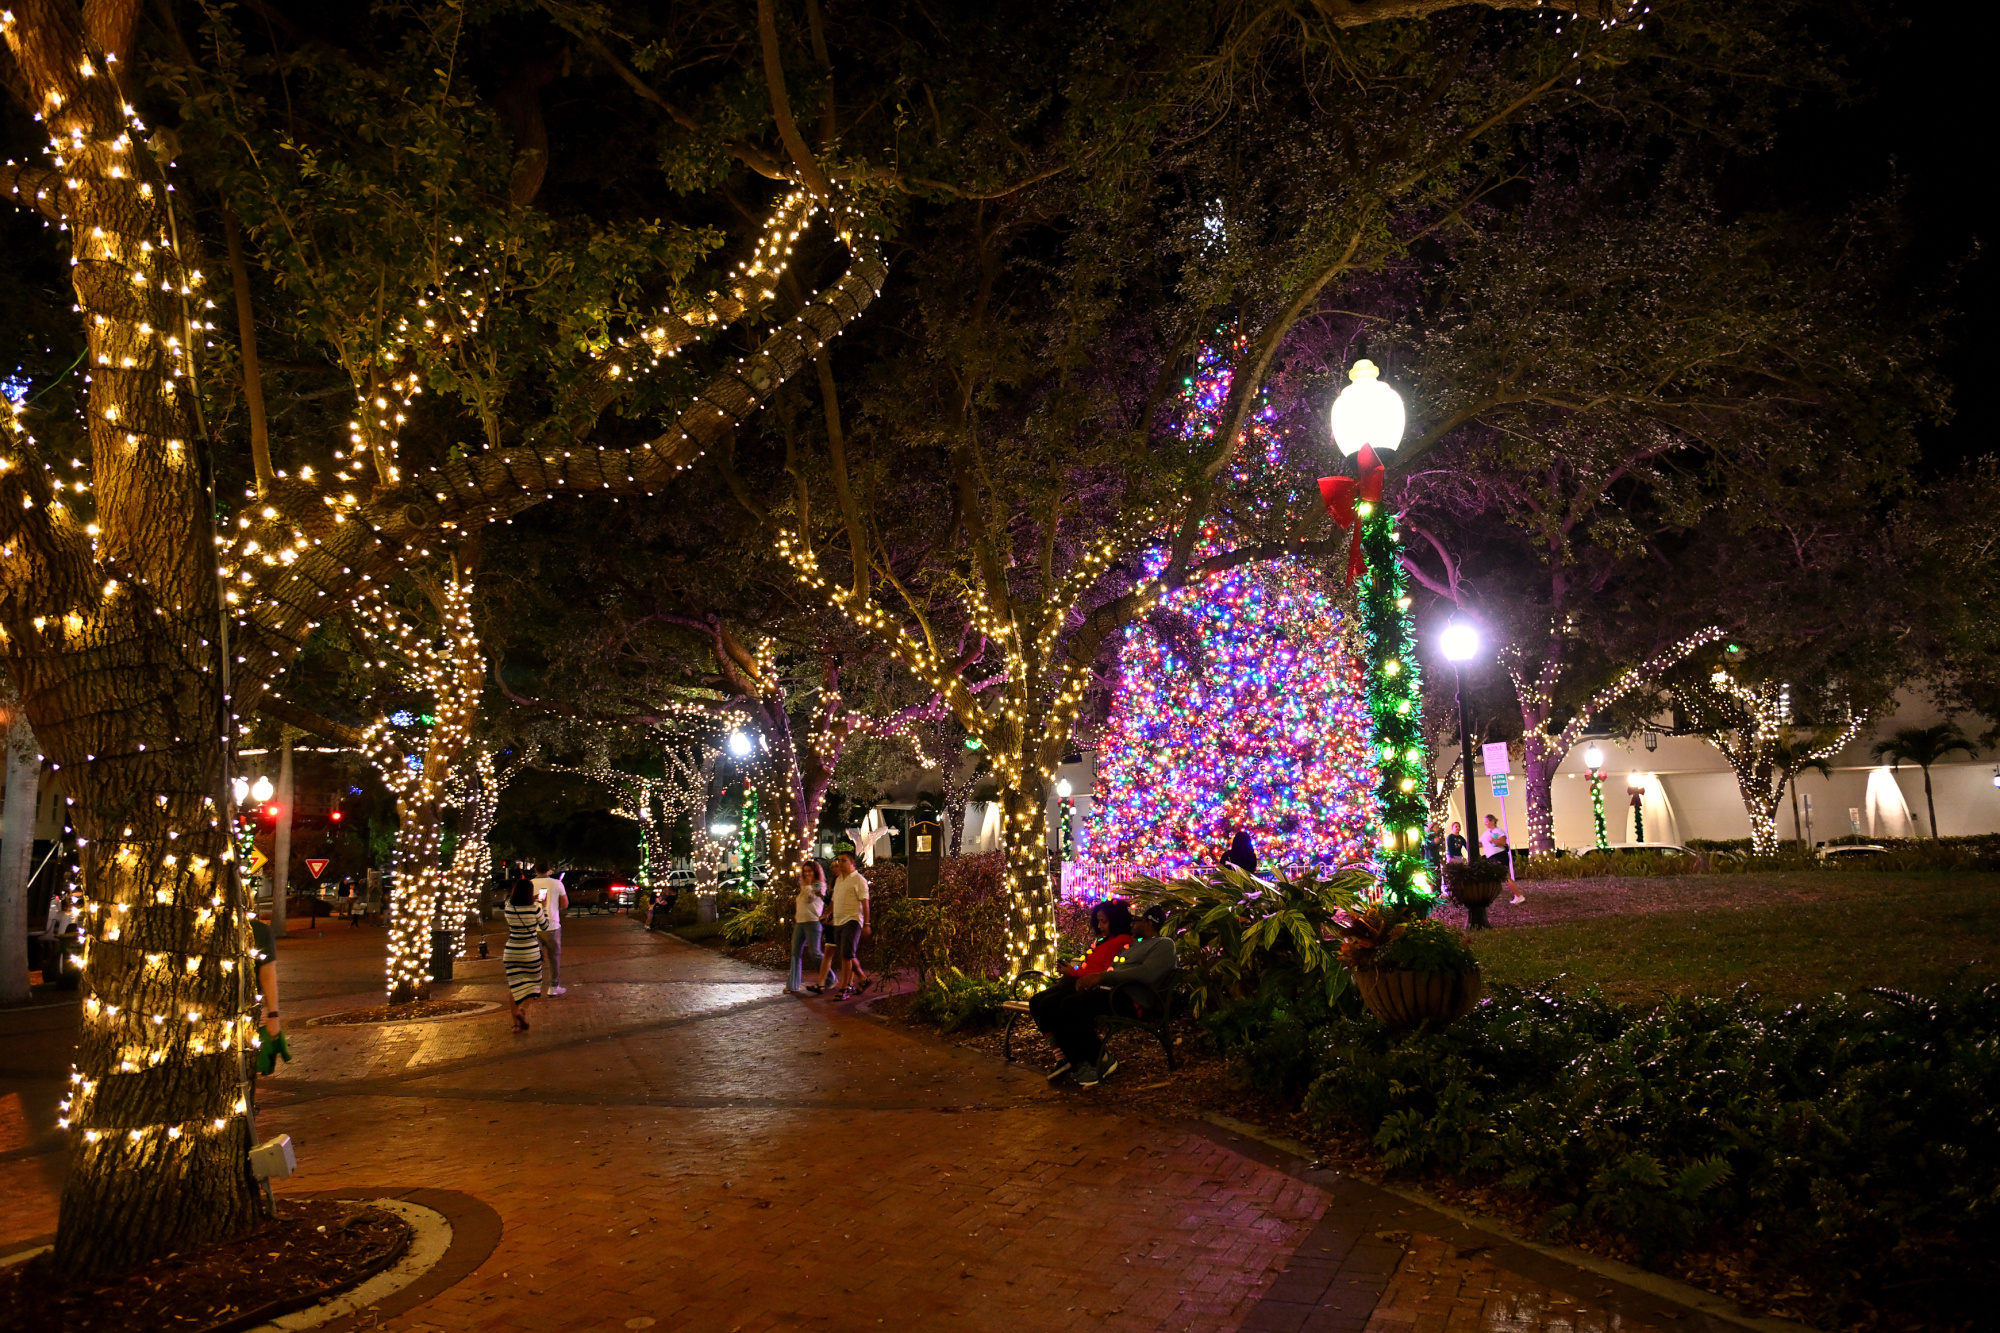
Next to the roundabout is Selby Five Points Park.
A Christmas market is missing here with all the good things: air that smells like roasted almonds and gingerbread, and you are mysteriously holding a Bratwurst in one hand and a paper cone of roasted chestnuts in the other.
Once in France I came across a Christmas market that kept going well into February.1/40s f/2,8 ISO 1250/32° 16-50mm f/2,8 VR f=16mm/24mm
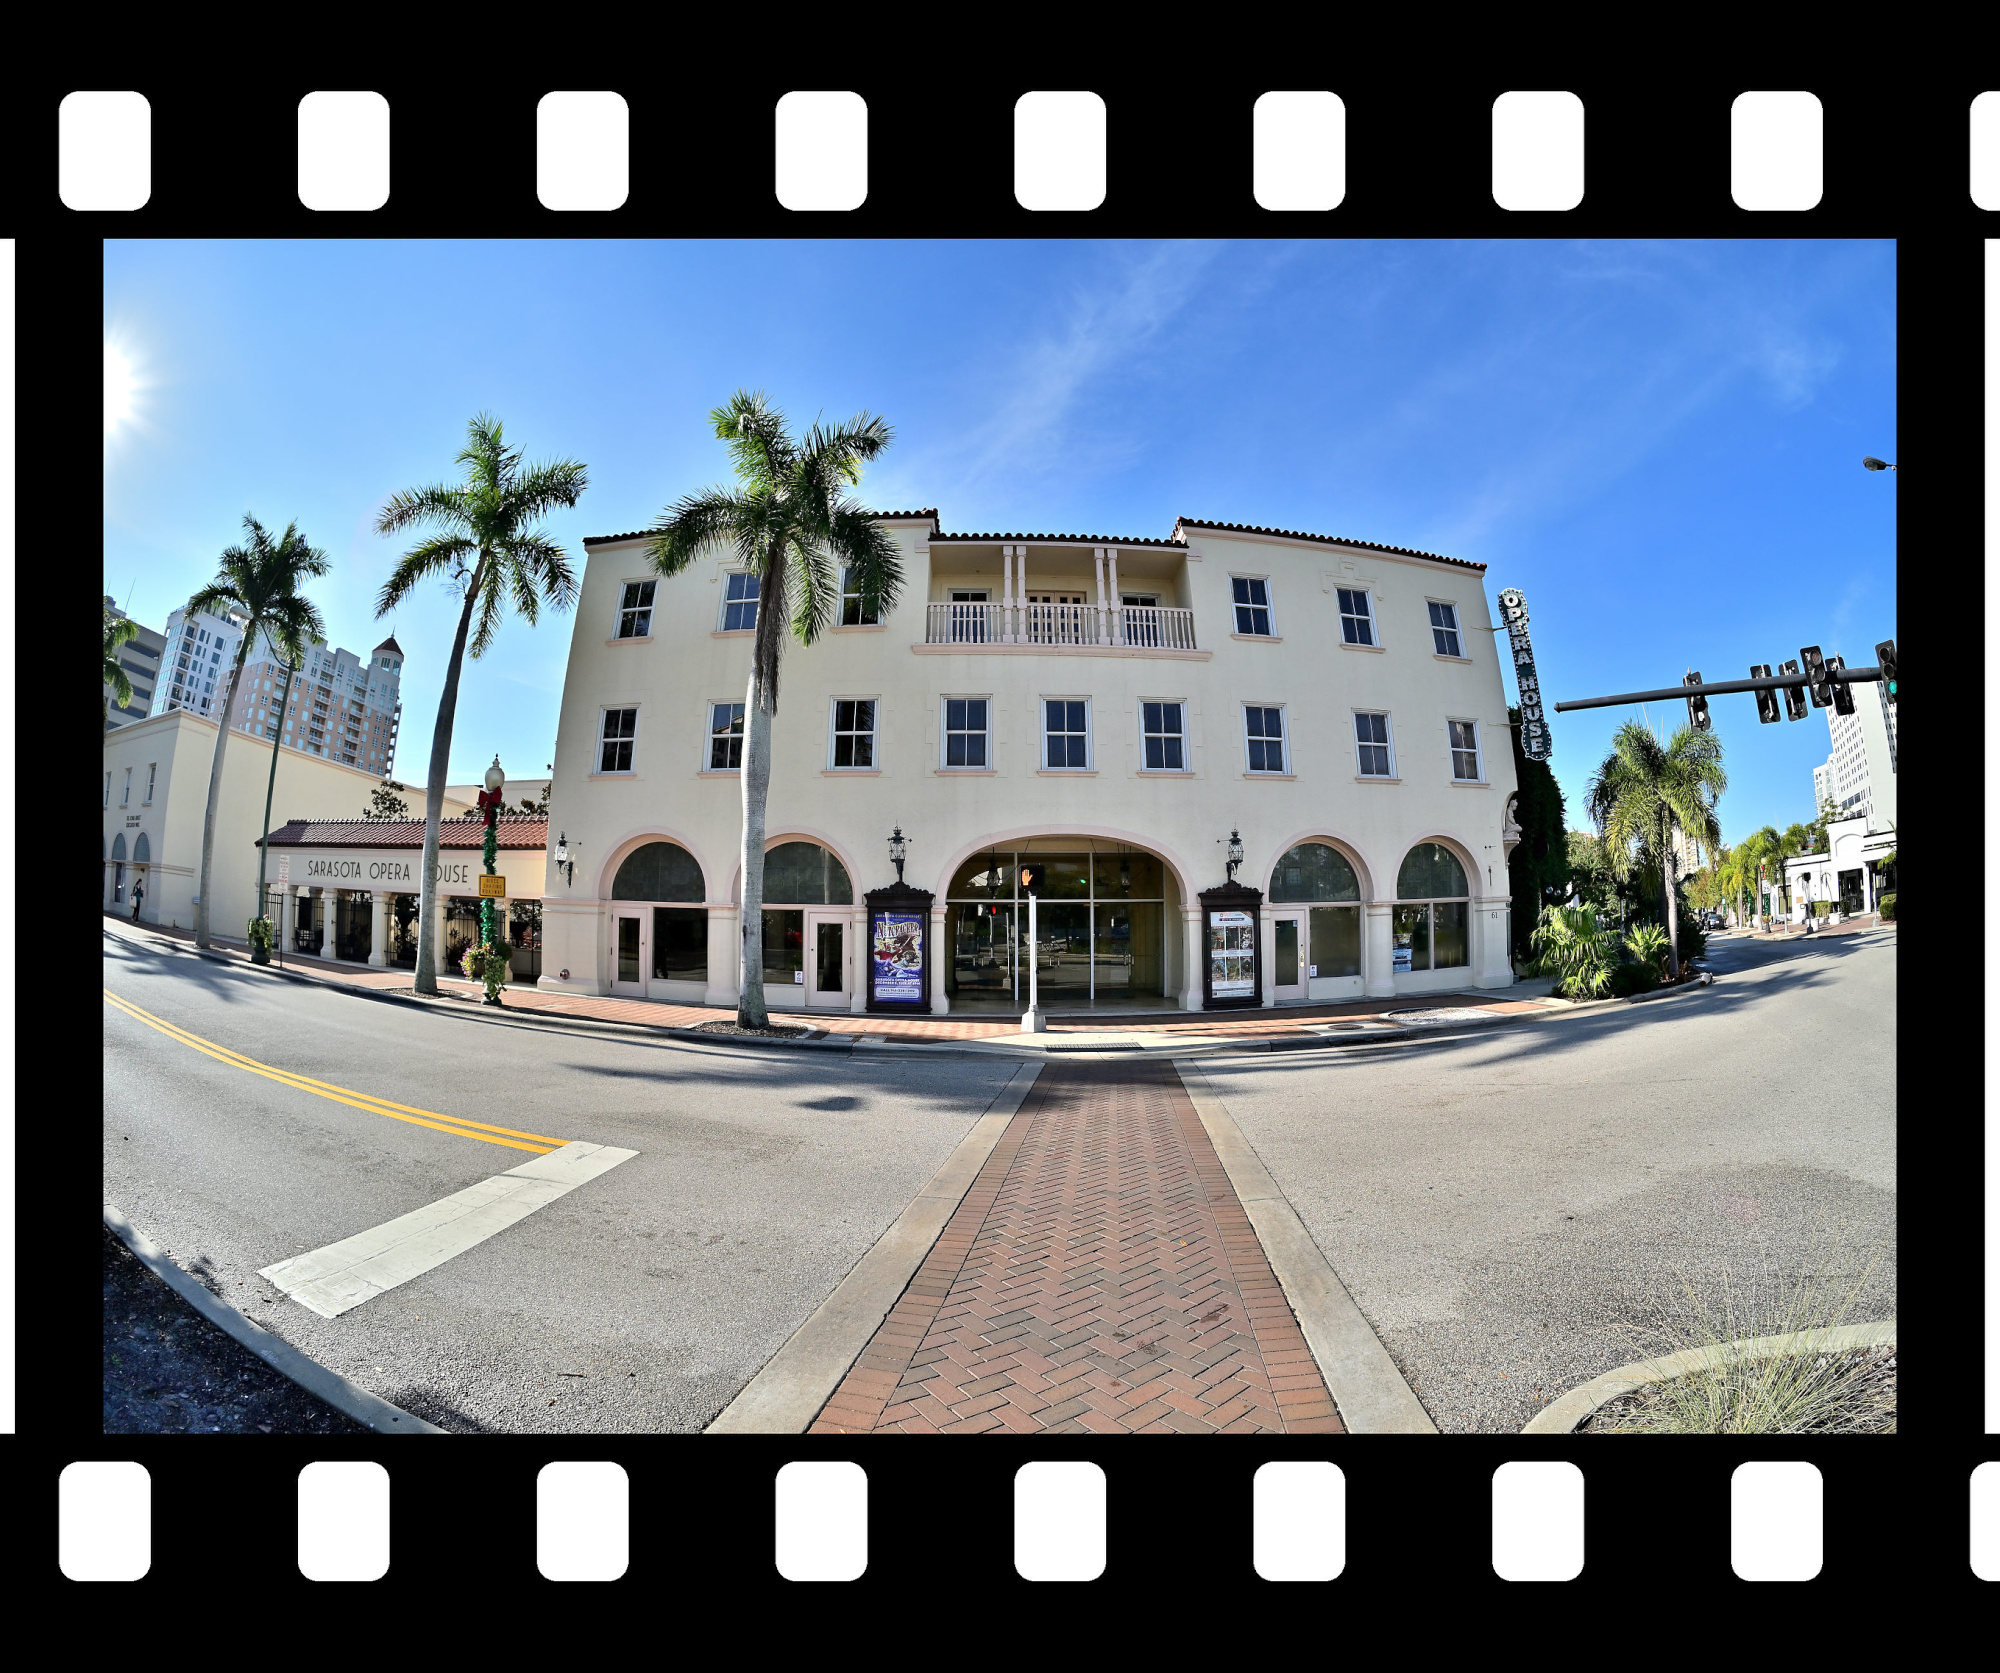
Half a block further you arrive at the Opera House of Sarasota. It has a sign, it has a door, and yet at first glance you could be forgiven for thinking you are entering a well behaved municipal building. If you pause for a moment, a faint aria seems to rise through the stairwell, as if the building is politely reminding you of its true purpose.
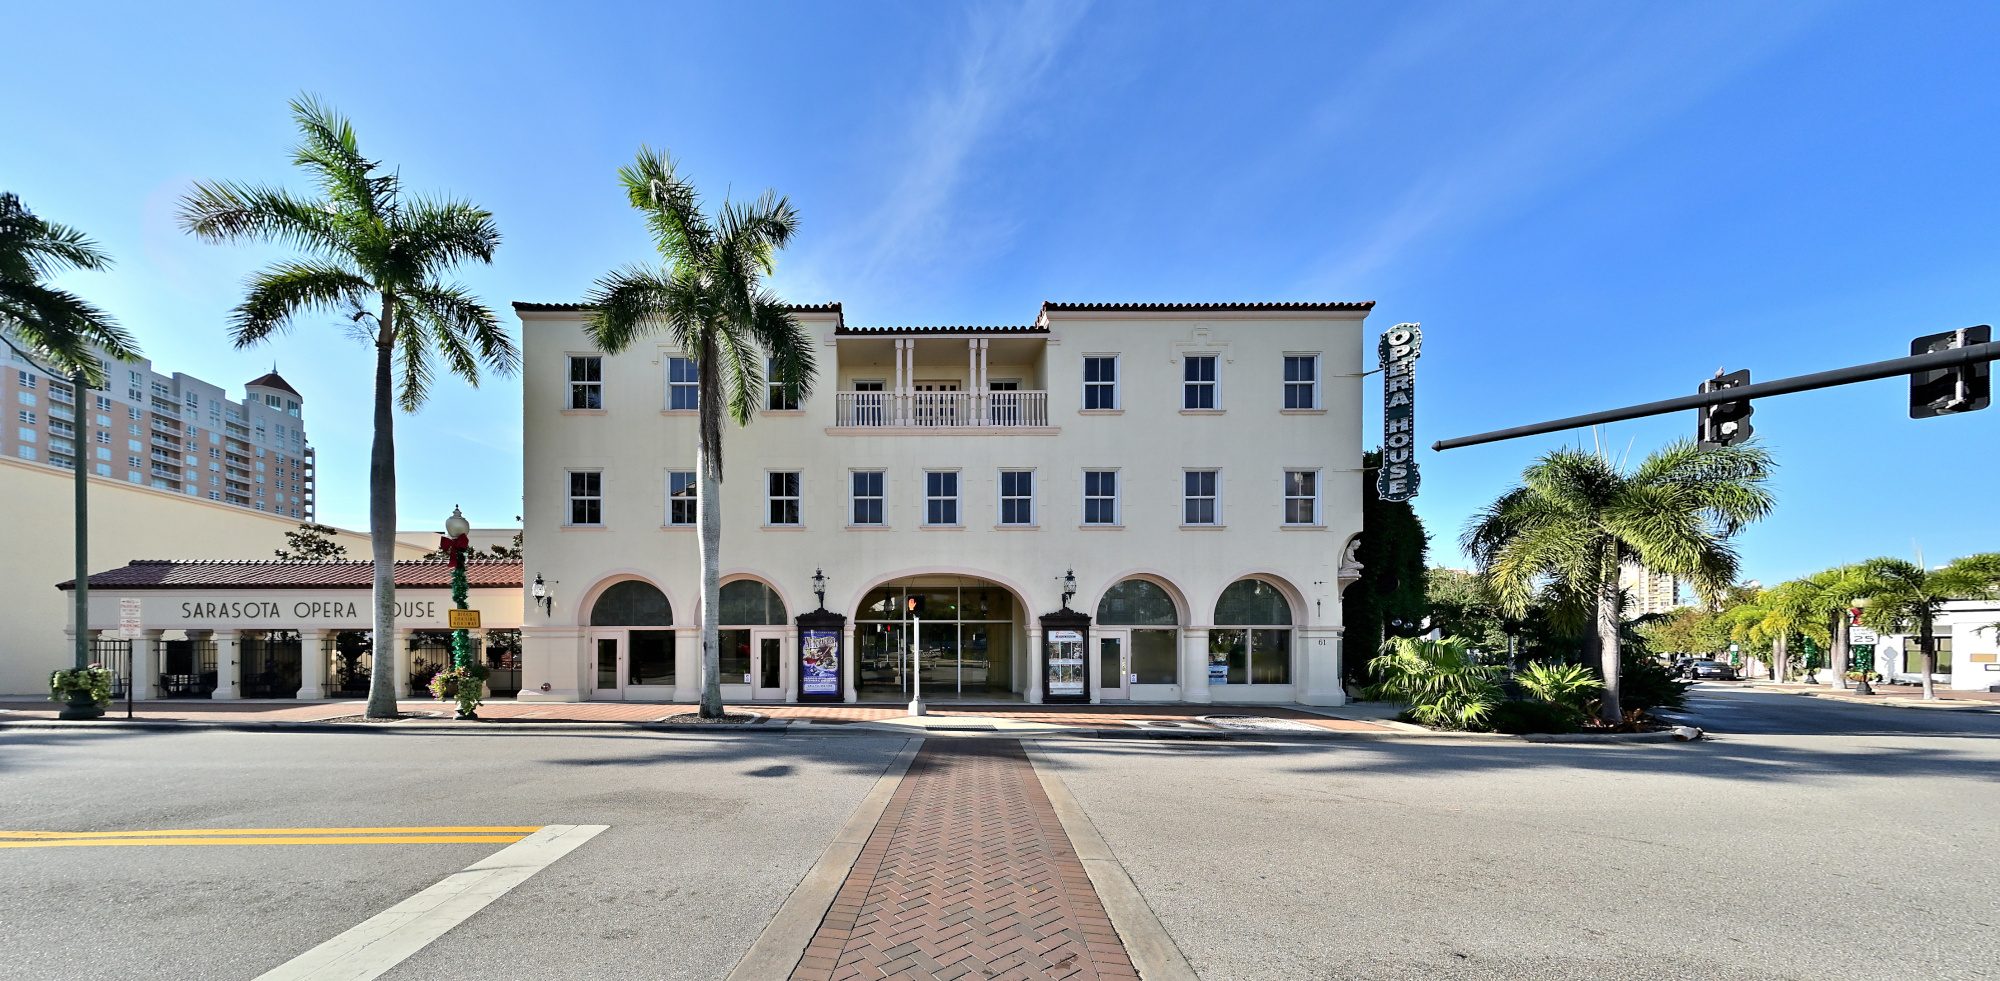
1/640s f/5,6 ISO 100/21° f=7,5mm
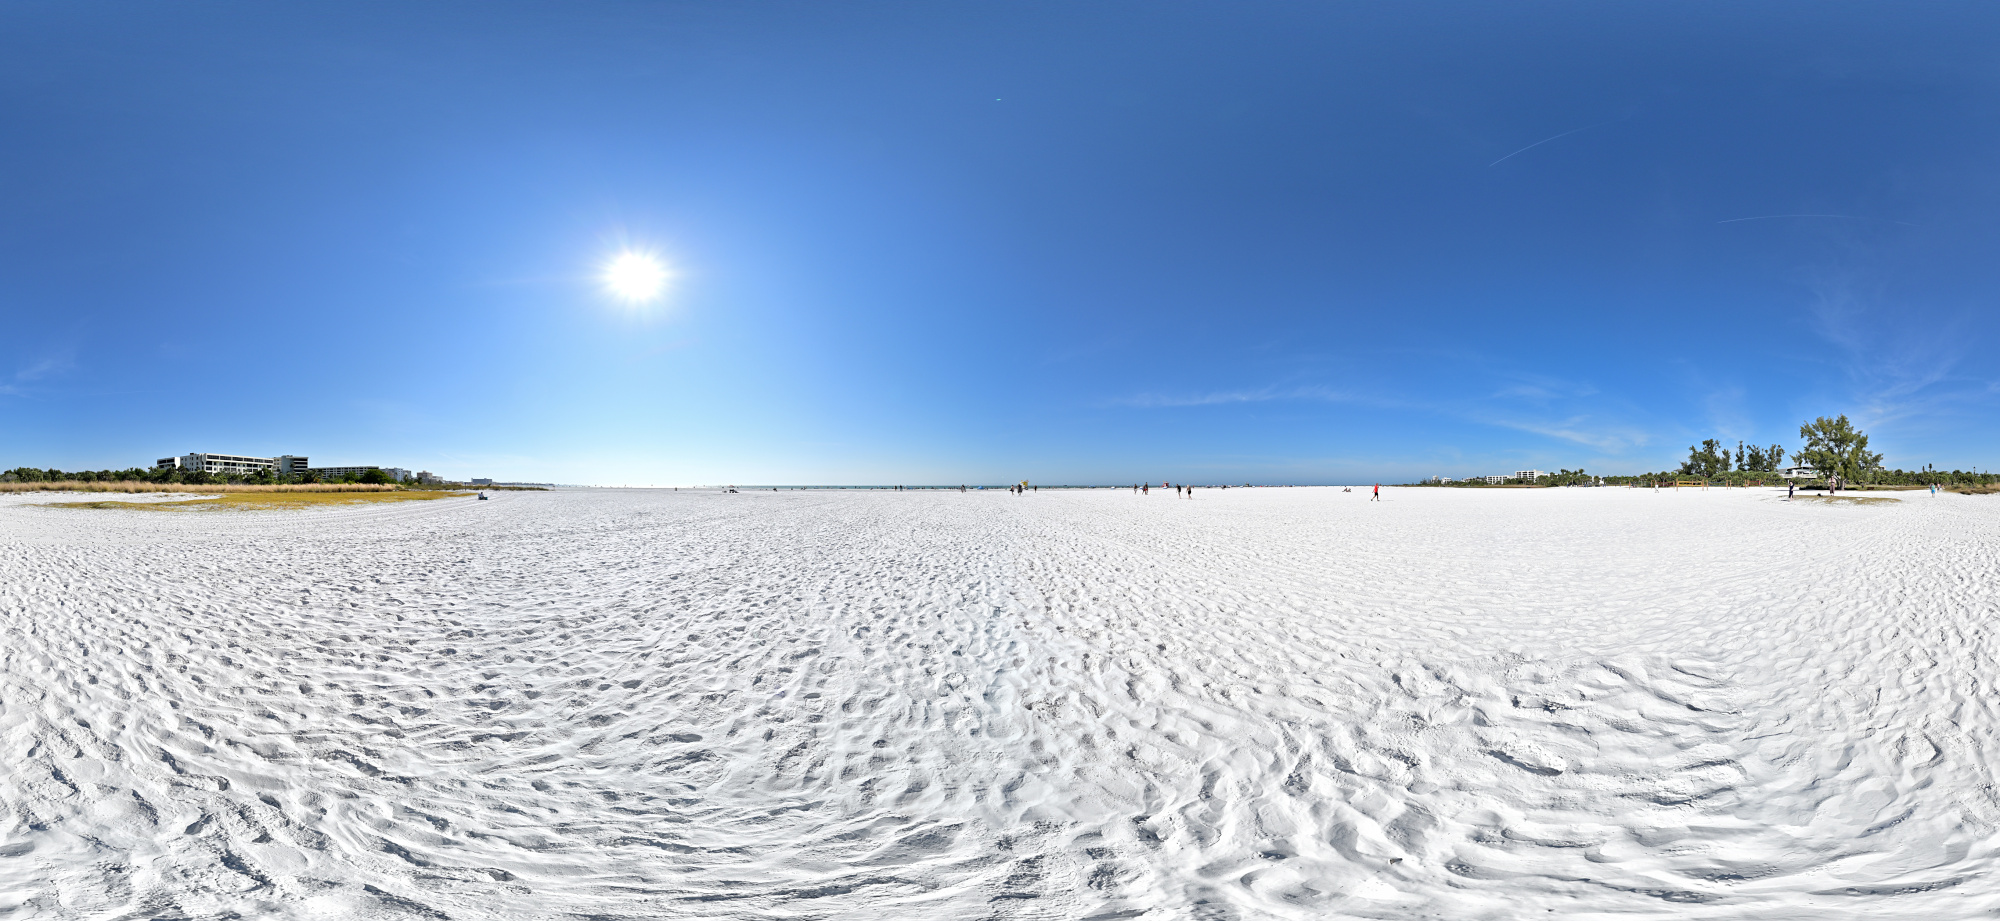
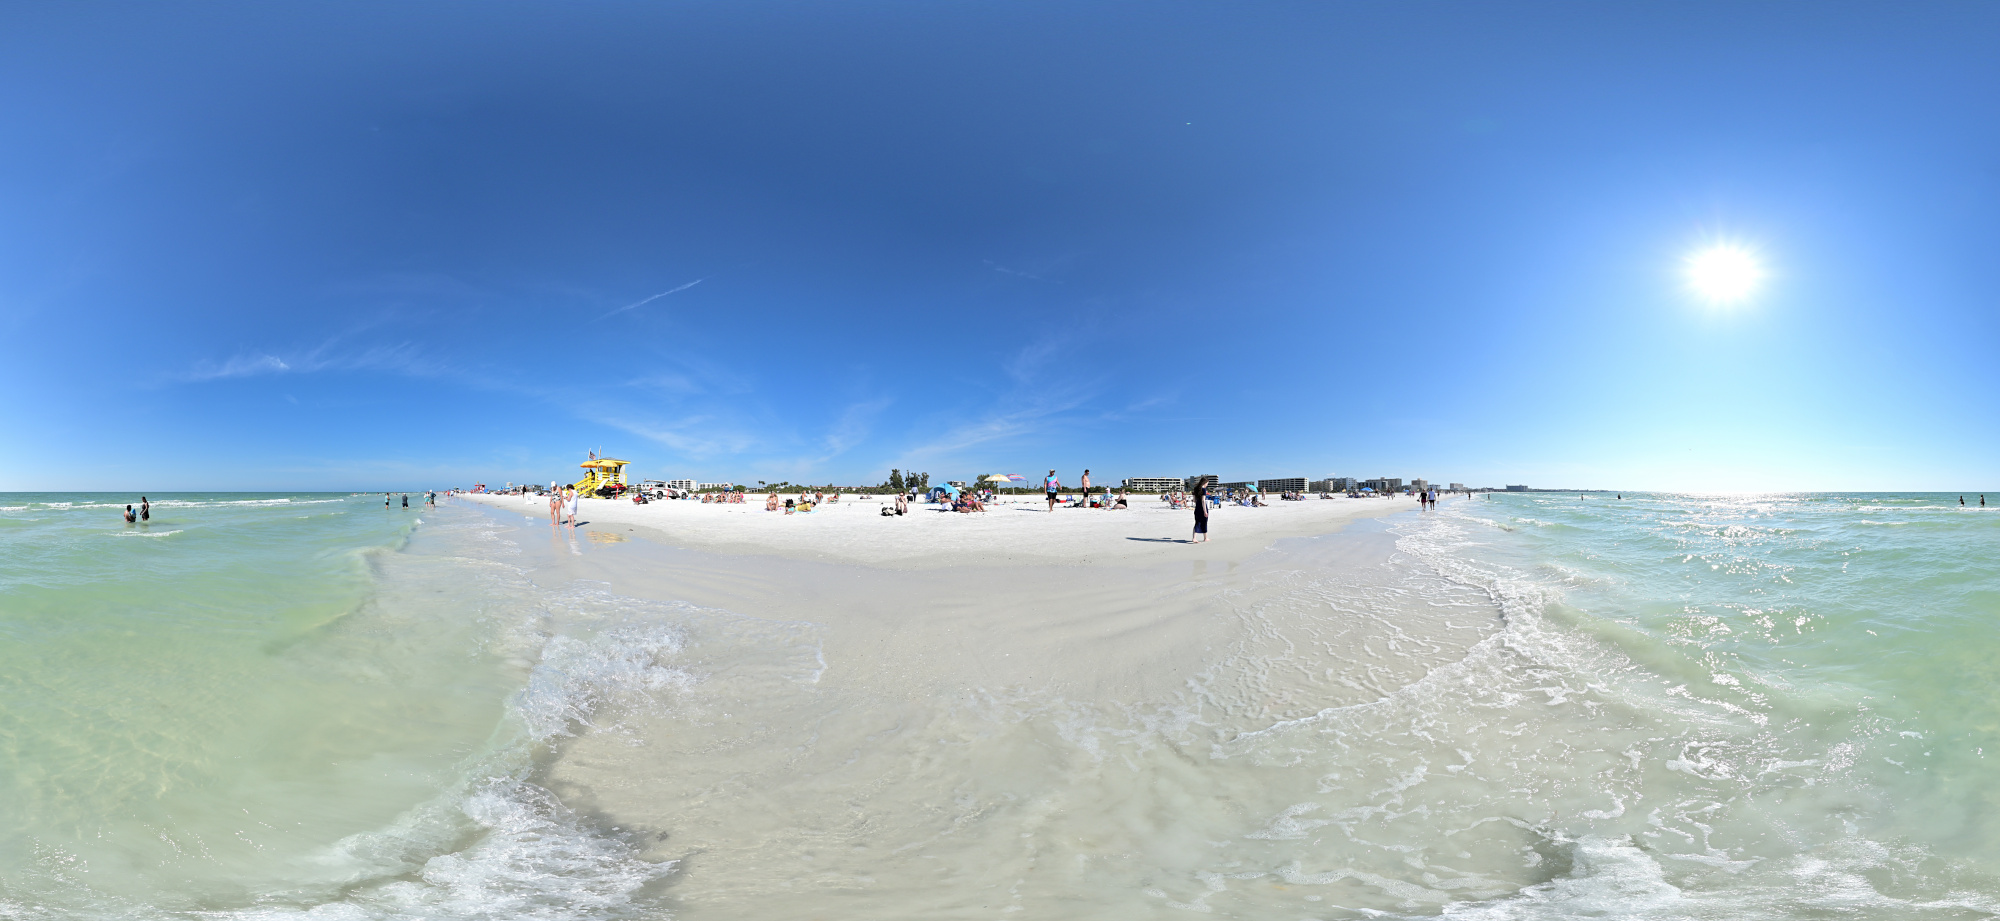
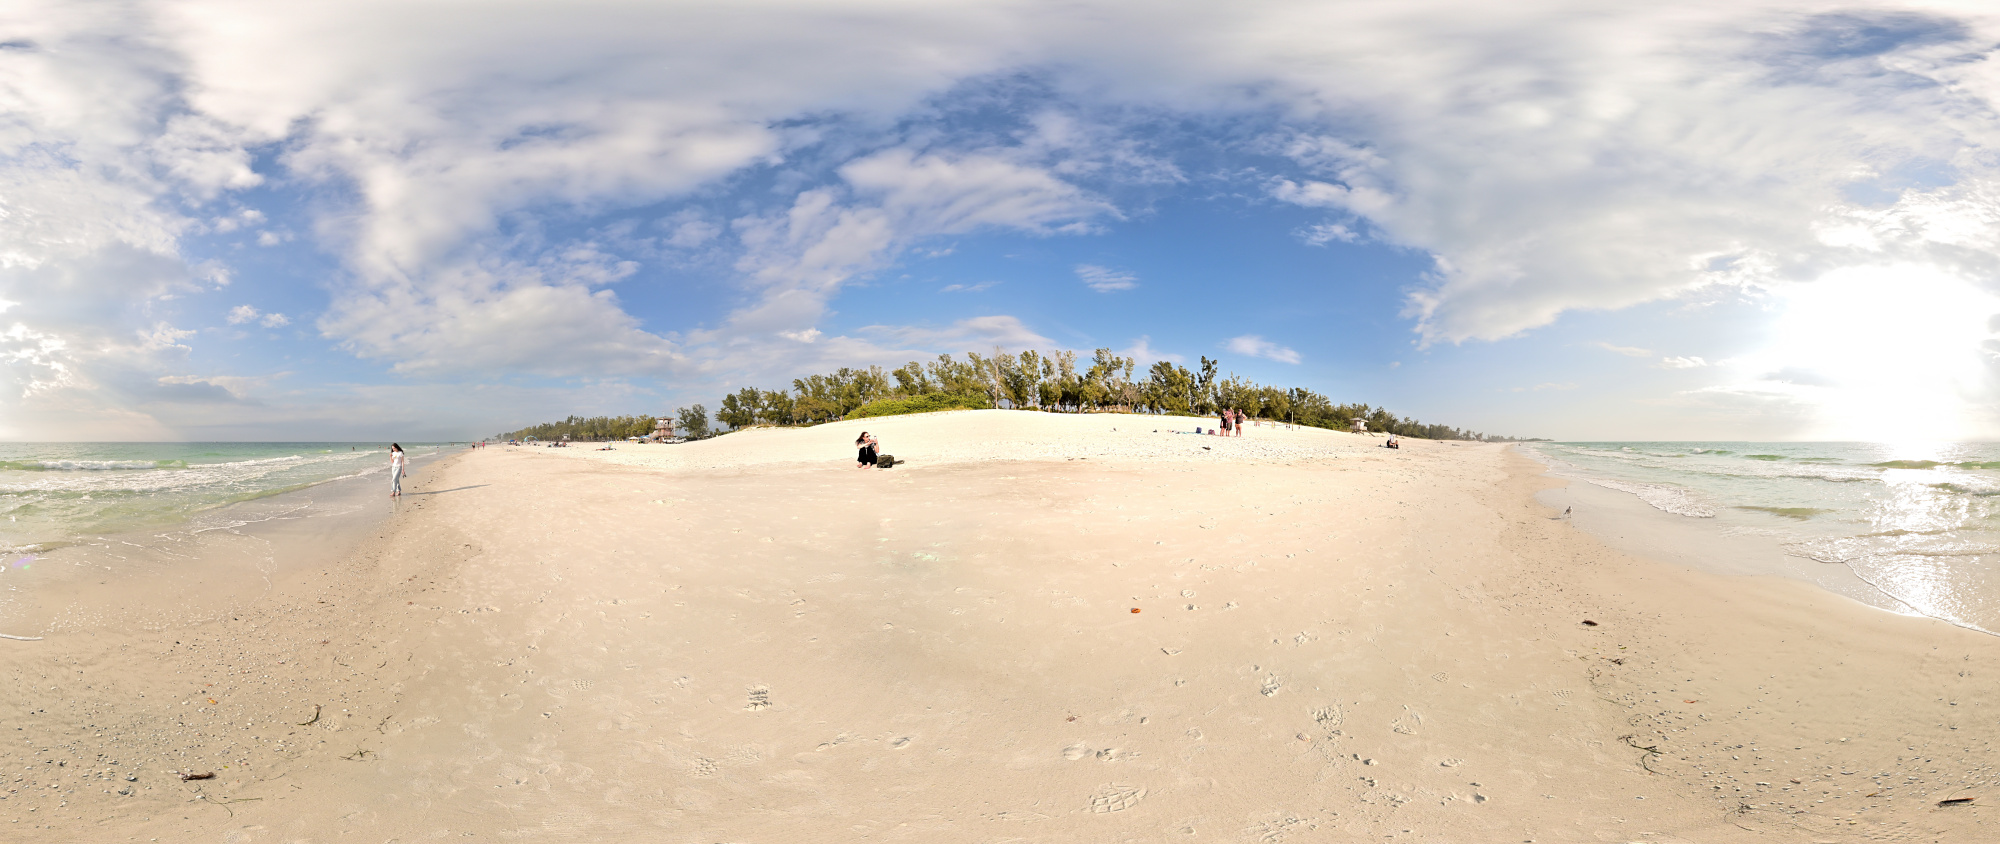
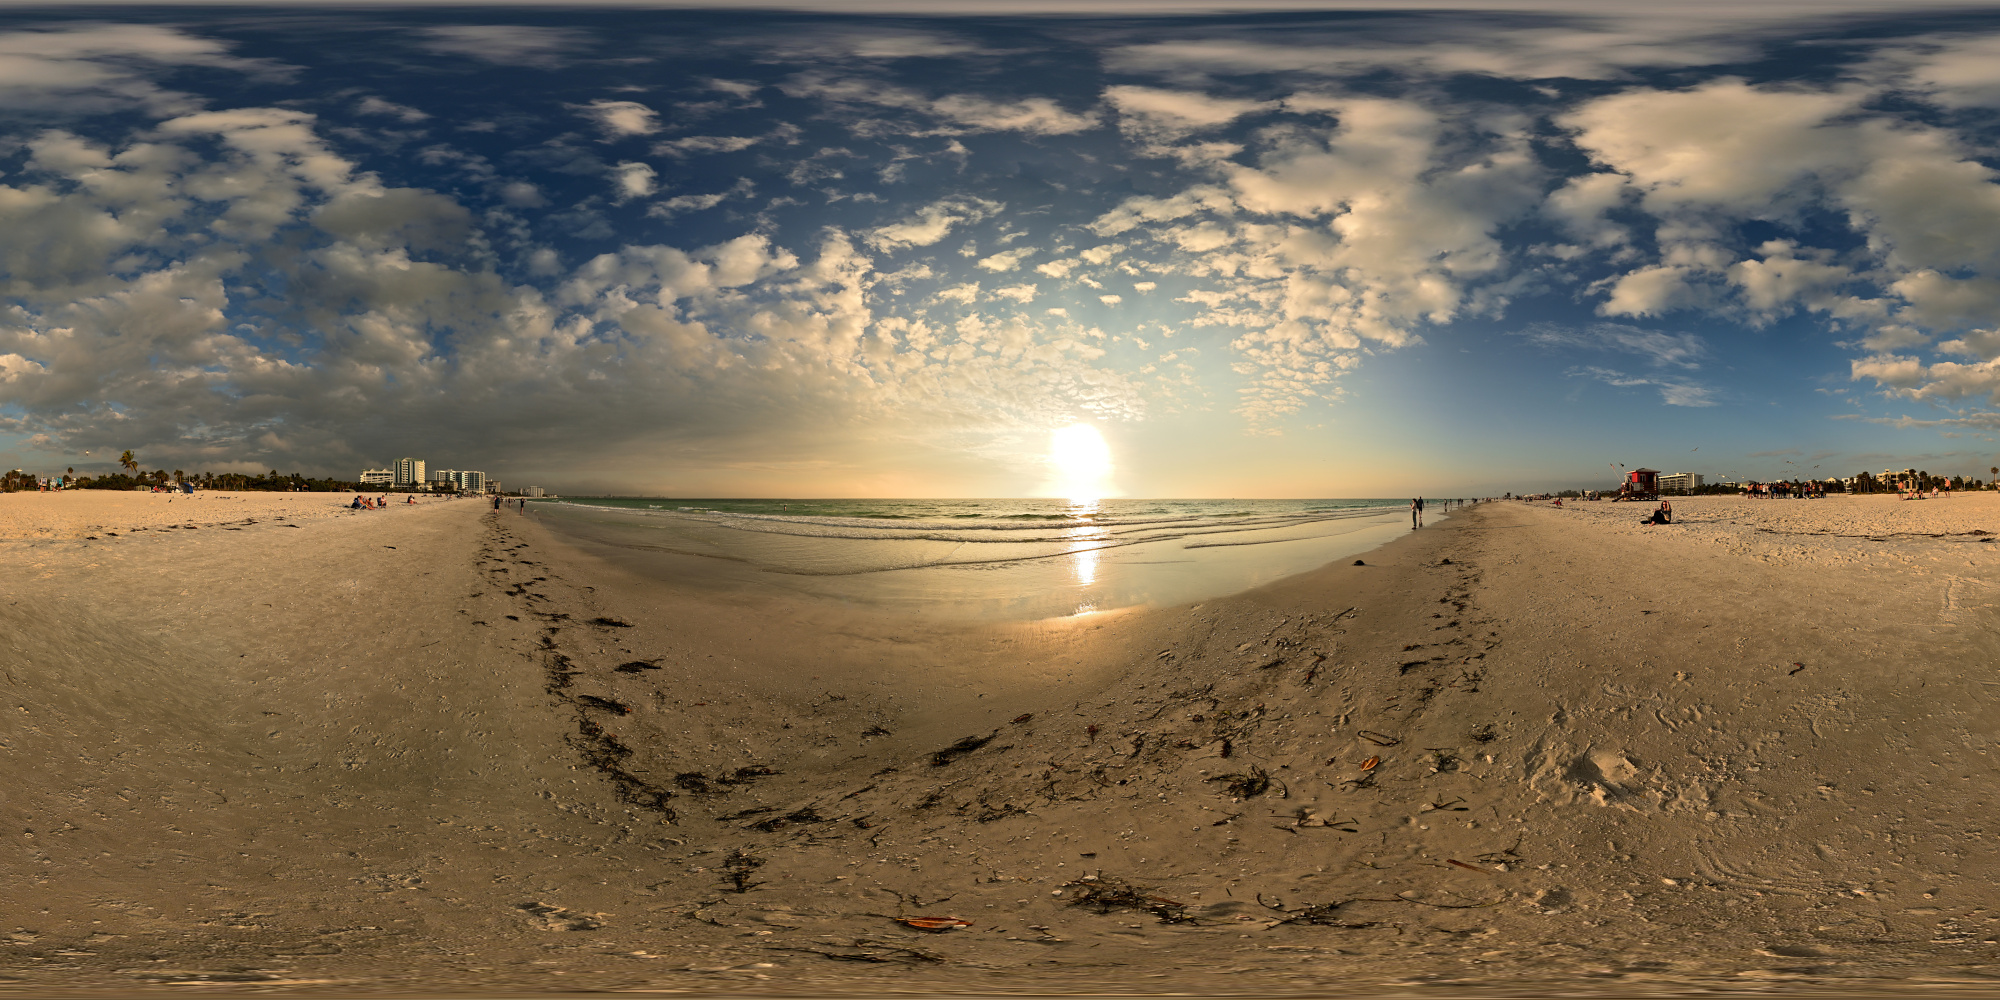
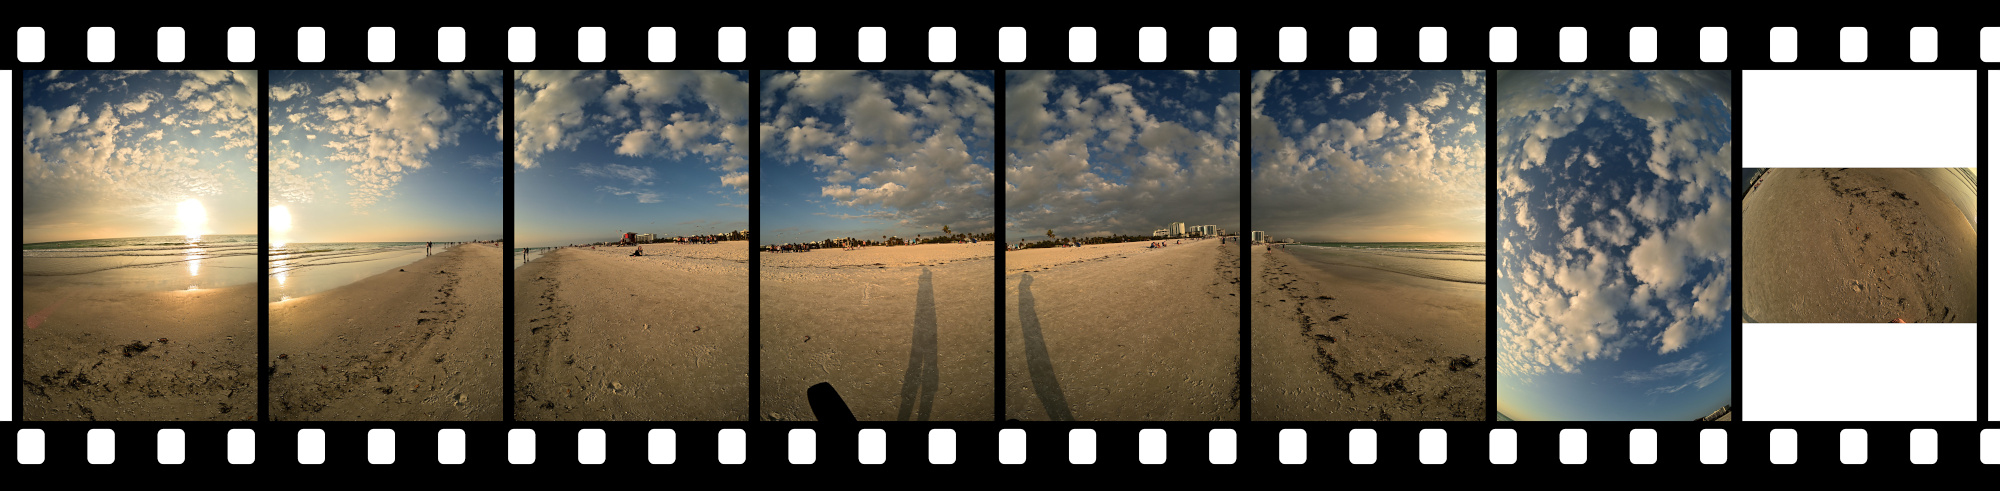
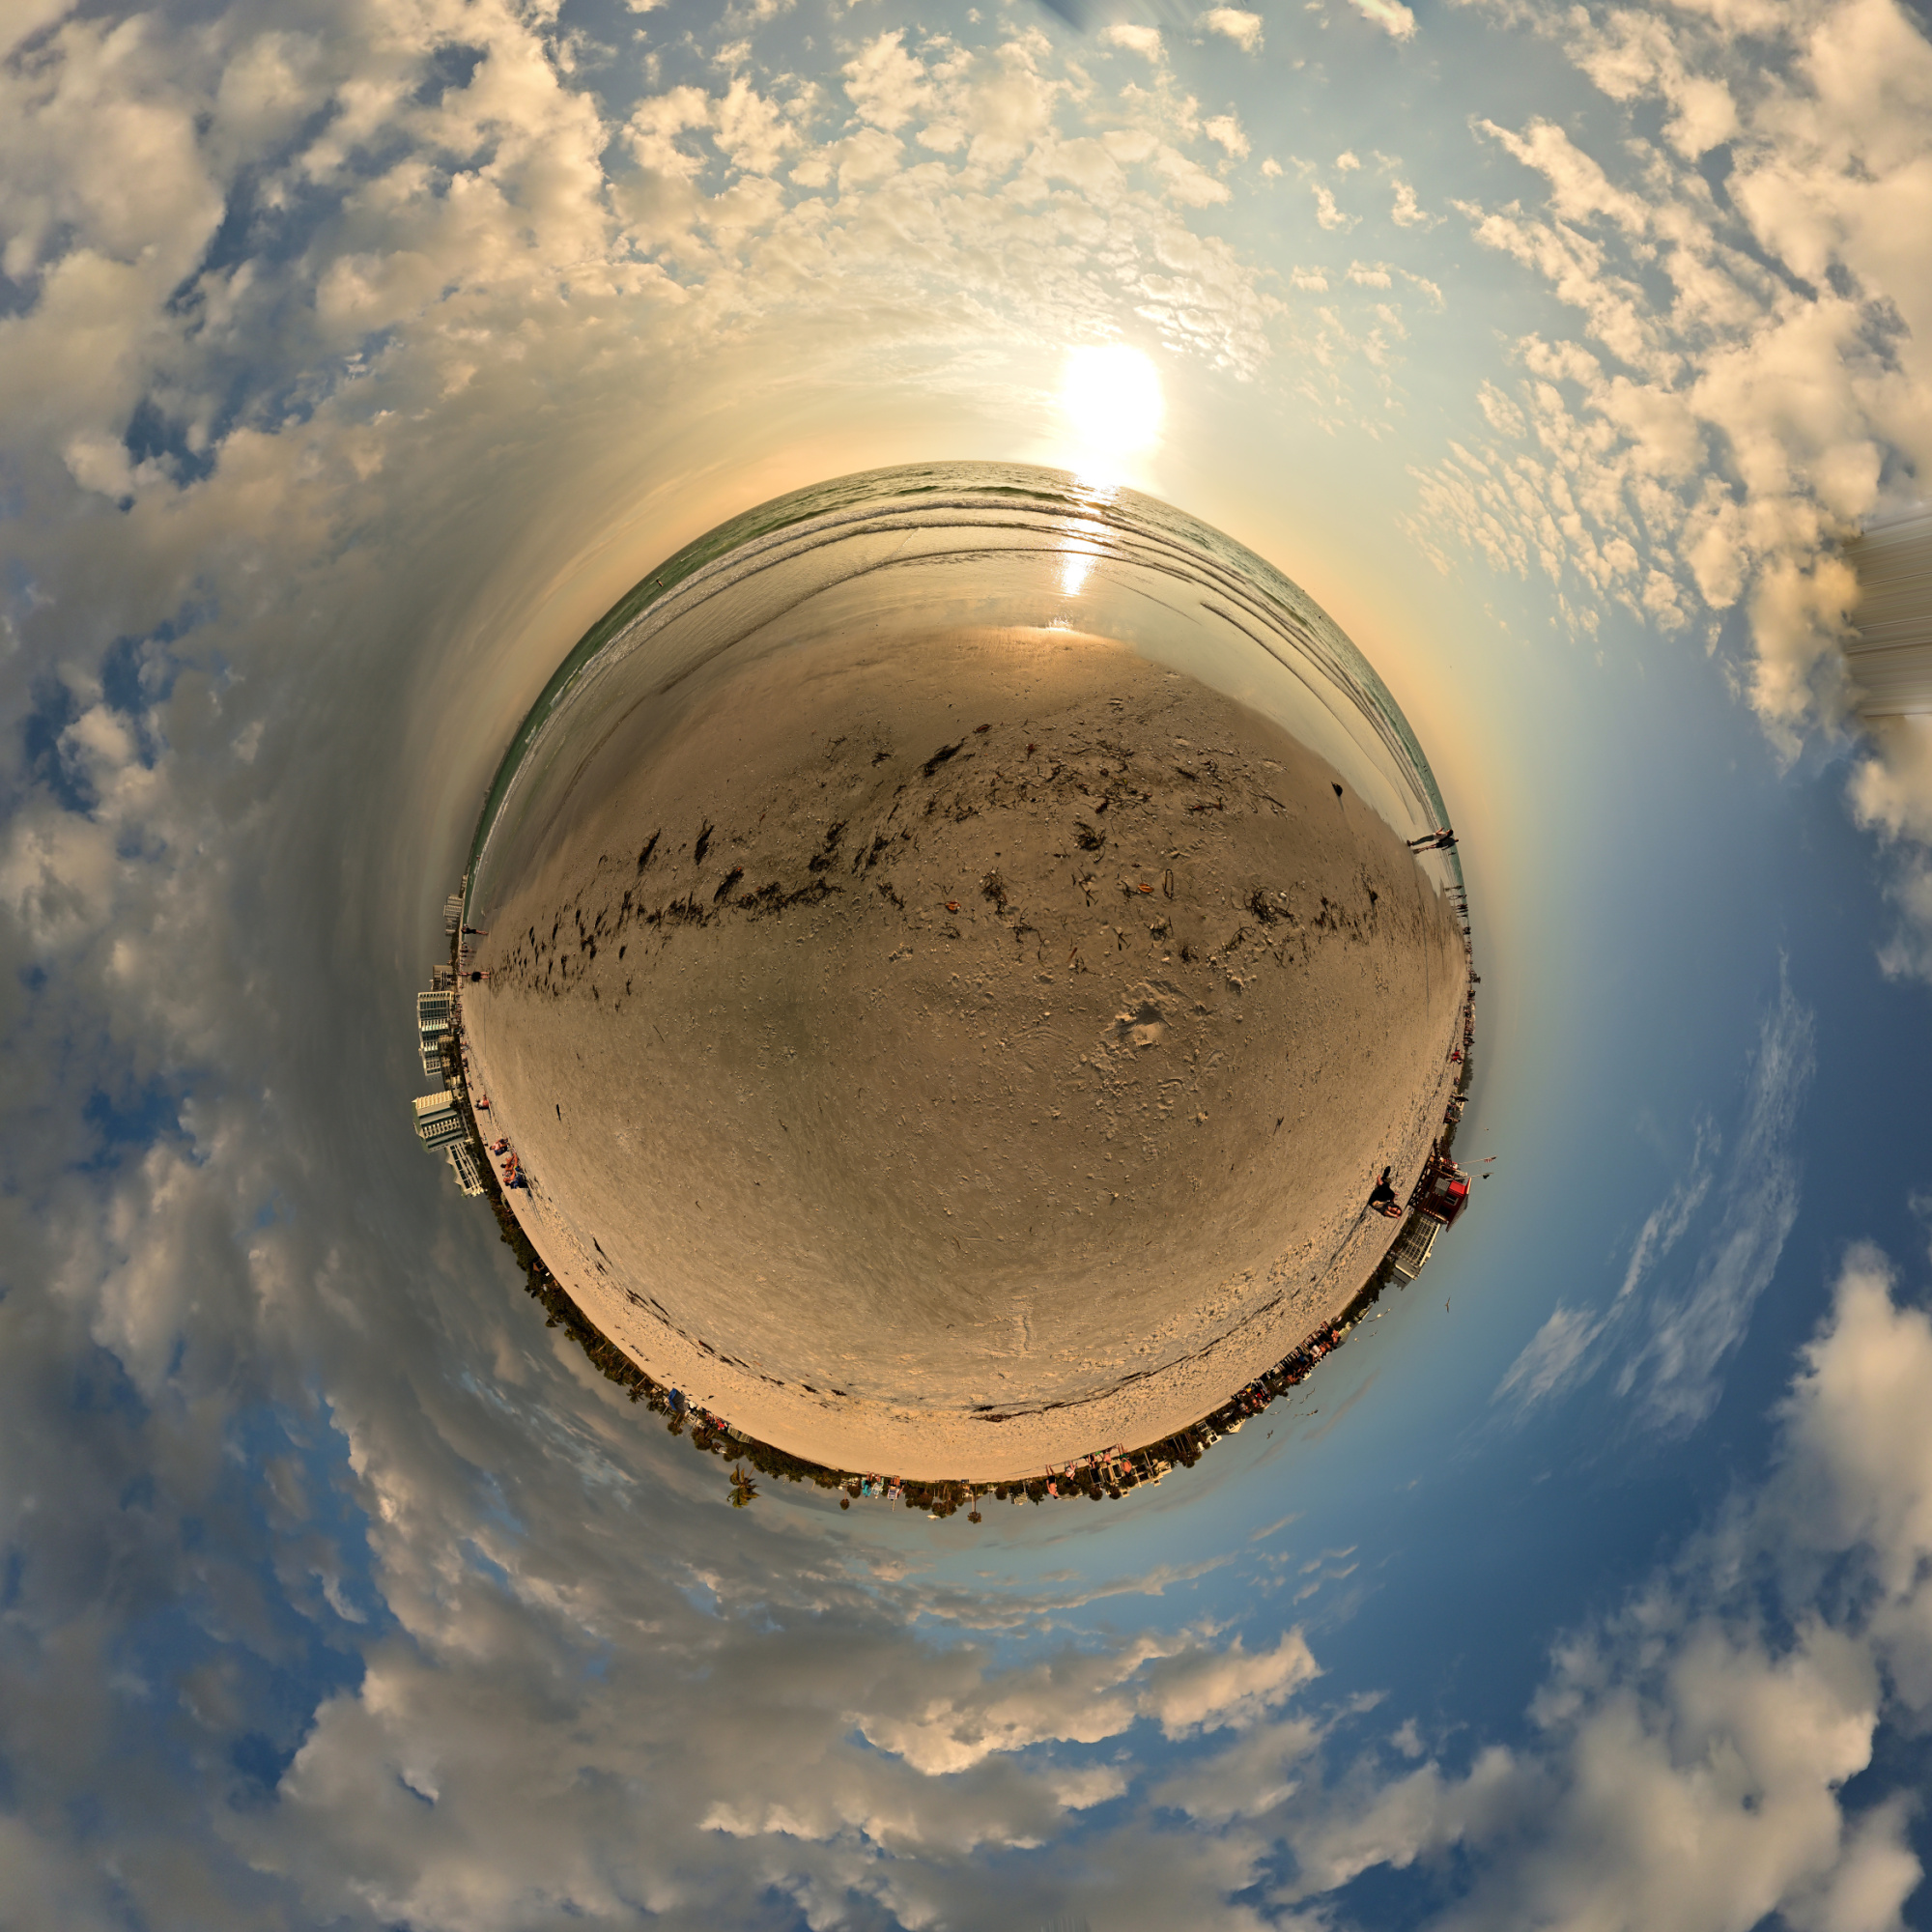
Siesta Key Beach
Siesta Key3 Beach is all about light sand, a wide beach, and a clear horizon. Even on busy days, the shoreline still feels open, with shallow waves and long stretches to walk. It is the quiet blend of sun, breeze, and open space that makes Siesta Key stand out on Sarasota's coast.
Interactive Panorama Siesta Key Beach 1
1/1250s f/5,6 ISO 100/21° f=7,5mm
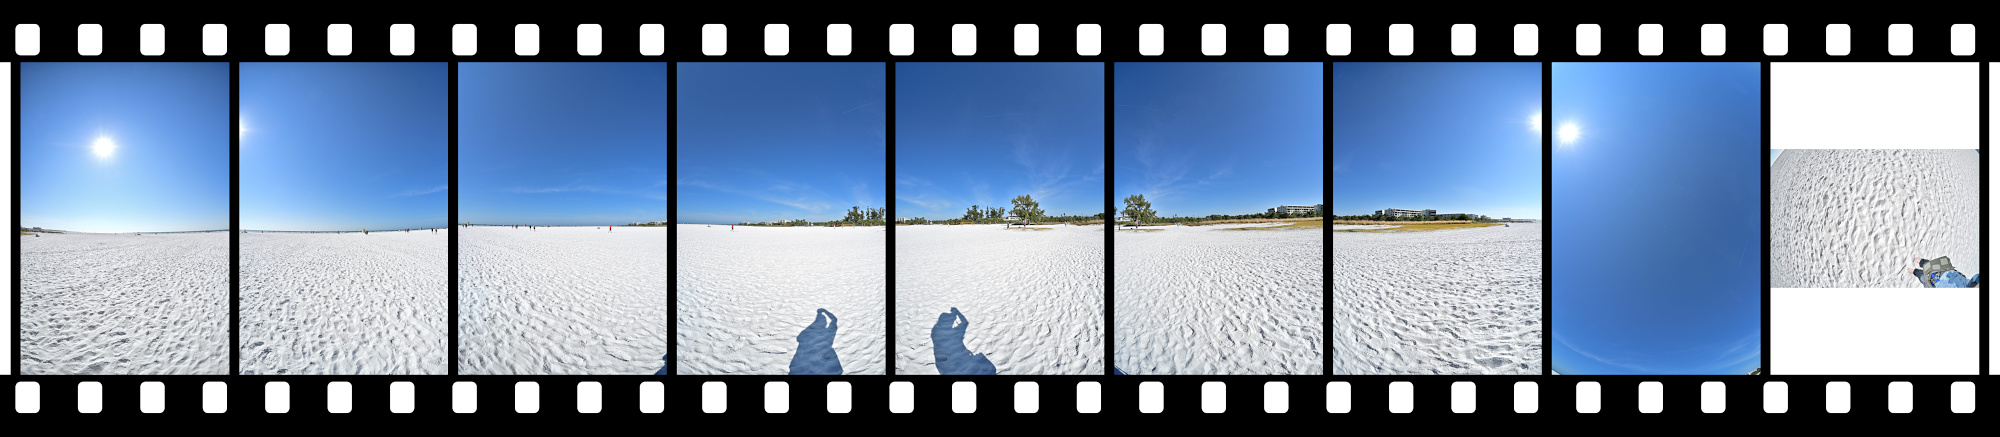
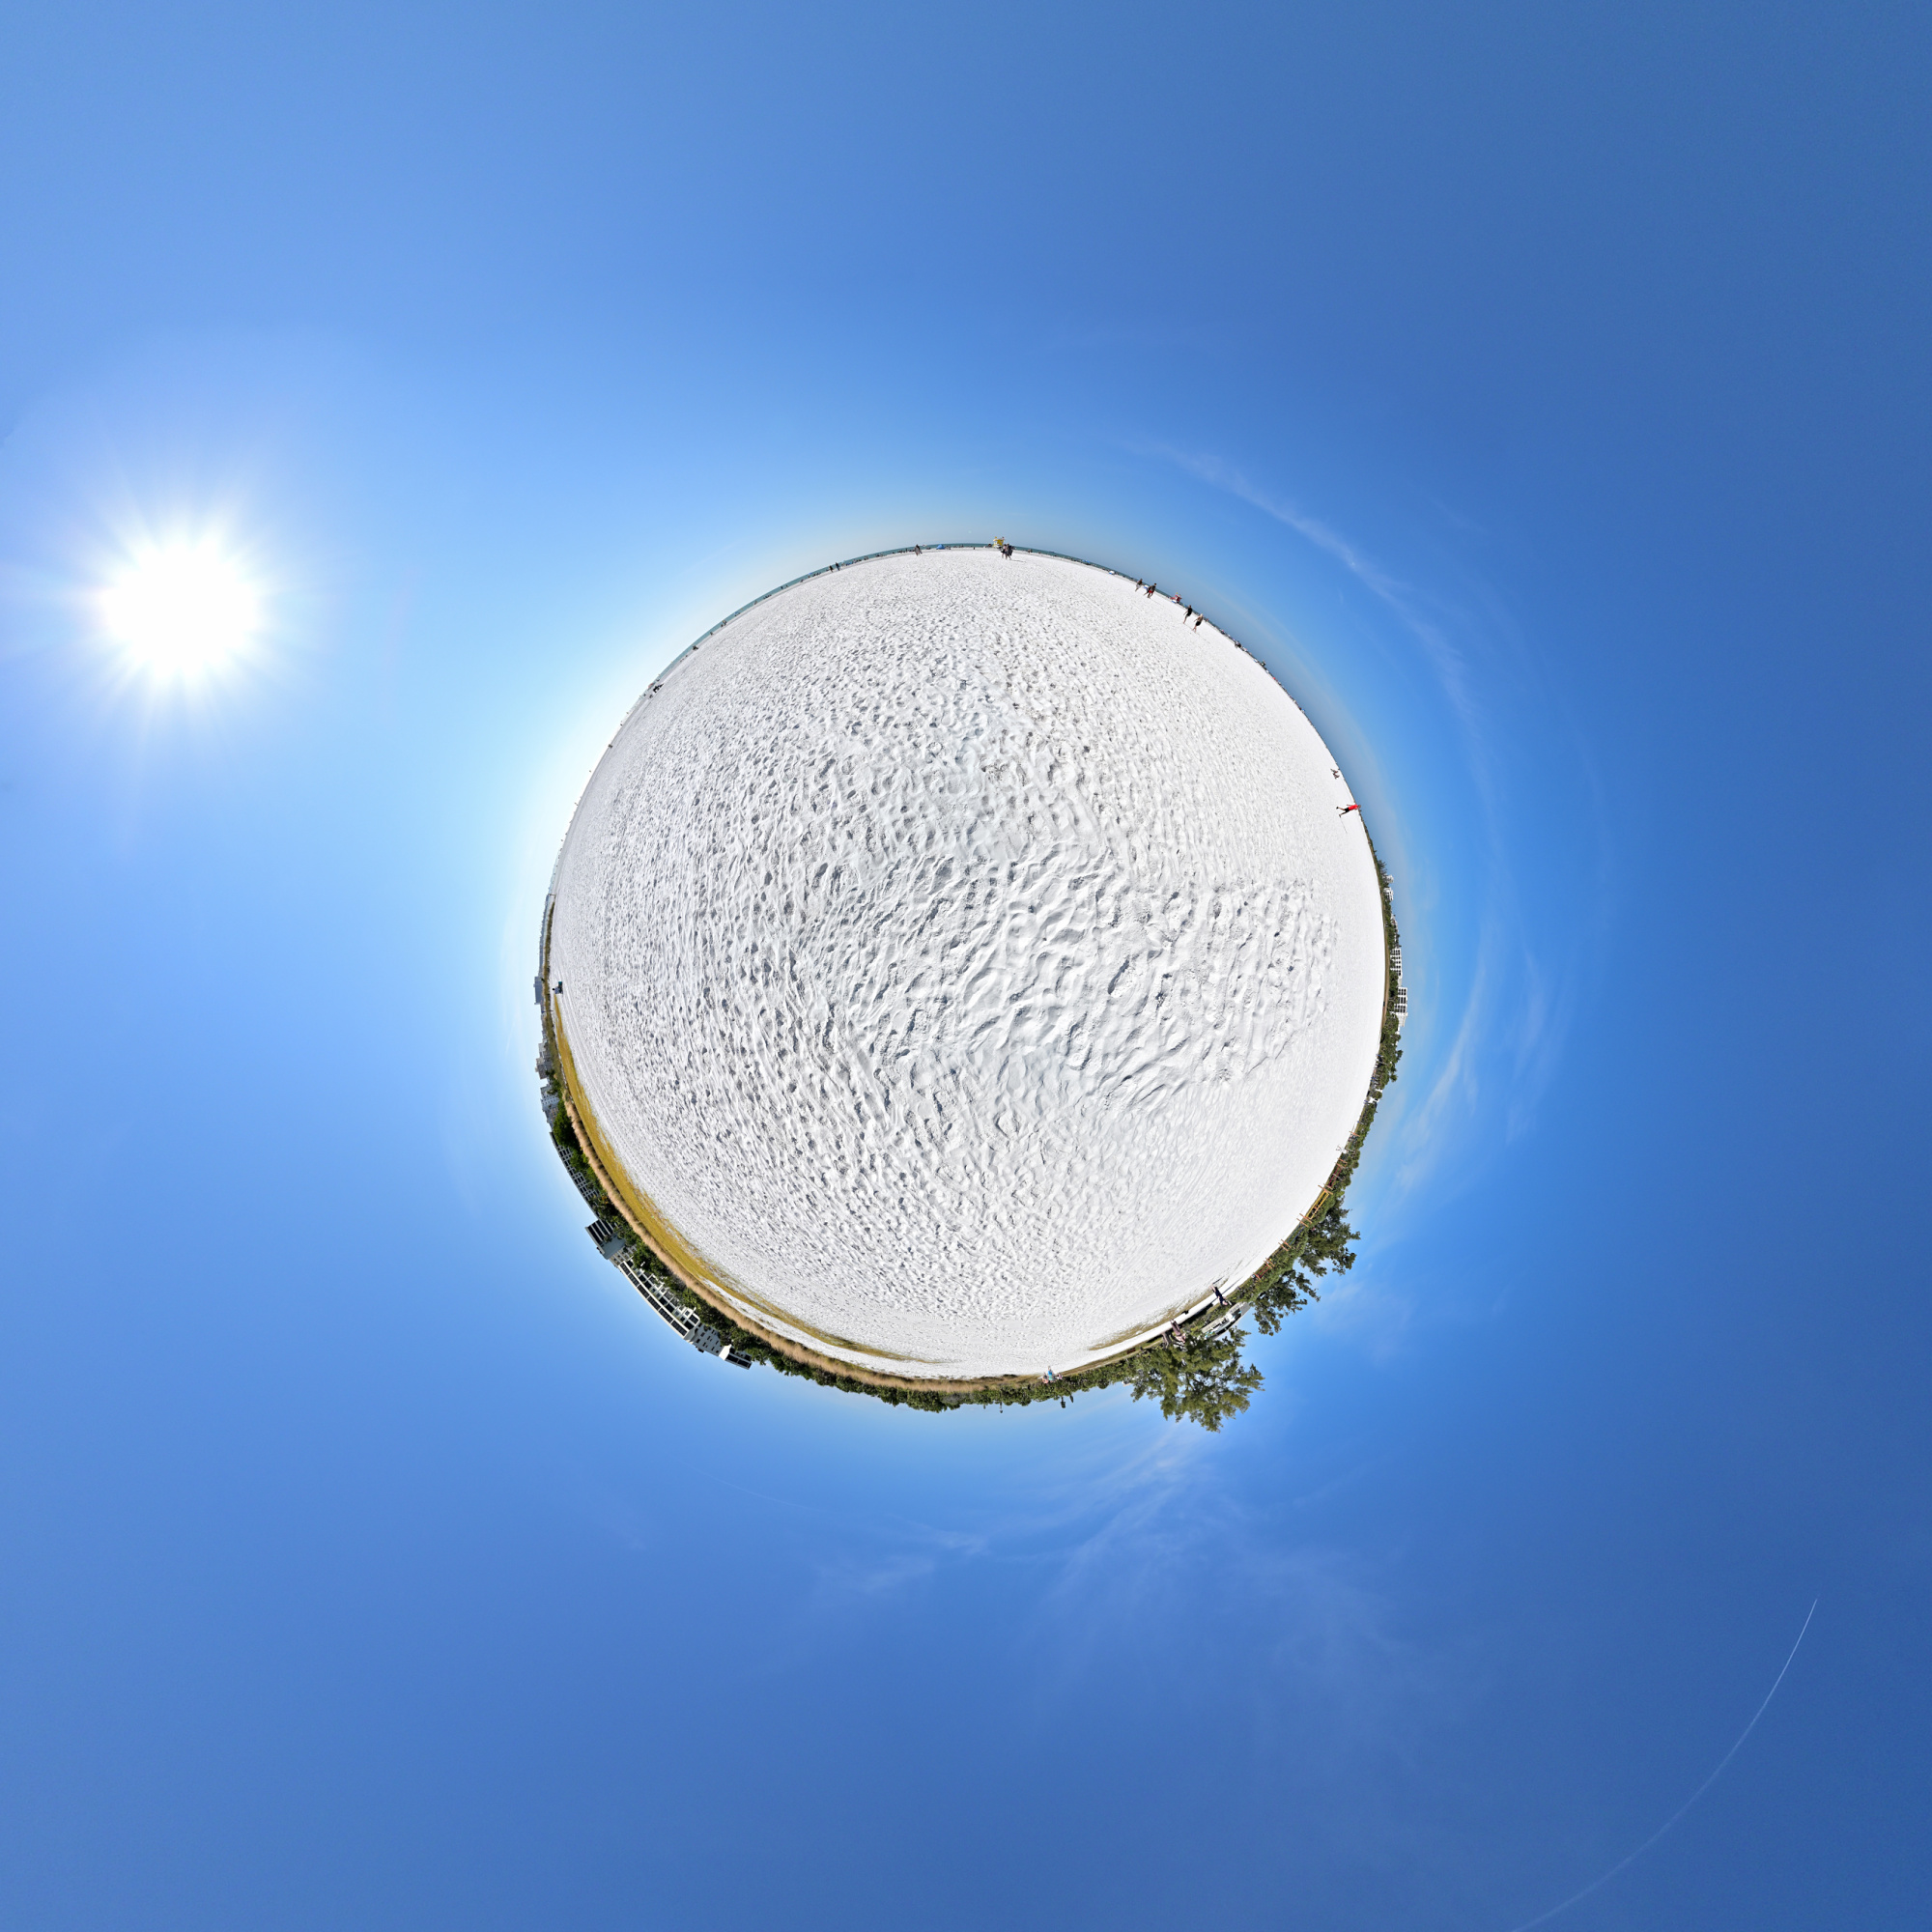
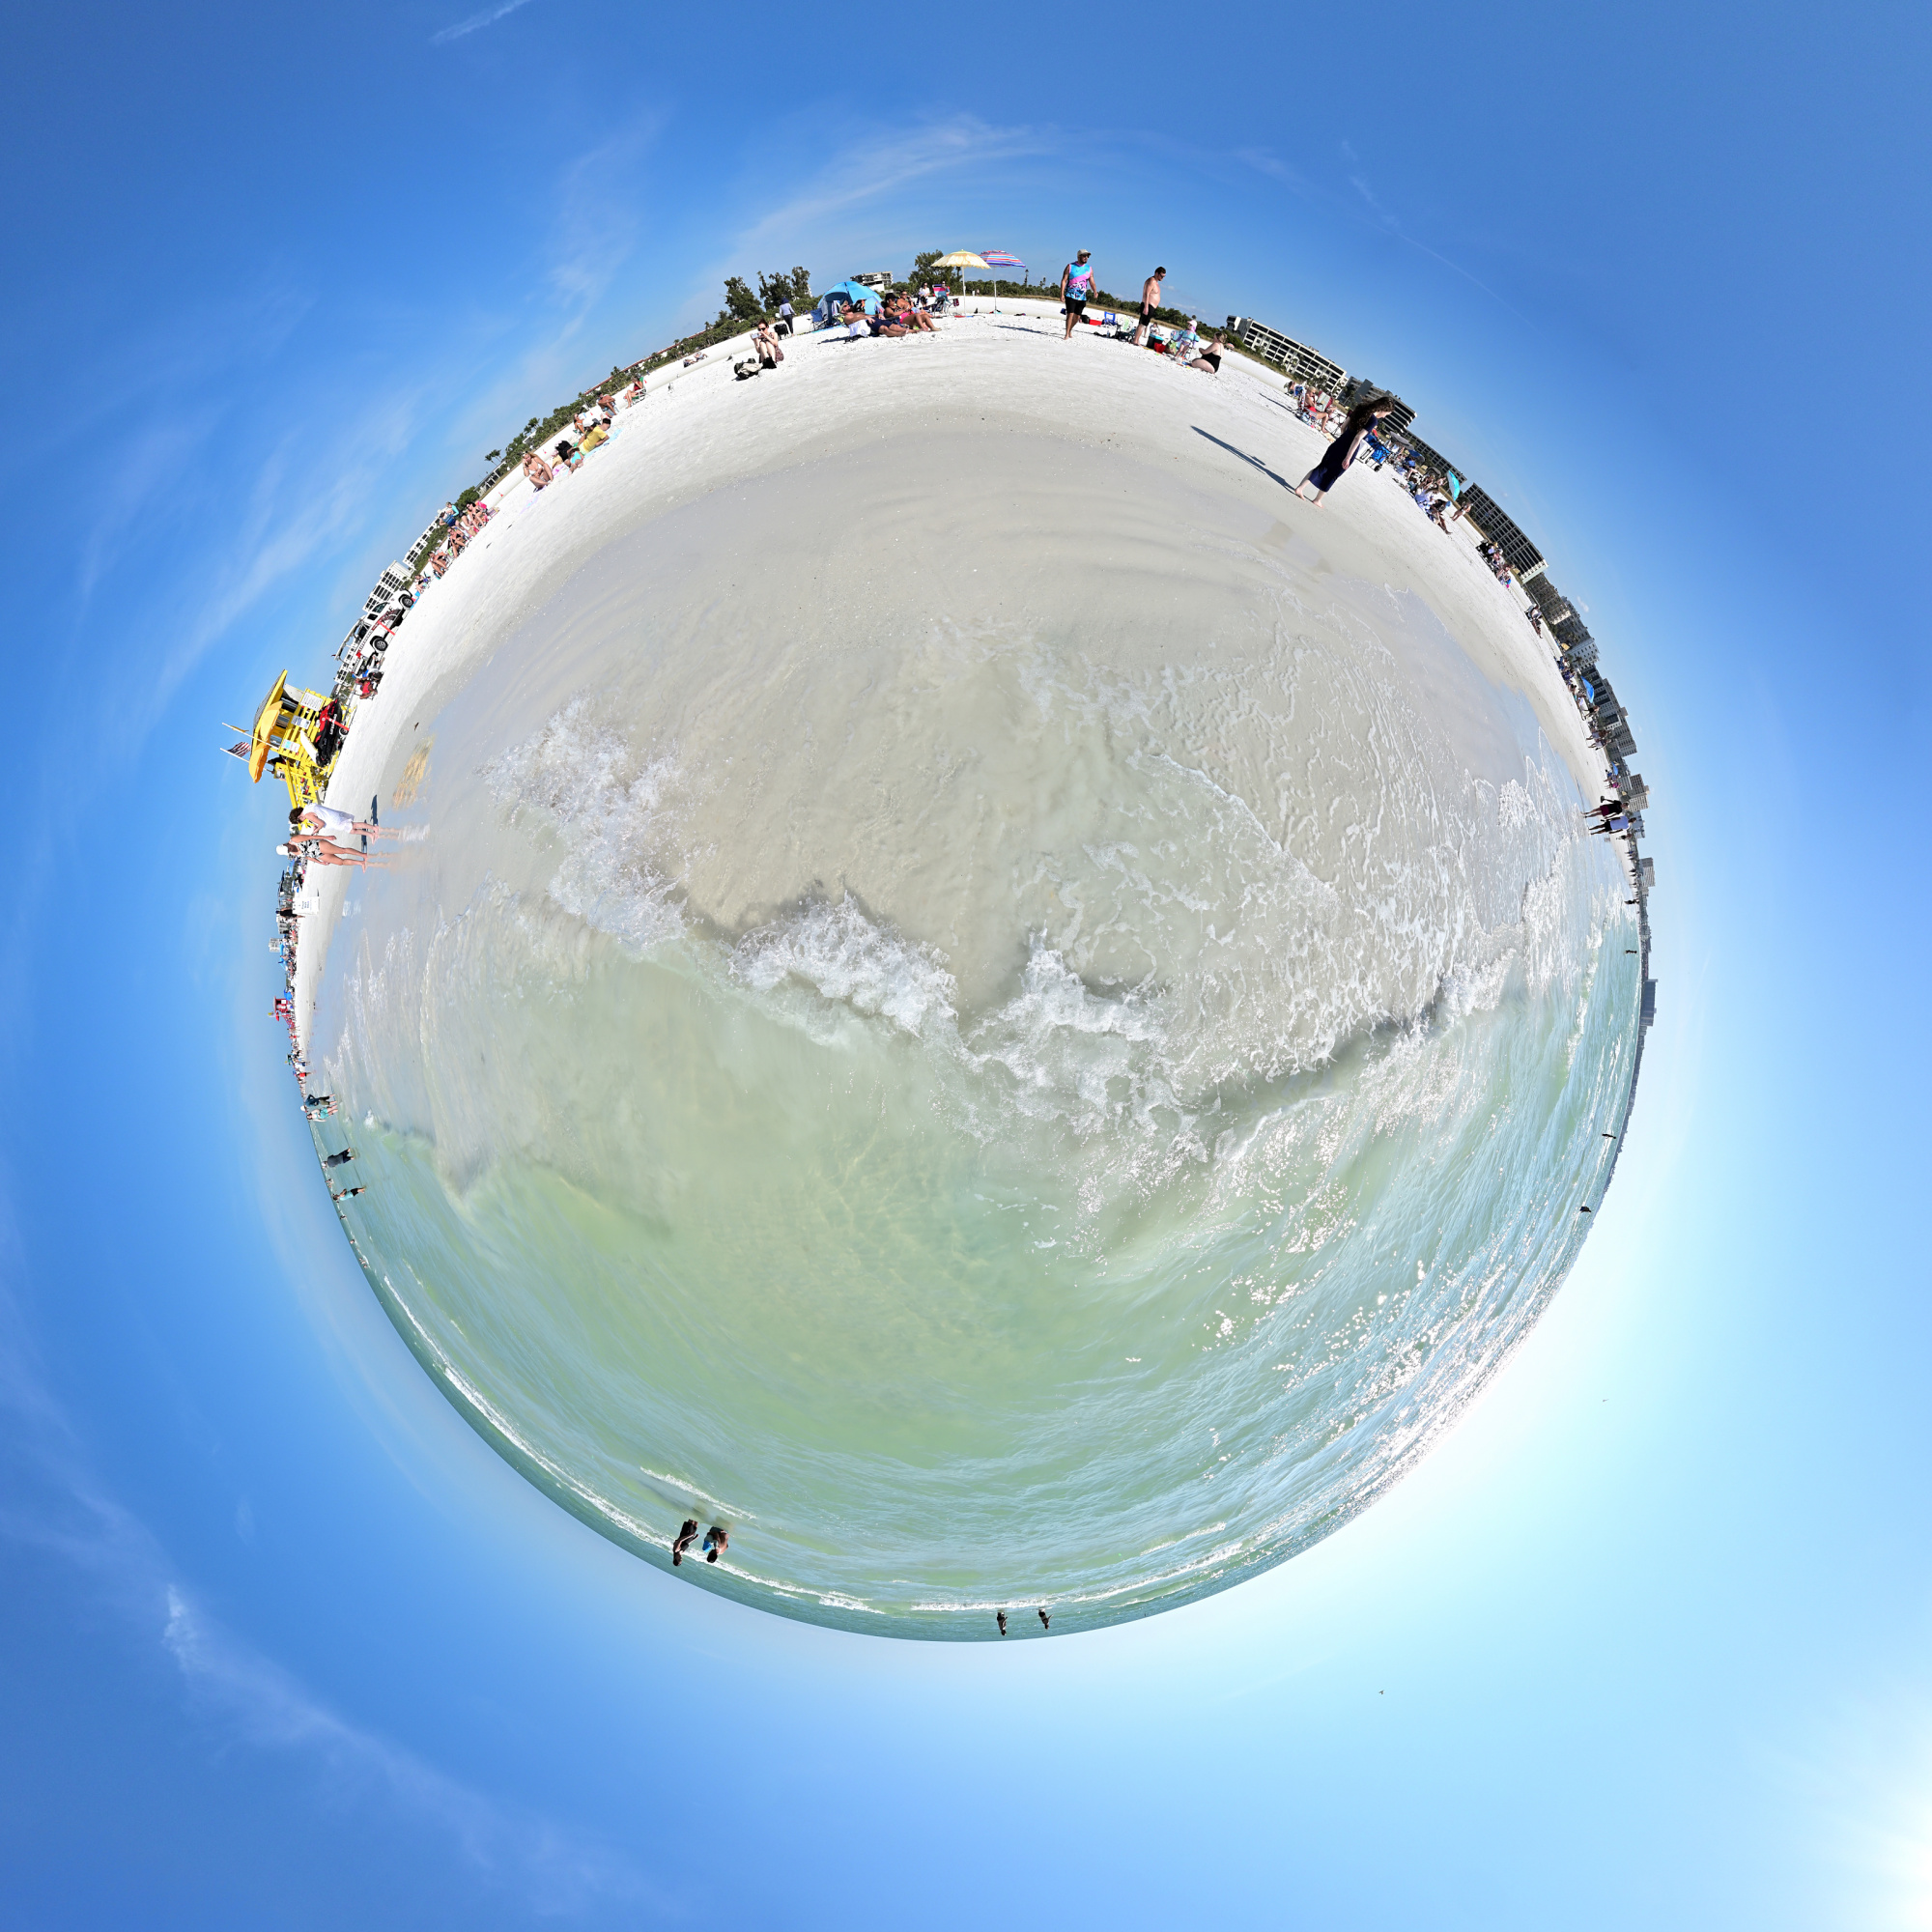
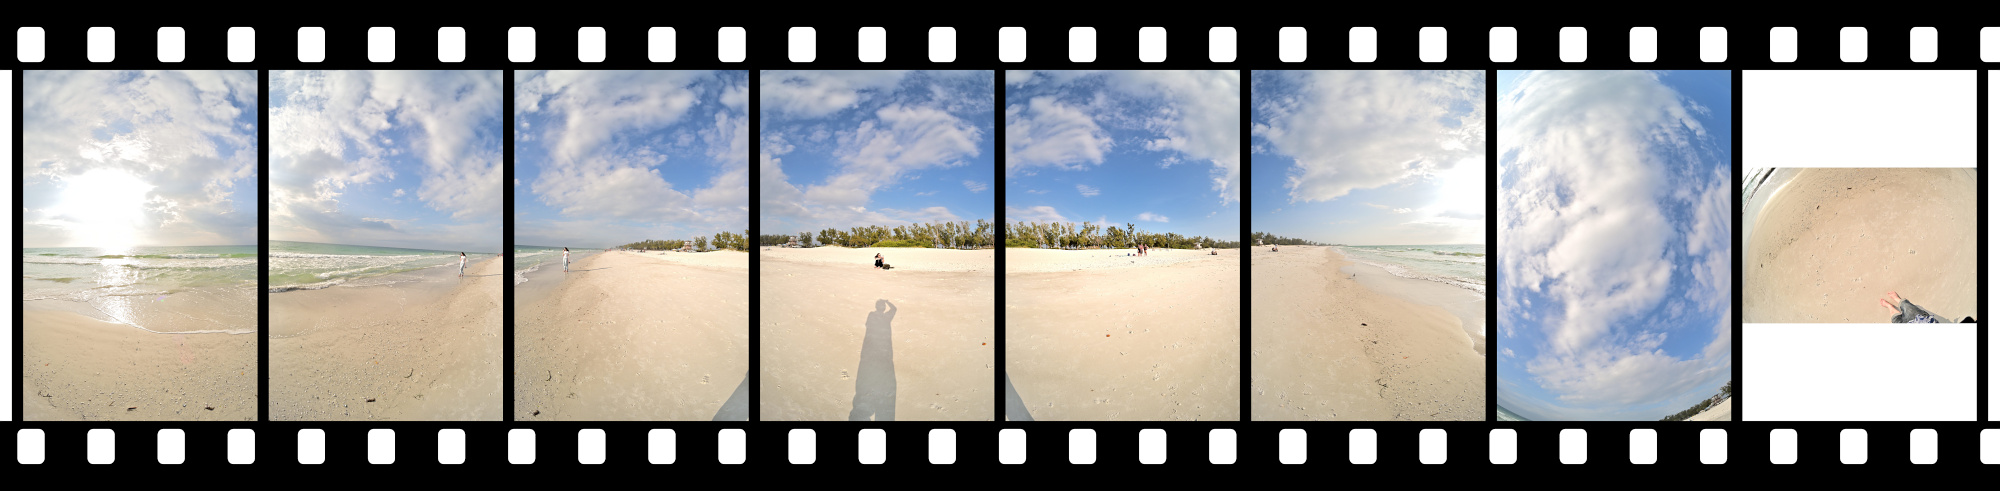
Siesta Key Desert Planet
Exploration of perception for the Worldwide Panoramas event.
Perception is shaped not only by what is visible, but also by the position from which it is experienced.
Just off the beach but not out in the water, that in-between place changes the way the scene reads. At the edge, everything is in motion, and you are between two worlds, seeing both at once.
There are no footprints to hide here, but the moving waves bring their own challenges. Masks in the stitch editor guide the transitions between frames and help maintain alignment where the surface never stays still.
Photographed in winter, the scene carries a tropical atmosphere. That quiet inversion becomes part of the viewer's perception.
Interactive Panorama Siesta Key Beach 2
1/1250s f/5,6 ISO 100/21° f=7,5mm

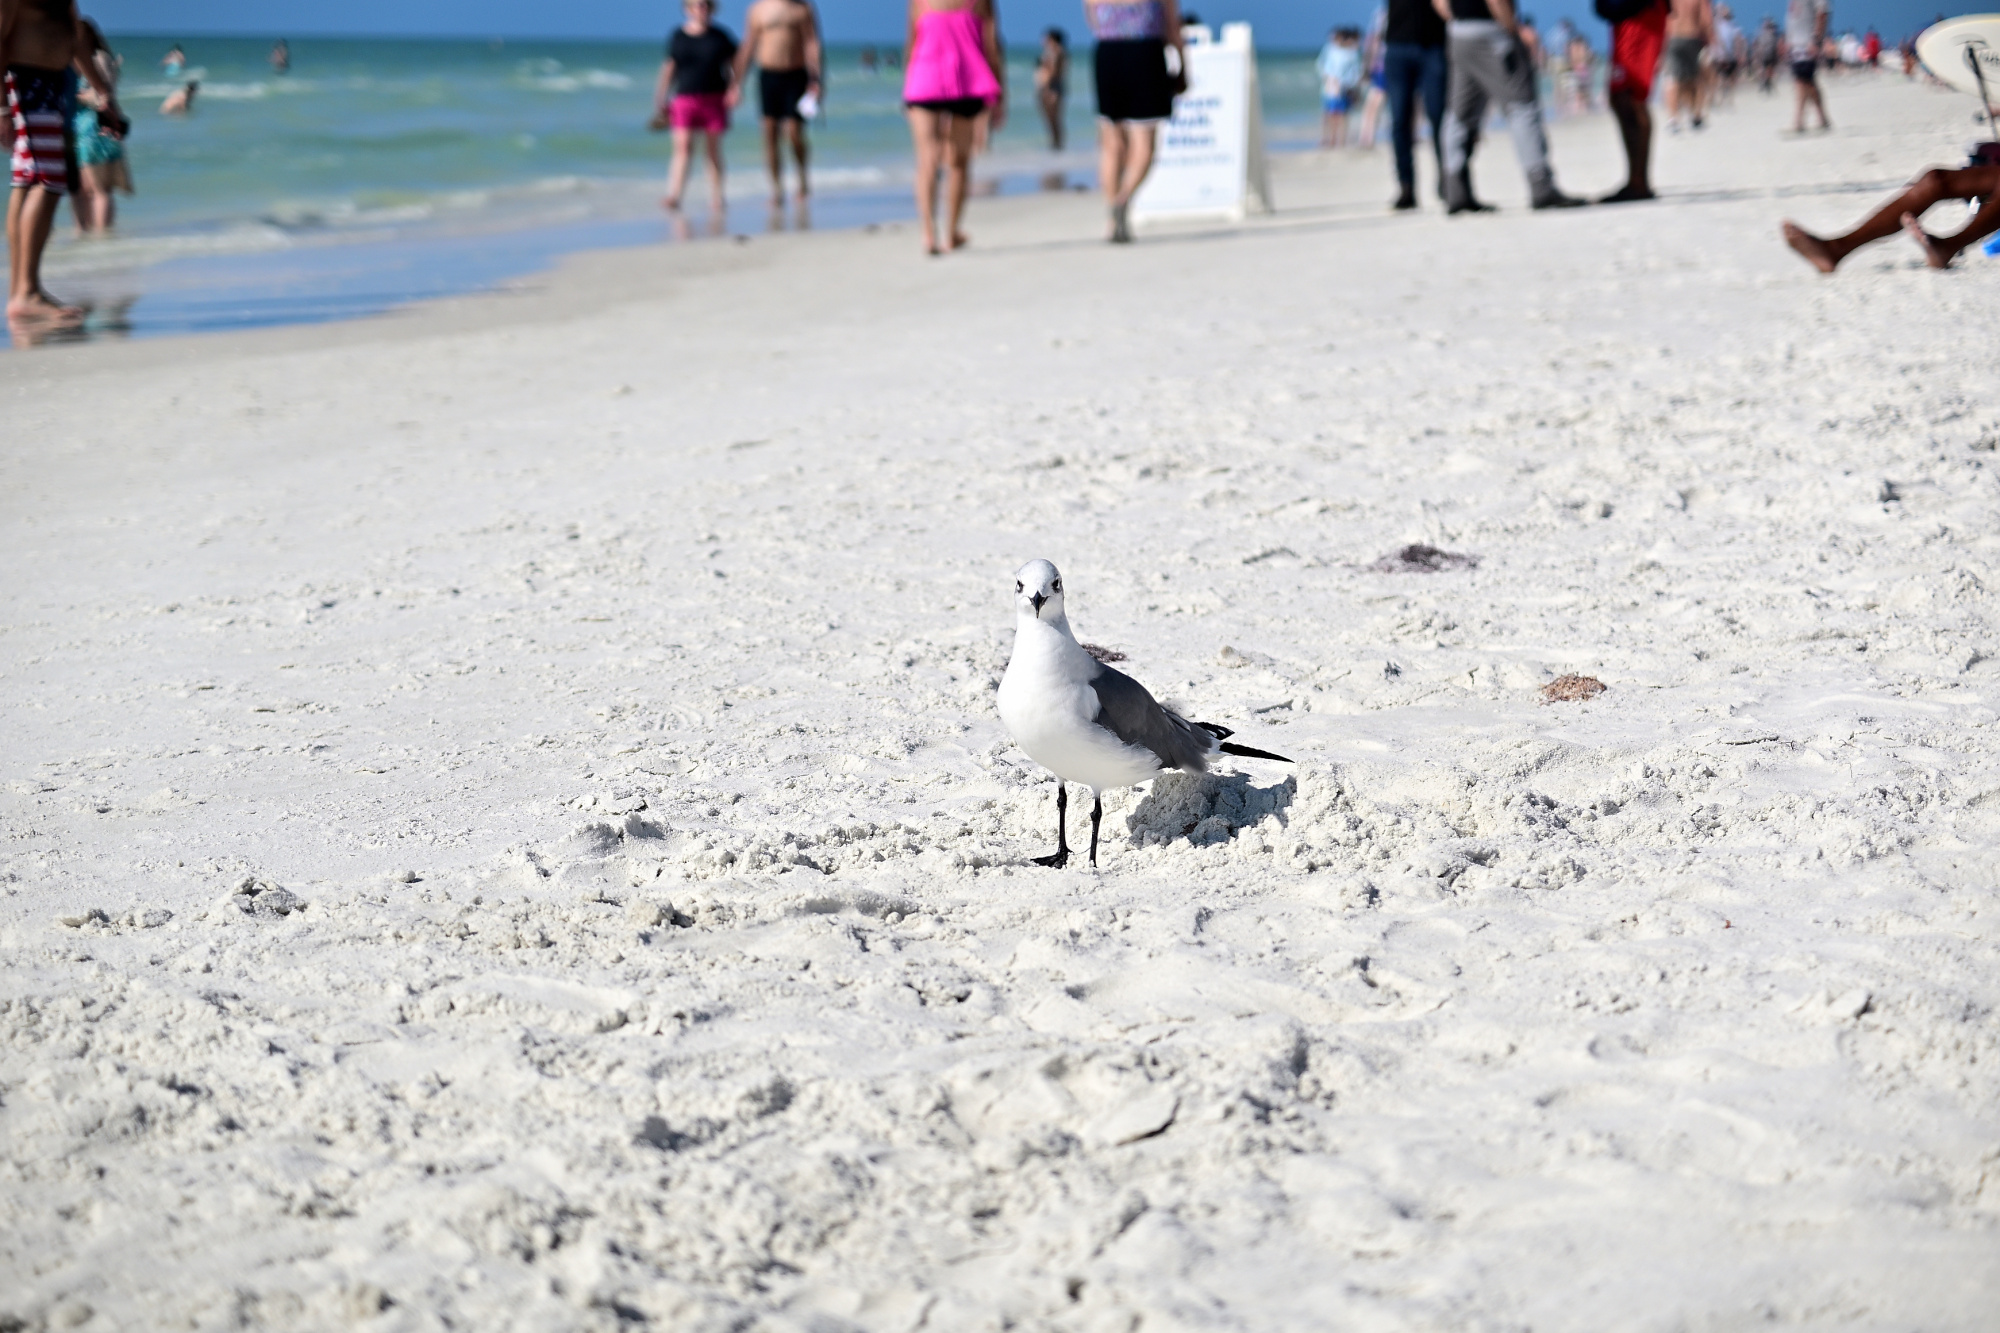
With my camera in hand, I noticed a seagull staring and inspecting me. Surely one panorama should be acceptable, right? It watched calmly like a tiny director and never blinked4.
1/50s f/2,8 ISO 100/21° 16-50mm f/2,8 VR f=50mm/75mm
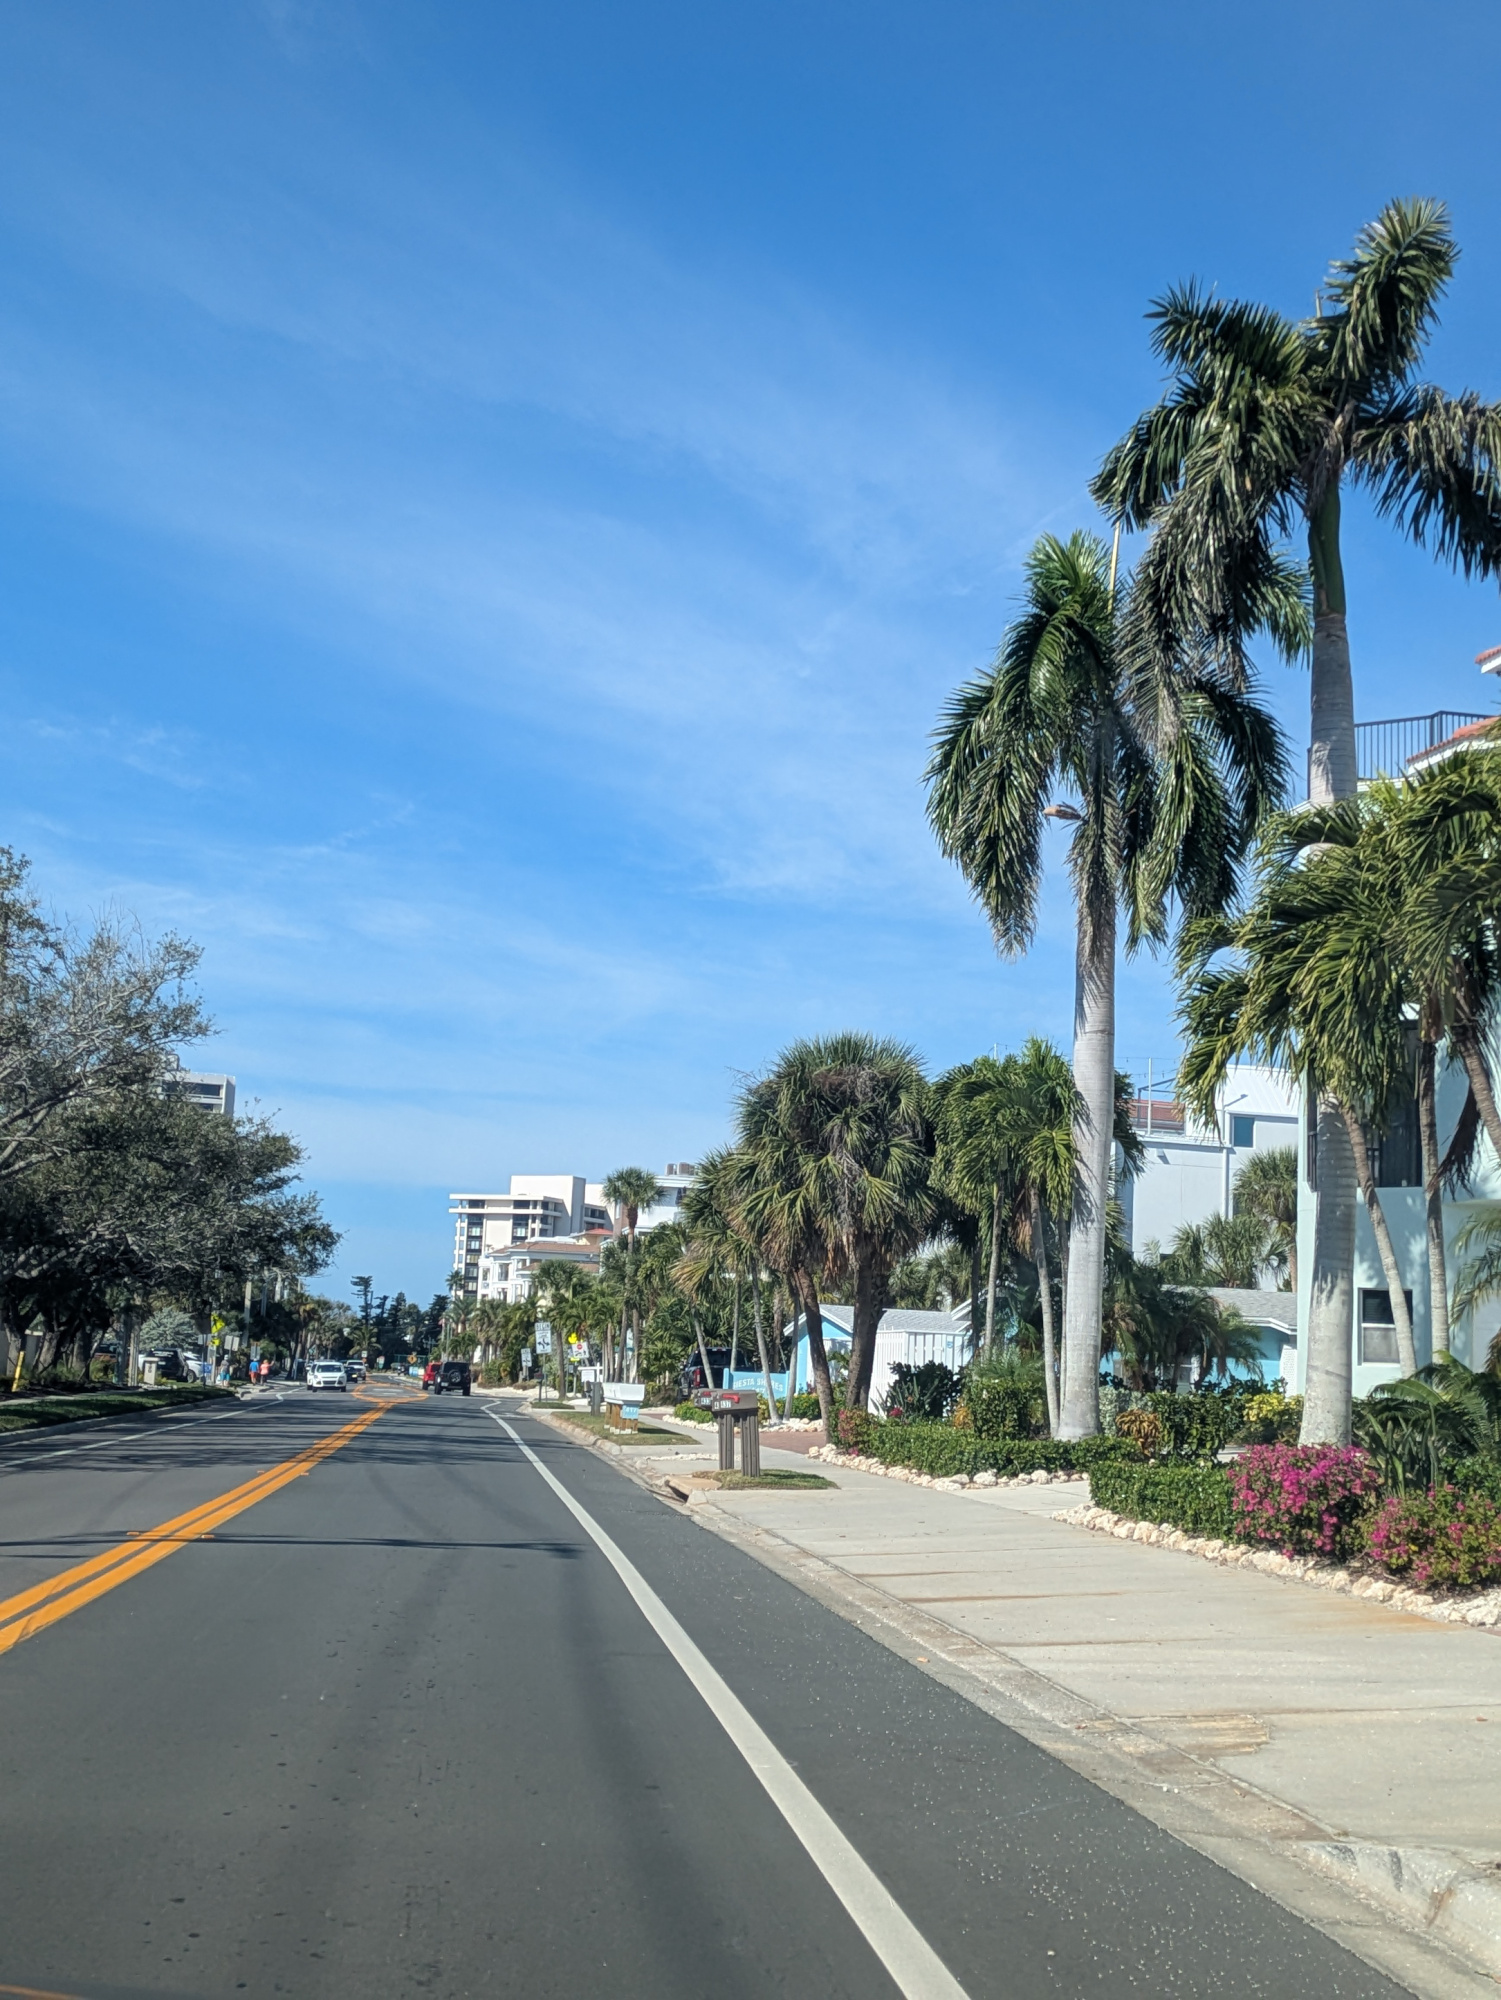
Driving away from the beach, the palm trees lined the street in a clean row, like they were guiding the way.
1/1546s f/1,9 ISO 47 f=5mm/25mm
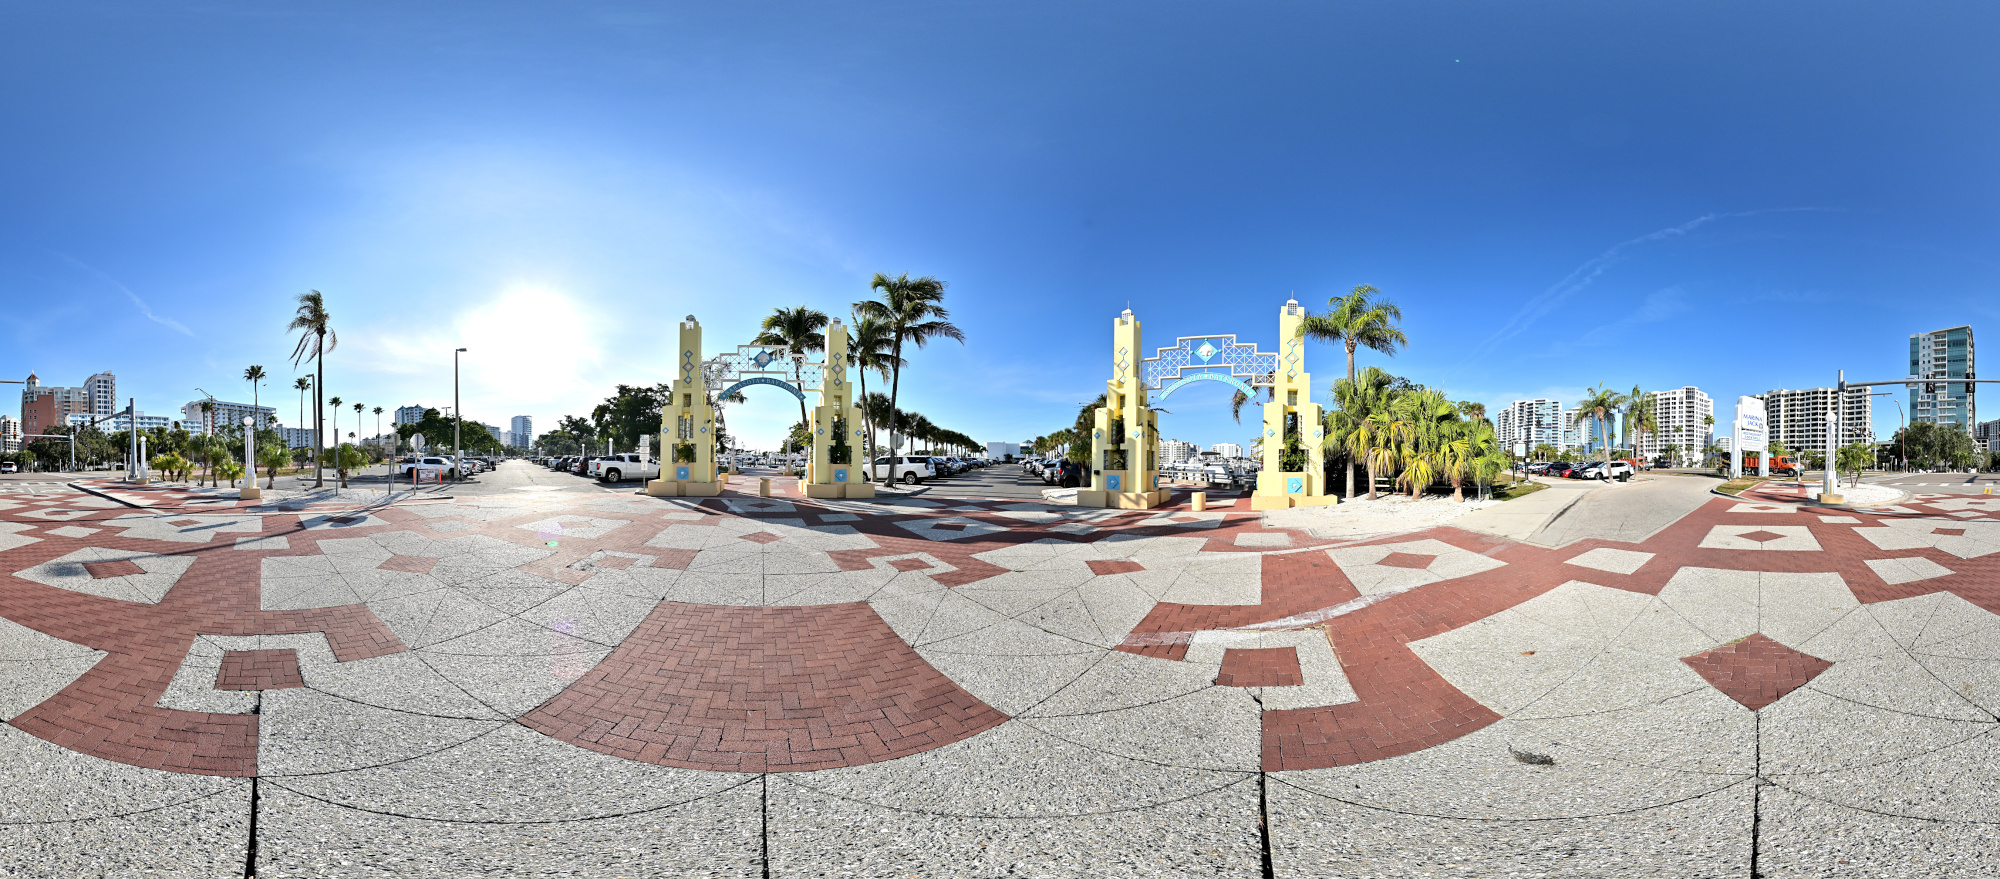
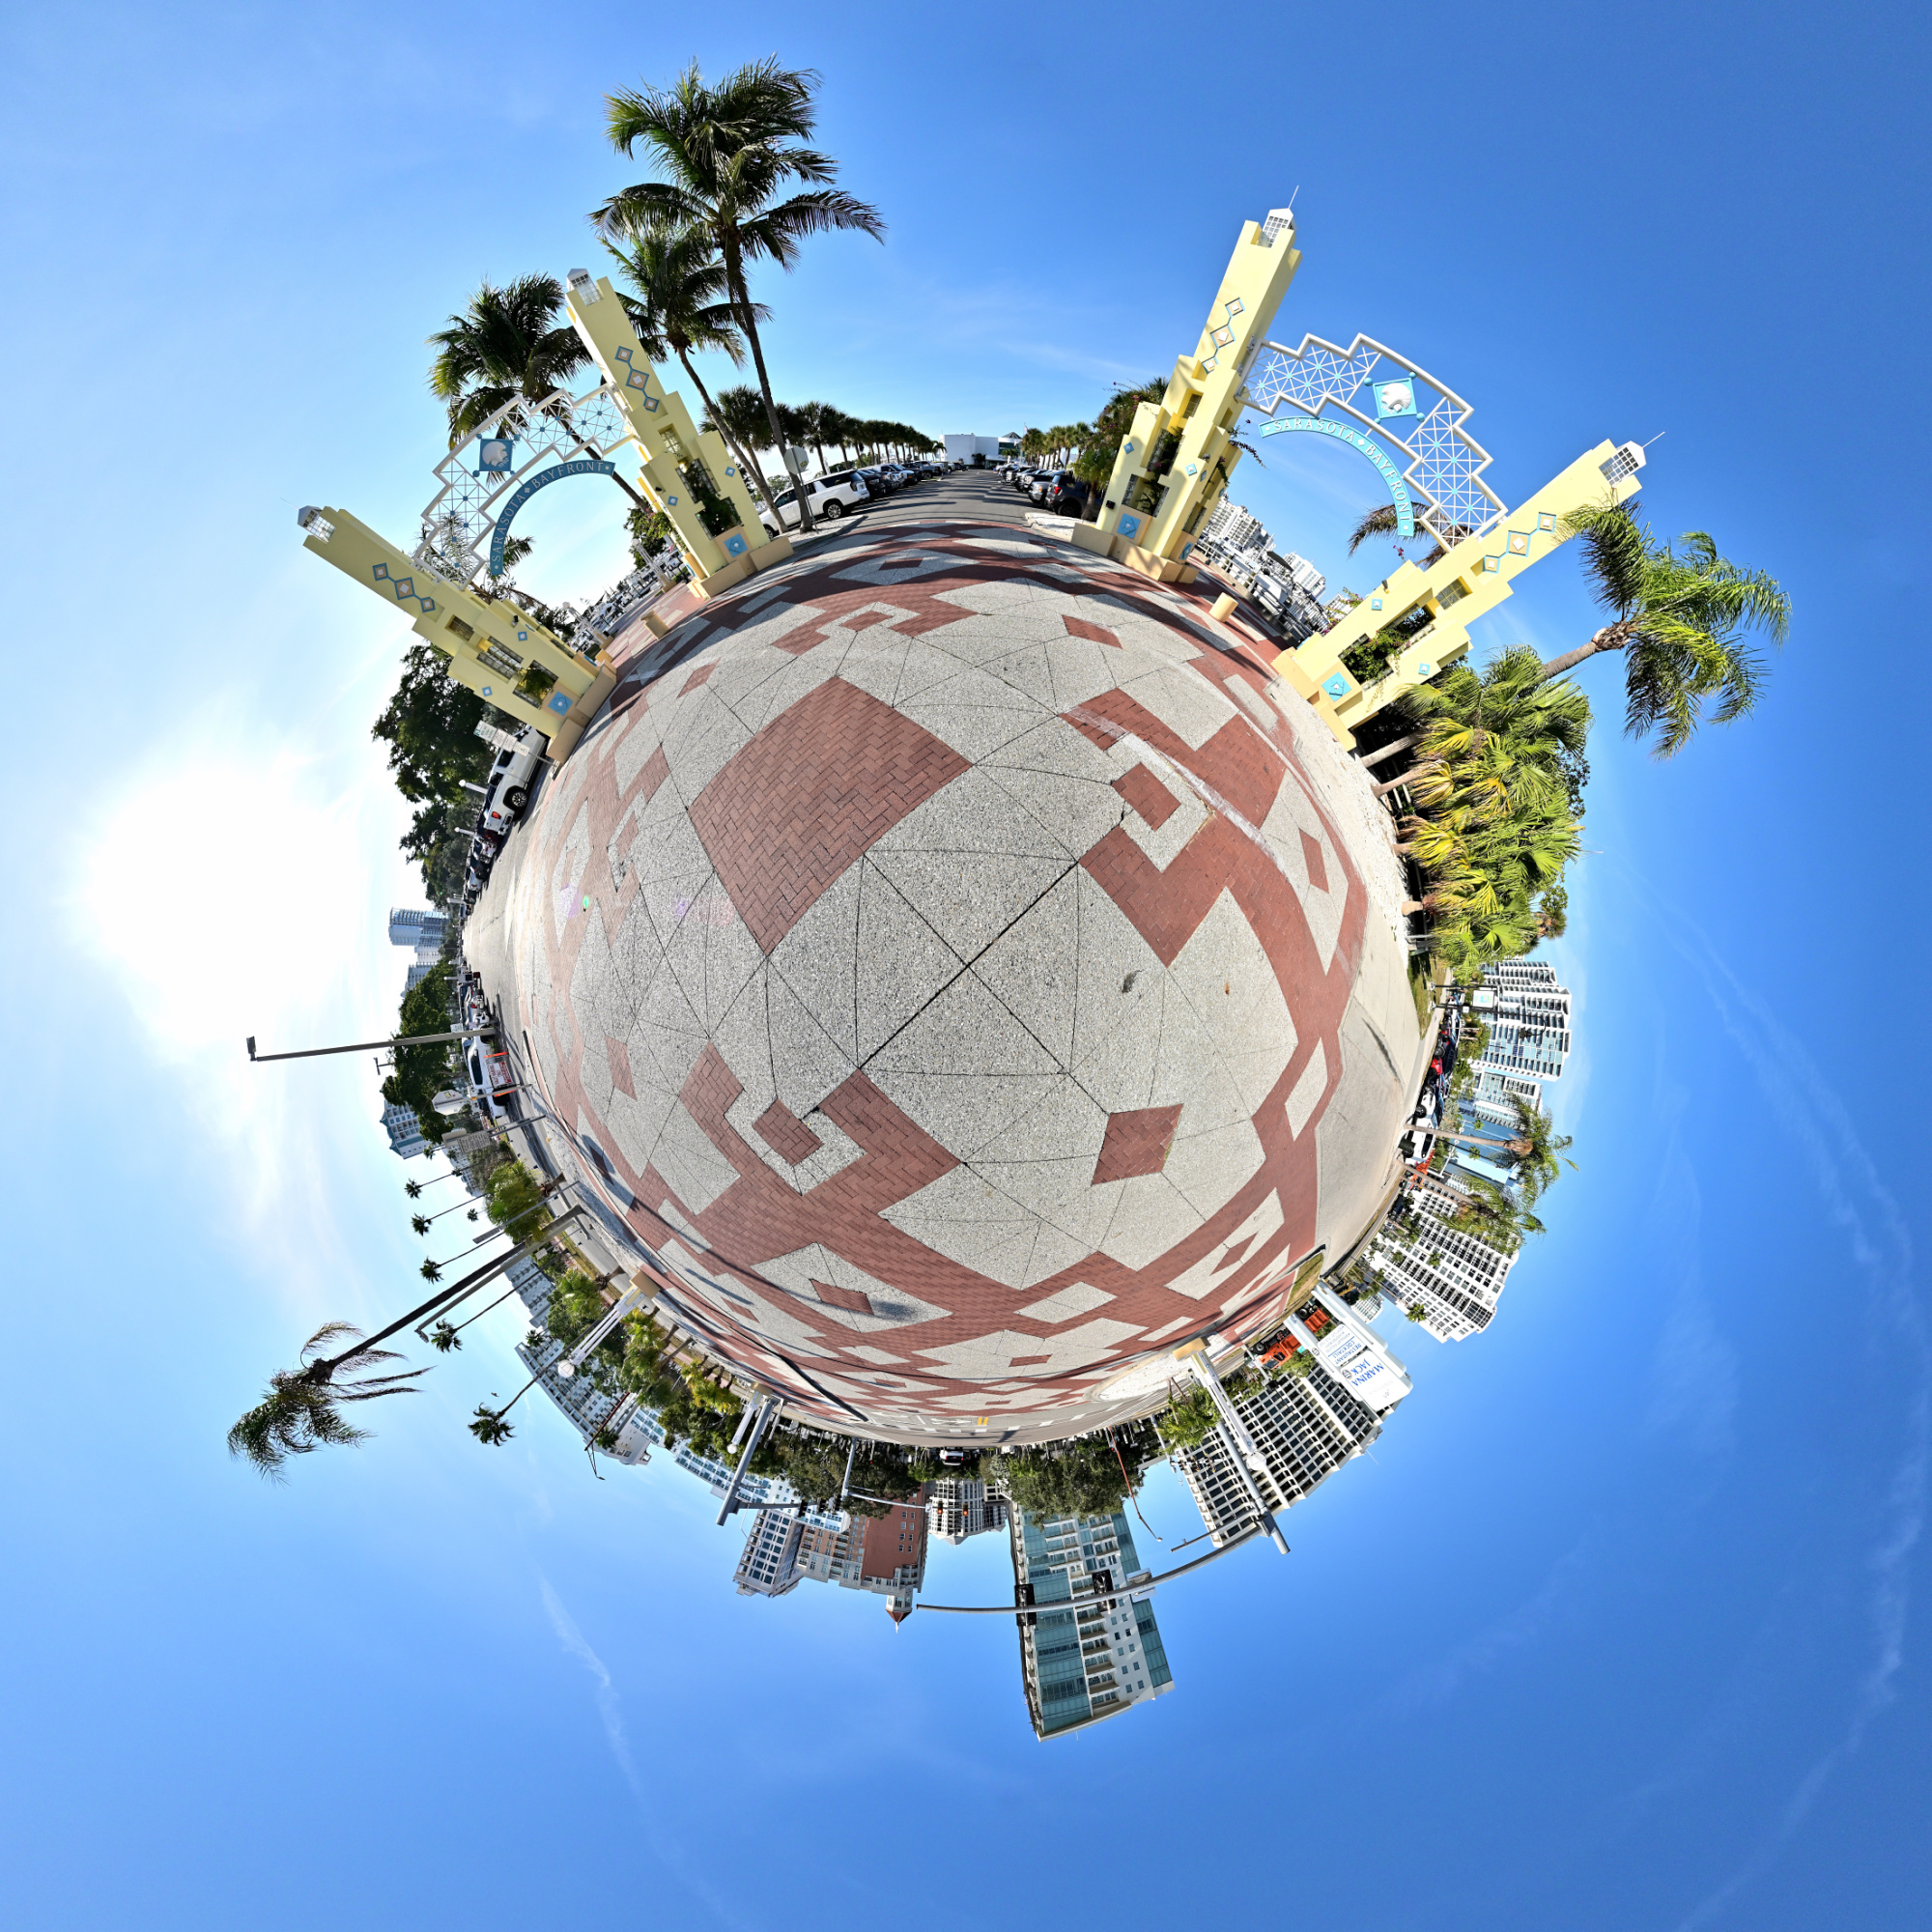
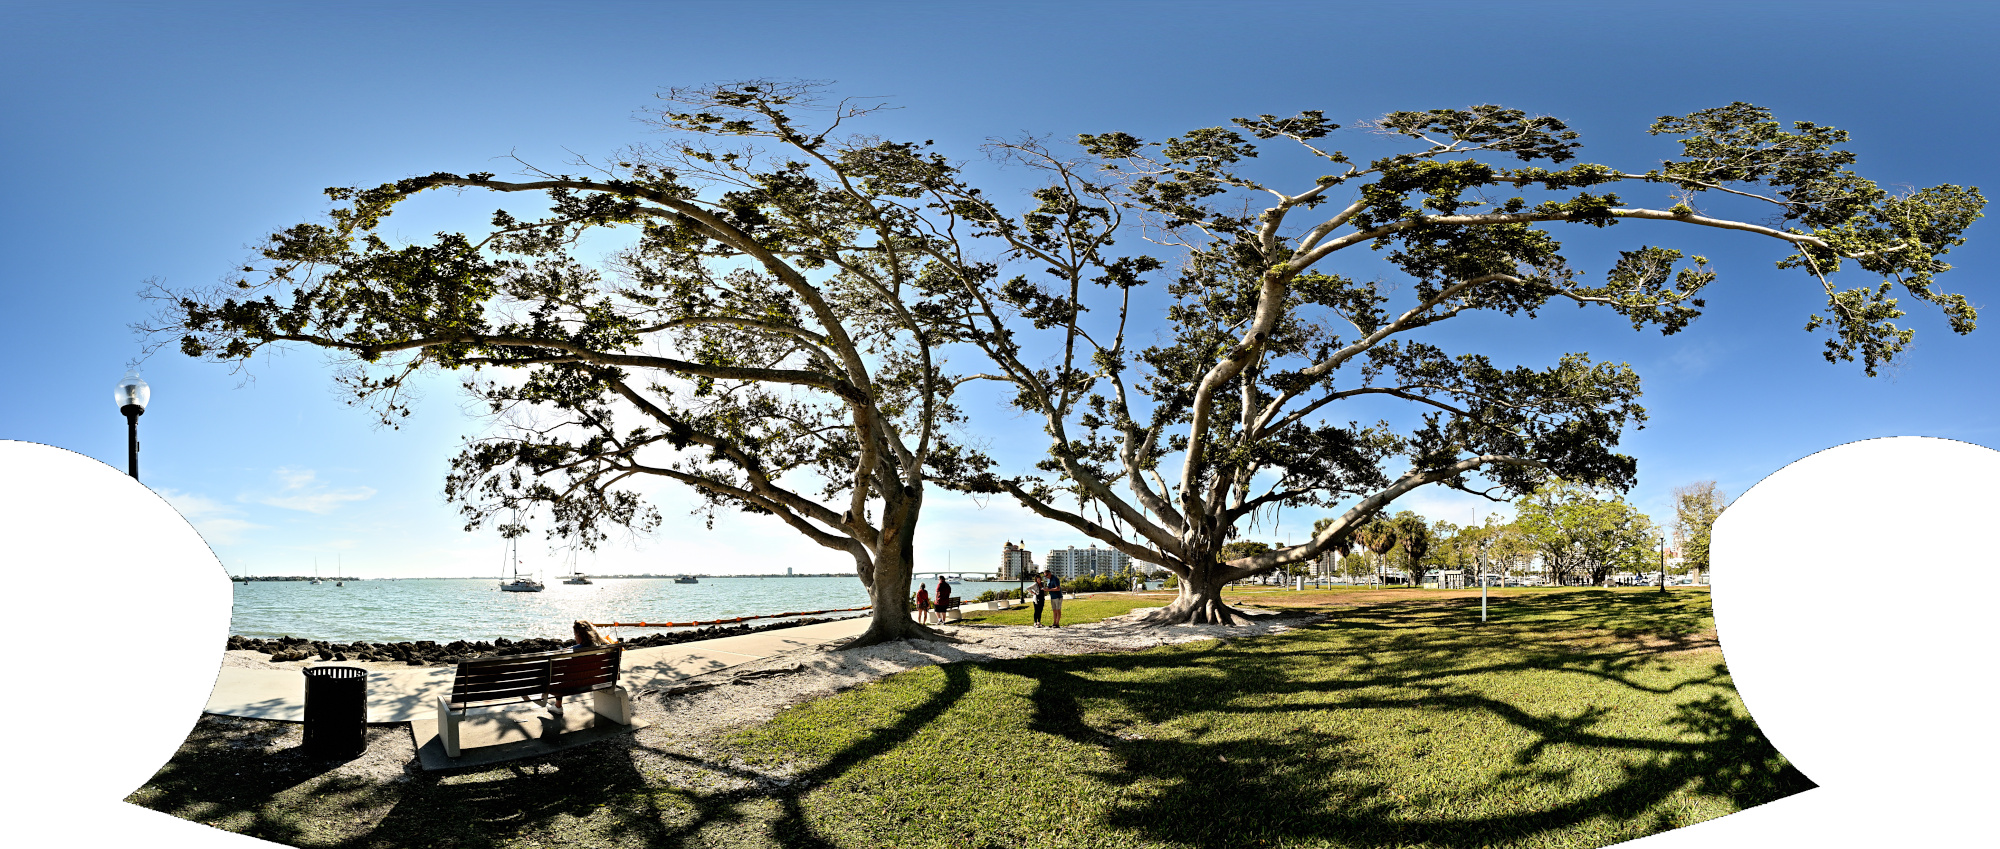
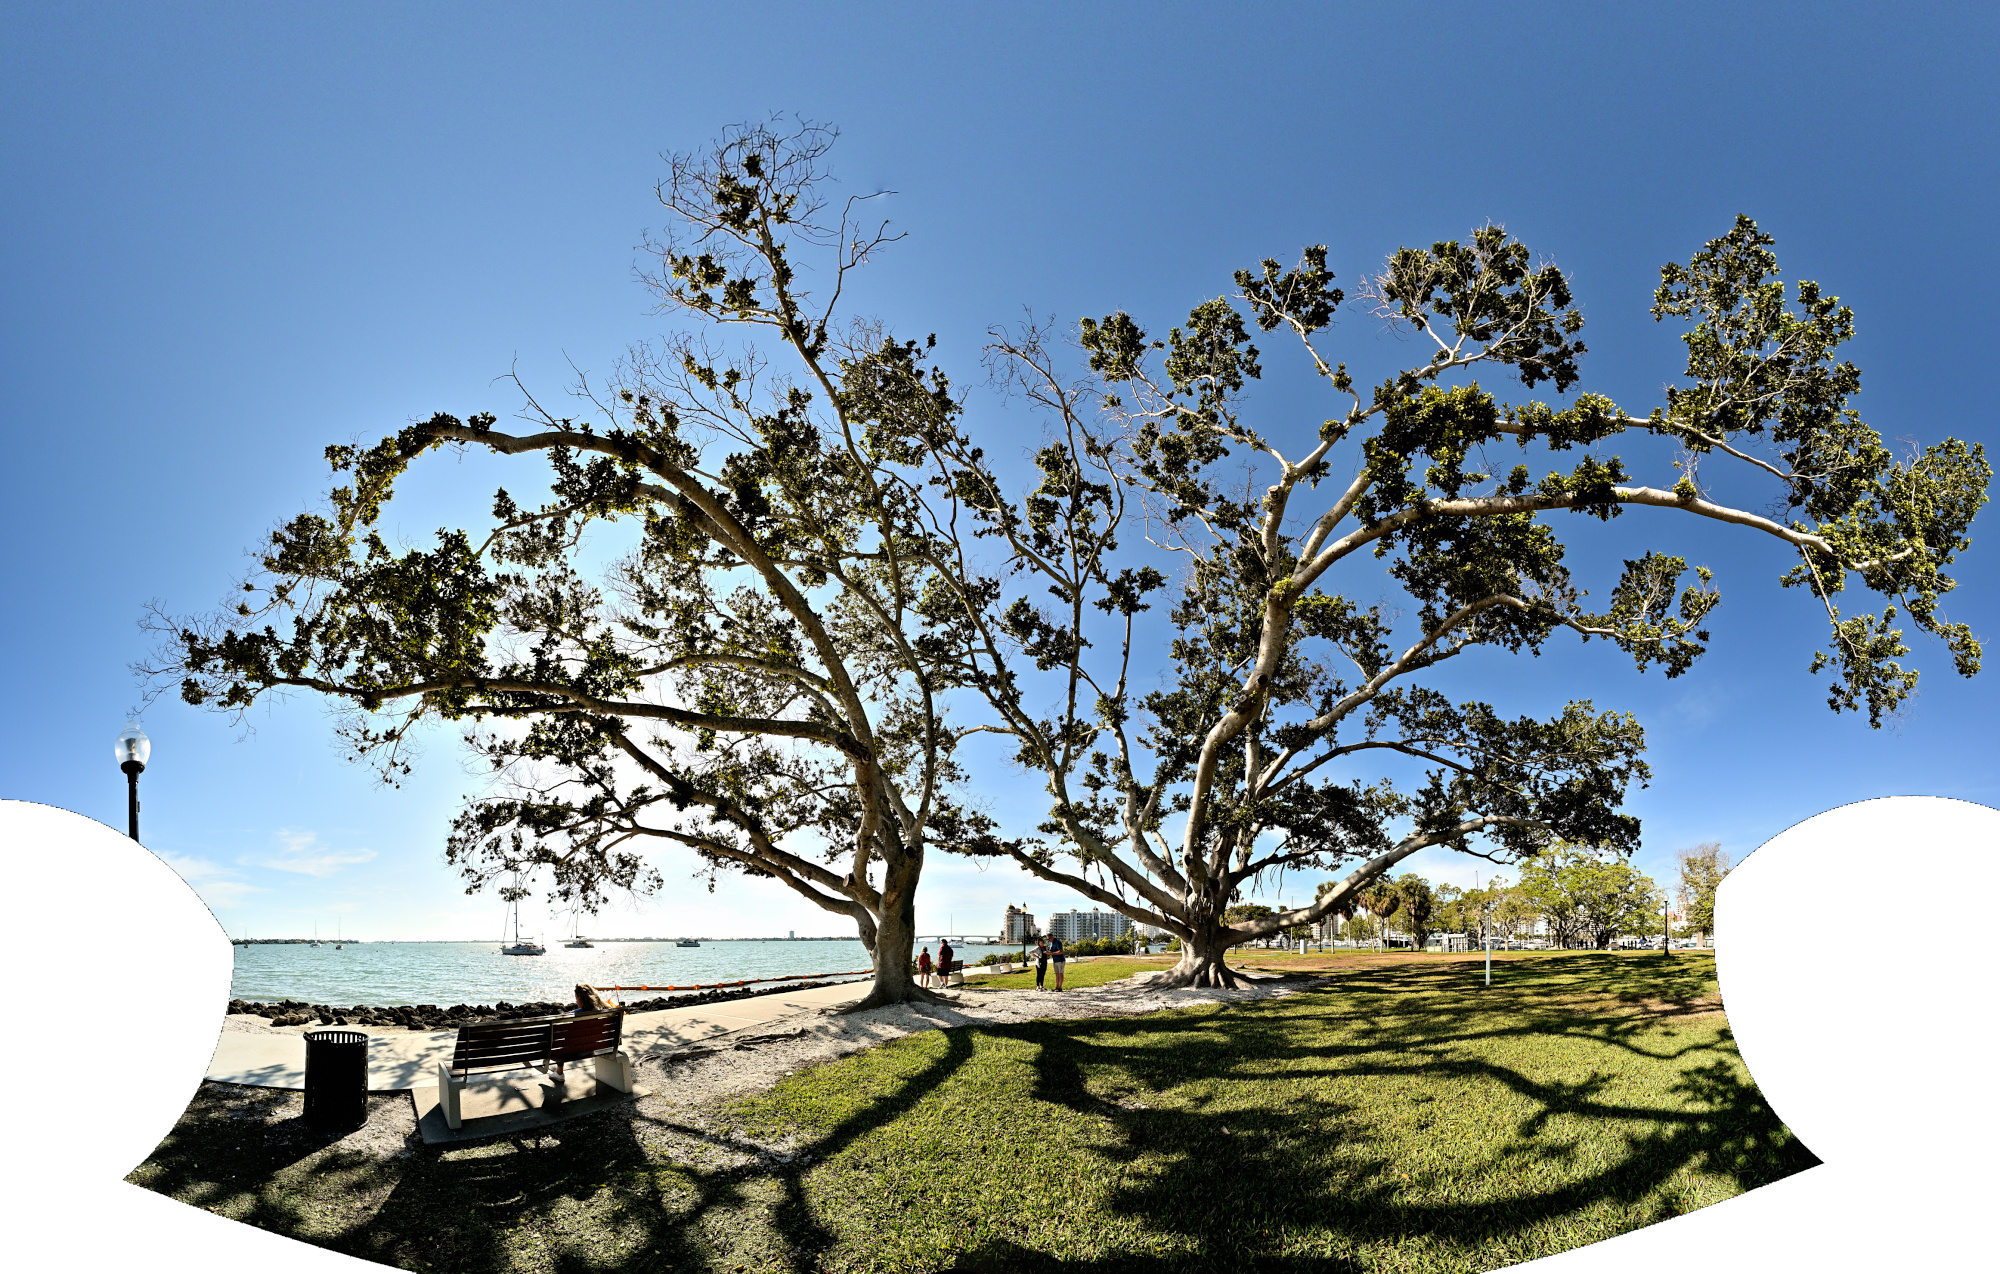
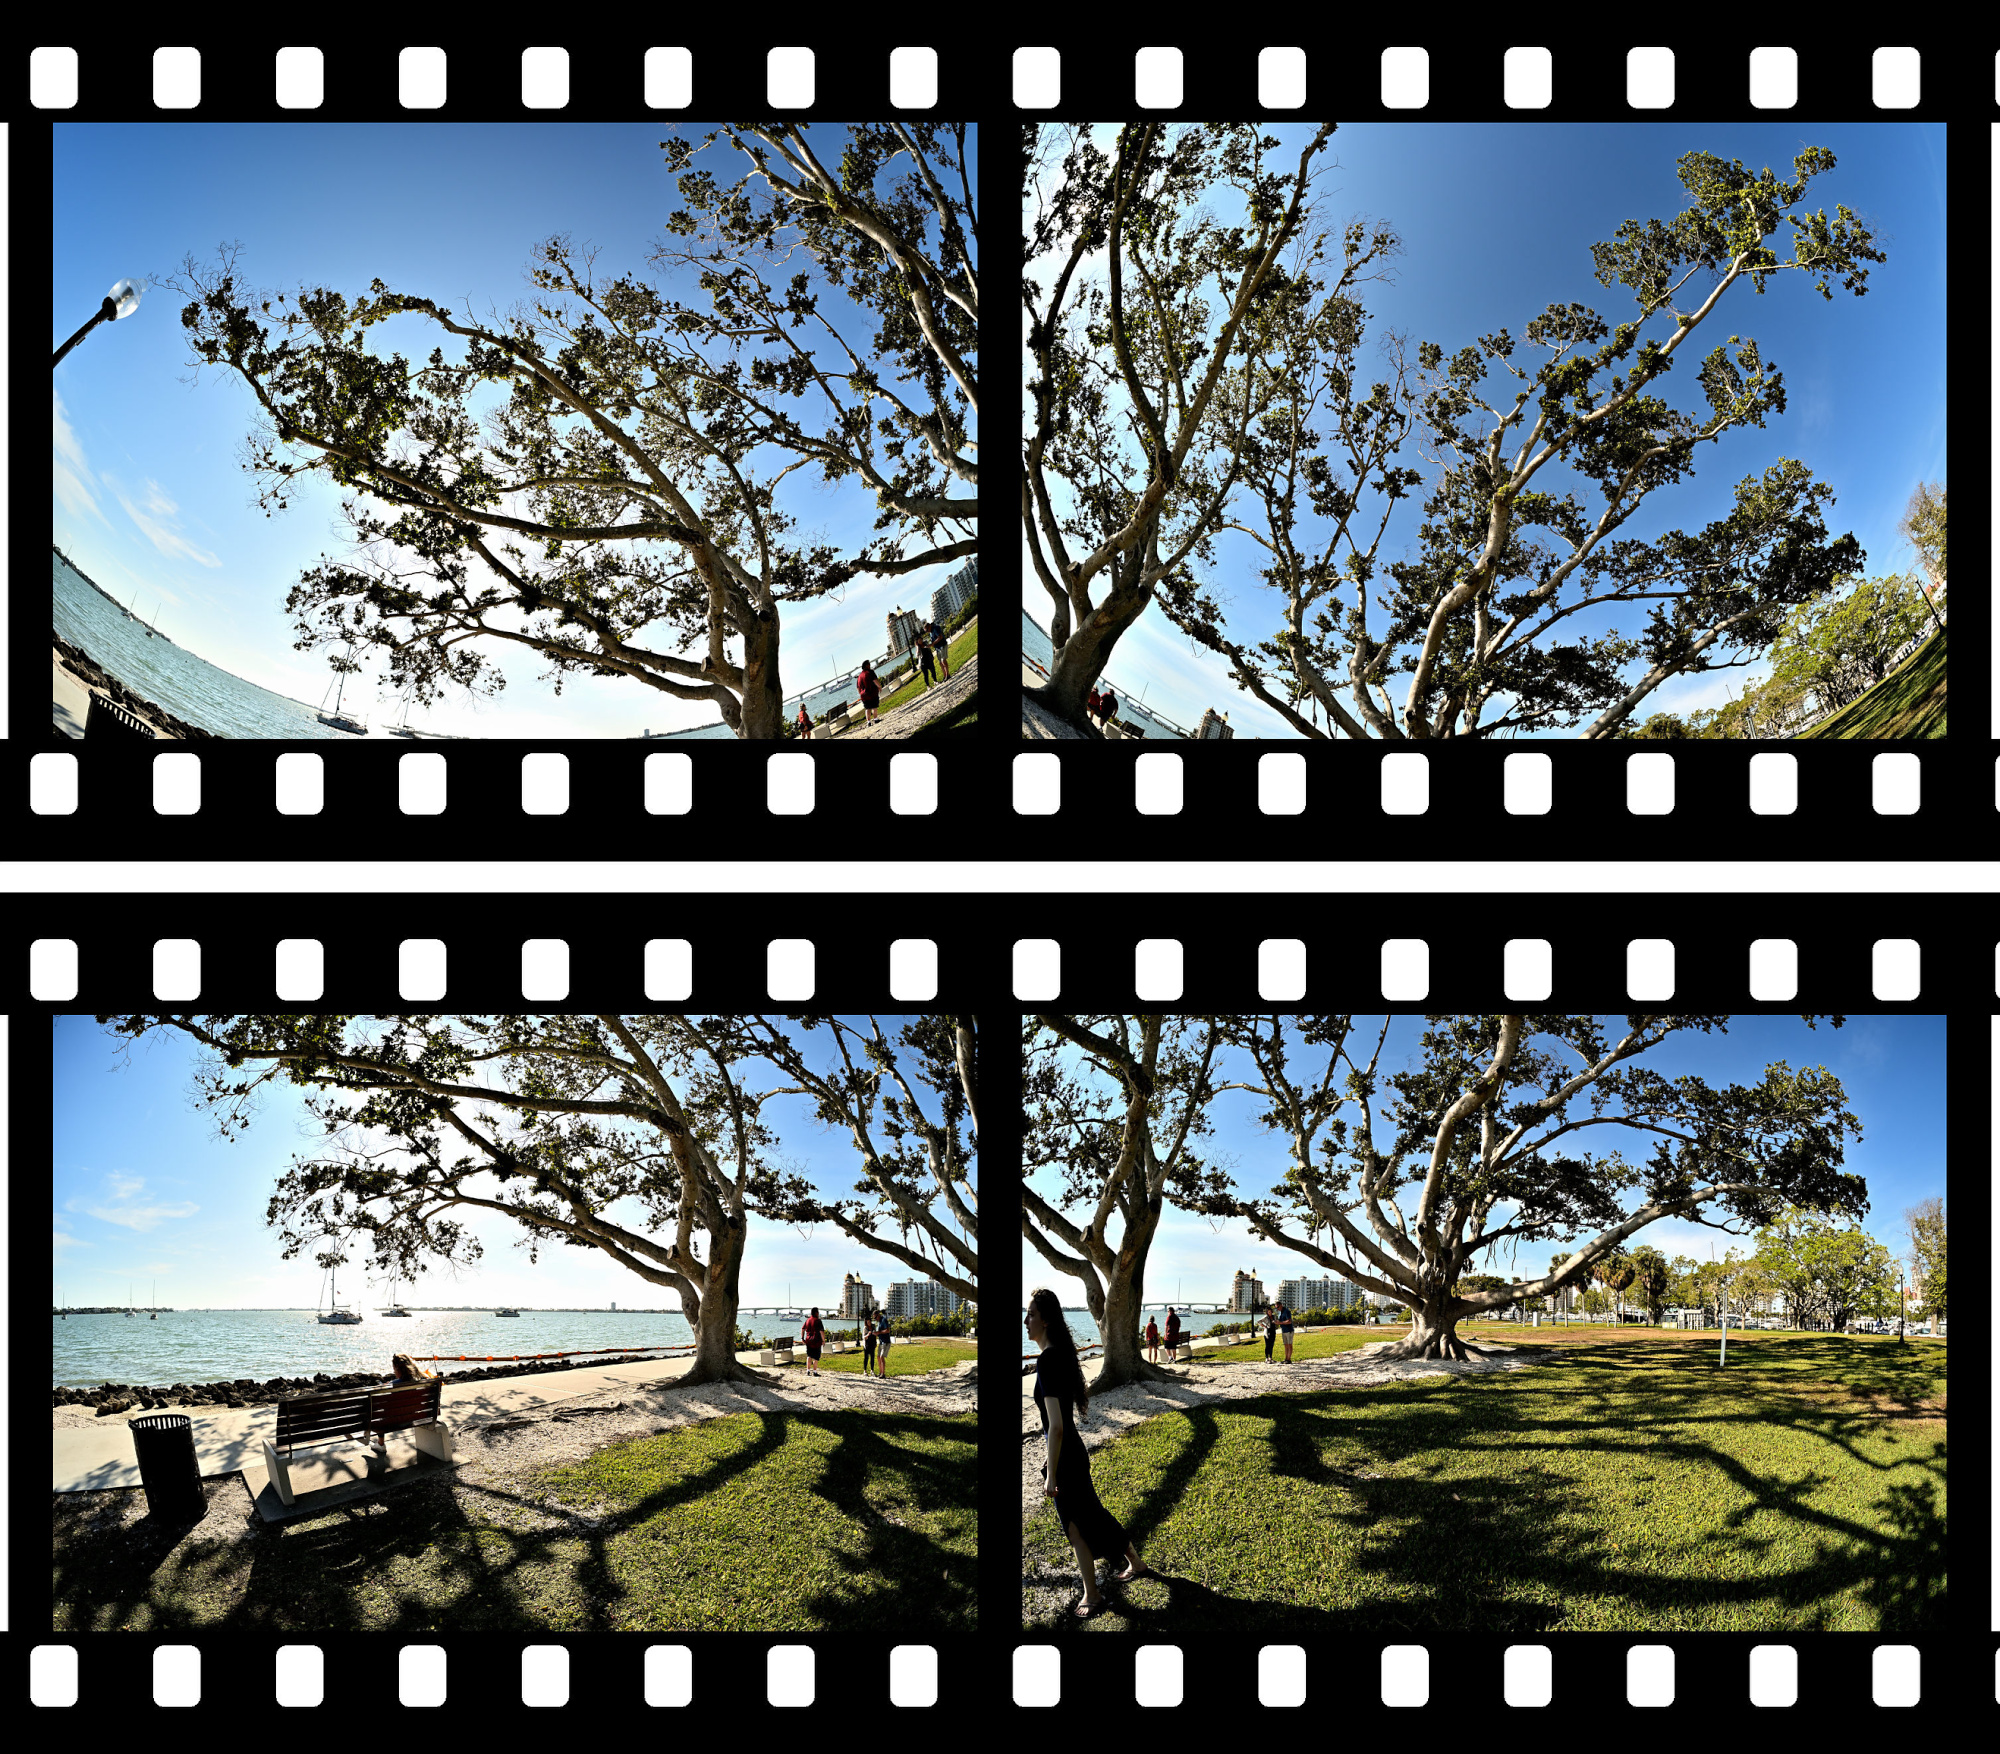
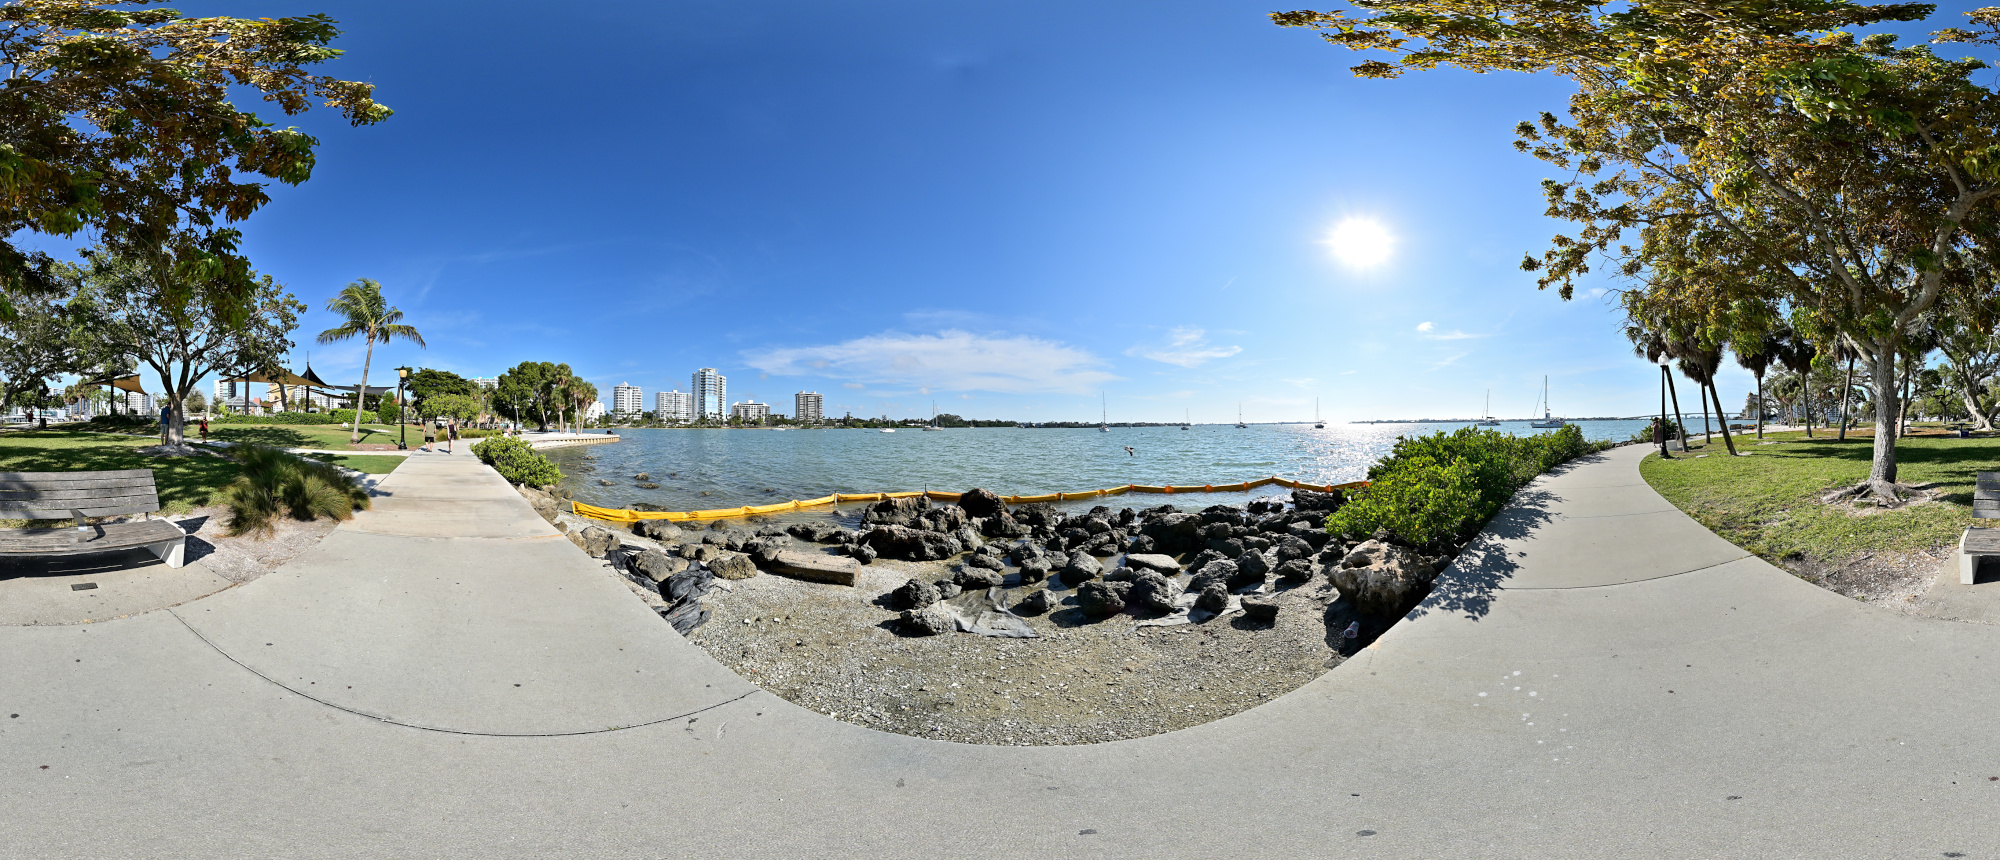
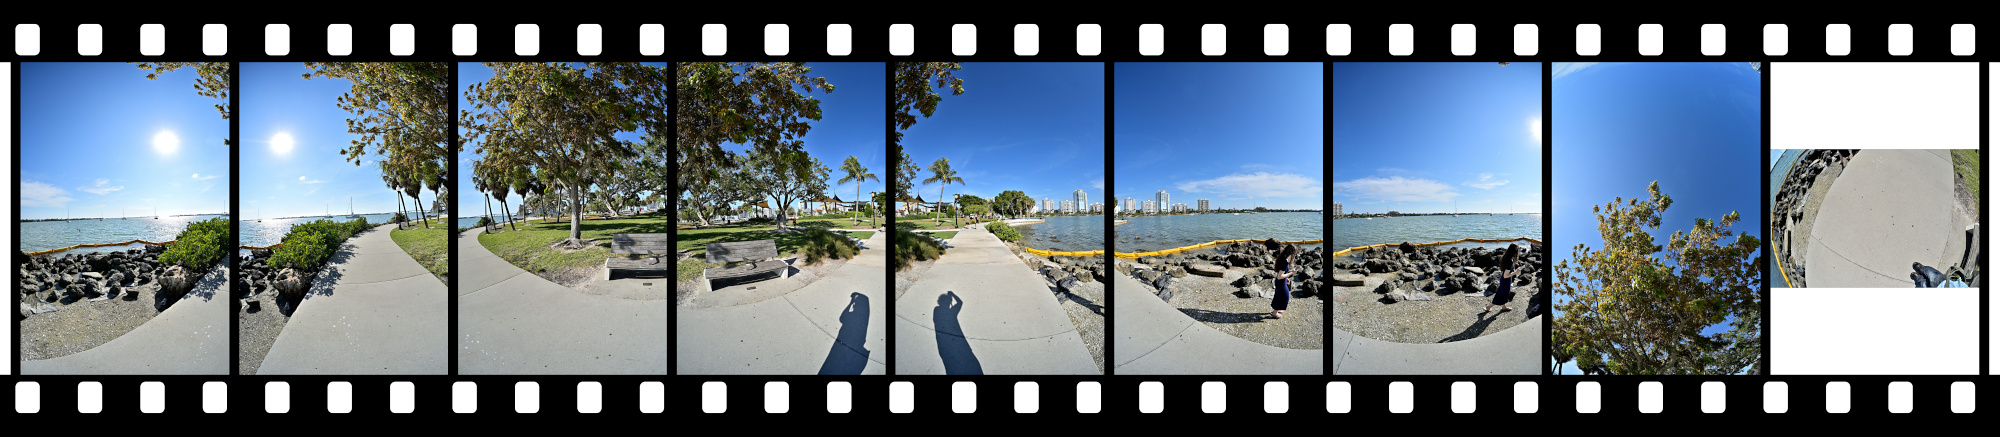
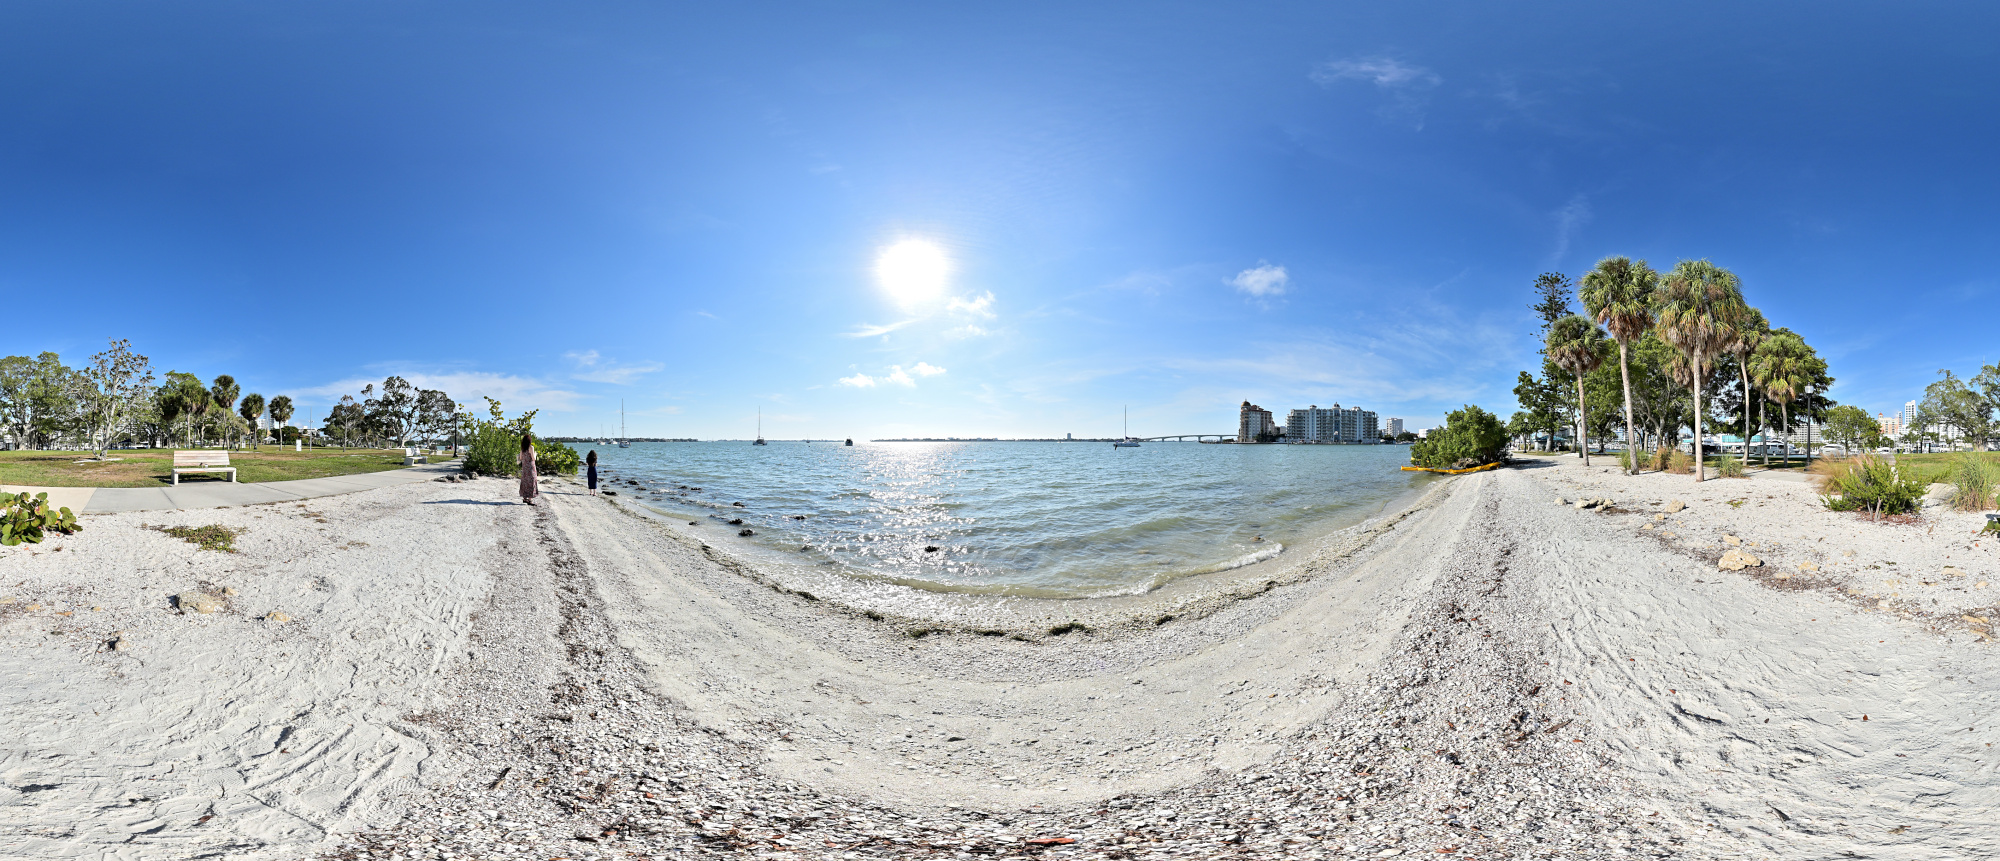
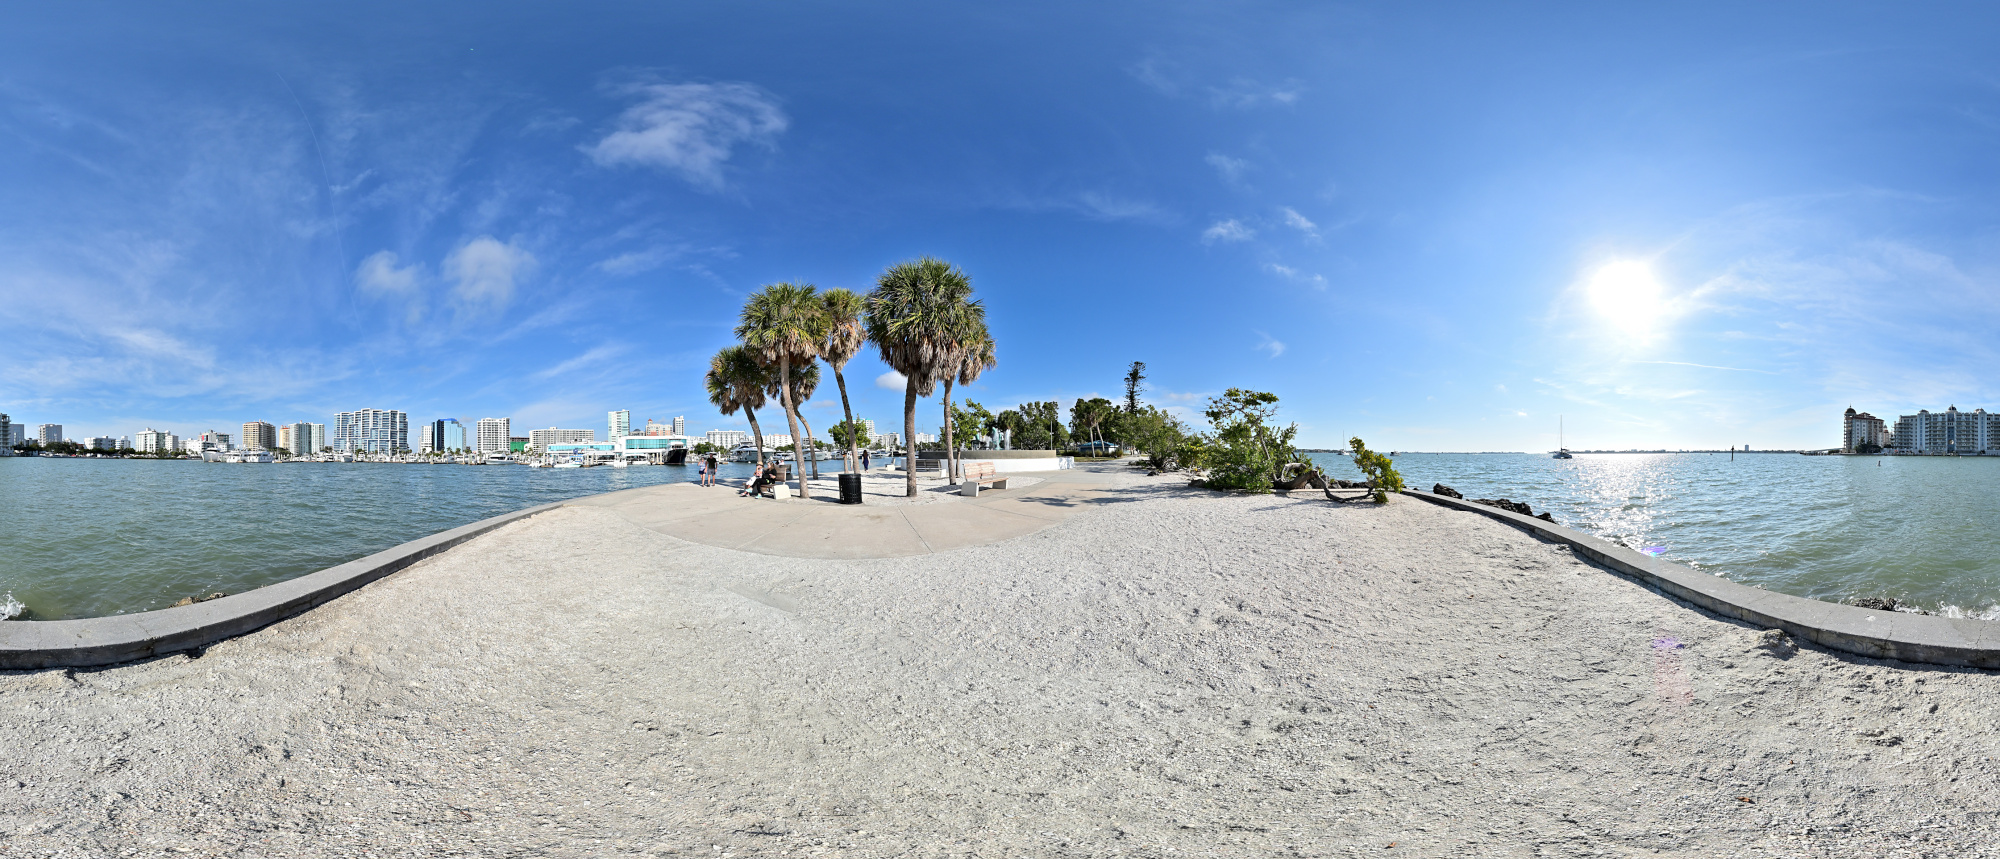
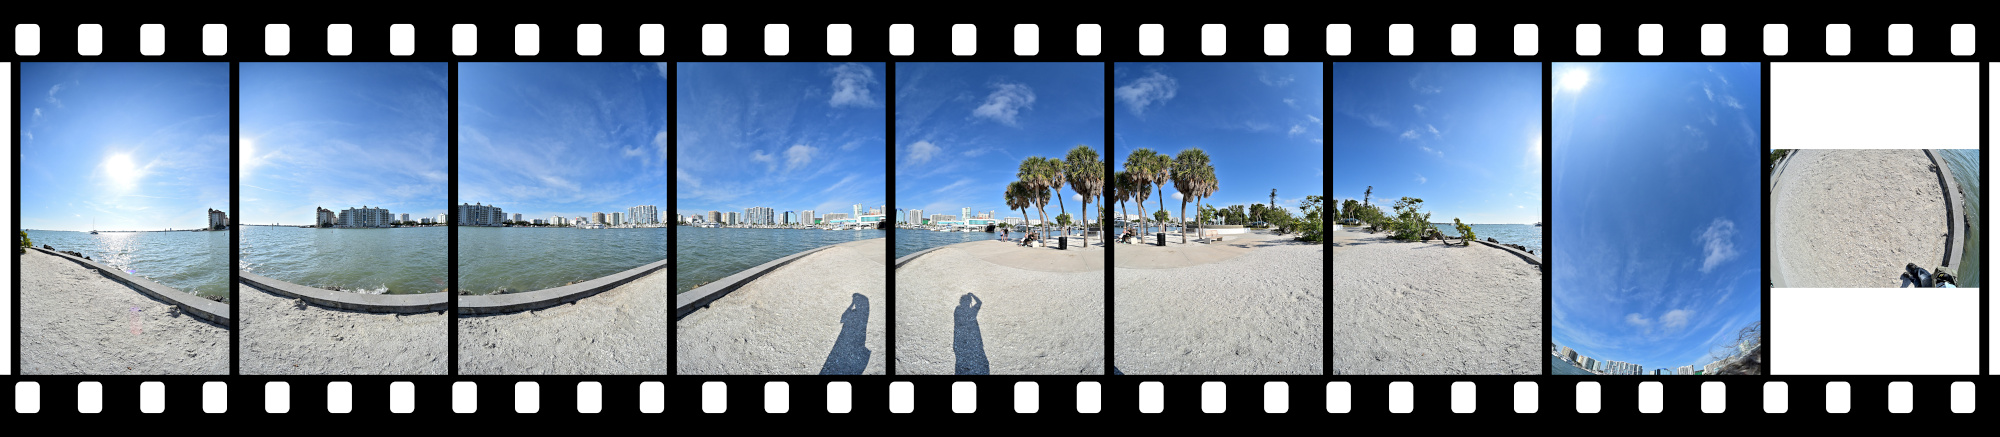
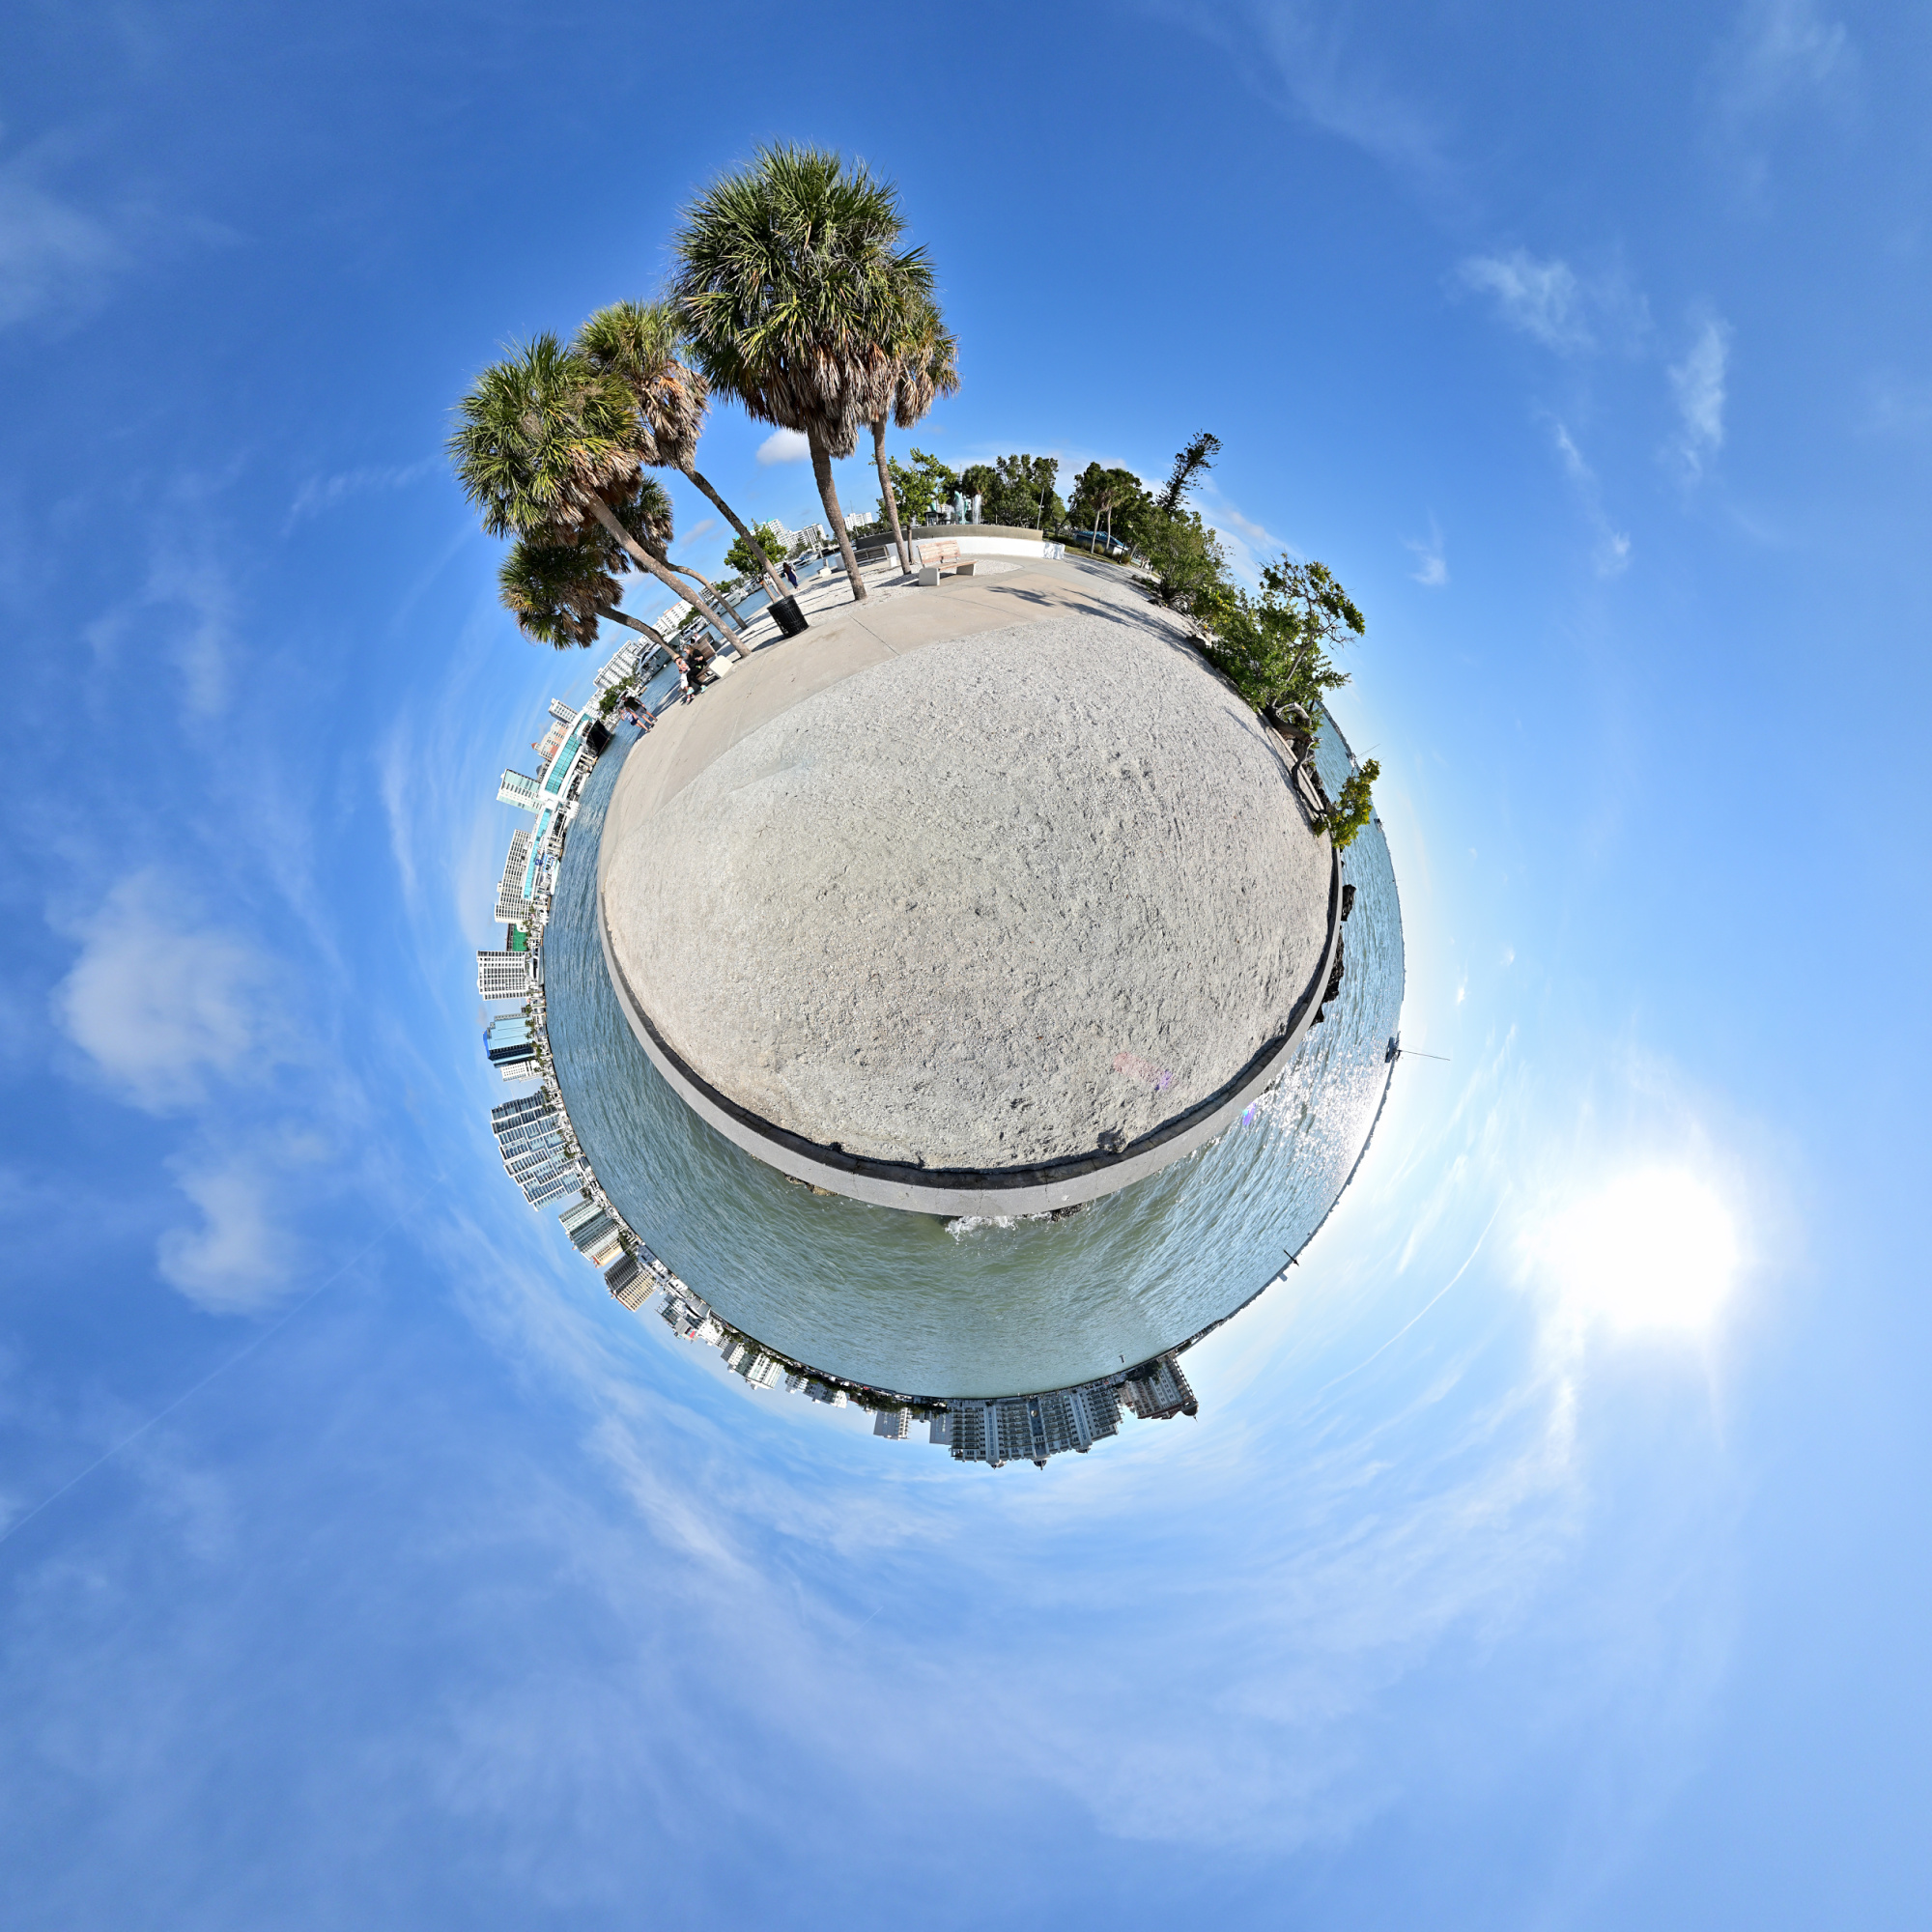
Bayfront Park
Bayfront Park sits right on the water between the marina and the bay. A few paths, some shade, and benches facing the boats make it an easy stop on the way along the waterfront.
Equirectangular Projection
Mercator Projection
1/640s f/5,6 ISO 100/21° f=7,5mm
Interactive Panorama Bayfront Park 1
1/1000s f/5,6 ISO 100/21° f=7,5mm
Interactive Panorama Bayfront Park 2

1/1000s f/5,6 ISO 100/21° f=7,5mm

Interactive Panorama Bayfront Park 3
1/1000s f/5,6 ISO 100/21° f=7,5mm


Interactive Panorama Bayfront Park 4
1/1000s f/5,6 ISO 100/21° f=7,5mm
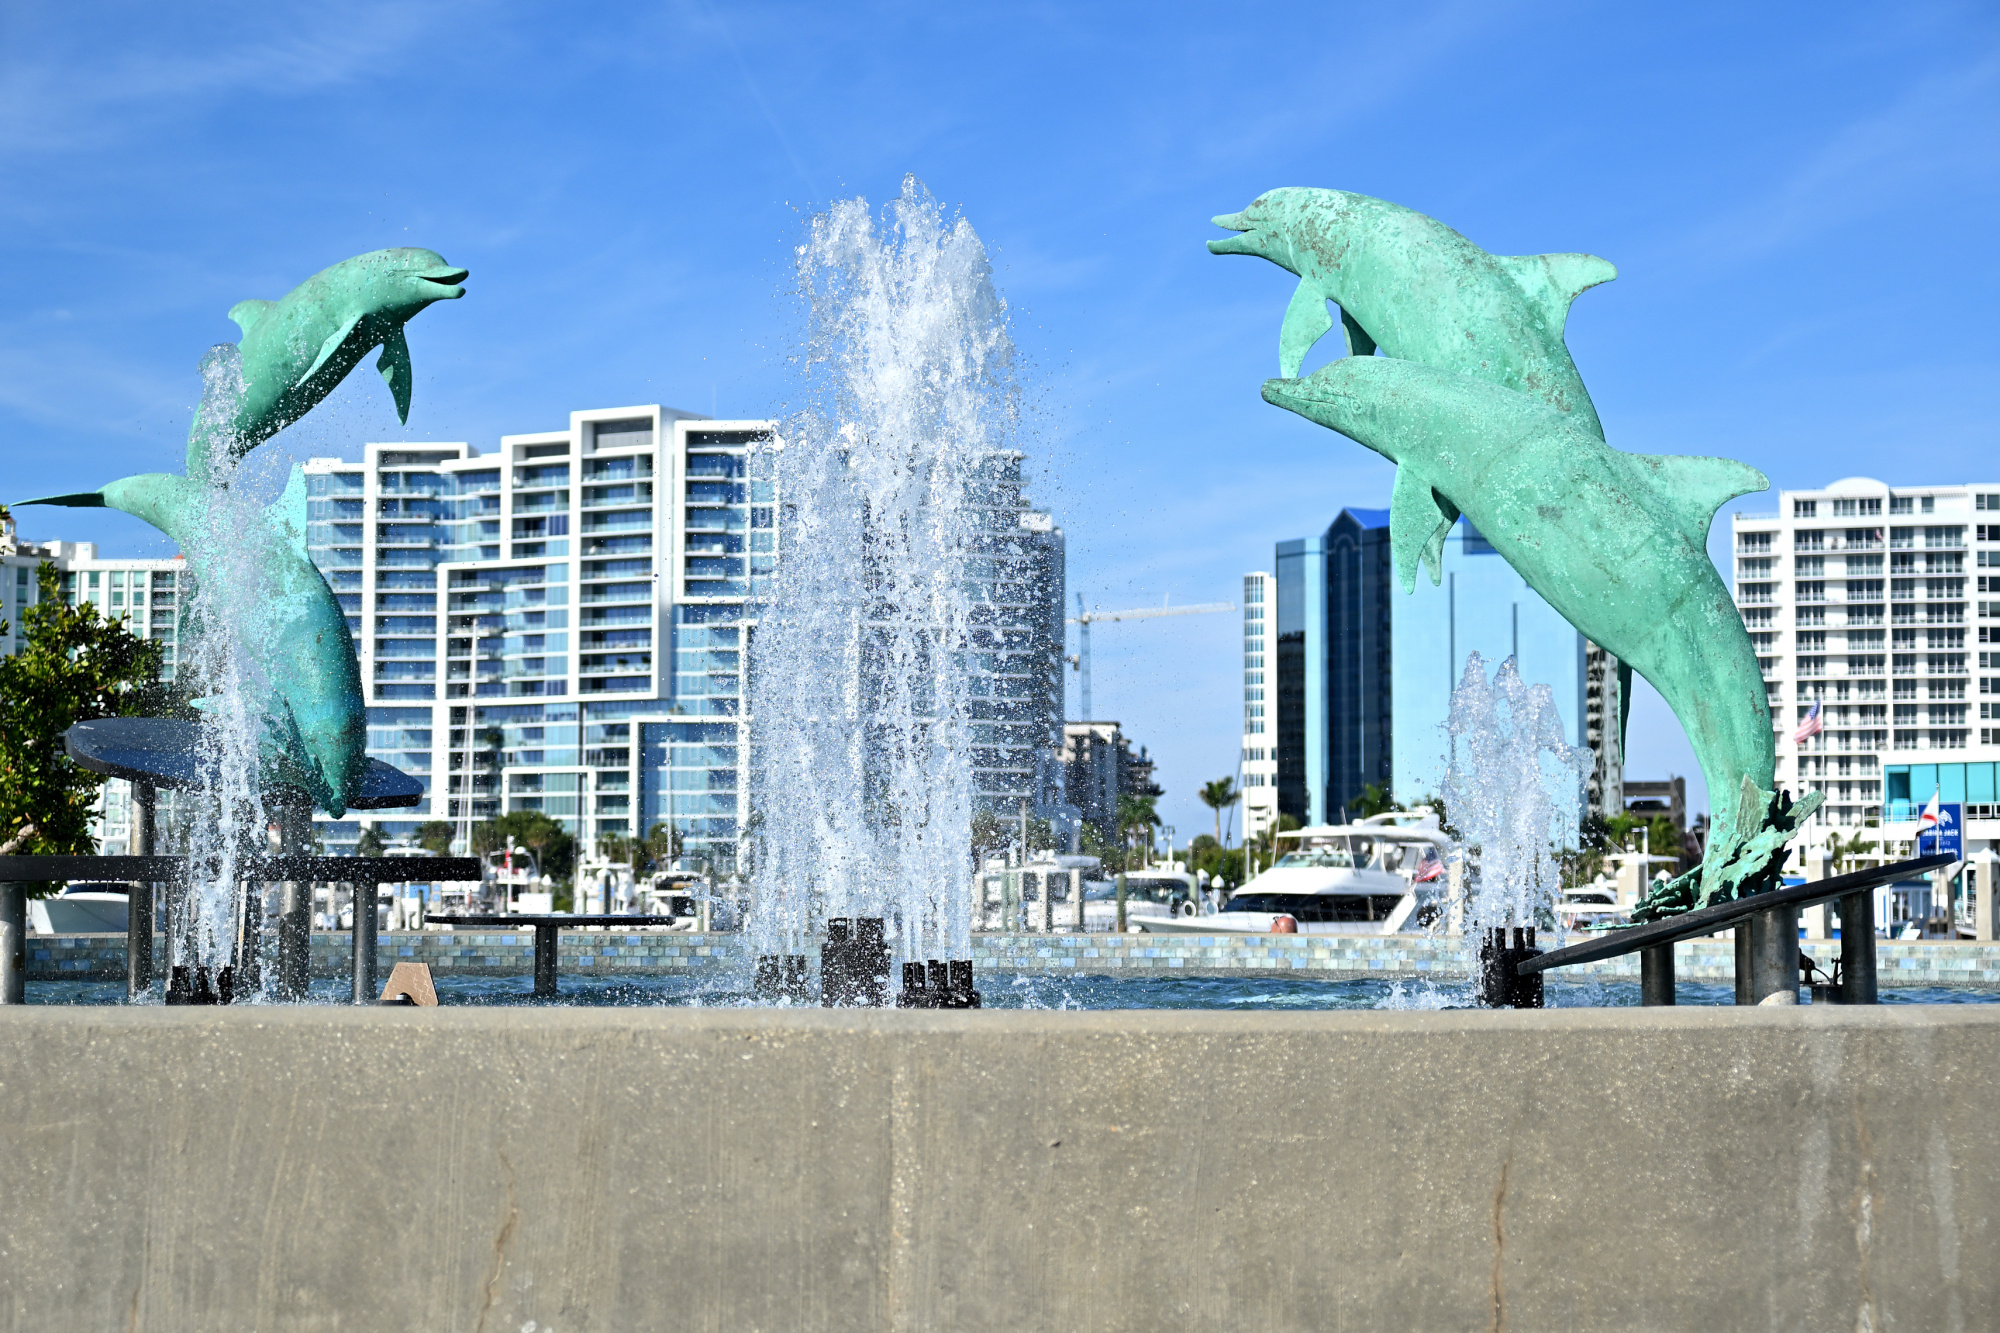
The four bronze dolphins by sculptor Steve Dickey rise in a clean upward arc. The figures stand a little over three and a half meters tall within a circular basin of about twelve meters. In the bright light the moment feels like a paused film frame, held just before the scene continues.
1/4000s f/2,8 ISO 100/21° 16-50mm f/2,8 VR f=37mm/55mm
We arrived by plane, not by boat.
1/500s f/8 ISO 100/21° 16-50mm f/2,8 VR f=28mm/42mm

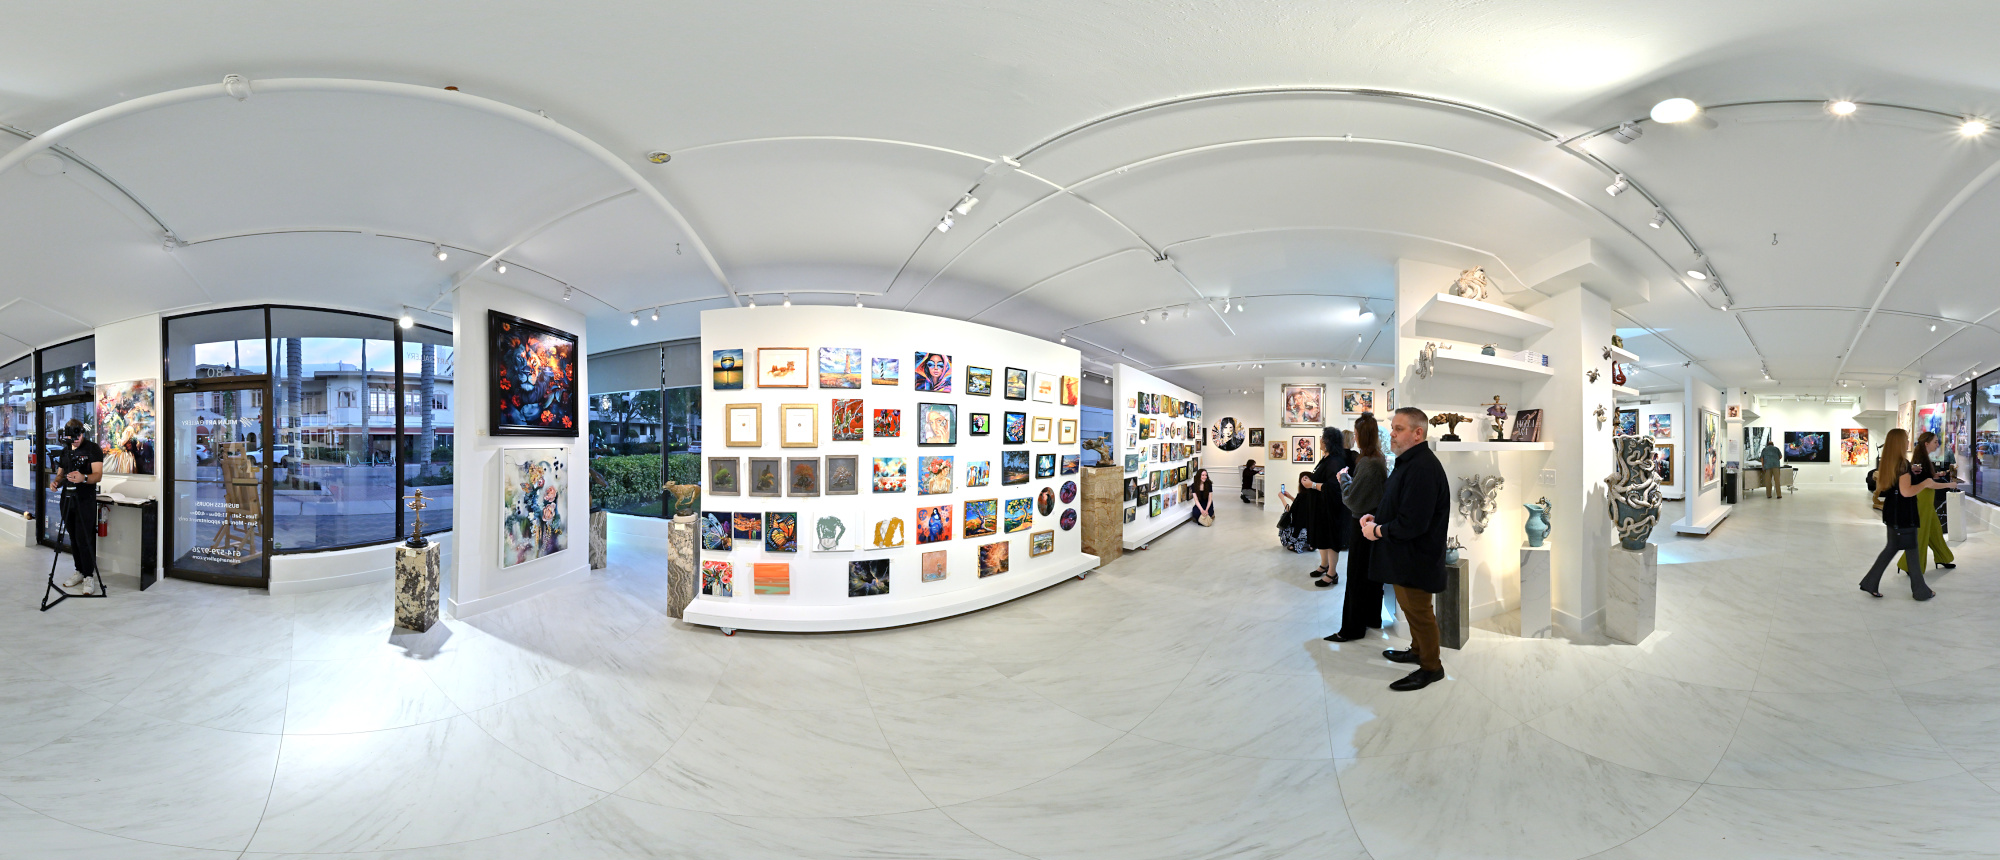
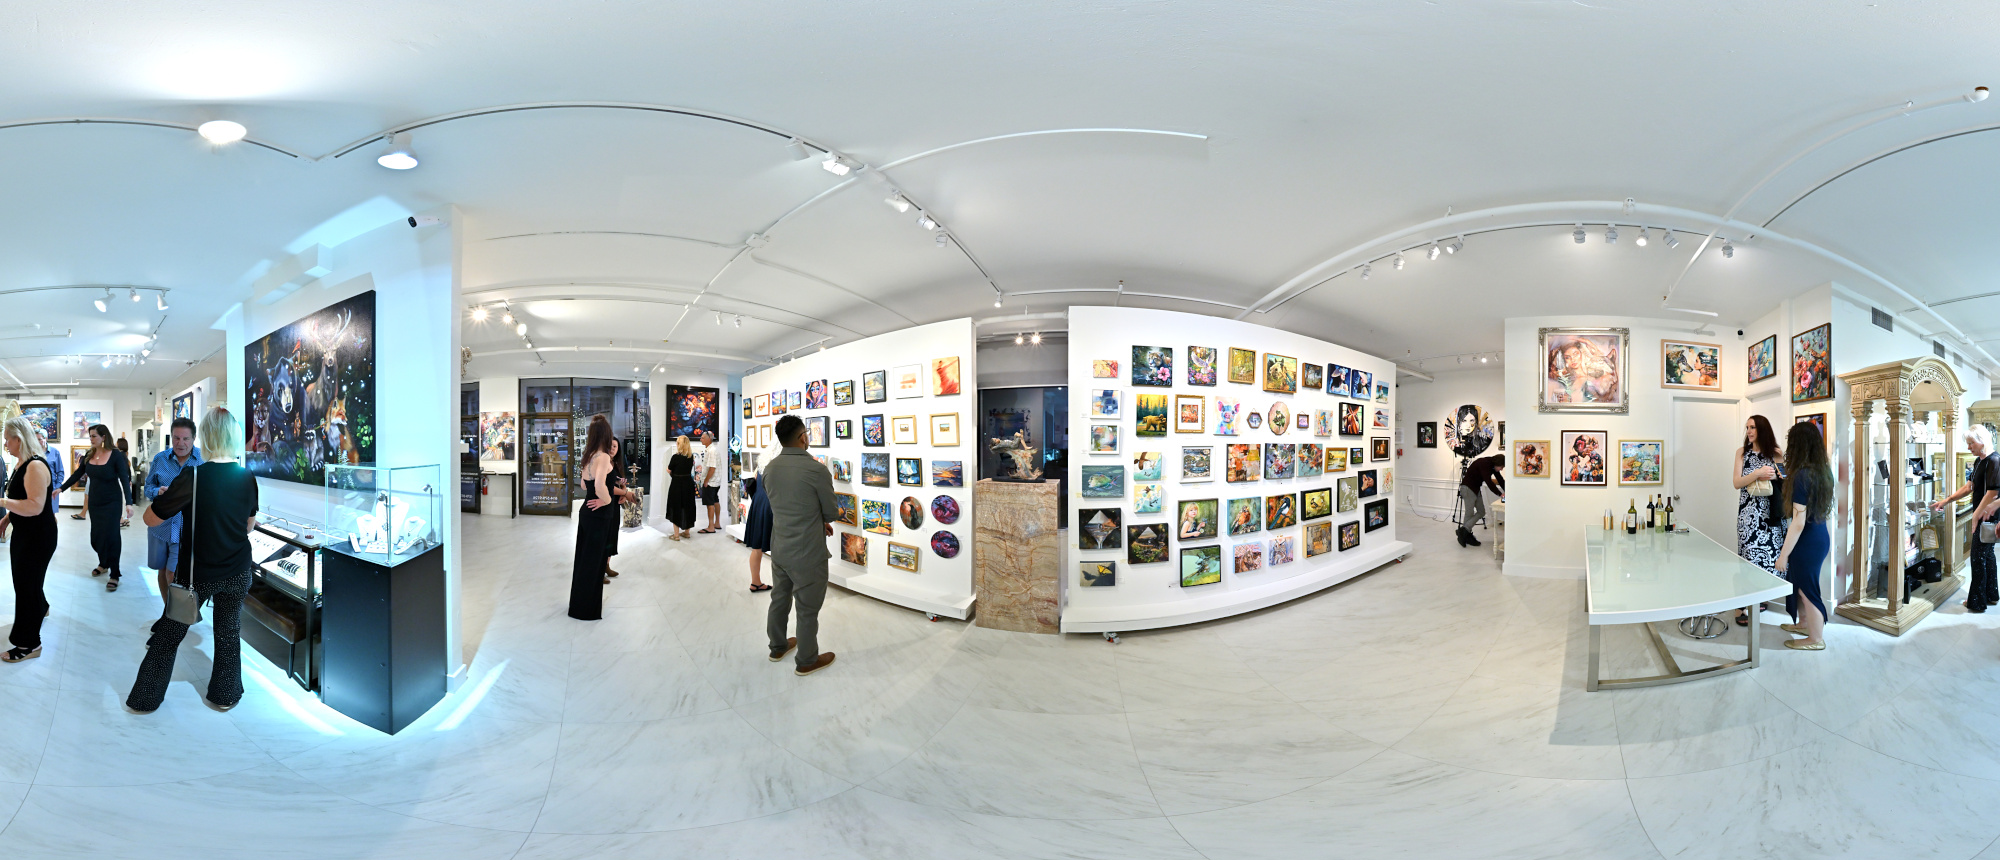
Milan Art Gallery
Visited the Milan Art Gallery for the opening of the Mini Masterpieces Collection exhibition. It featured original works from a variety of artists. The paintings were striking, with a level of detail and character that kept drawing us back for a second look. It was part of Art Walk, a recurring evening that brings the local art scene together, and one of the highlights of the night.
Interactive Panorama Milan Art Gallery 1
1/80s f/5,6 ISO 500/28° f=7,5mm

Interactive Panorama Milan Art Gallery 2
1/80s f/5,6 ISO 500/28° f=7,5mm

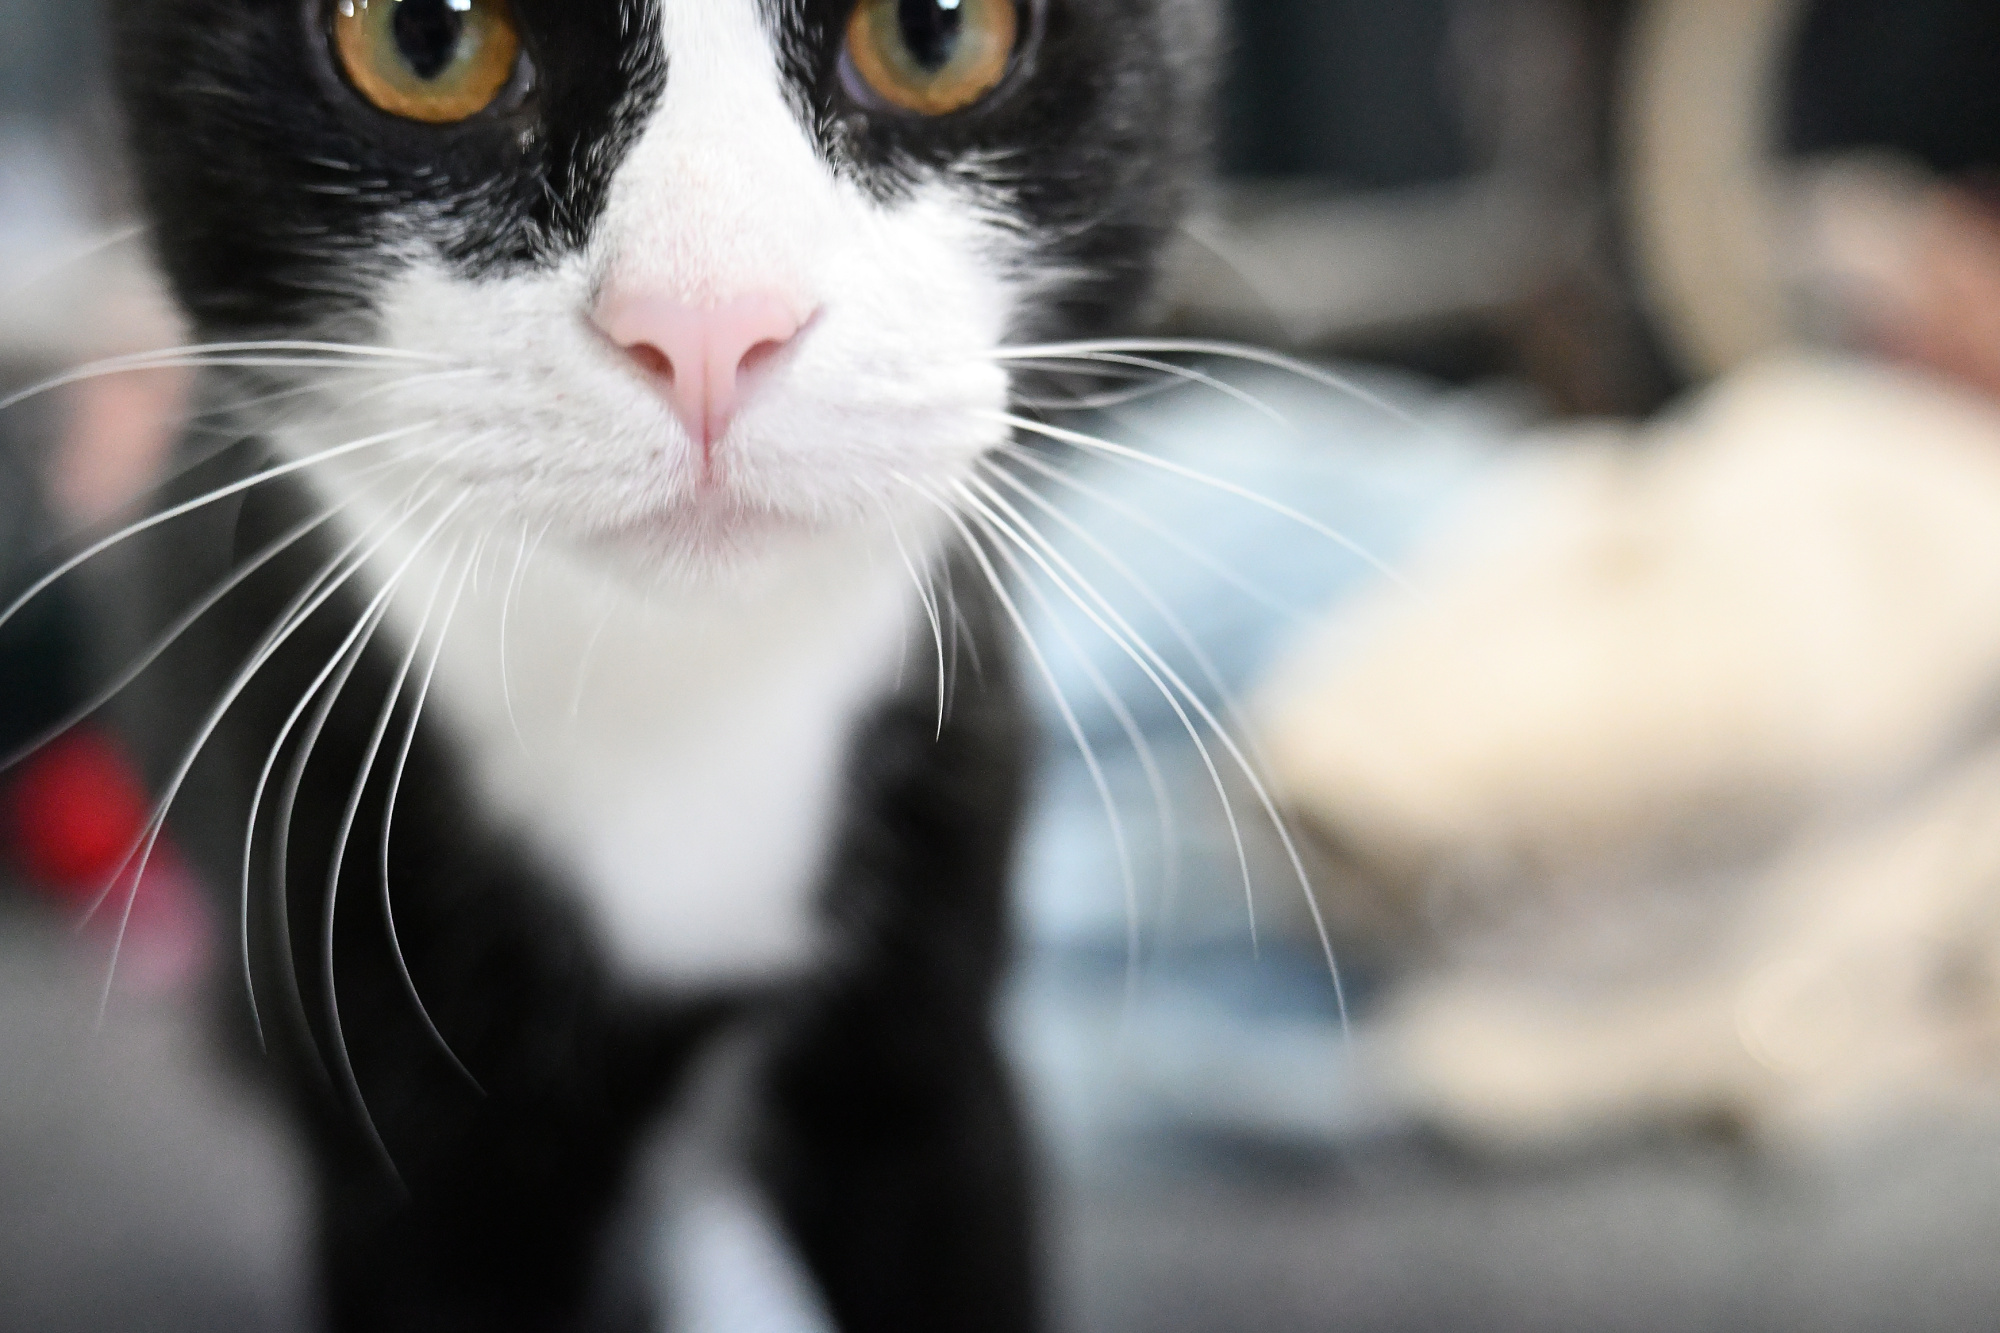
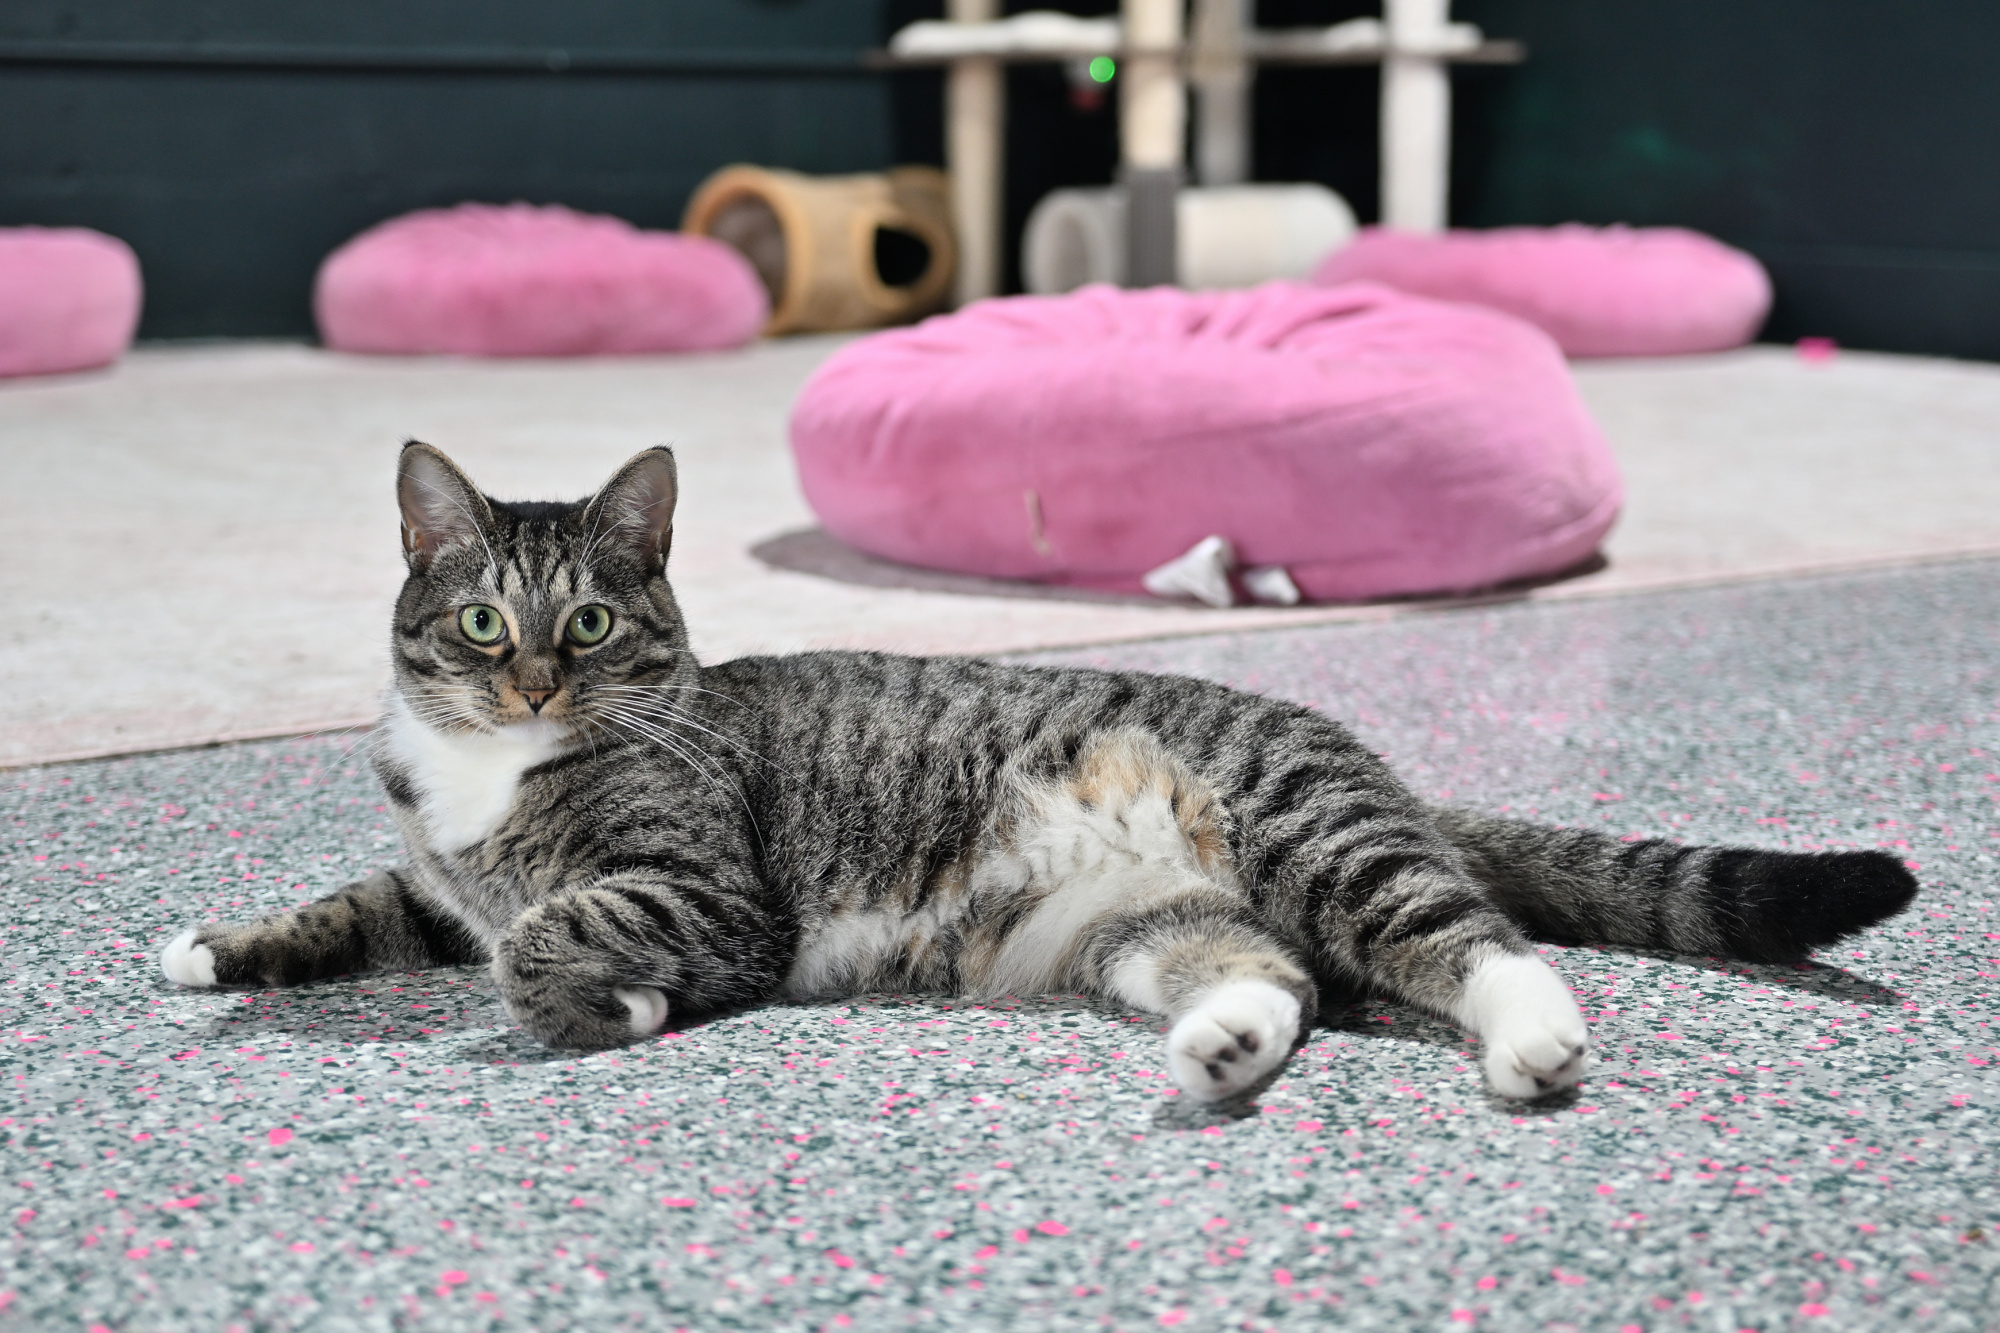
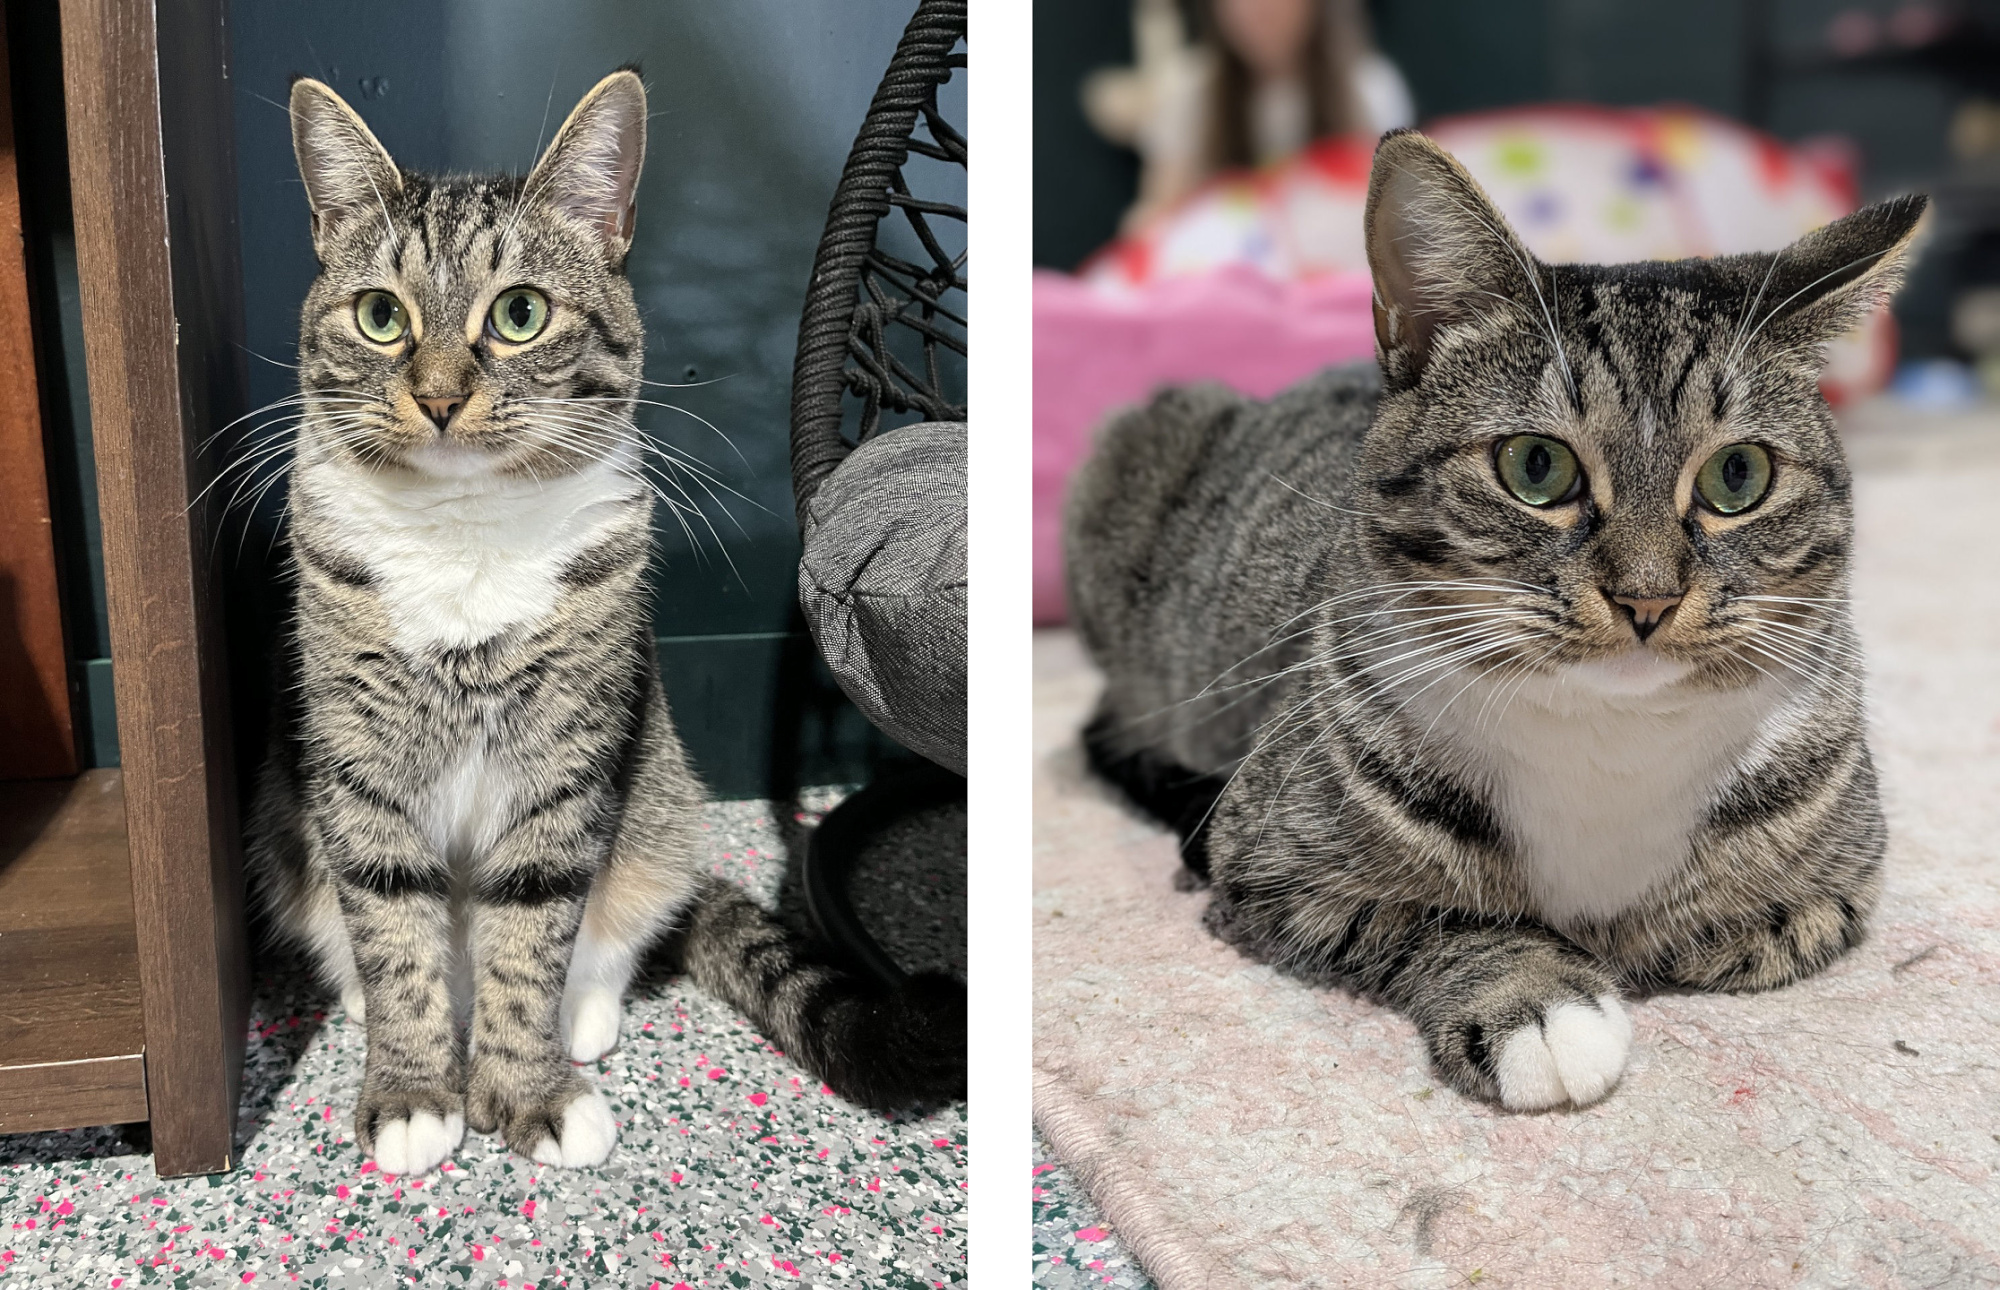
Katy's Cat Cafe 🐱
Parsley checks the minimum focus distance.
1/500s f/2,8 ISO 6400/39° 16-50mm f/2,8 VR f=30mm/45mm
Audrey poses with the confidence of a professional model.
1/25s f/2,8 ISO 400/27° 16-50mm f/2,8 VR f=35mm/52mm
1/30s f/1,9 ISO 314/26° f=5mm/25mm
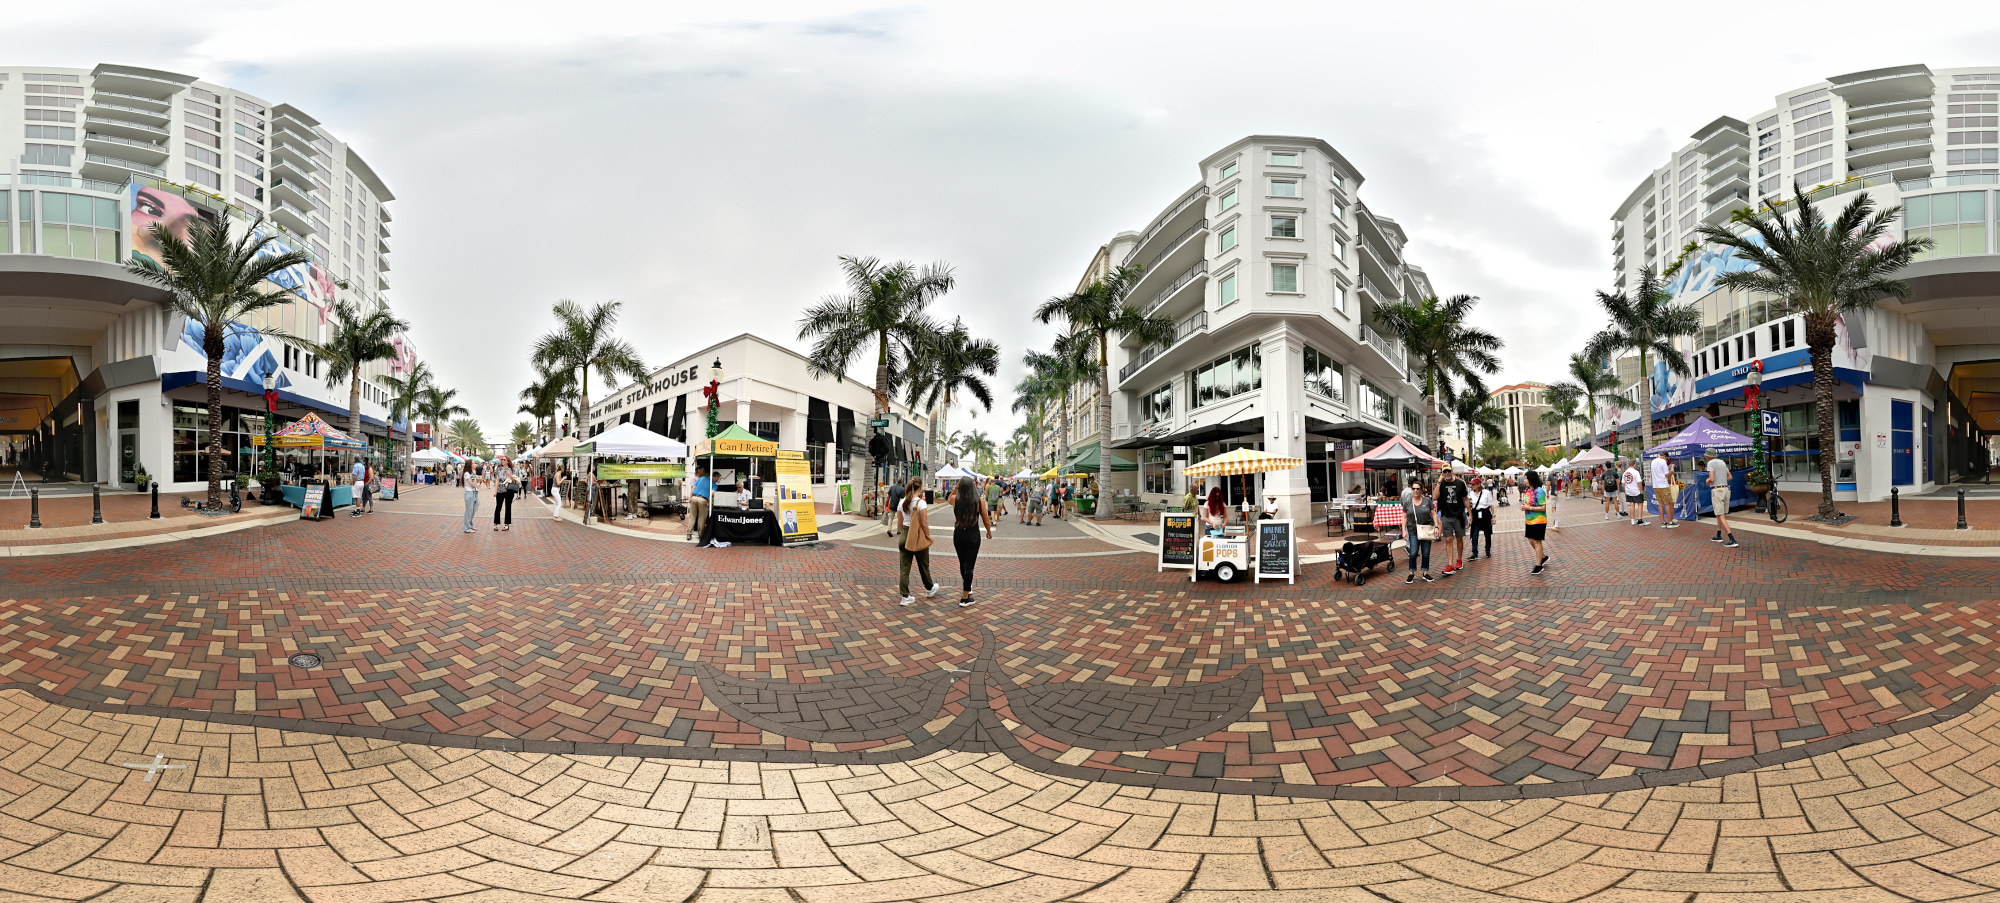
Farmers Market
Not many farmers, but lots of stitching errors. Handheld usually works fine; here it refused.
Interactive Panorama Farmers Market
1/320s f/5,6 ISO 500/28° f=7,5mm

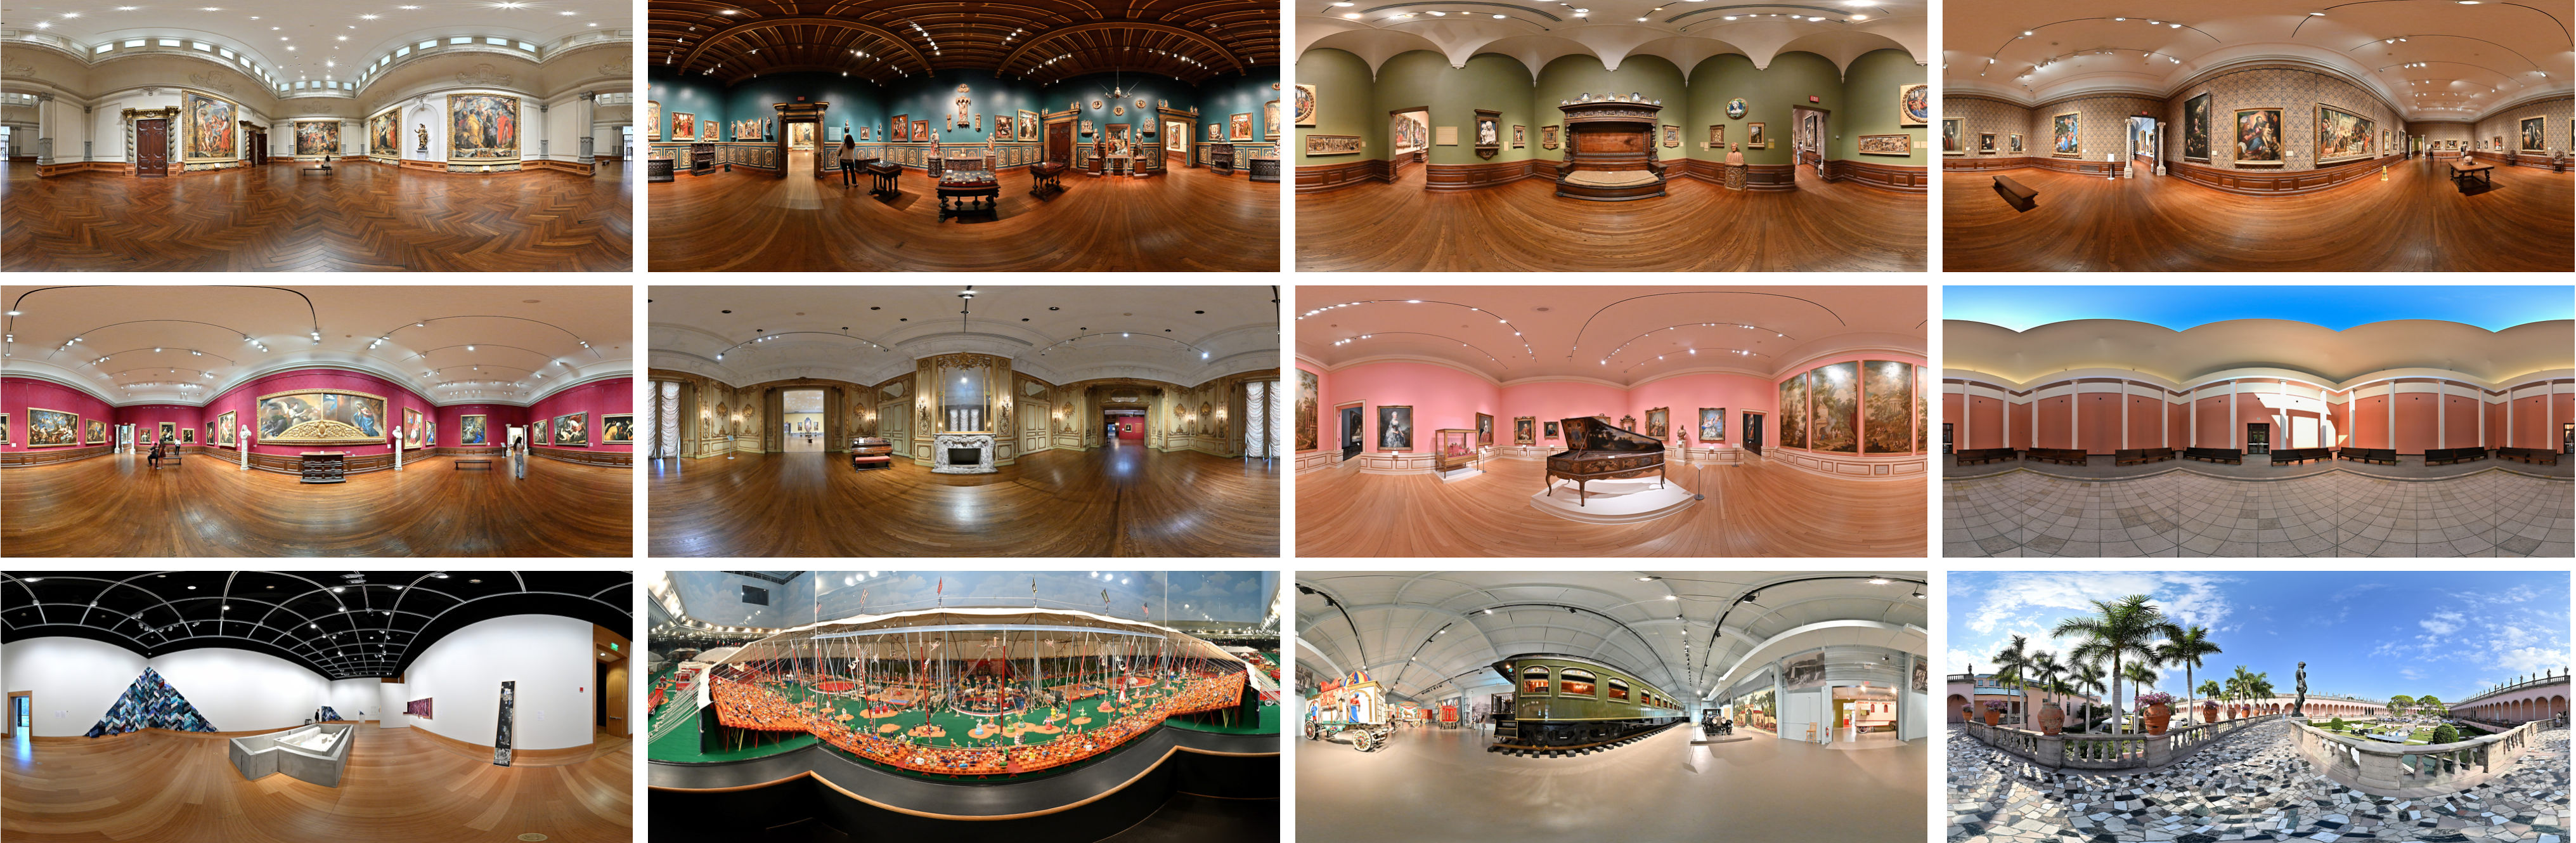
Ringling Museum of Art
Panoramas from the Ringling Museum of Art, with views from galleries to courtyard.
Coquina Beach
Soft light, almost no wind, and water that barely moved. Dark clouds moved in from the gulf, and the brightness faded. Minutes later, the storm closed in around the bay.
Interactive Panorama Coquina Beach
1/1000s f/5,6 ISO 100/21° f=7,5mm
Lido Beach
The last light of the day settled in as the sky dimmed, the colors softened, and the shoreline eased quietly toward evening.
1/4000s f/8 ISO 100/21° 16-50mm f/2,8 VR f=50mm/75mm
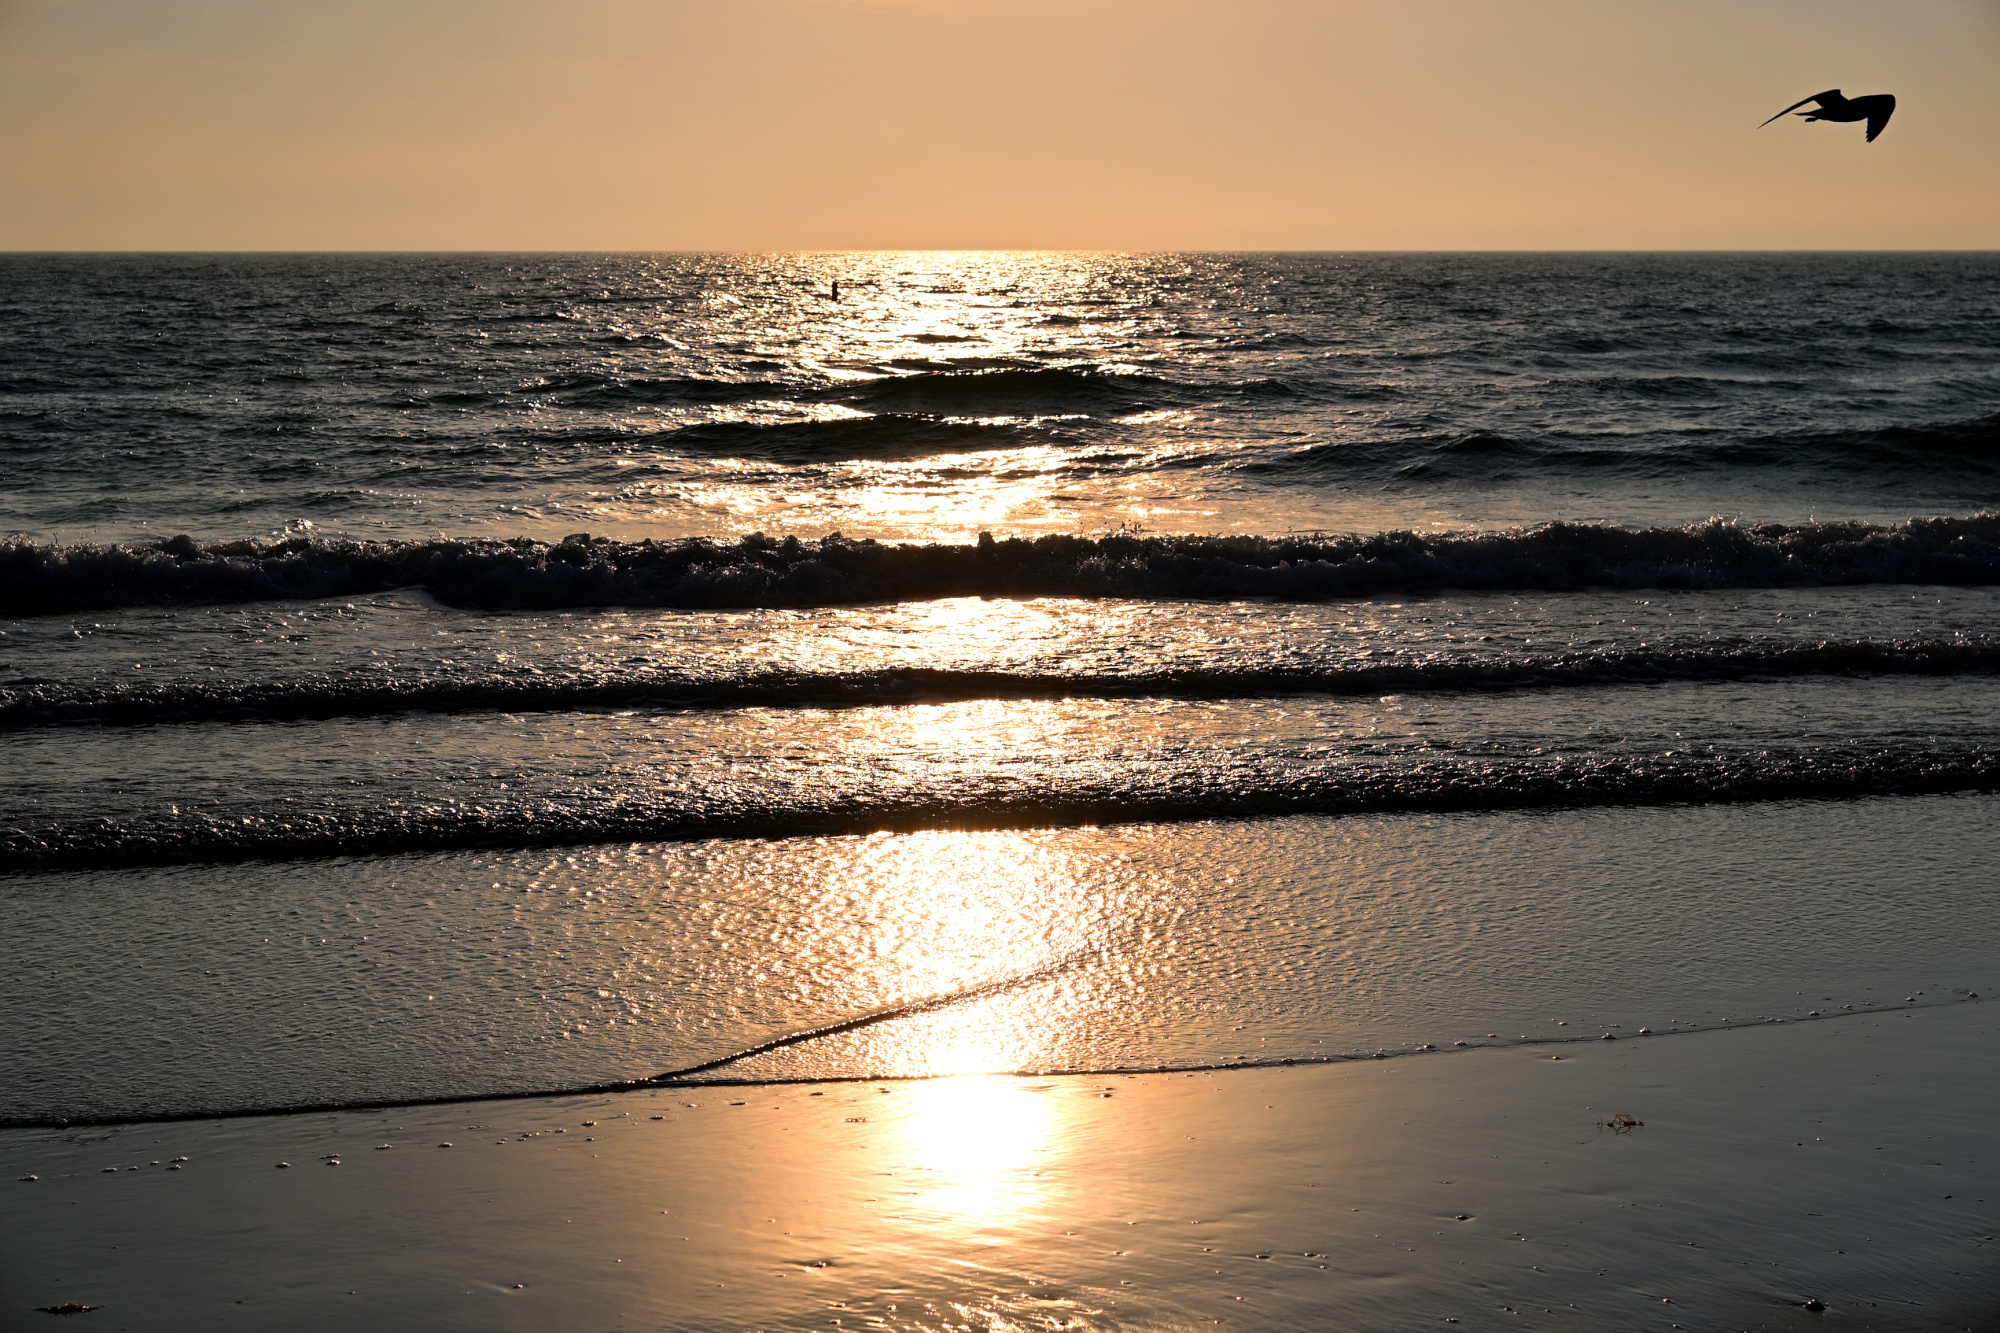
Interactive Panorama Lido Beach
1/800s f/5,6 ISO 100/21° f=7,5mm
A winter escape at 25°C, with days shaped more by place than by schedule. The coast offered space, the water stayed calm, and the light guided the course of the trip. It became a quiet record of a season lived differently.
-
The word Key is derived from the Spanish cayo, meaning a small, low-lying island formed from coral or sand. Early Spanish explorers used the term across the region, and the English name Key developed from this usage. Many coastal islands in Florida, including Siesta Key, still carry this inherited name. ↩
-
Later review confirmed the presence of Agent Gull from the Panorama Supervision Unit:
AGL 01, internal
Field Observer for the Panorama Supervision Unit
Calm presence noted during direct face to face inspection
Observation confirmed from first frame
Identity confirmed as Agent Gull ↩
Seite 1 von 22
Ältere Beiträge →