-
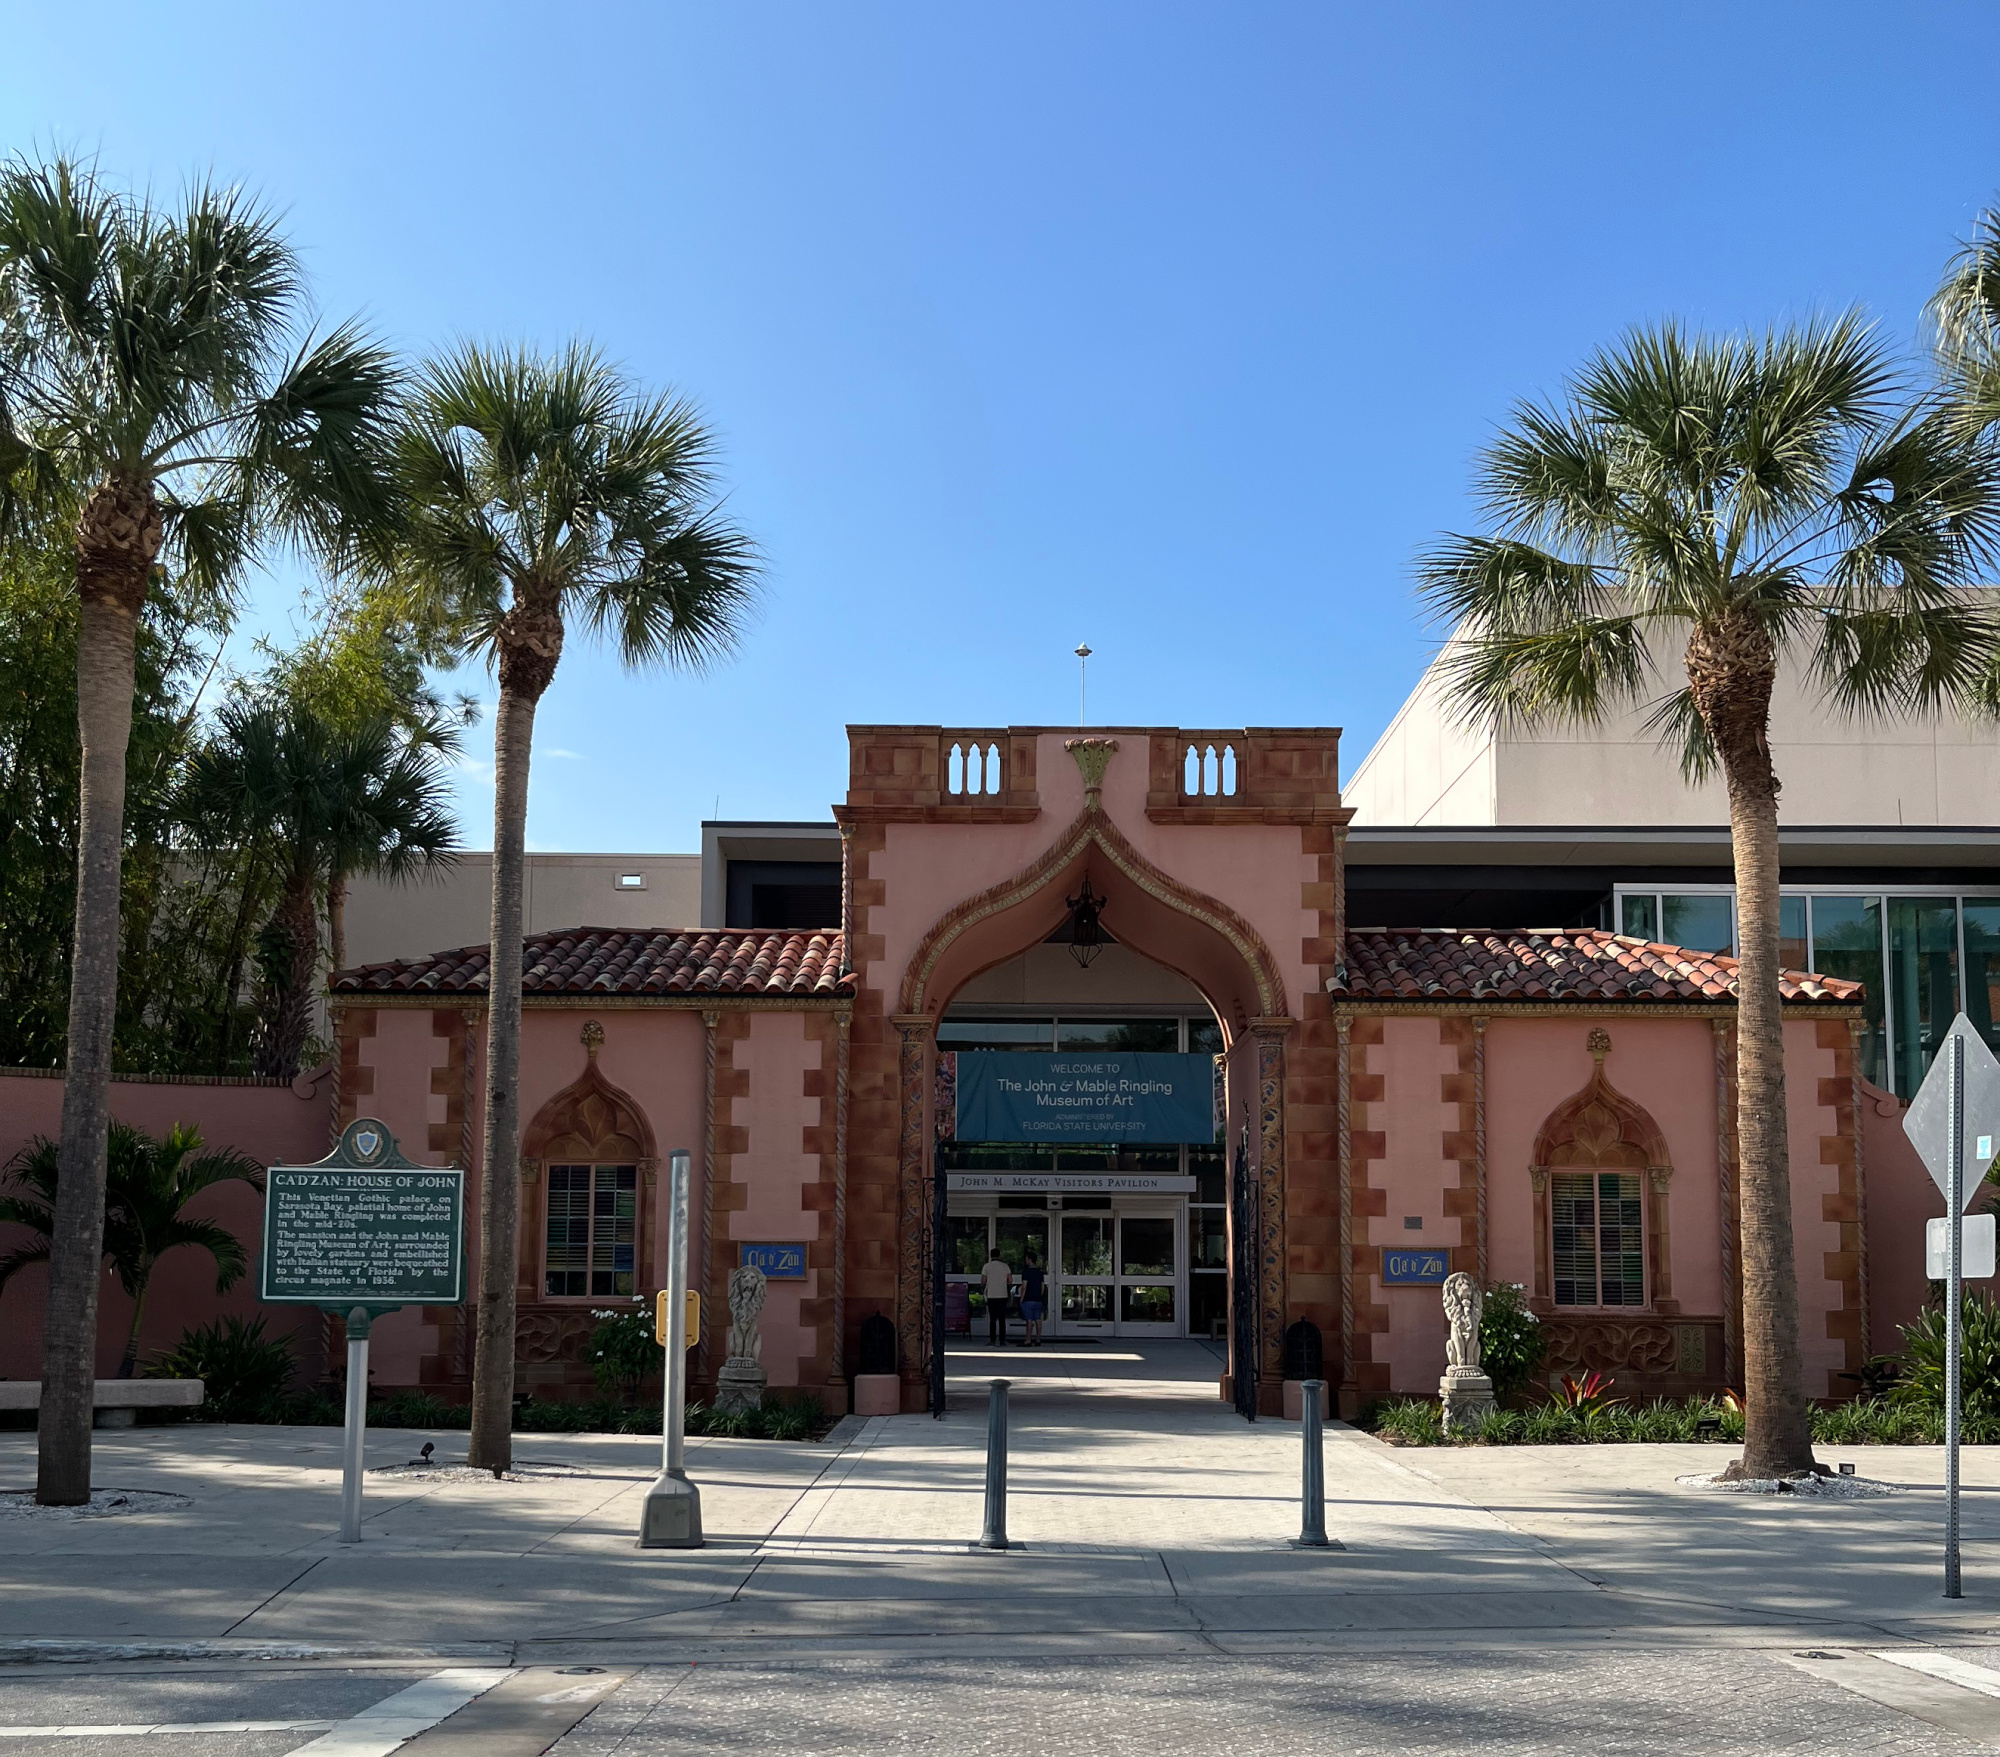
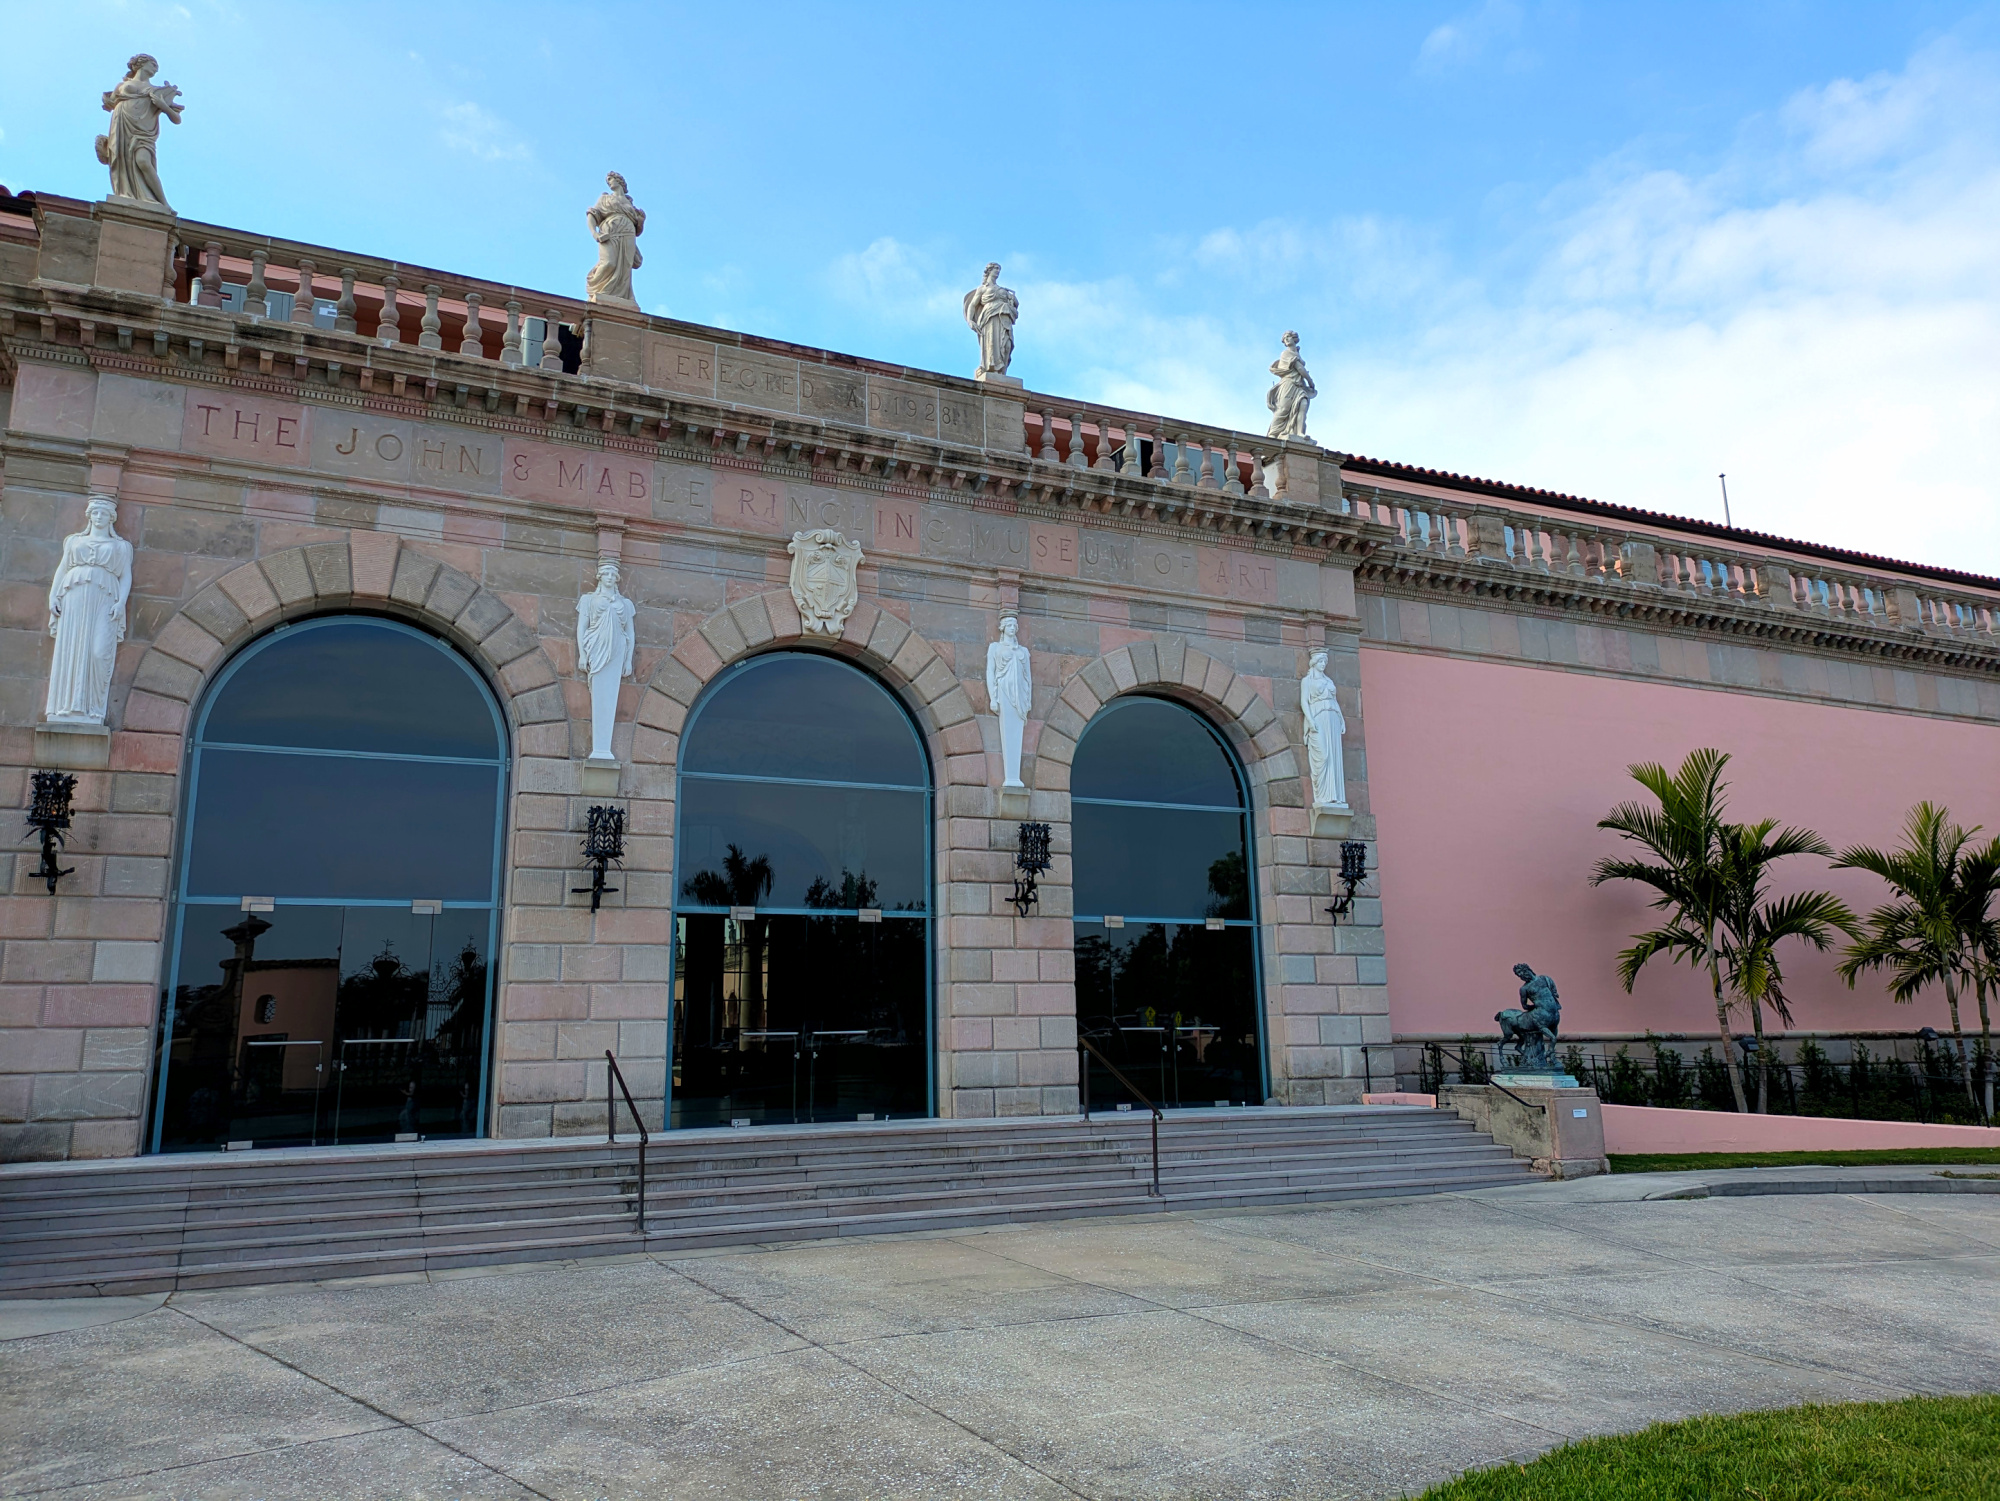
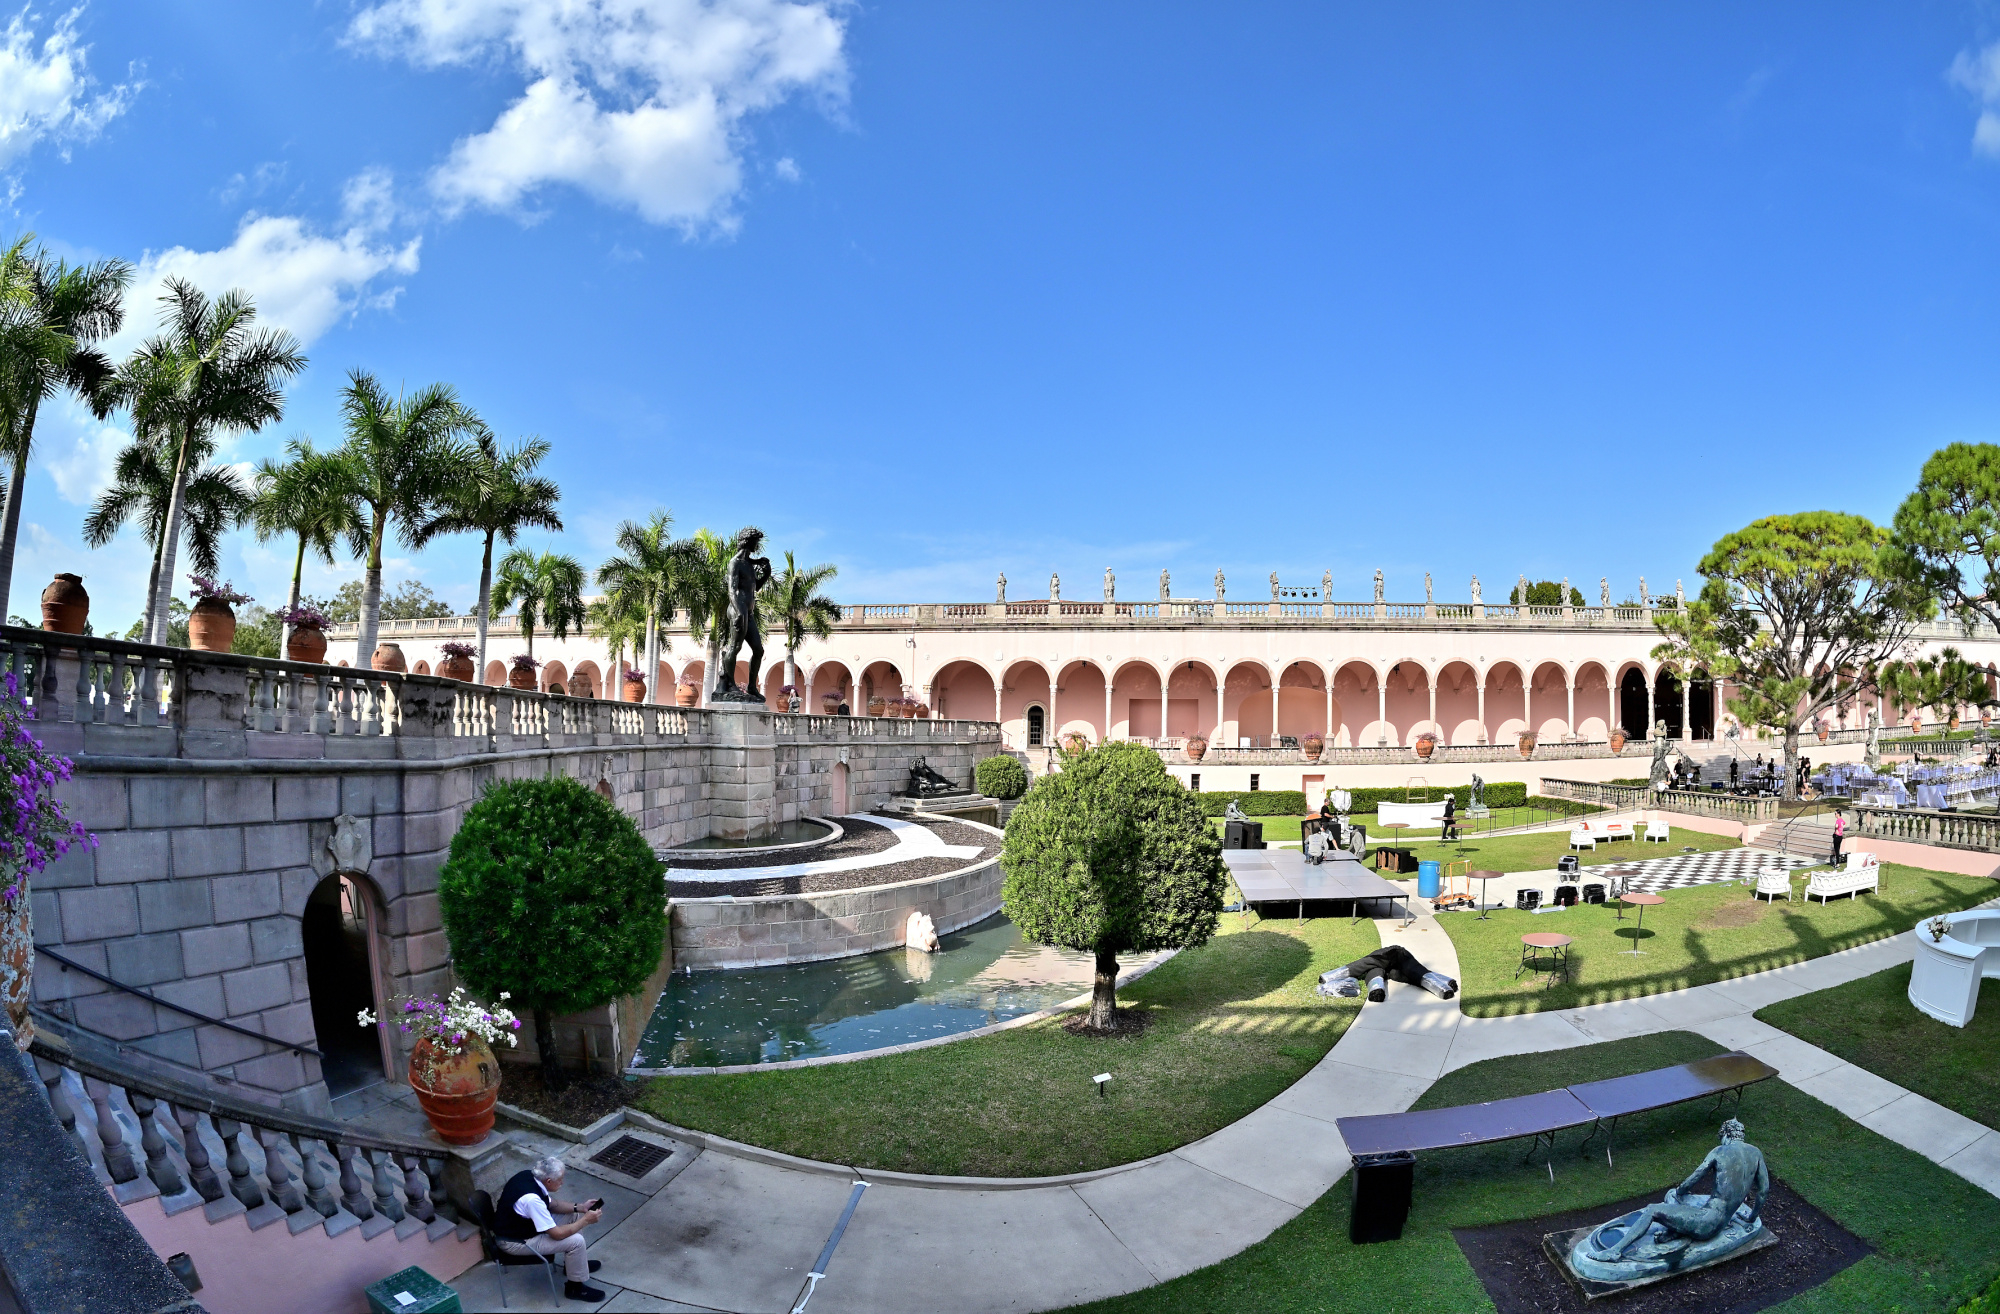
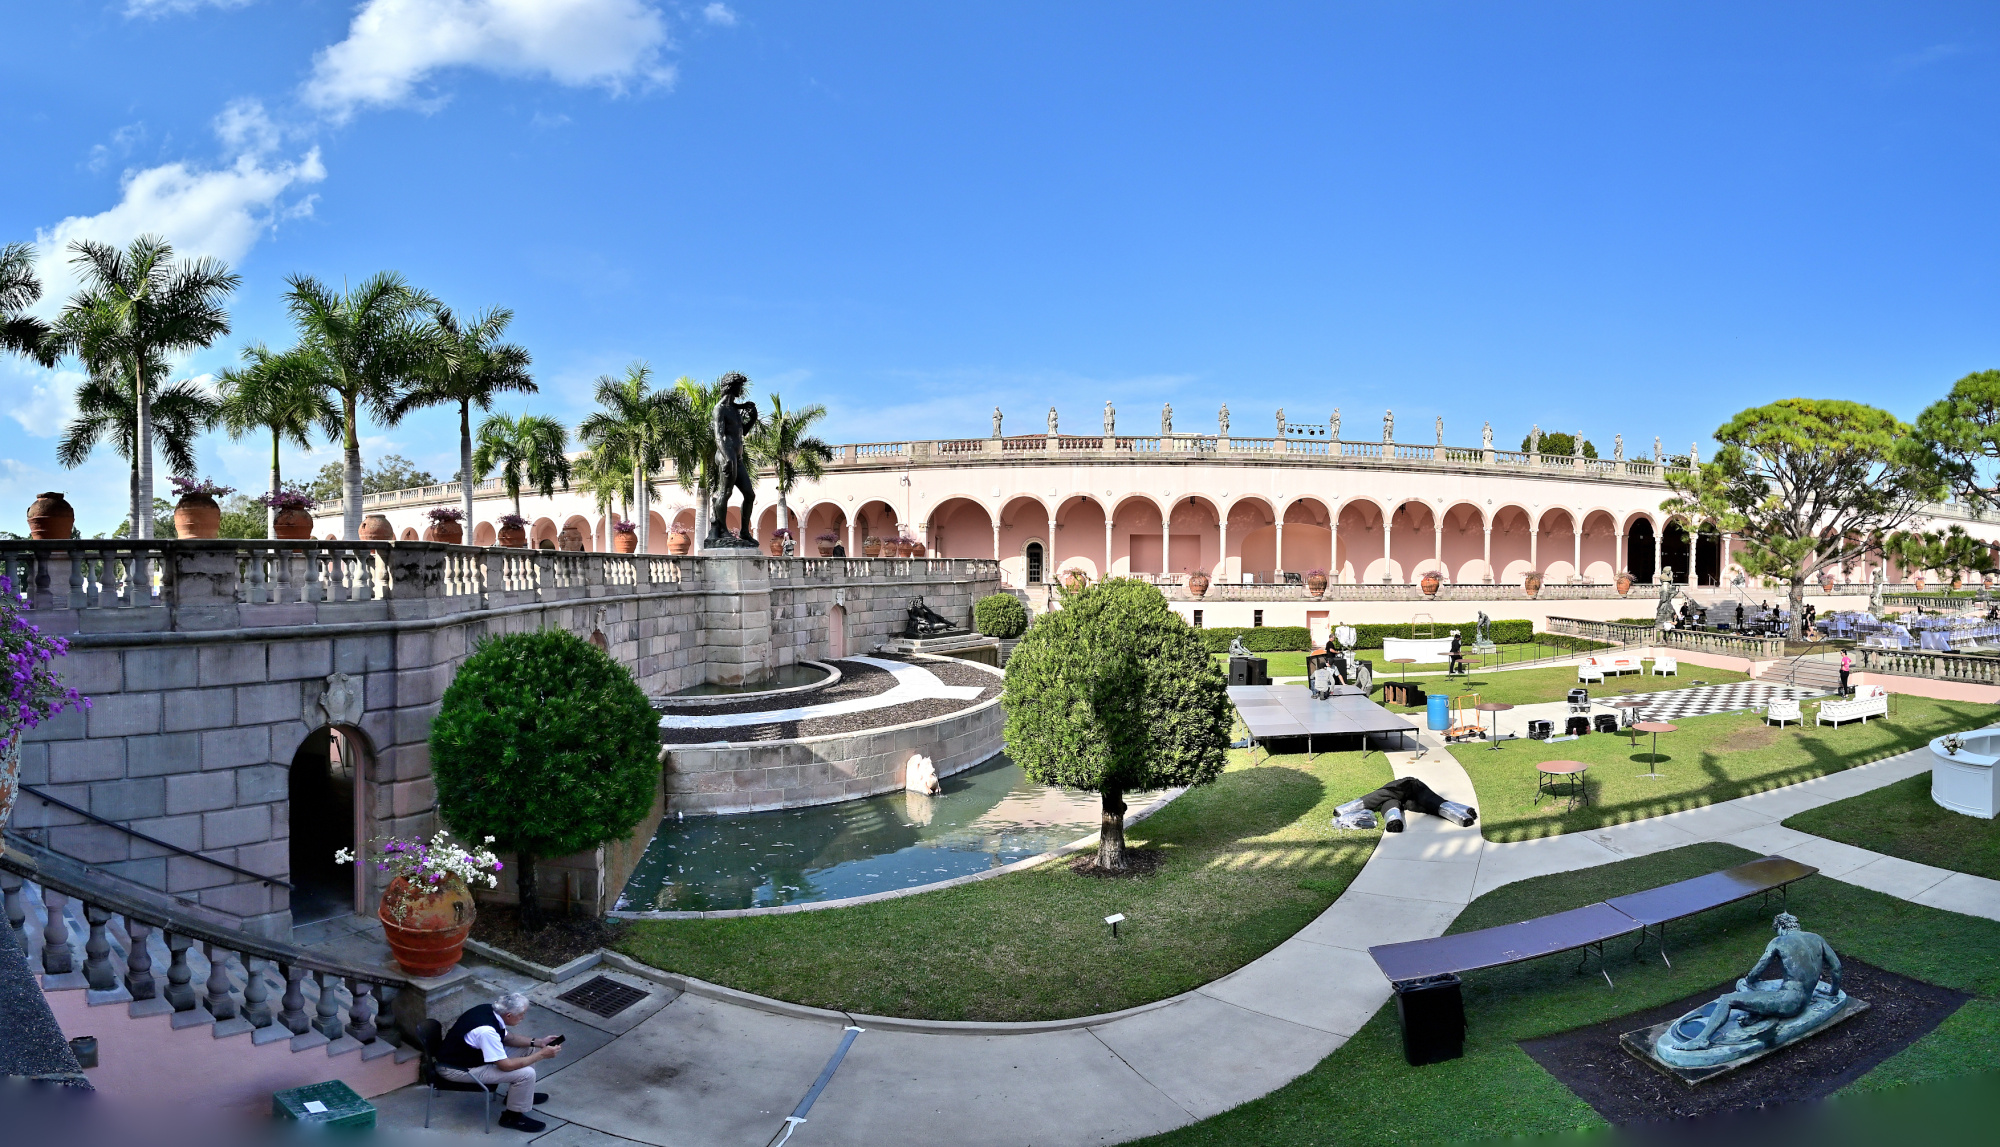
Ringling Museum of Art, Sarasota

Established in 1927, the John and Mable Ringling Museum of Art was completed in 1928 and welcomed its first visitors in 1930.
1/3745s f/1,6 ISO 50/18° f=5mm/26mm
1/1316s f/1,9 ISO 45 f=5mm/25mm
1/2755s f/1,6 ISO 50/18° f=5mm/26mm

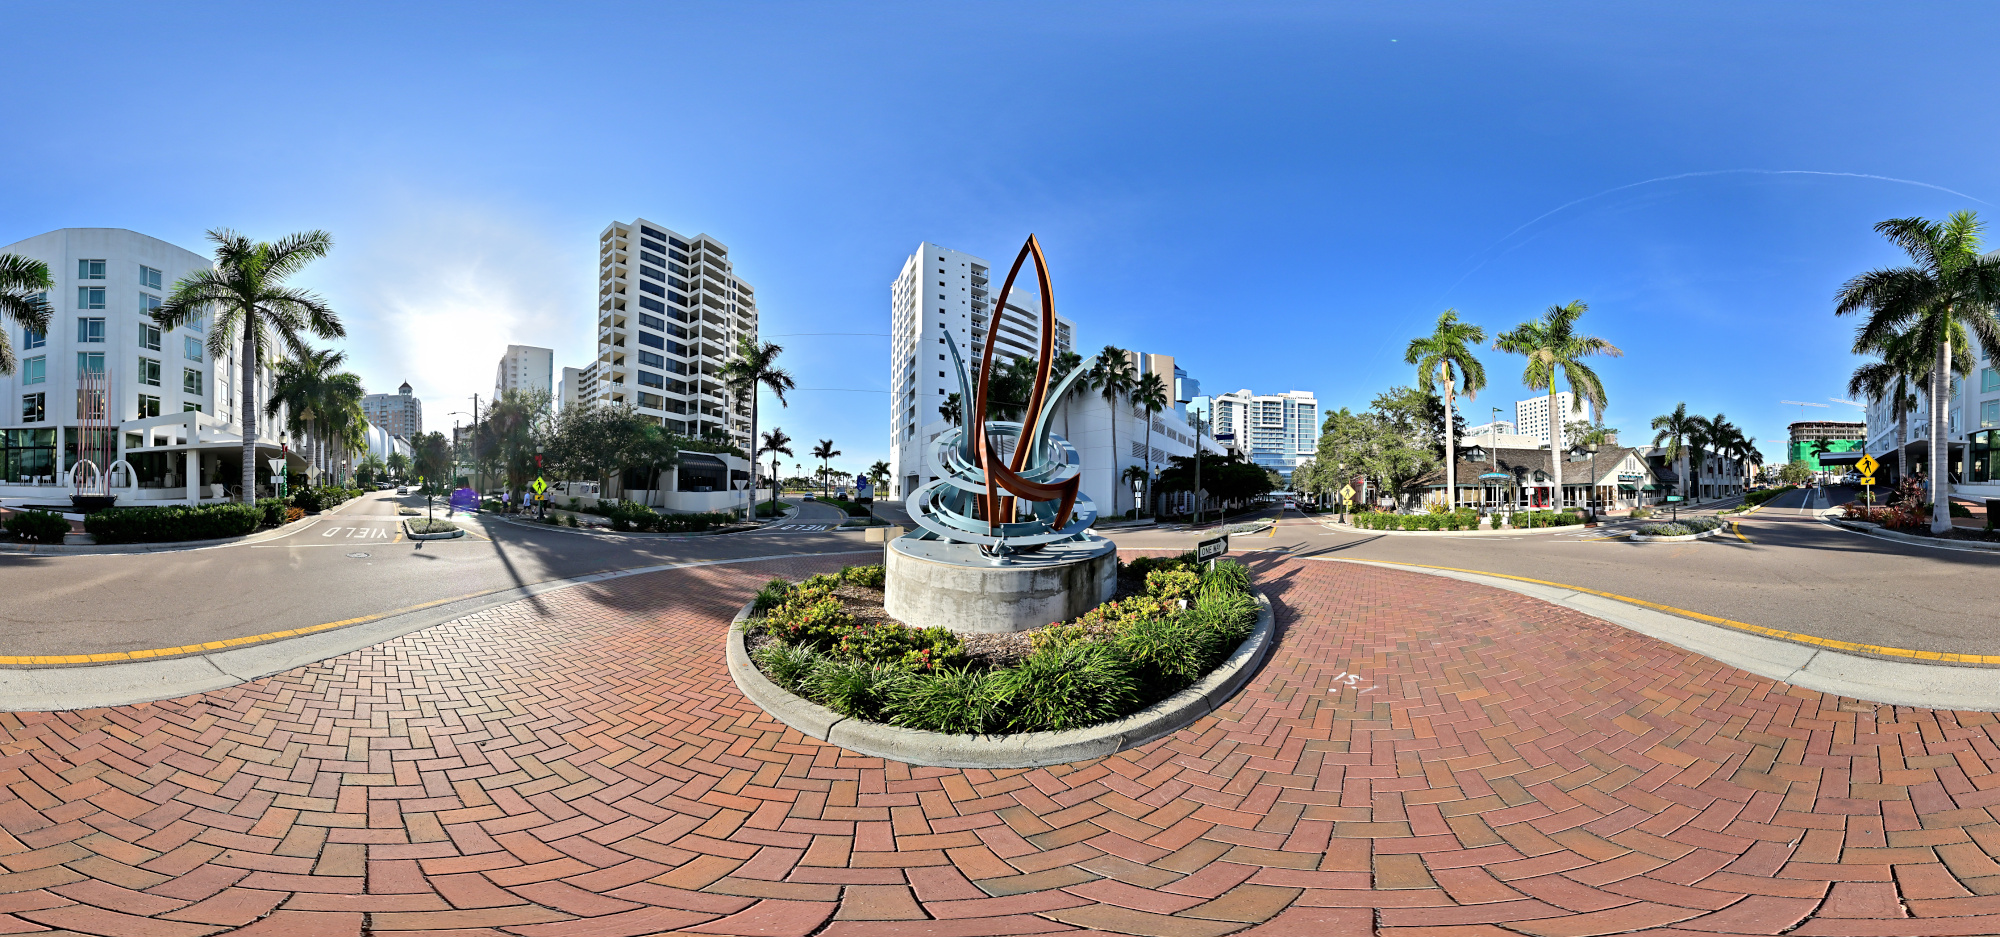
Started as a circus, now a museum by the bay.
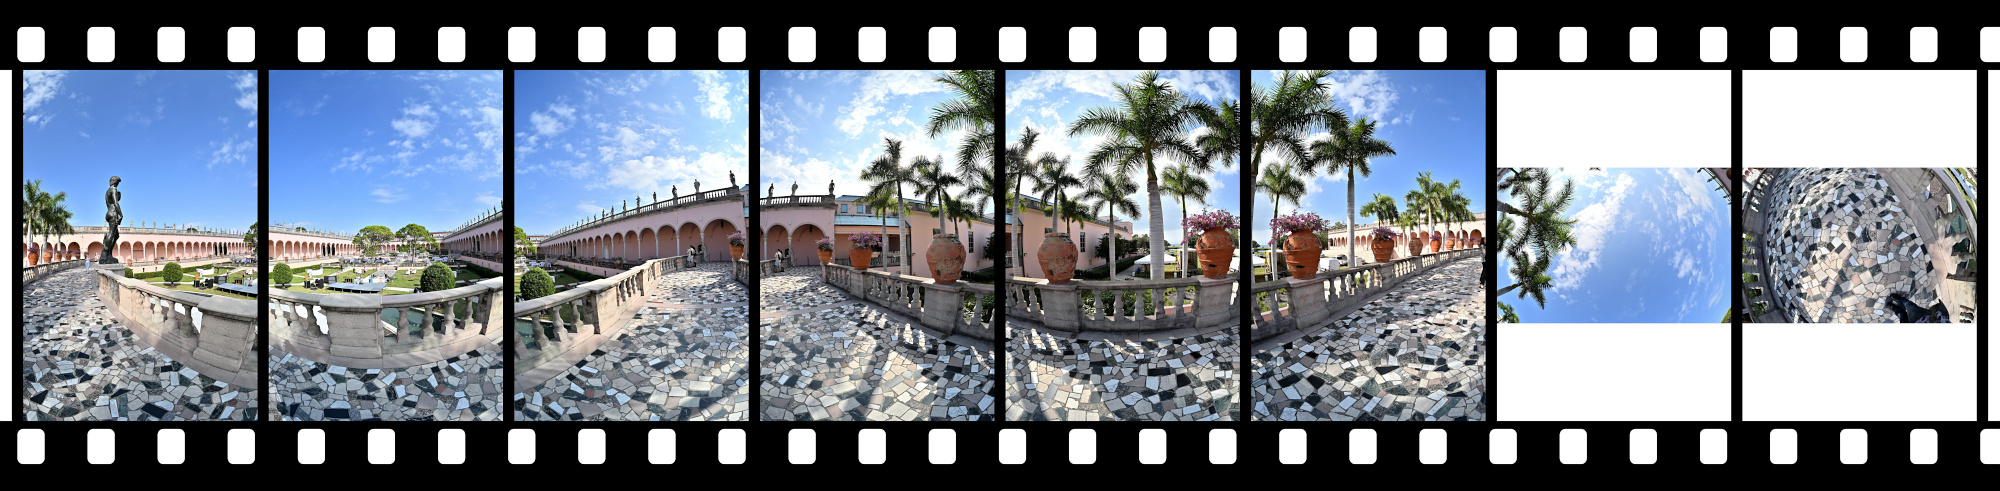
Ringling turned seasons on the road into an art collection in Sarasota, and these panoramas take the long view in wide frames.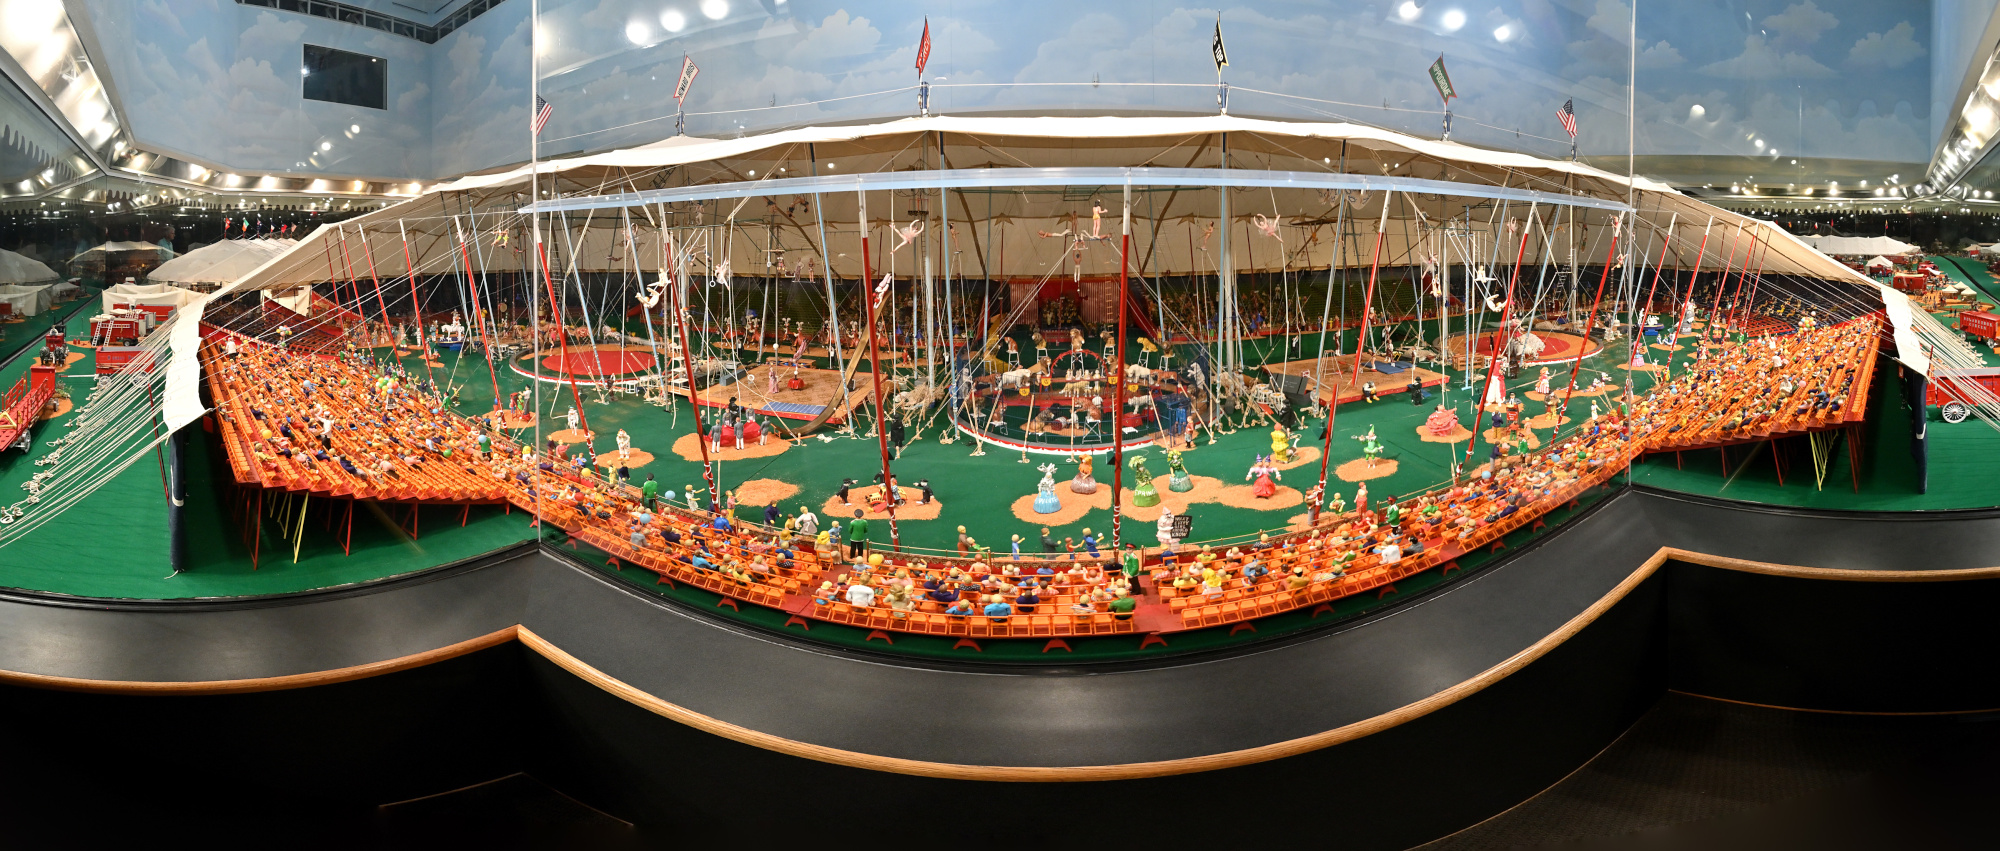
1/10s f/5,6 ISO 500/28° f=7,5mm
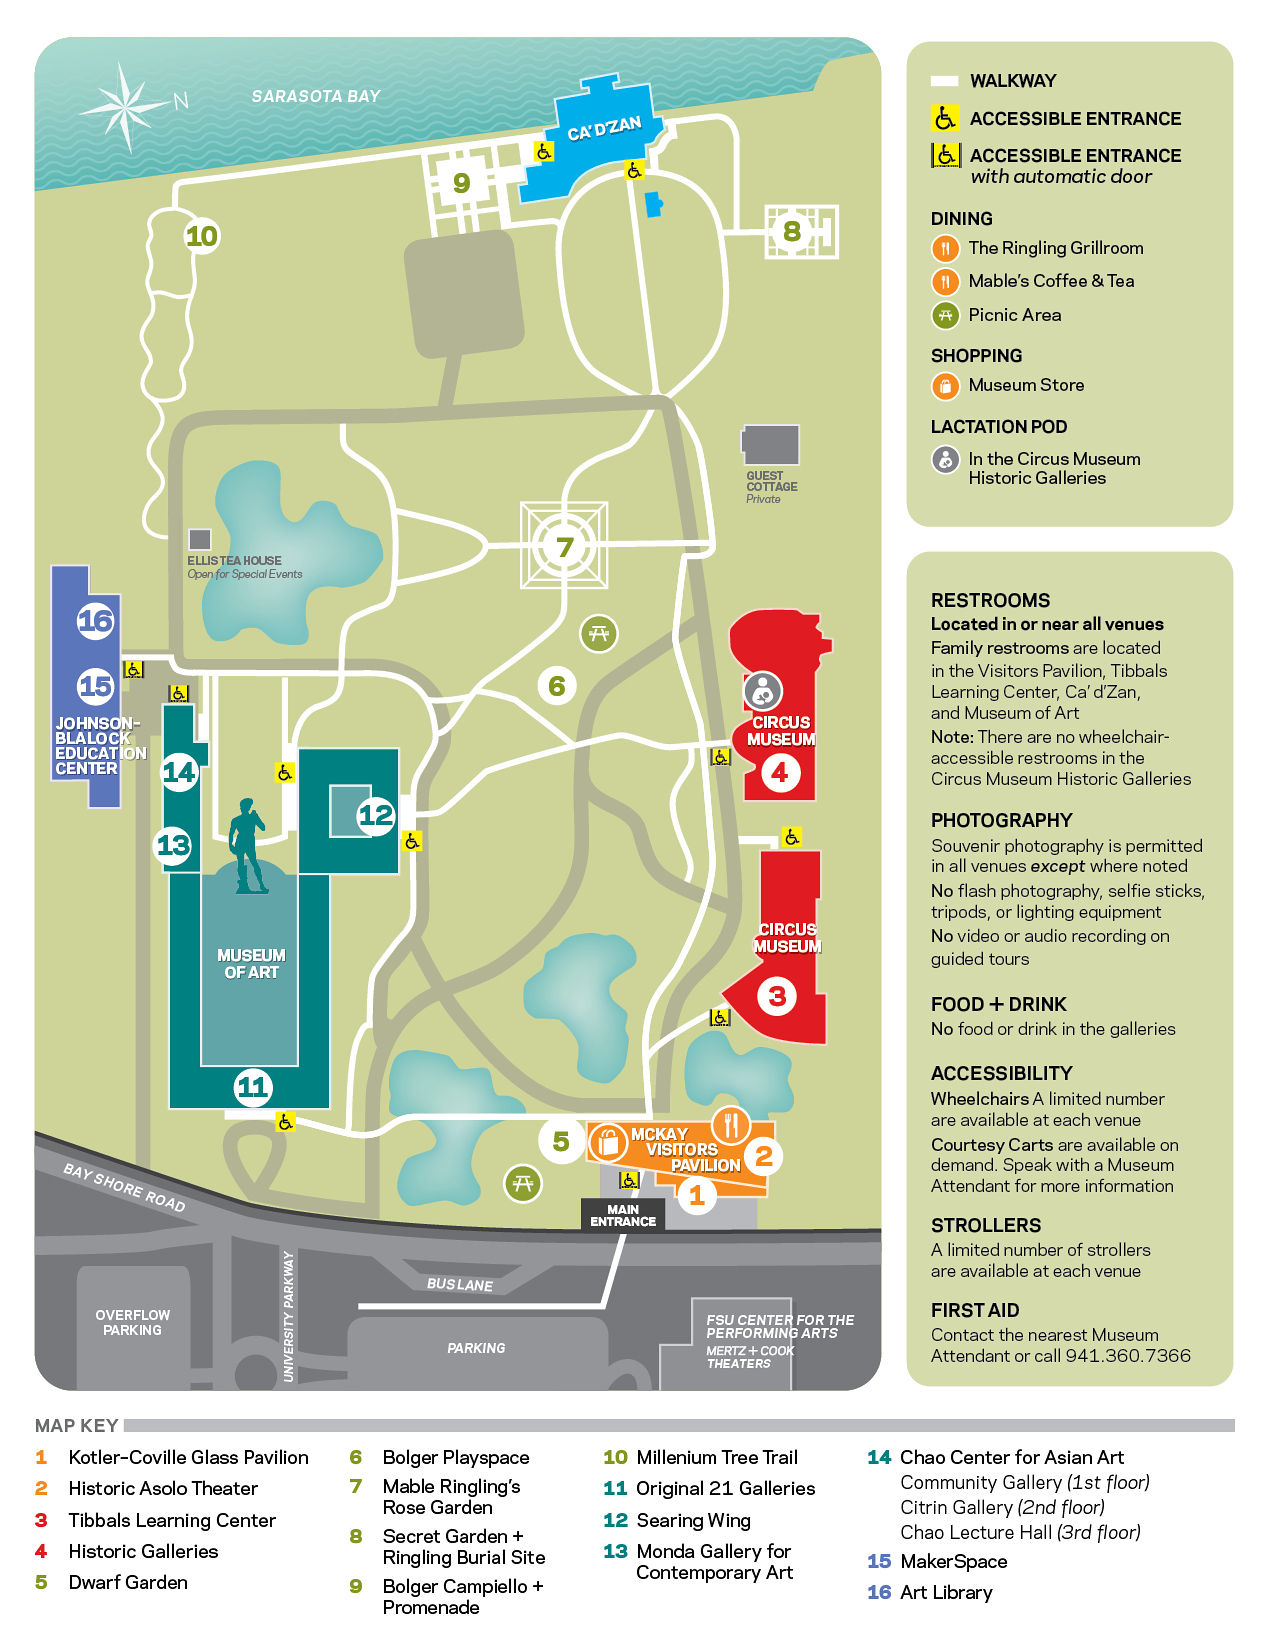
In case you get lost in the art, here is the official map. The place is big.
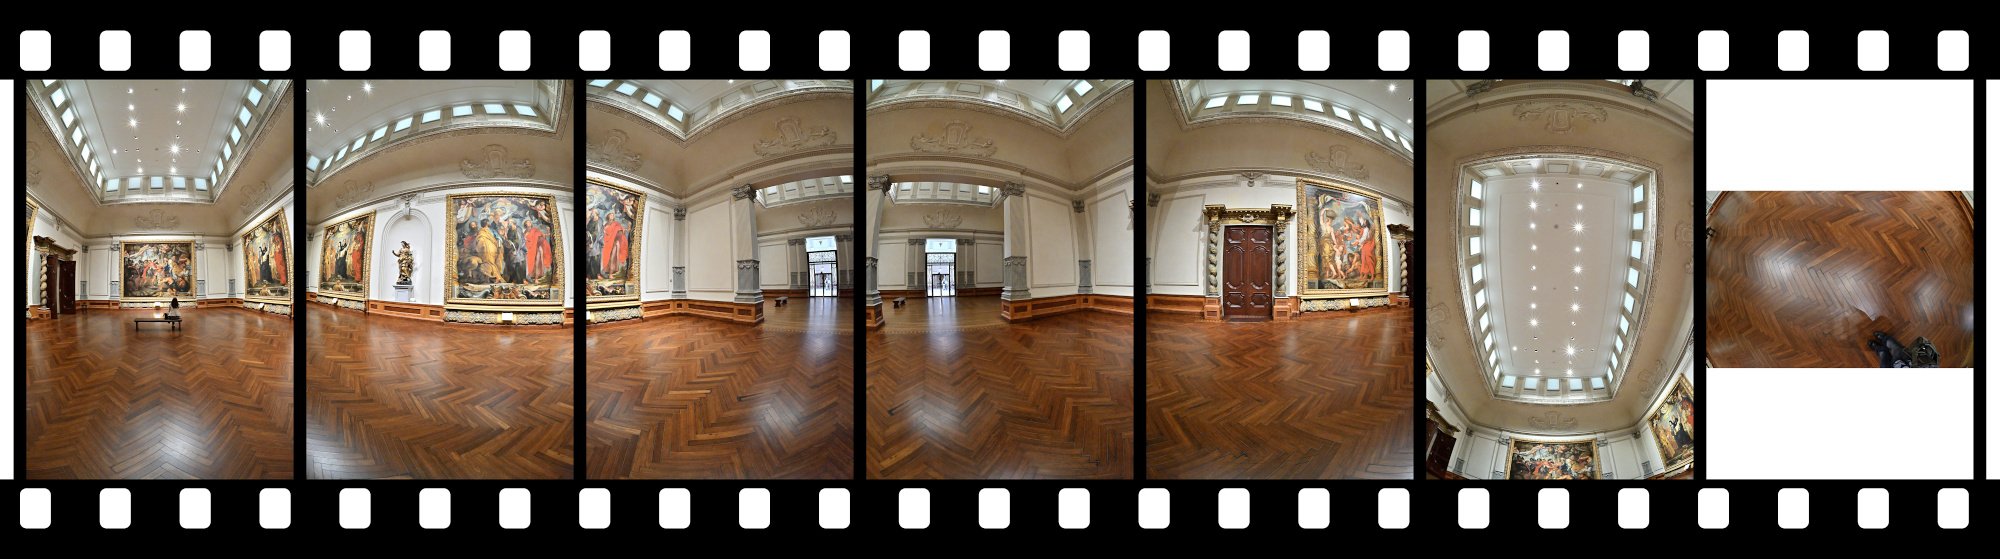
As tripods were not permitted, all panoramas were captured handheld, increasing the risk of stitching errors from parallax and alignment sensitivity in an environment where precise alignment is most important.
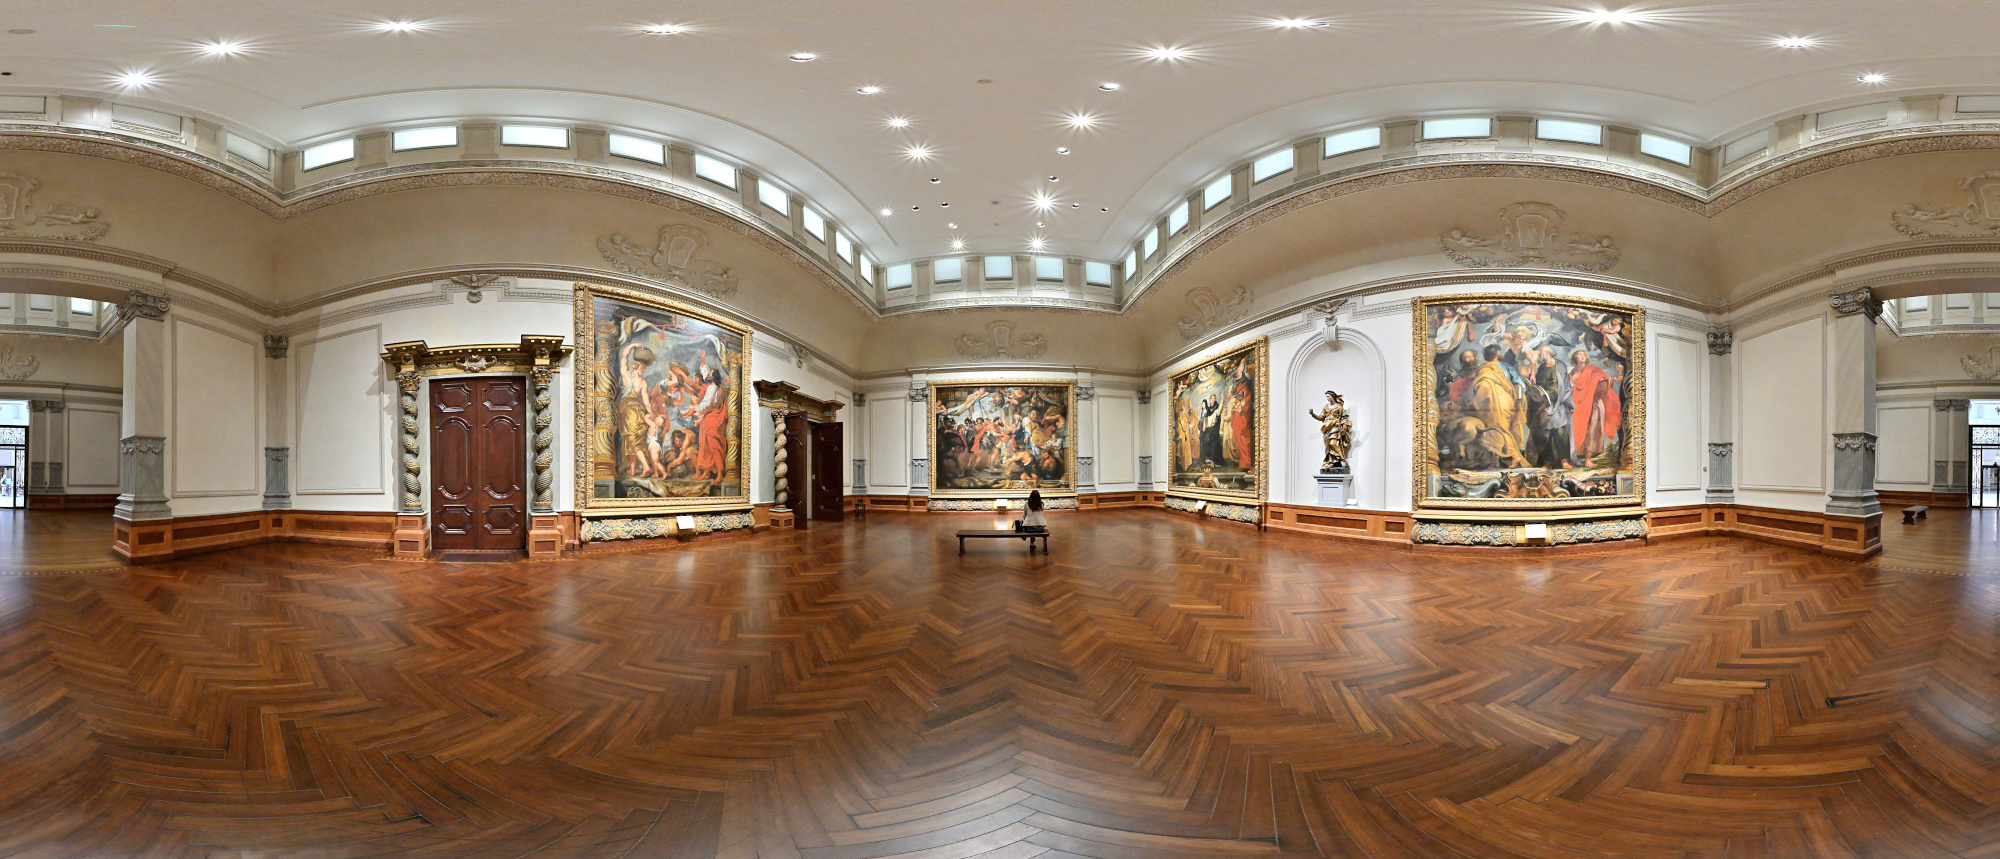
Gallery 1
Rubens opens the walk with five towering canvases from his Triumph of the Eucharist series. Once made for royalty, now casually greeting anyone who steps inside.
Interactive Panorama Gallery 1
1/50s f/5,6 ISO 2000/34° f=7,5mm
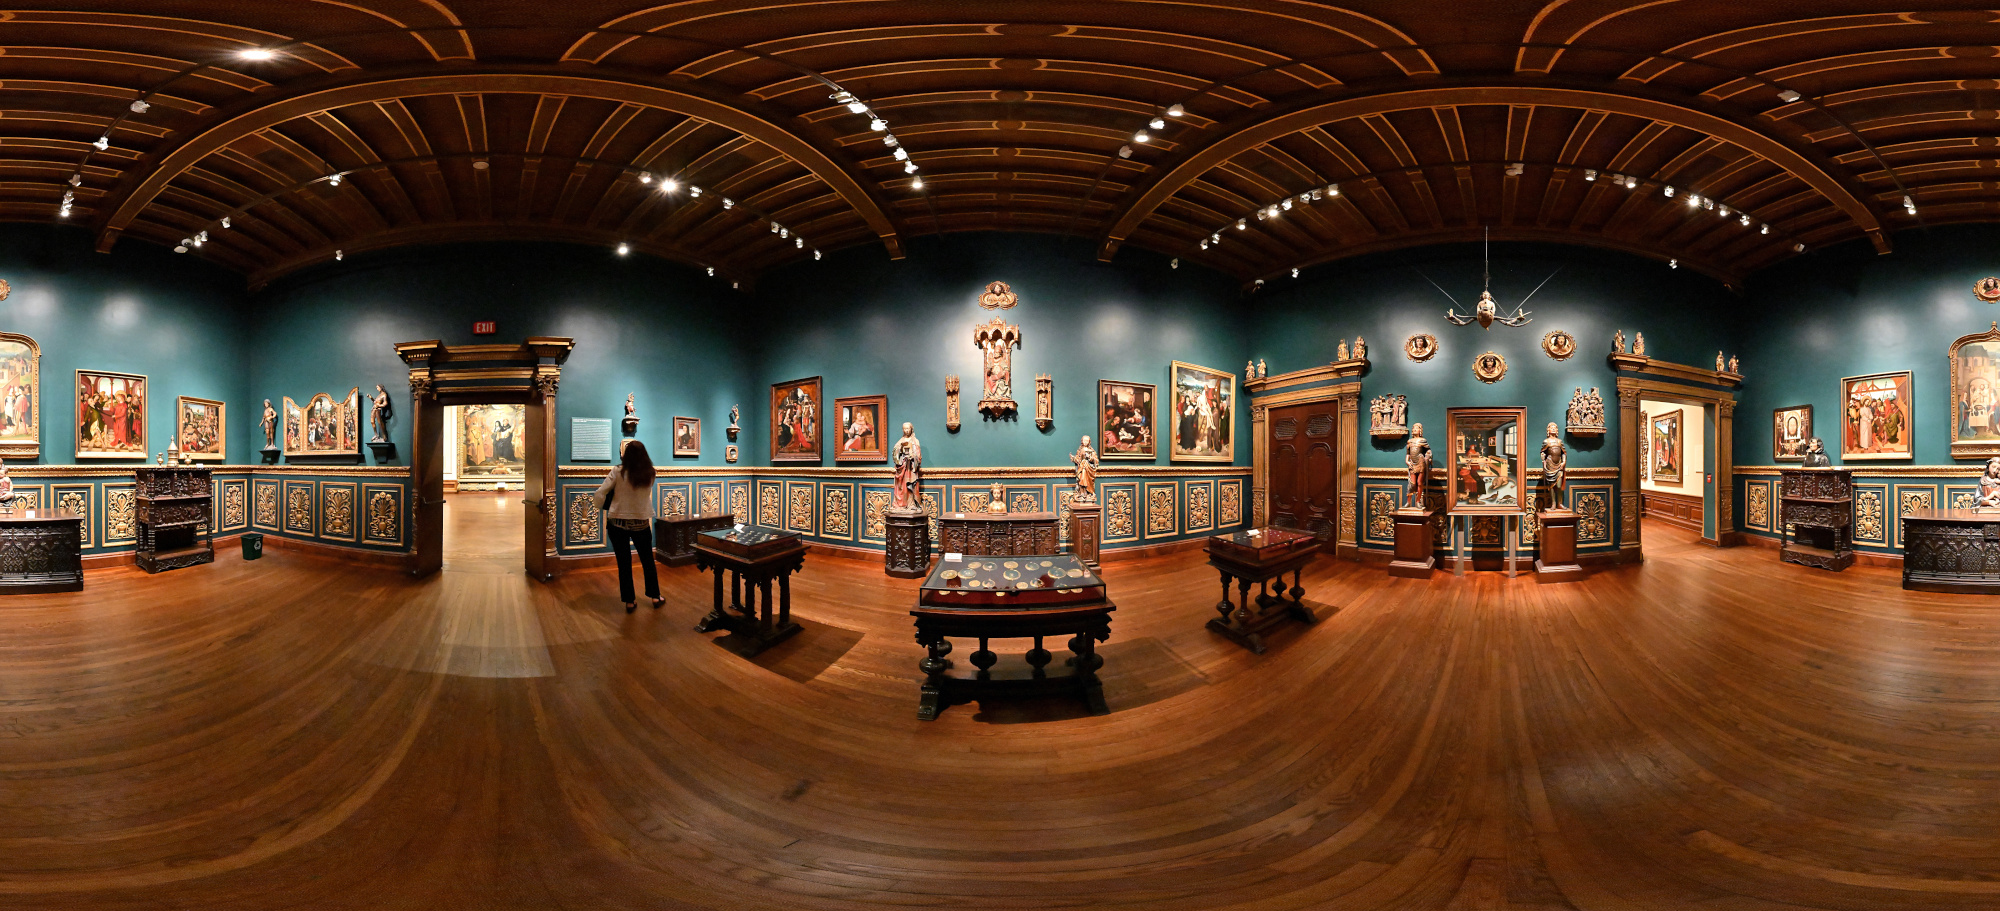
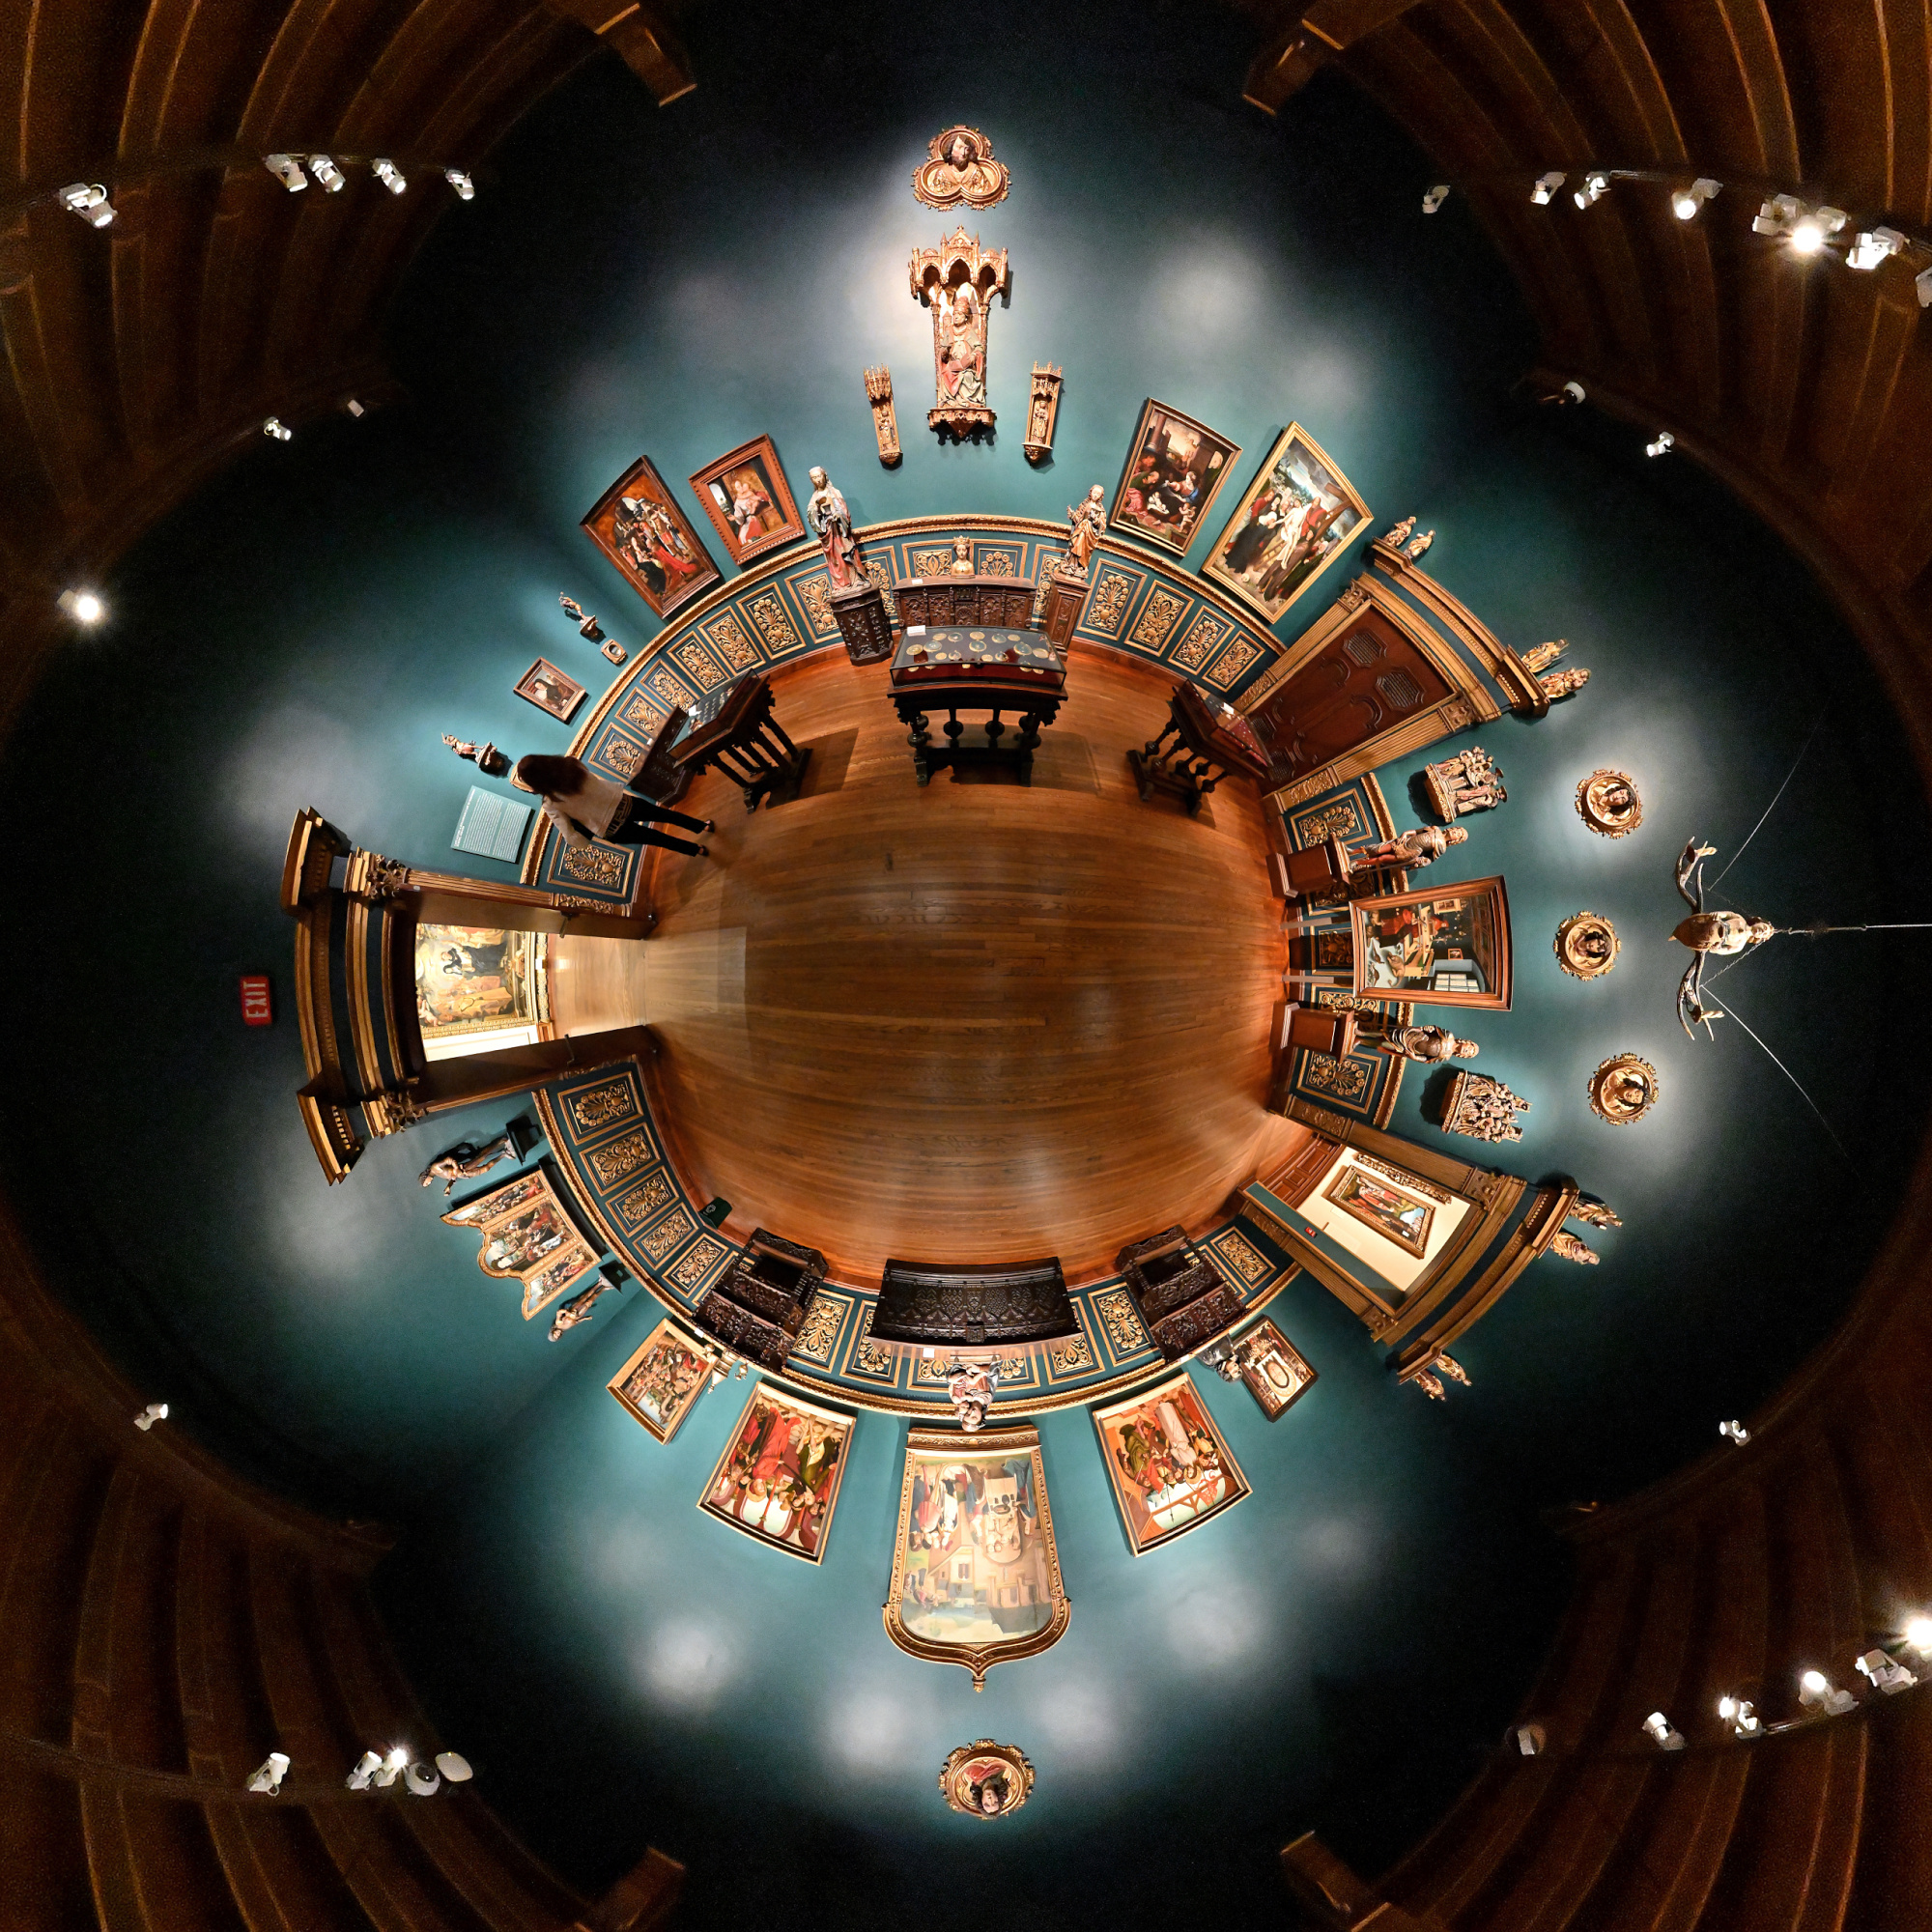
Gallery 3
Late Gothic and Renaissance works from Northern Europe, including pieces by Cranach the Elder, Cornelis van Cleve, and Quinten Metsys. Sculptures, furniture, and smaller objects complete the atmosphere and give a good sense of the period.
Interactive Panorama Gallery 3
1/50s f/5,6 ISO 10000/41° f=7,5mm

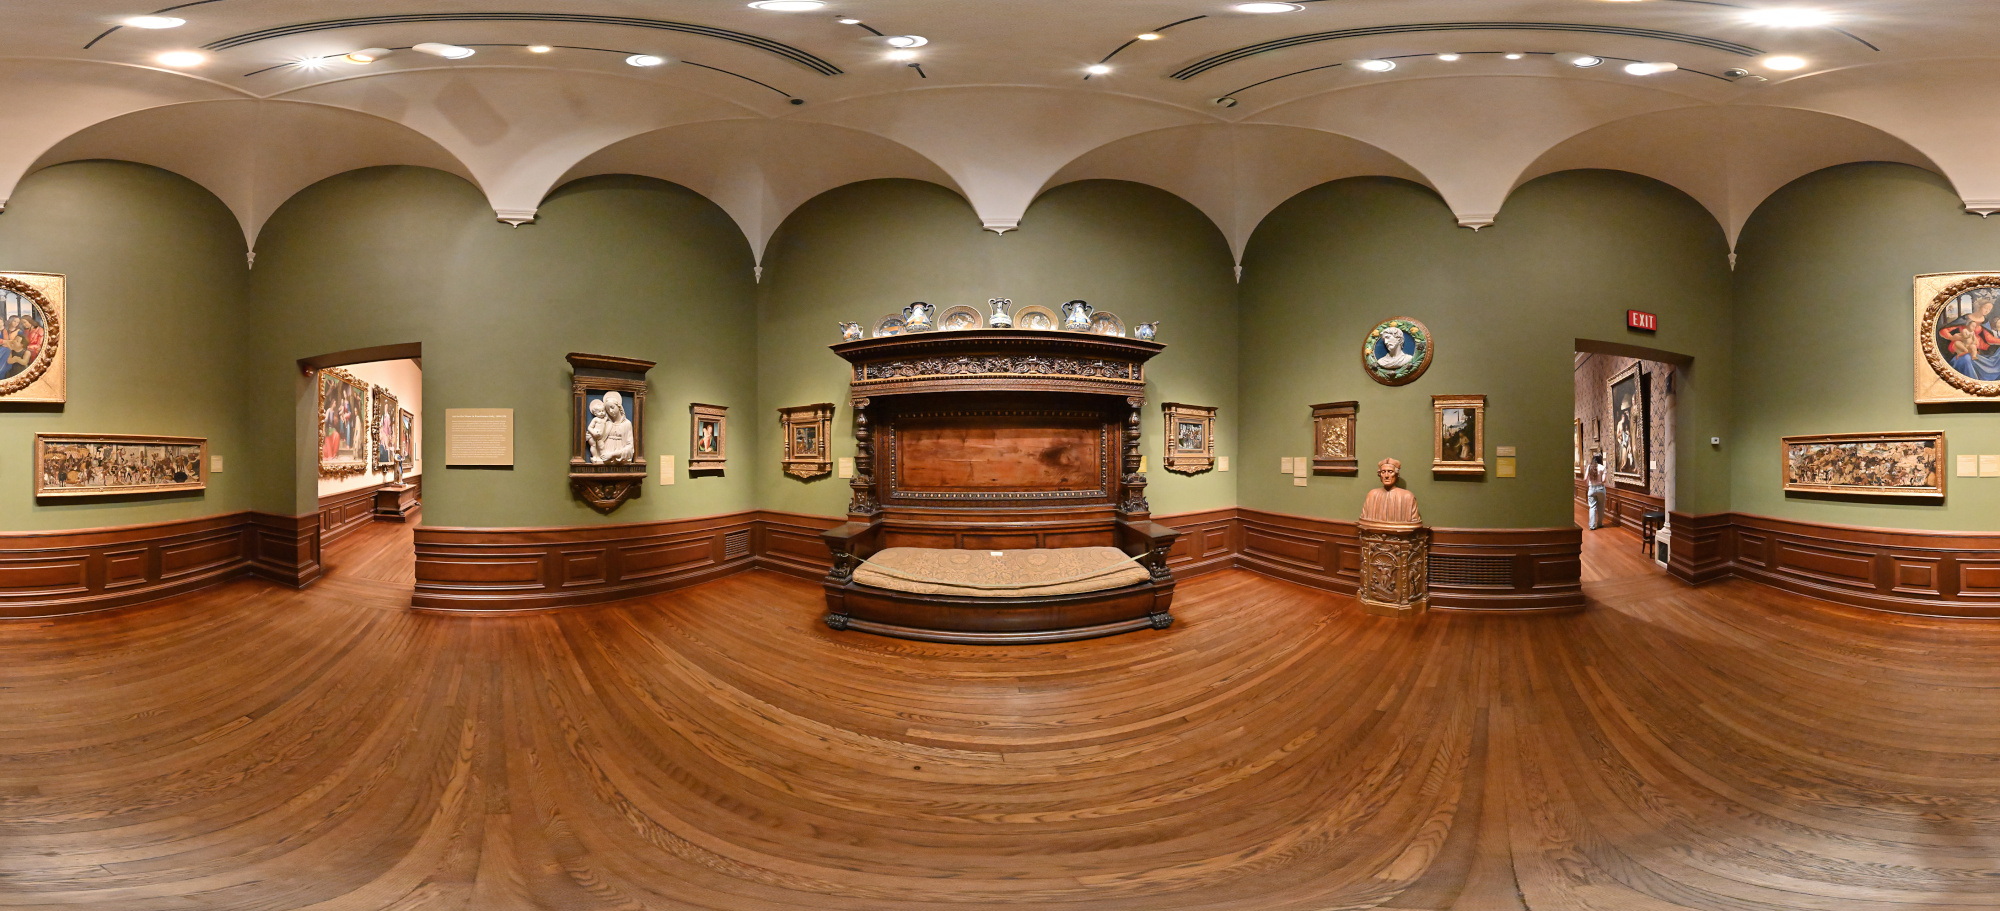
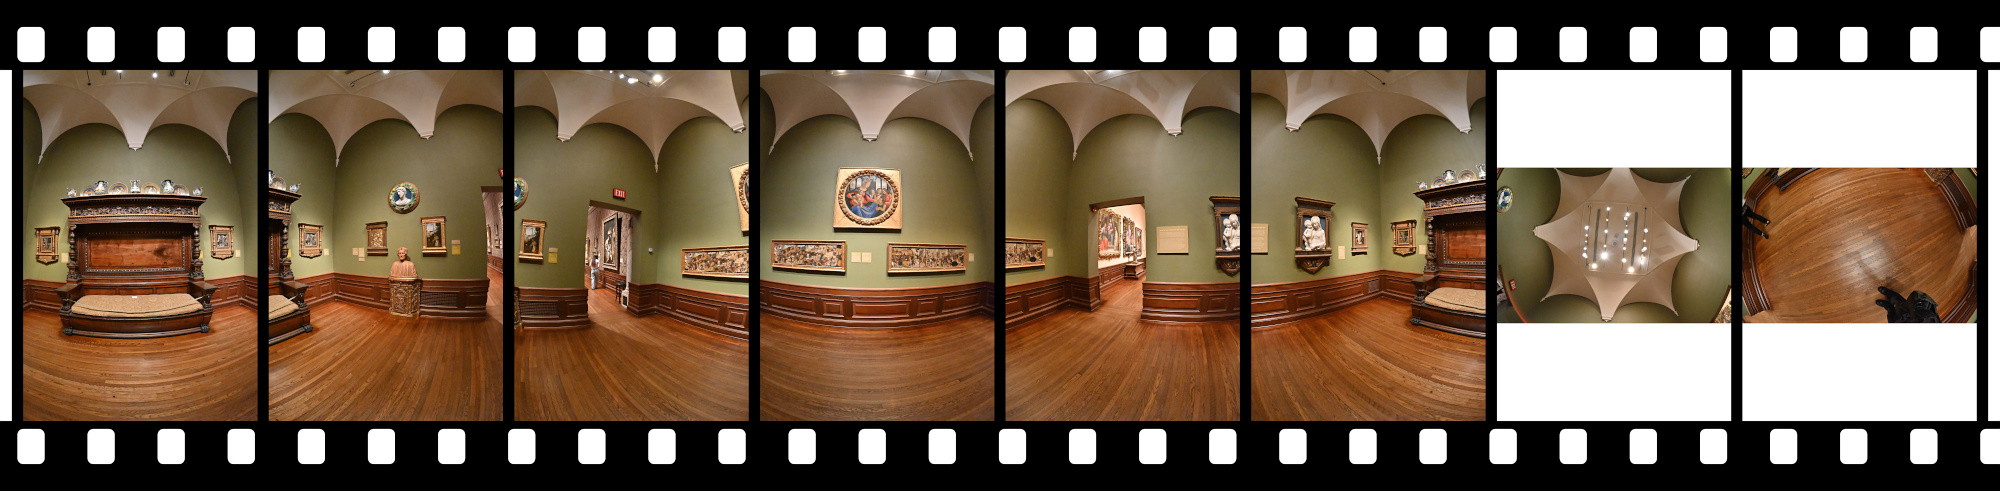
Gallery 5
Renaissance life shows up in softer tones. A 16th century daybed and devotional pieces, including a gentle Della Robbia Madonna and a warm Ghirlandaio, set the mood.
Interactive Panorama Gallery 5
1/50s f/5,6 ISO 10000/41° f=7,5mm
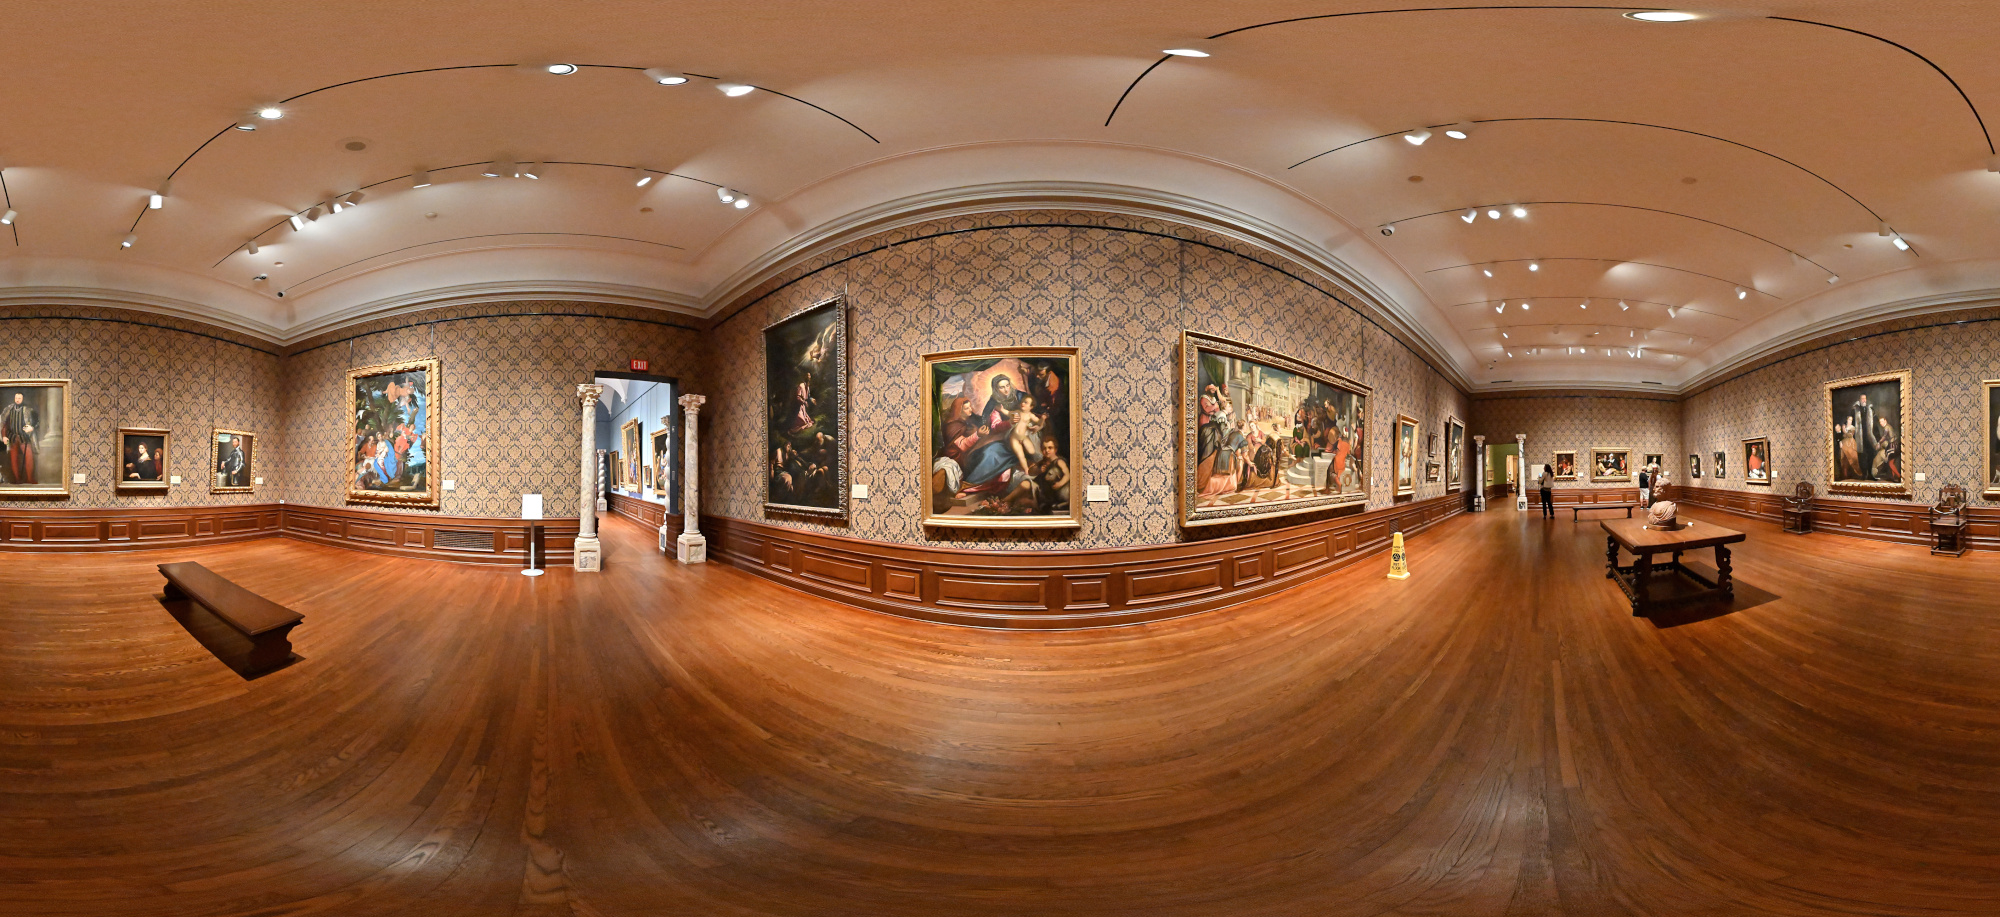
Gallery 6
Sixteenth century Italy comes into focus with Veronese's large Rest on the Flight to Egypt. Palma and Fasolo add drama and family presence to the room.
Interactive Panorama Gallery 6
1/50s f/5,6 ISO 10000/41° f=7,5mm

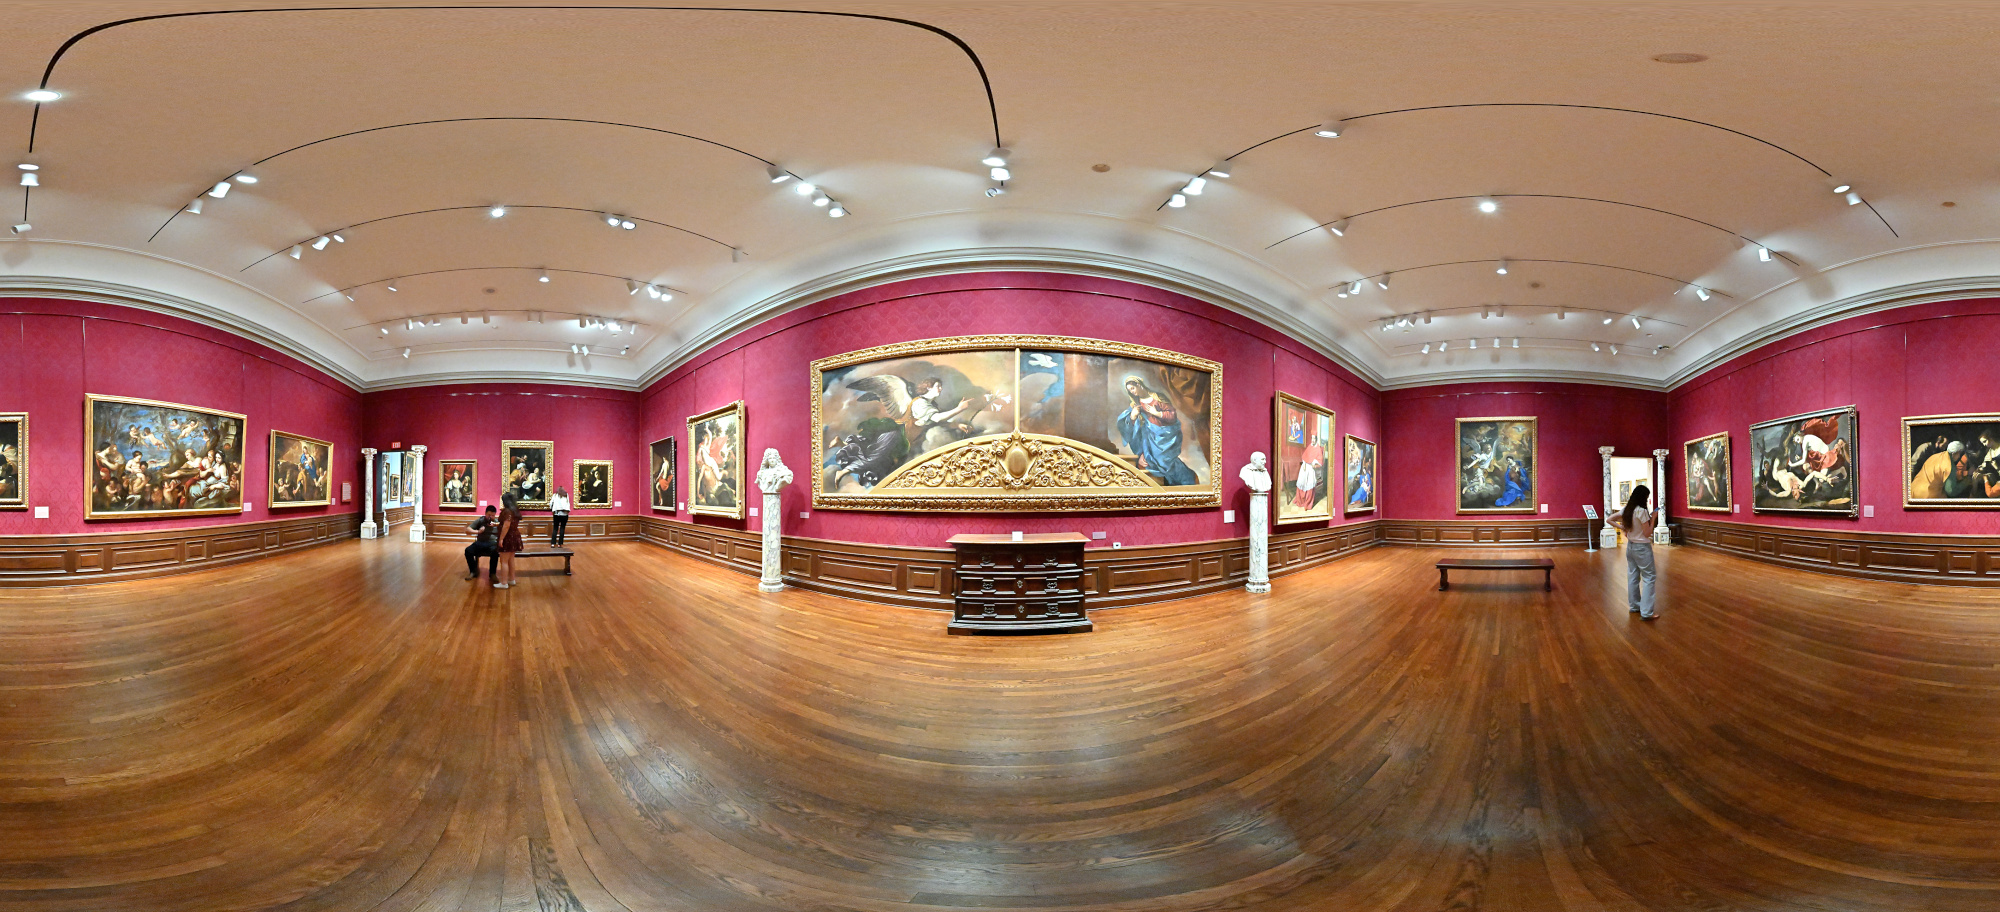
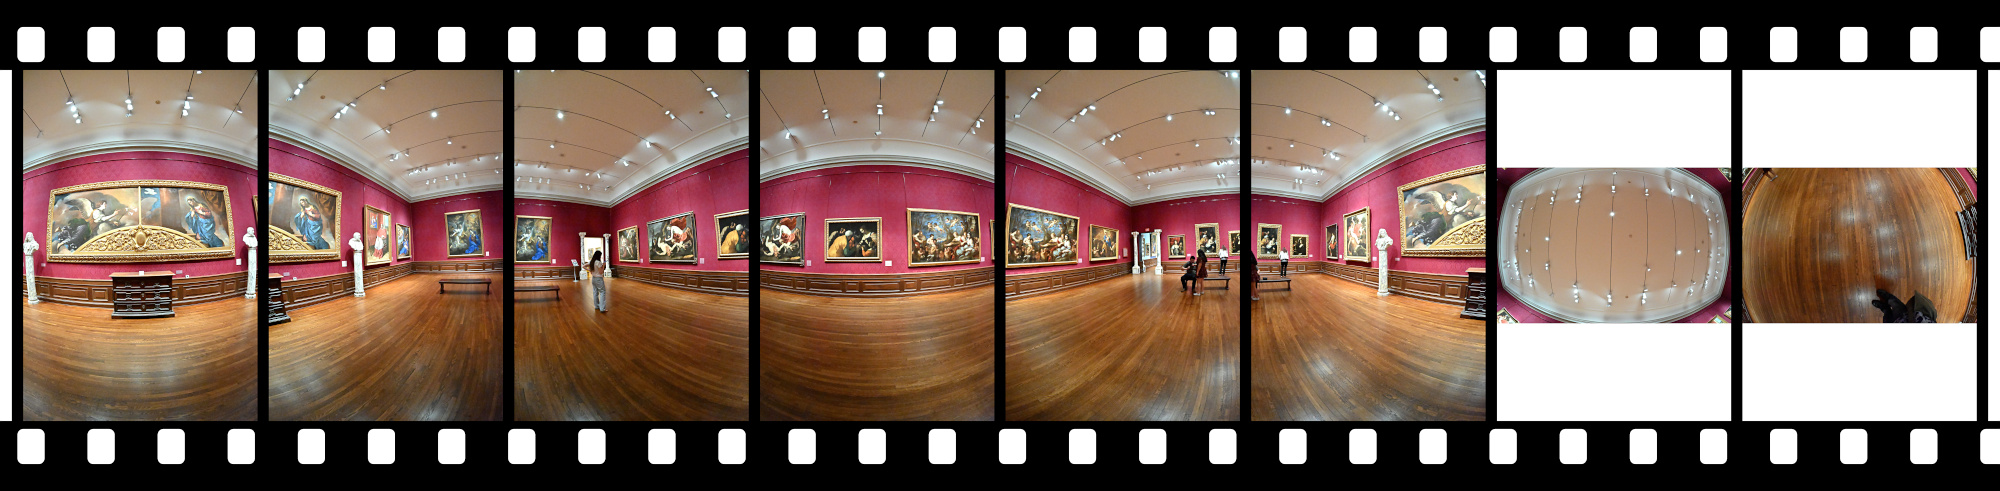
Gallery 8
Drama finds its home here. Italian Baroque painters like Fede Galizia, Guercino, and Benedetto Gennari II pull the room into motion with sharp light, deep shadow, and stories that never quite sit still.
Interactive Panorama Gallery 8
1/50s f/5,6 ISO 6400/39° f=7,5mm
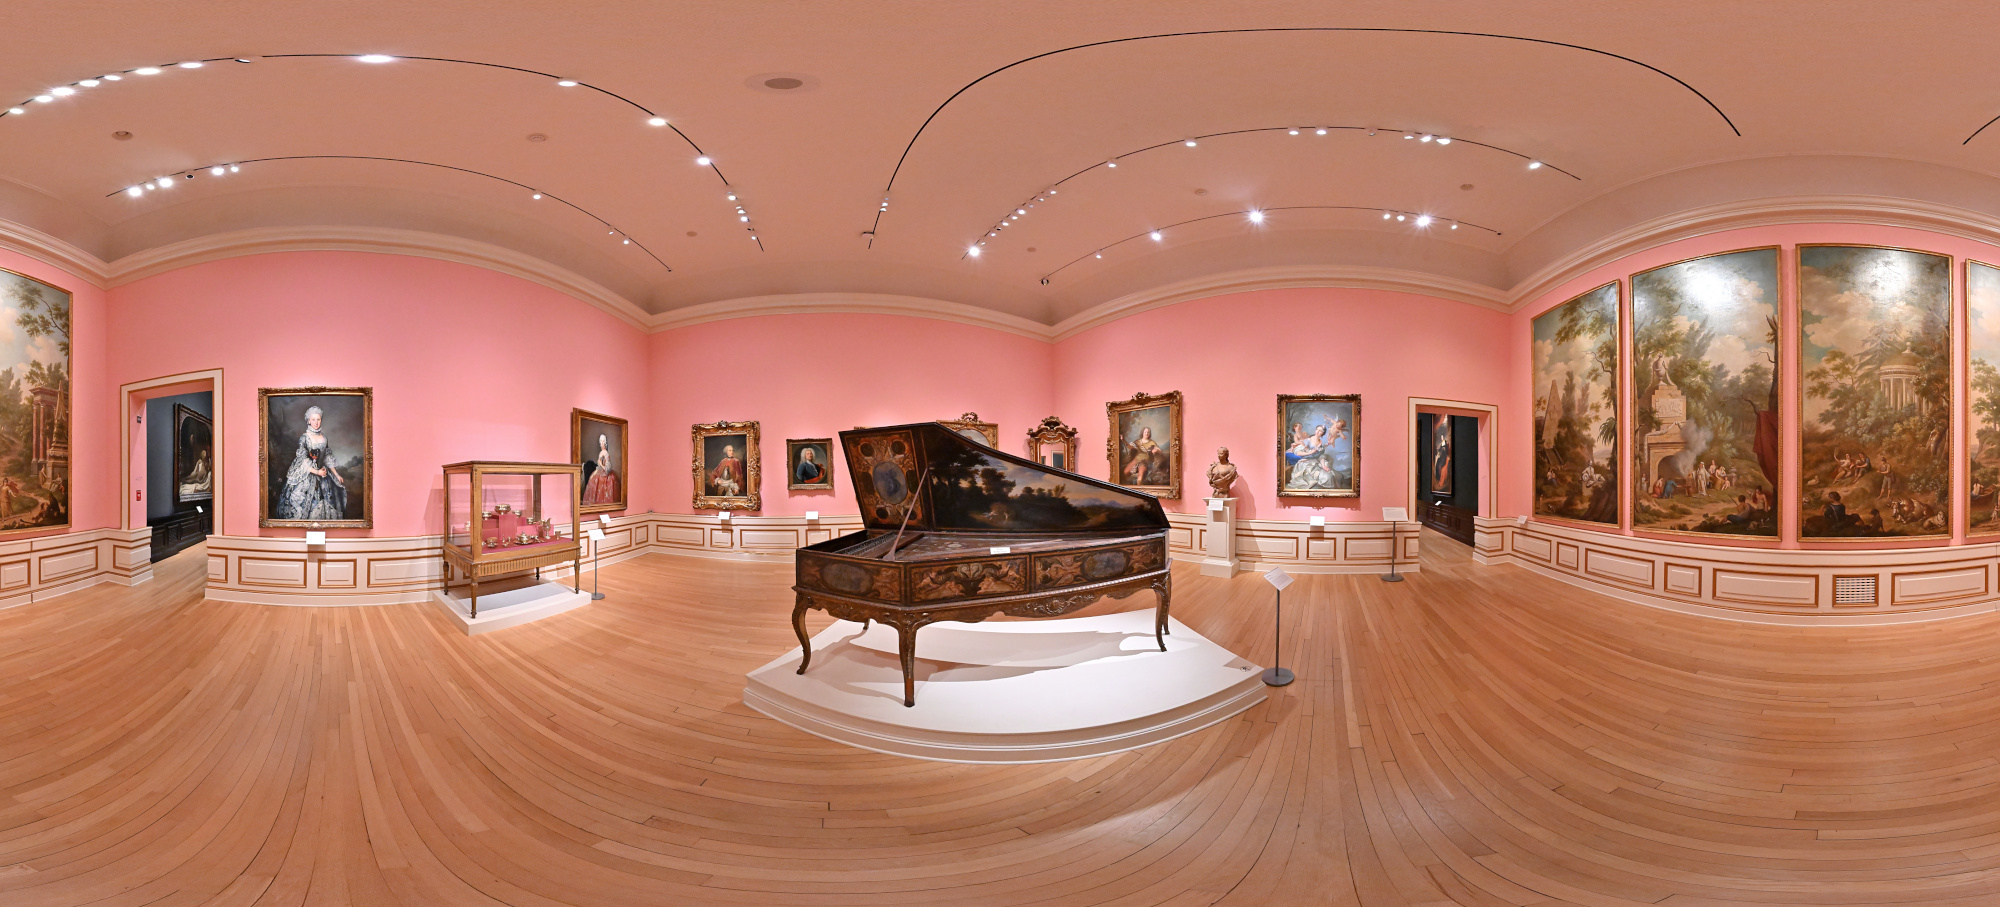
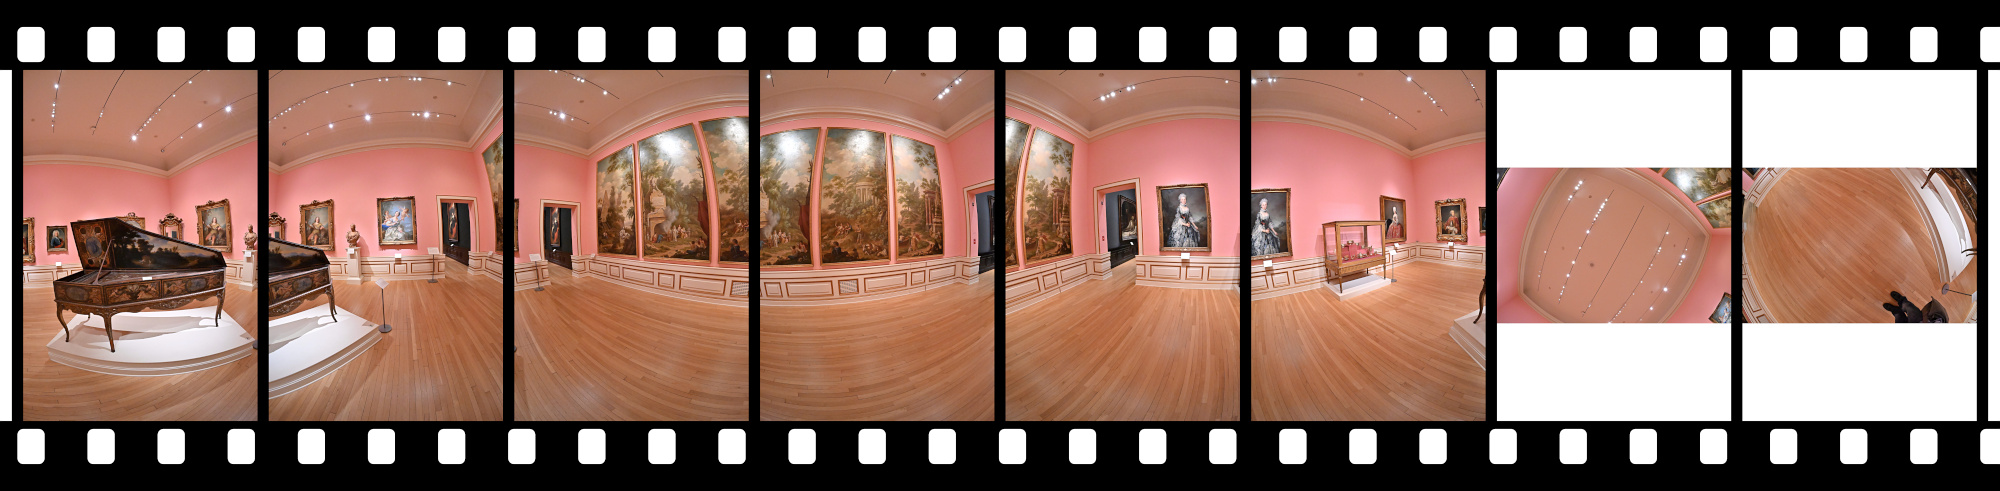
Gallery 15
This room dives into French Rococo with its lighthearted portraits and playful decoration. A highlight is the richly decorated harpsichord, almost 400 years old.
Interactive Panorama Gallery 15
1/50s f/5,6 ISO 5000/38° f=7,5mm
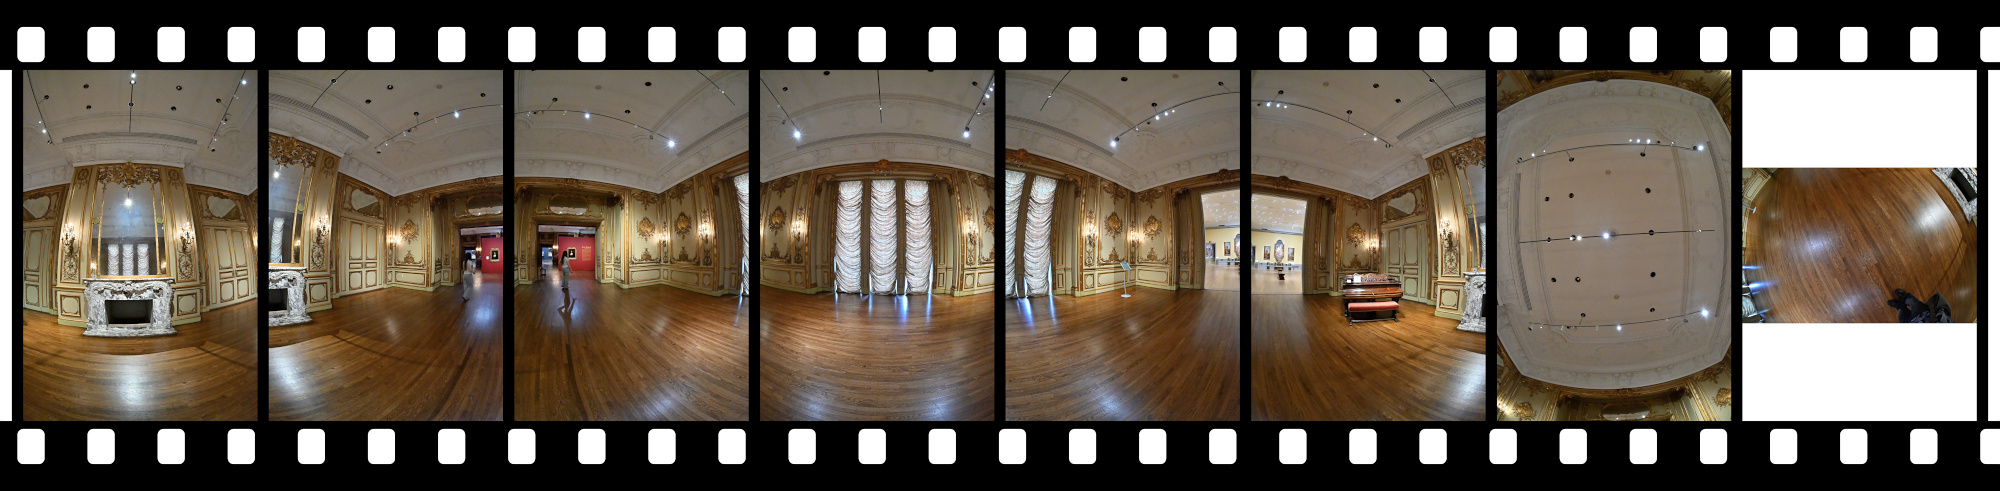
Gallery 19
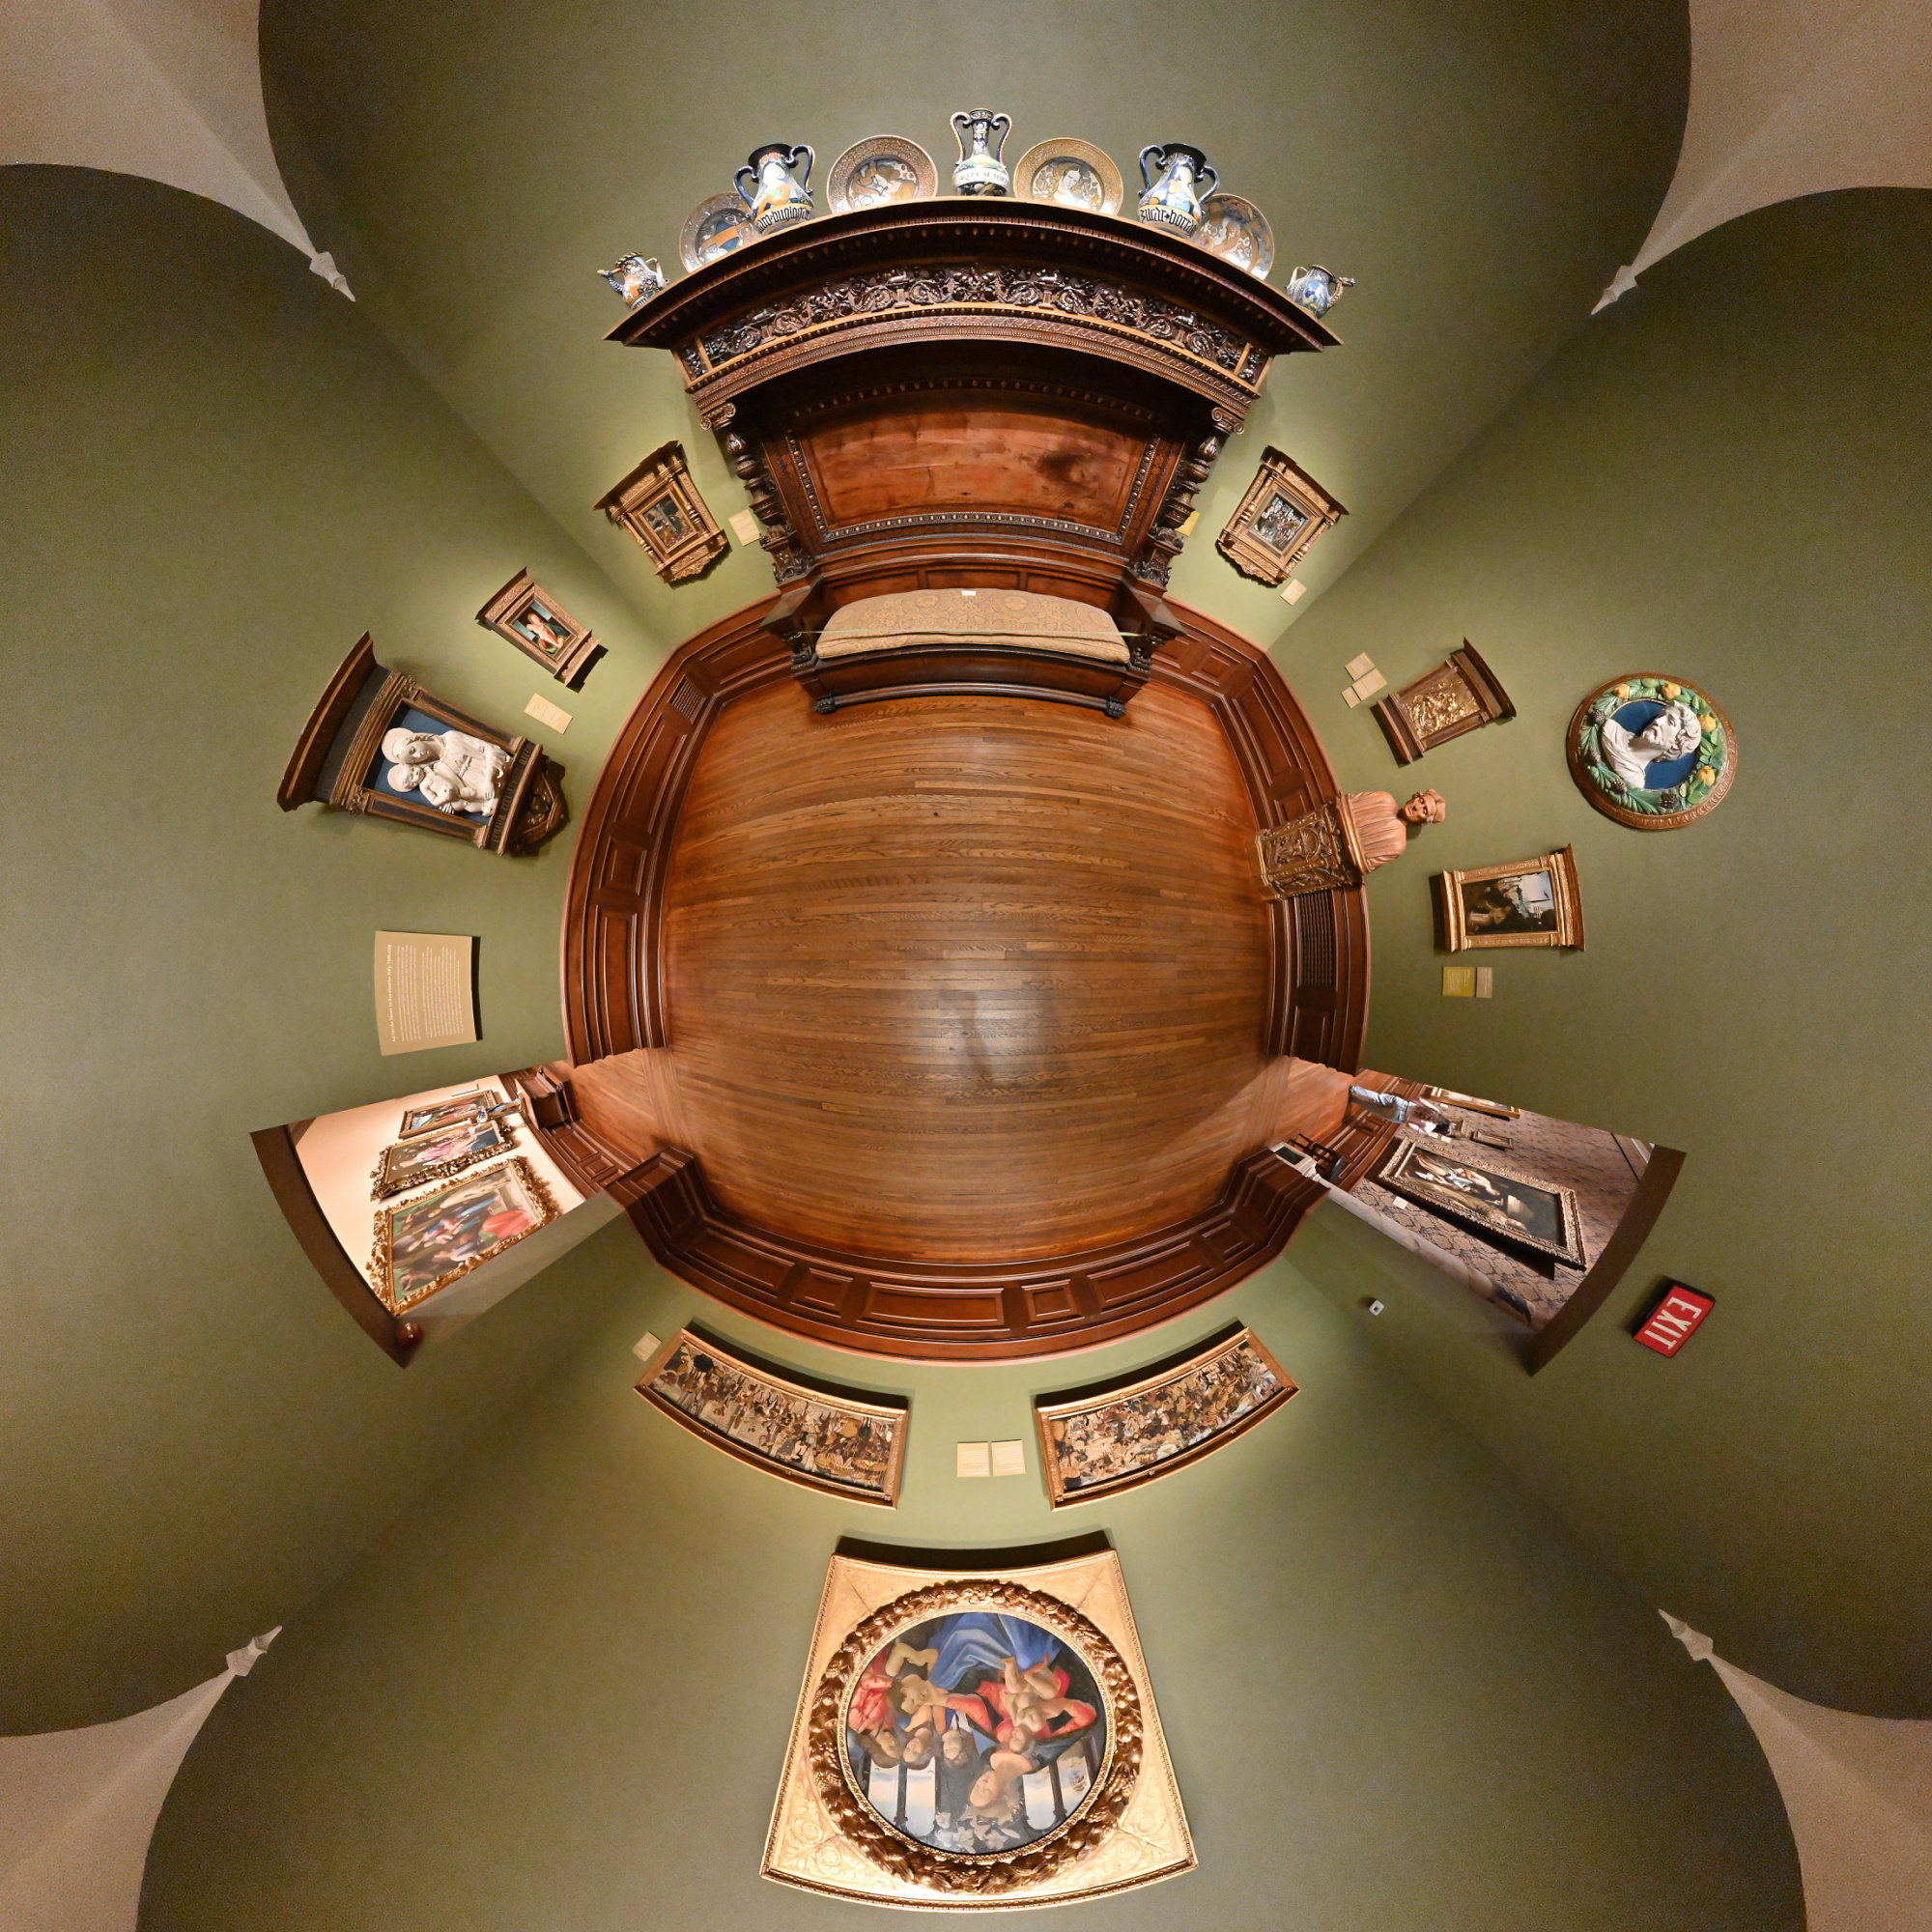
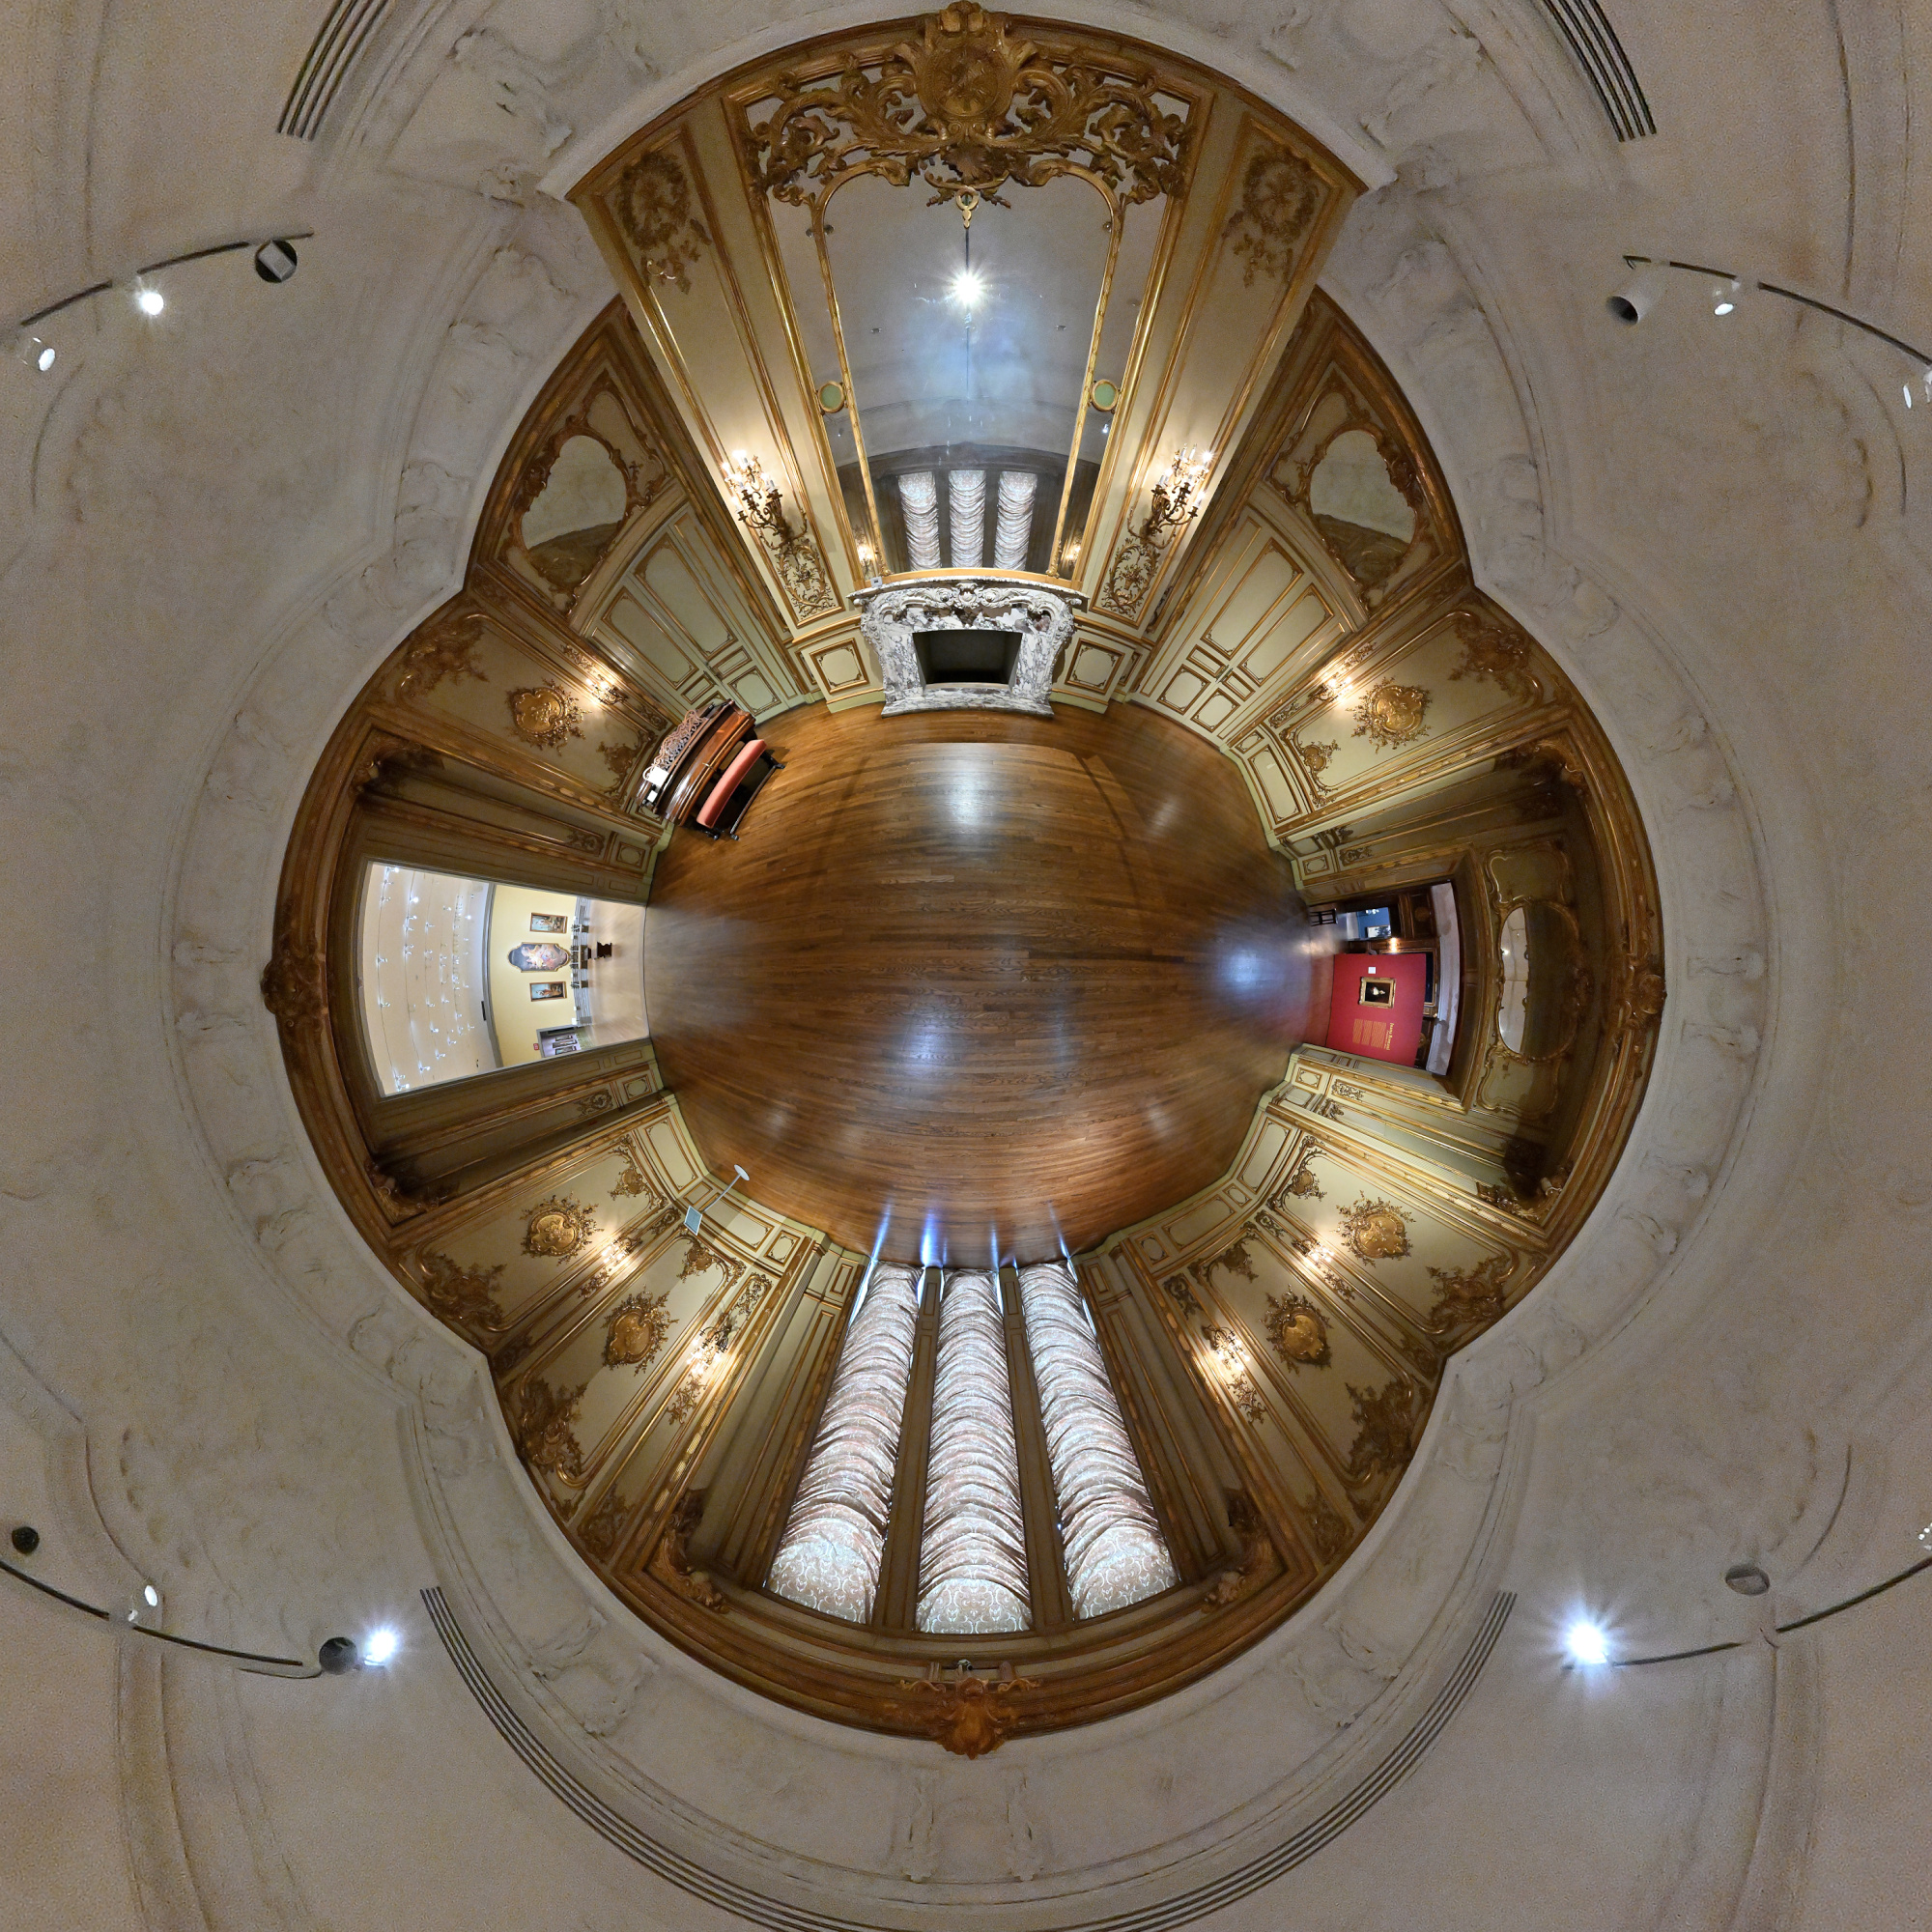
Here the Astor Mansion lives on. Ringling saved these Gilded Age interiors from demolition in 1926 and gave them a new home in Sarasota, where they now sit in quiet comfort.
Interactive Panorama Gallery 19
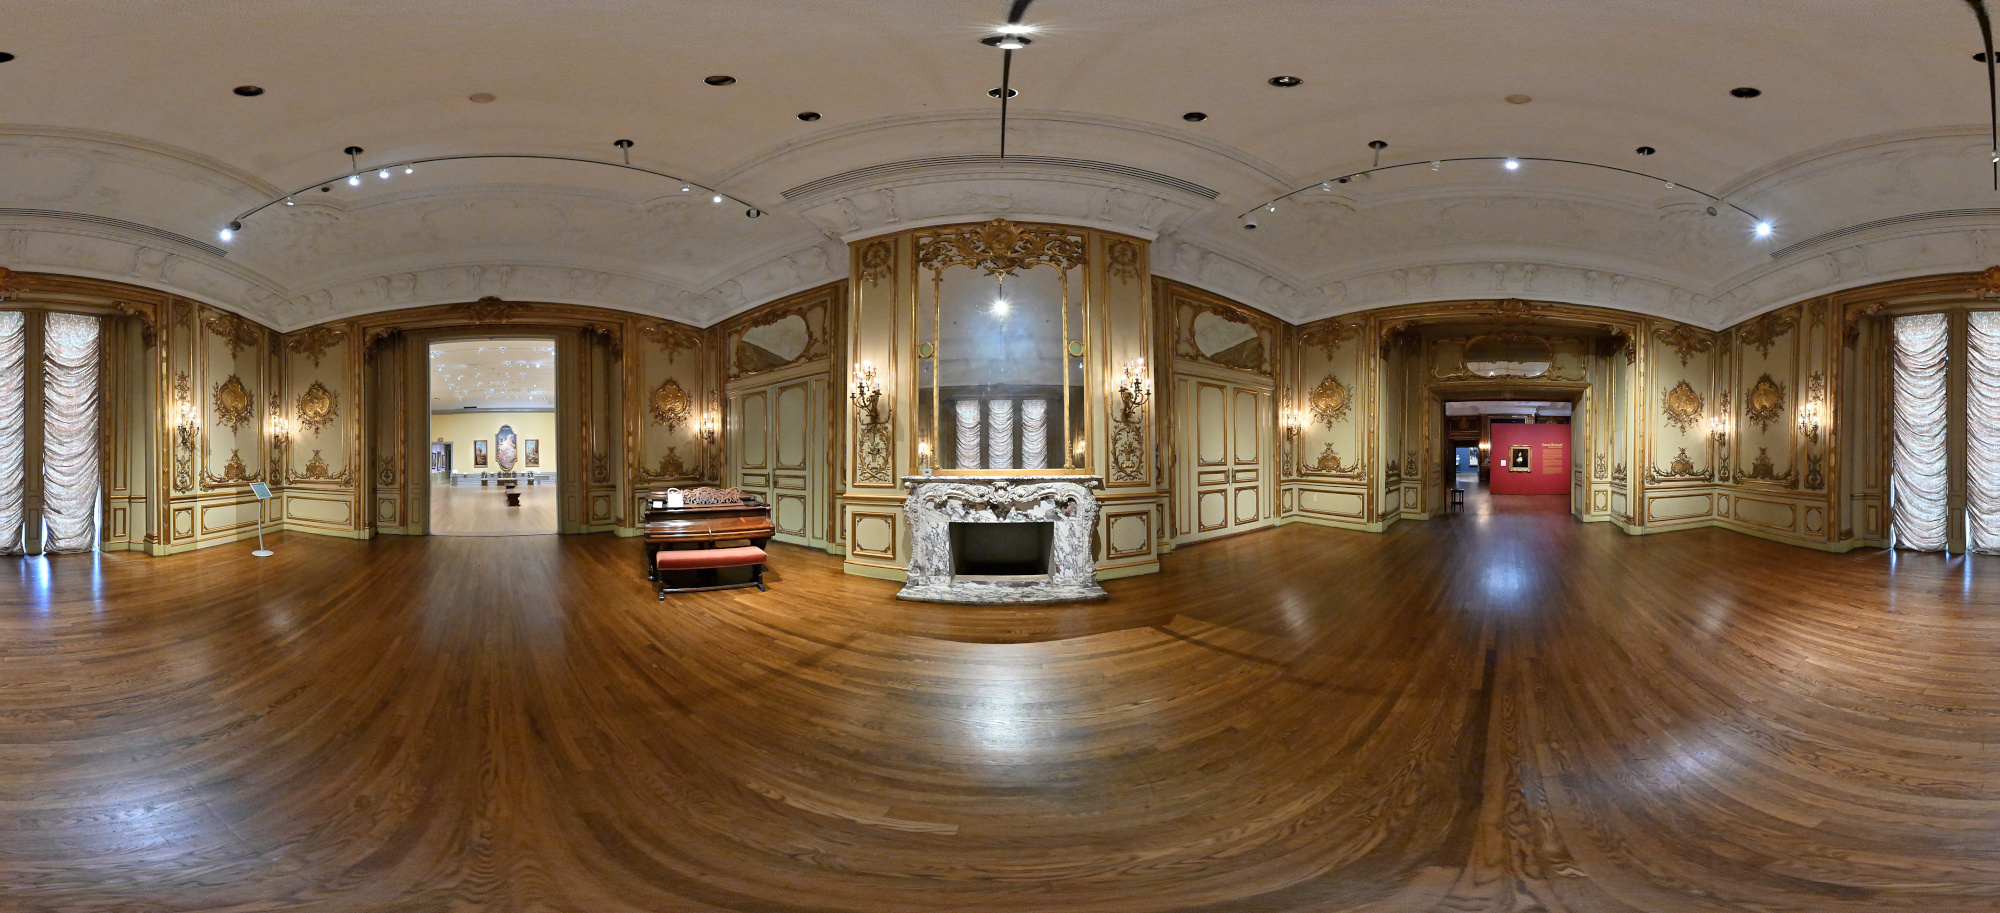
To keep the camera and my reflection out of the mirror, I photographed the scene from below the line where the fireplace mantle touched the mirror and projected the frame back into the panorama. In the index, the first frame is the one captured from that low angle, the others were taken from the normal viewpoint. The approach avoided the need for editing altogether.
1/50s f/5,6 ISO 5000/38° f=7,5mm
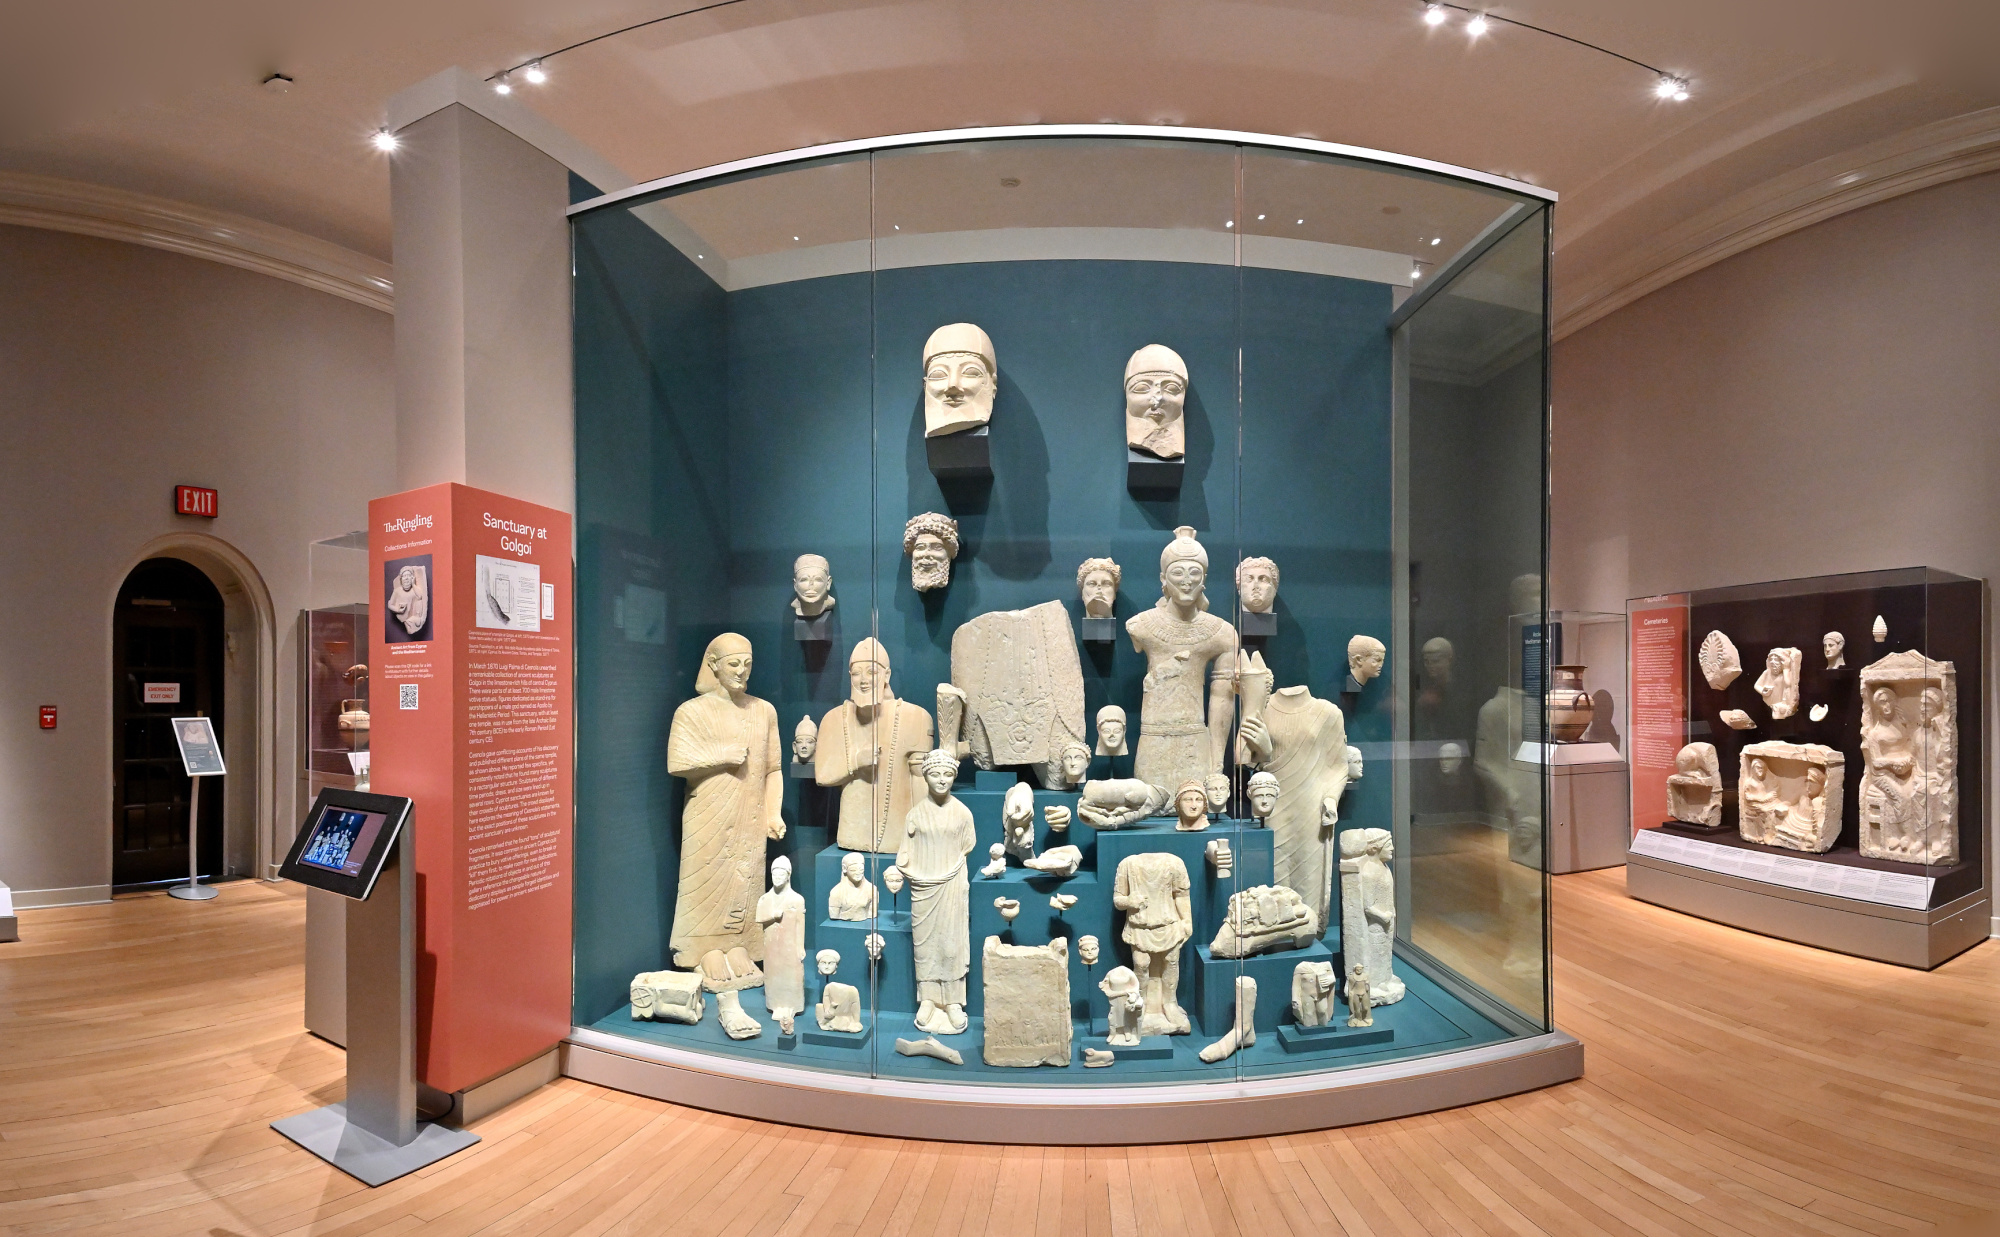
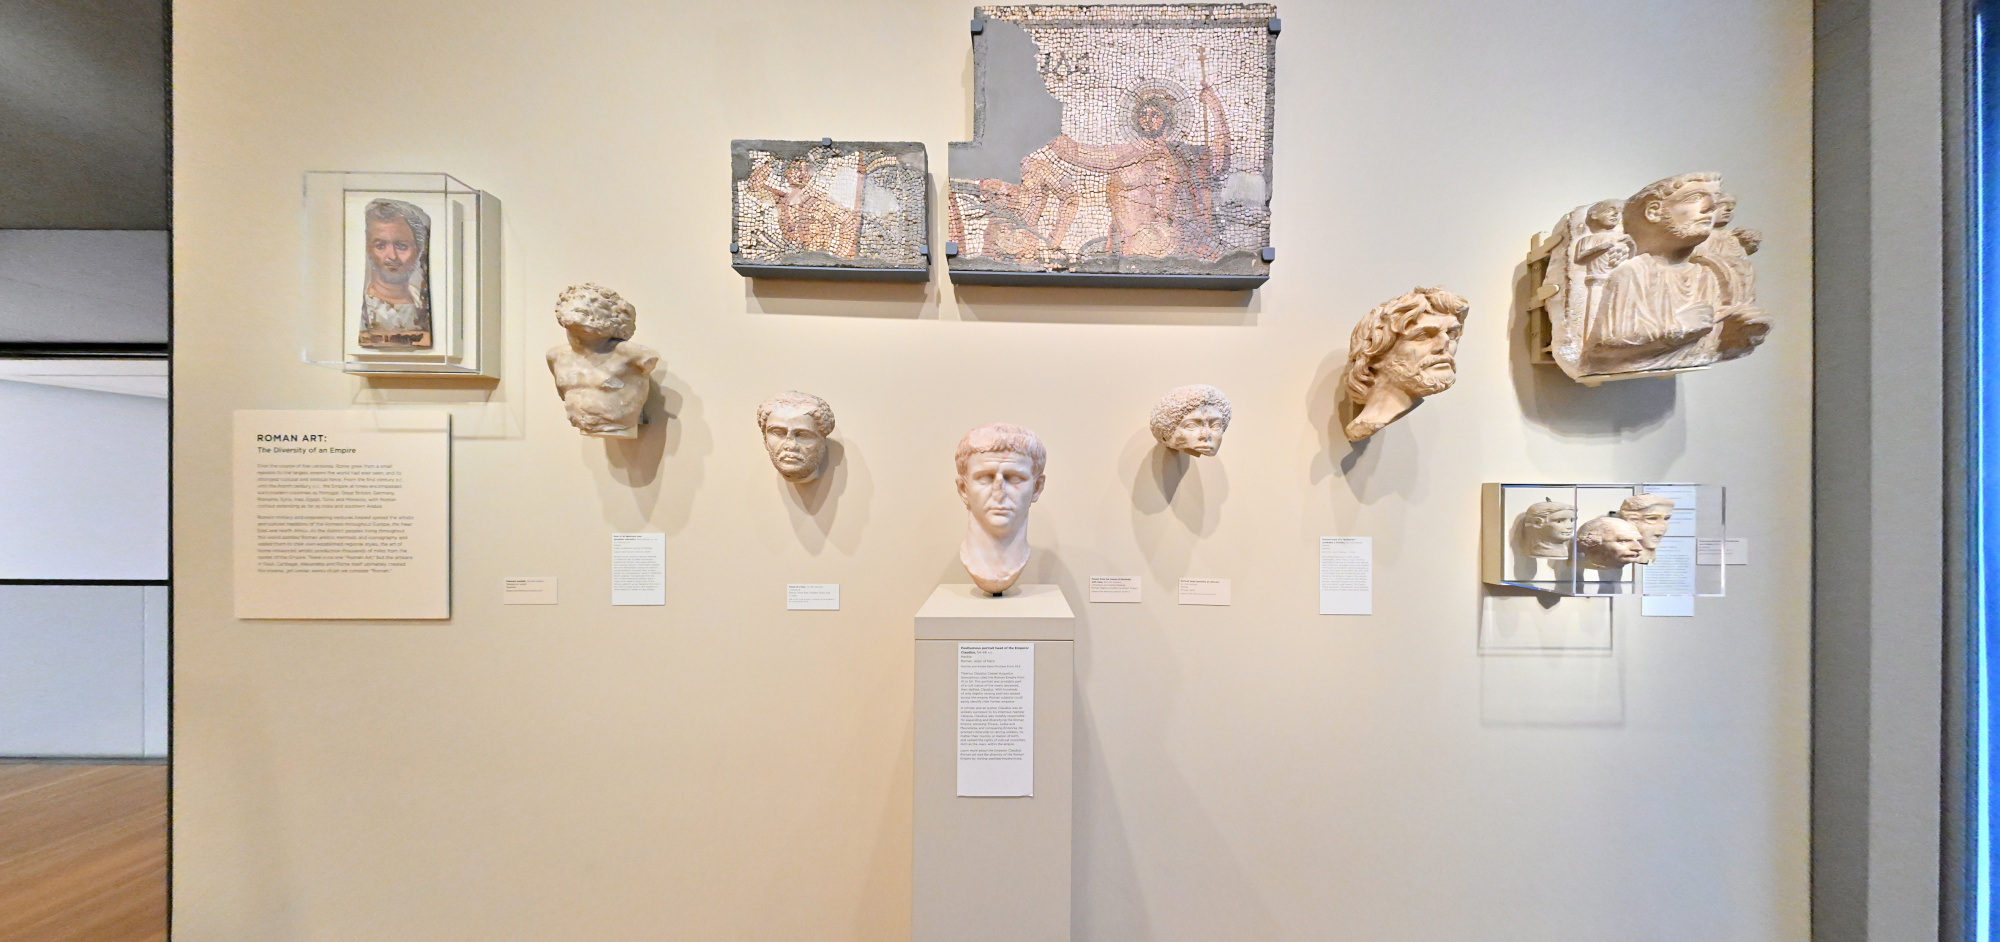
Ancient Art at the Ringling
The Ancient Art galleries at the Ringling bring together a small group of Greek, Roman, and early Mediterranean pieces. Most works are modest in scale, but their materials and craftsmanship make the room an unexpectedly quiet stop in the museum.
1/50s f/5,6 ISO 2500/35° f=7,5mm
1/50s f/5,6 ISO 2500/35° f=7,5mm

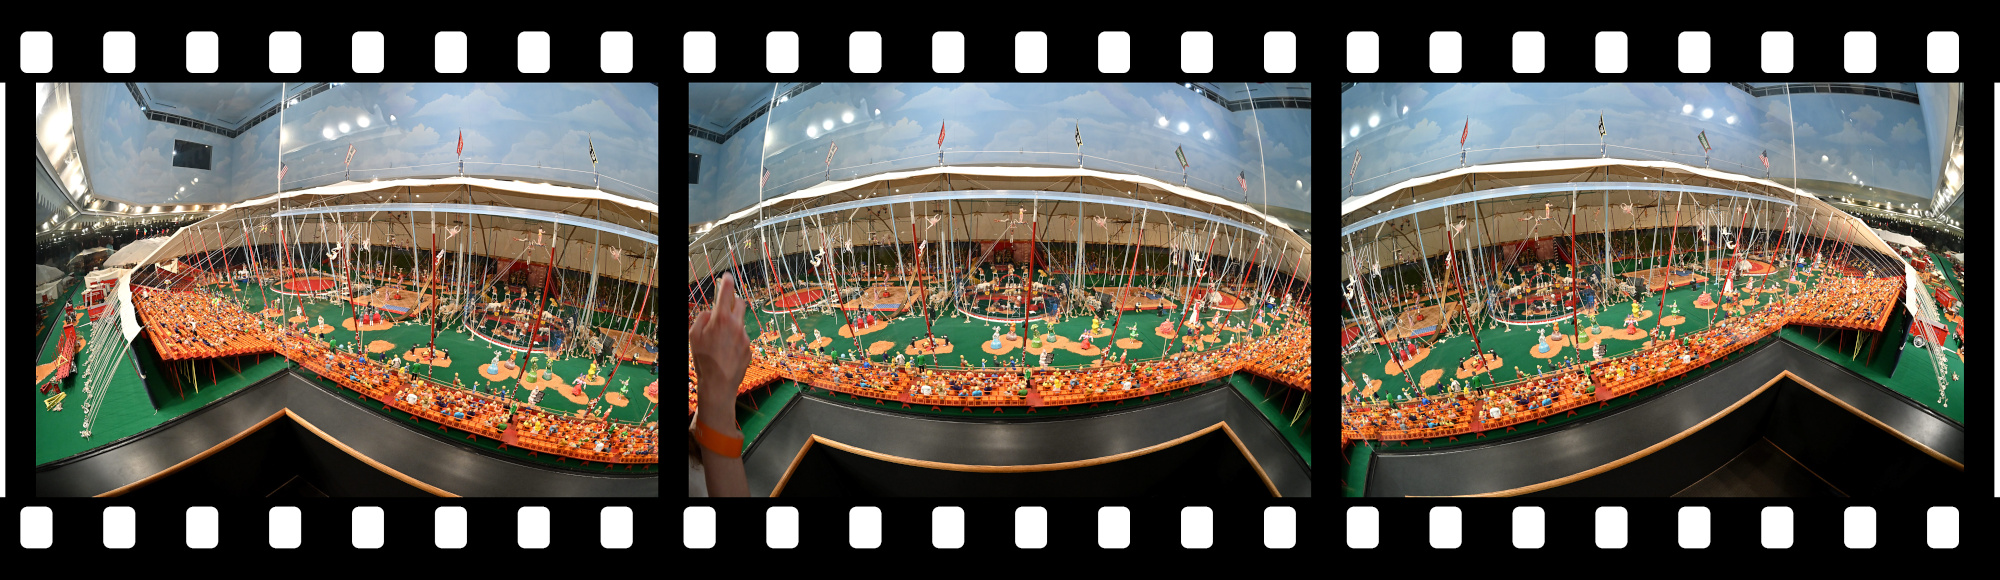
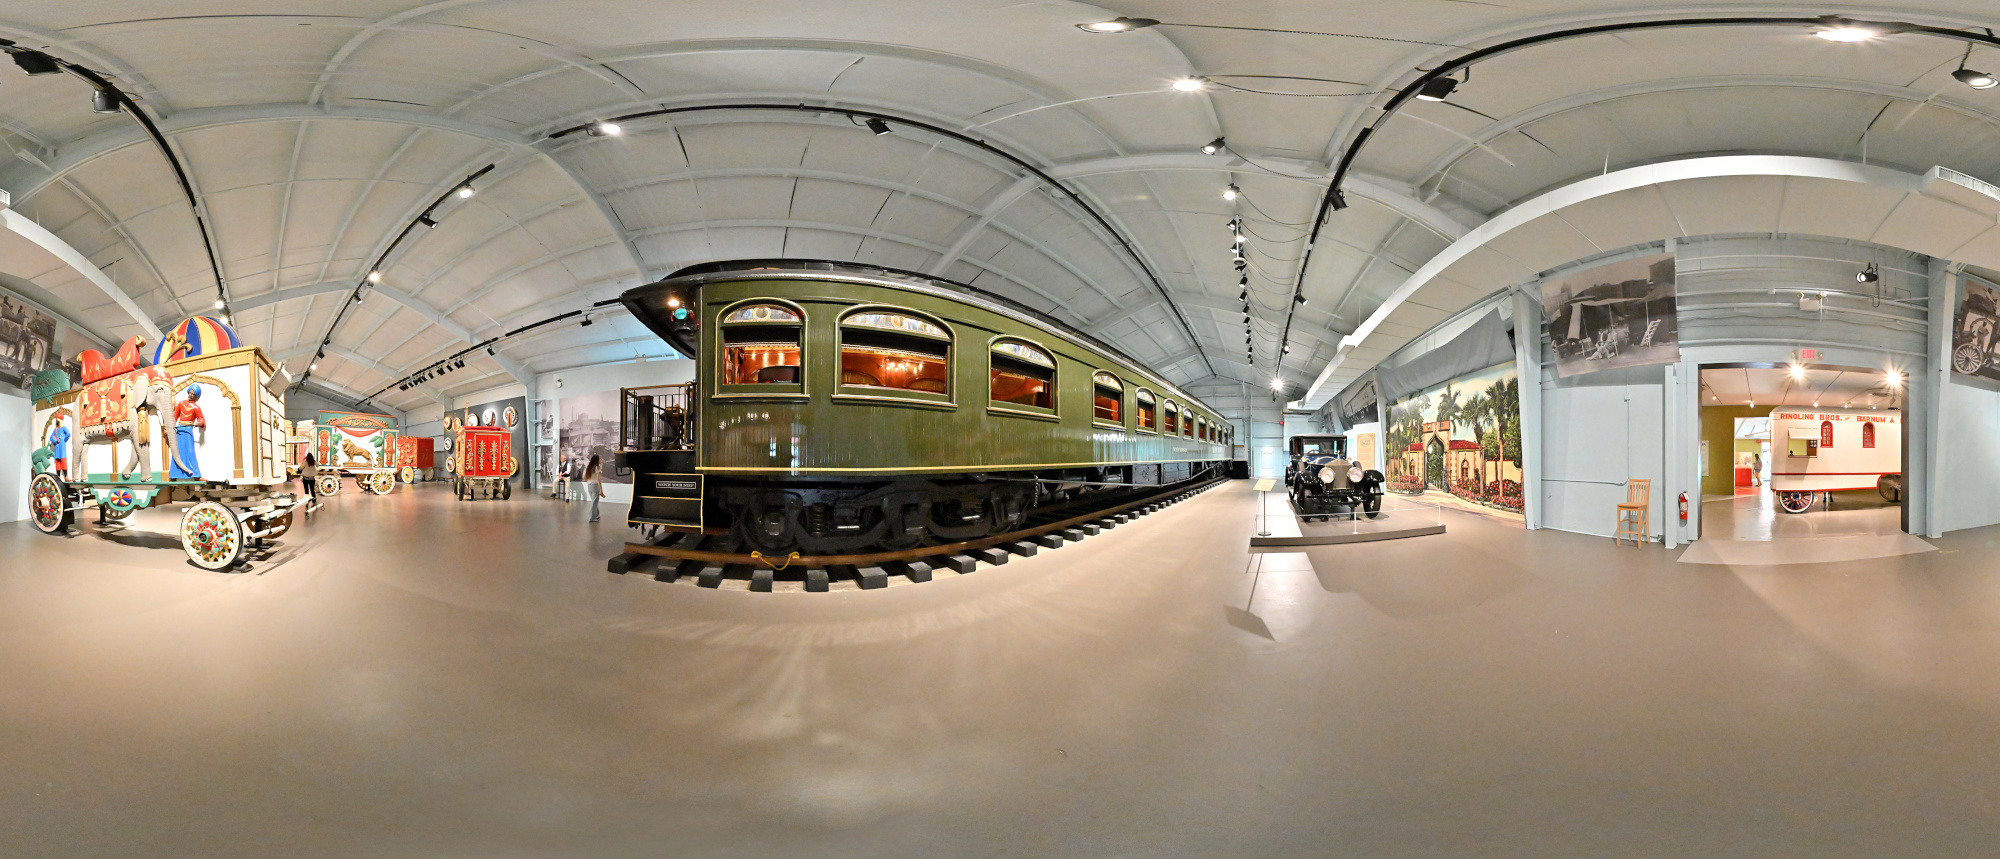
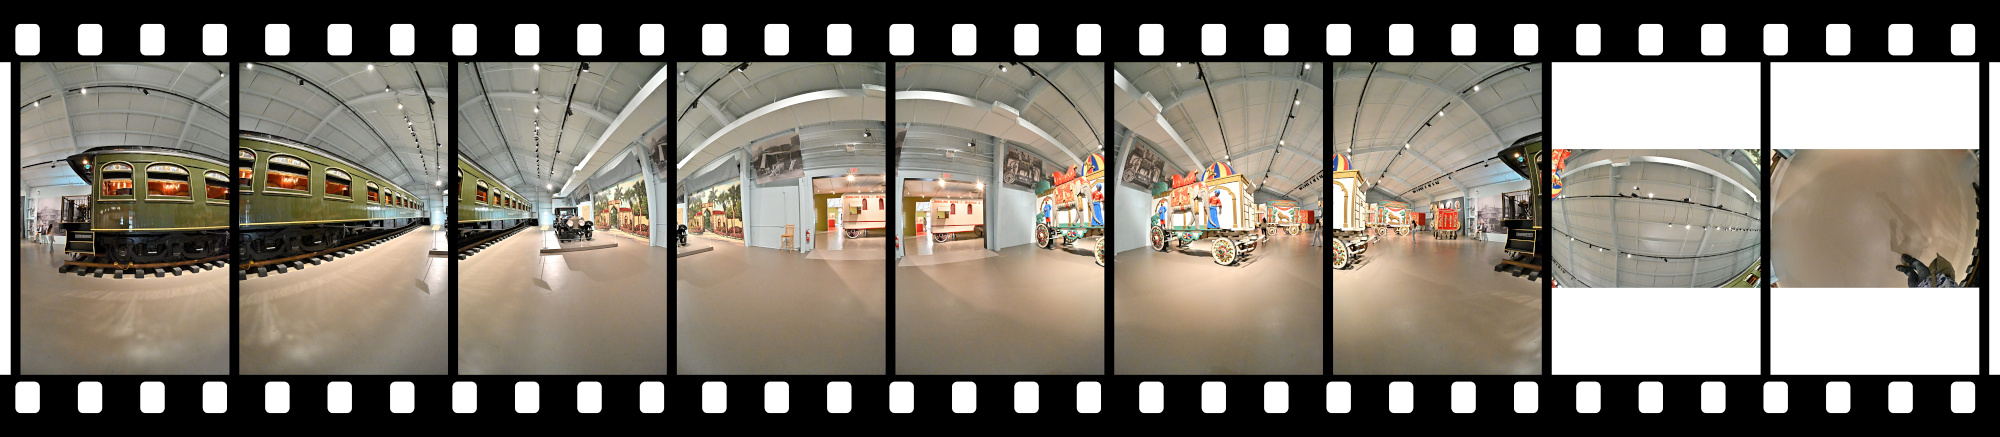
Circus Museum
The Ringling story shows its roots here. Original wagons, trains, and gear capture the life on the road that started everything long before the art collection took shape.
Interactive Panorama Circus Museum
1/50s f/5,6 ISO 12800/42° f=7,5mm
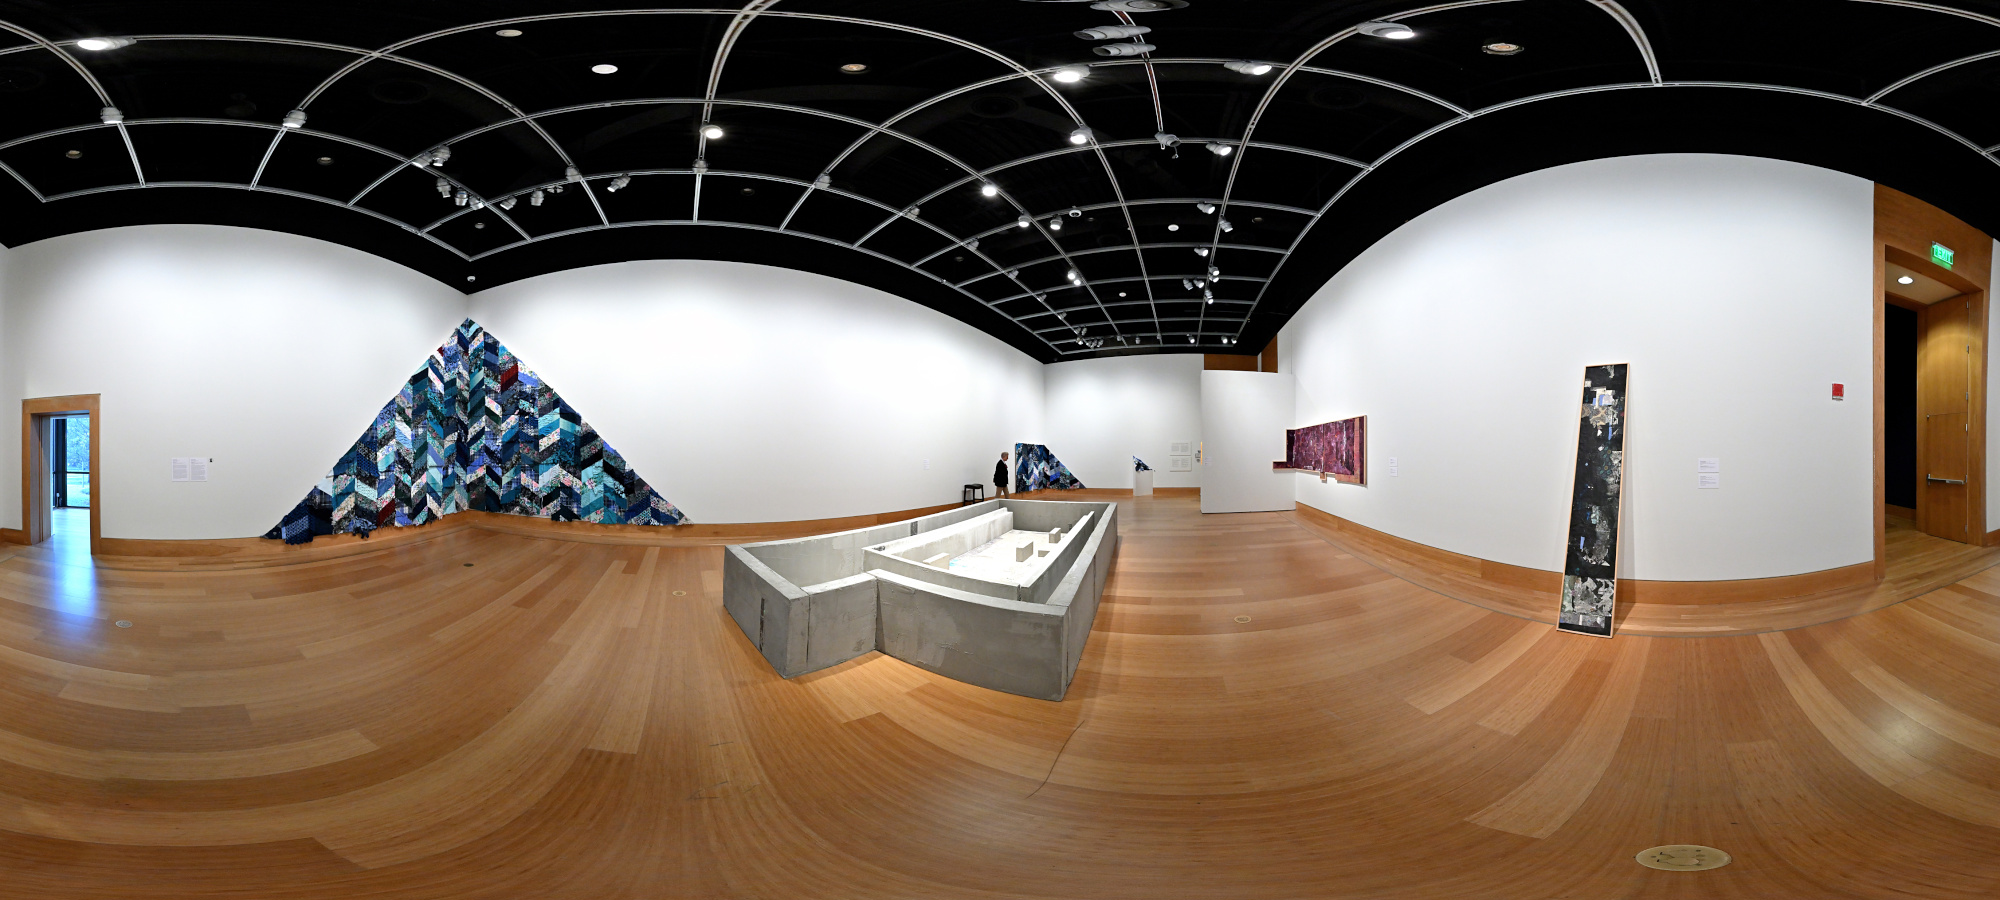
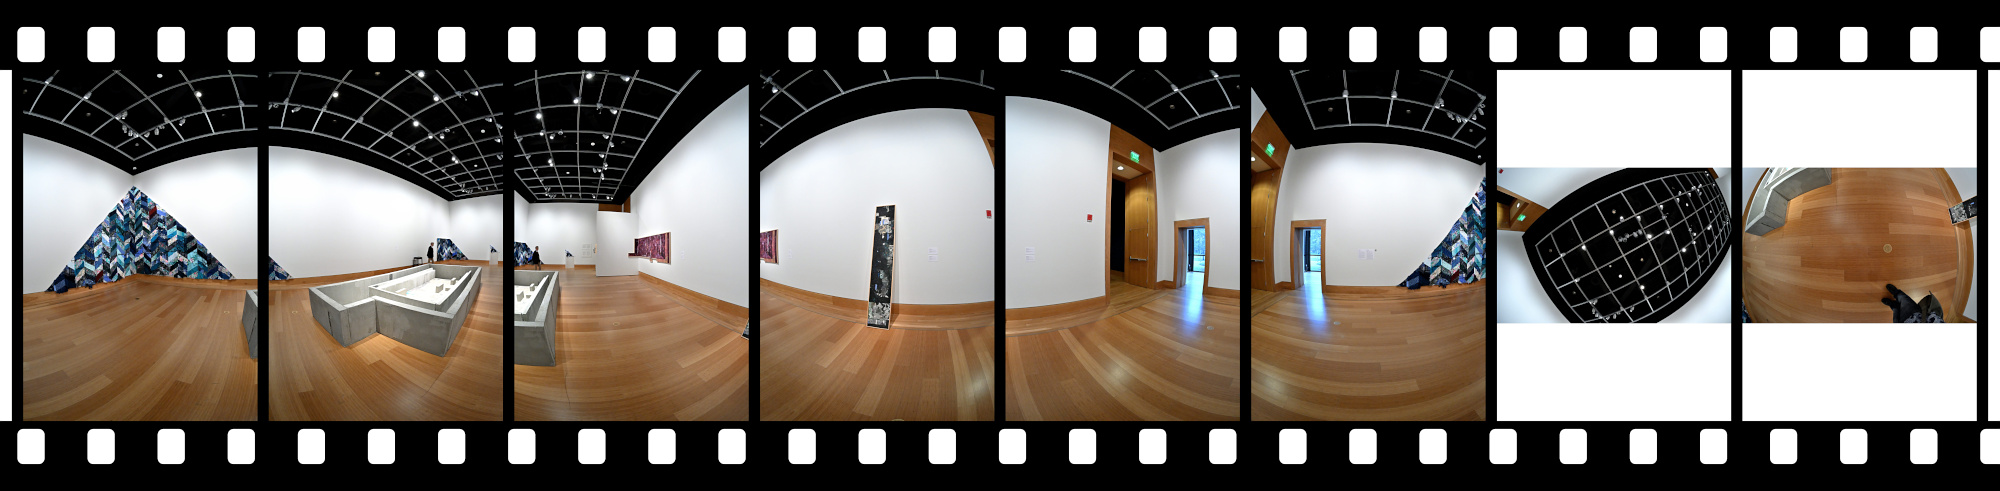
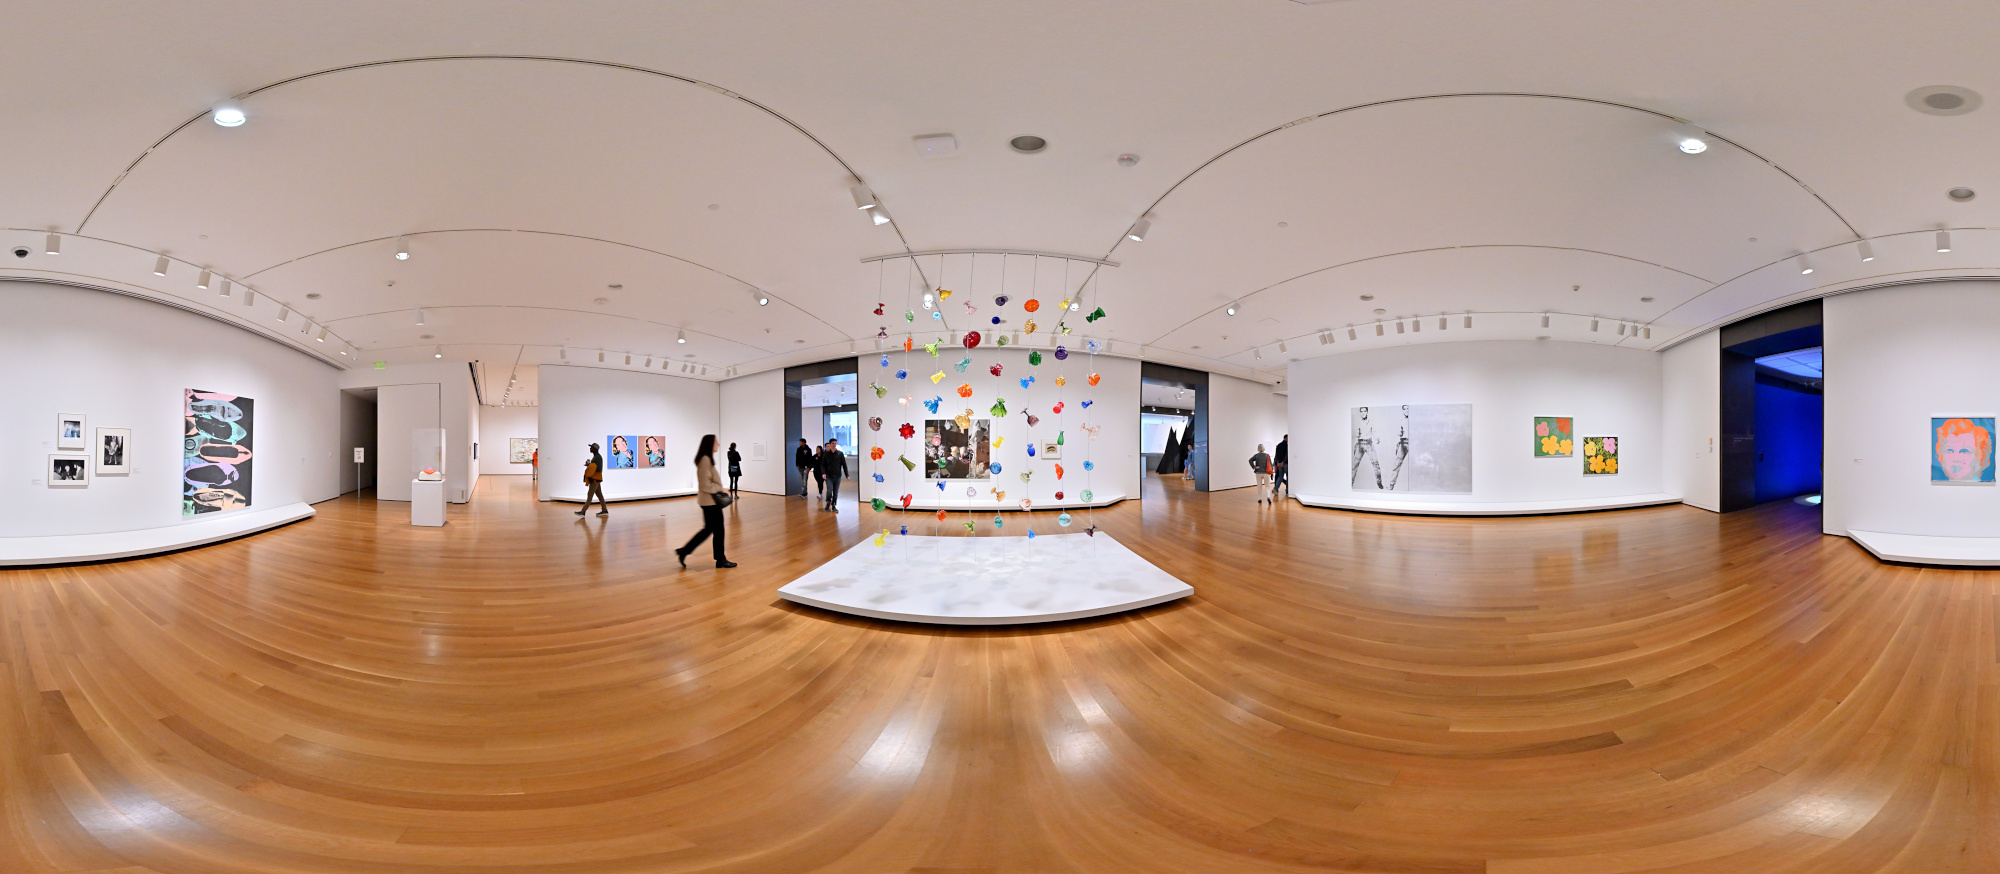
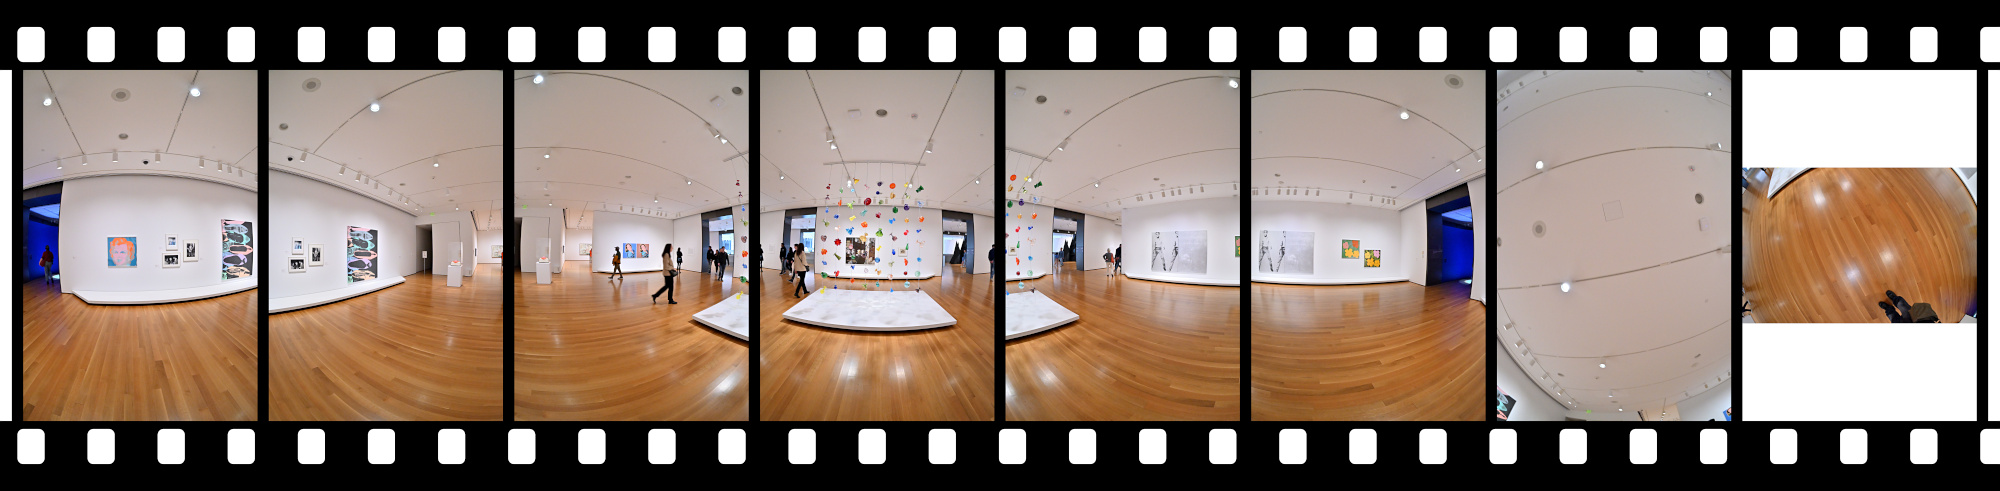
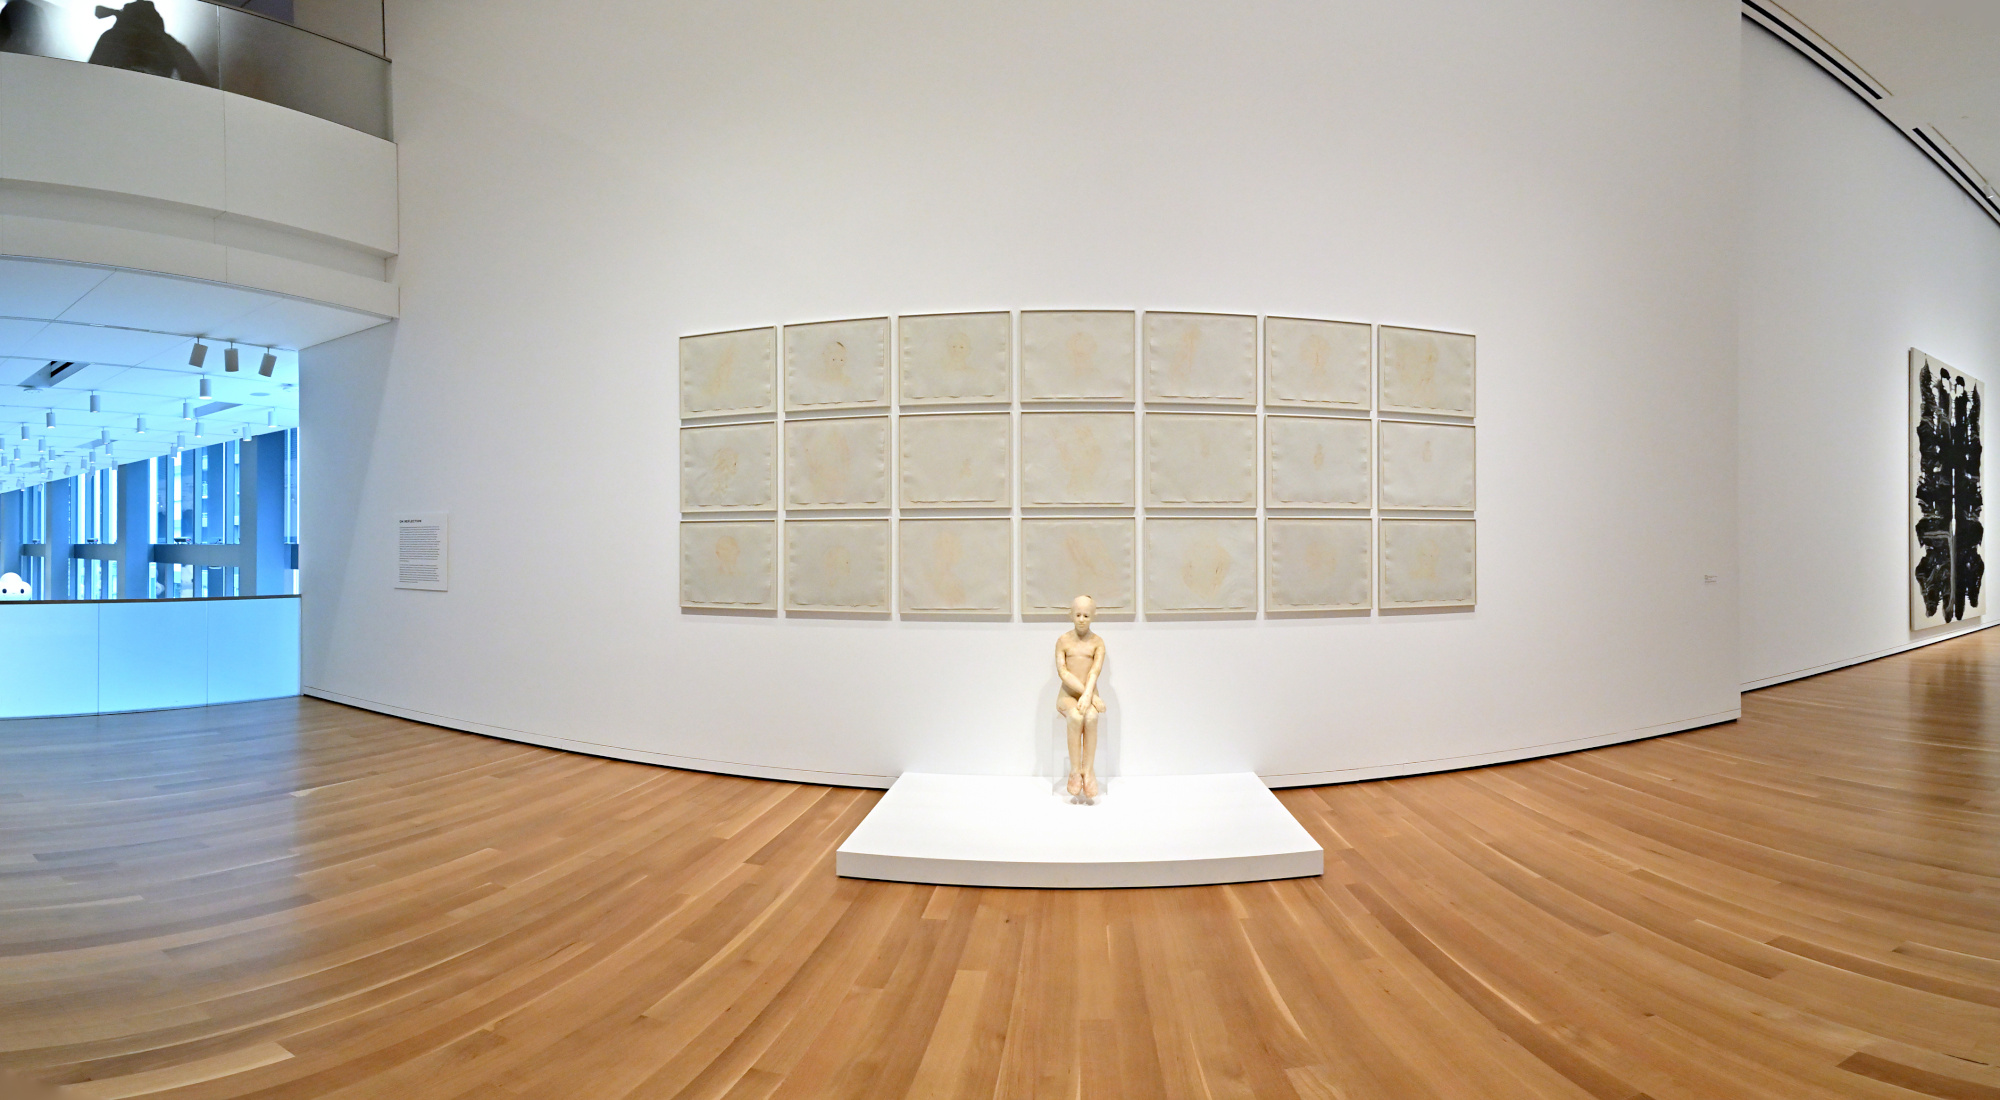
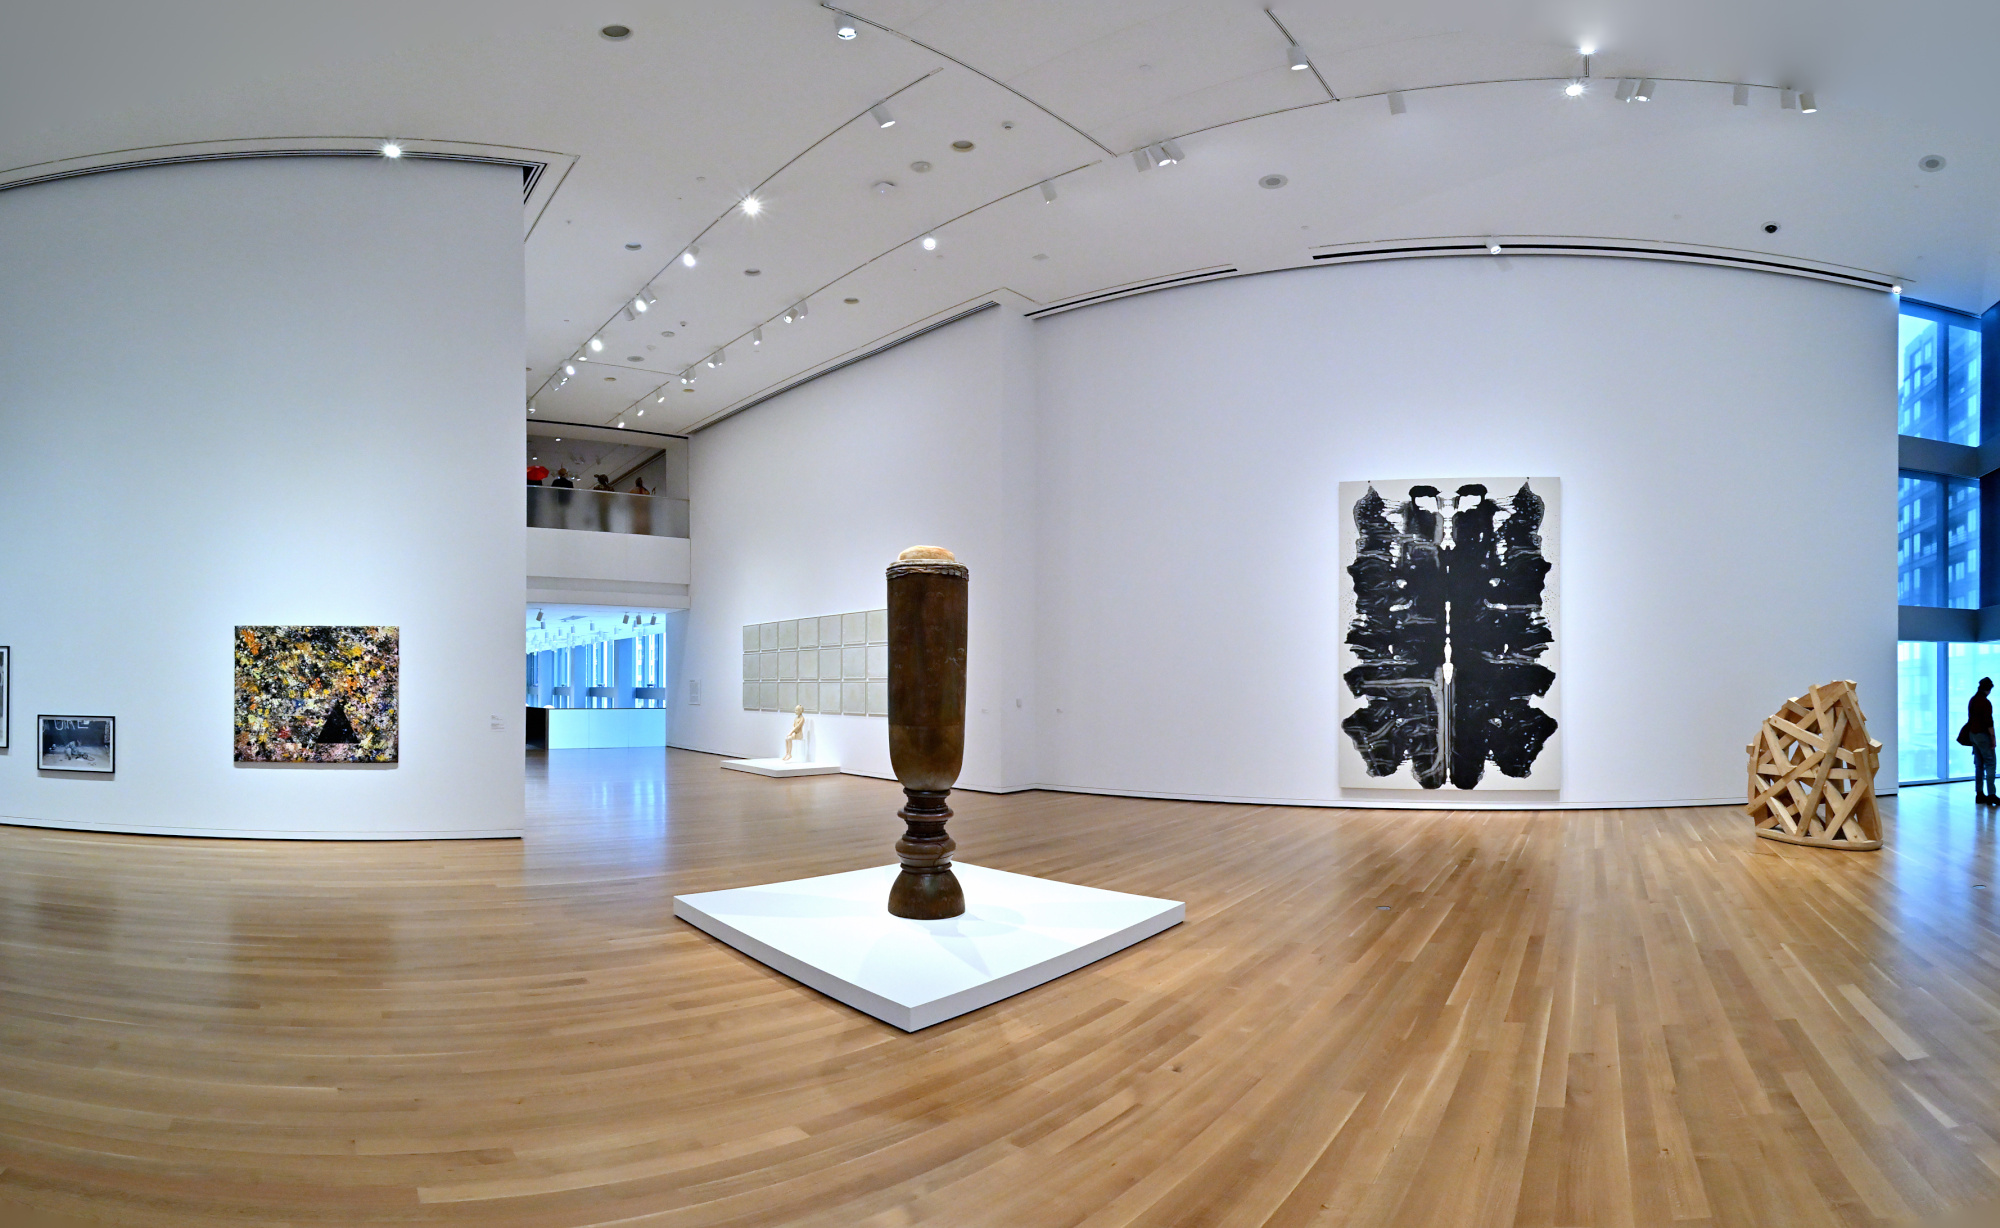
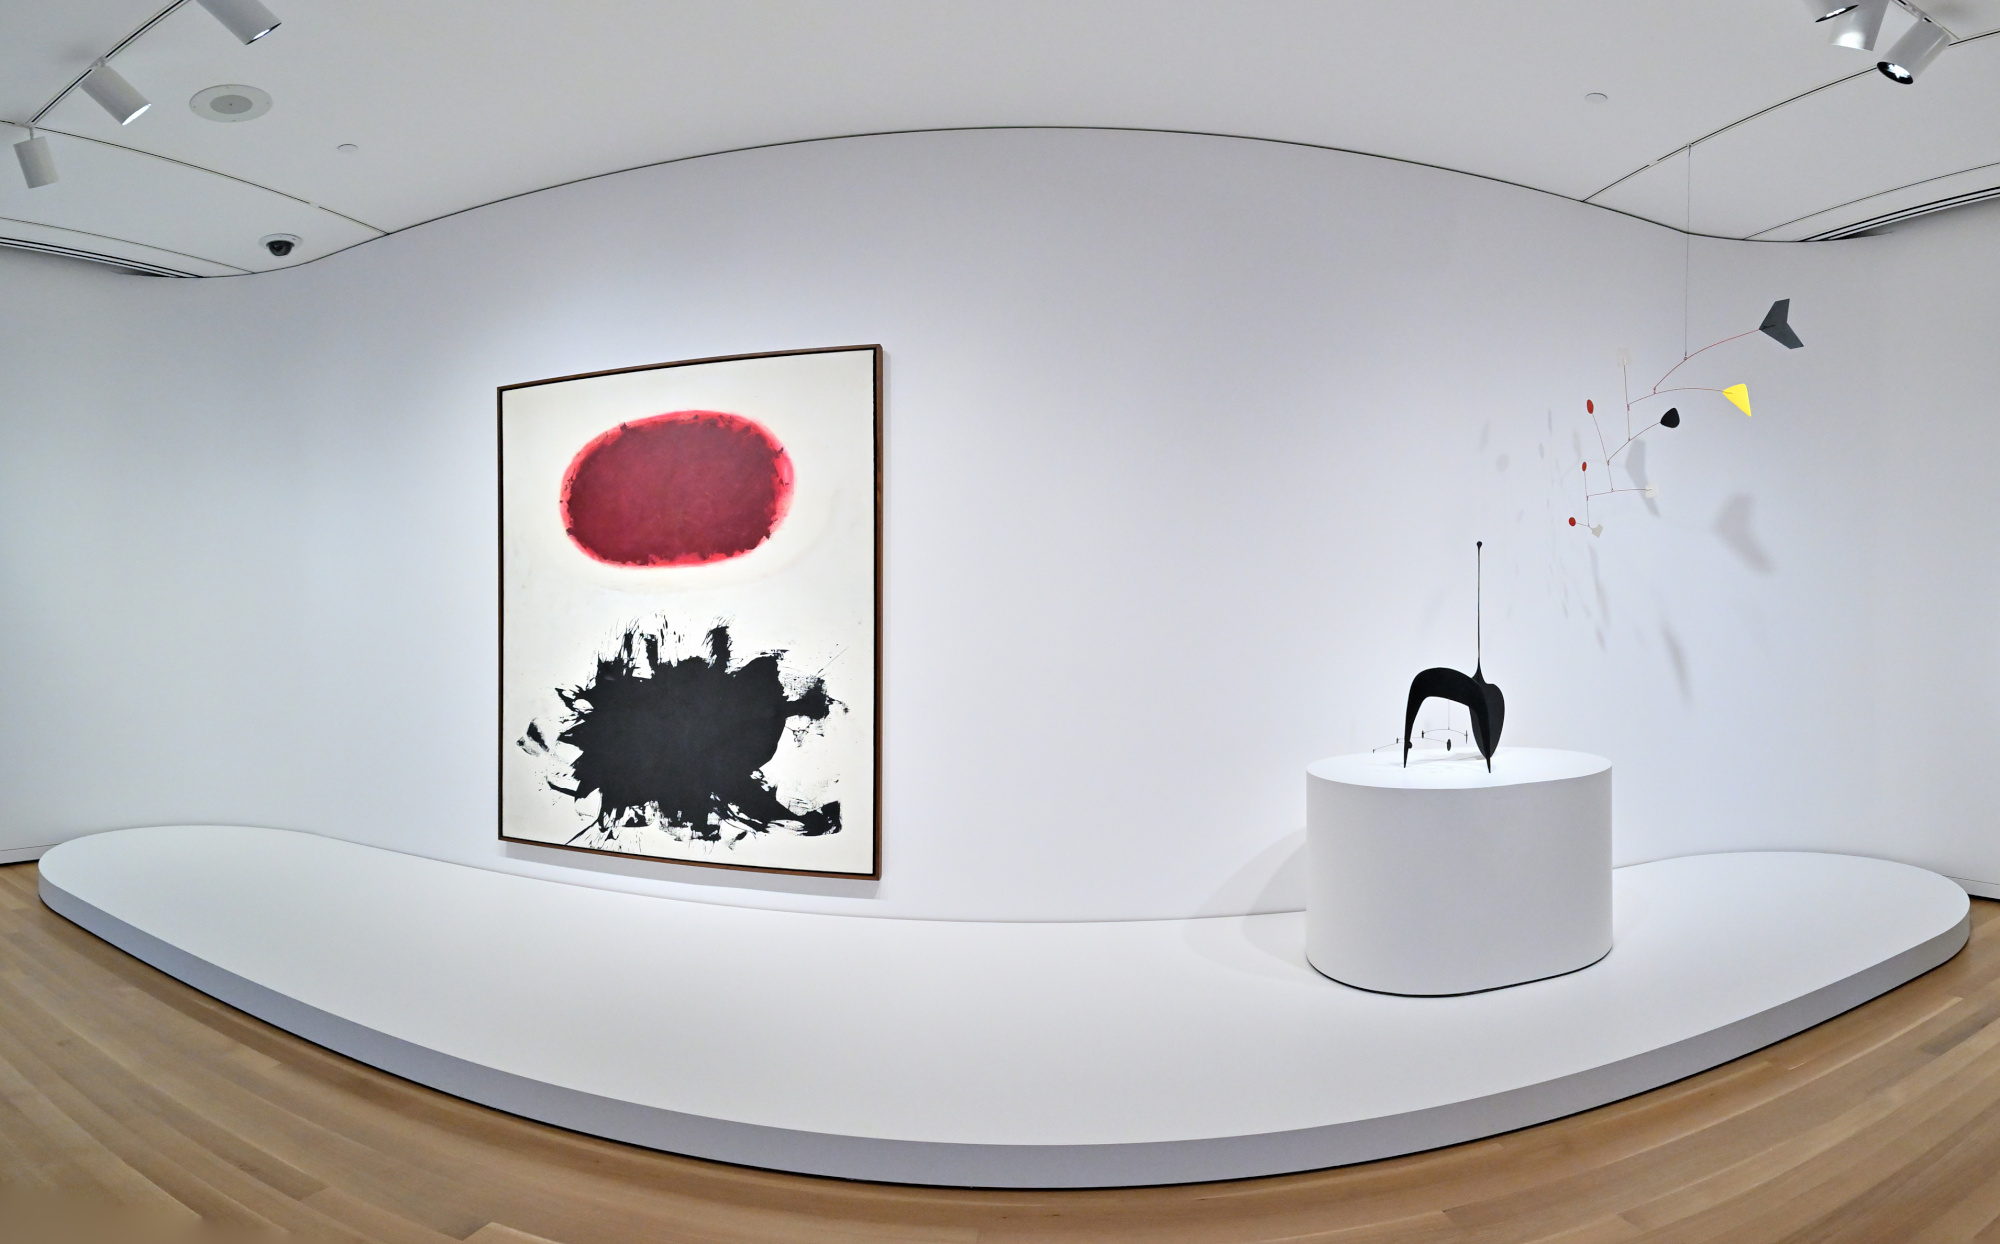
Contemporary Art
A different world entirely. The room abandons traditional paintings in favor of bold objects, sharp angles, and ideas that challenge more than they clarify. A concrete structure dominates the center as if making a statement only it fully understands, while a few quiet surprises wait in the corners. It is modern, very modern, and it certainly invites the ongoing question of what exactly we are looking at.
Interactive Panorama Contemporary Art
1/50s f/5,6 ISO 2000/34° f=7,5mm
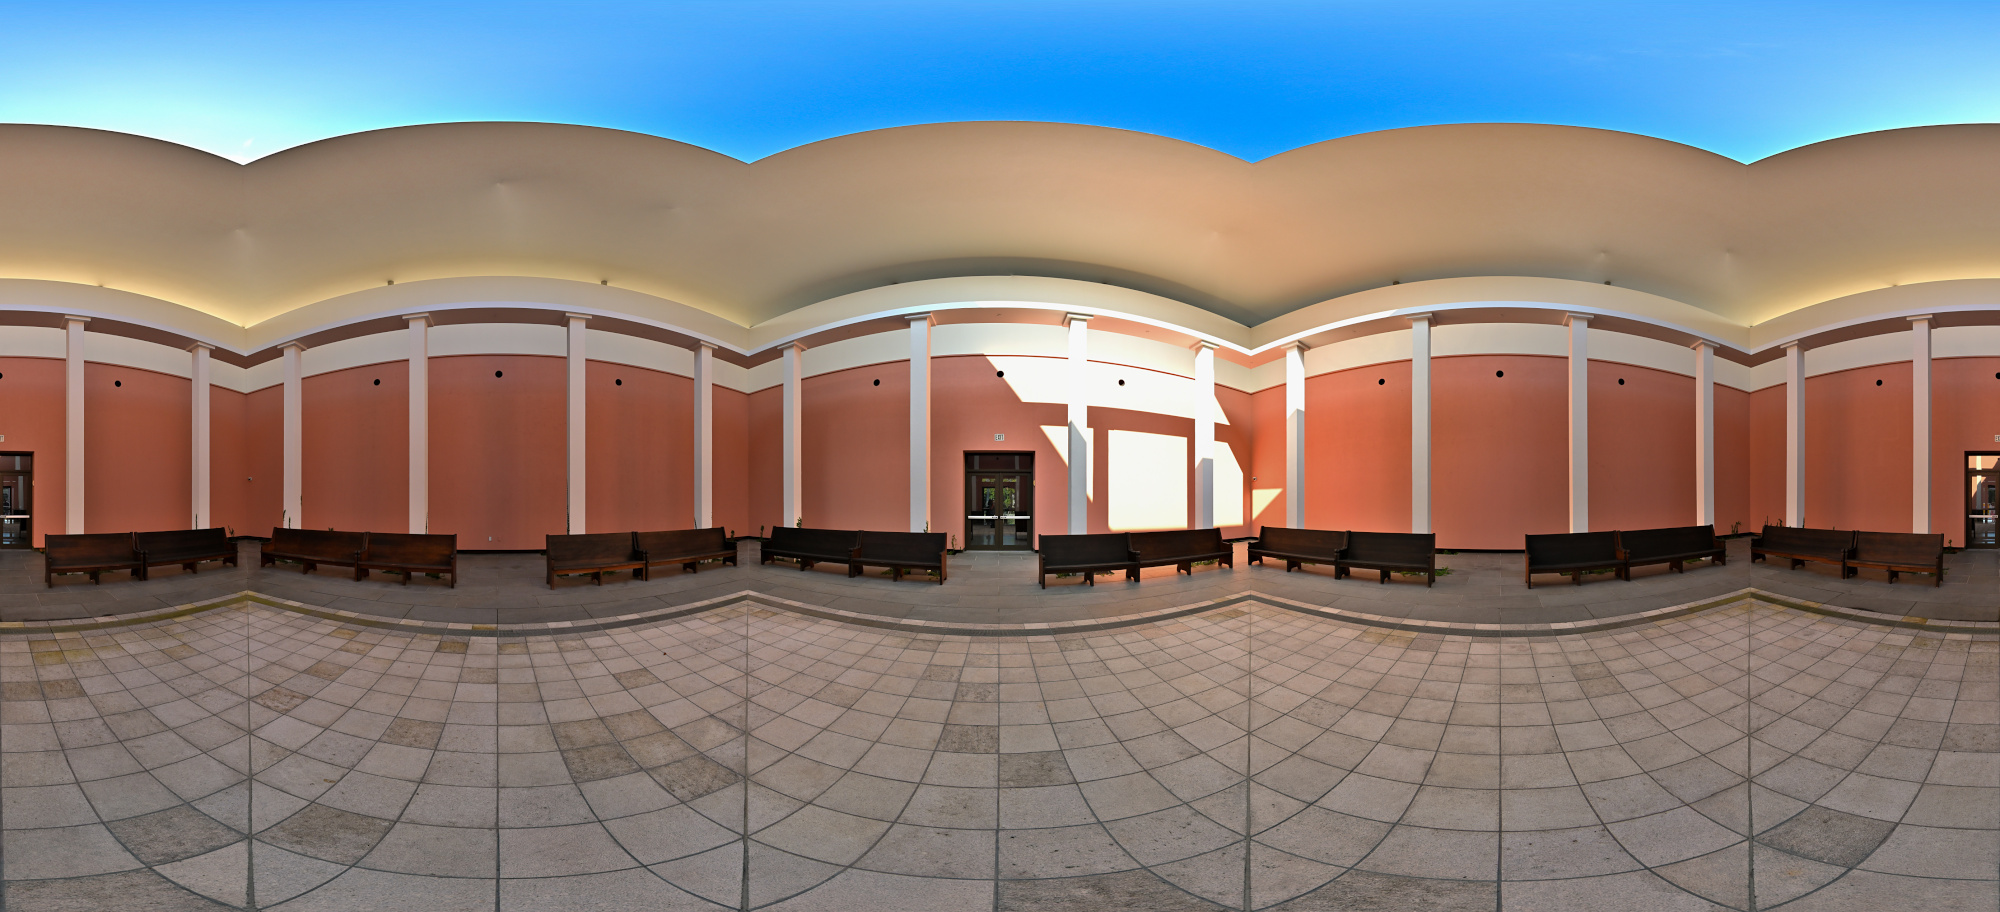
Inner Courtyard, Skyspace
The atrium echoes the Pantheon in Rome through its square opening, offering a calm pause of light and air between the rooms.
Interactive Panorama Inner Courtyard
1/160s f/5,6 ISO 125/22° f=7,5mm
Exposure for the ceiling: 1/400s f/5,6 ISO 125/22° f=7,5mm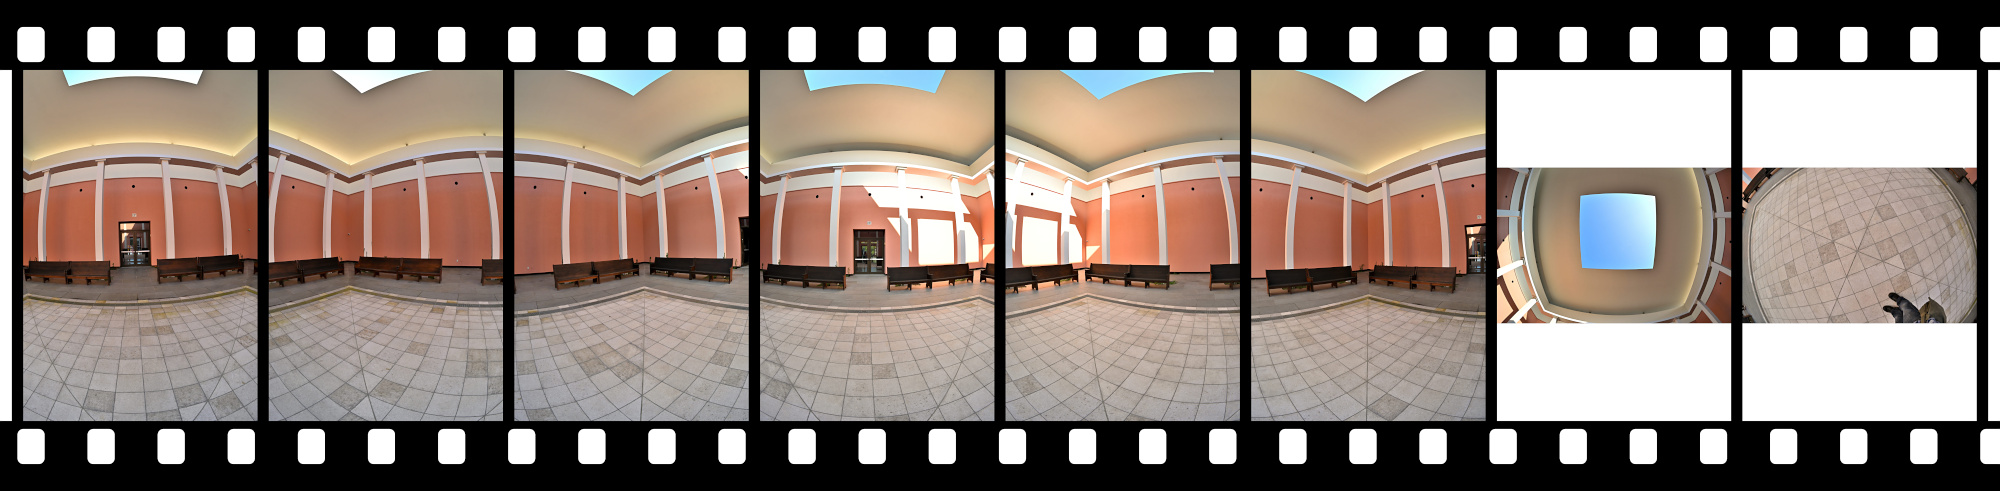
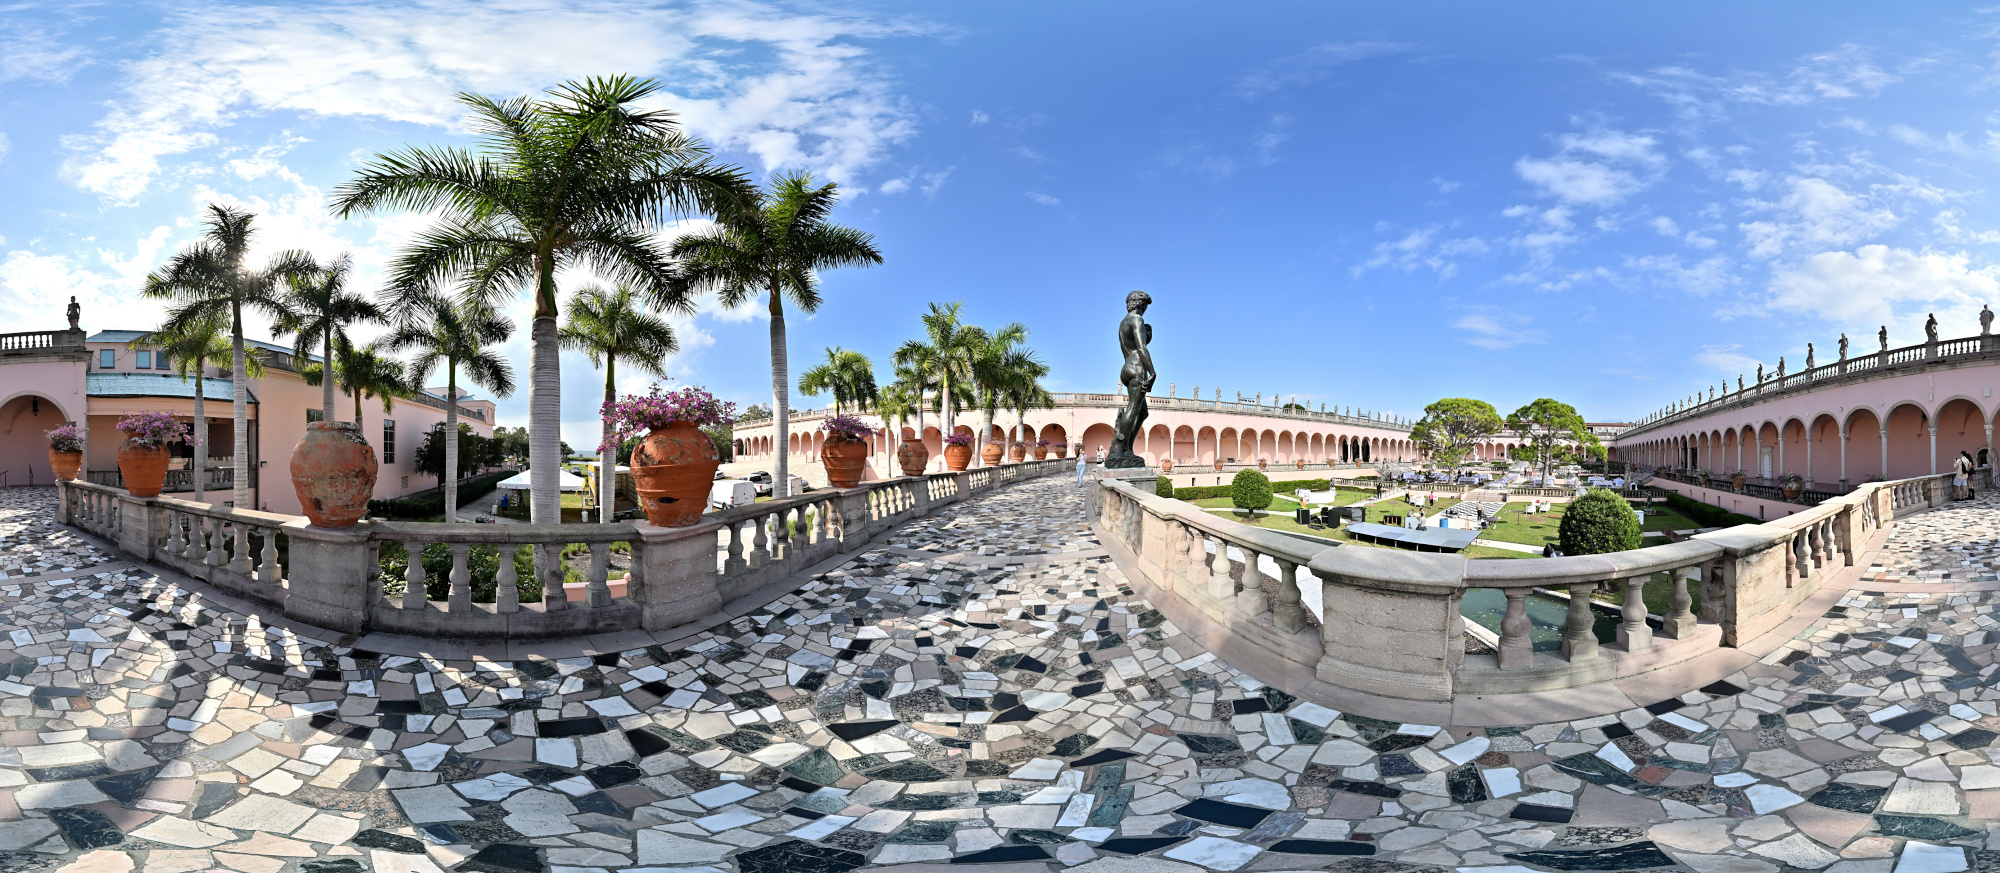
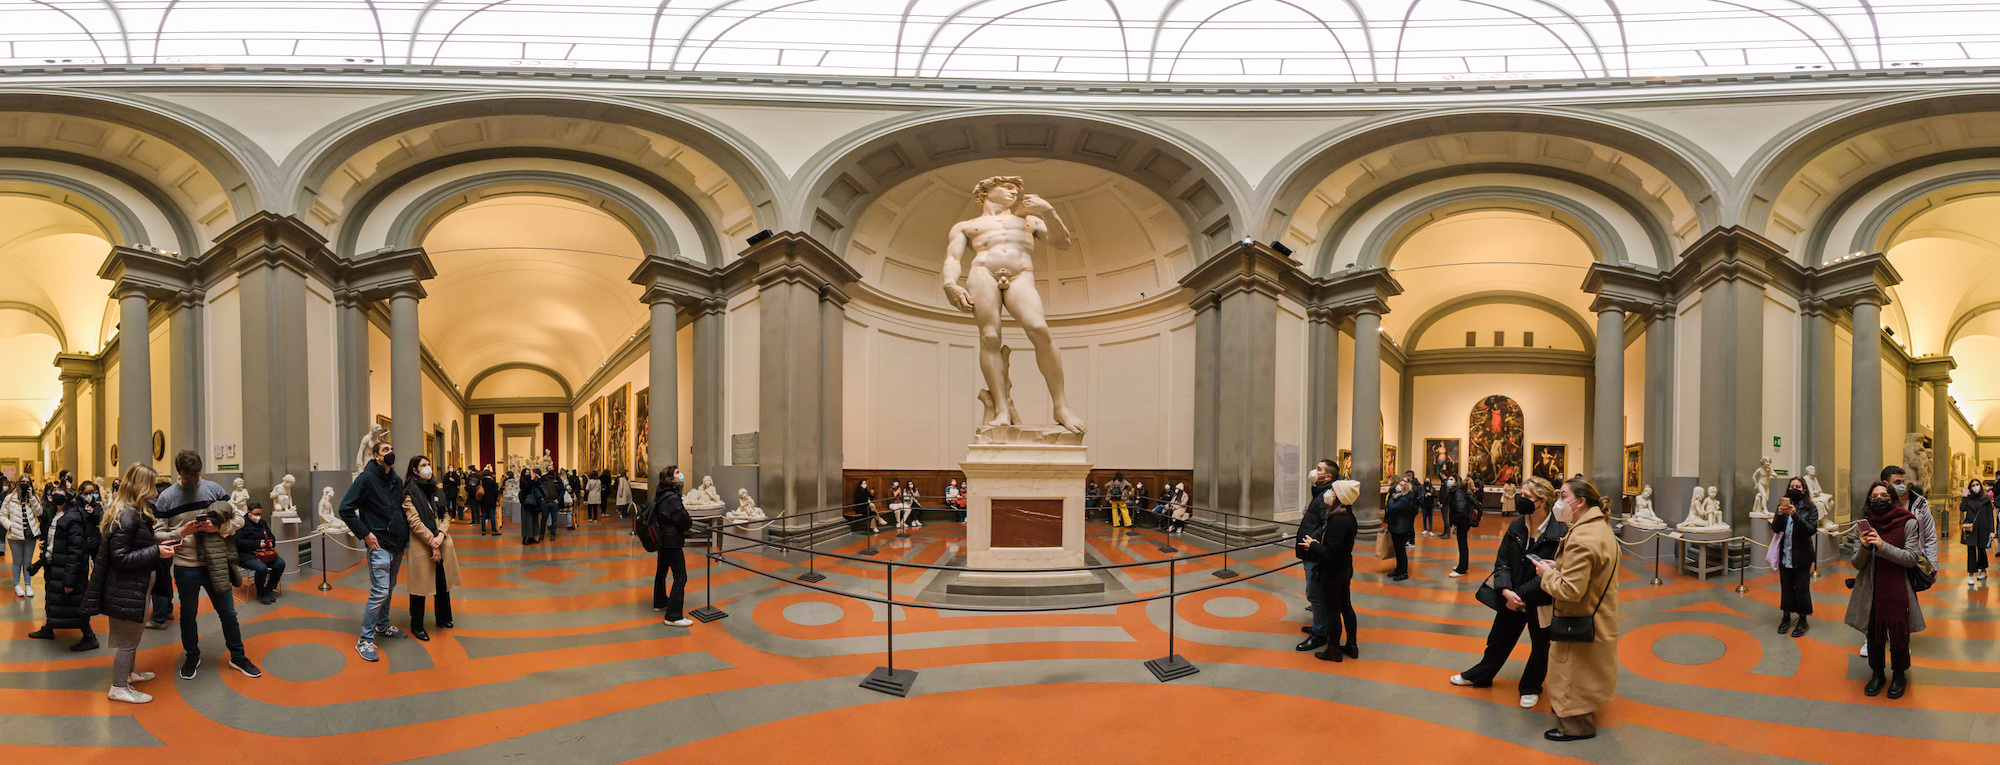
Grand Courtyard, Michelangelo's David
The 21 galleries surround a wide courtyard of fountains, sculptures, and a marble loggia. At its center stands a bronze replica of Michelangelo's David, looking out over the classical architecture.
Interactive Panorama Grand Courtyard, Michelangelo's David
1/800s f/5,6 ISO 100/21° f=7,5mm
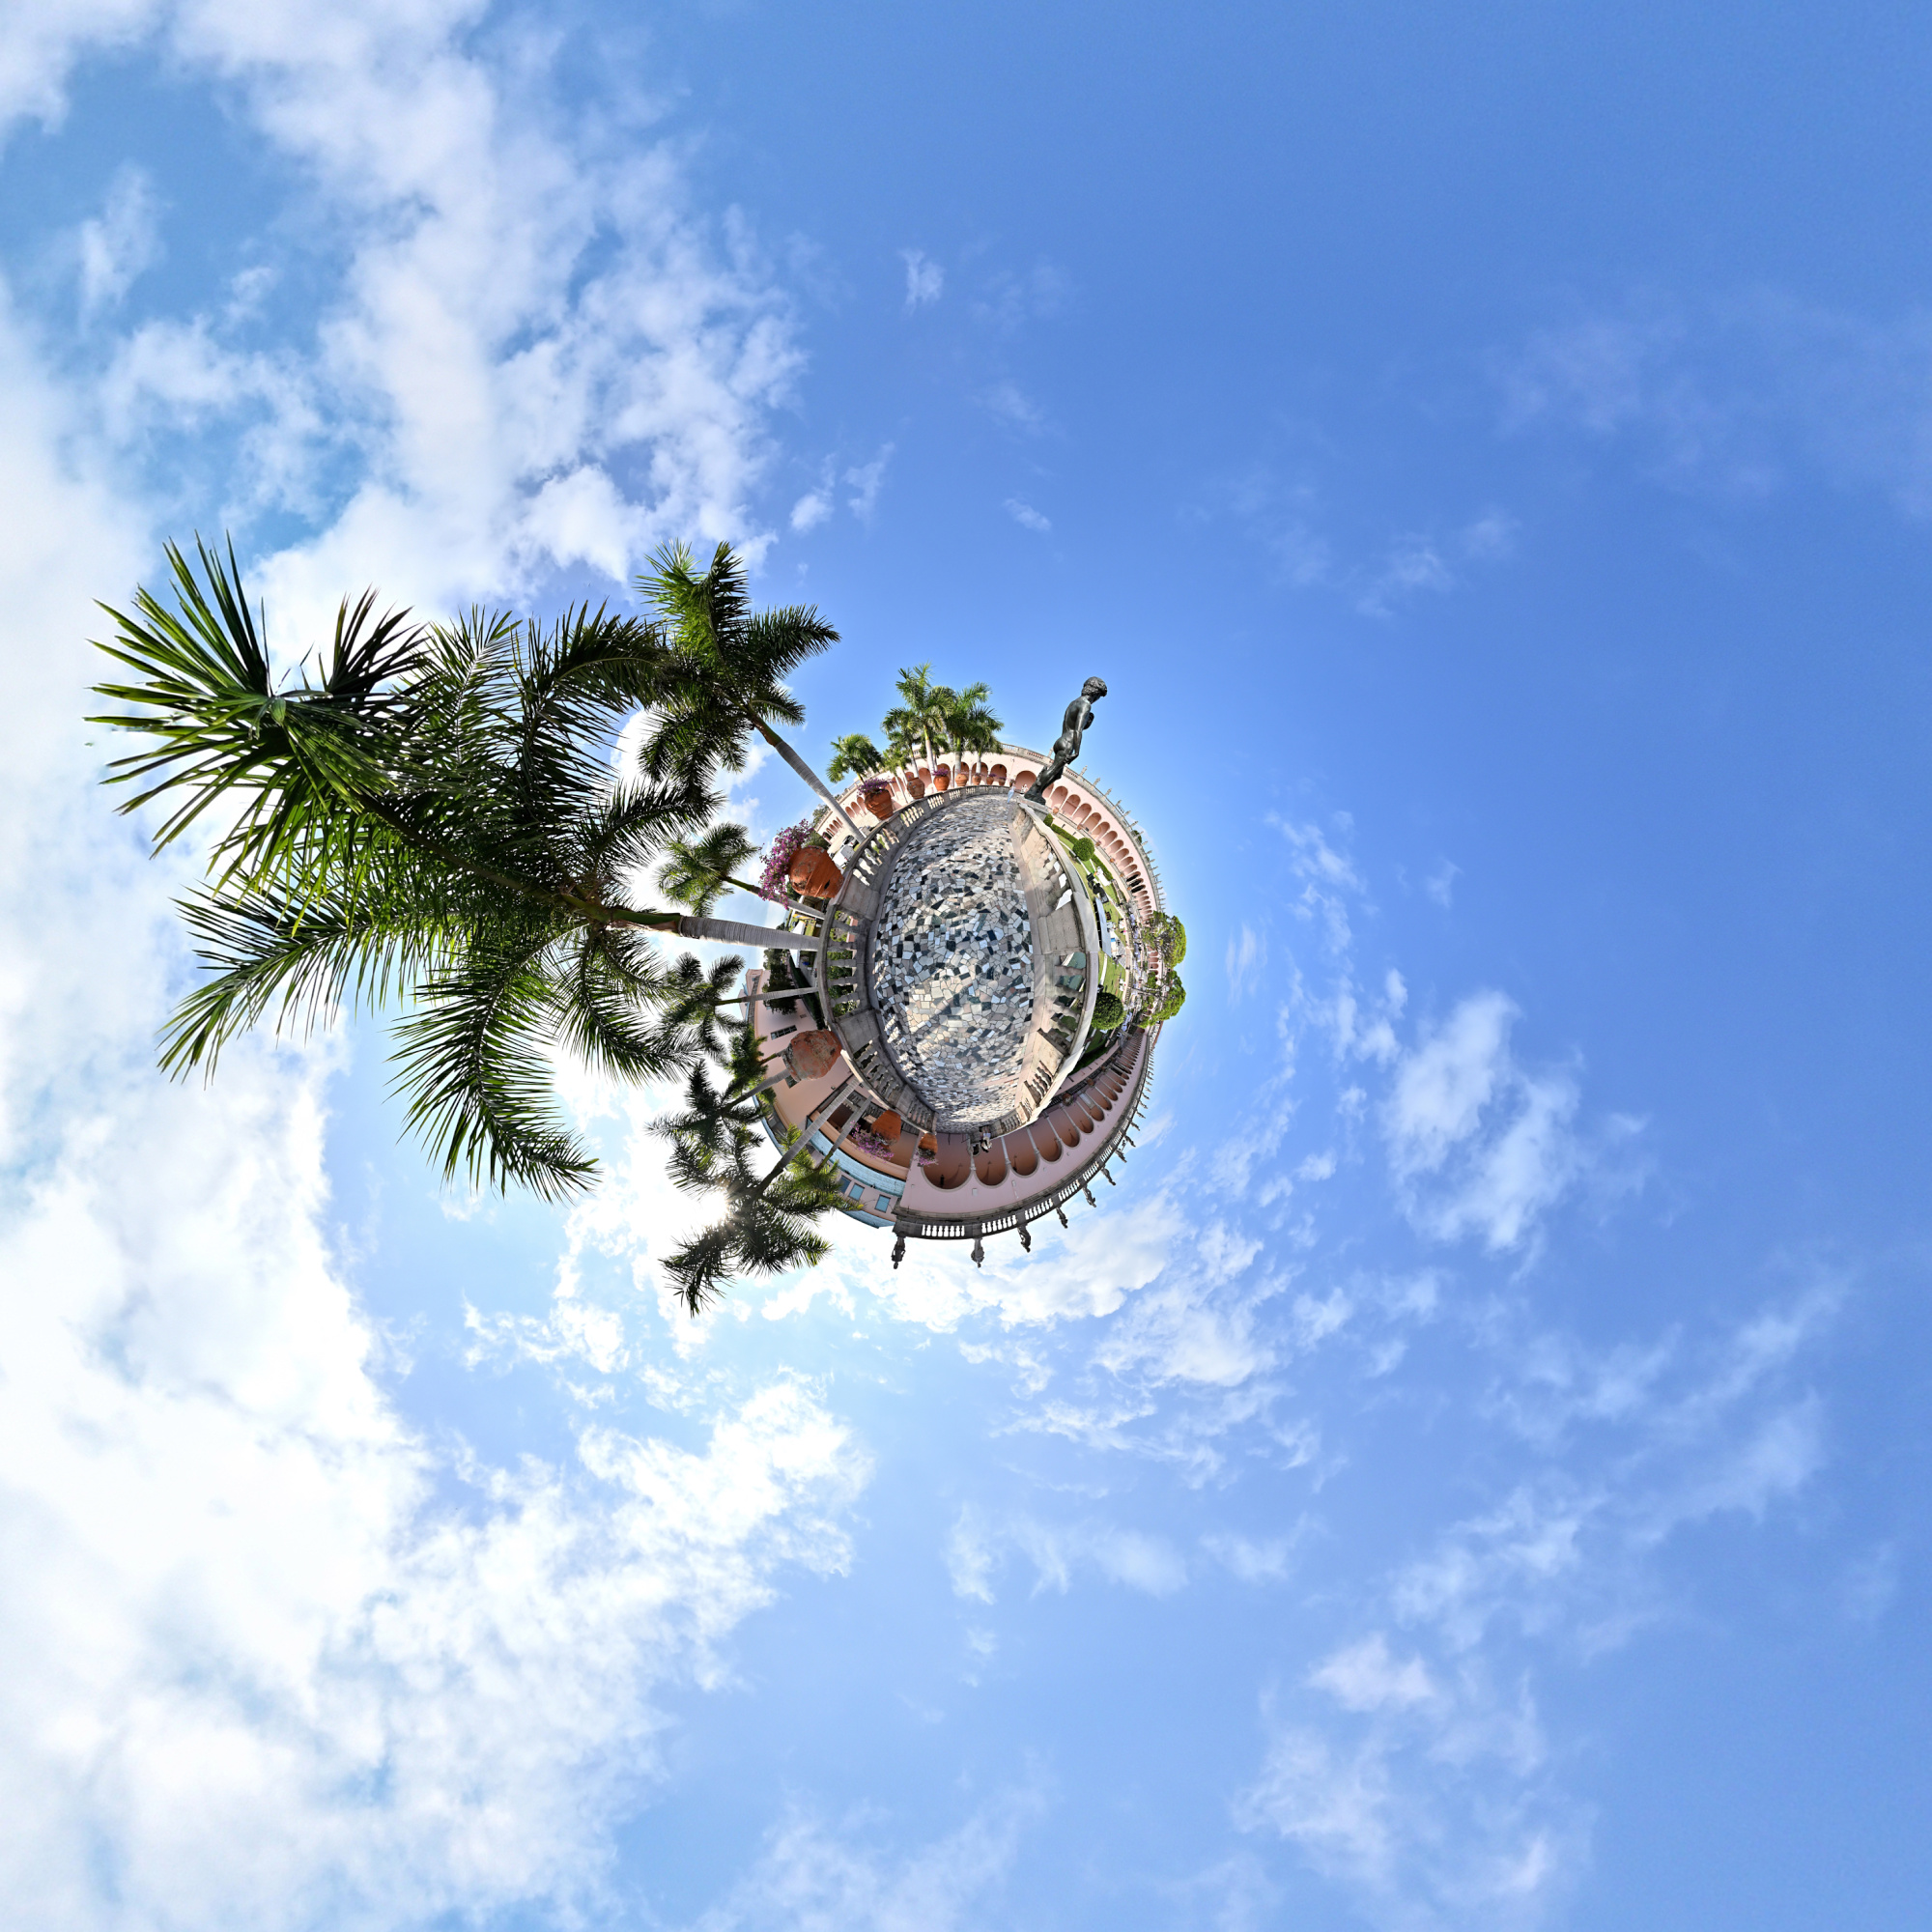
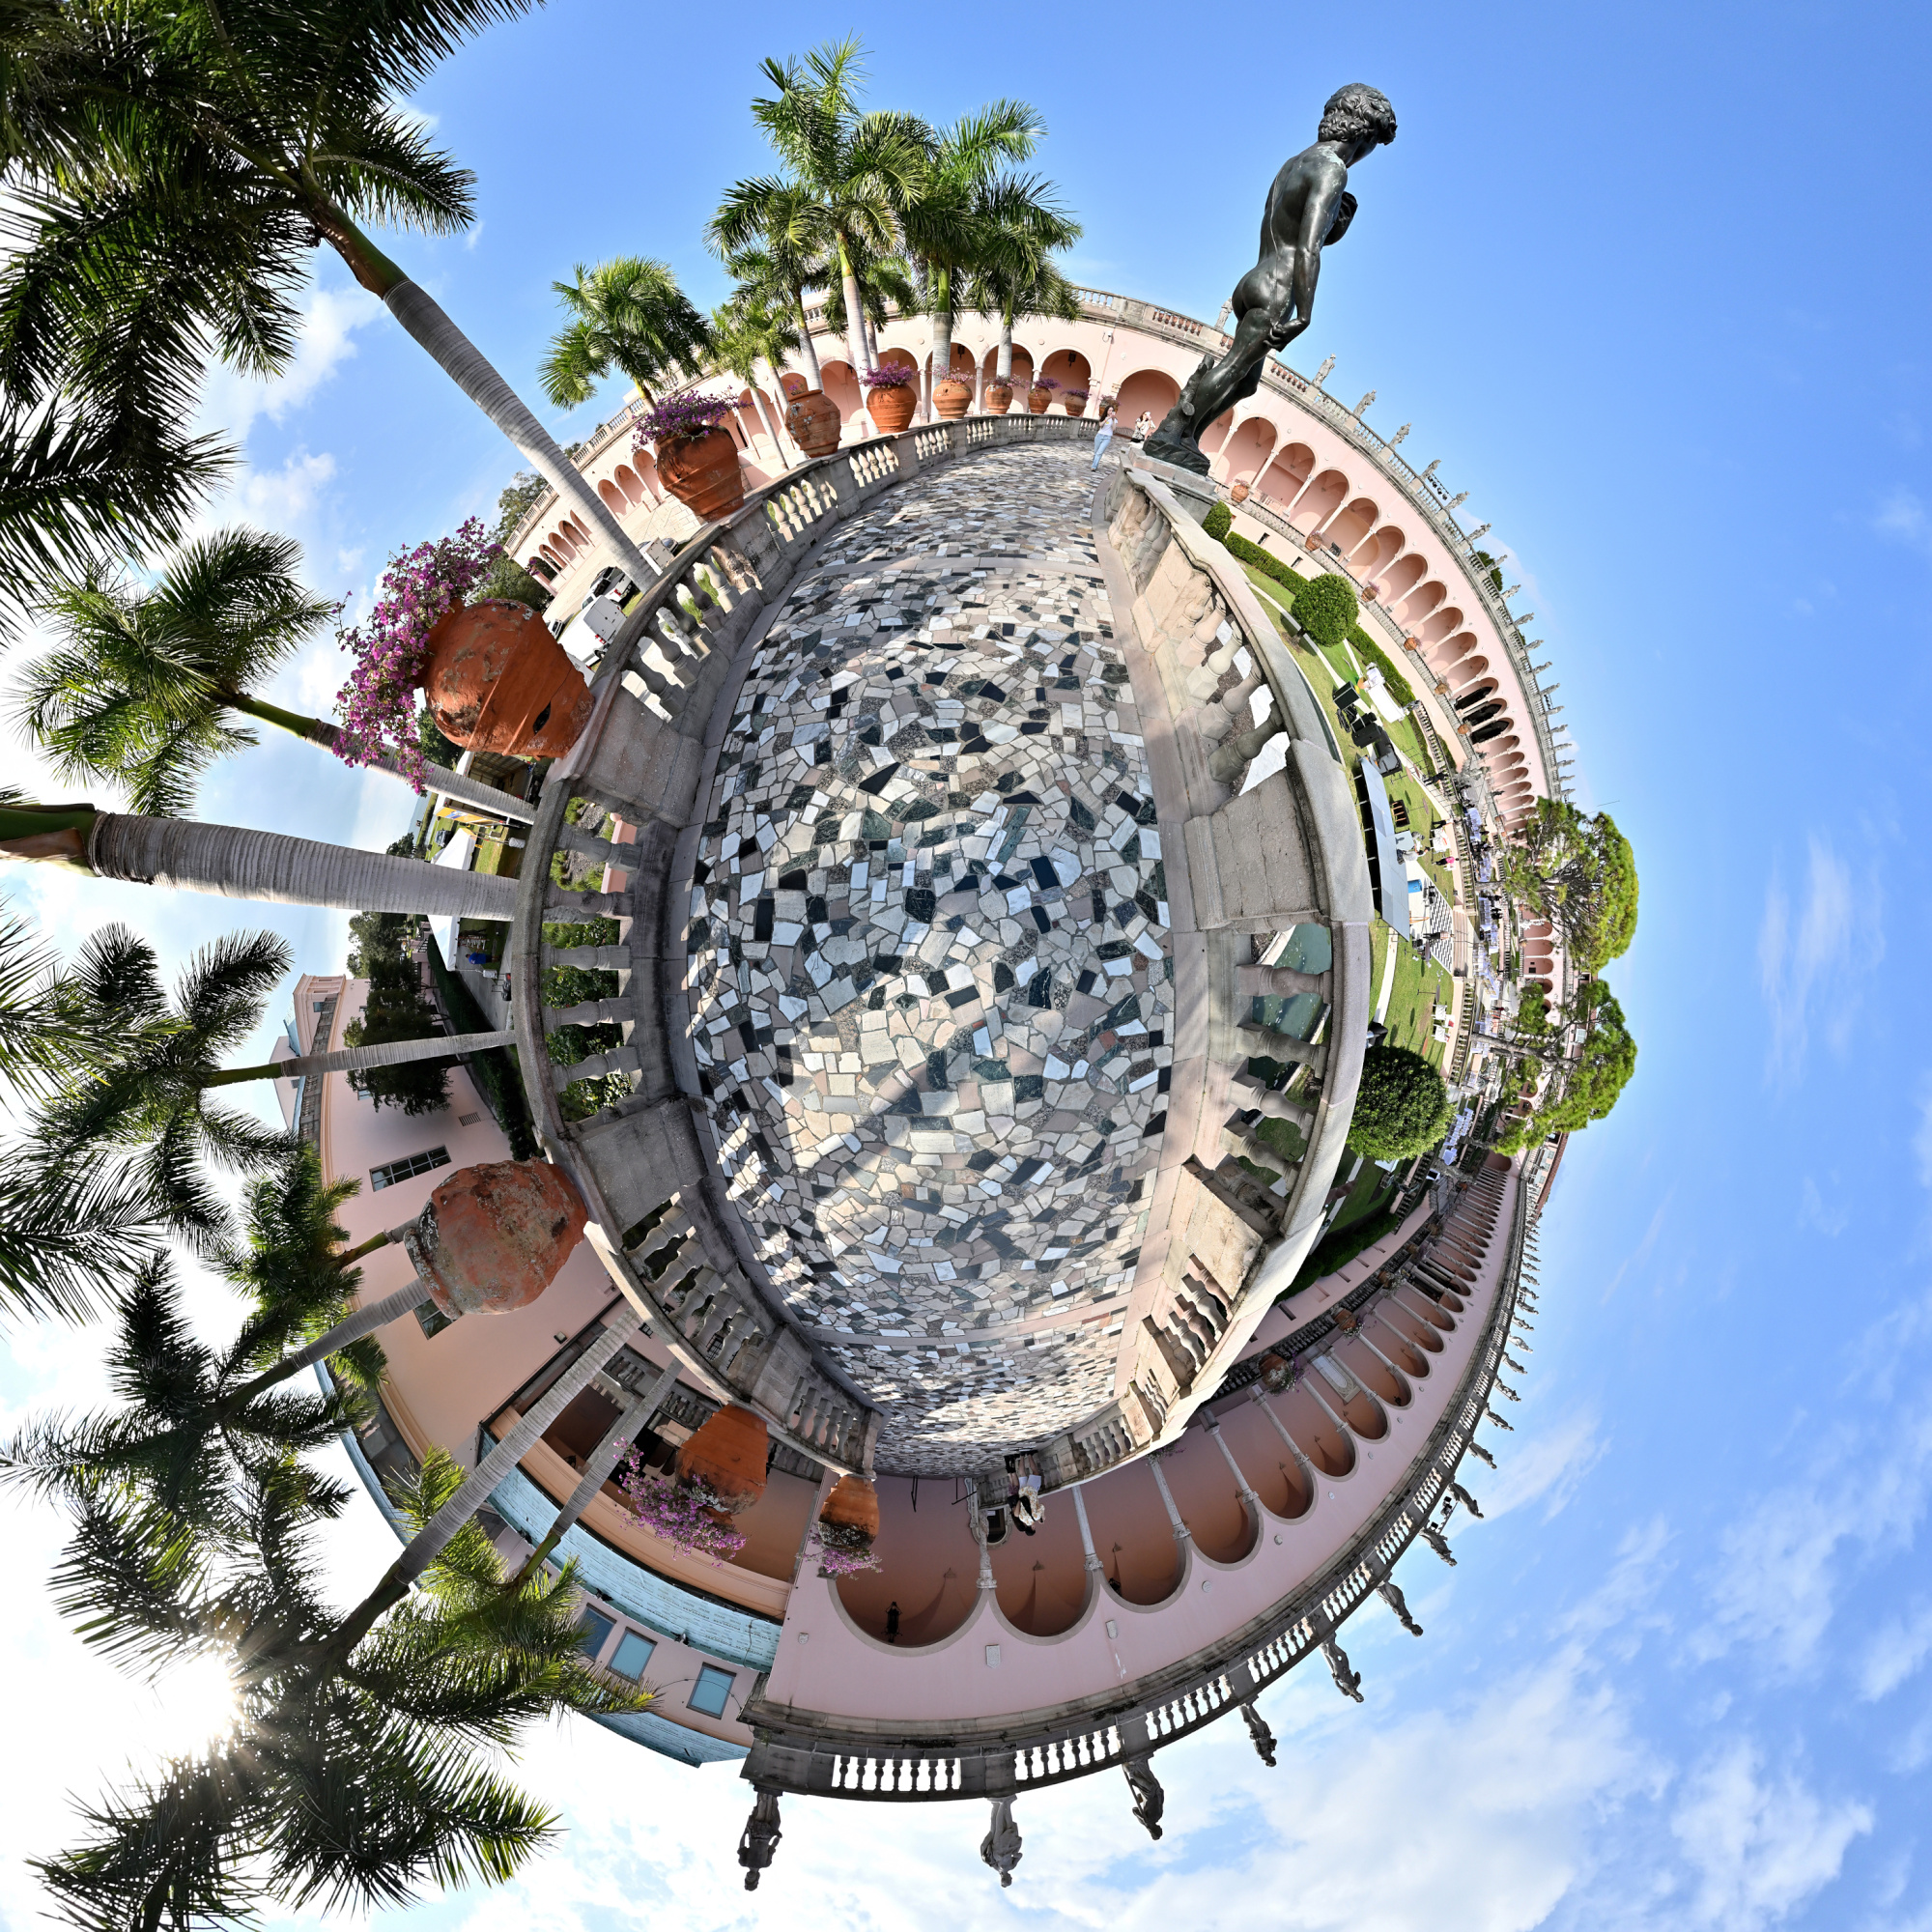
Full-Frame Fisheye Projection
1/800s f/5,6 ISO 100/21° f=7,5mm
Equirectangular Projection
The Sarasota copy is nice, but here is the original.
-
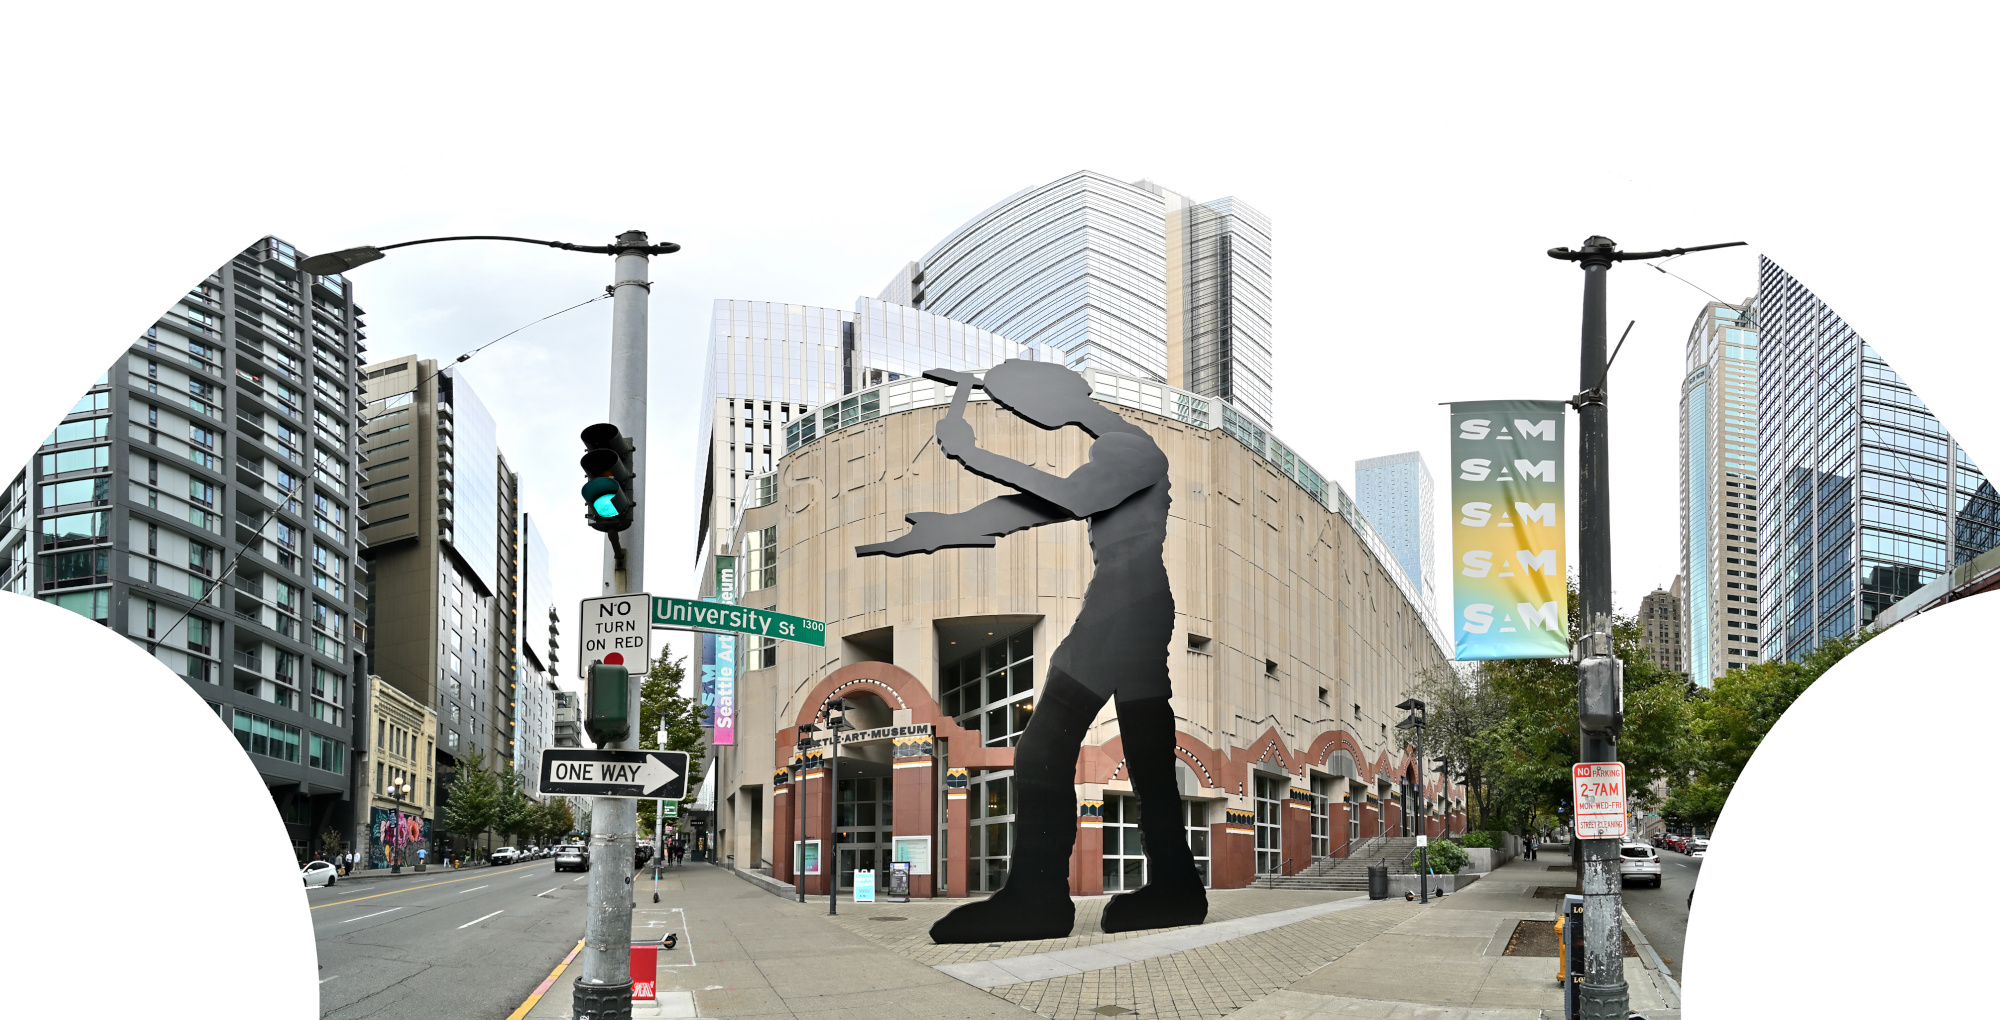
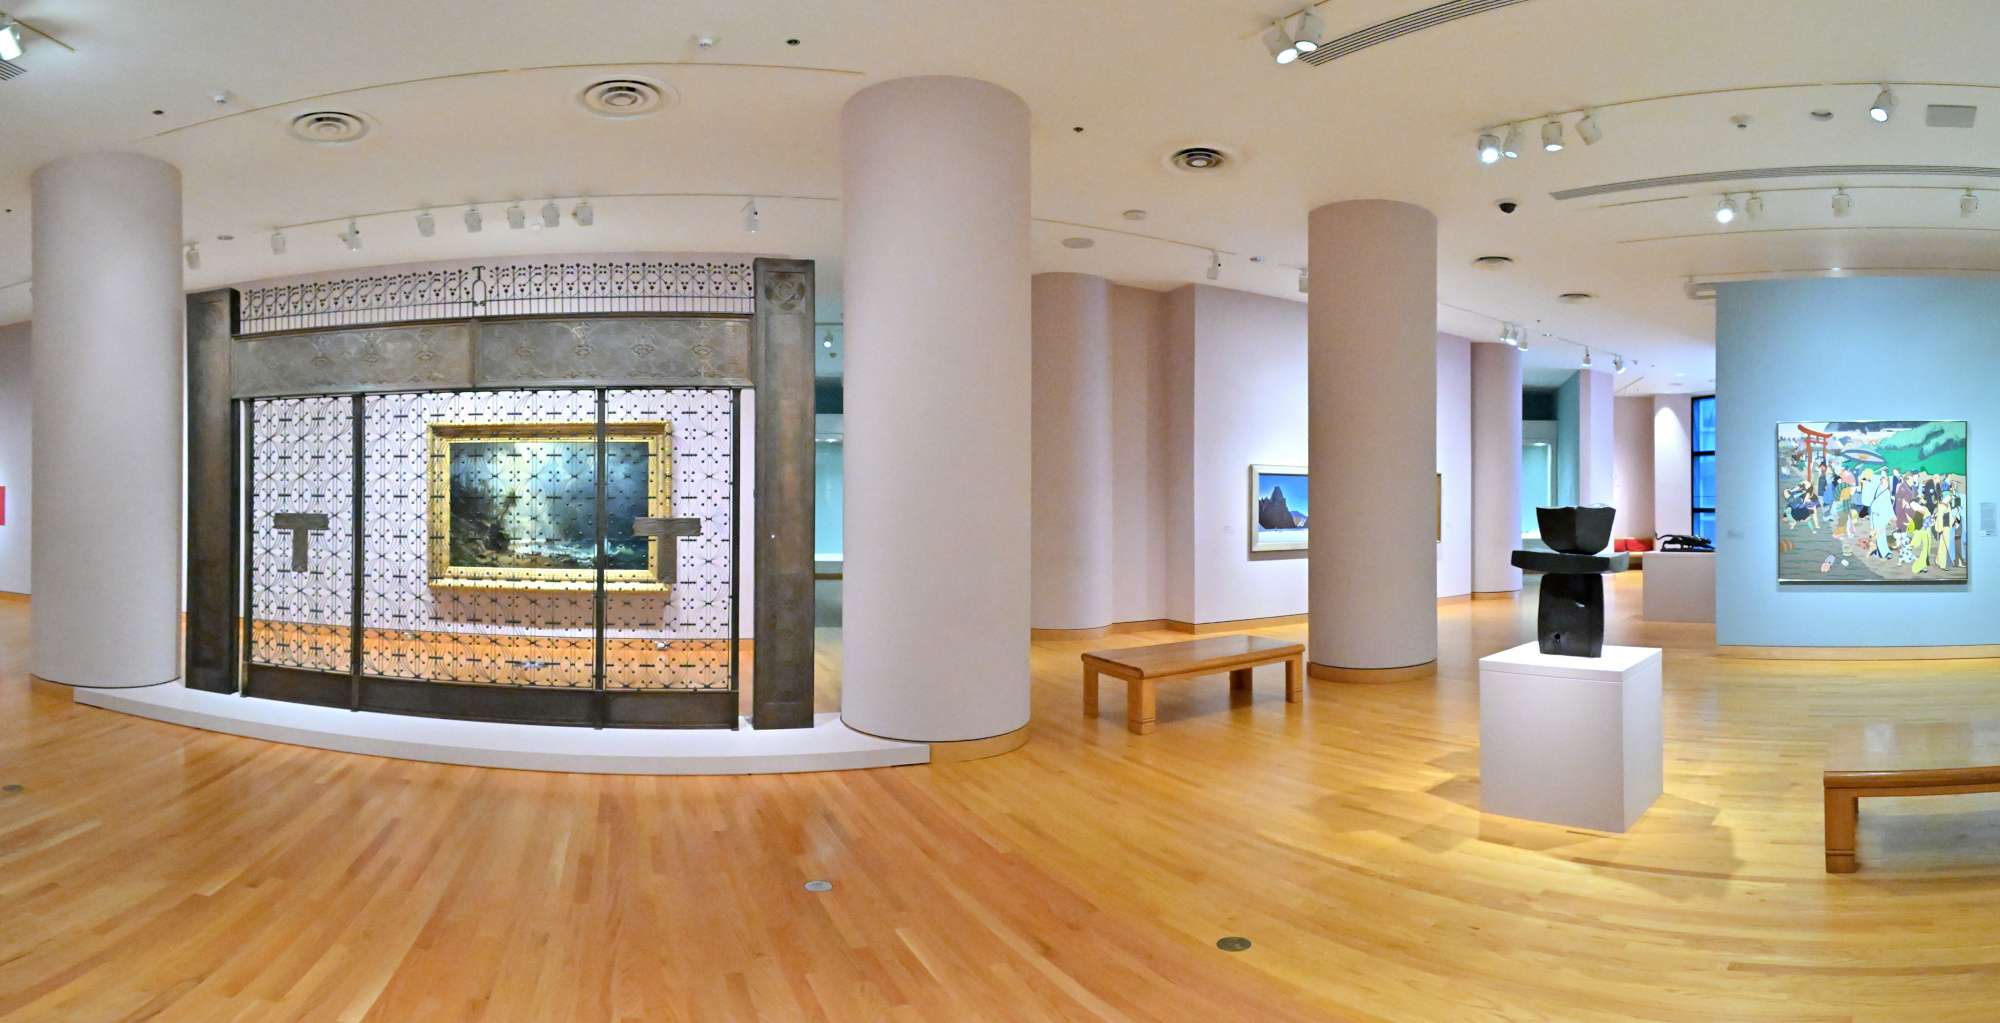
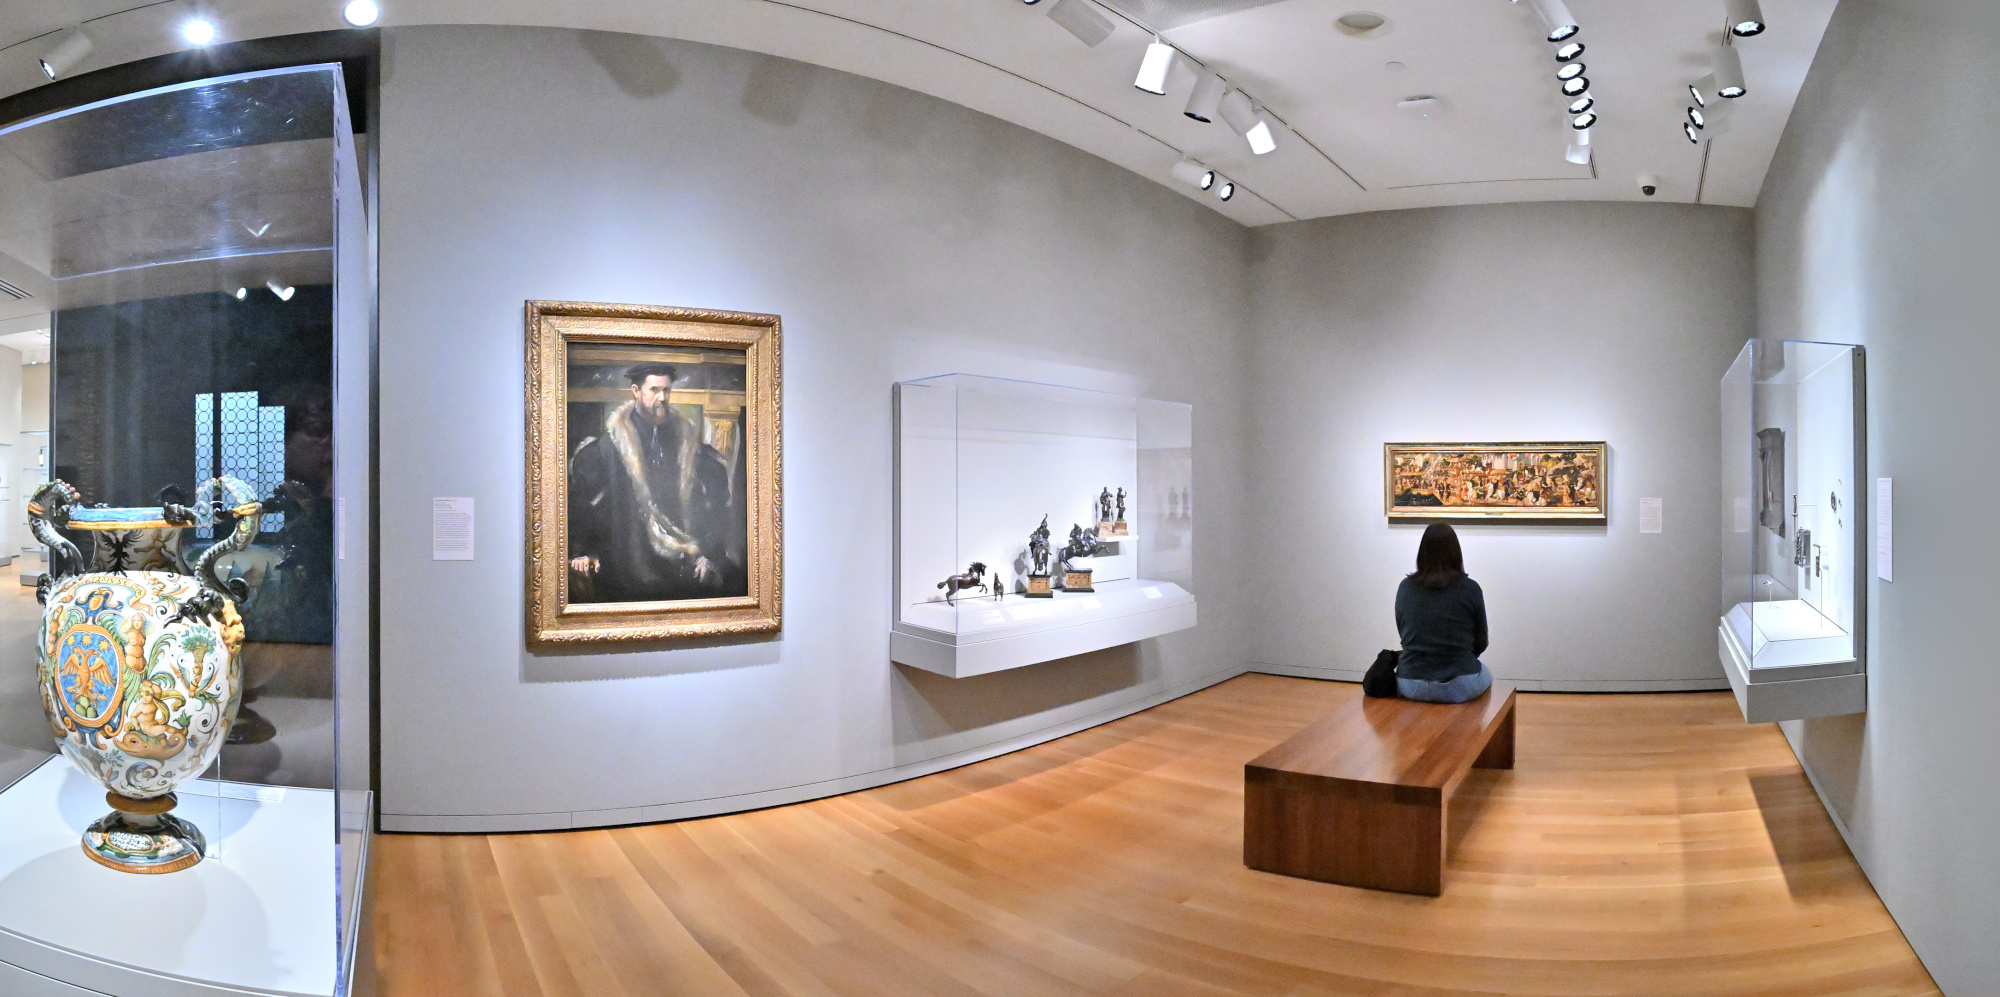
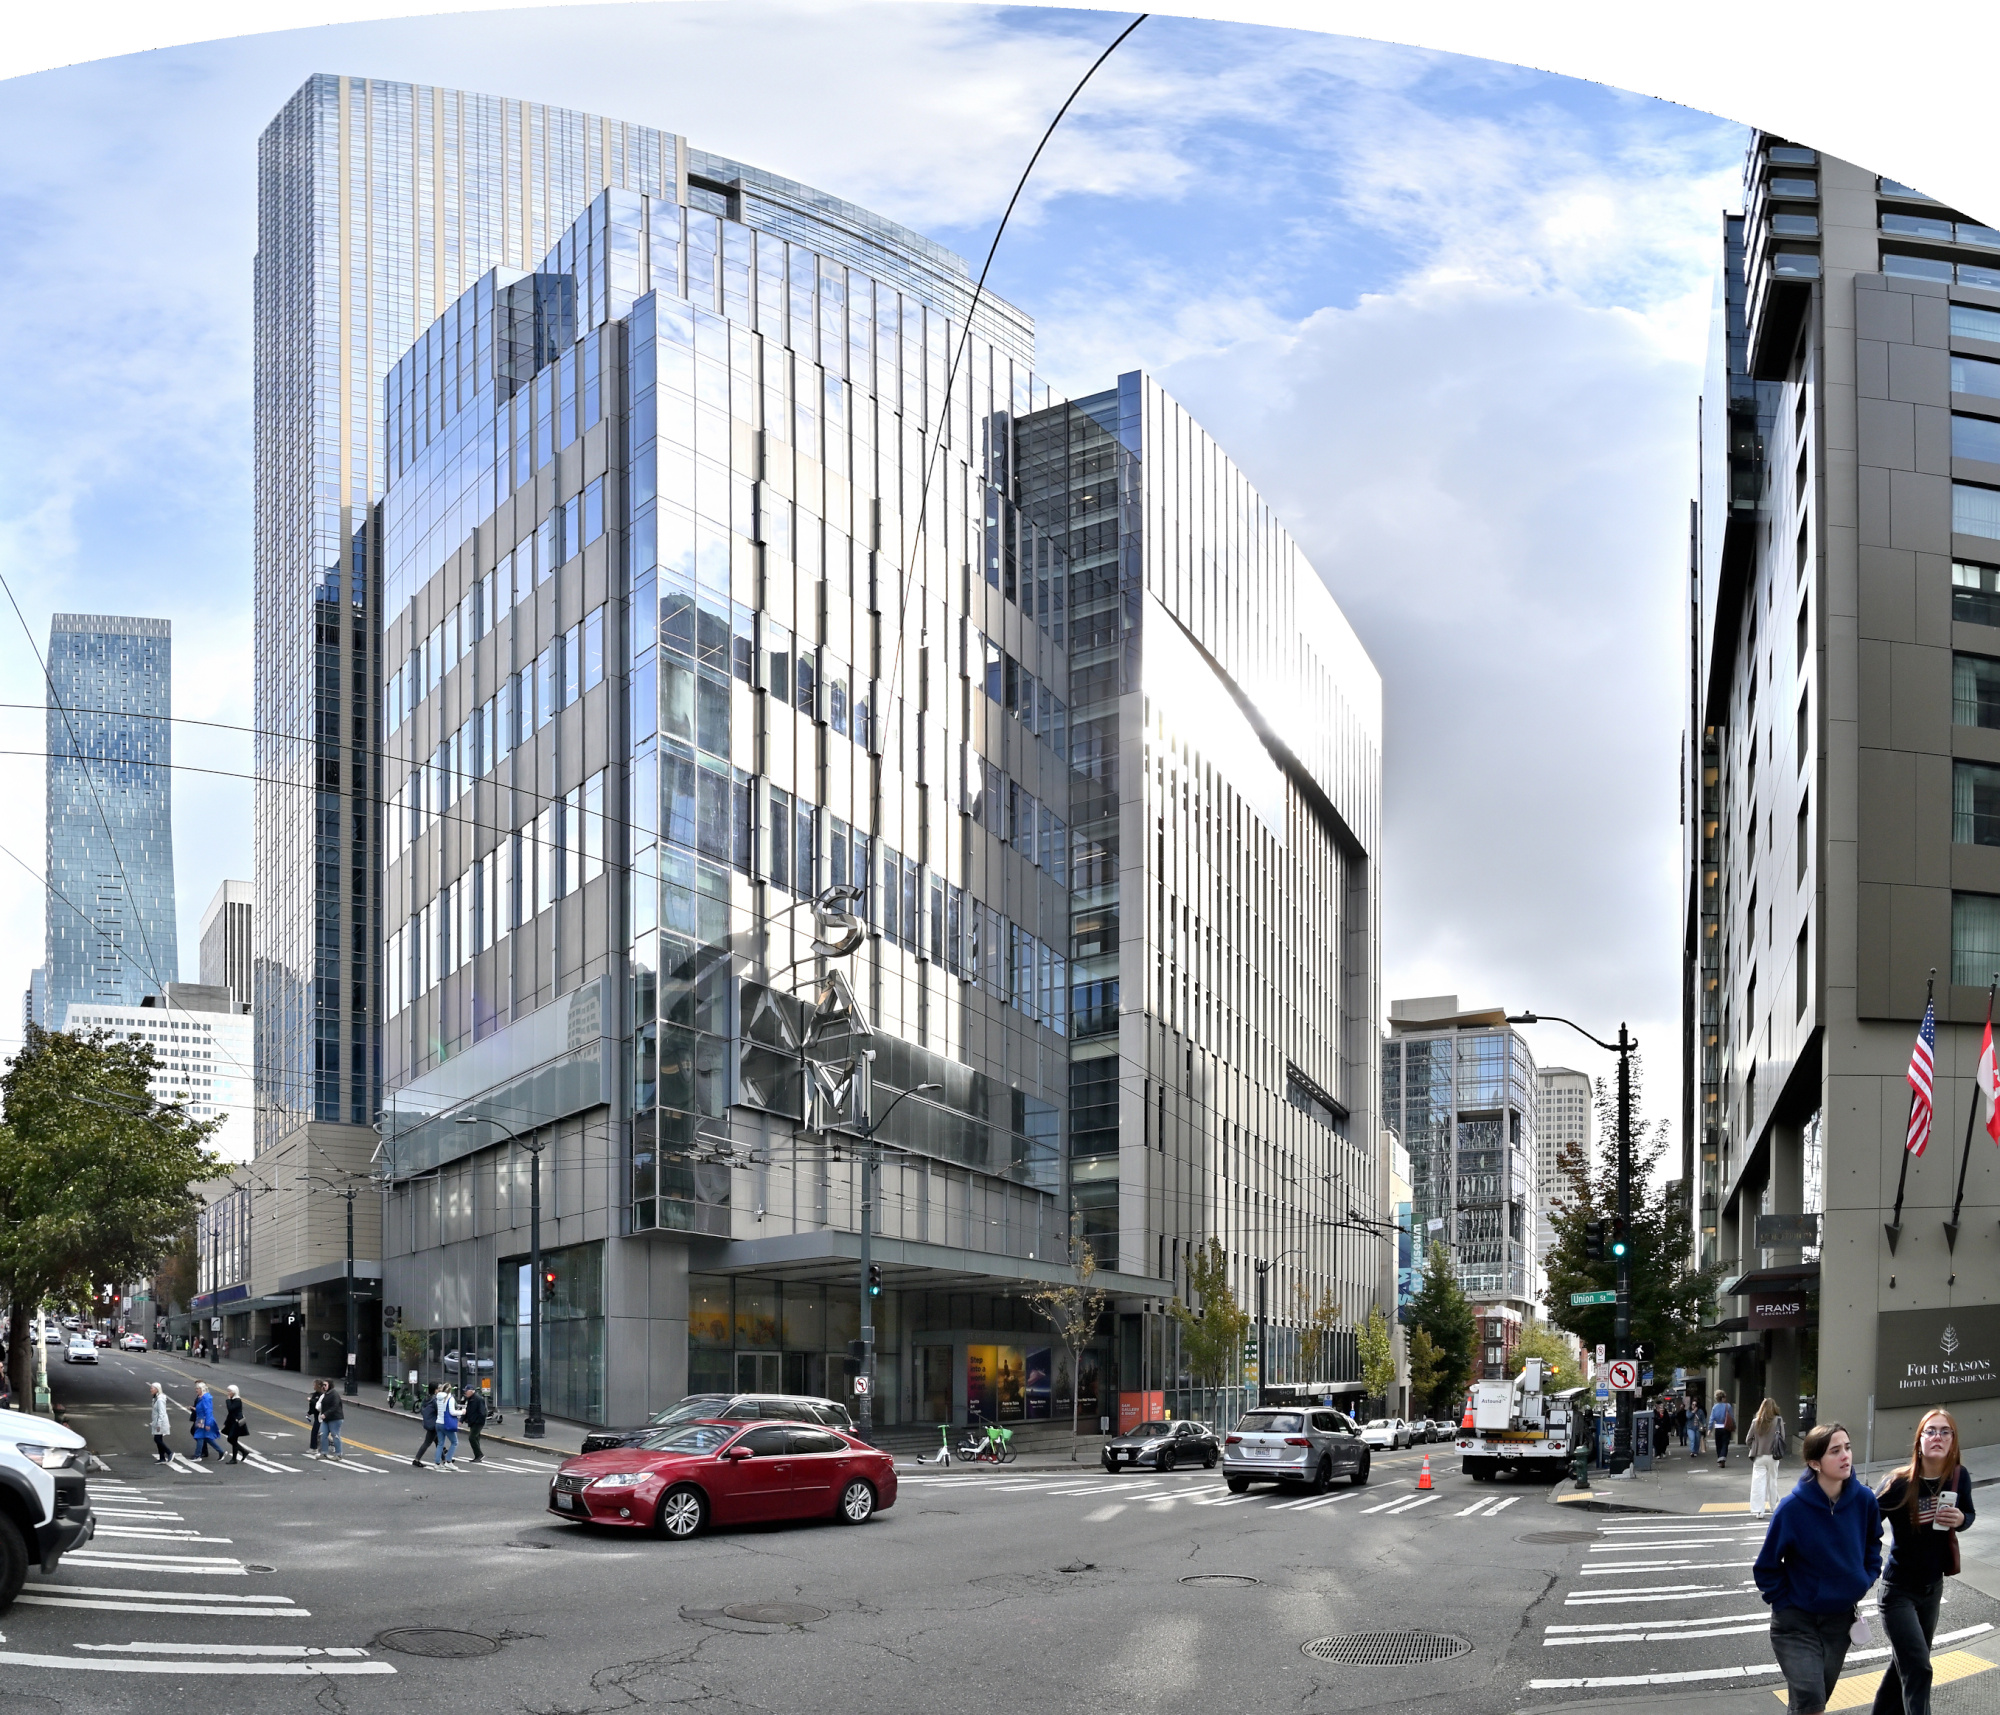
Seattle Art Museum
A cold, wet, and grey Sunday. Pacific Northwest in autumn is nature's way of saying, "Stay indoors."
So thats where we stay. In the Seattle Art Museum, of course.
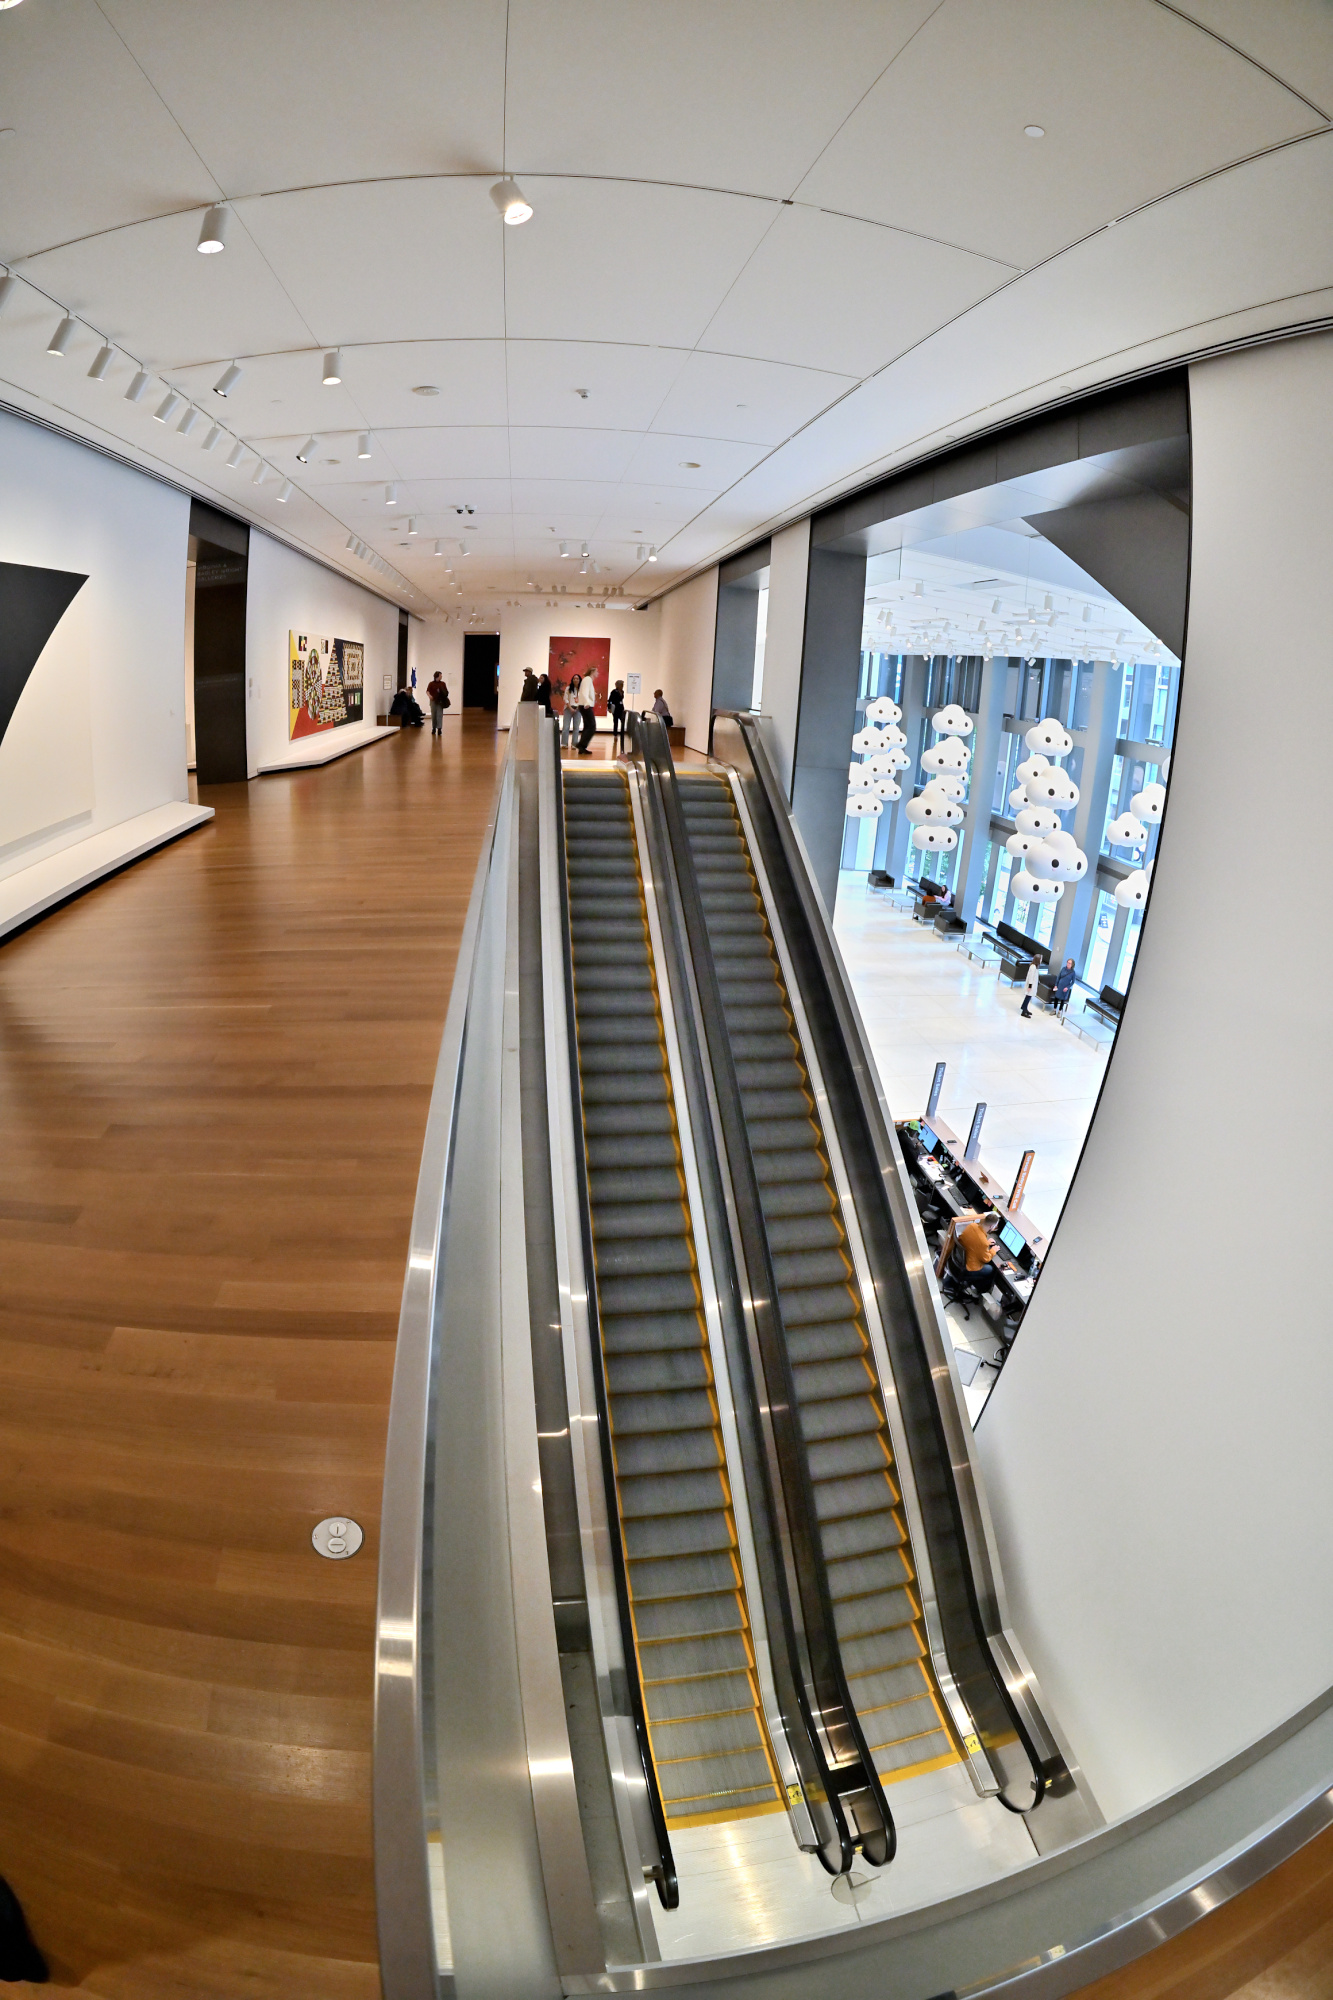
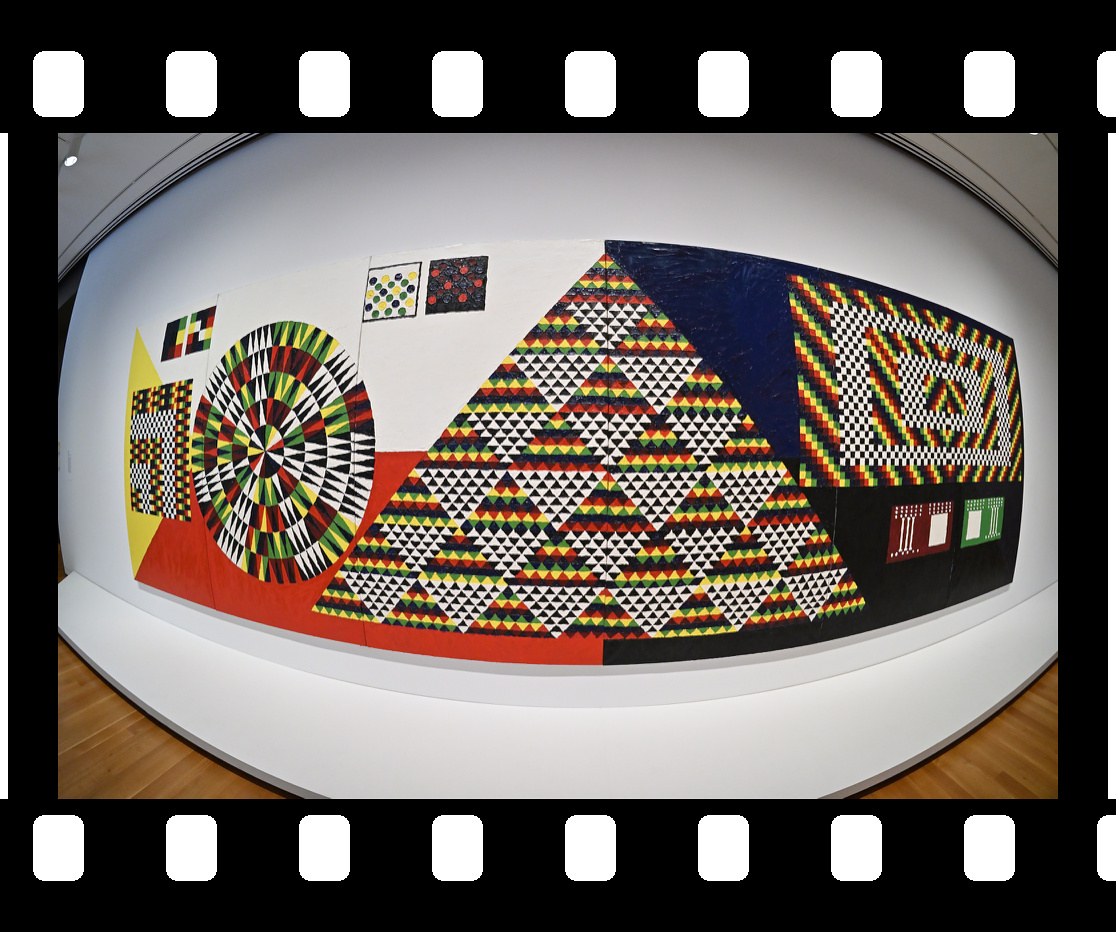
Where architecture curves into art — captured in a fisheye projection1/200s f/5,6 ISO 200/24° f=7,5mm
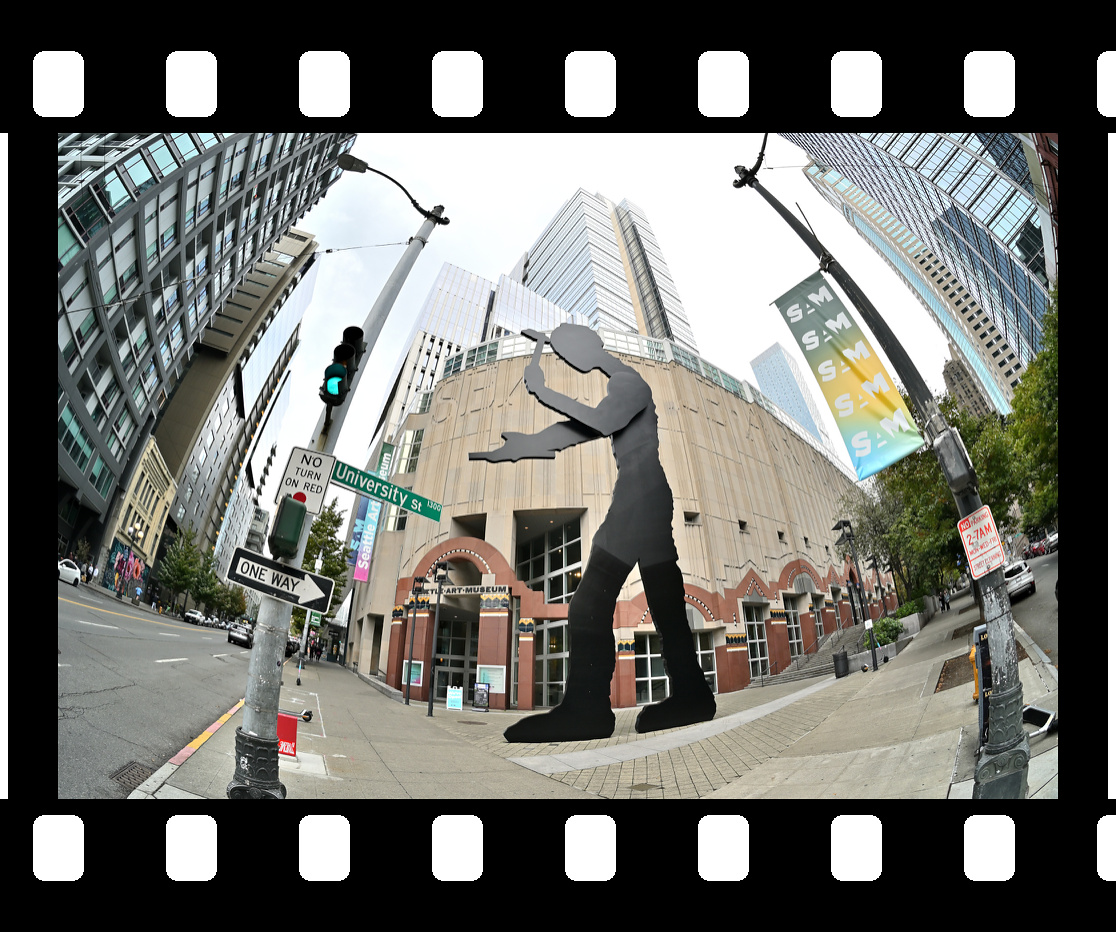
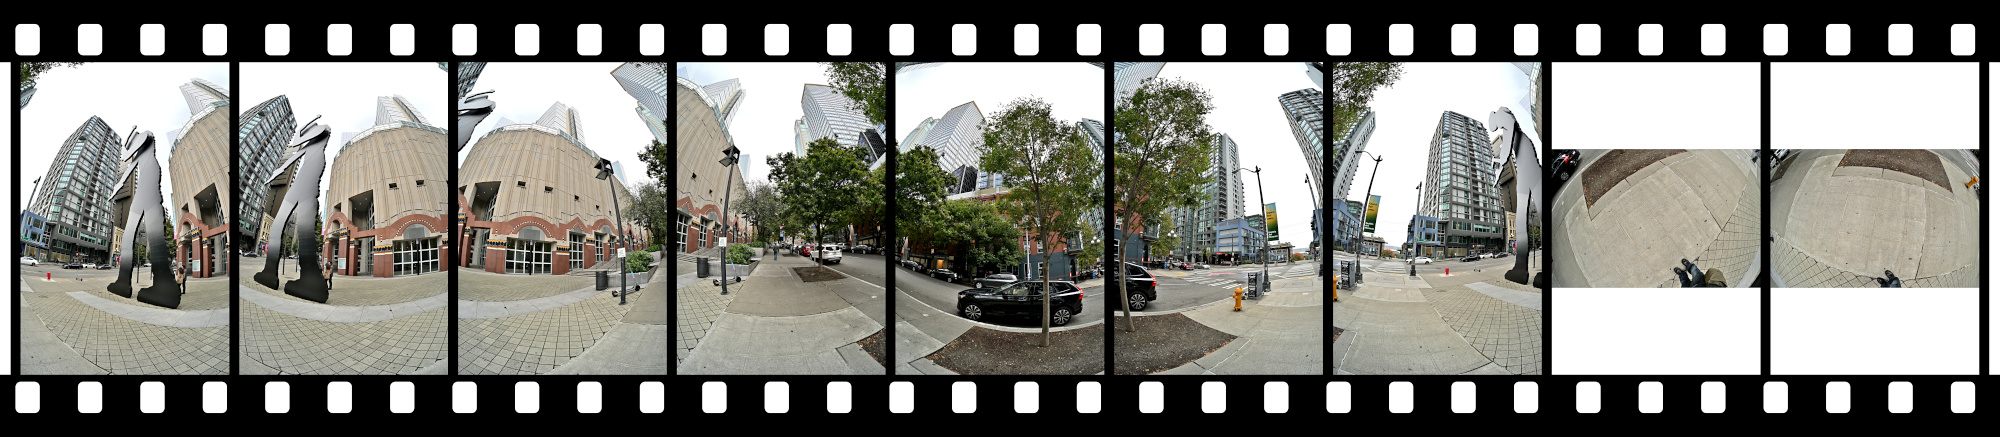
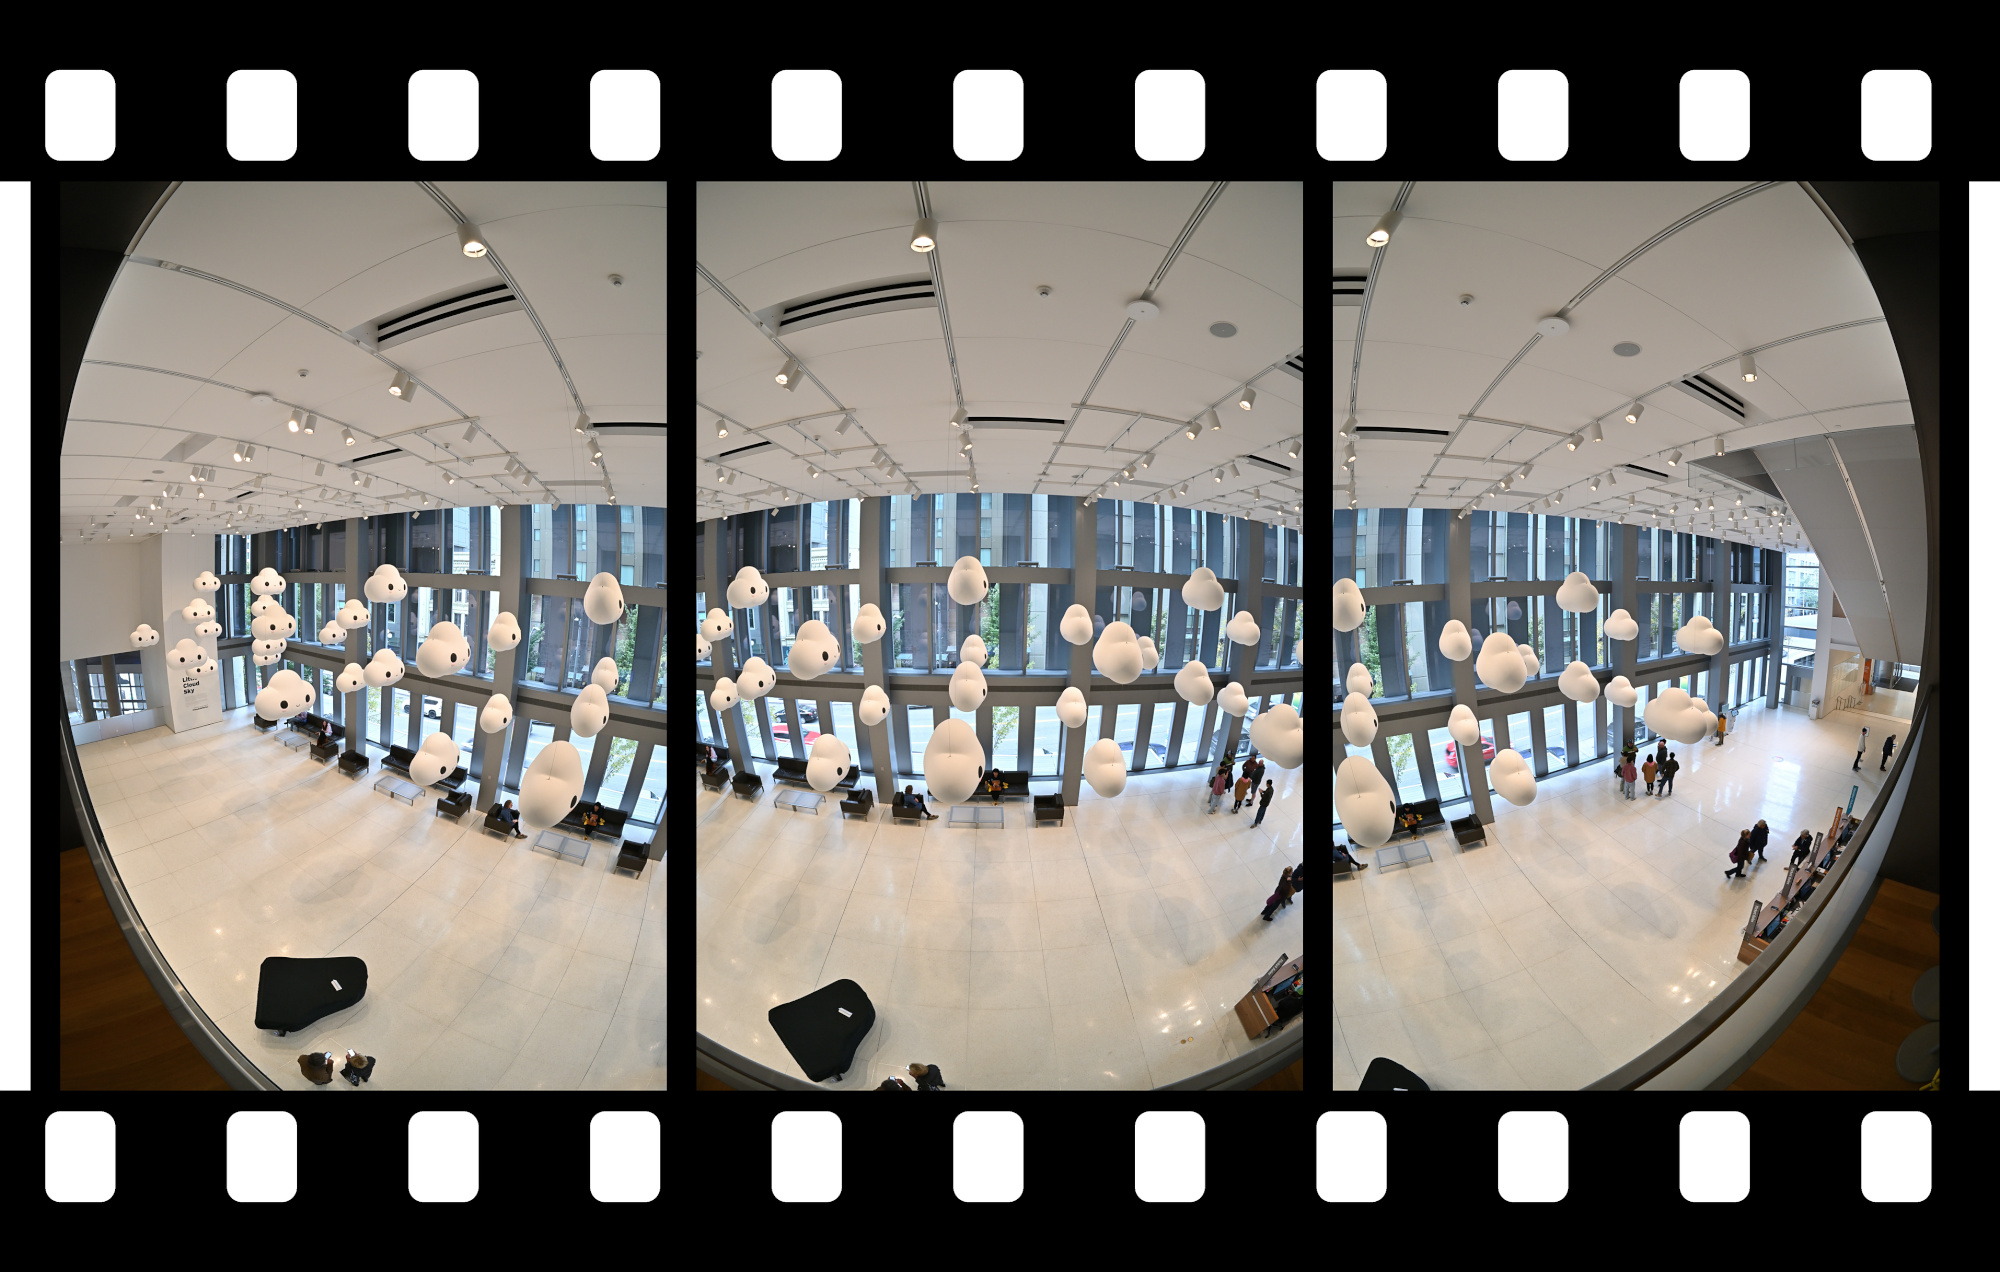
Interactive Panorama Seattle Art Museum 1

1/200s f/5,6 ISO 200/24° f=7,5mm
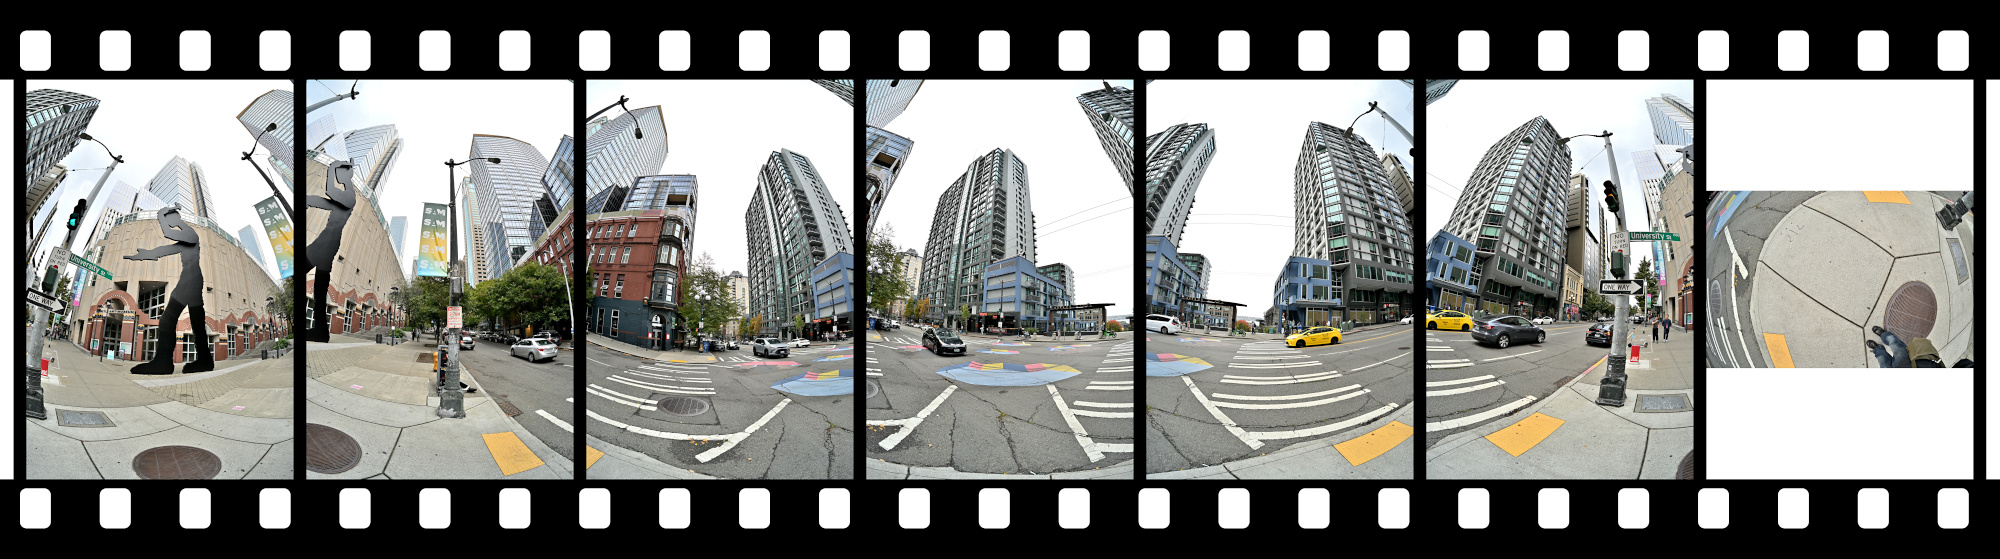
Interactive Panorama Seattle Art Museum 2
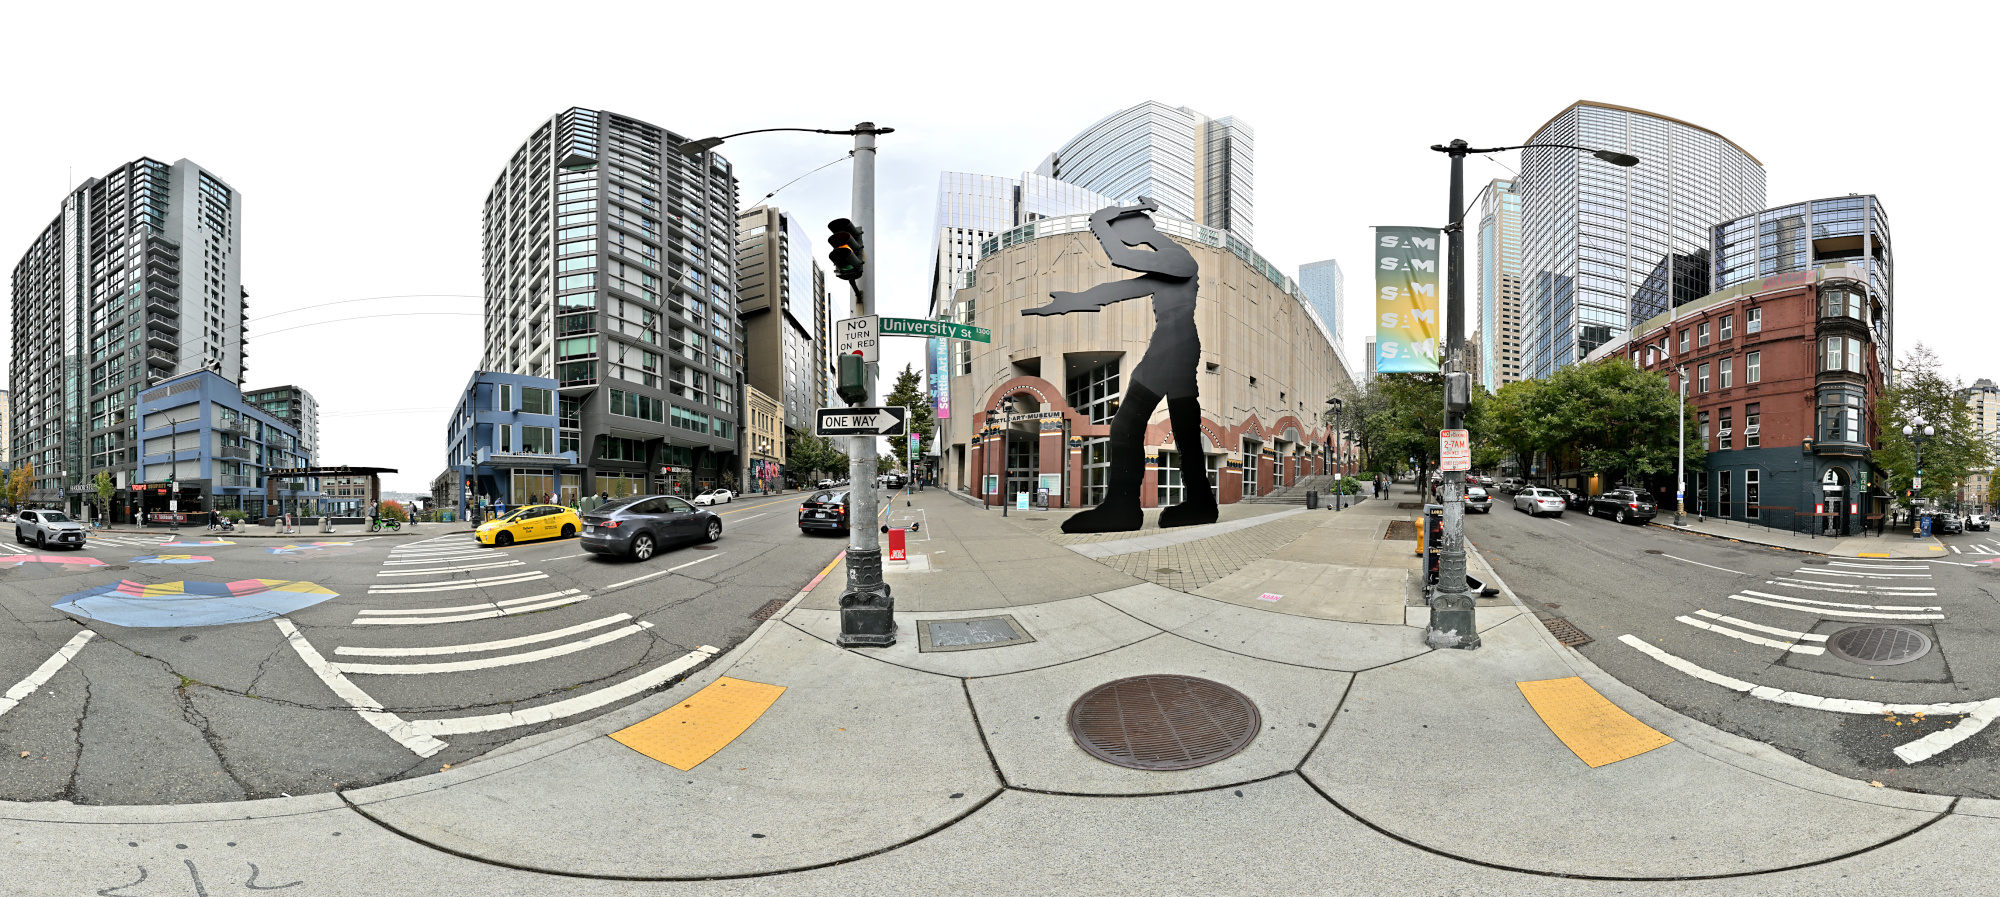
1/200s f/5,6 ISO 200/24° f=7,5mm
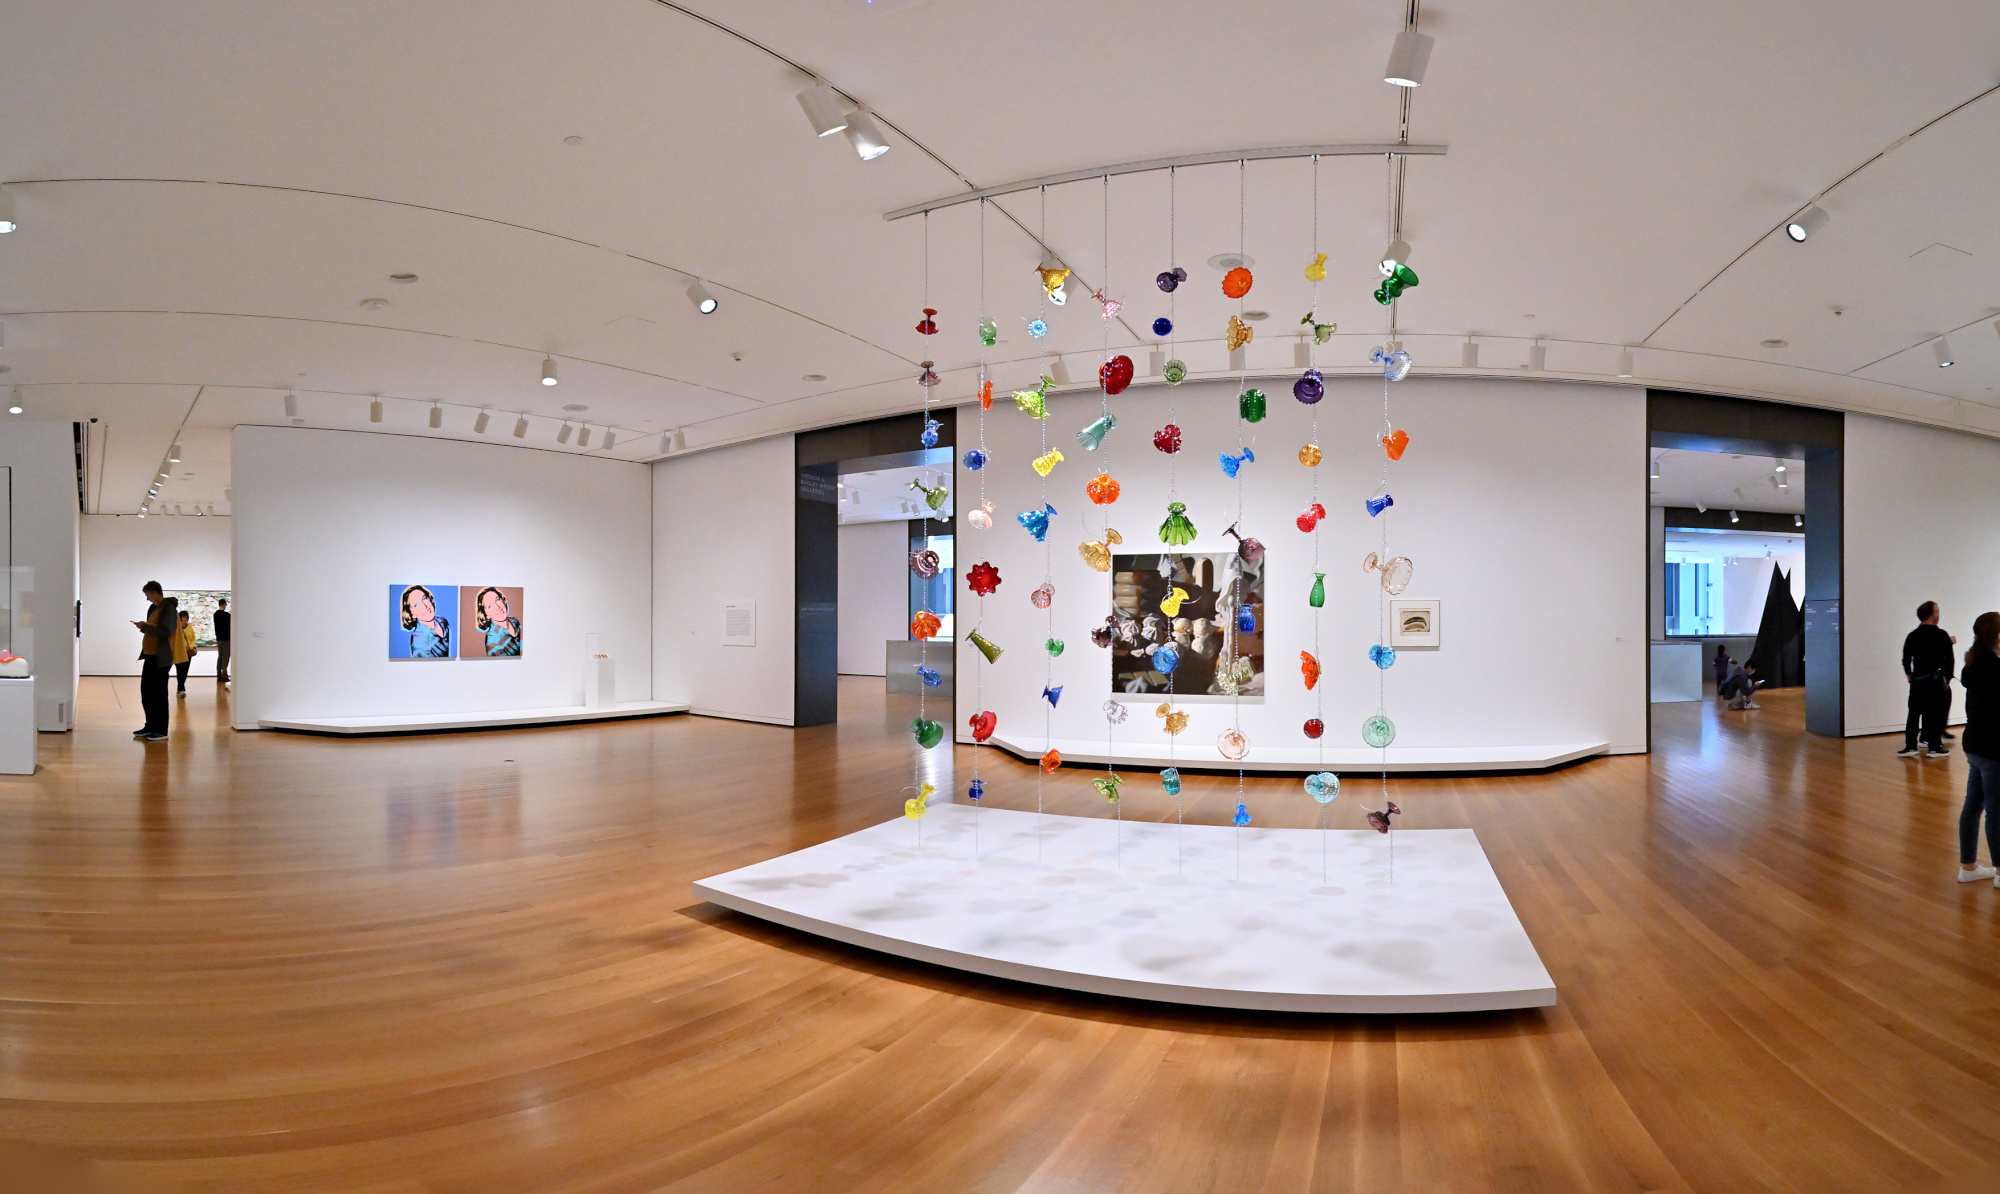
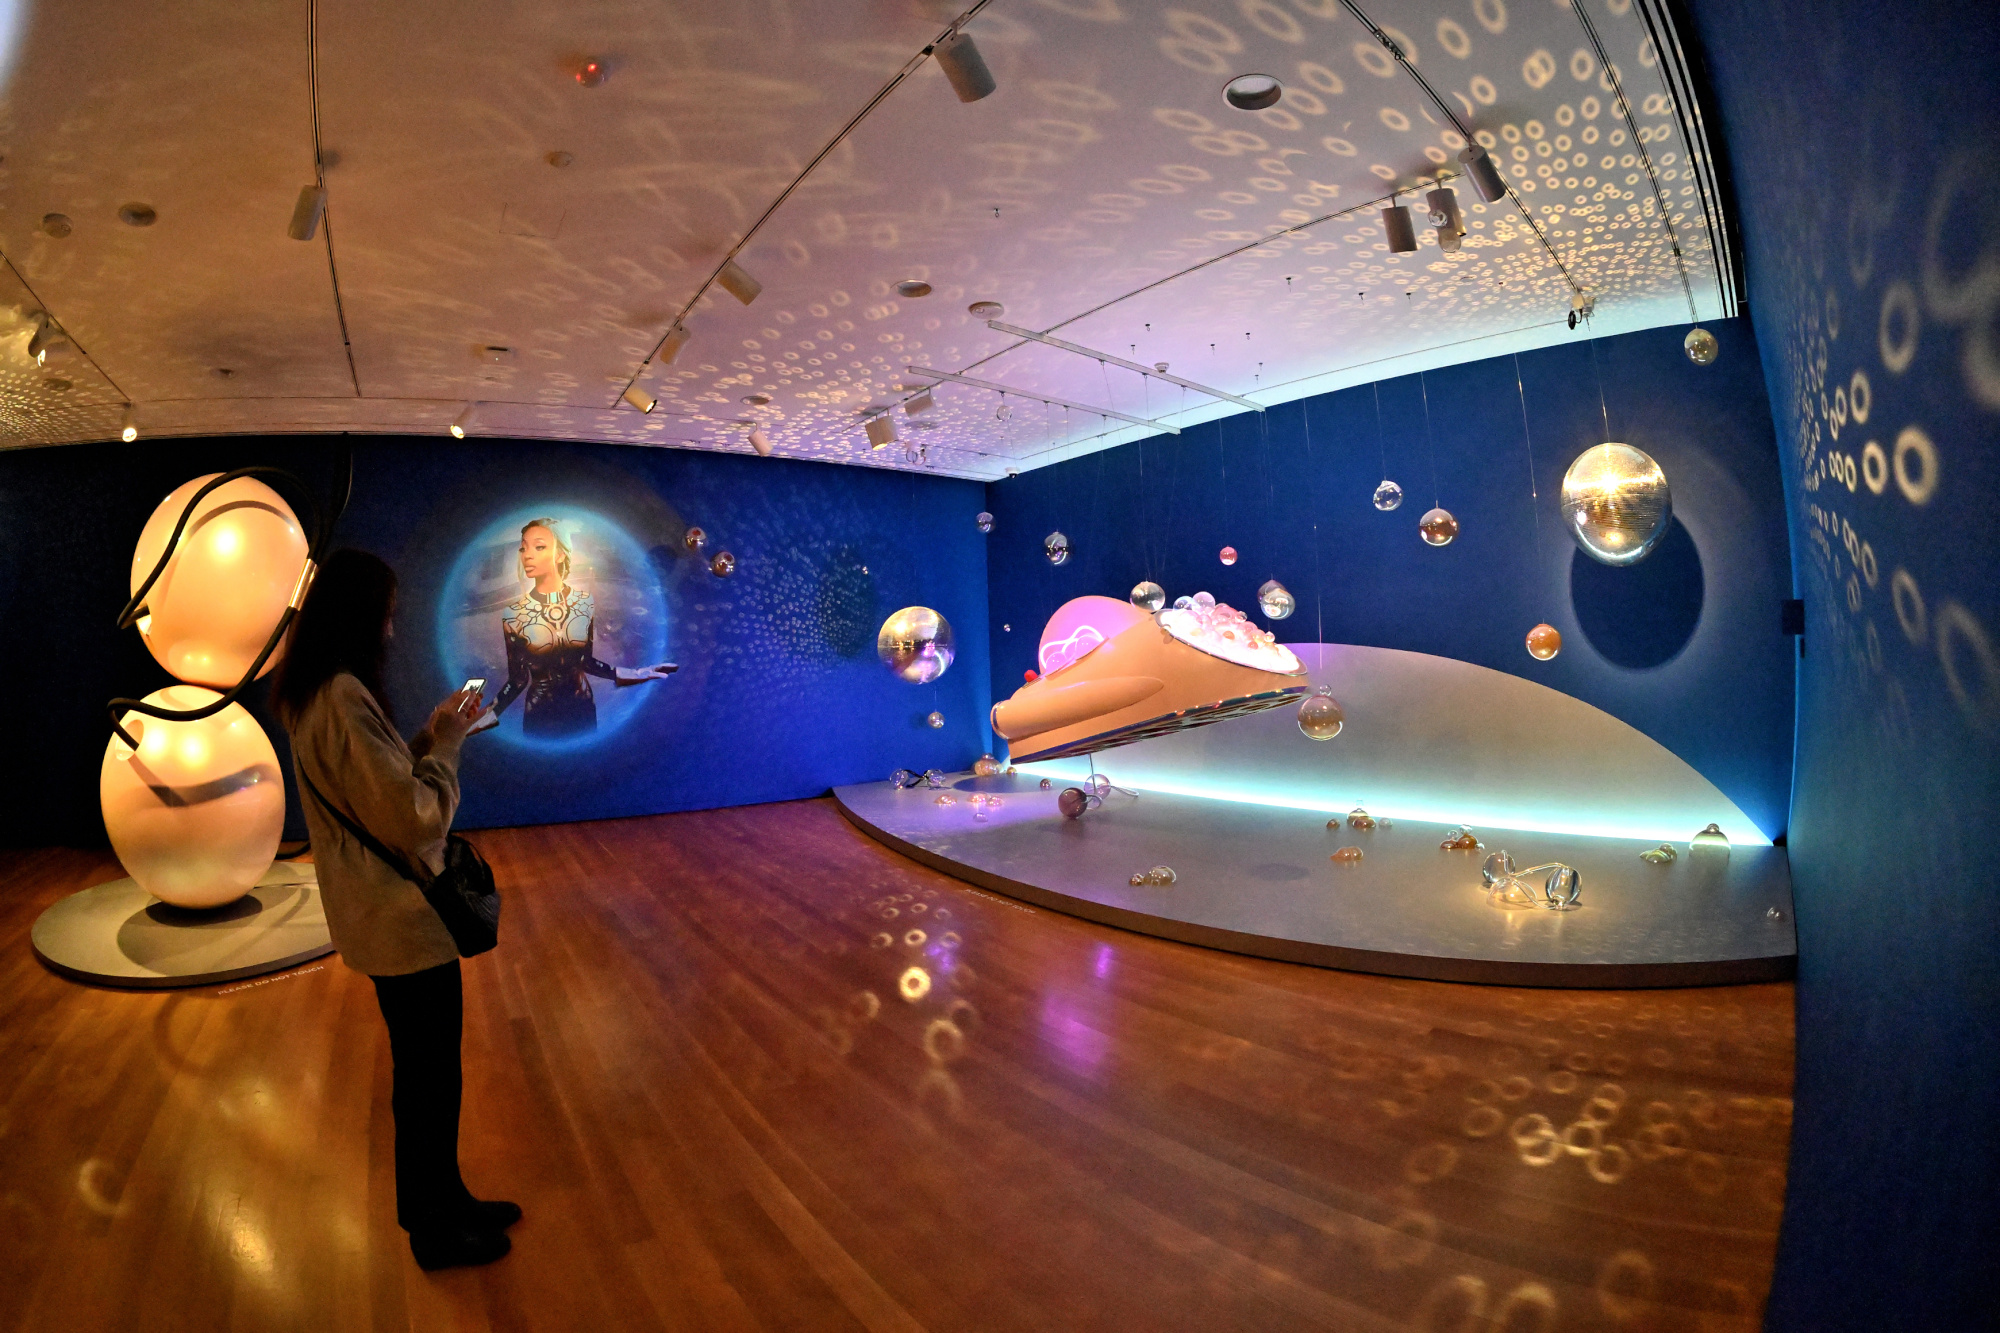
FriendsWithYou: Little Cloud Sky
Location: Brotman Forum (Main Foyer)
1/50s f/5,6 ISO 640/29° f=7,5mm
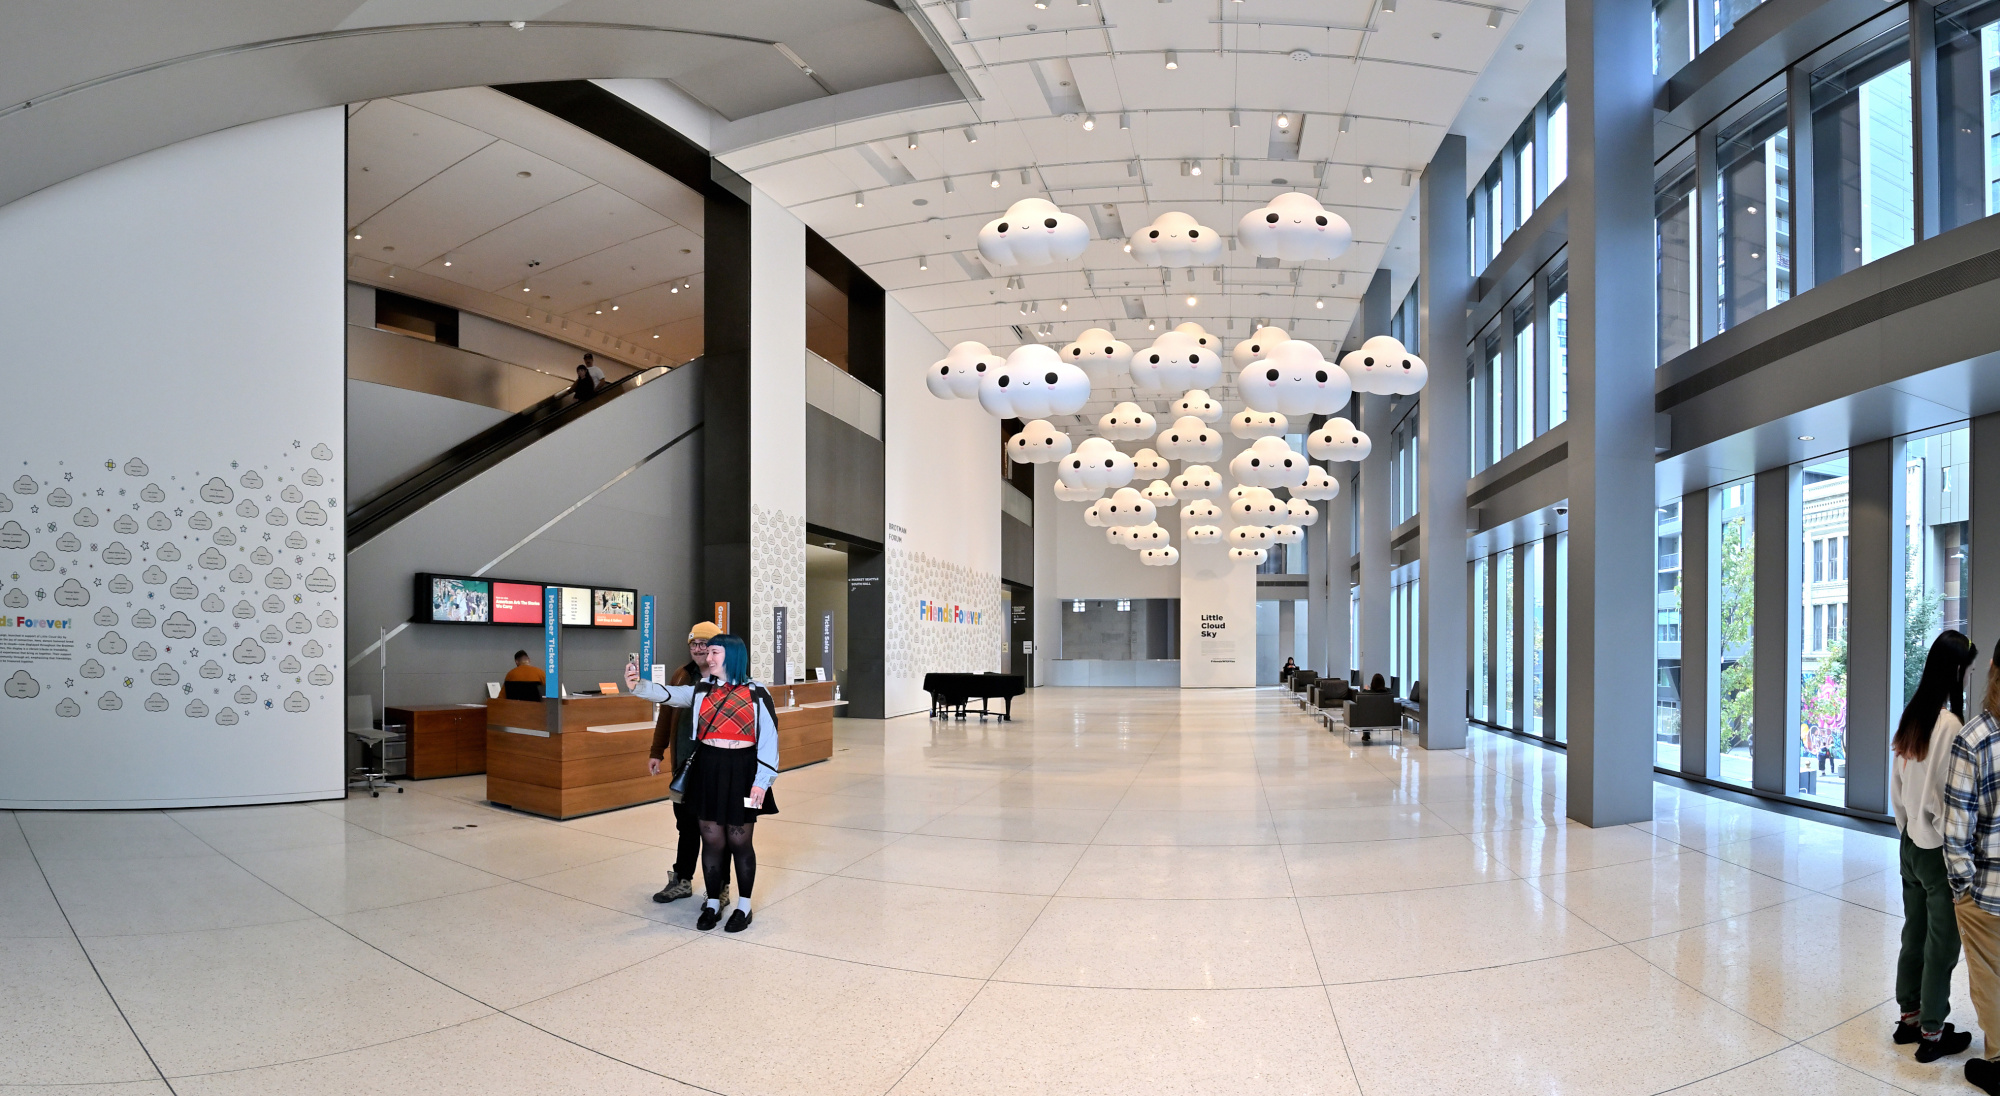
1/30s f/5,6 ISO 250/25° f=7,5mm
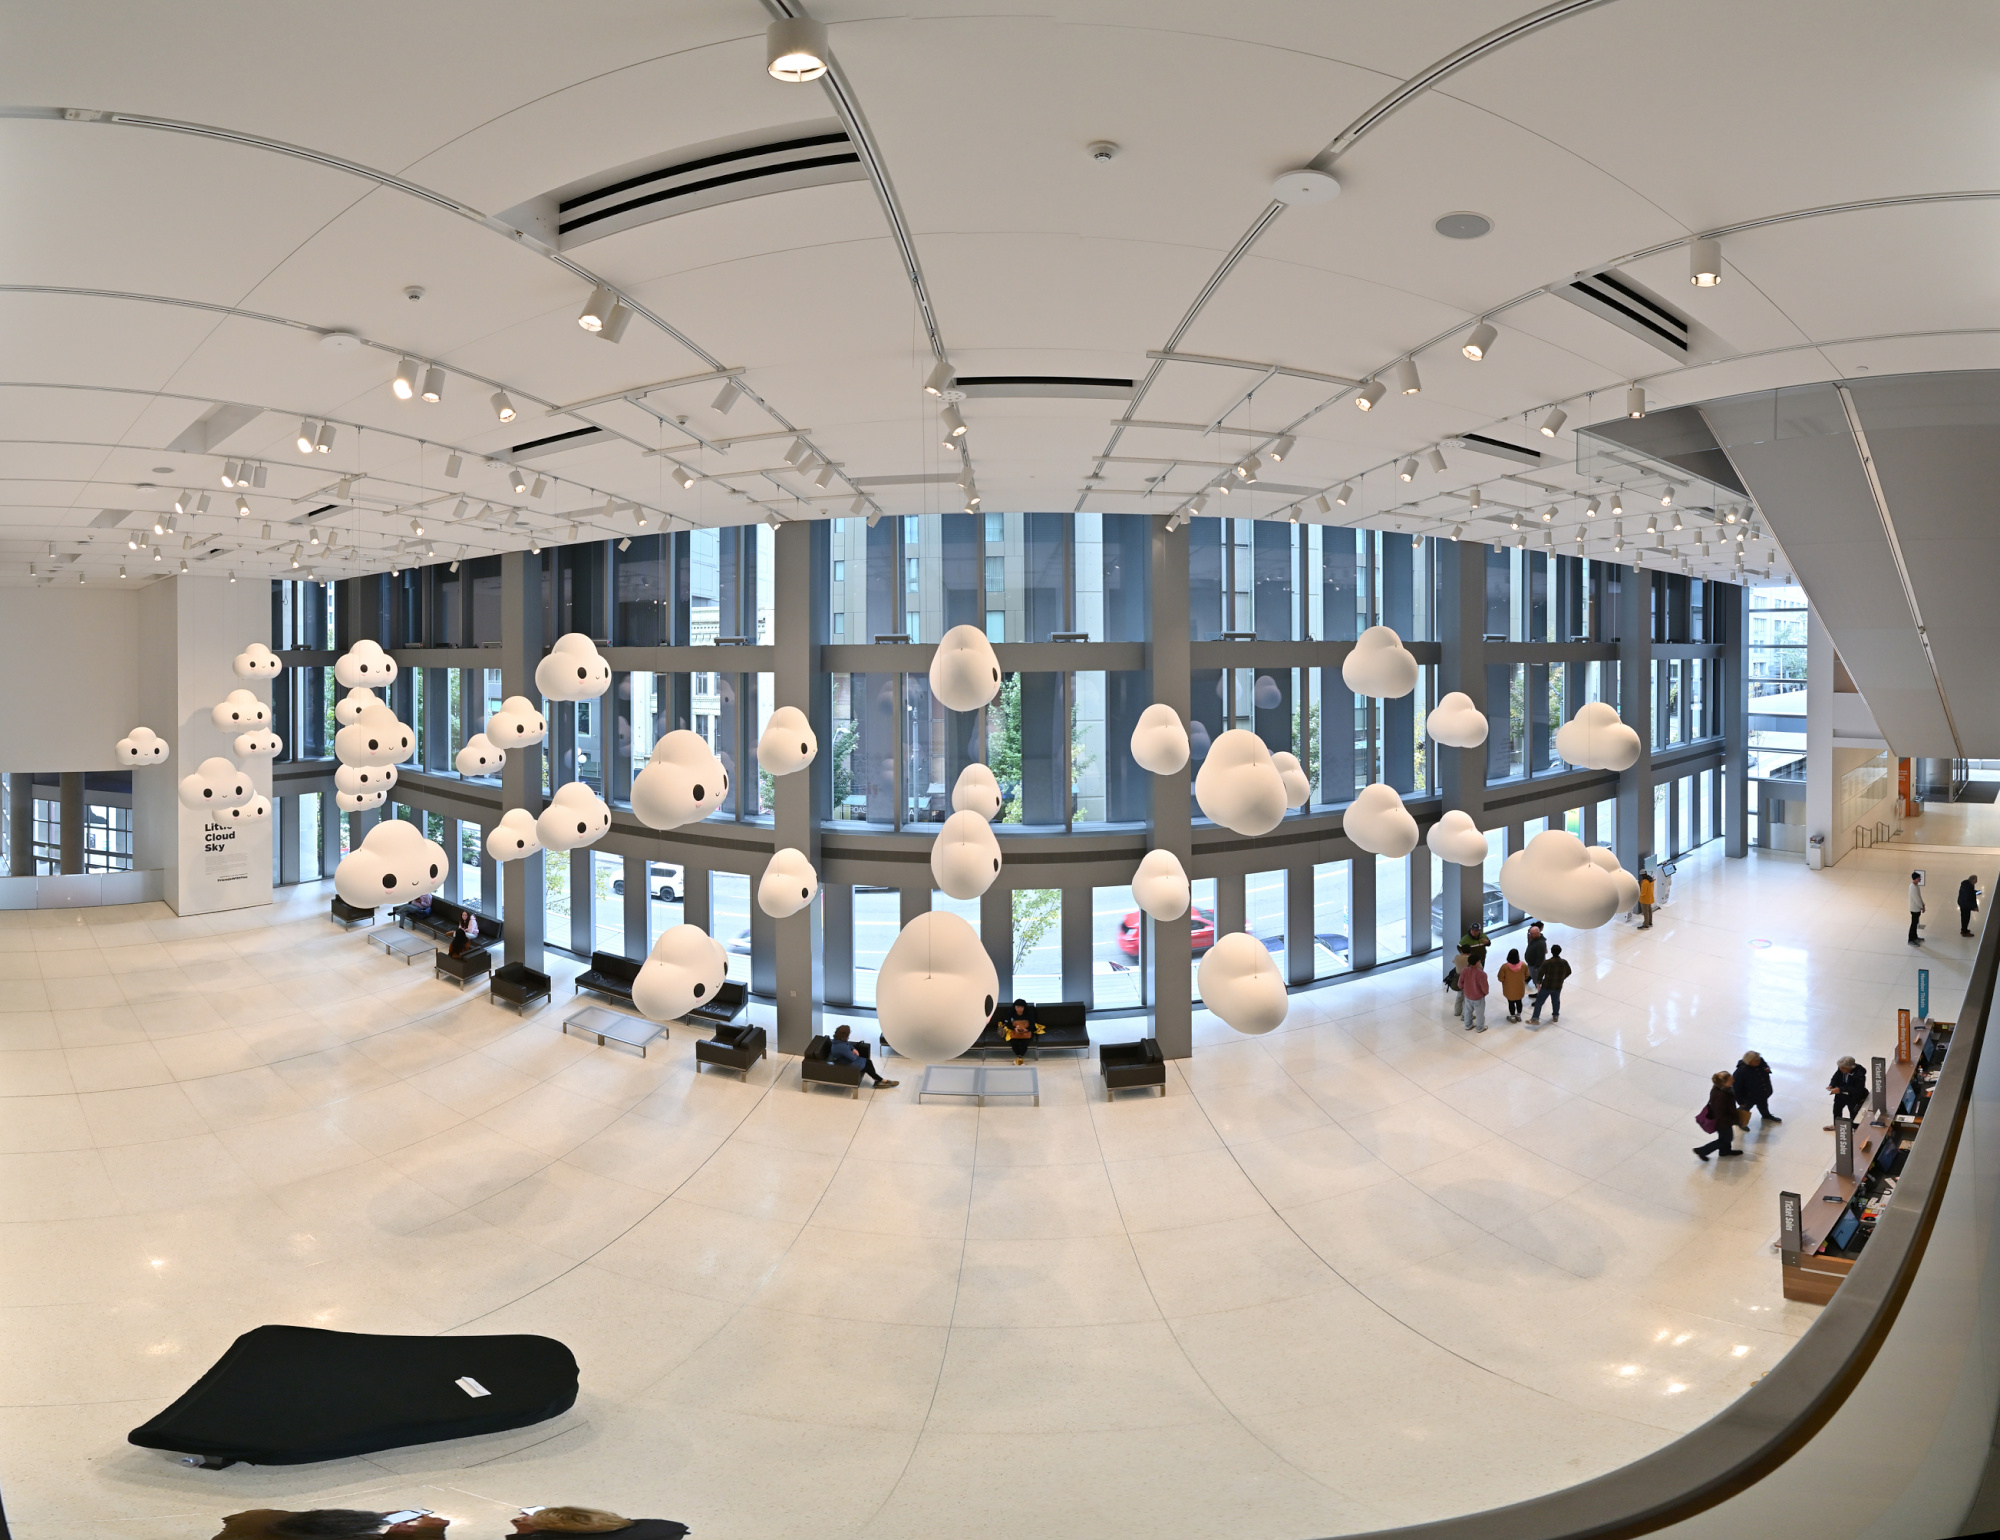
1/40s f/5,6 ISO 1000/31° f=7,5mm
1/30s f/5,6 ISO 2000/34° f=7,5mm
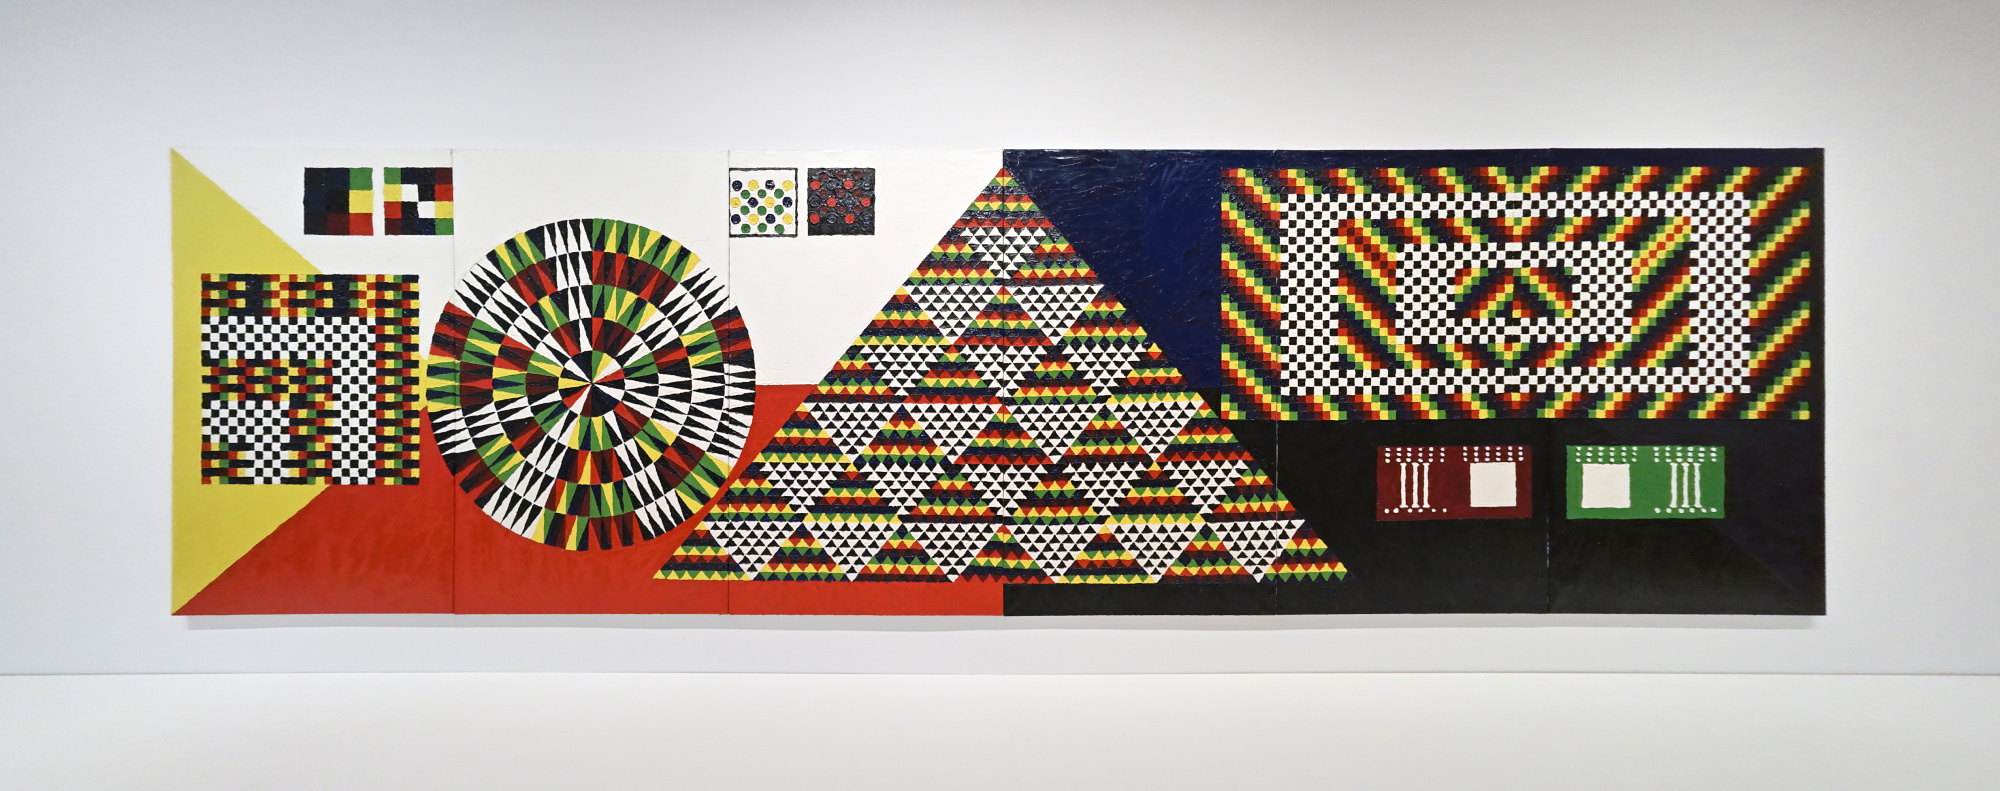
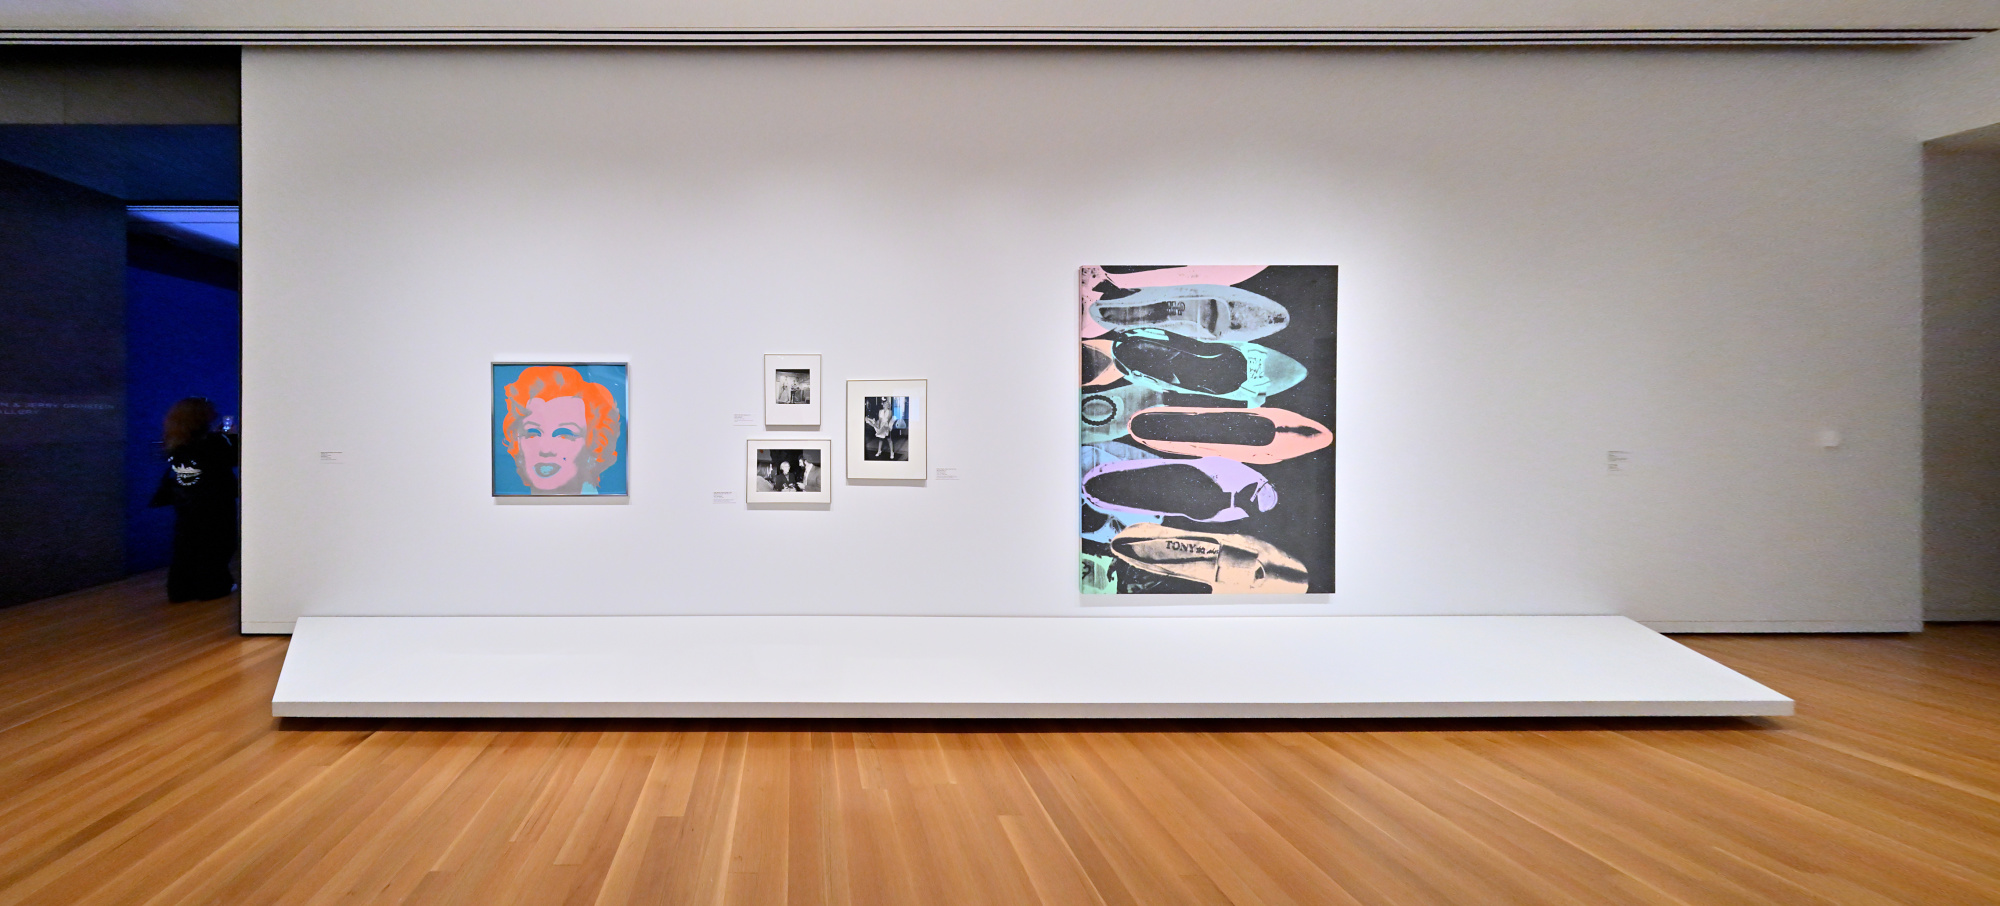
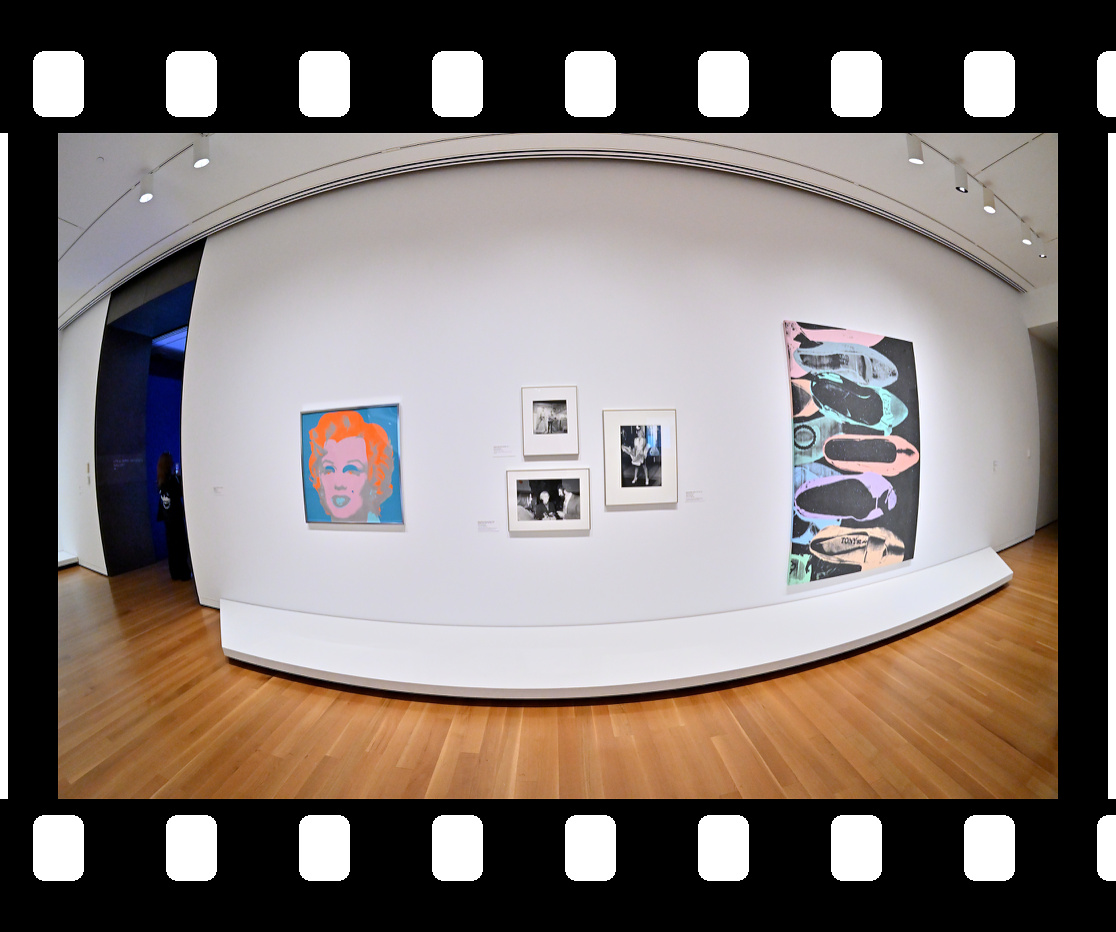
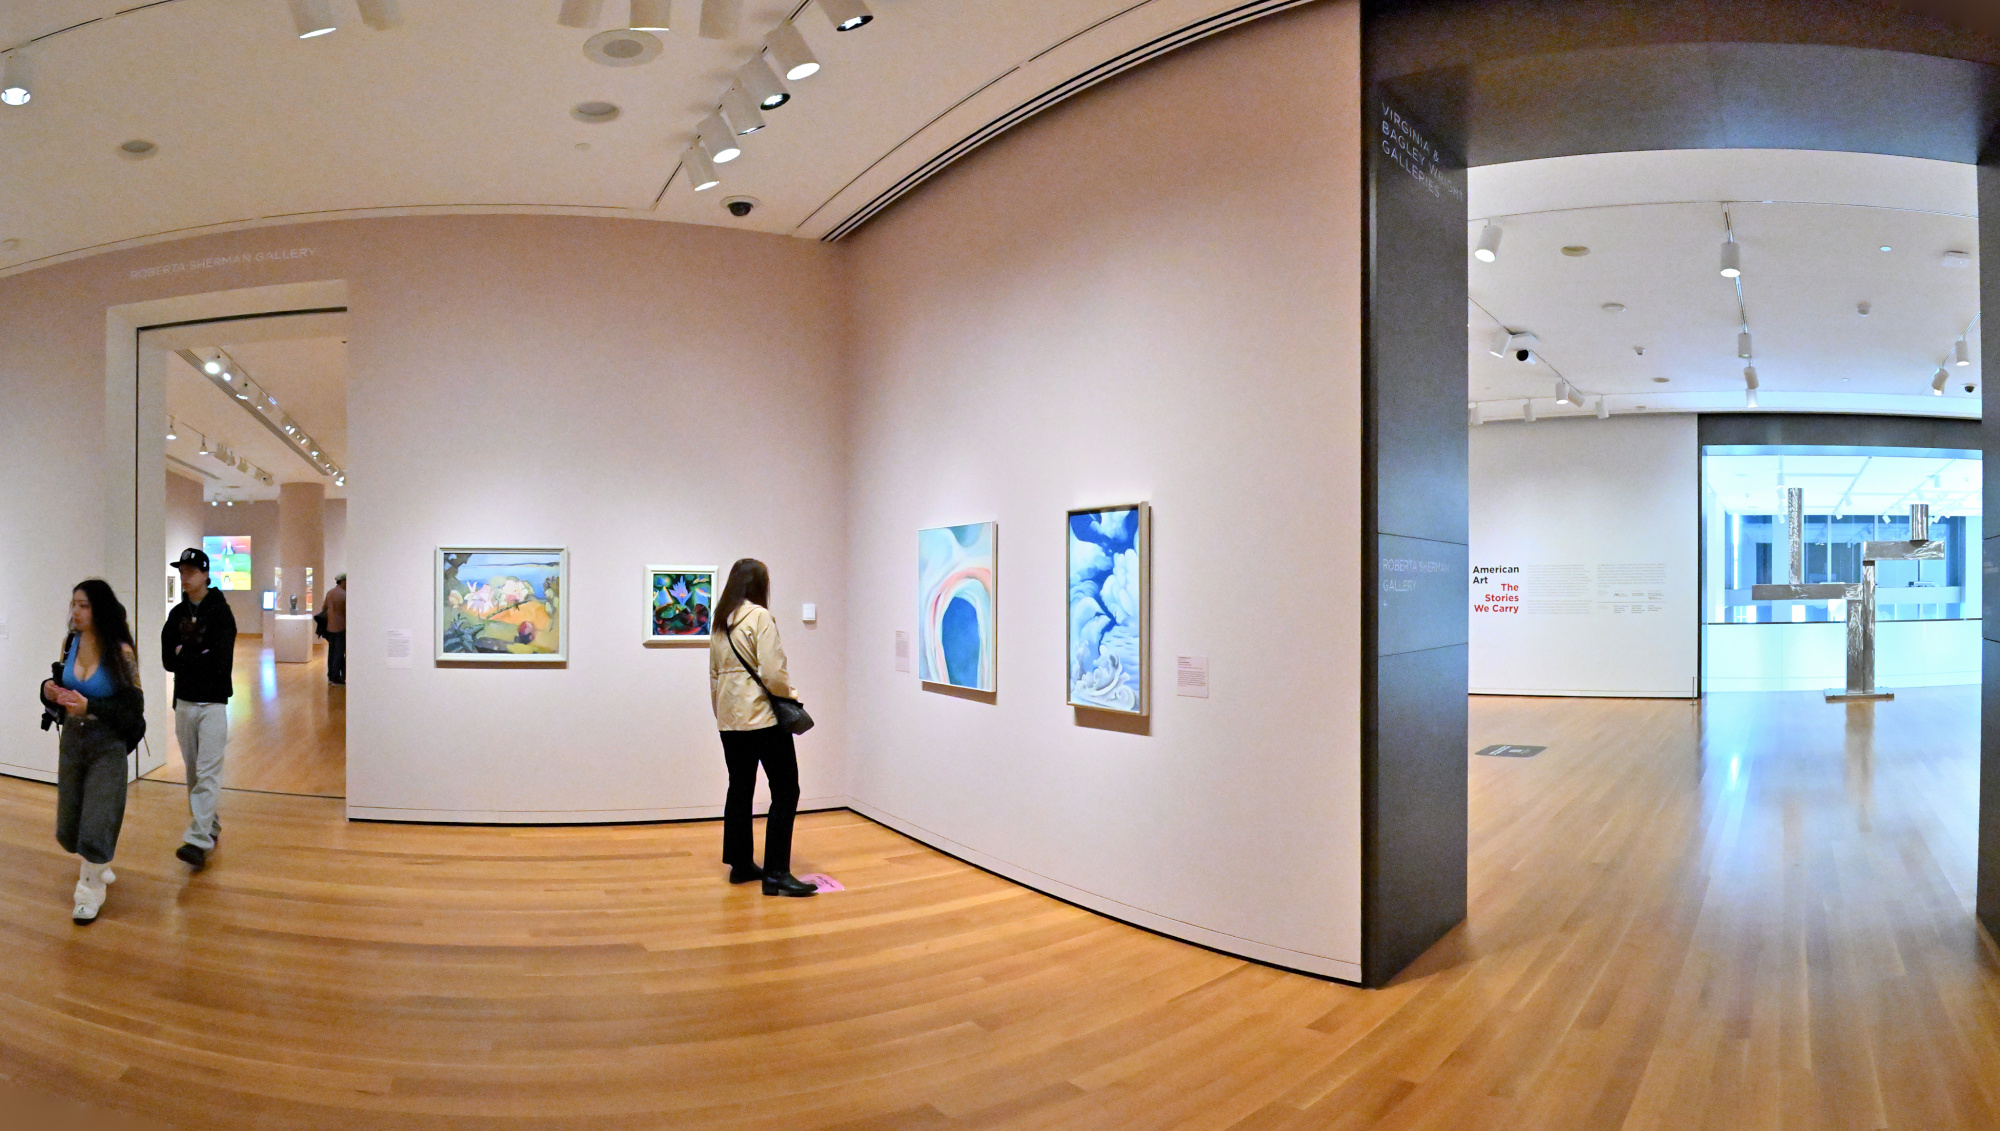
American Art: The Stories We Carry
This exhibition includes several works by Andy Warhol, highlighting his iconic Pop Art style.
1/40s f/5,6 ISO 2000/34° f=7,5mm
1/40s f/5,6 ISO 2500/35° f=7,5mm
1/40s f/5,6 ISO 6400/39° f=7,5mm
1/50s f/5,6 ISO 3200/36° f=7,5mm
1/50s f/5,6 ISO 3200/36° f=7,5mm
Interactive Panorama American Art: The Stories We Carry
1/40s f/5,6 ISO 2500/35° f=7,5mm
1/50s f/5,6 ISO 1000/31° f=7,5mm
1/50s f/5,6 ISO 1000/31° f=7,5mm
1/50s f/5,6 ISO 1600/33° f=7,5mm

1/50s f/5,6 ISO 1600/33° f=7,5m
1/80s f/5,6 ISO 5000/38° f=7,5mm
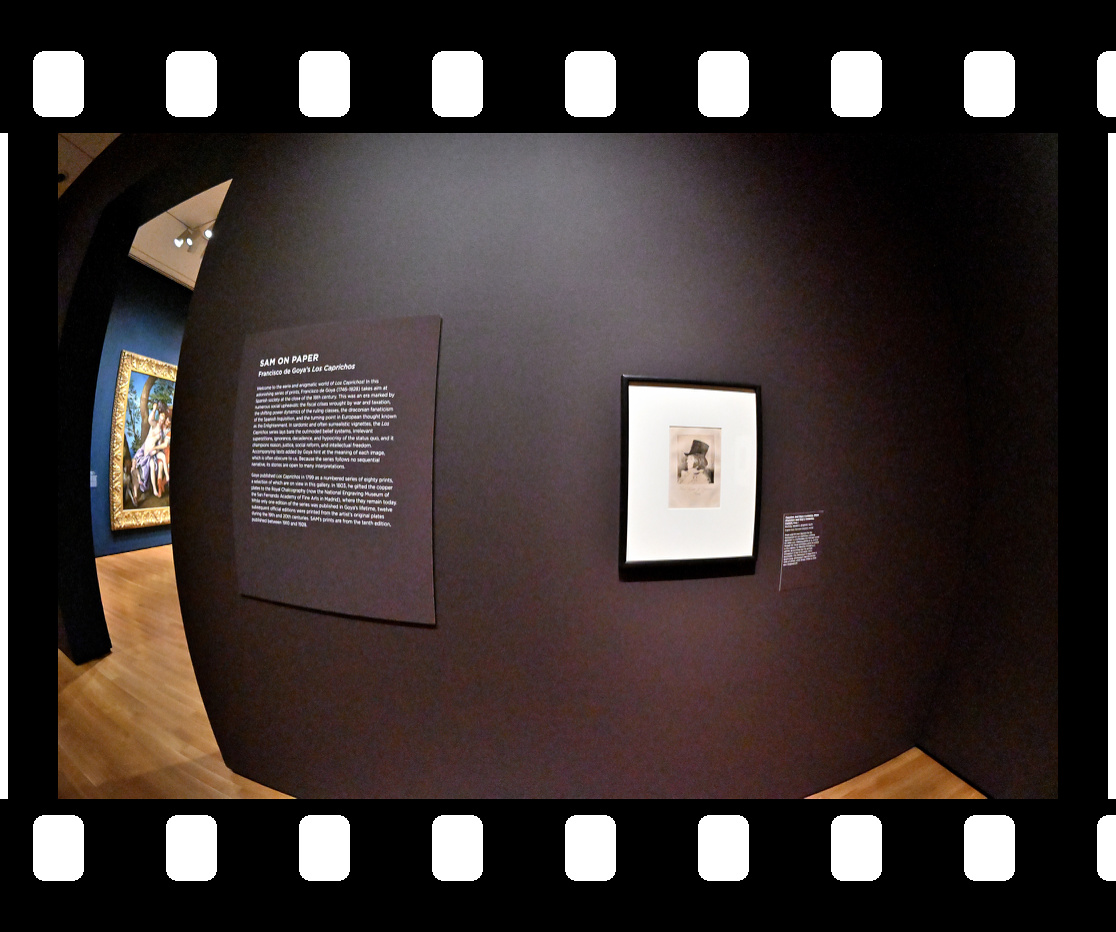
Only Connect: The Art of Devotion
1/50s f/5,6 ISO 16000/43° f=7,5mm
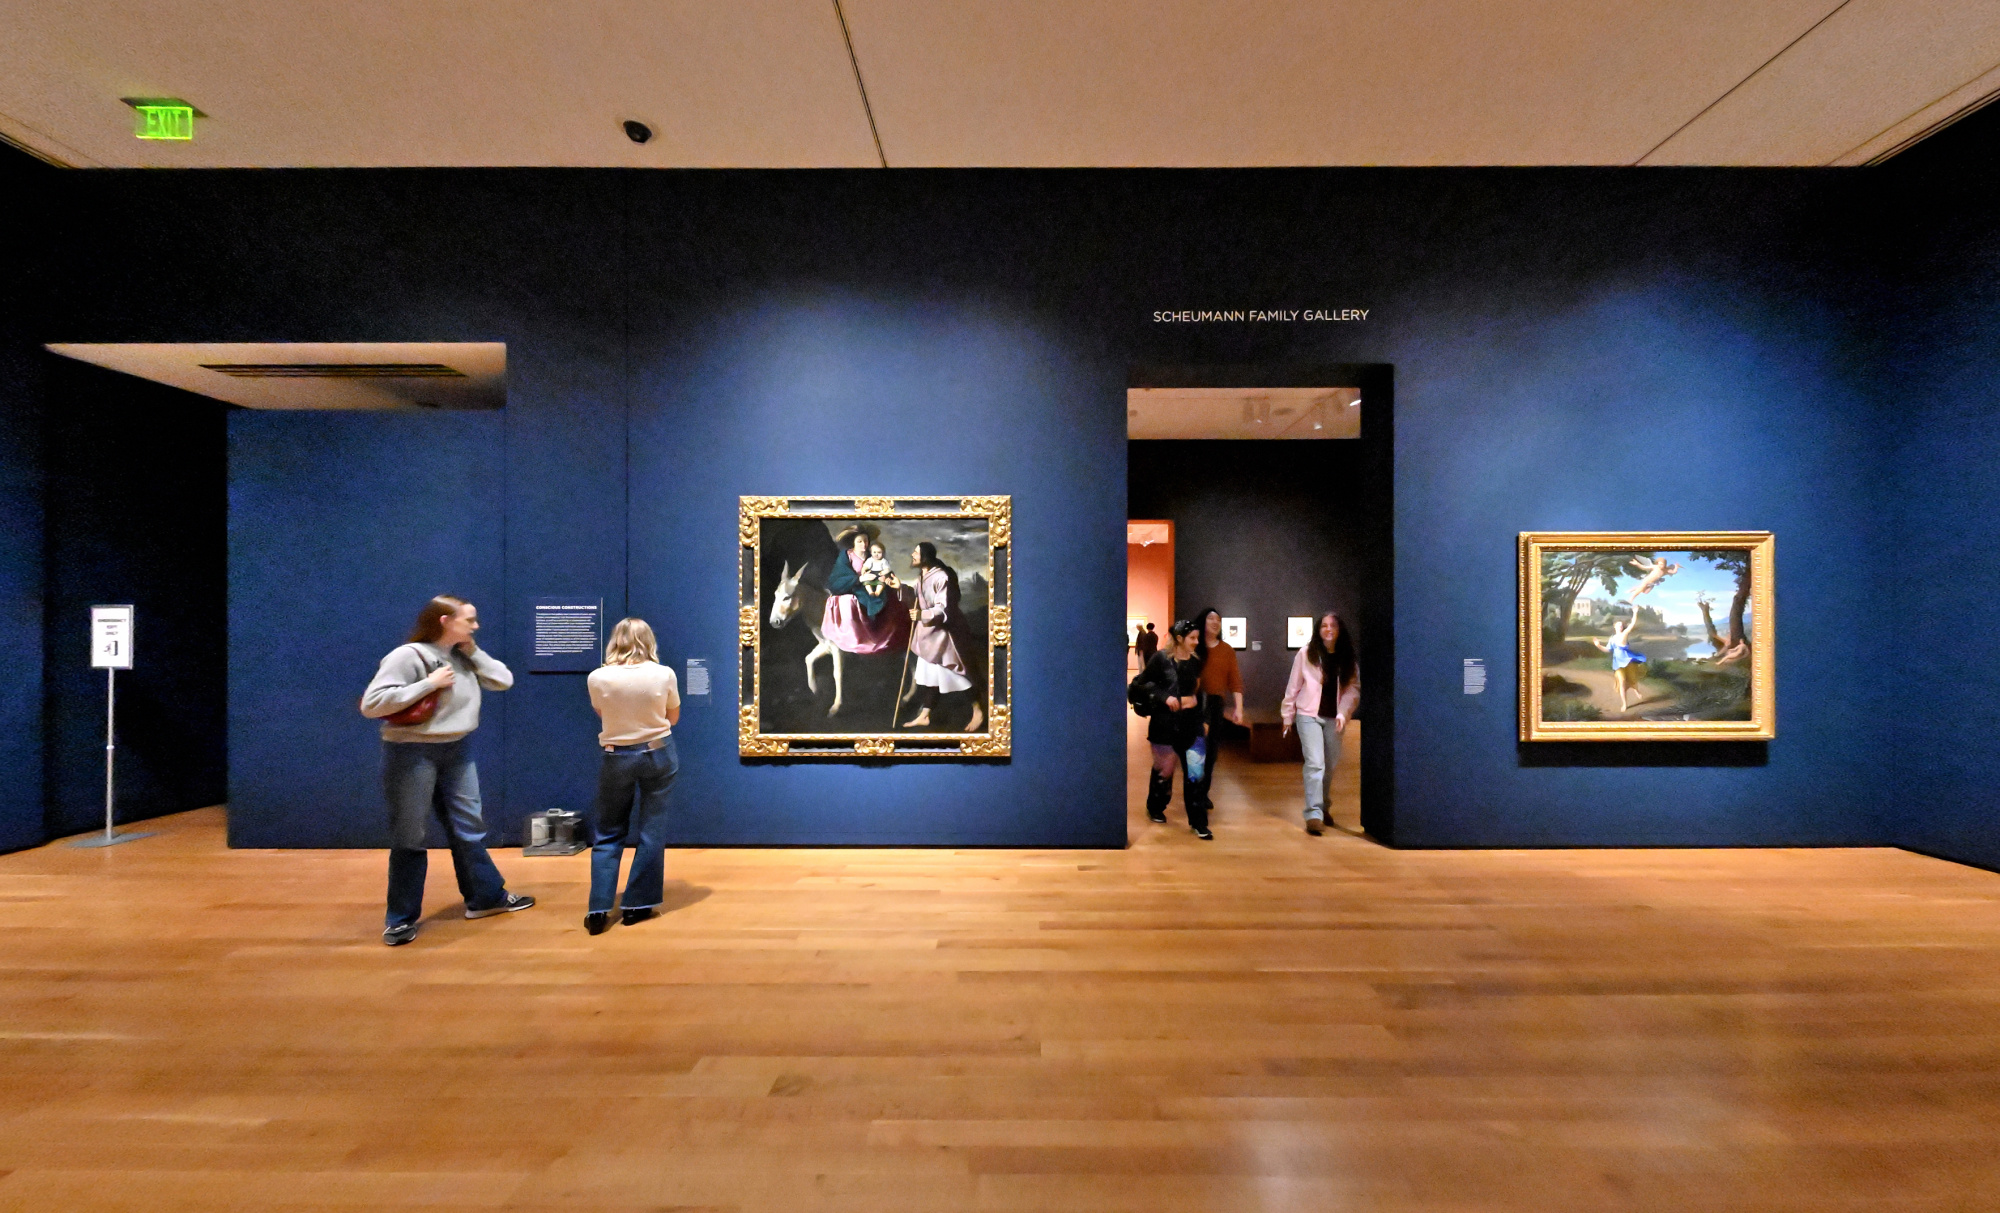
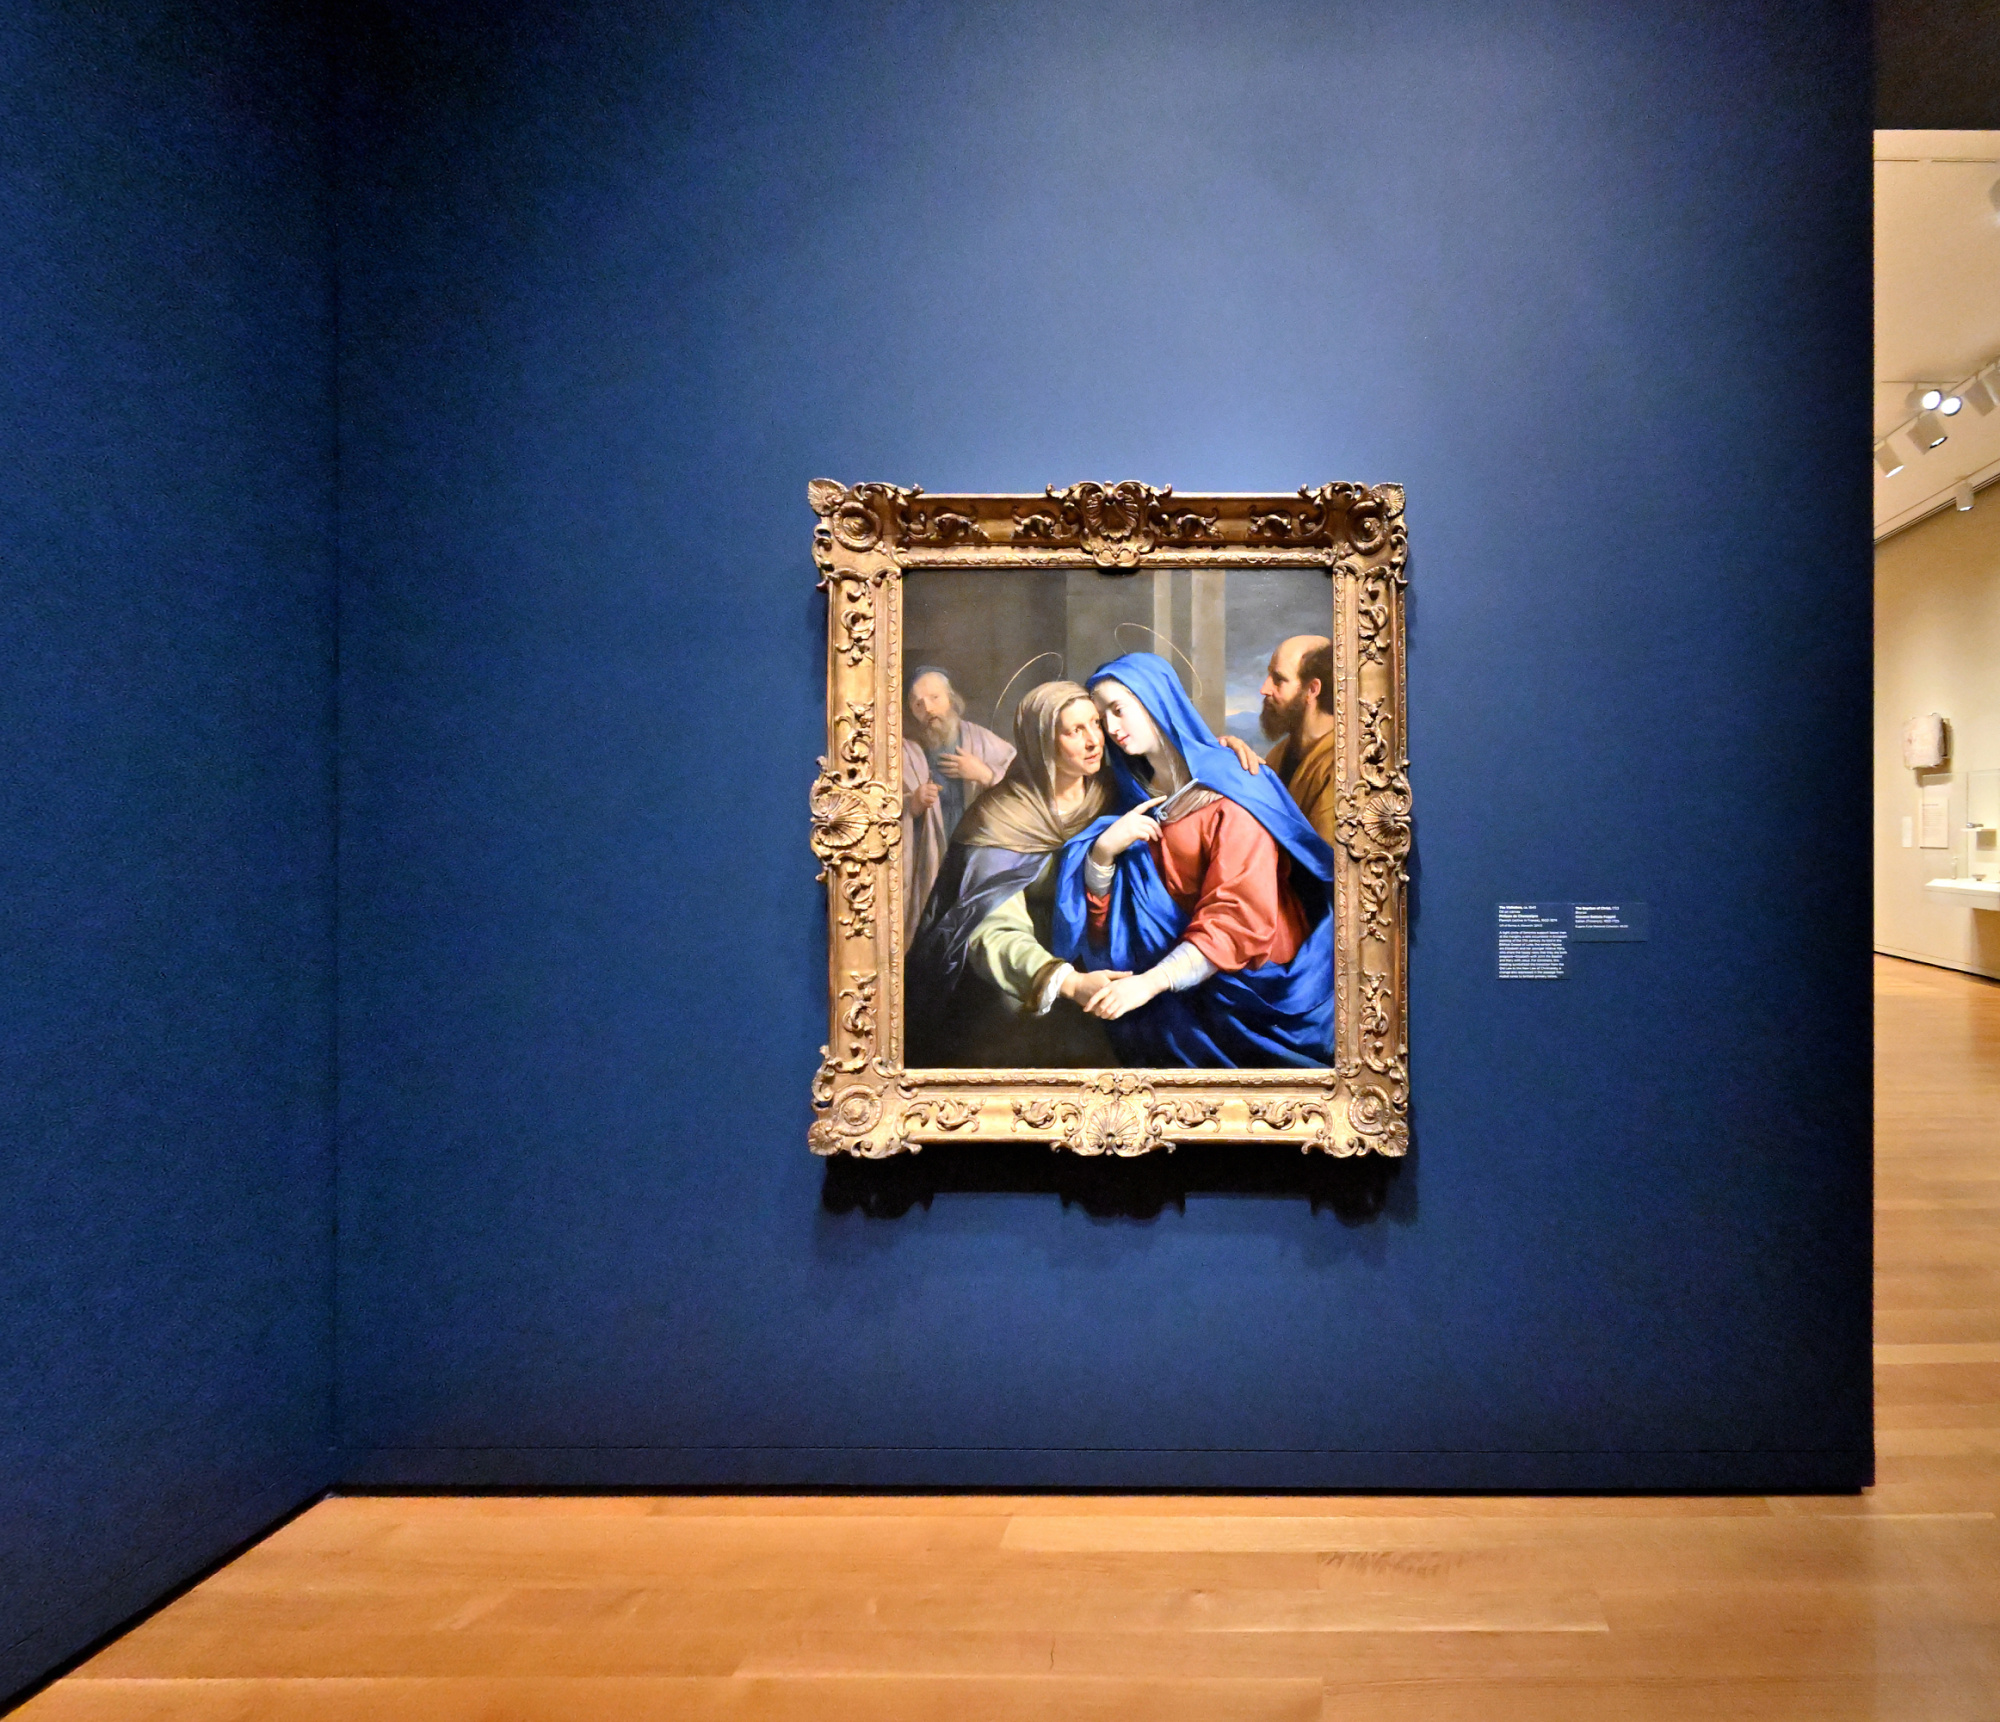
SAM Stories, The Visitation, 1643, Philippe de Champaigne
1/50s f/5,6 ISO 8000/40° f=7,5mm
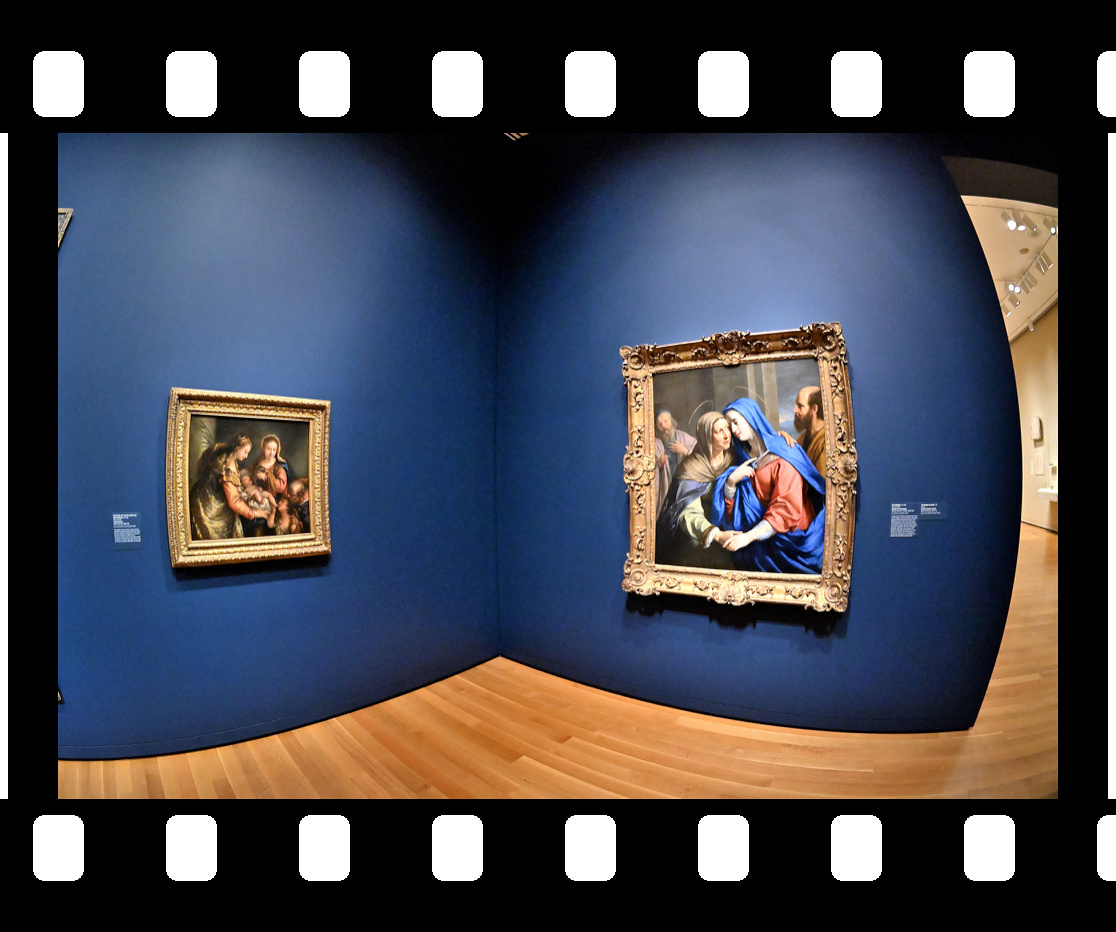
Interactive Panorama Only Connect: The Art of Devotion
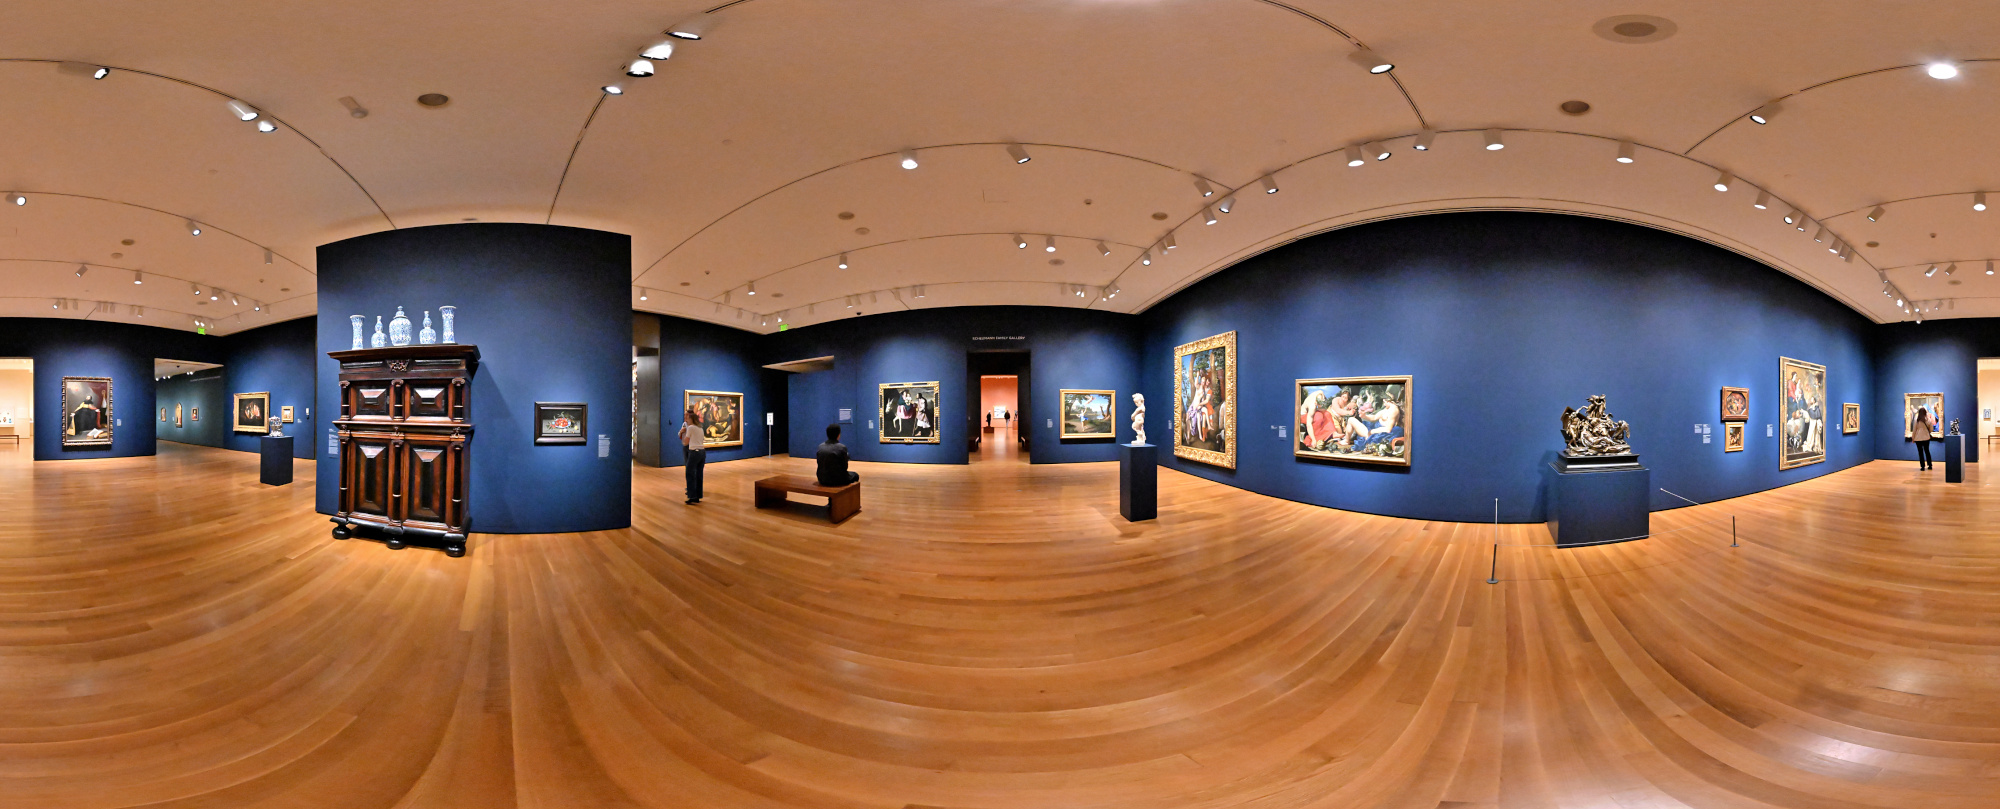
1/50s f/5,6 ISO 16000/43° f=7,5mm

A Goya worth reversing entropy for, but today I let time flow forward through my lens. Tenet.
SAM Stories1/50s f/5,6 ISO 6400/39° f=7,5mm
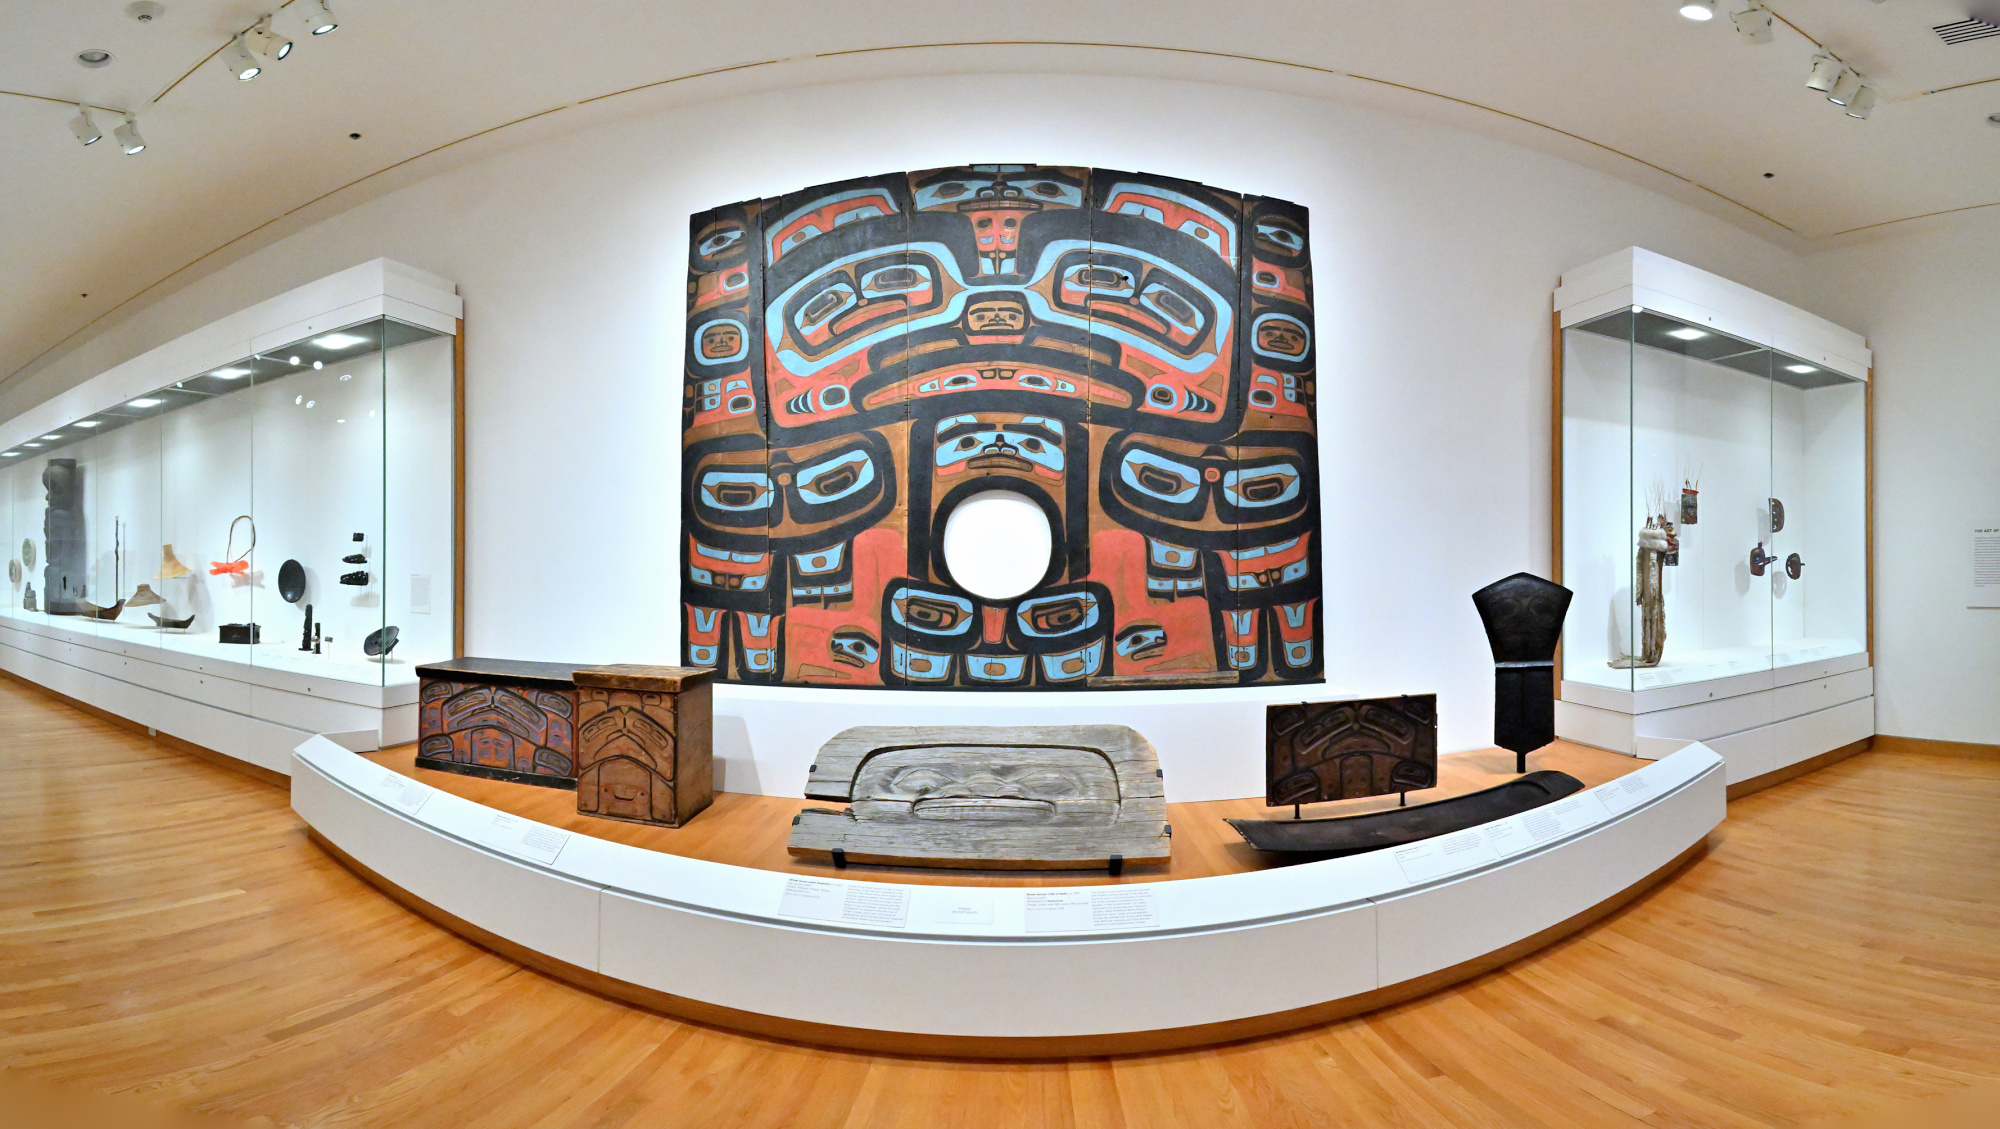
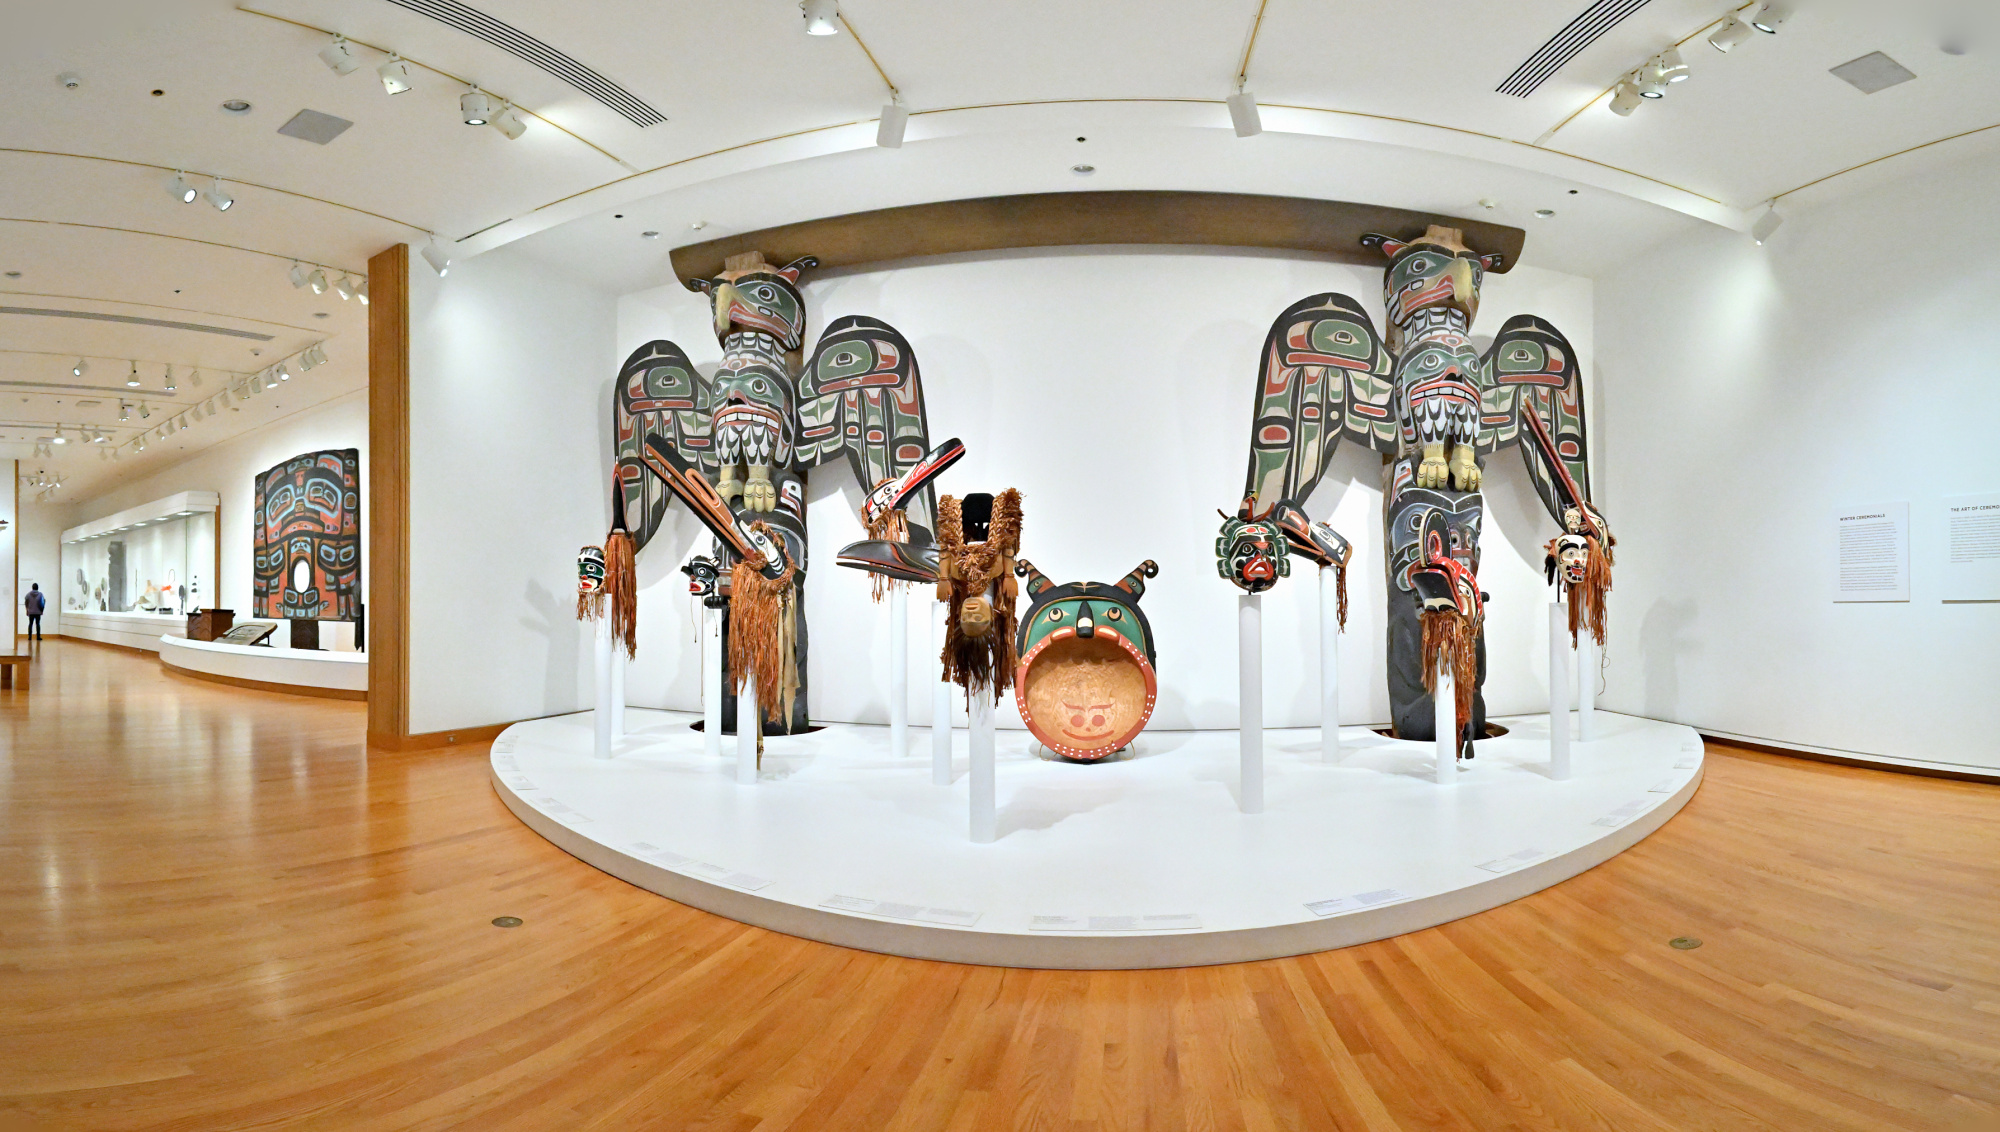
Art and Life Along the Northwest Coast
1/50s f/5,6 ISO 4000/37° f=7,5mm
1/50s f/5,6 ISO 4000/37° f=7,5mm
1/50s f/5,6 ISO 5000/38° f=7,5mm
1/50s f/5,6 ISO 5000/38° f=7,5mm
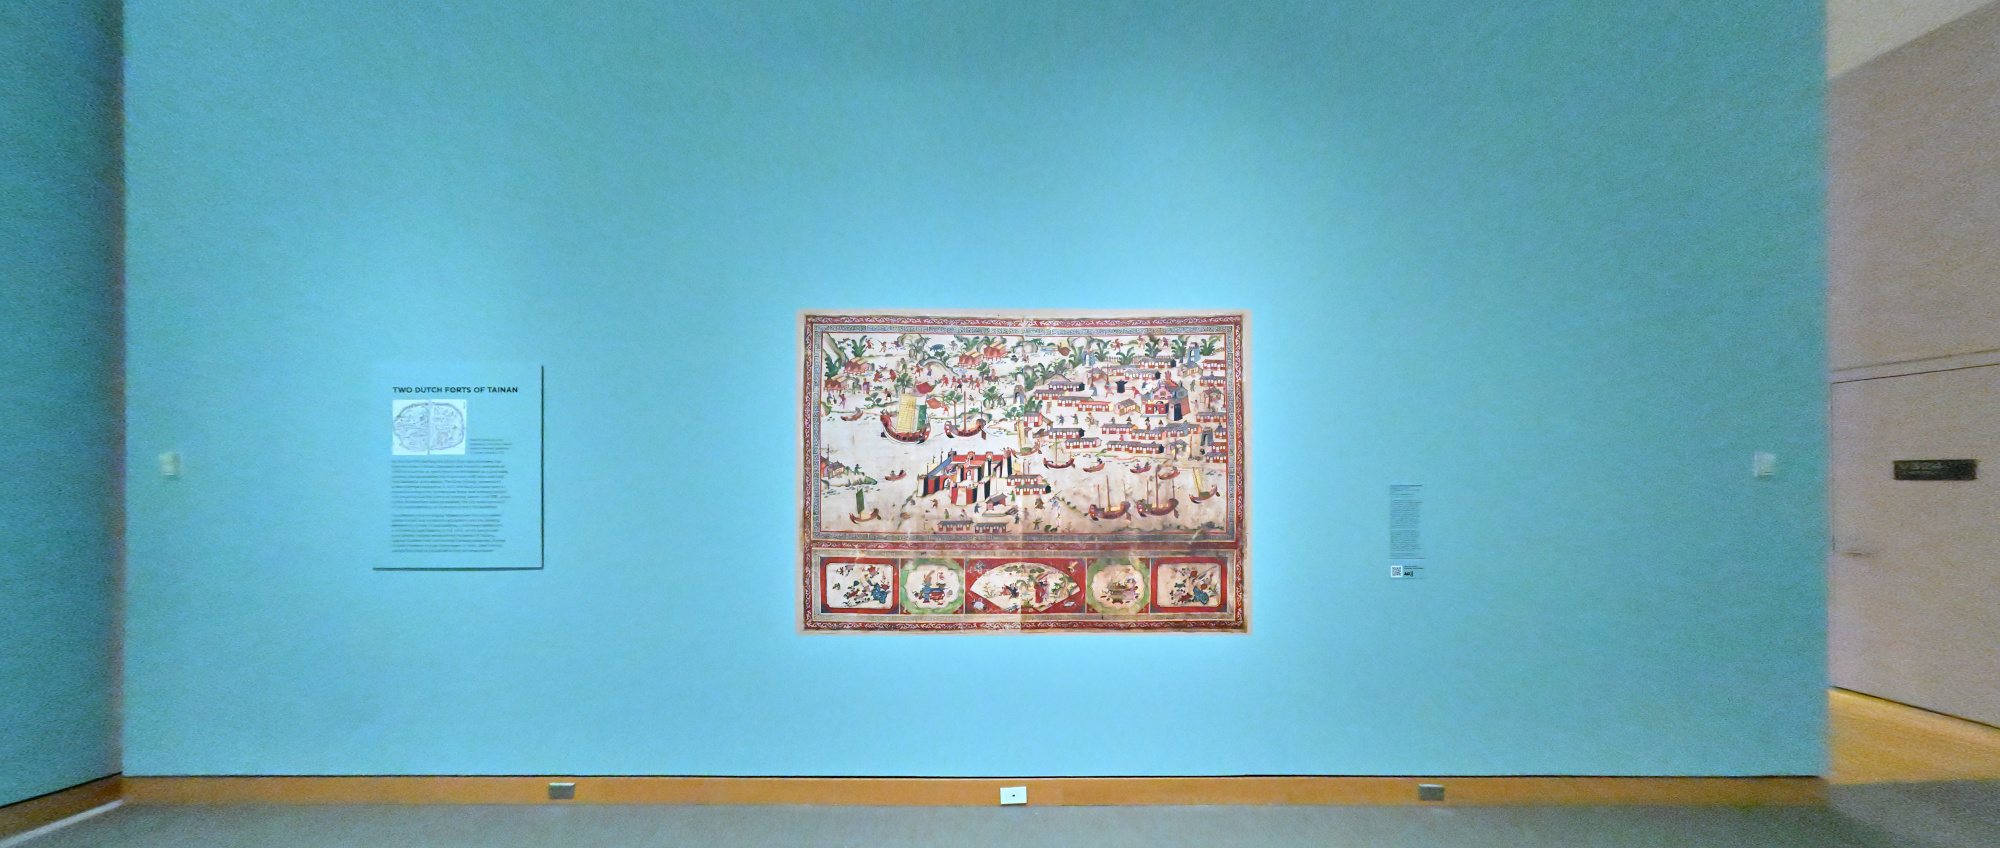
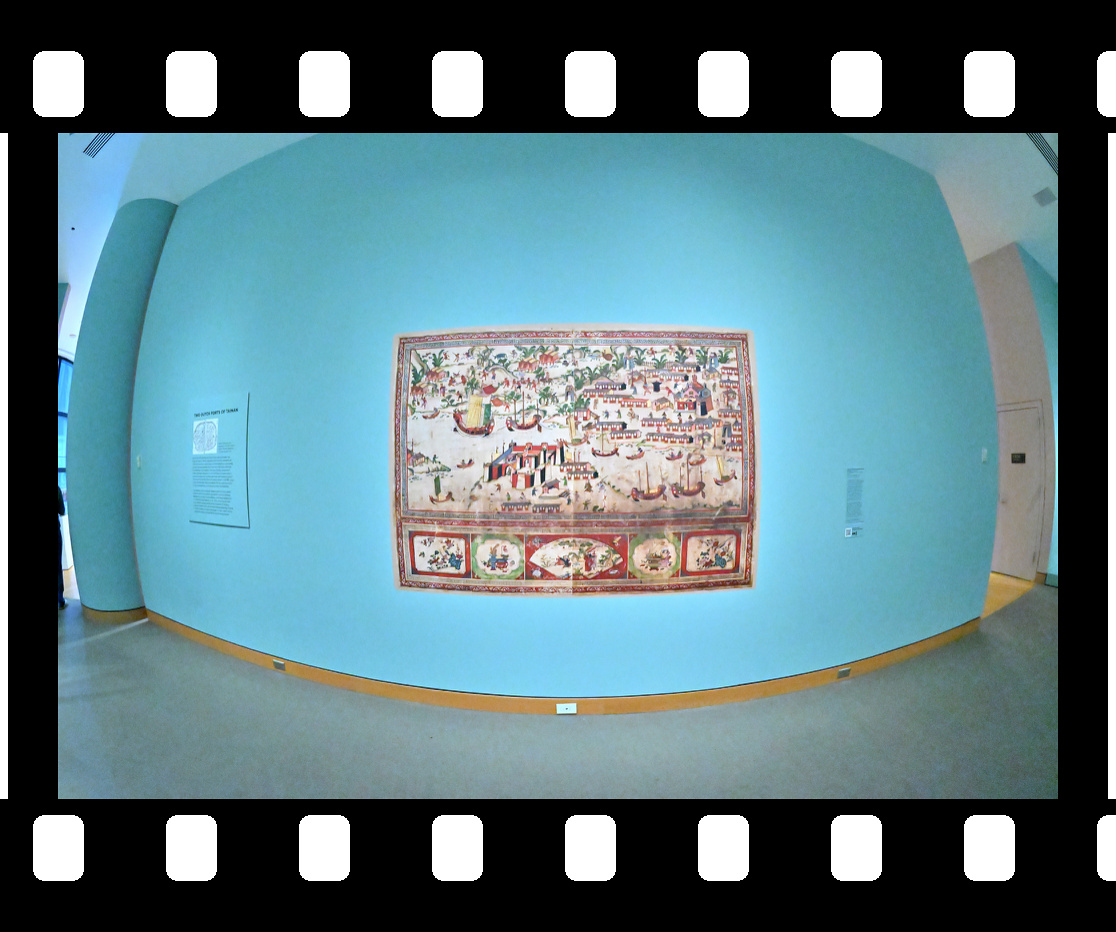
Chronicles of a Global East
1/80s f/5,6 ISO 16000/43° f=7,5mm
Roman Art: The Diversity of an Empire
1/50s f/5,6 ISO 4000/37° f=7,5mm
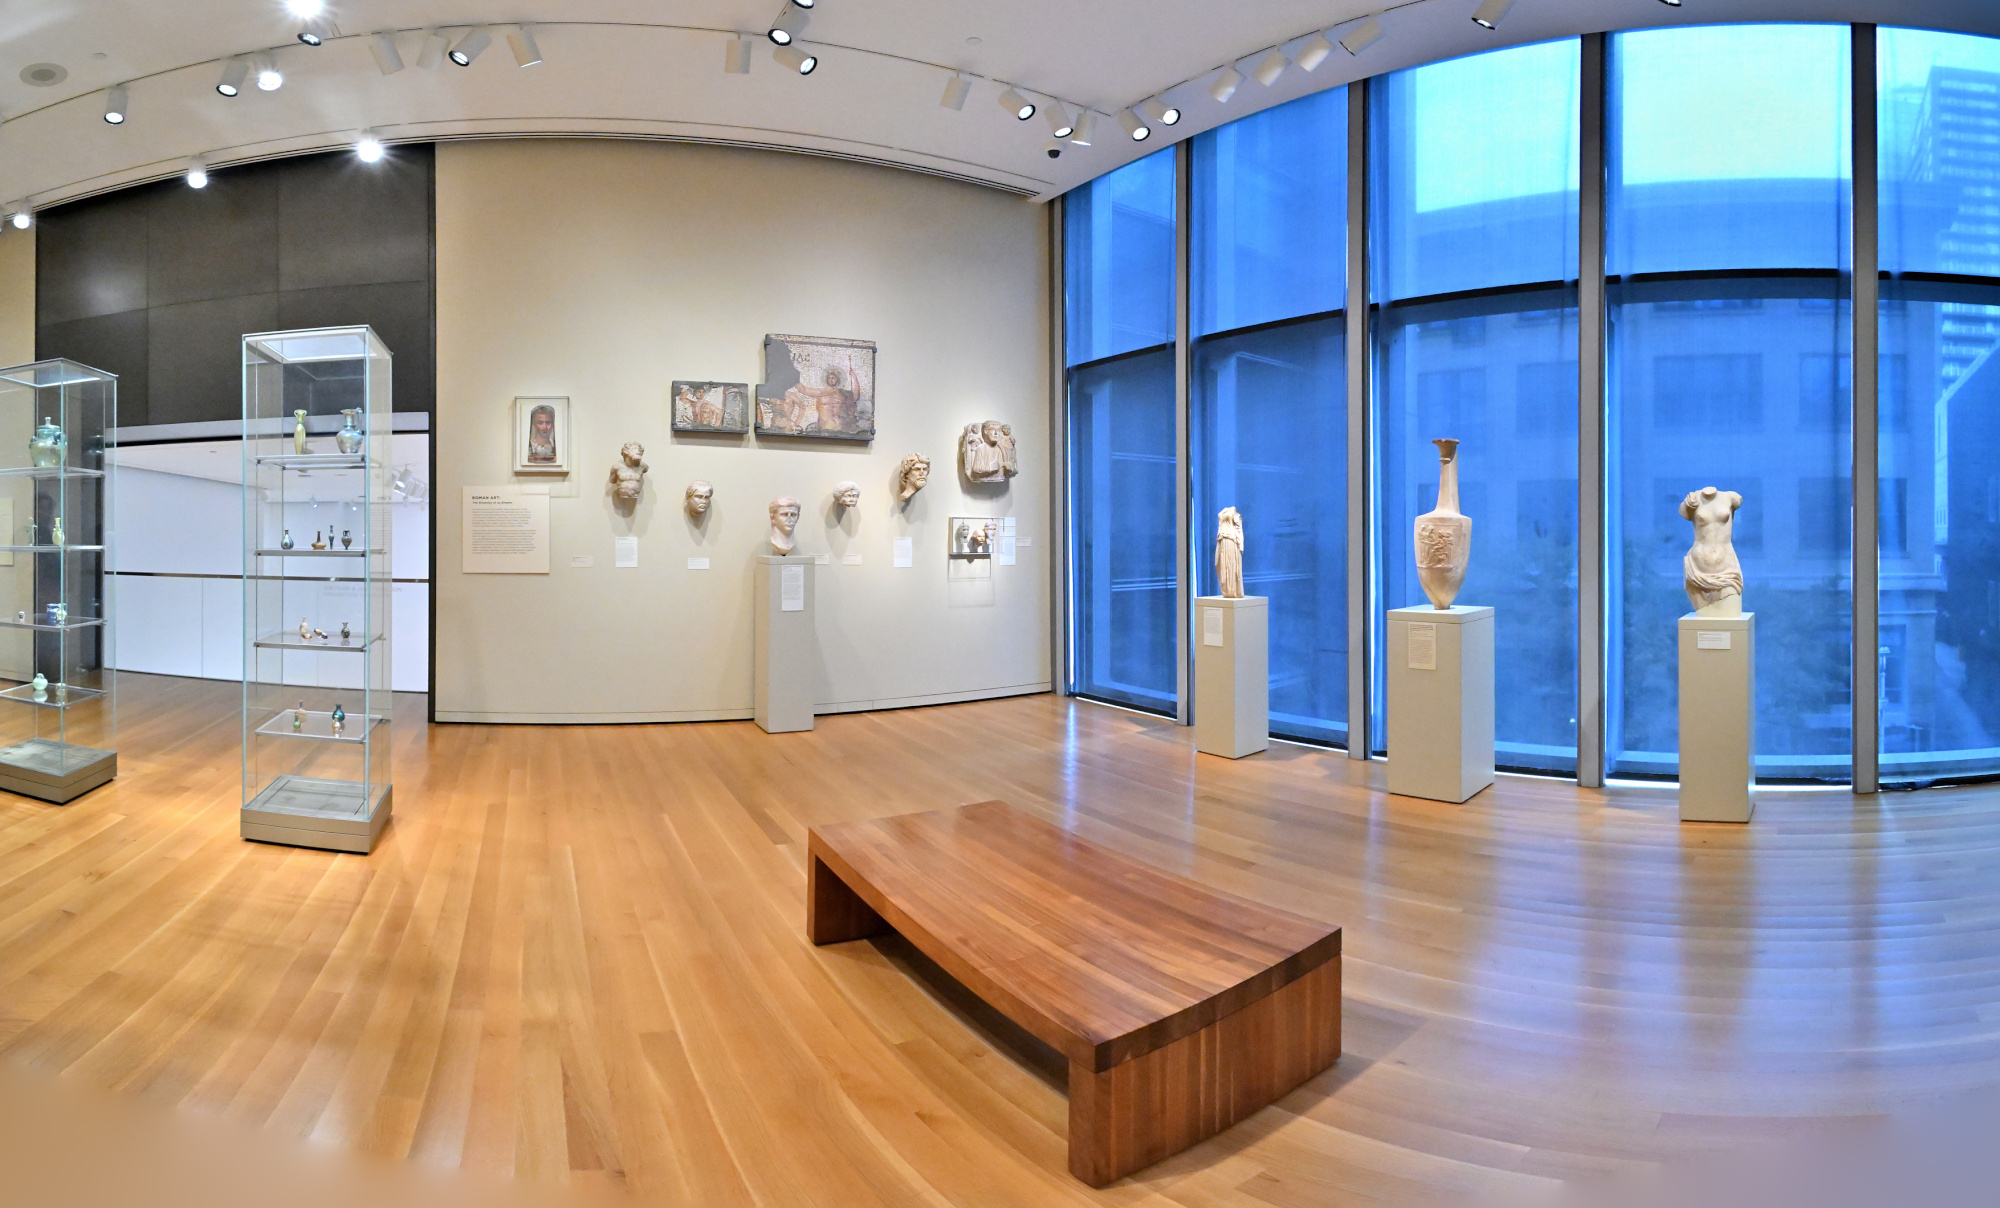
1/50s f/5,6 ISO 4000/37° f=7,5mm
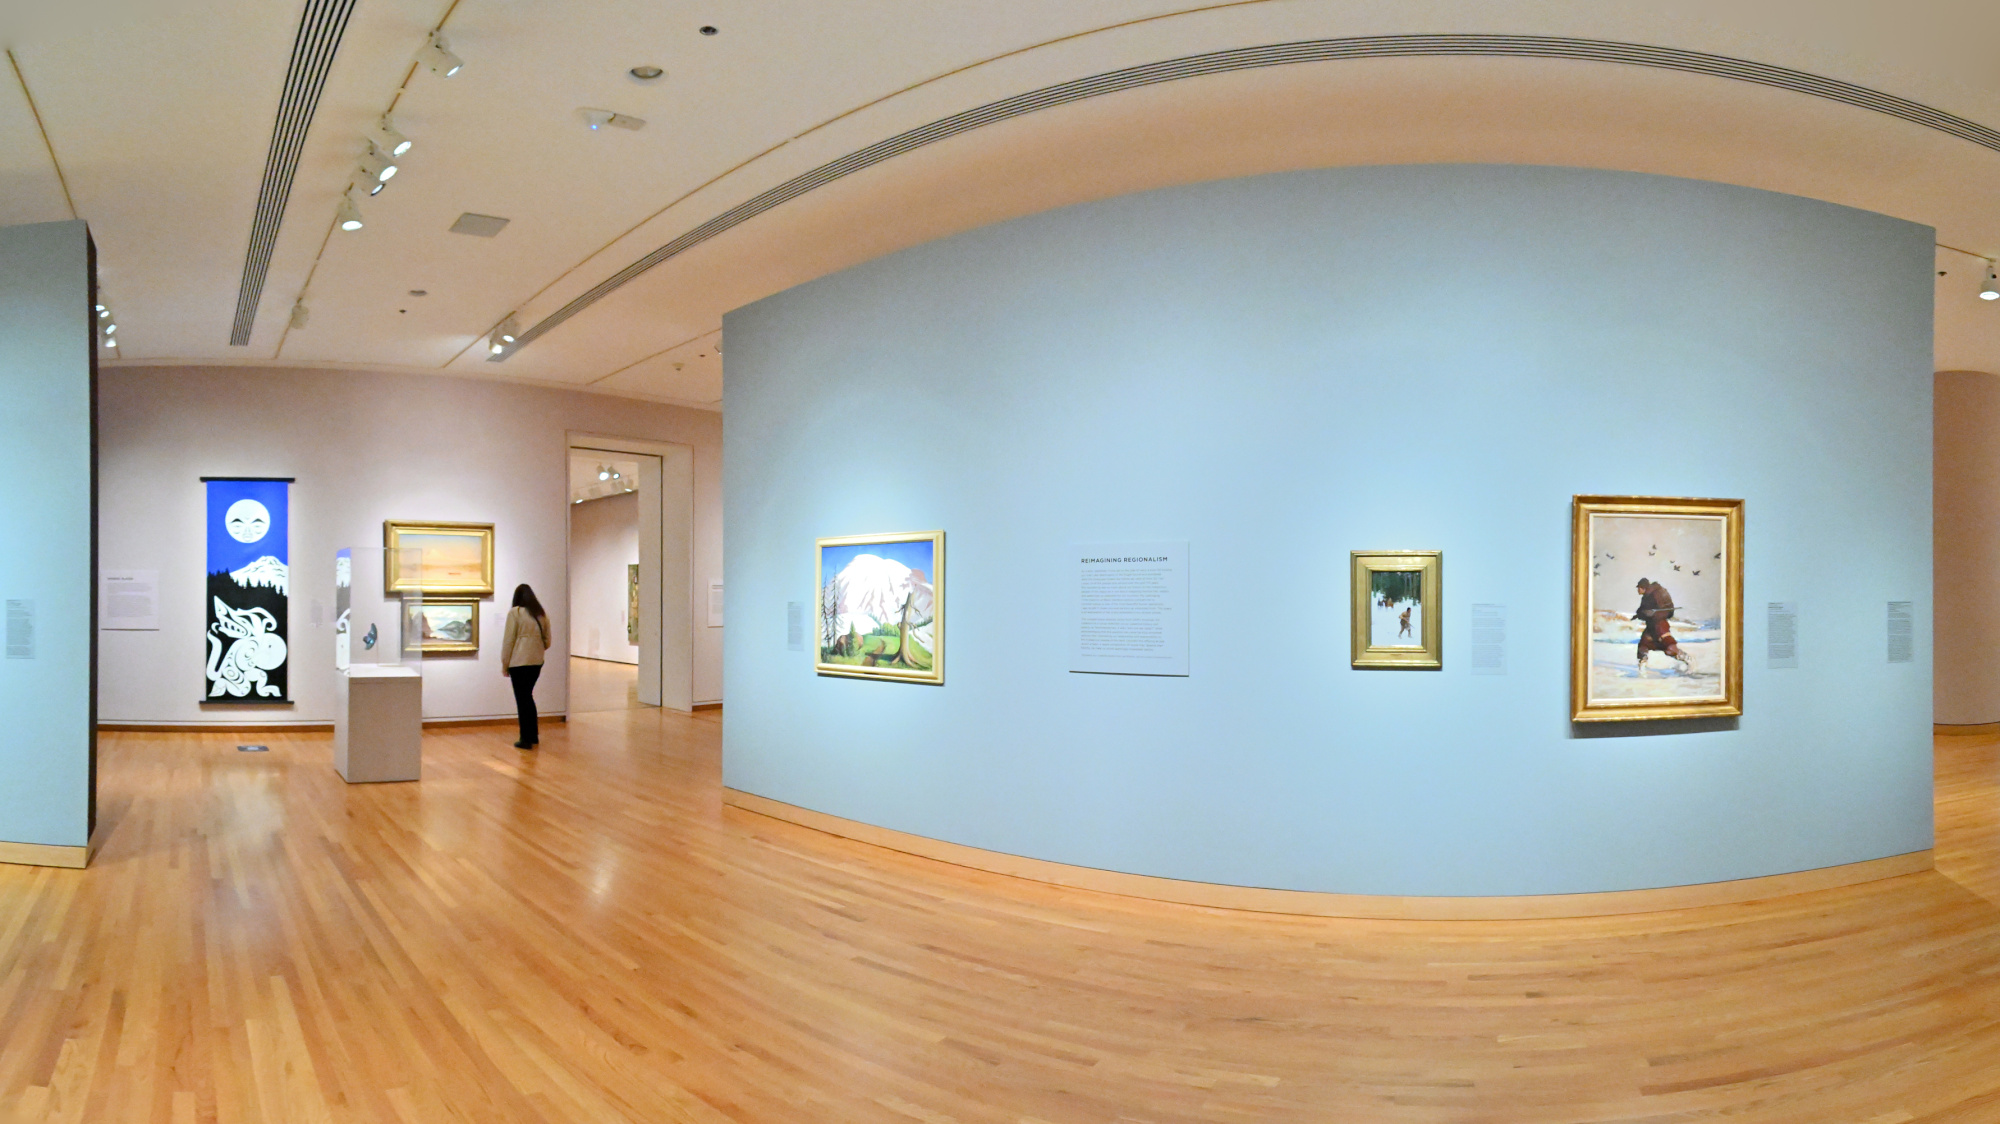
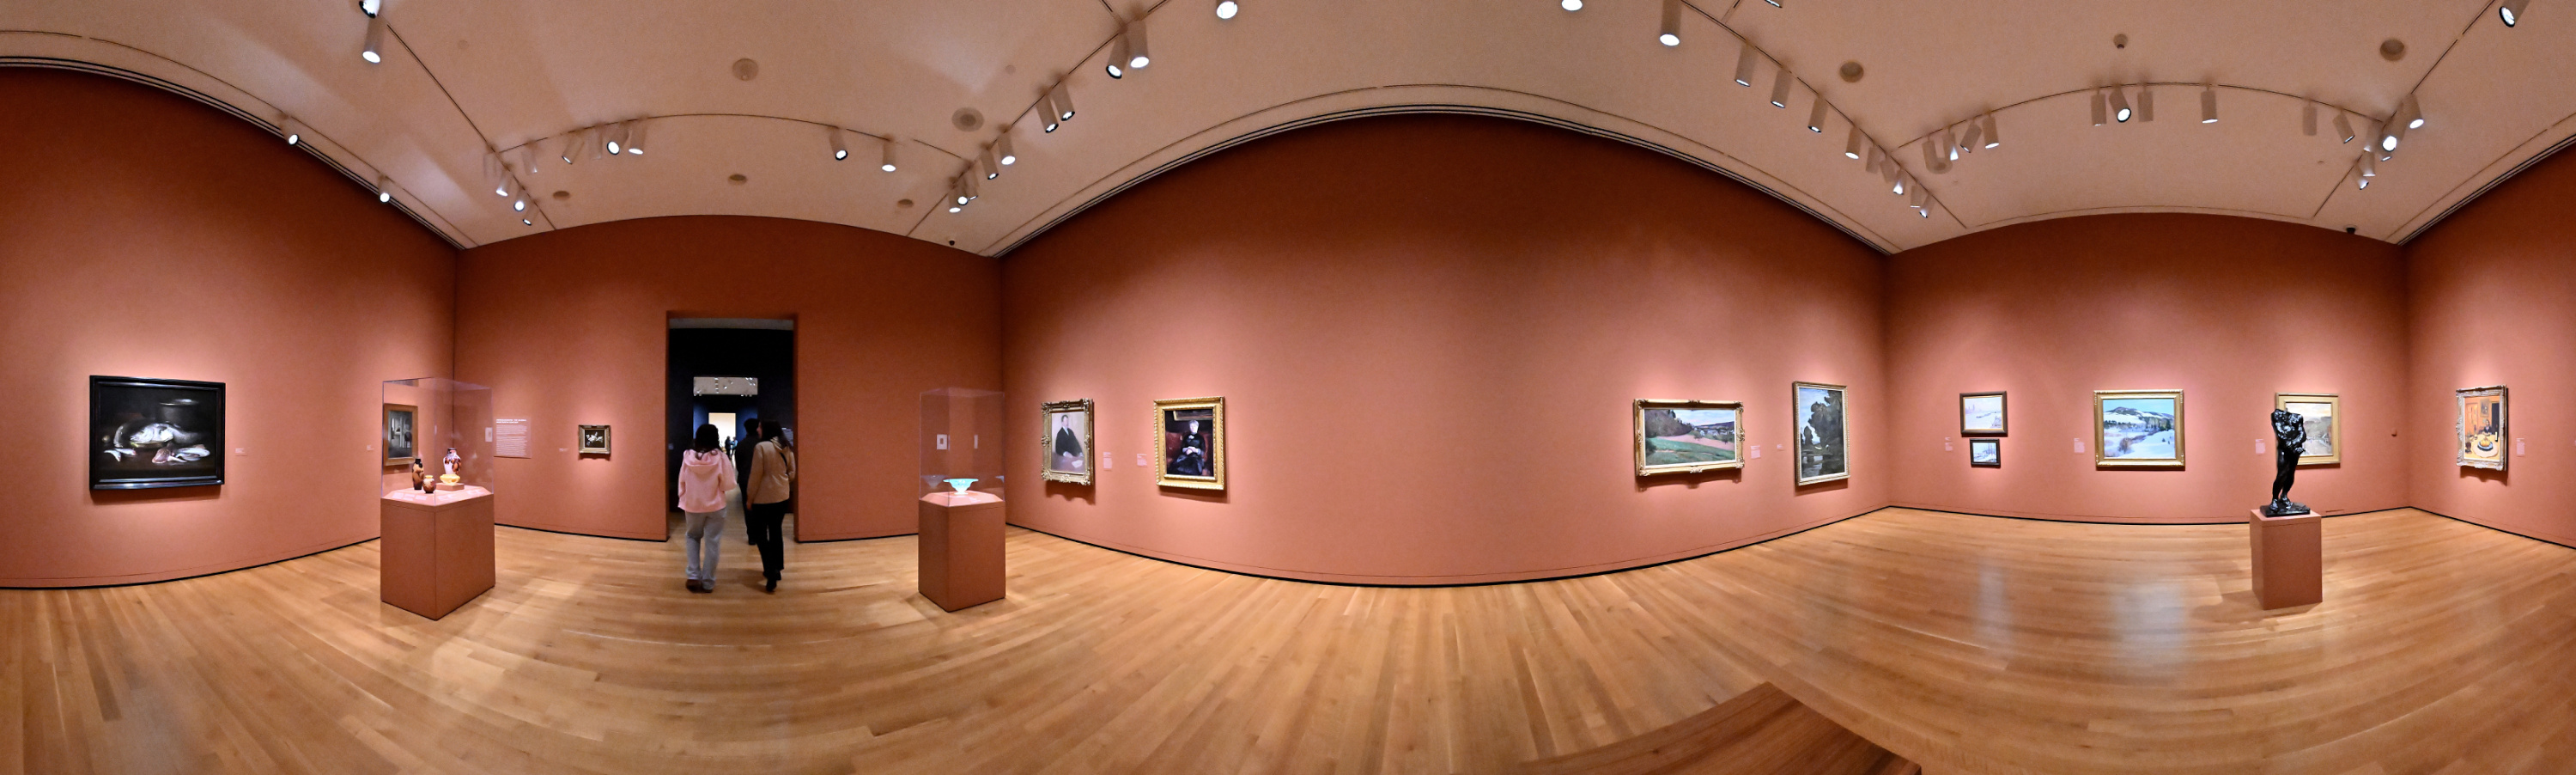
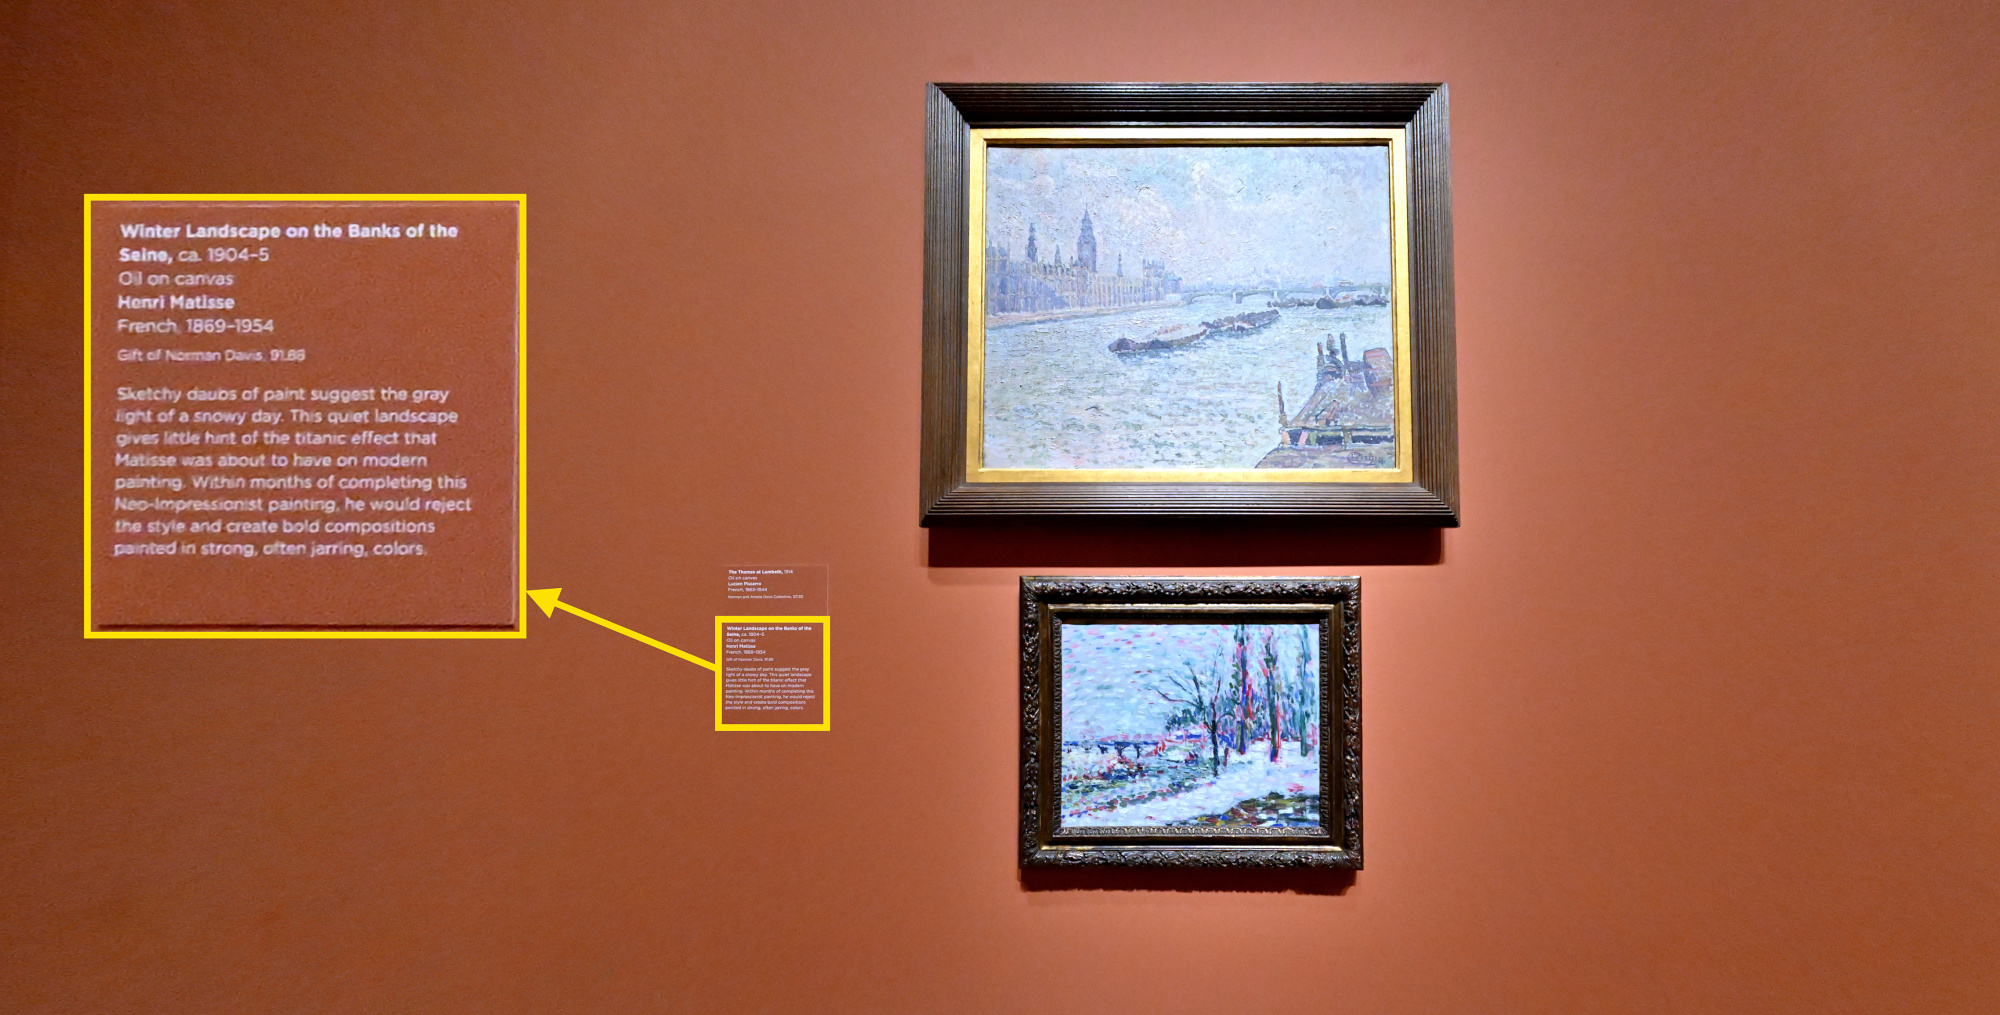
Impressionisms: The Global 19th Century
1/50s f/5,6 ISO 6400/39° f=7,5mm
Winter Landscape on the Bank of the Seine, Henri Matisse
SAM Stories and SAM's collection
1/50s f/5,6 ISO 6400/39° f=7,5mm
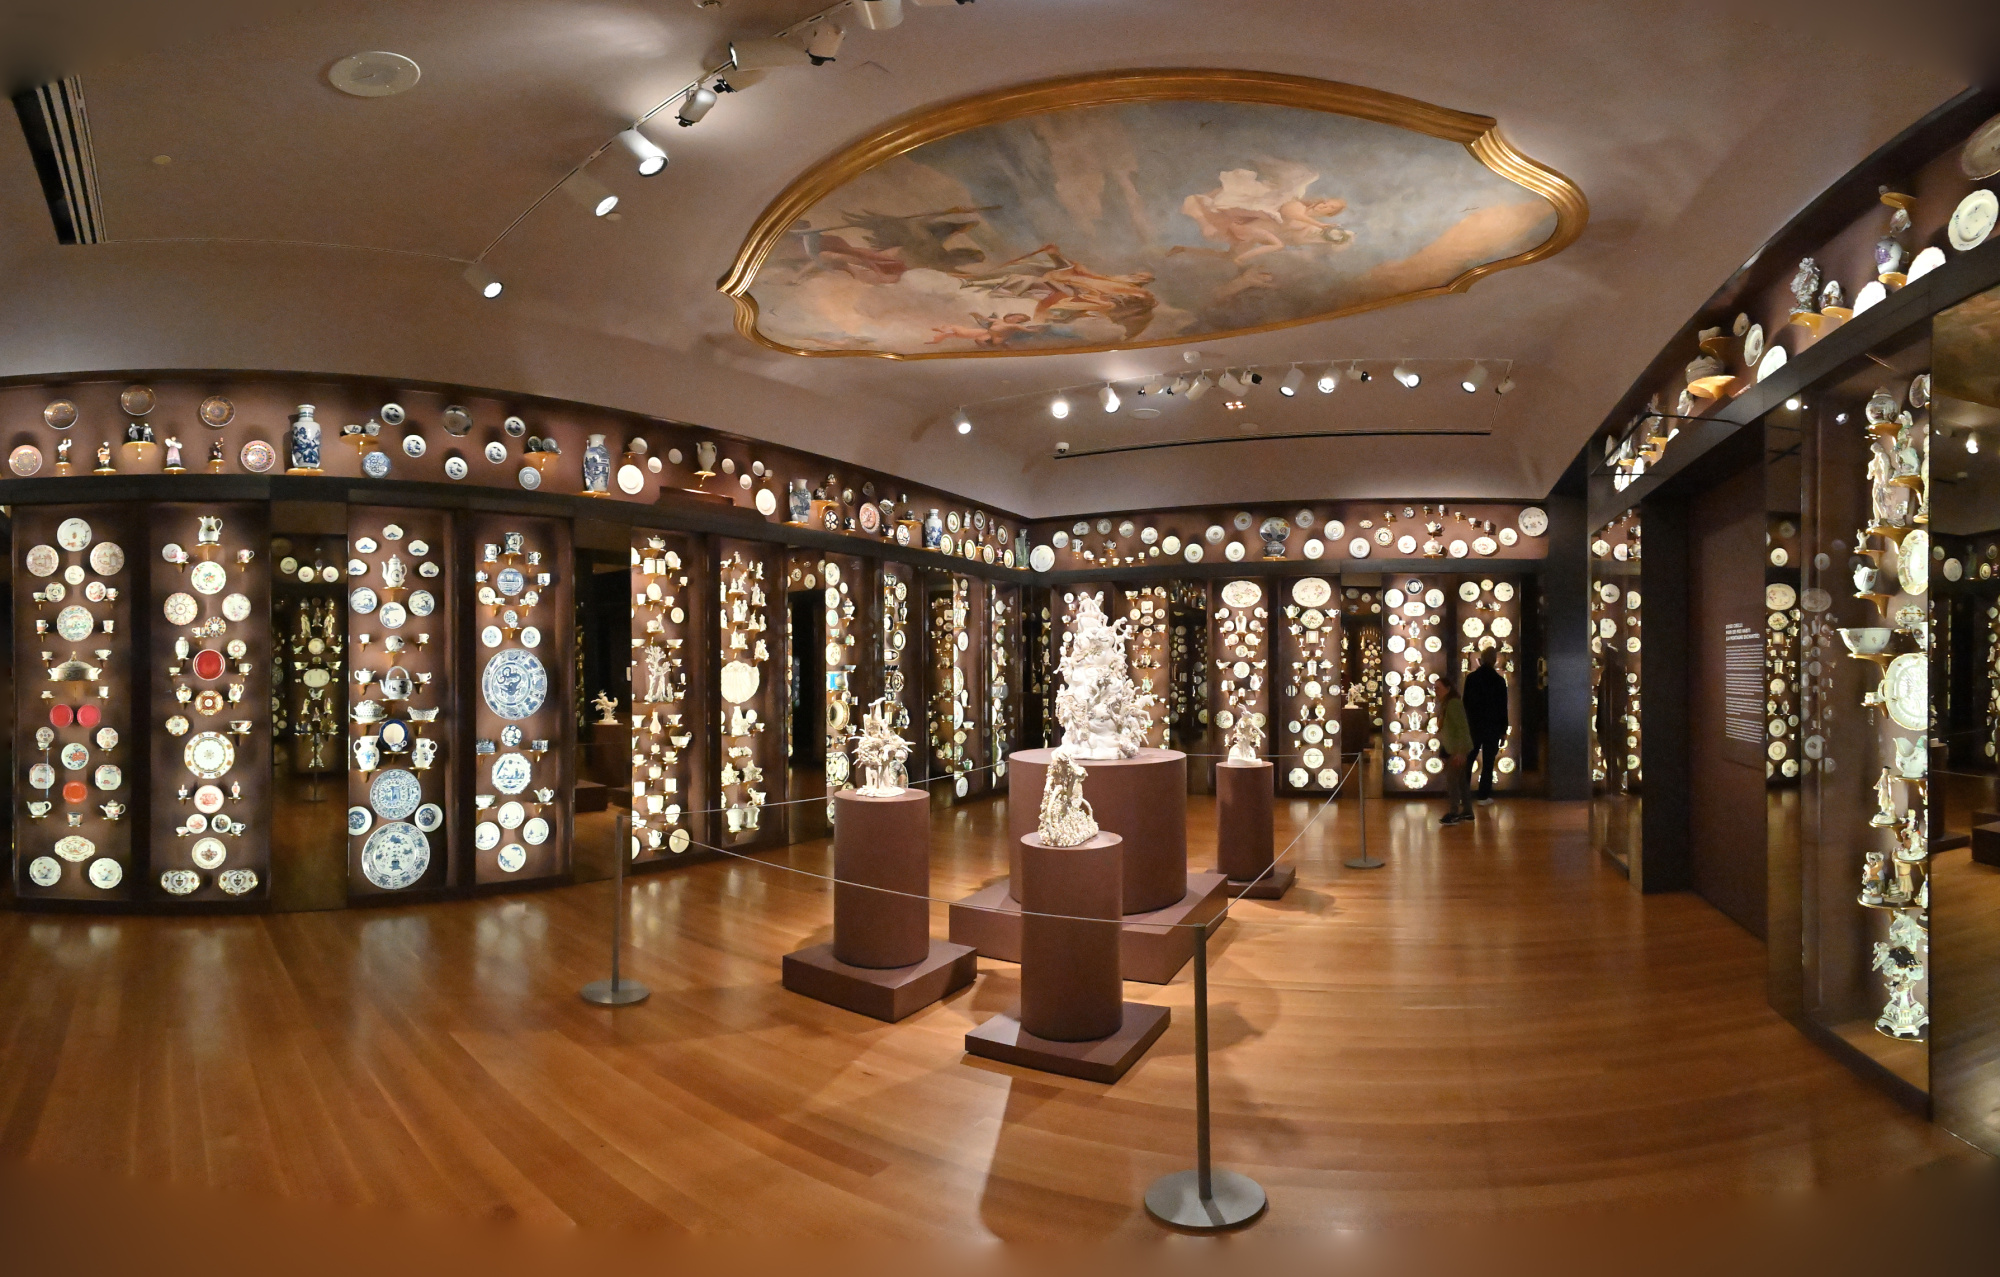
Porcelain Room
1/50s f/5,6 ISO 8000/40° f=7,5mm
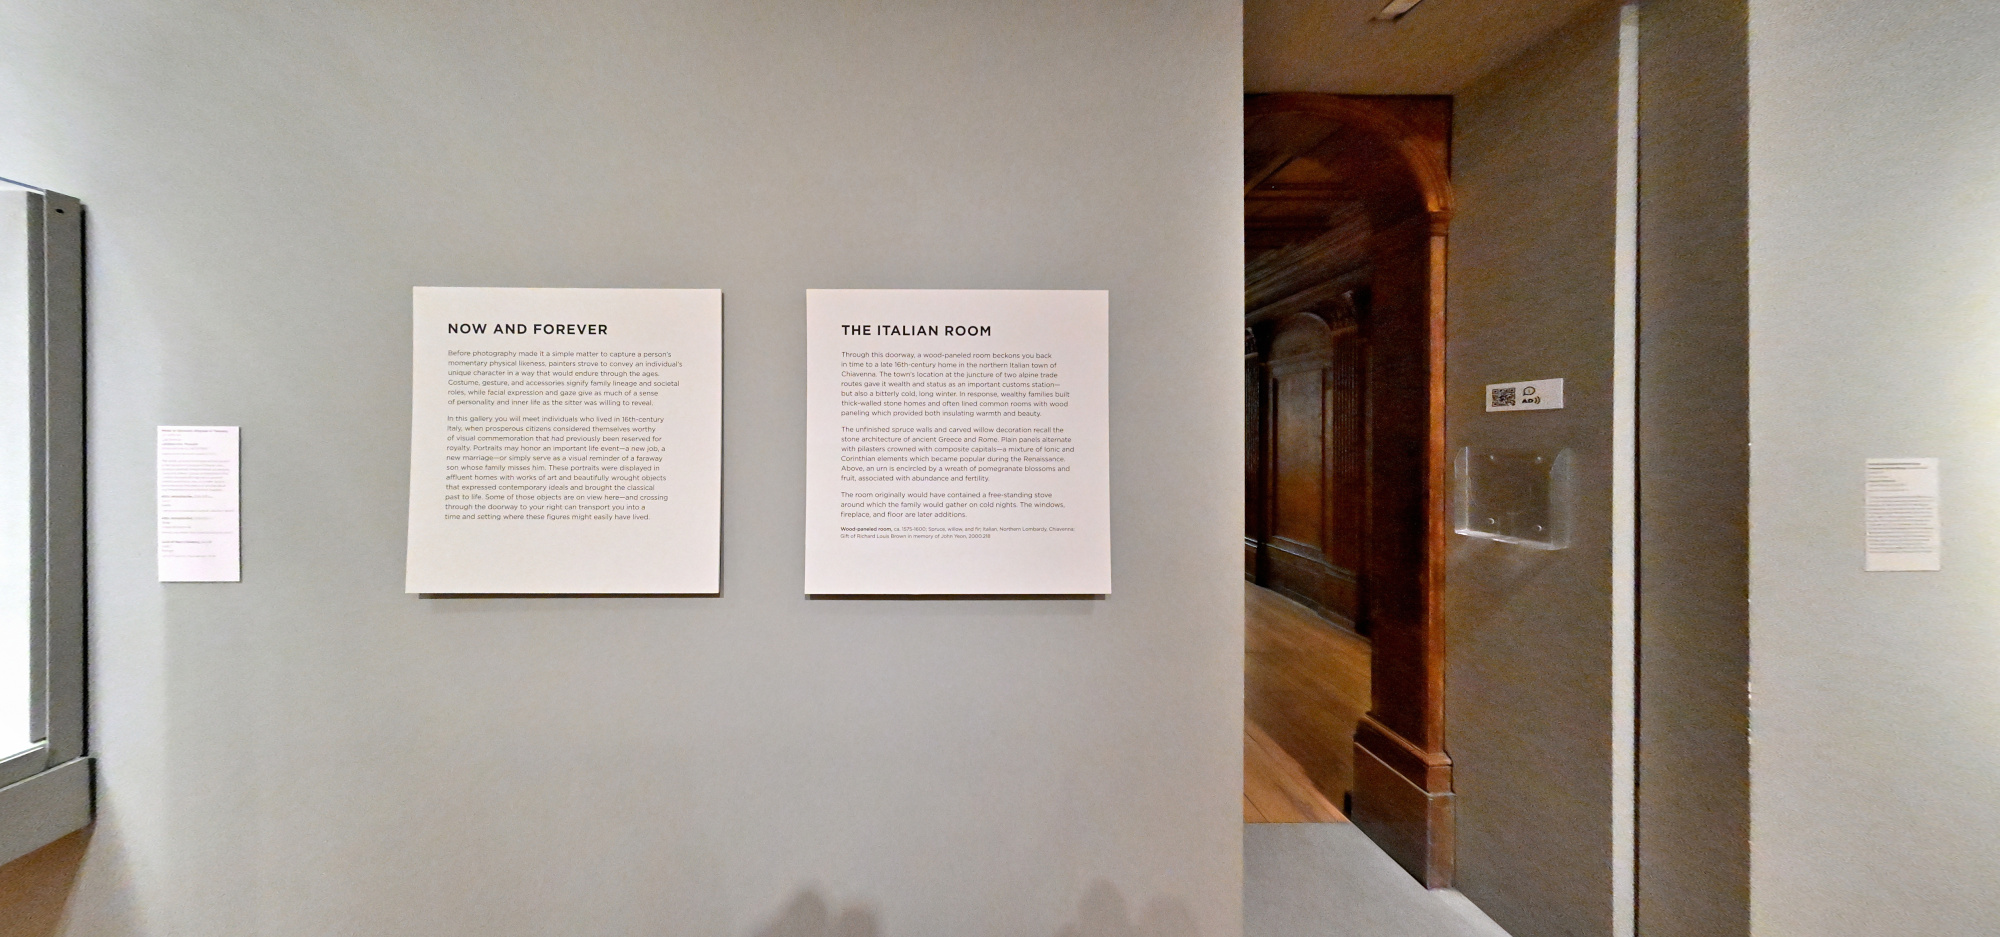
The Italian Room
SAM Stories and SAM's collection
1/50s f/5,6 ISO 8000/40° f=7,5mm
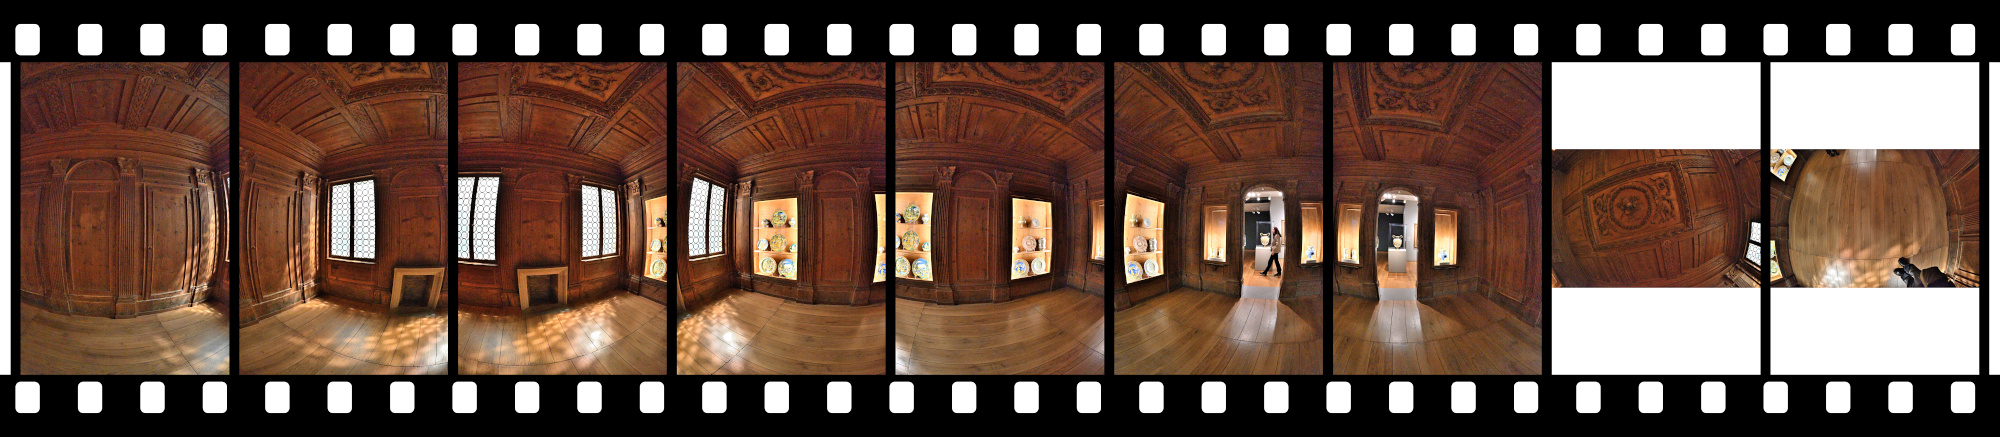
Interactive Panorama The Italian Room
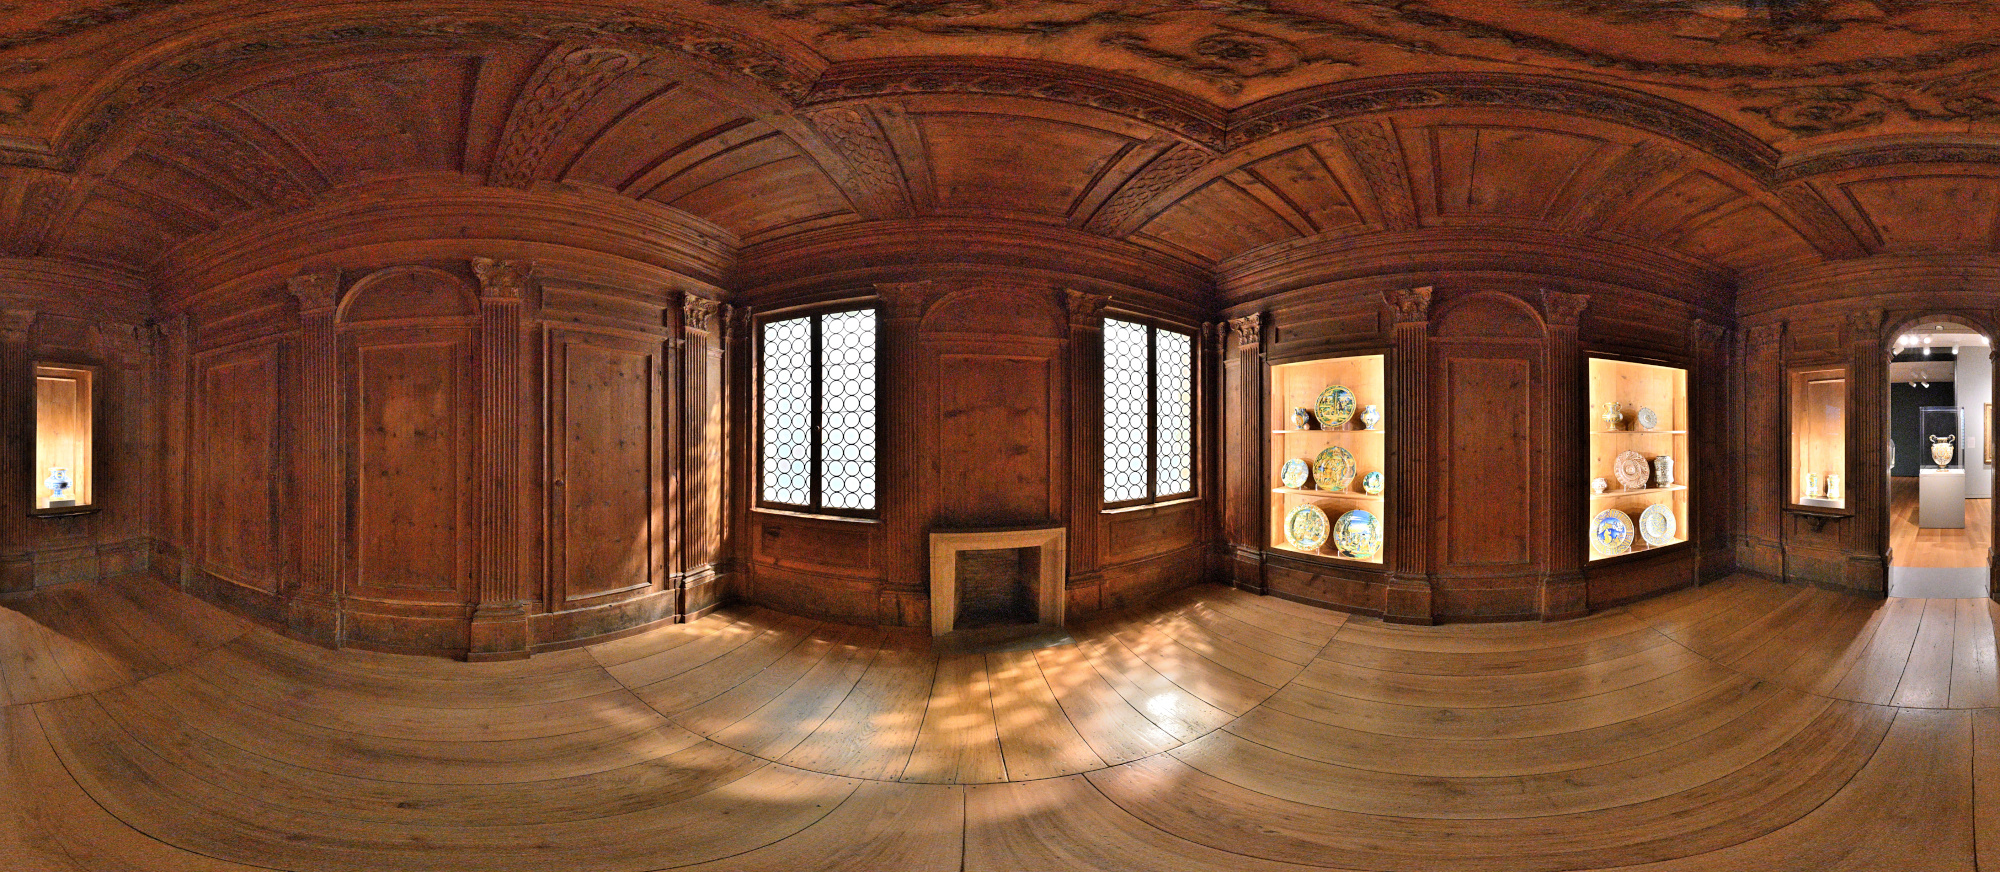
Noise reduction was not applied to retain details; the images were only graded2.
There was no time for multiple exposures for HDR, and of course no tripod because we were in a museum. I only had a brief moment when the room was empty to capture a 360°×180° panorama.1/50s f/5,6 ISO 8000/40° f=7,5mm
It was really dark in this room. Here are the ungraded raw images:
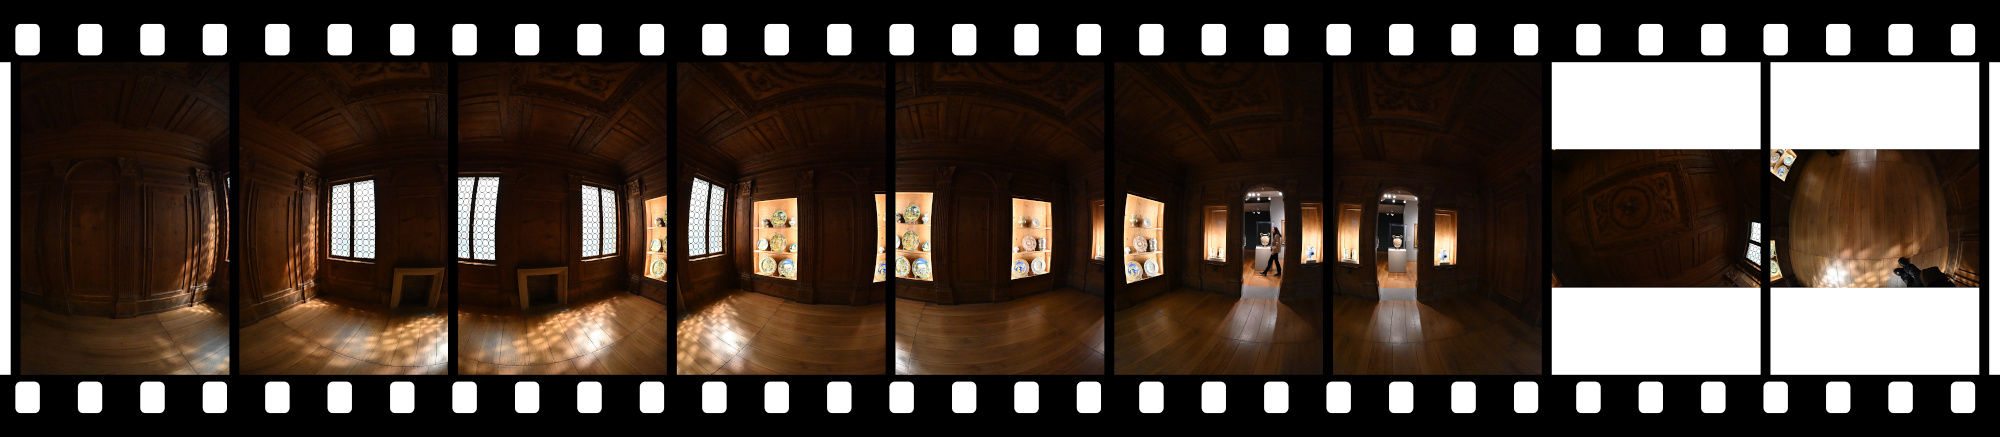
1/50s f/5,6 ISO 8000/40° f=7,5mm
From Galleries to Sidewalks
When we left the museum, it was only partly cloudy with a hint of sunshine. The Pacific Northwest's quiet way of saying thanks for staying.
1/400s f/5,6 ISO 100/21° f=7,5mm
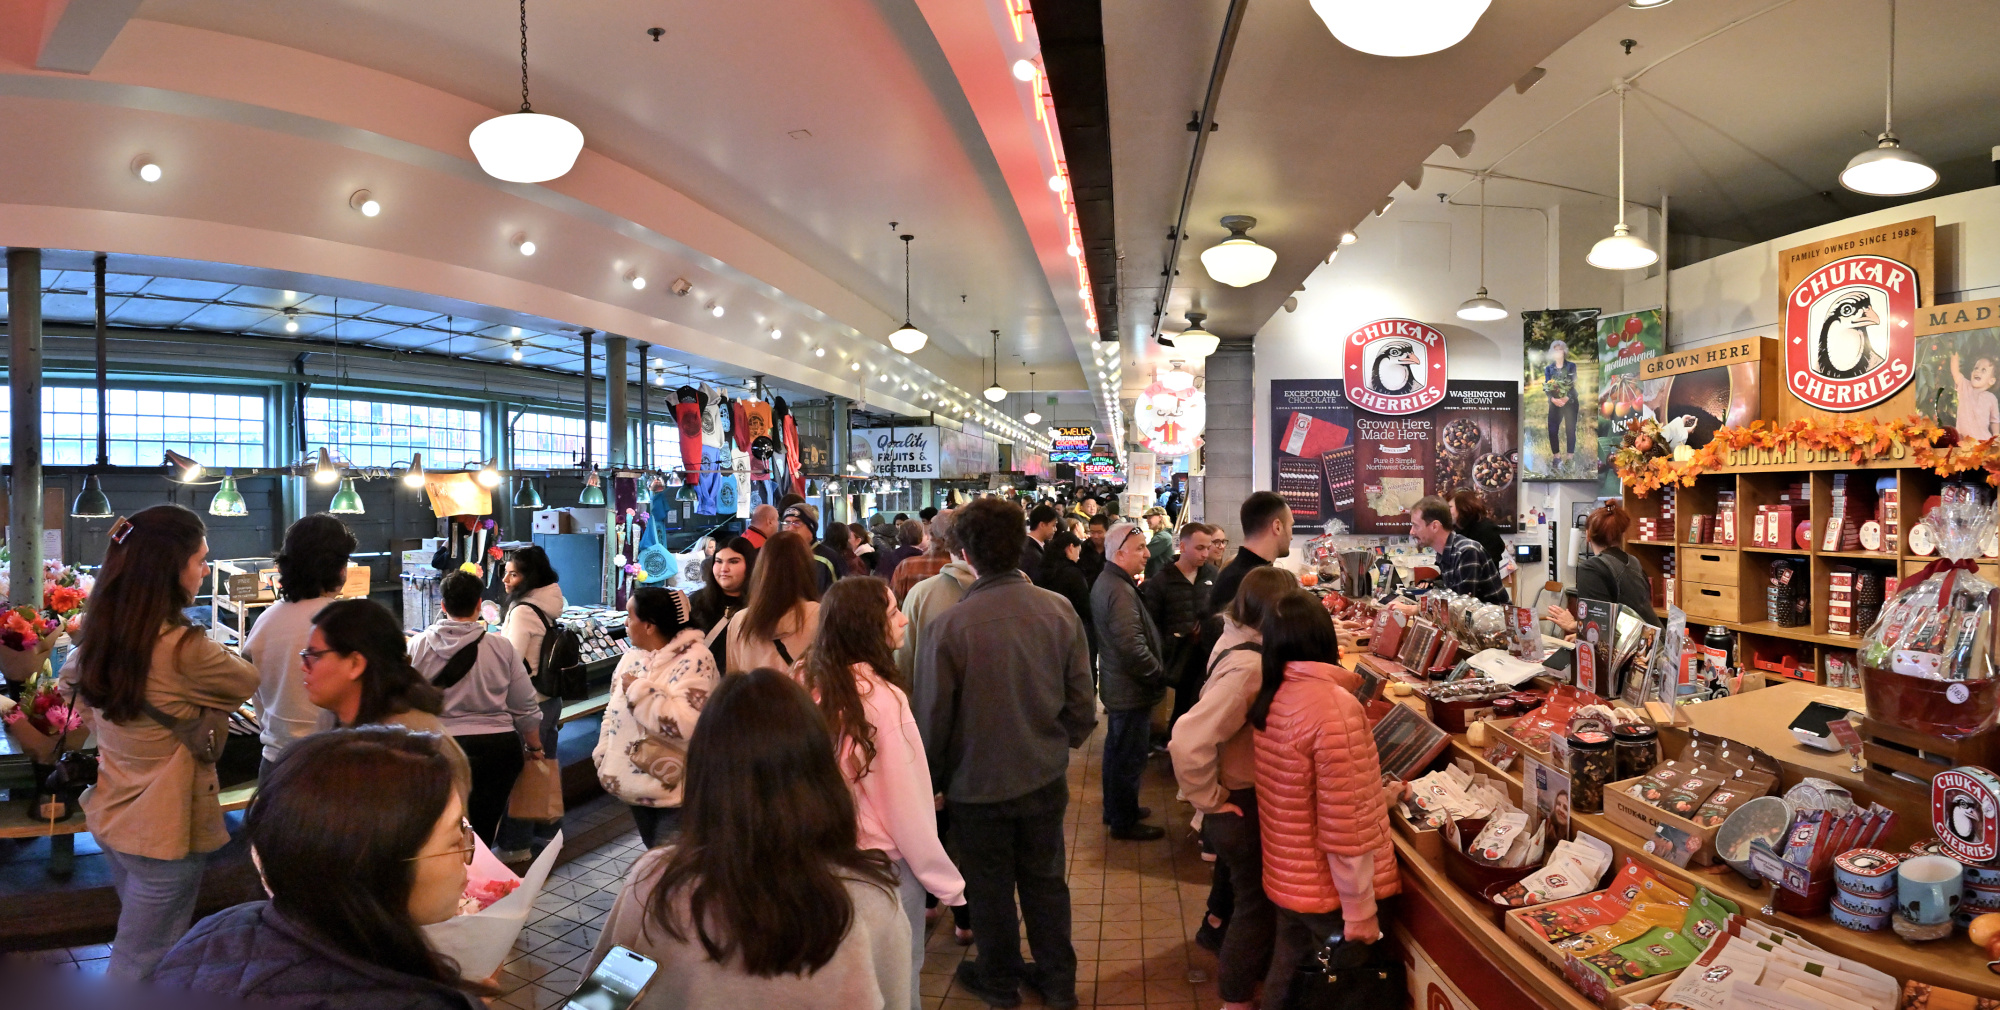
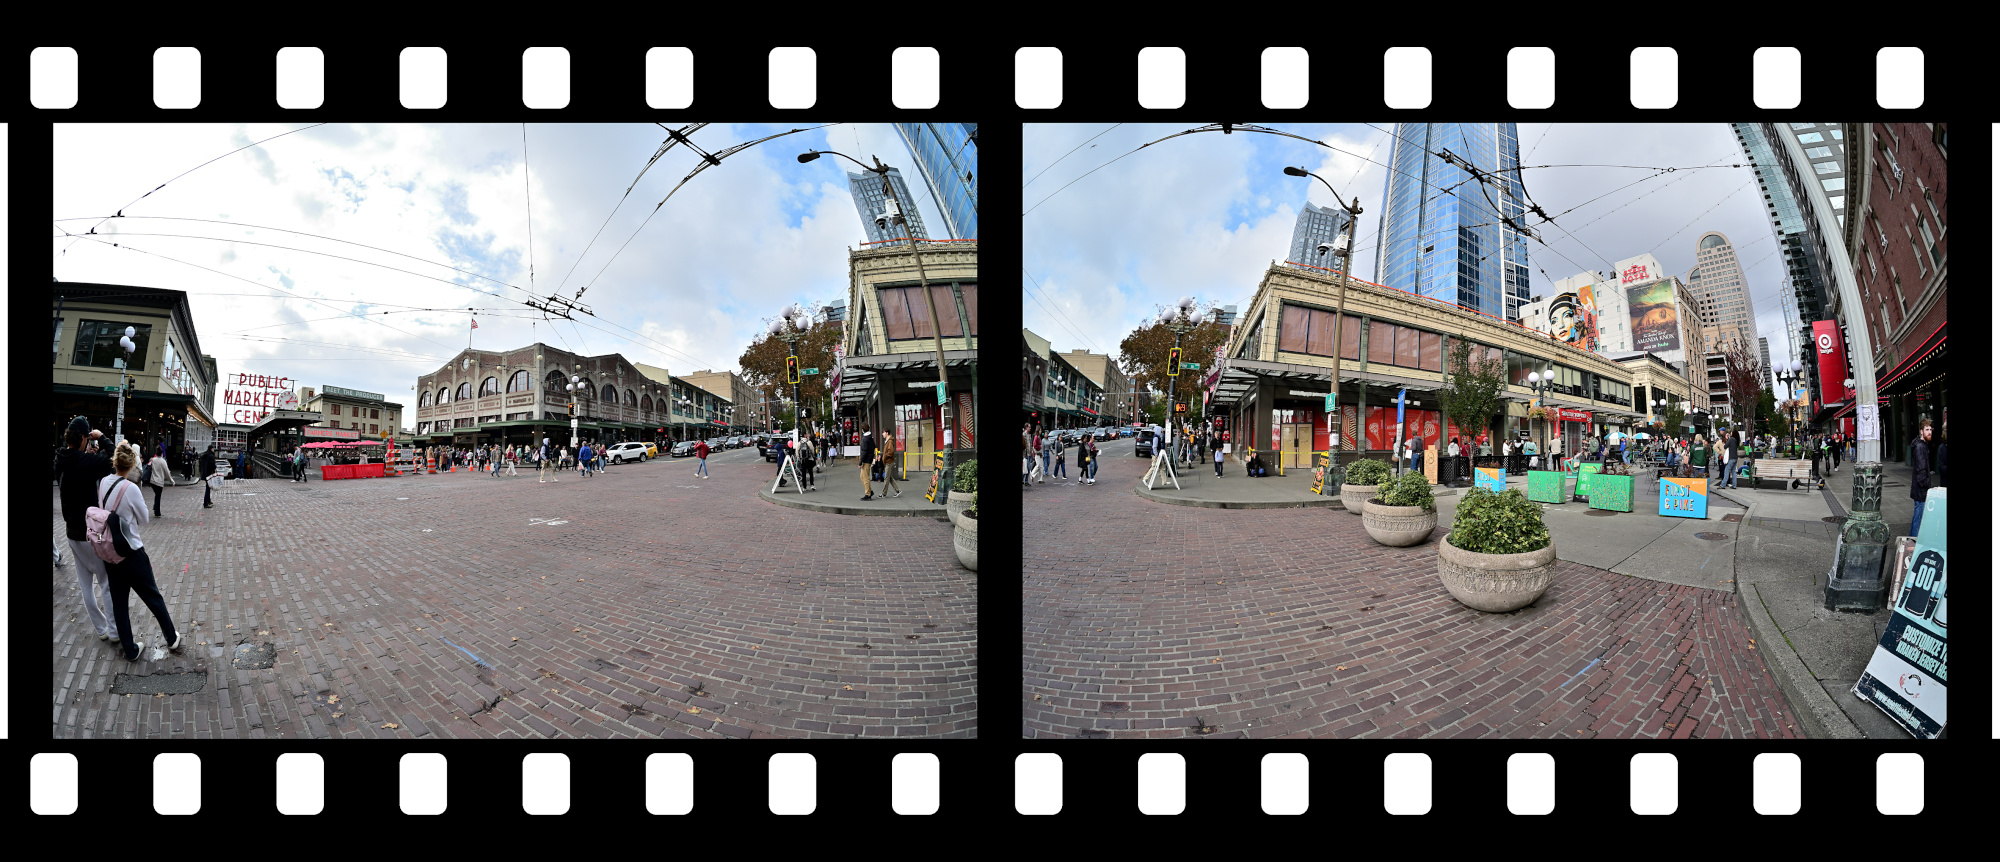
From the calm of the galleries to the vibrant pulse of Pike Place Market
1/125s f/5,6 ISO 2500/35° f=7,5mm

1/125s f/5,6 ISO 100/21° f=7,5mm
-
List of Exhibitions for 2025:
• FriendsWithYou: Little Cloud Sky – Jun 27, 2025 – ongoing
• Ash-Glazed Ceramics from Korea and Japan – Jul 9, 2025 – Jul 12, 2027
• Diego Cibelli: Fiori dei Miei Habiti / La Montagne Enchantée – May 31, 2024 – May 10, 2026
• Yirrkala: Art from Australia's Top End – May 10, 2024 – ongoing
• Lessons from the Institute of Empathy – Mar 31, 2018 – ongoing
• Impressionisms: The Global Nineteenth Century – Mar 27, 2024 – ongoing
• American Art: The Stories We Carry – Oct 20, 2022 – ongoing
• Chronicles of a Global East – Oct 20, 2022 – ongoing
• Pacific Species – Dec 22, 2022 – ongoing
• Cosmic Beings in Mesoamerican and Andean Art – Nov 10, 2018 – ongoing
• Art and Life Along the Northwest Coast – Nov 26, 2014 – ongoing
• Only Connect: The Art of Devotion – Apr 29, 2011 – ongoing
• Porcelain Room – May 5, 2007 – ongoing
↩ -
In this context, graded refers to applying tone curve adjustments to brighten dark areas and make details more visible. ↩
-
-
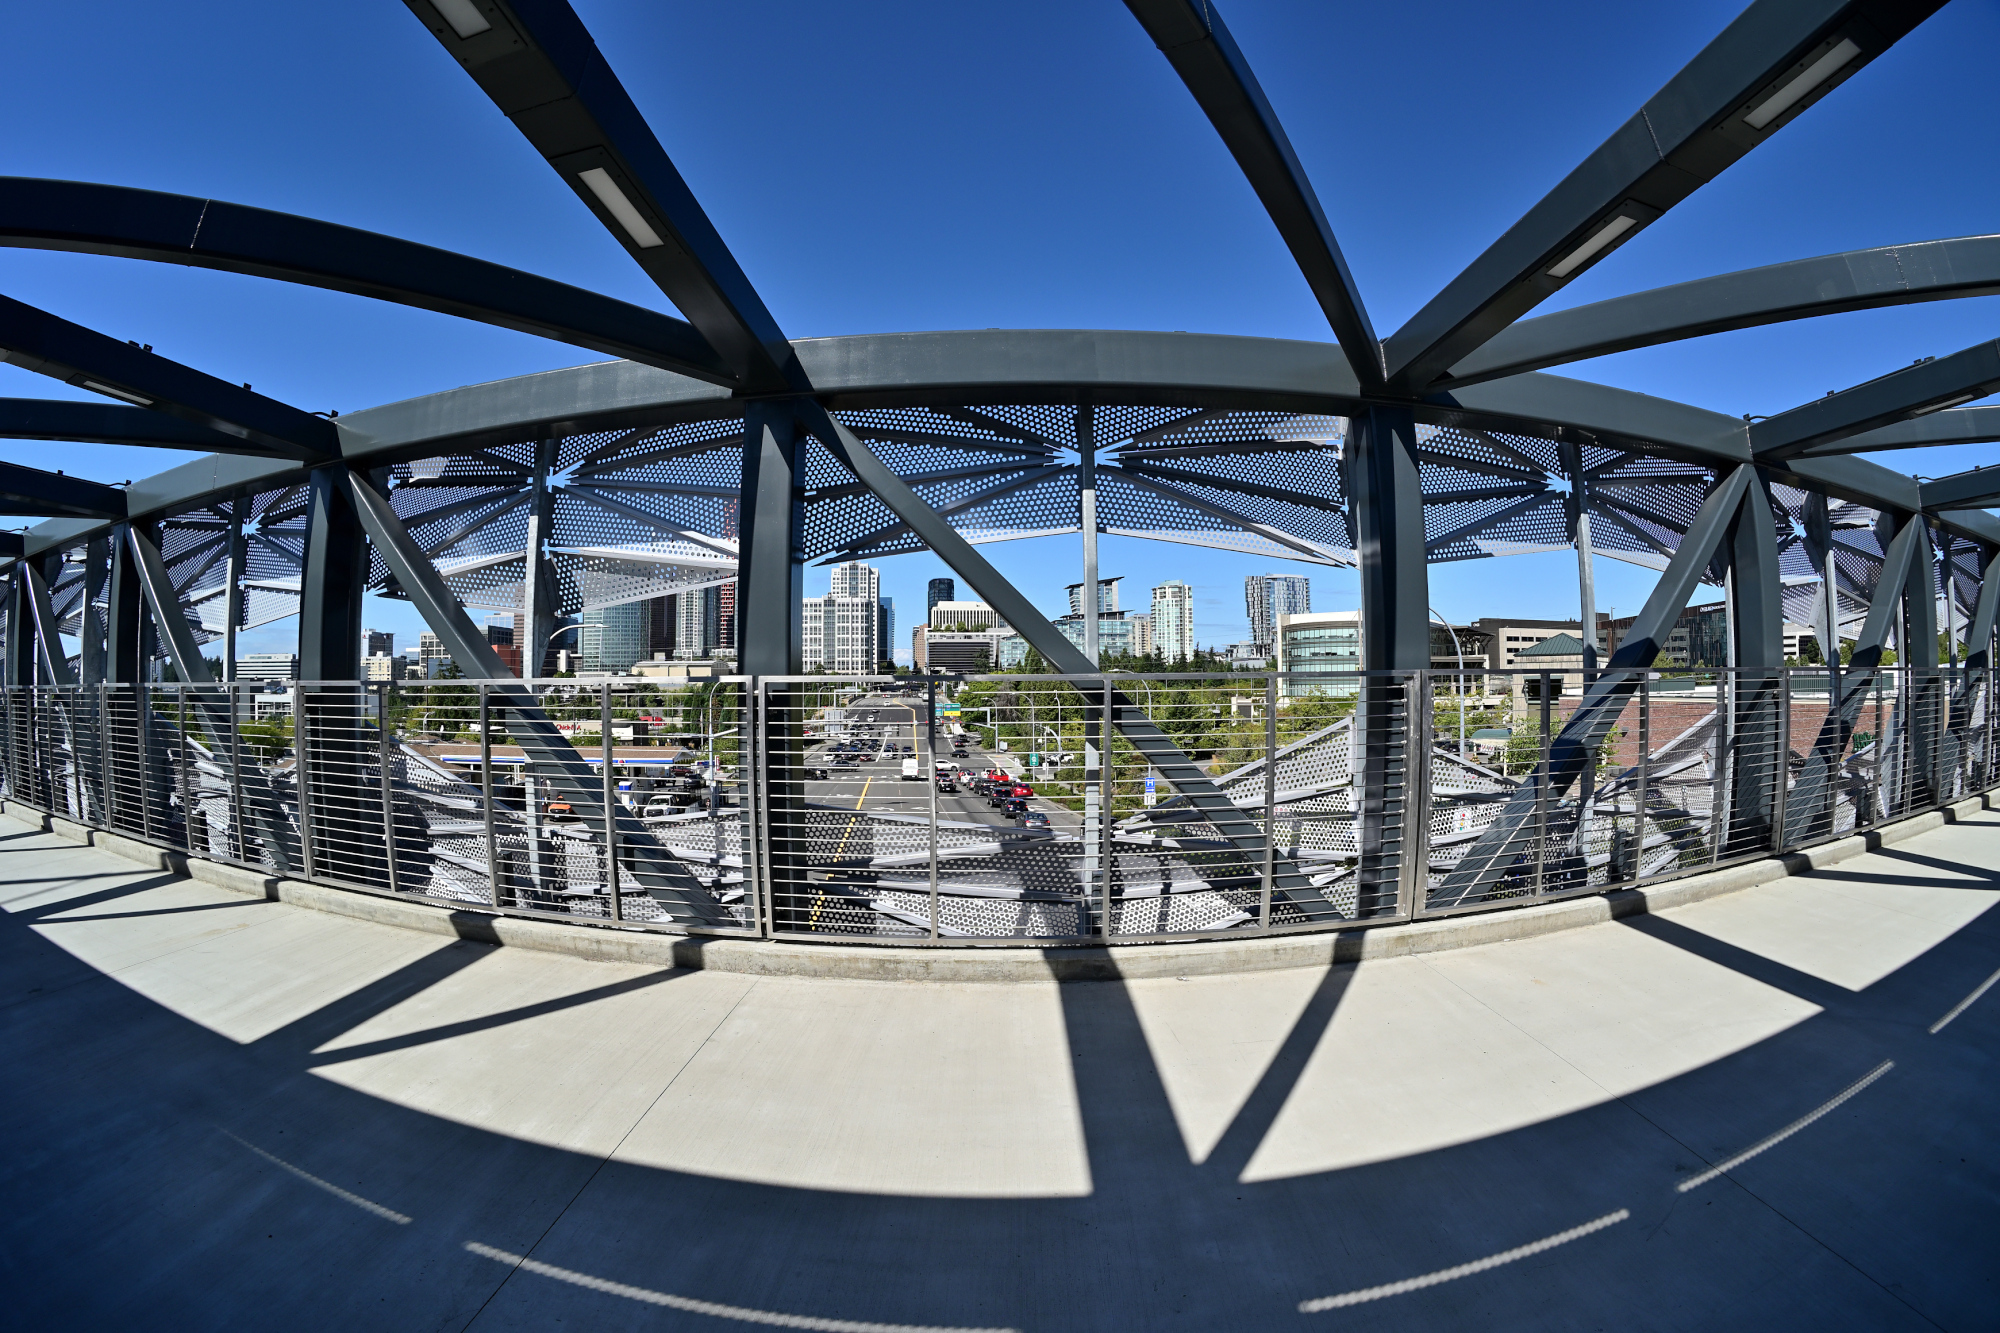
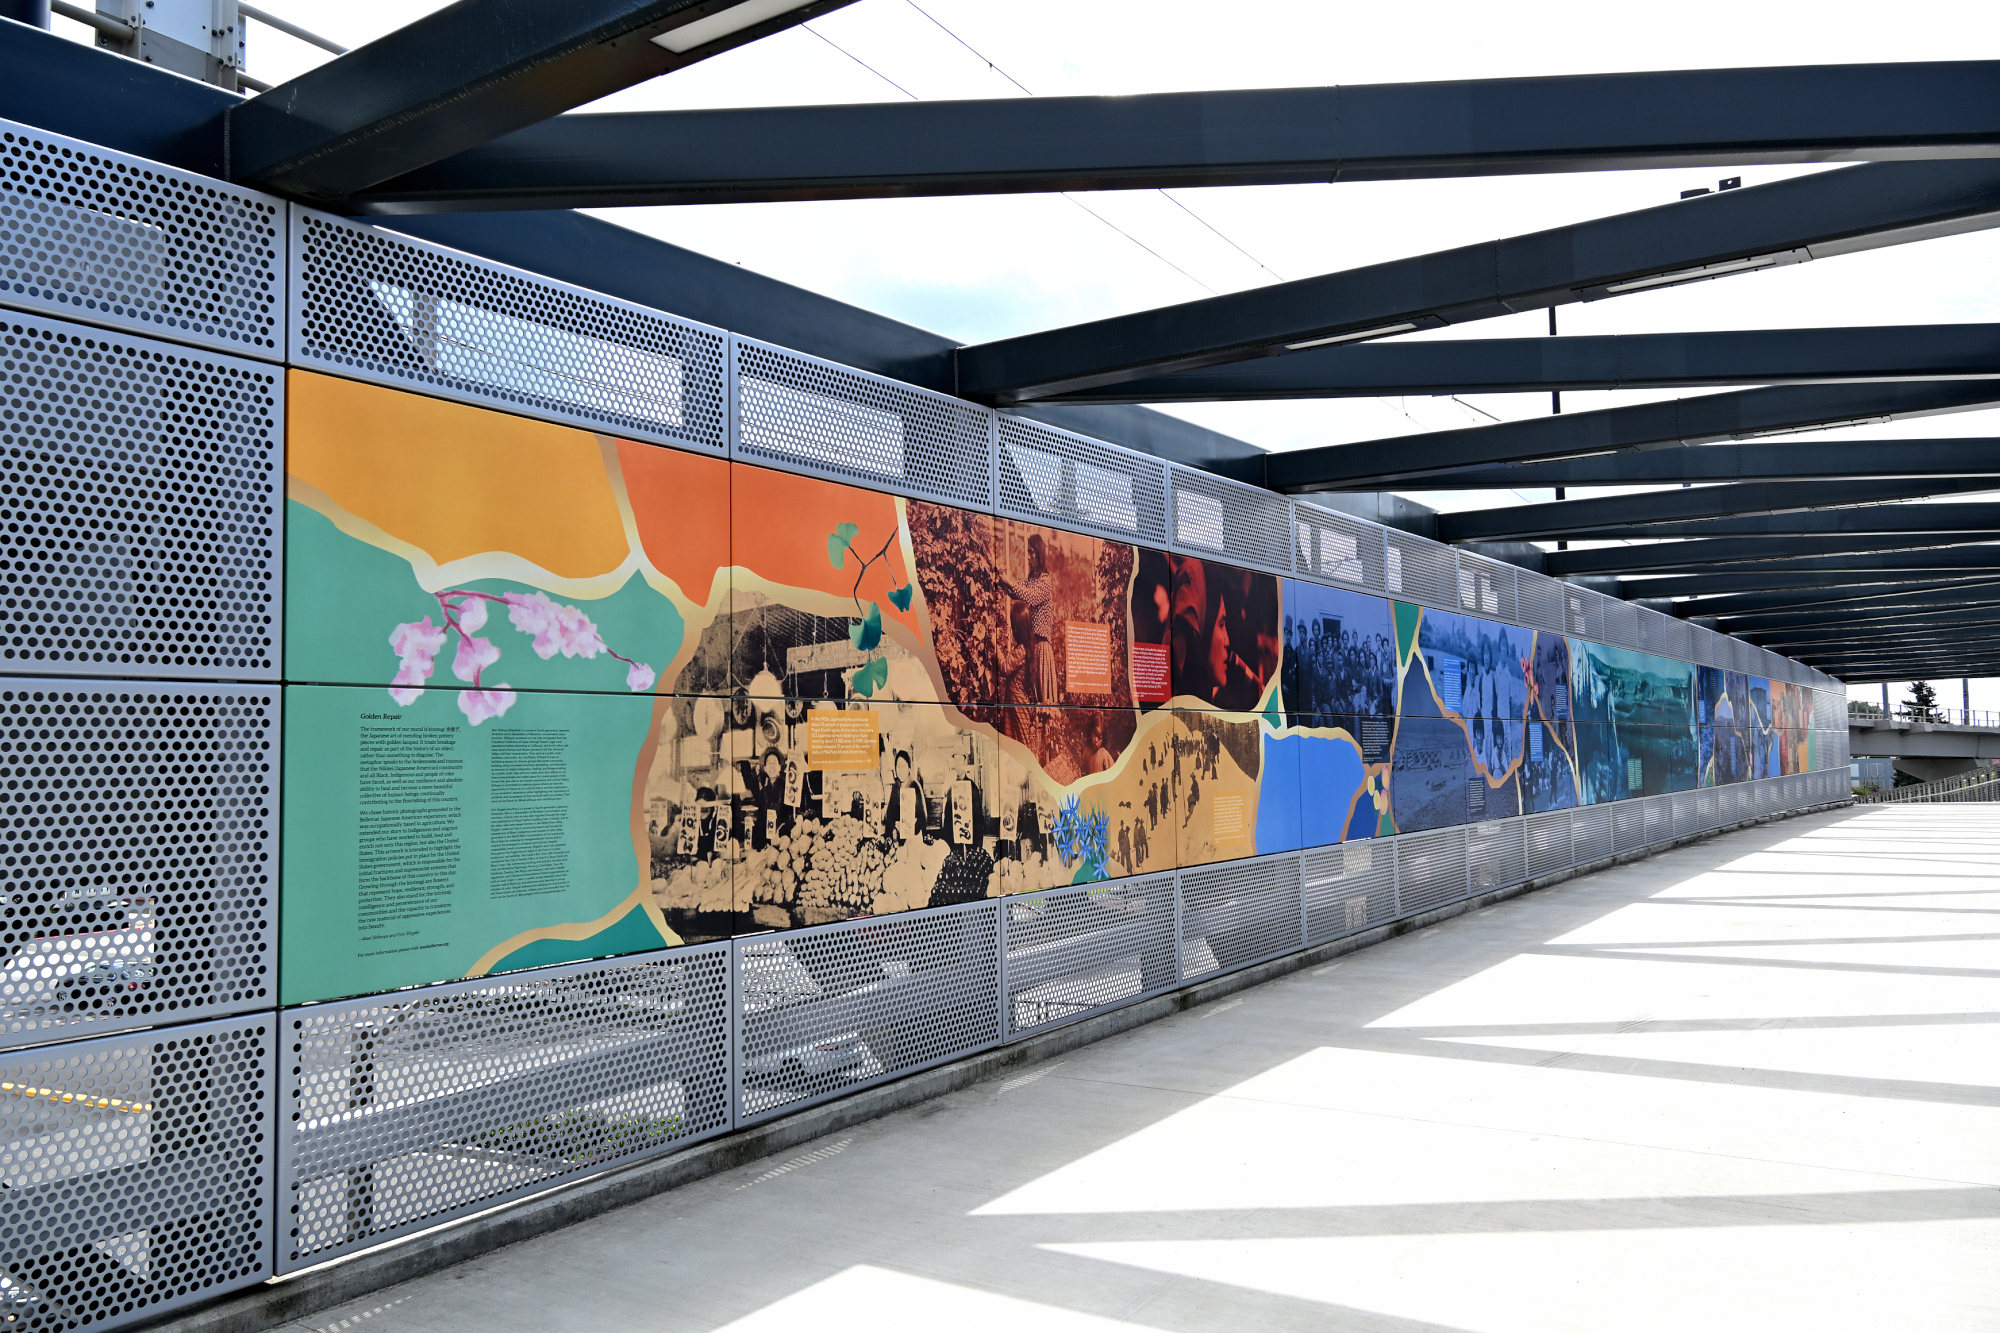
Bellevue Connector Bridge
Die Bellevue Connector Bridge – Licht, Schatten und der perfekte Moment
Die Bellevue Connector Bridge ist Teil eines städtebaulichen Konzepts, das Fußgänger und Radfahrer besser mit dem Stadtzentrum verbindet. Sie steht exemplarisch für moderne Infrastruktur, die nicht nur funktional, sondern auch ästhetisch ansprechend gestaltet ist.
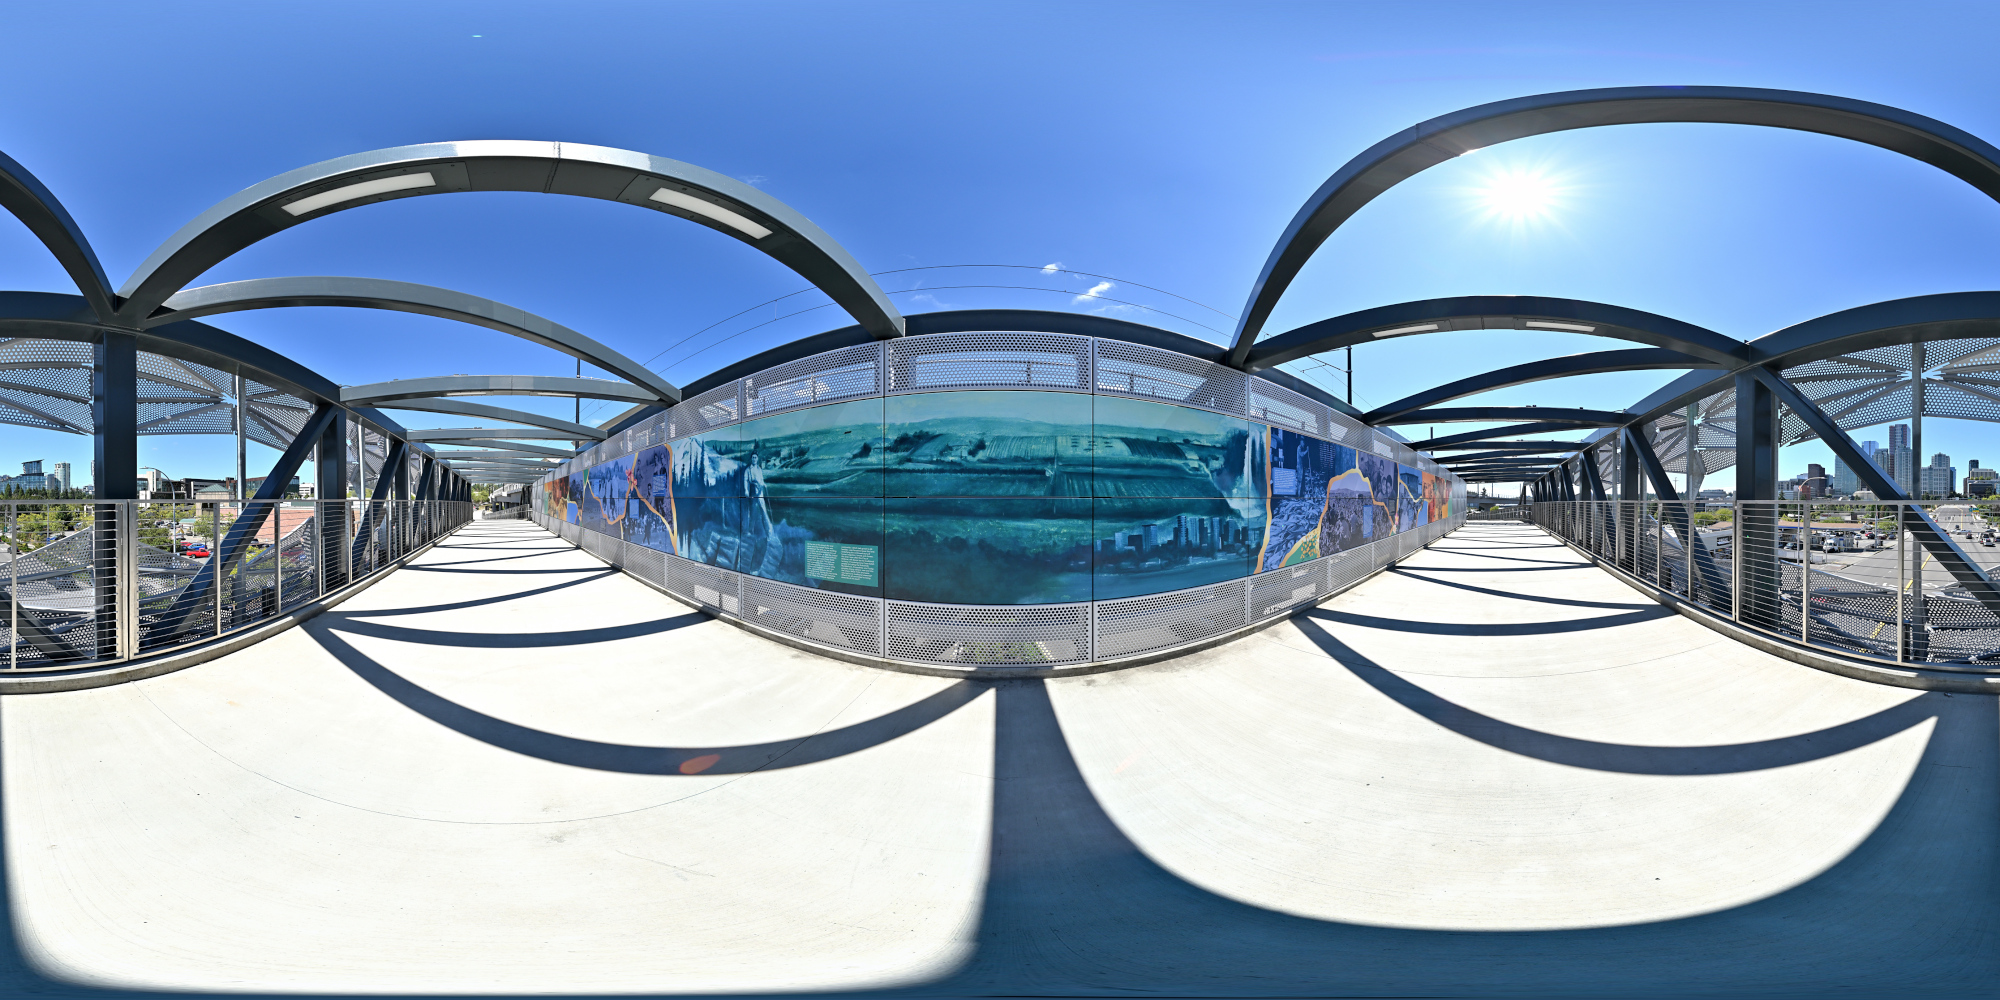
Am Vormittag liegt die Seite der Brücke mit dem Mural3 im Schatten:
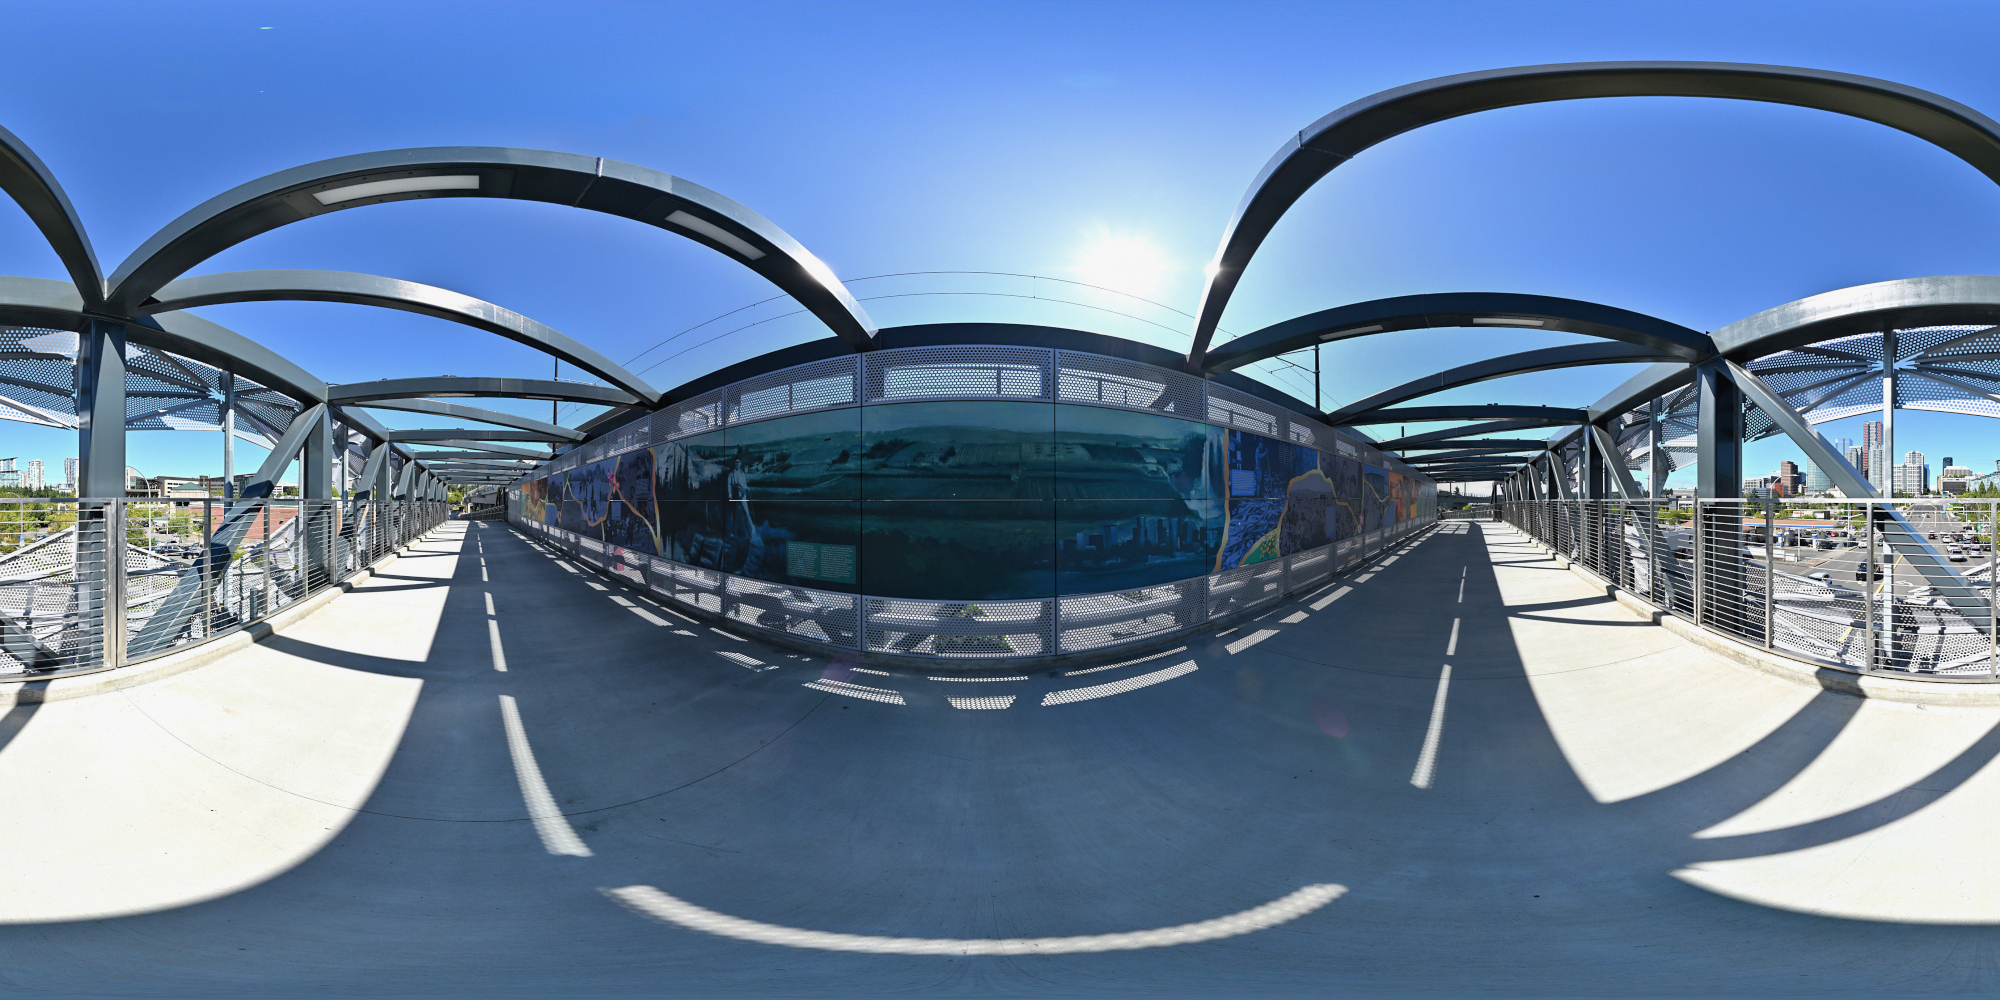
Erst am Nachmittag fällt Sonnenlicht direkt auf das Mural. Allerdings werfen dann auch die architektonischen Elemente der Brücke markante Schatten auf die Wand.
Kurz nach Mittag entsteht ein besonderer Moment: Die Sonne steht in einem Winkel, bei dem das Mural vollständig aus dem Schatten tritt, während die Brückenarchitektur noch keine Schatten wirft. Ich habe diesen seltenen Lichtmoment genutzt, um das Panorama aufzunehmen. Fast so selten wie eine Sonnenfinsternis, nur ohne Schutzbrille und mit deutlich besserer Auflösung.
Die Nord-Süd-Ausrichtung sorgt dafür, dass die Sonne einmal täglich exakt genug steht, um das Mural für wenige Minuten wie eine Bühne auszuleuchten. Ein Moment, in dem Architektur und Sonnenstand kurz in Konjunktion treten.
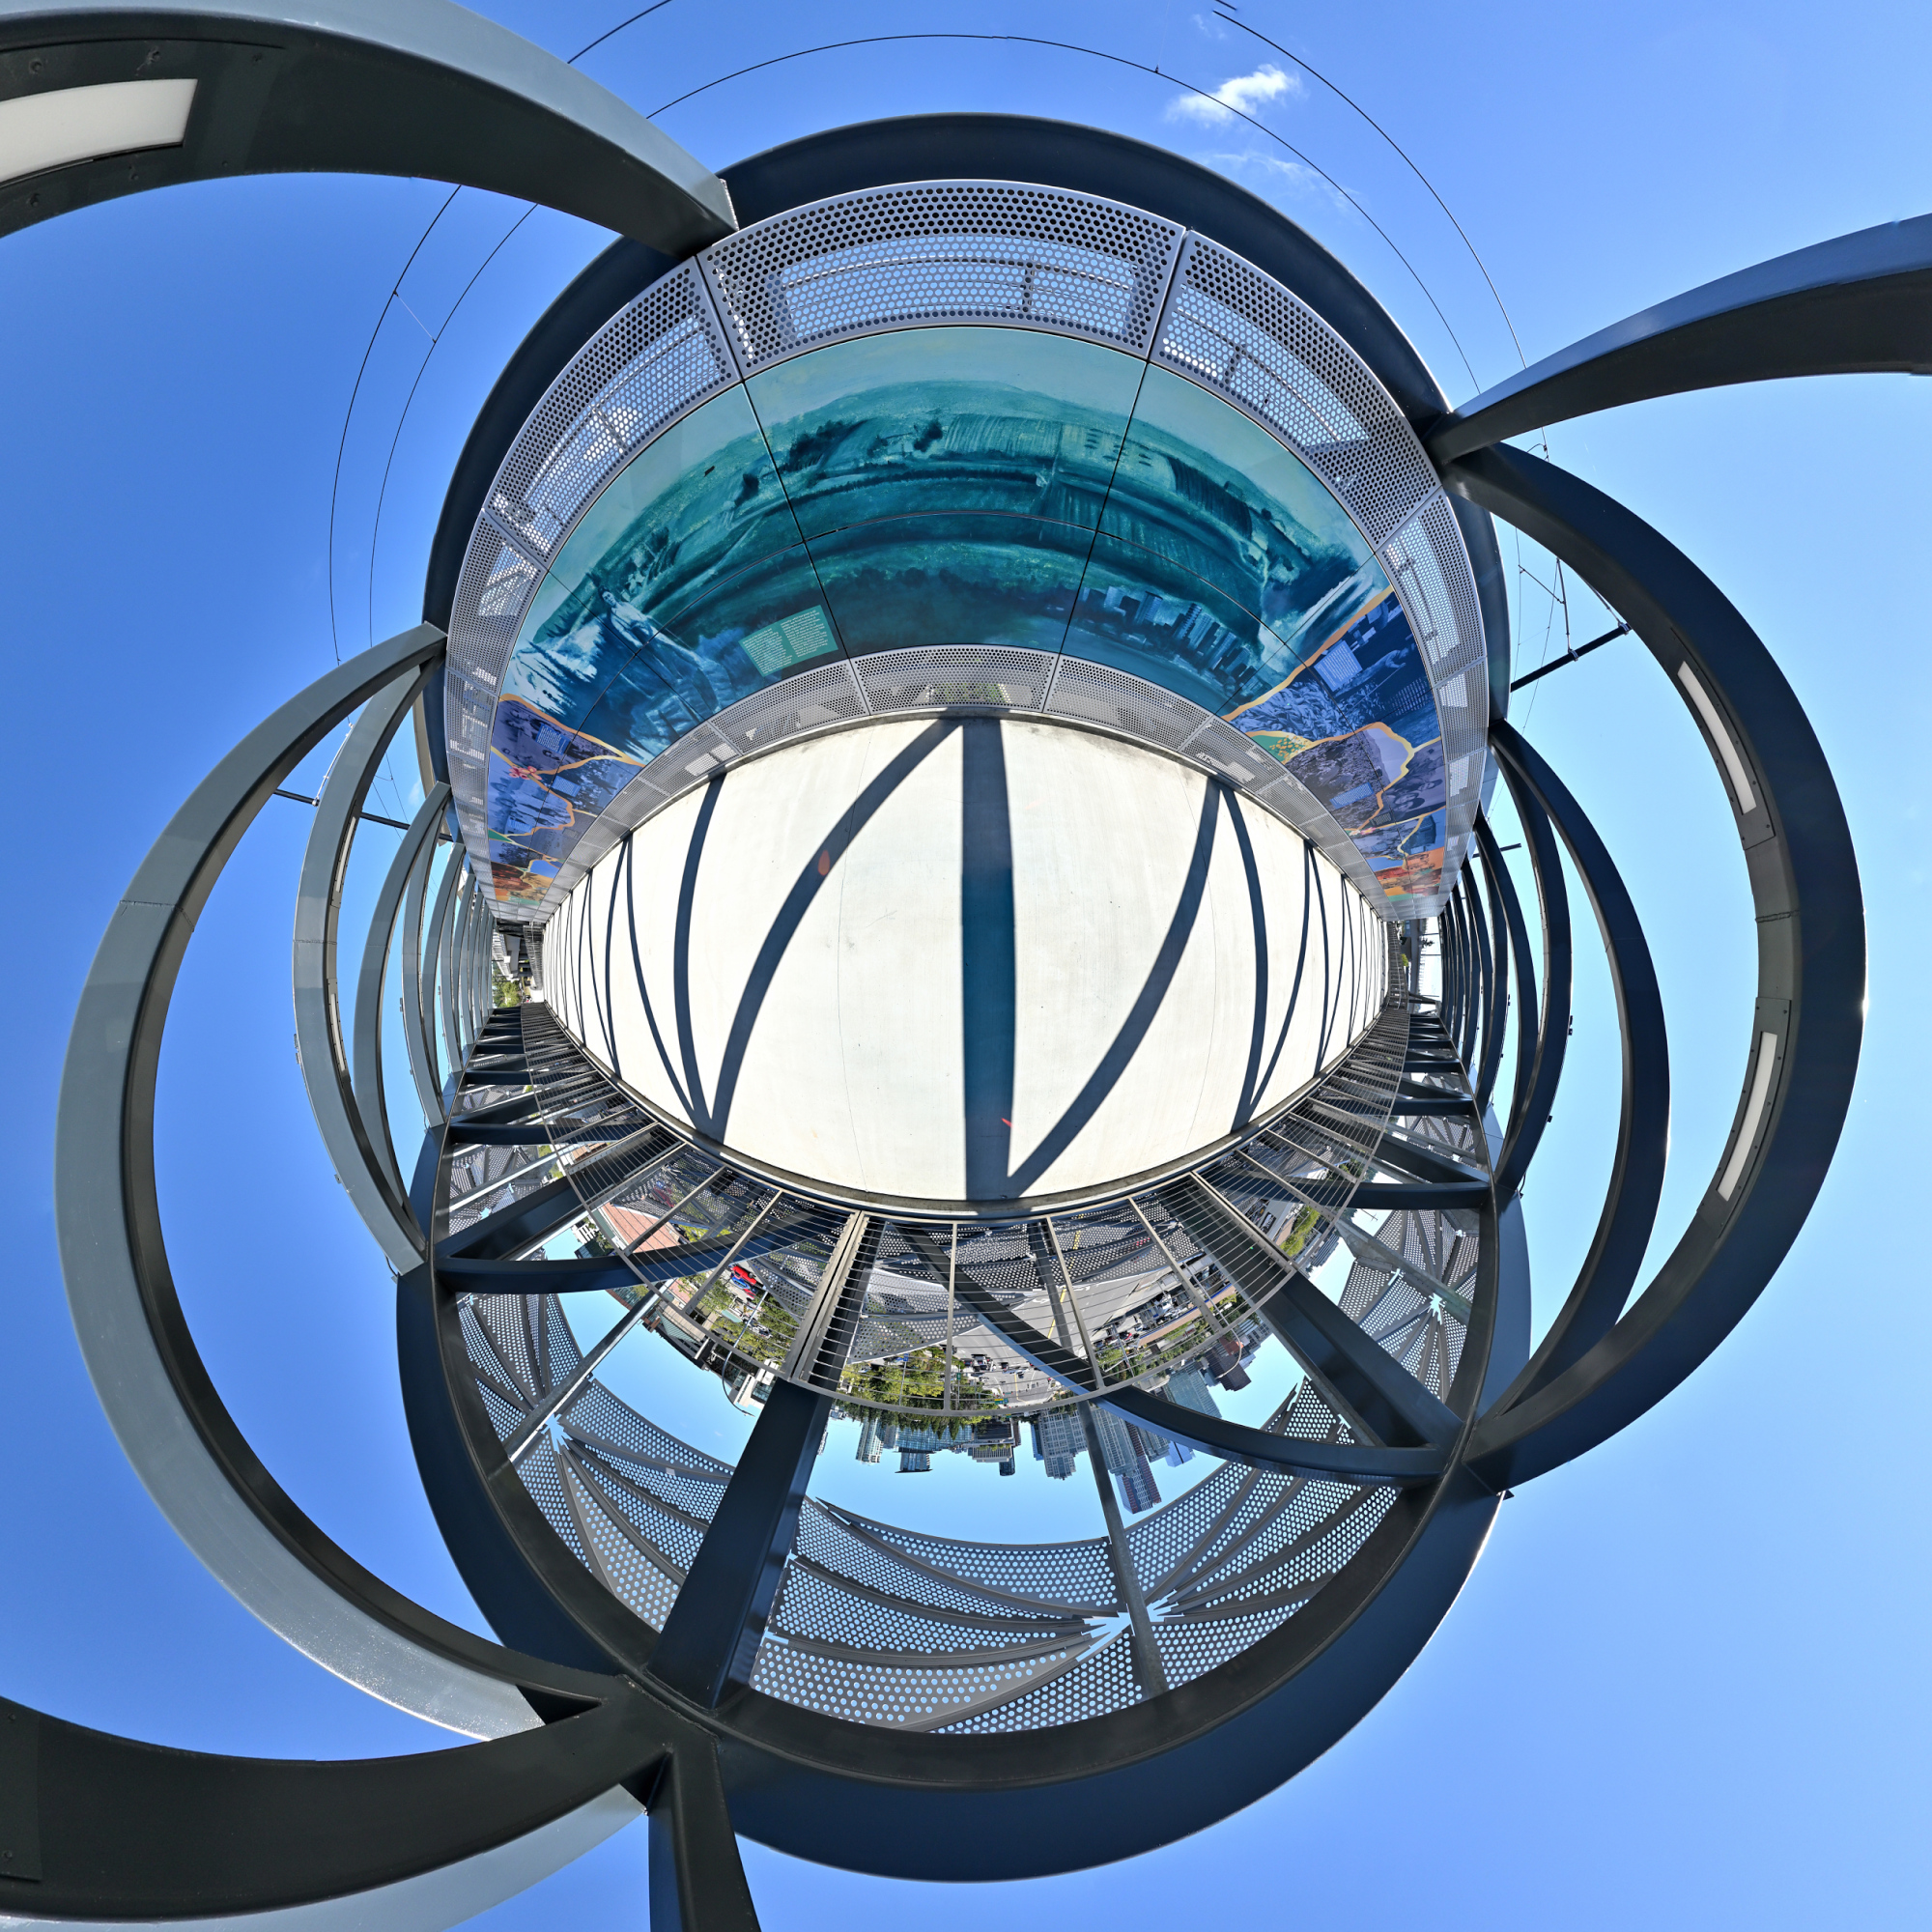
Interactive Panorama Bellevue Connector Bridge
1/800s f/5,6 ISO 100/21° f=7,5mm
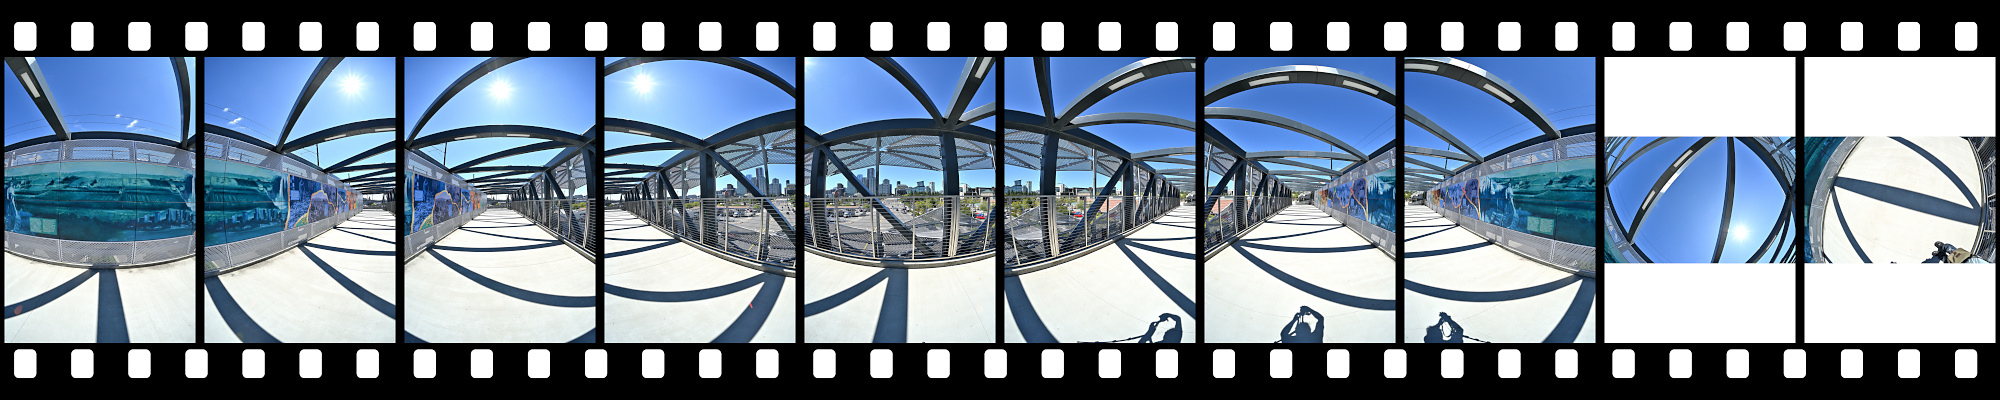
Ein Blick hinter das Geländer
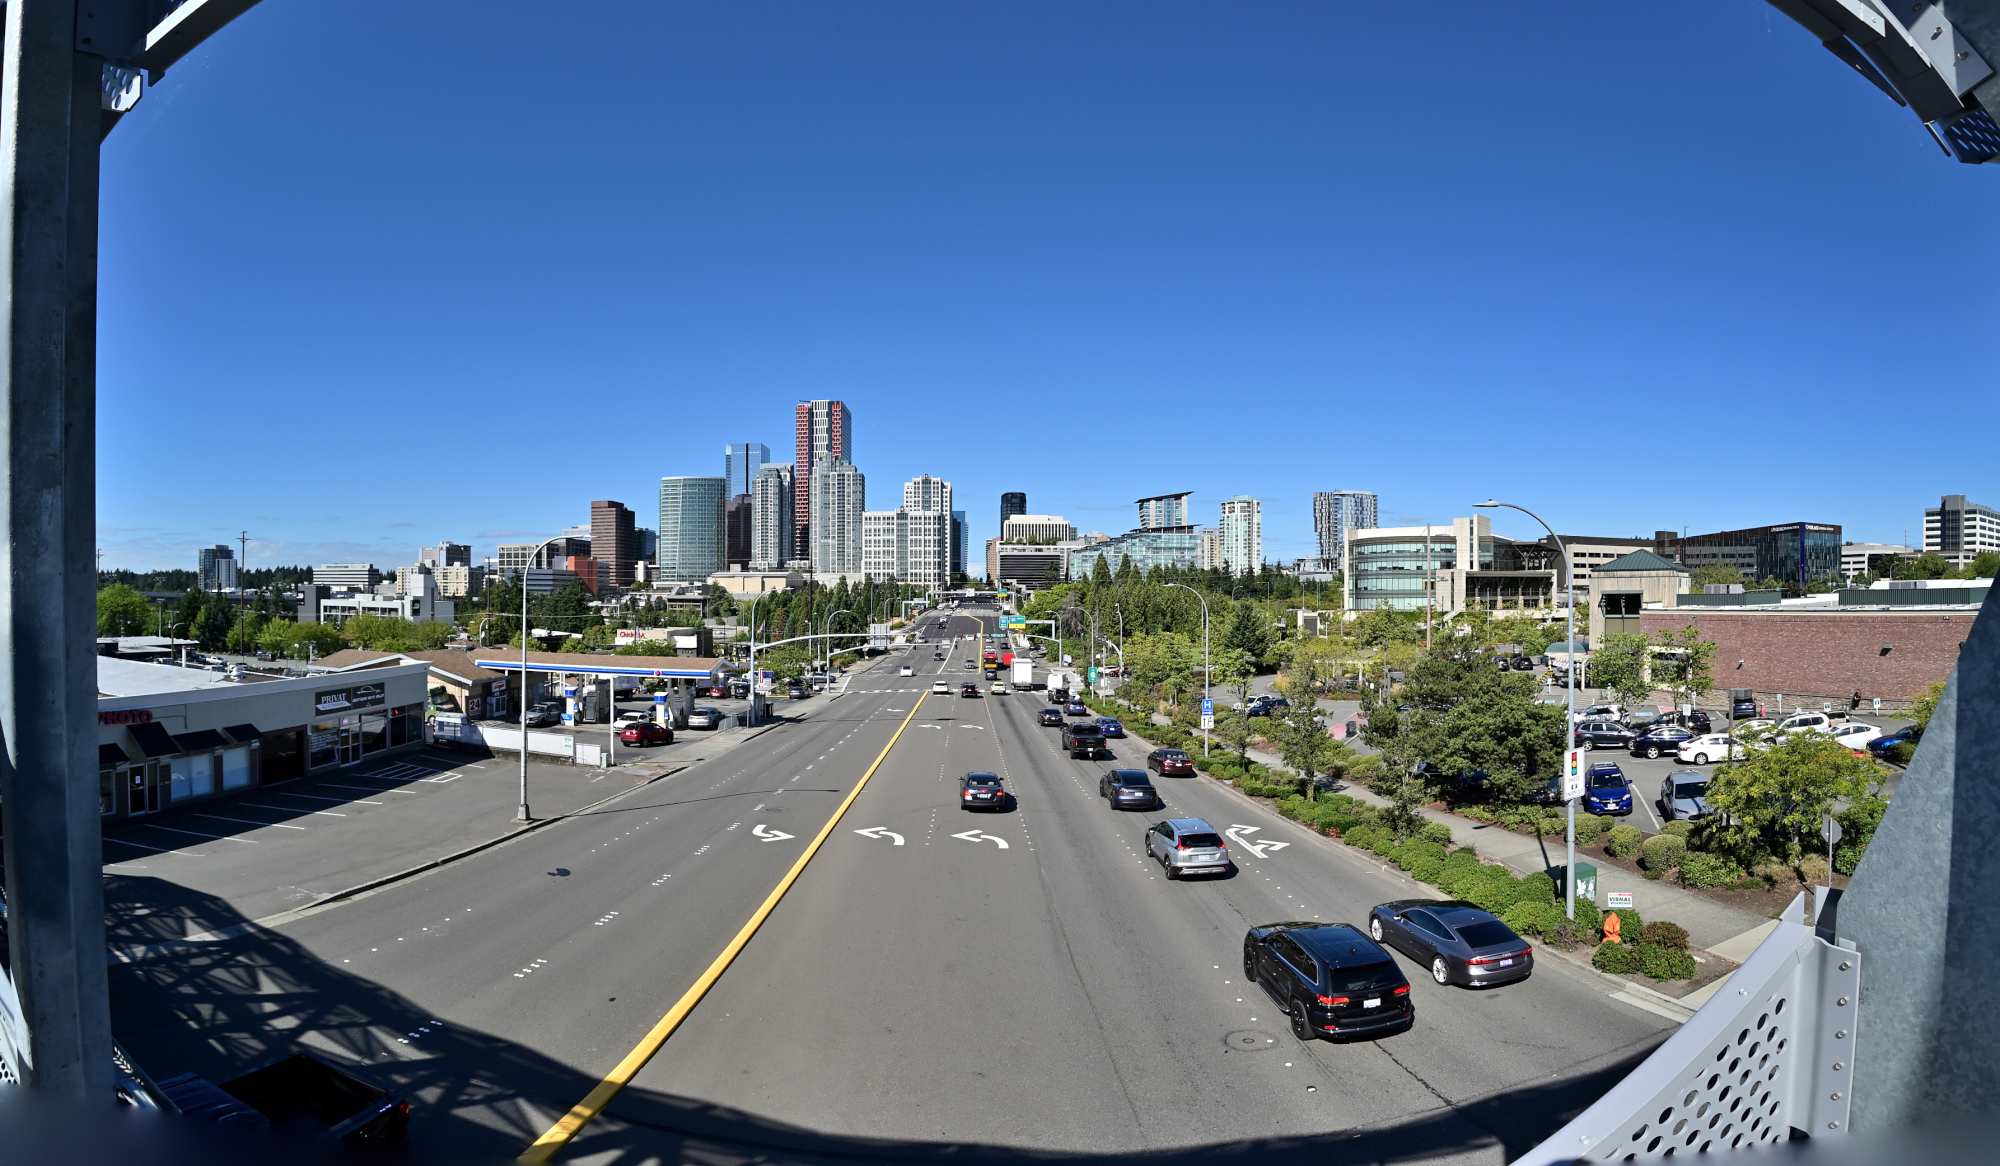
Und nebendran rauscht ein Zug vorbei. Vermutlich weil der Lärmpegel noch nicht ganz bei 'Großstadt' war.
Mural als lineares Panorama:
1/320s f/6,3 ISO 100/21° 18-140mm f/3,5-6,3 VR f=18mm/27mm

Skaliert auf 7k×500 für die Webansicht:

Größere Version mit 27k×2k, 13MB
-
Ein Mural ist ein großflächiges Wandgemälde, das direkt auf eine Wand oder andere architektonische Oberfläche gemalt oder aufgebracht wird. ↩
-
-
Lineares Panorama
Lineares Panorama: Eine Alternative zur klassischen Drehung
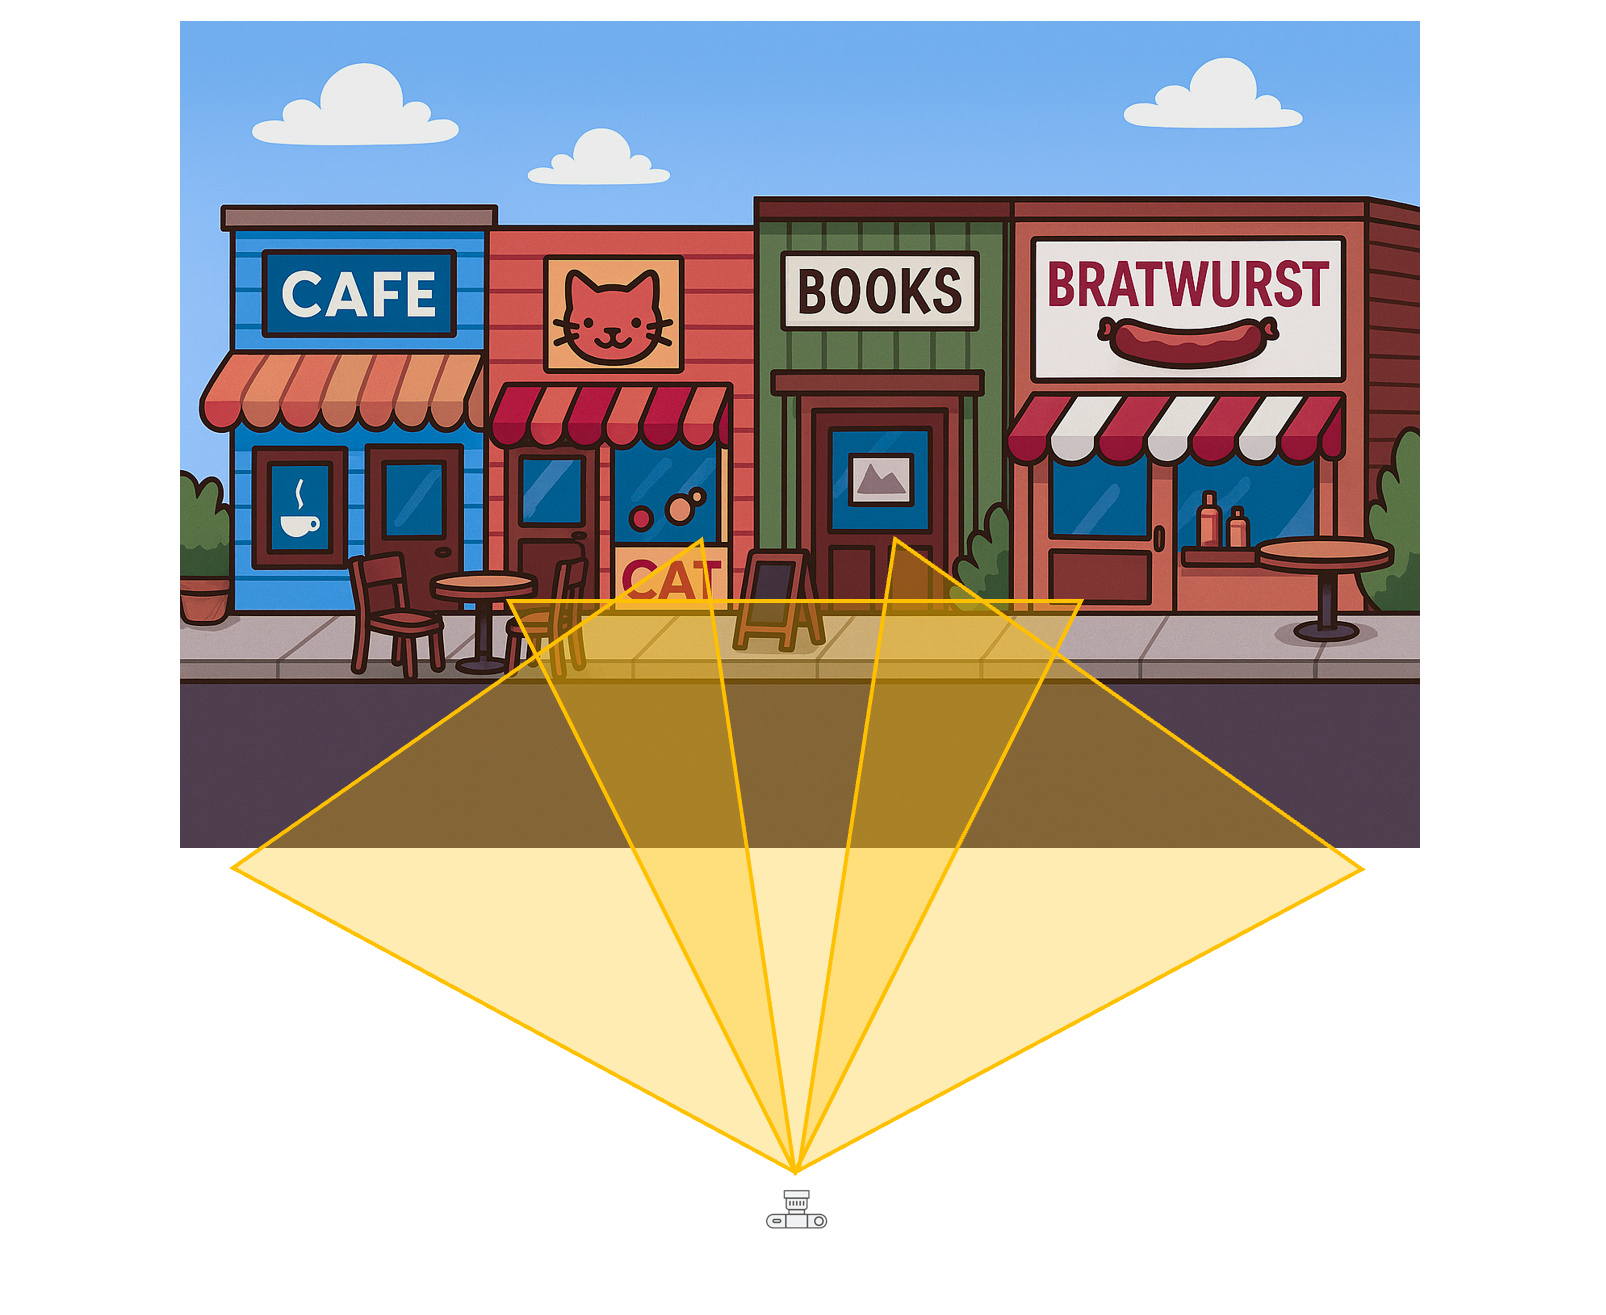
Die klassische Panorama-Fotografie basiert auf der Drehung der Kamera um ihren Nodalpunkt. Diese Technik ermöglicht beeindruckende Rundumaufnahmen und funktioniert besonders gut bei Szenen mit großer Tiefenausdehnung. Doch was passiert, wenn das Motiv selbst langgestreckt ist, wie etwa ein Wandgemälde oder eine Häuserfront, und sich nicht sinnvoll durch Rotation erfassen lässt?
In solchen Fällen bietet das lineare Panorama eine gute Alternative: Statt die Kamera zu drehen, wird sie entlang einer geraden Linie bewegt. Diese Methode eröffnet neue gestalterische Möglichkeiten und stellt besondere Anforderungen an Projektion, Perspektive und Technik. Der folgende Beitrag beleuchtet die Unterschiede zwischen klassischen und linearen Panoramen und zeigt anhand eines konkreten Beispiels, wie ein lineares Panorama entsteht.
Projektionstypen in der Panorama-Fotografie
Für ein Bild mit einem Bildwinkel bis etwa 110° kann die rectilineare Abbildung verwendet werden1. Diese Projektion bewahrt gerade Linien und eignet sich besonders für Architektur- oder Landschaftsaufnahmen mit moderatem Blickwinkel. Sobald der Bildwinkel diesen Bereich überschreitet, treten bei der rectilinearen Projektion zunehmend starke Verzerrungen auf, insbesondere an den Bildrändern. Gerade Linien wirken dann übermäßig gedehnt, und das Bild verliert an natürlicher Wirkung.
Für größere Blickwinkel sind daher die äquirektangulare oder zylindrische Projektion besser geeignet. Sie verteilen die Verzerrung gleichmäßiger und ermöglichen ein harmonischeres Gesamtbild, besonders bei Rundum-Panoramen oder Szenen mit einem Sichtfeld über 180°.
Beim klassischen Panorama wird die Kamera für die einzelnen Bilder um ihren Nodalpunkt gedreht, um Parallaxfehler zu vermeiden.
Vergleich von Projektionstypen
Projektionstyp Typischer Bildwinkel Abbildungseigenschaften Ideale Einsatzbereiche Rectilinear < 110° Gerade Linien bleiben erhalten; starke Randstreckung ab 110° Architektur, Landschaften mit moderatem Sichtfeld Zylindrisch 90°–360° Nur vertikale Linien bleiben gerade Weite Panoramen, Rundum-Szenen, Stadtansichten, Naturvistas Äquirektangular 180°–360° Gleichmäßige Abbildung in beiden Achsen; geeignet für Kugelpanoramen 360°-Panoramen, virtuelle Touren, immersive Szenen Während die klassische Panorama-Technik bei weitwinkligen Szenen hervorragend funktioniert, stößt sie bei langgestreckten Motiven wie Wandgemälden oder Häuserfronten entlang einer Straße an ihre Grenzen. Die Drehung um den Nodalpunkt führt hier zu perspektivischen Verzerrungen und einem unnatürlichen Bildaufbau, da sich die räumliche Tiefe des Motivs nicht gleichmäßig erfassen lässt.
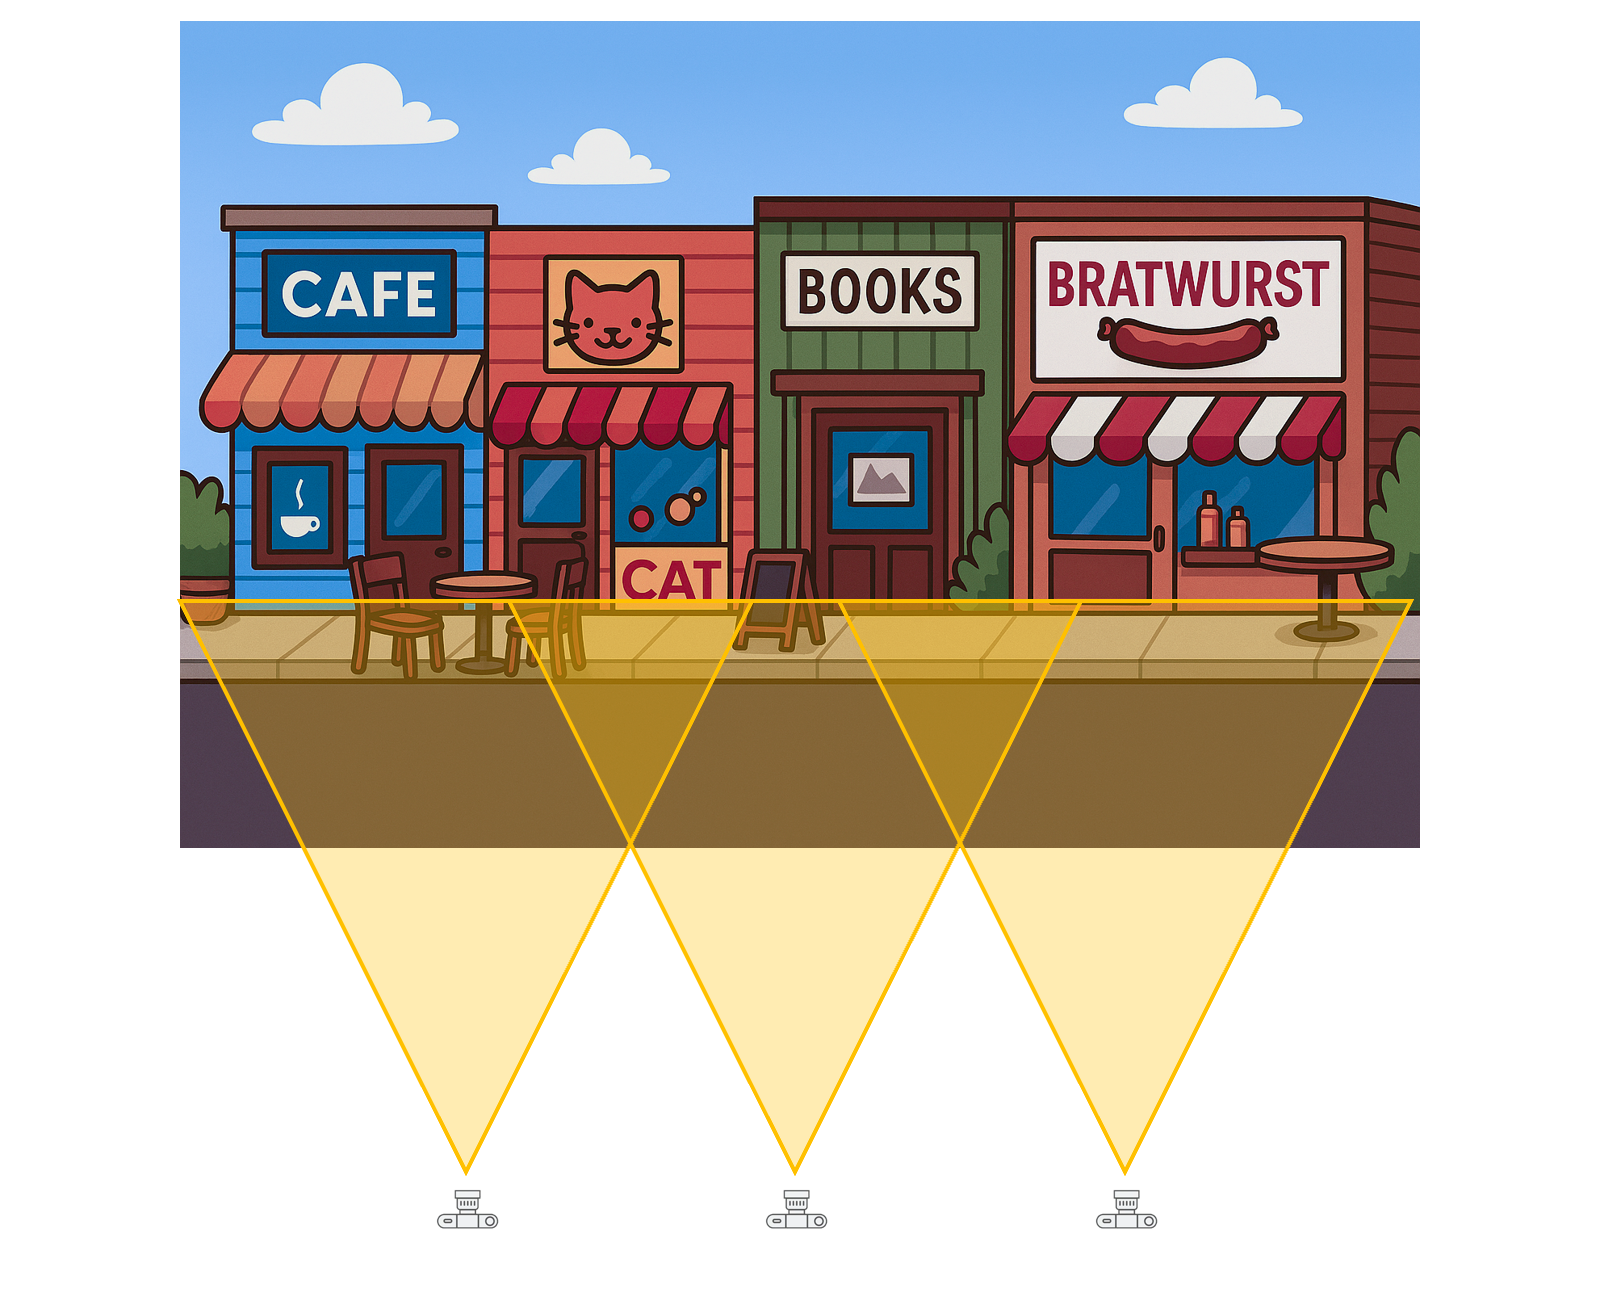
Hier setzt das lineare Panorama an: Statt die Kamera zu drehen, wird sie linear entlang des Motivs mit konstantem Abstand und paralleler Ausrichtung bewegt. Das Ergebnis ist ein visuelles Band, das die räumliche Kontinuität bewahrt und das Motiv in seiner gesamten Länge zeigt. Diese Technik eignet sich besonders für Szenen mit geringer Tiefenausdehnung und großer horizontaler Ausdehnung, bei denen eine klassische Panoramaaufnahme zu perspektivischen Brüchen führen würde.
Die lineare Methode bringt jedoch eigene technische und gestalterische Herausforderungen mit sich, die bei der Planung und Umsetzung berücksichtigt werden müssen:
- Parallaxfehler durch hervorstehende Objekte wie Stühle, Autos oder
Personen, die sich bei der Bewegung der Kamera unterschiedlich
überlagern
- Perspektivische Verzerrungen, da sich die Kamera seitlich bewegt und
dadurch die Fluchtlinien des Motivs beeinflusst werden
- Bewegte Elemente wie Autos oder Fußgänger, die zu Stitchingfehlern
oder Geisterbildern führen können
- Lichtveränderungen entlang der Strecke, etwa durch Schattenwurf, unterschiedliche Beleuchtung oder wechselnde Wetterbedingungen
Lineares Panorama am Beispiel eines Murals
In diesem Projekt wird ein Mural2 dokumentiert, das seitlich im Inneren der Bellevue Connector Bridge angebracht ist und sich über deren gesamte Länge erstreckt. Es zeigt eine zusammenhängende Szene, die sich nur durch eine lineare Kamerabewegung vollständig und verzerrungsfrei erfassen lässt.
Denn das Wandbild passt nicht in ein einziges (Fisheye) Bild.
Und das Geländer passt nicht zur Idee für mehr Abstand einfach mal eben drüberzusteigen.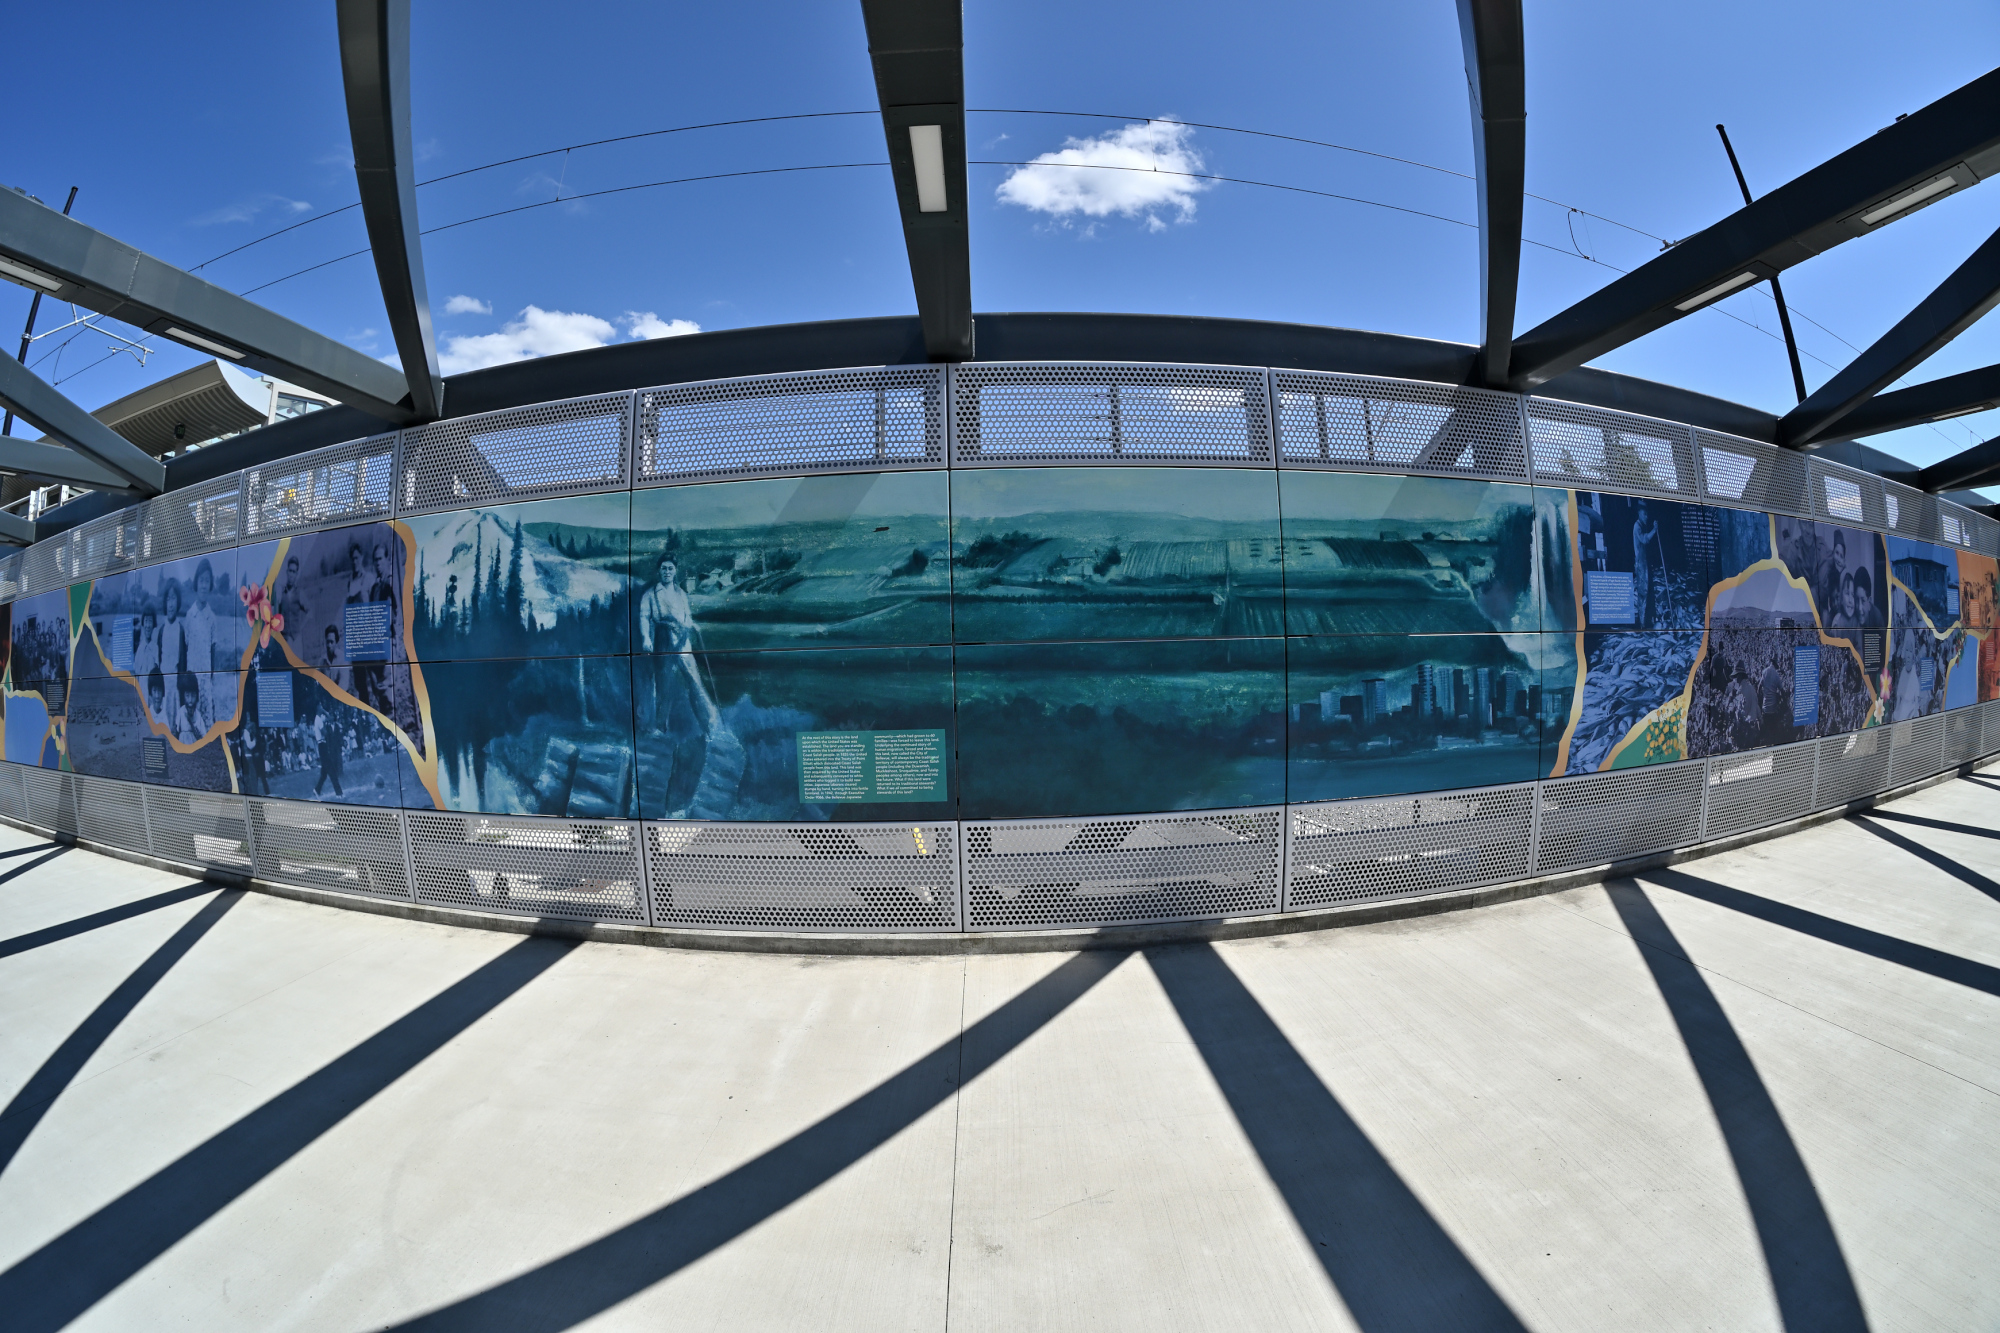
Interactive Panorama Bellevue Connector Bridge
Siehe Bellevue Connector BridgeUm das Mural abzubilden, wird die Kamera linear entlang des Motivs mit konstantem Abstand und paralleler Ausrichtung bewegt3.
Wie beim klassischen Panorama sind manuelle Einstellungen für Belichtung, Weißabgleich und Fokus entscheidend für konsistente Ergebnisse. Weiterhin ist zu beachten:
- Kamerabewegung: Linear entlang der Straße – z. B. auf einem Slider,
Fahrrad oder zu Fuß mit Markierungen
- Konstanter Abstand: Möglichst gleichbleibend, z. B. 5 m zur
Häuserfront
- Horizontale Ausrichtung: Kamera bleibt parallel zum Motiv
- Überlappung: 20–50 % zwischen den Bildern
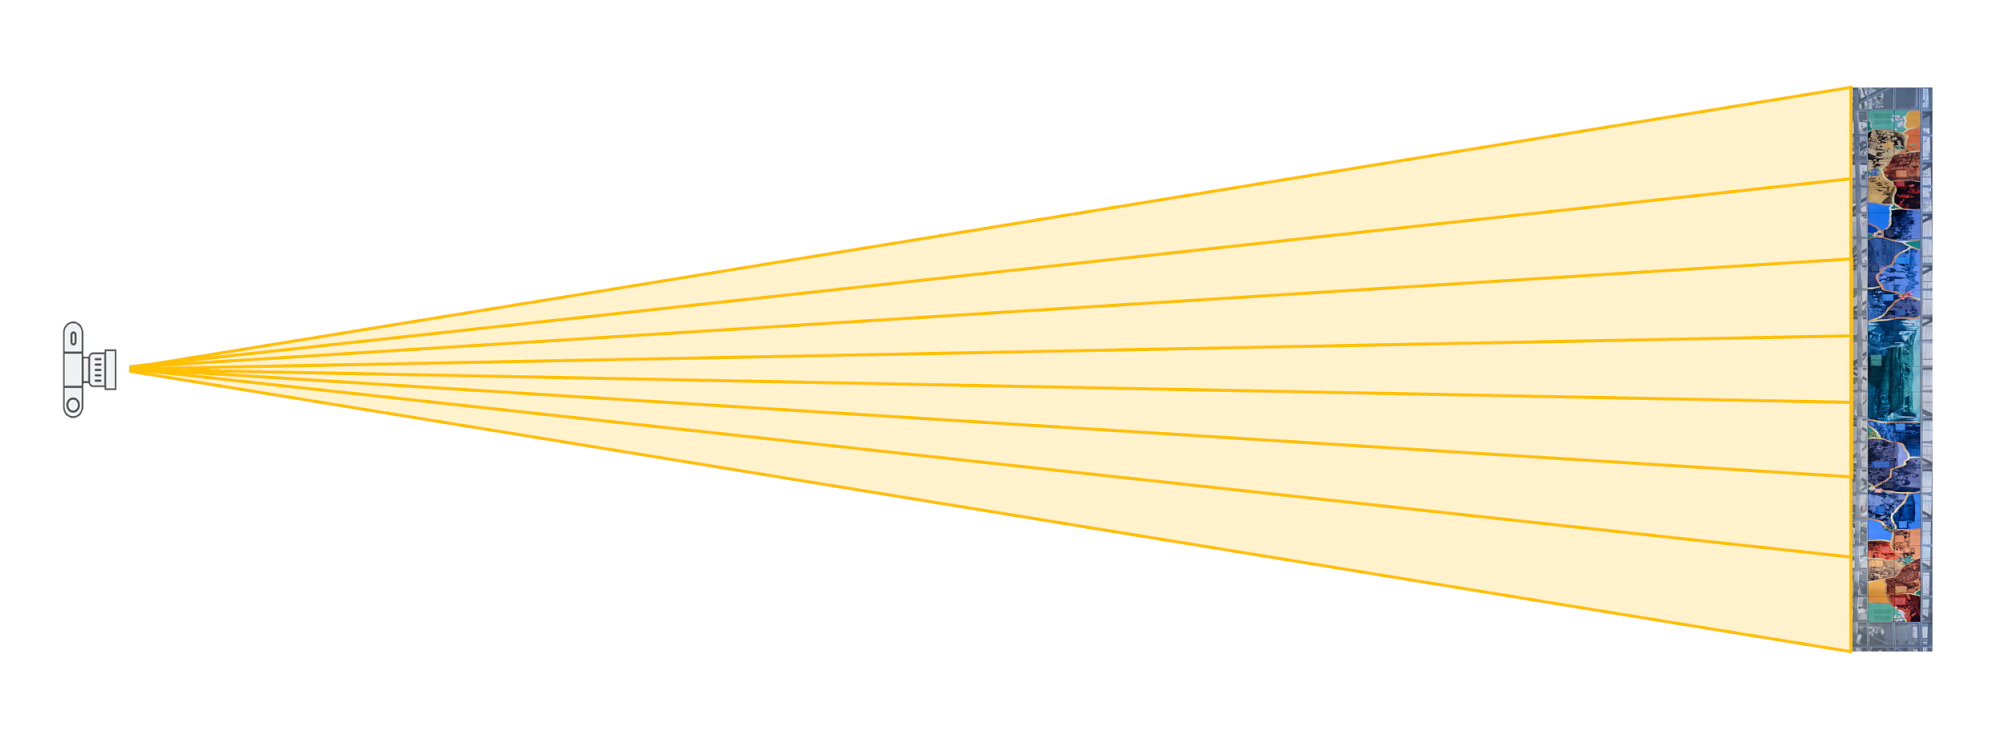
Die Rectilinearprojektion führt zu Verzerrungen in den Randbereichen – ähnlich wie bei einem Weitwinkelobjektiv.
Um ein lineares Panorama zu erstellen, wird eine (fast) orthogonale Projektion verwendet. Der resultierende kleine Bildwinkel minimiert Verzerrungen. Dadurch lassen sich Panoramen erstellen, die aufgrund des erforderlichen großen Blickwinkels sonst nicht abbildbar wären.
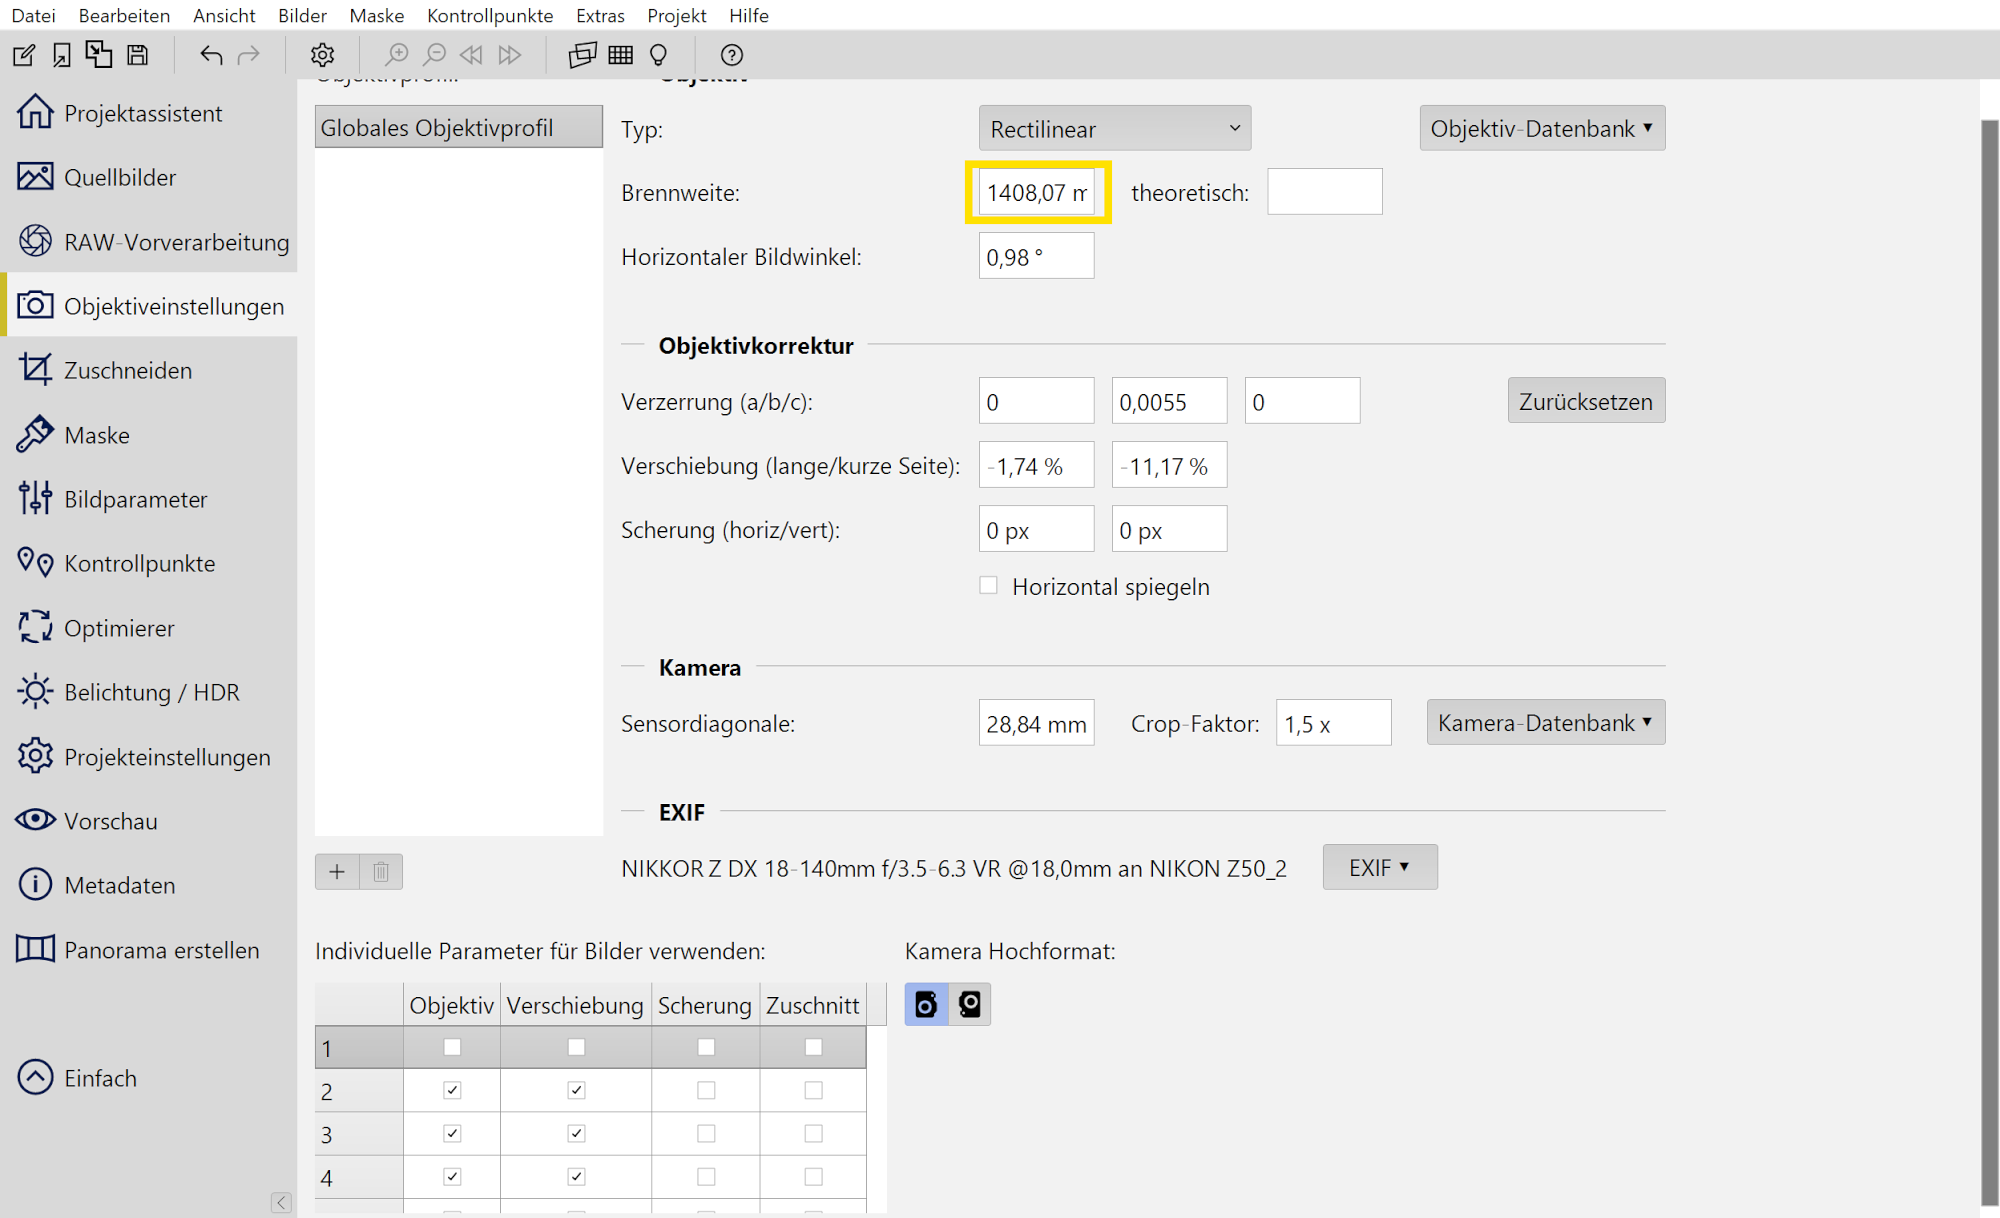
Die Optimierung ergab in diesem Beispiel eine effektive Brennweite von etwa 1400 mm, entsprechend einem Bildwinkel von etwa horizontal 8° und vertikal 1°.Dasselbe Verfahren findet auch beim Zusammensetzen von Scans Anwendung (Mosaik). Die dabei verwendete orthogonale Projektion ist der Grund, warum das mit Fisheye-Bildern nicht funktioniert. Sie kann nur auf rectilineare Bilder angewendet werden, genauso wenig wie ein gekrümmter Spiegel parallele Linien korrekt reflektieren kann.
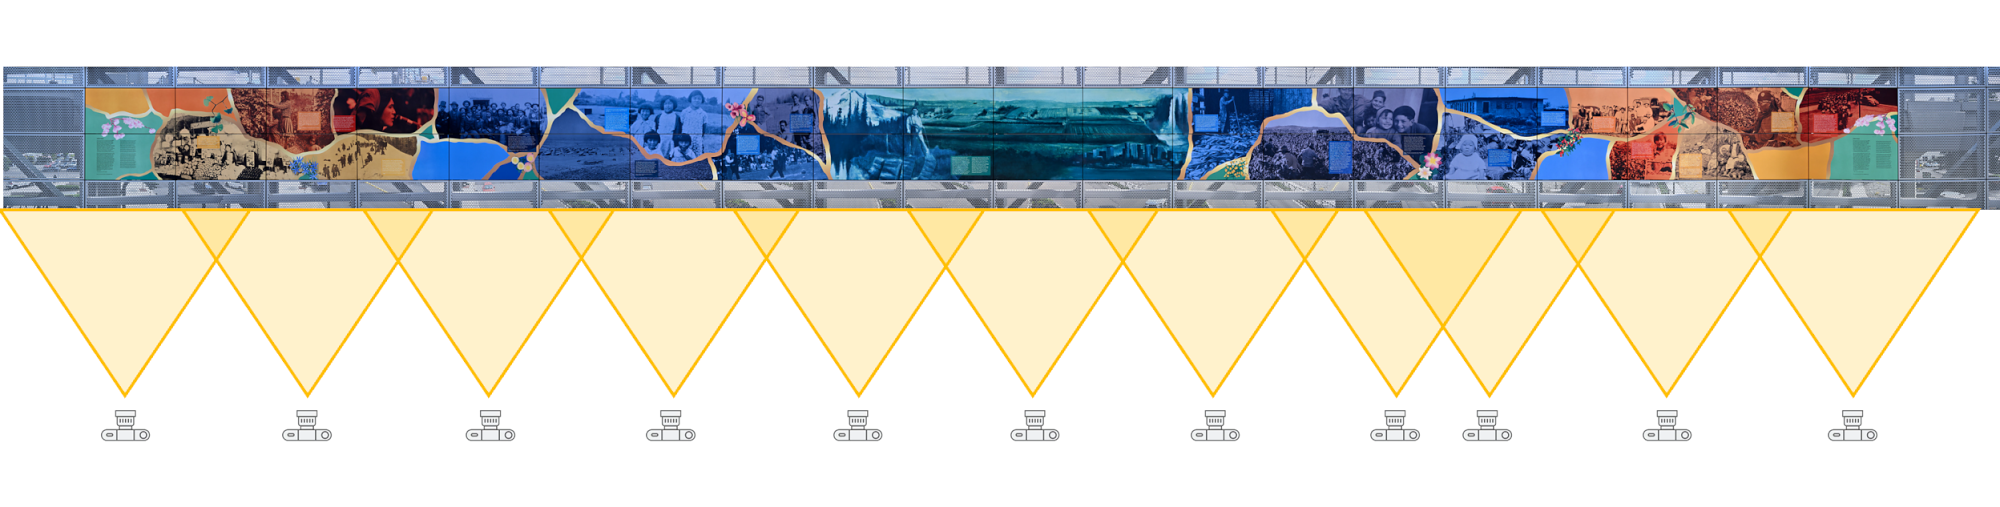
Panorama-Erstellung in PTGui
Im ersten Schritt werden sämtliche Bilder in PTGui importiert, um mit der Panorama-Erstellung zu beginnen.

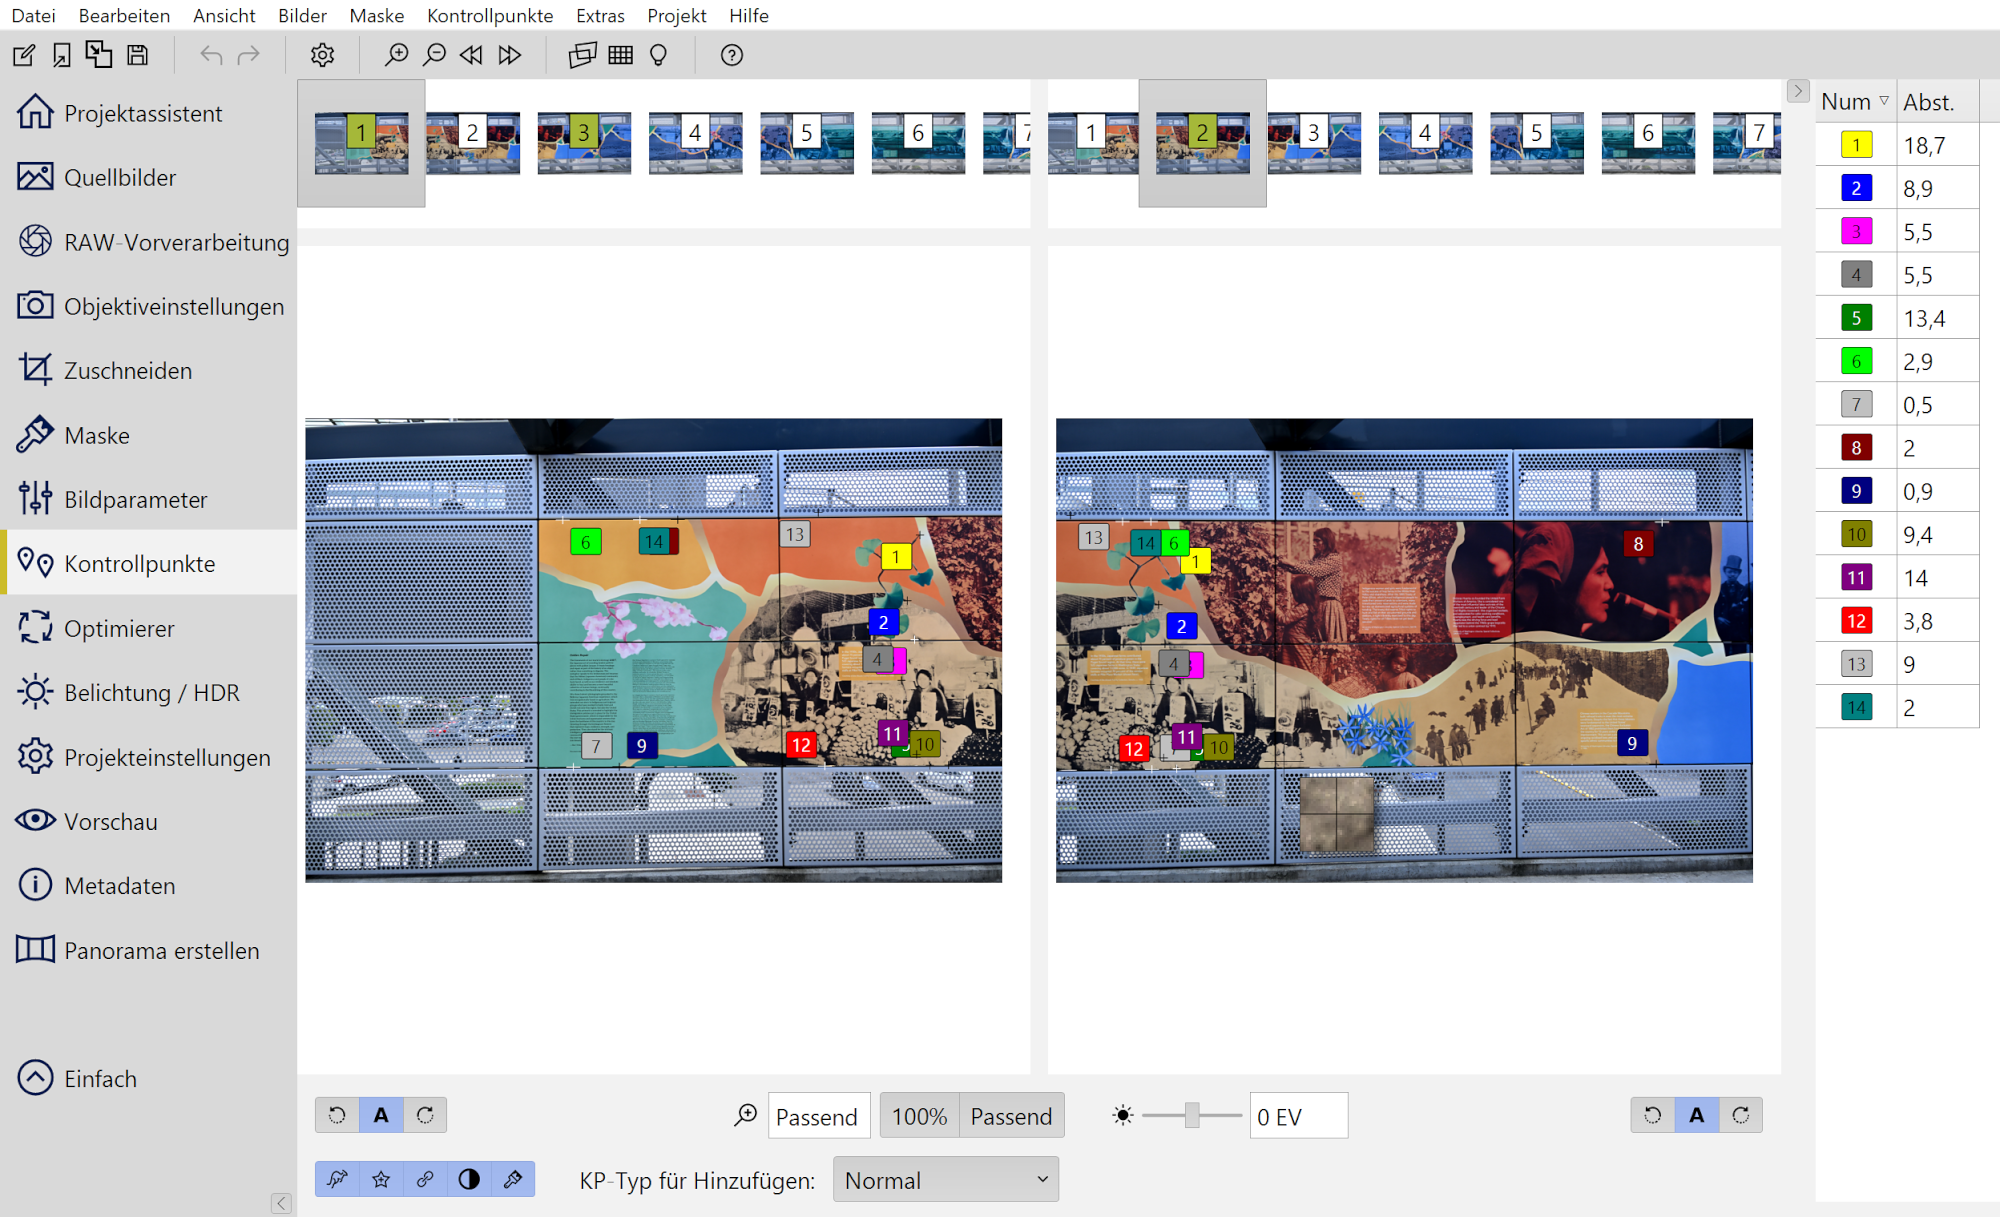
Für jedes Einzelbild werden horizontale (grün) und vertikale (rot) Kontrollpunkte gesetzt.
Zwischen den Bildern werden zusätzlich horizontale Kontrollpunkte (gelb) eingefügt, um eine gleichmäßige Ausrichtung des Panoramas sicherzustellen. Auch zwischen dem ersten und letzten Bild werden horizontale Kontrollpunkte gesetzt, um die Gesamtgeometrie auszurichten.
Für jedes einzelne Bild werden horizontale Kontrollpunkte gesetzt.
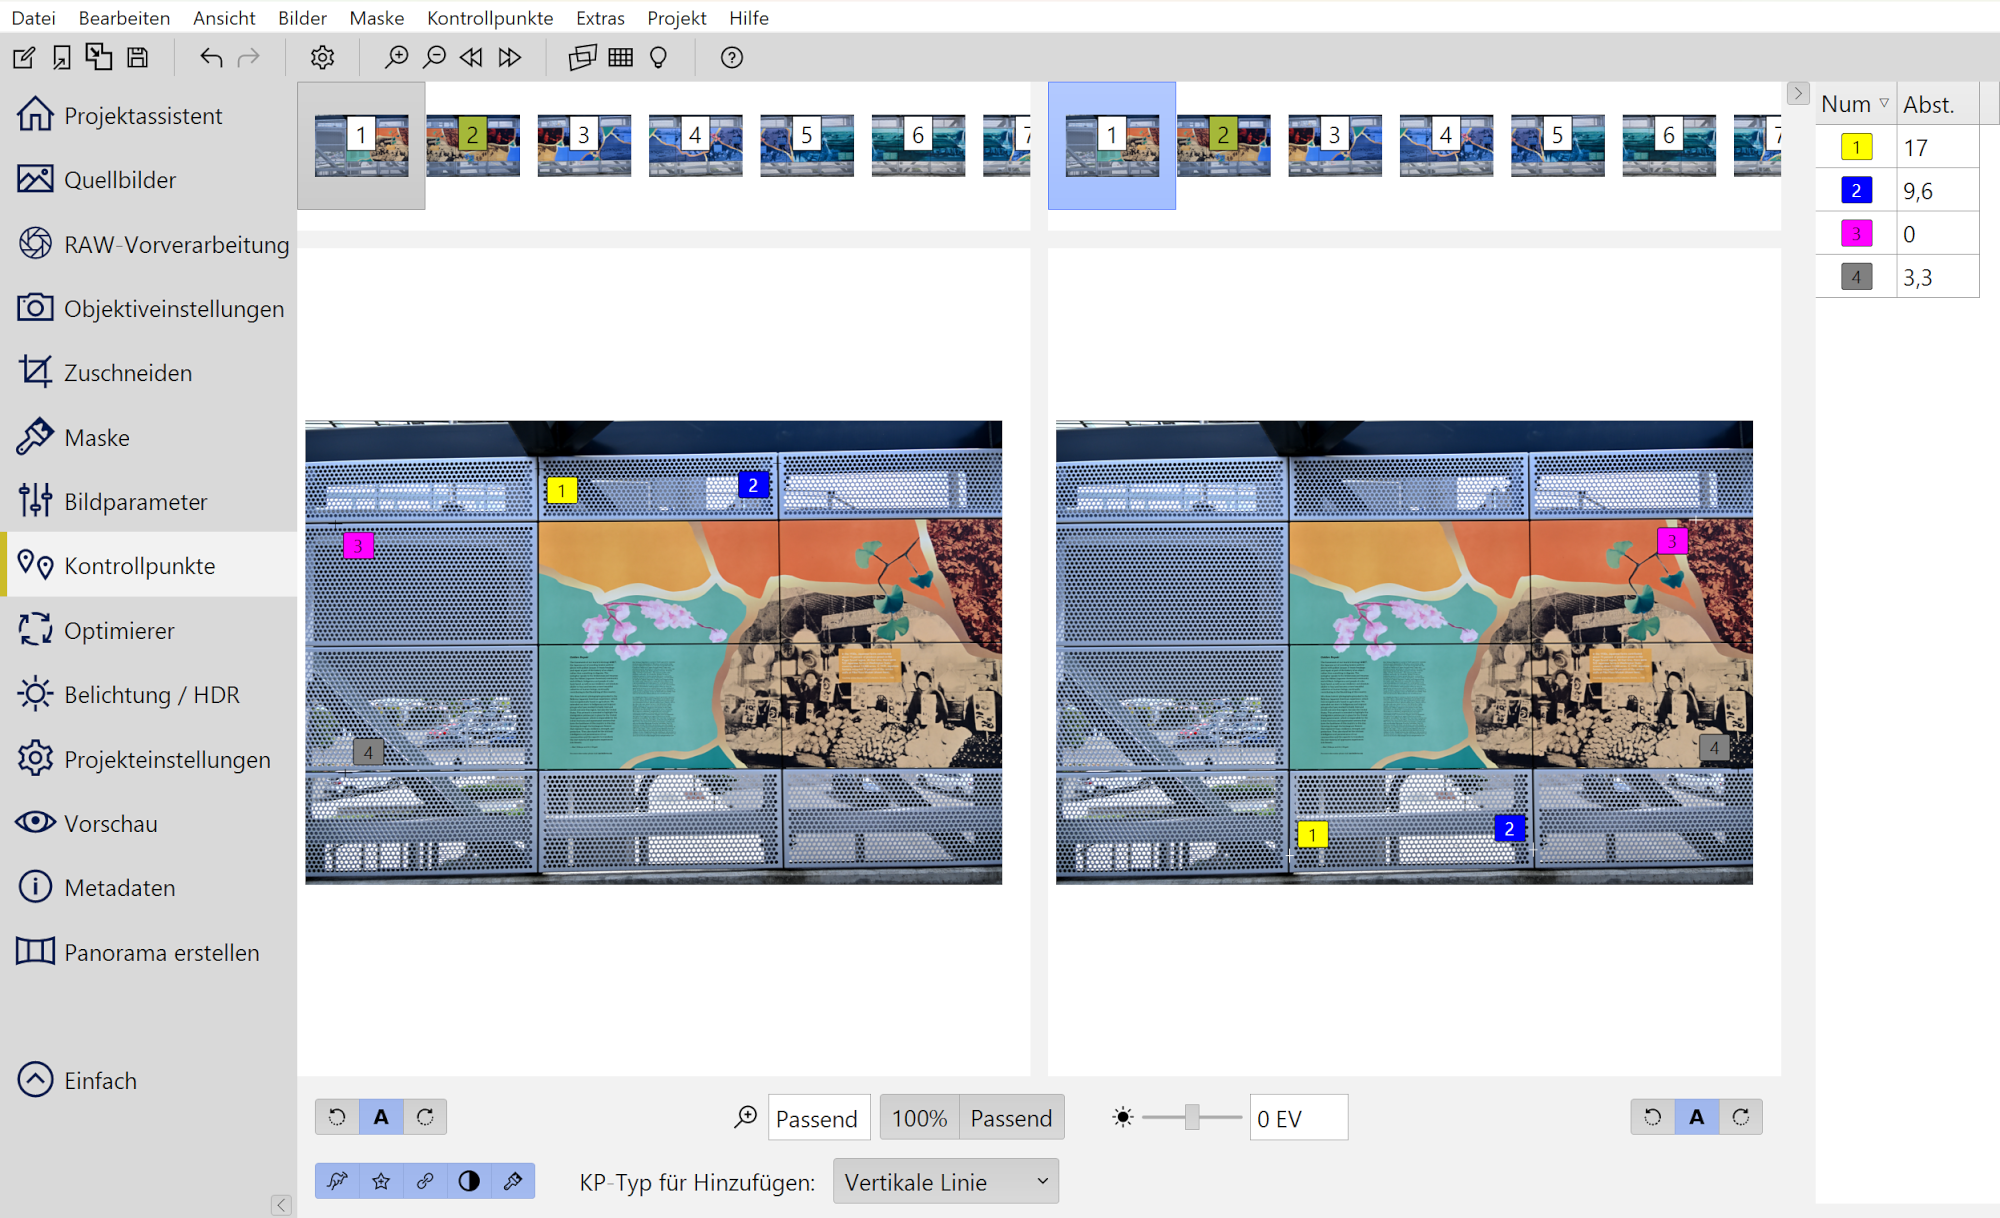
Zusätzlich zu den normalen Kontrollpunkten zwischen den Bildern werden horizontale Kontrollpunkte eingefügt.
Die Projektion wird auf "Rectilinear" gesetzt. Für alle Bilder außer dem ersten Bild wird die individuelle Optimierung für Objektiv und Verschiebung gesetzt.
Zunächst ohne Blickwinkel, Parameter 'b' und Verschiebung optimieren, um die Bilder grob auszurichten.
Dann wird mit Blickwinkel, Parameter 'b' und Verschiebung optimiert.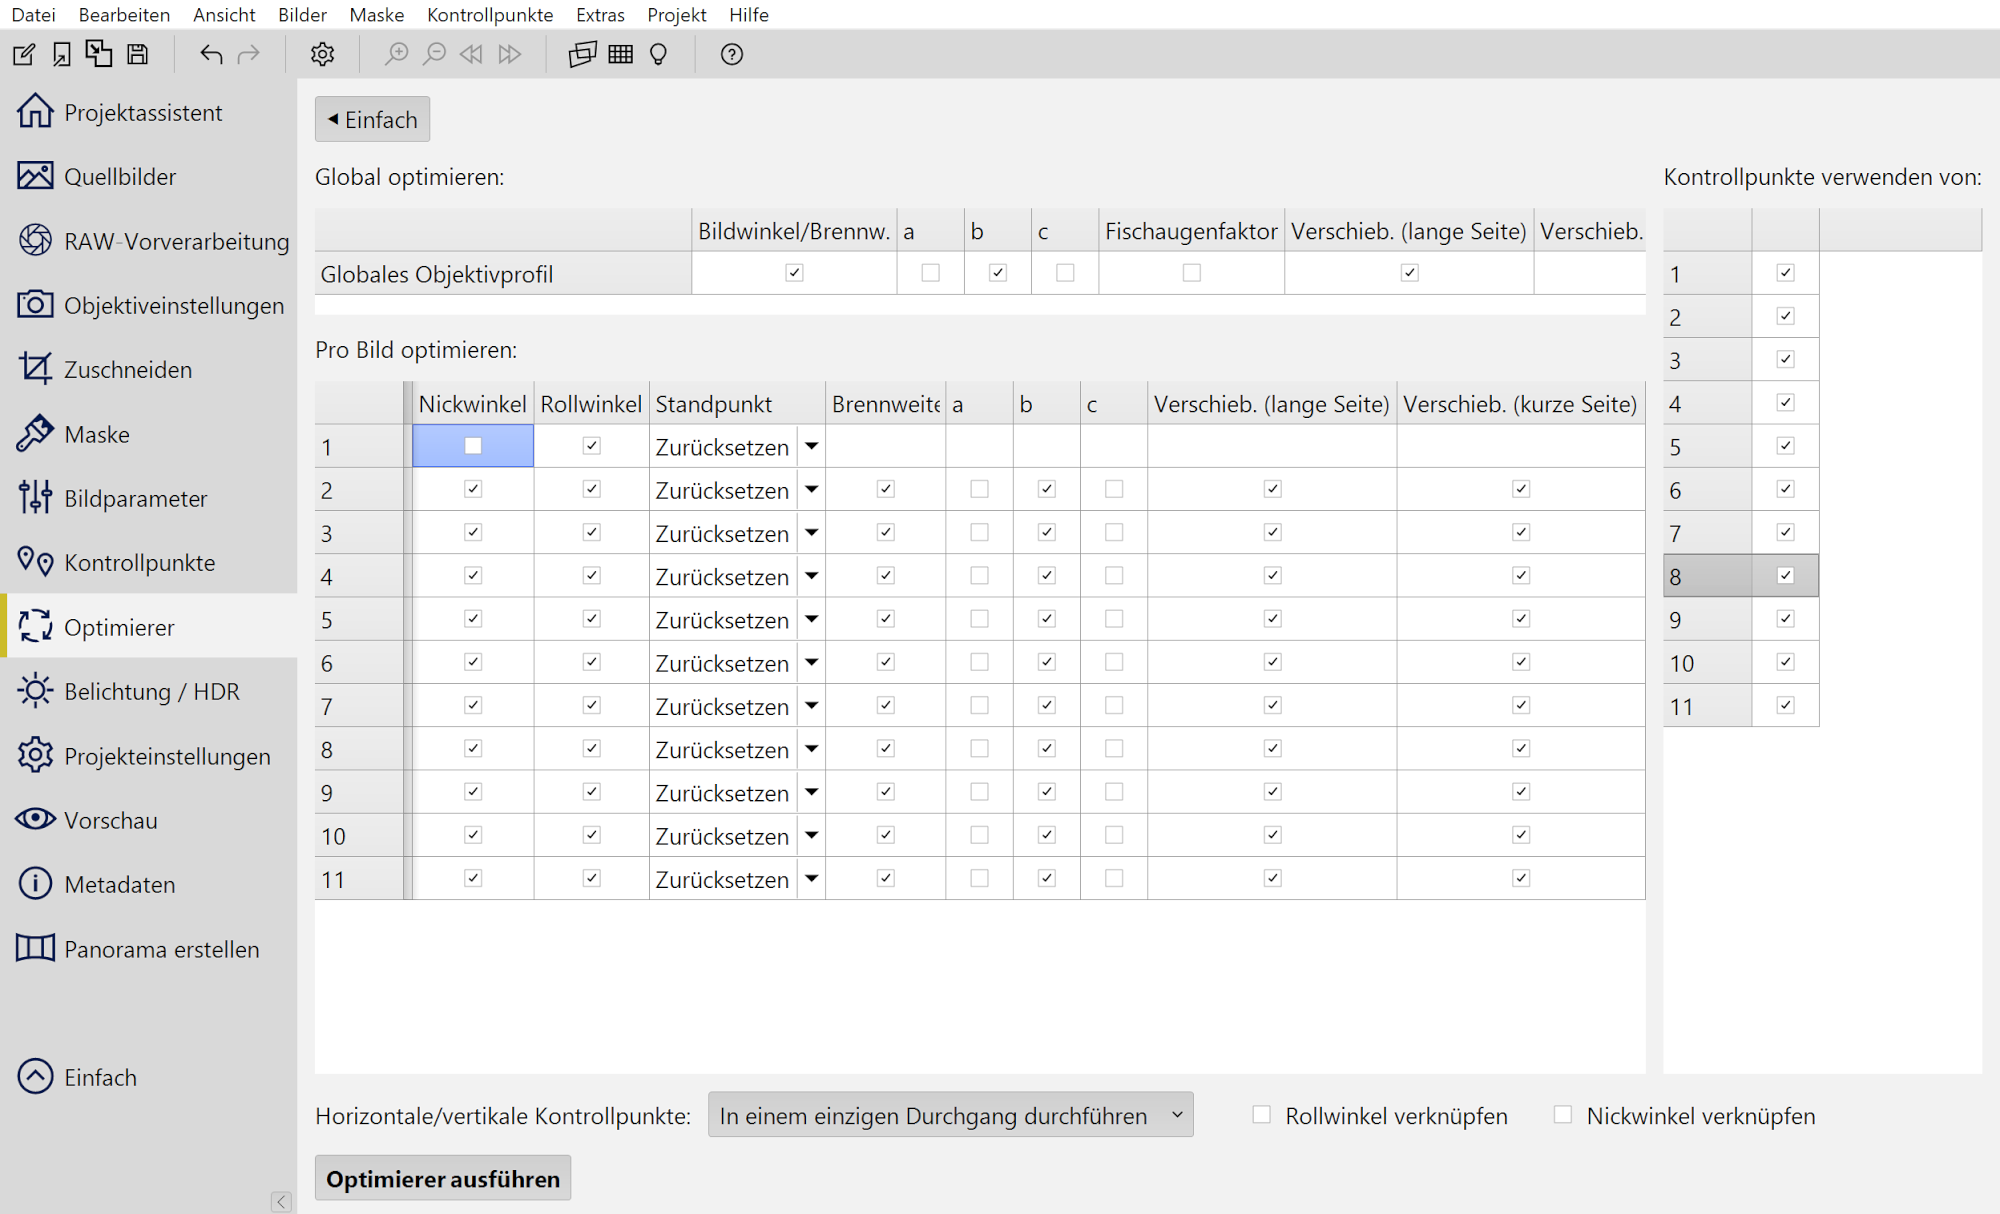
Ein kleiner horizontaler und vertikaler Bildwinkel reduziert Verzerrungen an den Bildrändern. Bei einer Optimierung mit der tatsächlichen Objektivbrennweite läge der Blickwinkel über 180 Grad und das Panorama ließe sich nicht korrekt erzeugen.
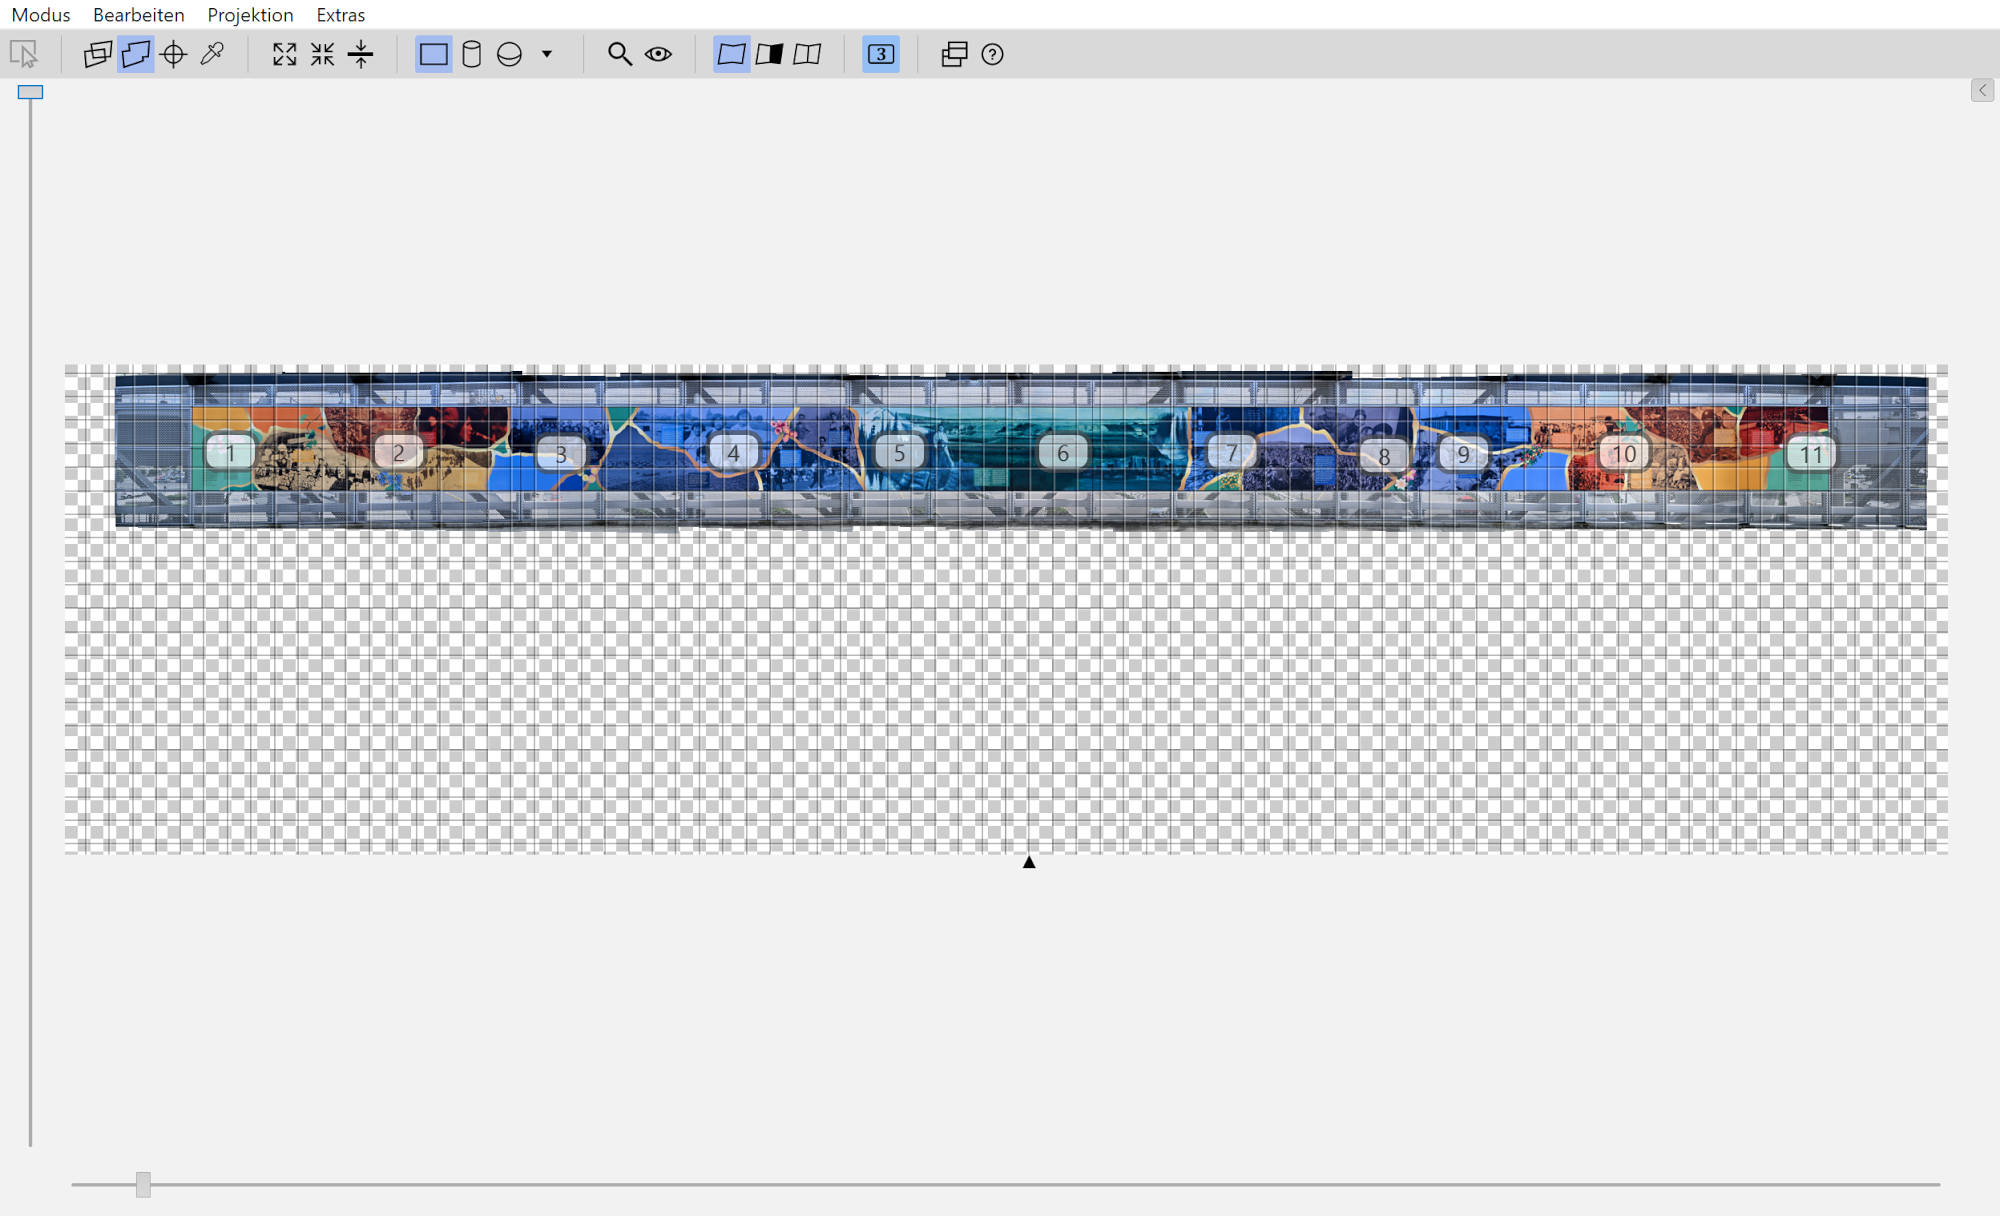
Das Ergebnis: Ein lineares Panorama in voller Länge
Aus 11 Einzelbildern entsteht ein durchgehendes Panorama mit 44135 × 3242 Bildpunkten (143,1 MP, 61,4 MB), das die gesamte Szene in hoher Detailtreue abbildet. Die Aufnahme wurde mit der Z50 II bei 18 mm Brennweite erstellt und anschließend gemäß der beschriebenen Schritte in PTGui zusammengesetzt.
1/320s f/6,3 ISO 100/21° 18-140mm f/3,5-6,3 VR f=18mm/27mm
Skaliert auf 7k×500 für die Webansicht:
Größere Version mit 27k×2k, 13MB
-
Ein 14mm-Objektiv an Vollformat liefert etwa 104° horizontalen Bildwinkel.↩
-
Ein Mural ist ein großflächiges Wandgemälde, das direkt auf eine Wand oder andere architektonische Oberfläche gemalt oder aufgebracht wird.↩
-
Ein Abschnitt wurde mit verkürztem Wegabstand aufgenommen, da jedes Bild drei Segmente enthält und die Gesamtanzahl der Segmente kein Vielfaches von drei ist.↩
Linear Panorama: An Alternative to Classical Rotation
Classical panoramic photography relies on rotating the camera around its nodal point. This technique enables impressive 360° captures and works especially well for scenes with significant depth. But what if the subject itself is elongated, like a mural or a row of buildings, and cannot be effectively captured through rotation?
In such cases, the linear panorama offers a compelling alternative: instead of rotating the camera, it is moved along a straight path. This method opens up new creative possibilities and introduces unique challenges in projection, perspective, and technique. The following article explores the differences between classical and linear panoramas and illustrates how a linear panorama is created using a real-world example.
Projection Types in Panoramic Photography
For images with a field of view up to approximately 110°, the rectilinear projection can be used1. This projection preserves straight lines and is ideal for architectural or landscape shots with moderate angles. Once the field of view exceeds this range, rectilinear projection introduces strong distortions, especially at the edges. Straight lines appear overly stretched, and the image loses its natural appearance.
For wider fields of view, equirectangular or cylindrical projections are better suited. These distribute distortion more evenly and produce a more harmonious overall image, especially for full panoramas or scenes with a field of view over 180°.
In classical panoramas, the camera is rotated around its nodal point to avoid parallax errors.
Comparison of Projection Types
Projection type Typical image angle Mapping properties Ideal areas of application Rectilinear < 110° Straight lines are preserved; Strong edge stretching from 110° Architecture, landscapes with a moderate field of view Cylindrical 90°–360° Only vertical lines remain straight Wide panoramas, all-around scenes, cityscapes, nature vistas Equirectangular 180°–360° Uniform image in both axes; suitable for spherical panoramas 360° panoramas, virtual tours, immersive scenes While classical panorama techniques work well for wide-angle scenes, they struggle with elongated subjects like murals or building facades along a street. Rotating around the nodal point introduces perspective distortions and an unnatural composition, as the spatial depth of the subject cannot be evenly captured.
This is where the linear panorama comes in: instead of rotating the camera, it is moved linearly along the subject with constant distance and parallel alignment. The result is a visual ribbon that preserves spatial continuity and displays the subject in its full length. This technique is especially suitable for scenes with low depth and large horizontal extent, where classical panoramas would cause perspective breaks.
However, the linear method introduces its own technical and creative challenges:
- Parallax errors from protruding objects like chairs, cars, or people
that overlap differently during camera movement
- Perspective distortions due to lateral camera movement affecting
vanishing lines
- Moving elements like cars or pedestrians causing stitching errors or
ghosting
- Lighting changes along the path, such as shadows, varying illumination, or changing weather
Linear Panorama Example: A Mural
This project documents a mural2, spanning its entire length inside the Bellevue Connector Bridge. It depicts a continuous scene that can only be captured fully and distortion-free through linear camera movement.
The mural does not fit into a single (fisheye) image. And the railing is not suitable for simply stepping over to gain more distance.
Interactive Panorama Bellevue Connector Bridge
See Bellevue Connector BridgeTo capture the mural, the camera is moved linearly along the subject with constant distance and parallel alignment3.
As with classical panoramas, manual settings for exposure, white balance, and focus are crucial for consistent results. Additionally:
- Camera movement: Linear along the street – e.g., on a slider,
bicycle, or on foot with markers
- Constant distance: Ideally consistent, e.g., 5 m from the building
facade
- Horizontal alignment: Camera remains parallel to the subject
- Overlap: 20–50% between images
The rectilinear projection causes edge distortions, similar to a wide-angle lens.
To create a linear panorama, a (nearly) orthogonal projection is used. The resulting small field of view minimizes distortions. This allows panoramas to be created that would otherwise be impossible due to the required wide field of view.
In this example, optimization resulted in an effective focal length of approximately 1400 mm, corresponding to a field of view of about 8° horizontal and 1° vertical.
This same technique is used in scan stitching (mosaics). The orthogonal projection applied here is why fisheye images do not work. It can only be applied to rectilinear images, just as a curved mirror cannot reflect parallel lines correctly.
Panorama Creation in PTGui
The first step is importing all images into PTGui to begin panorama creation.
For each image, horizontal (green) and vertical (red) control points are set. Horizontal control points (yellow) are also added between images to ensure consistent alignment. Horizontal control points are also placed between the first and last image to align the overall geometry.
Each image receives horizontal control points.
In addition to regular control points between images, horizontal control points are added.
The projection is set to "Rectilinear." For all images except the first, individual optimization for lens and shift is applied.
First, optimize without field of view, parameter 'b', and shift to roughly align the images. Then optimize with field of view, parameter 'b', and shift.
A small horizontal and vertical field of view reduces edge distortions. If optimized using the actual lens focal length, the field of view would exceed 180°, making correct panorama creation impossible.
The Result: A Full-Length Linear Panorama
From 11 individual images, a continuous panorama of 44135 × 3242 pixels (143.1 MP, 61.4 MB) is created, capturing the entire scene in high detail. The shot was taken with the Z50 II at 18 mm focal length and stitched in PTGui as described.
1/320s f/6.3 ISO 100/21° 18-140mm f/3.5-6.3 VR f=18mm/27mm
Scaled to 7k×500 for web view:
Larger version with 27k×2k, 13MB
-
A 14mm lens on full-frame delivers approximately 104° horizontal field of view.↩
-
A mural is a large-scale wall painting applied directly to a wall or architectural surface.↩
-
One section was captured with a shortened path distance, as each image contains three segments and the total number of segments is not a multiple of three.↩
- Parallaxfehler durch hervorstehende Objekte wie Stühle, Autos oder
Personen, die sich bei der Bewegung der Kamera unterschiedlich
überlagern
-
Use Case for Transverse Mercator Projection ✅
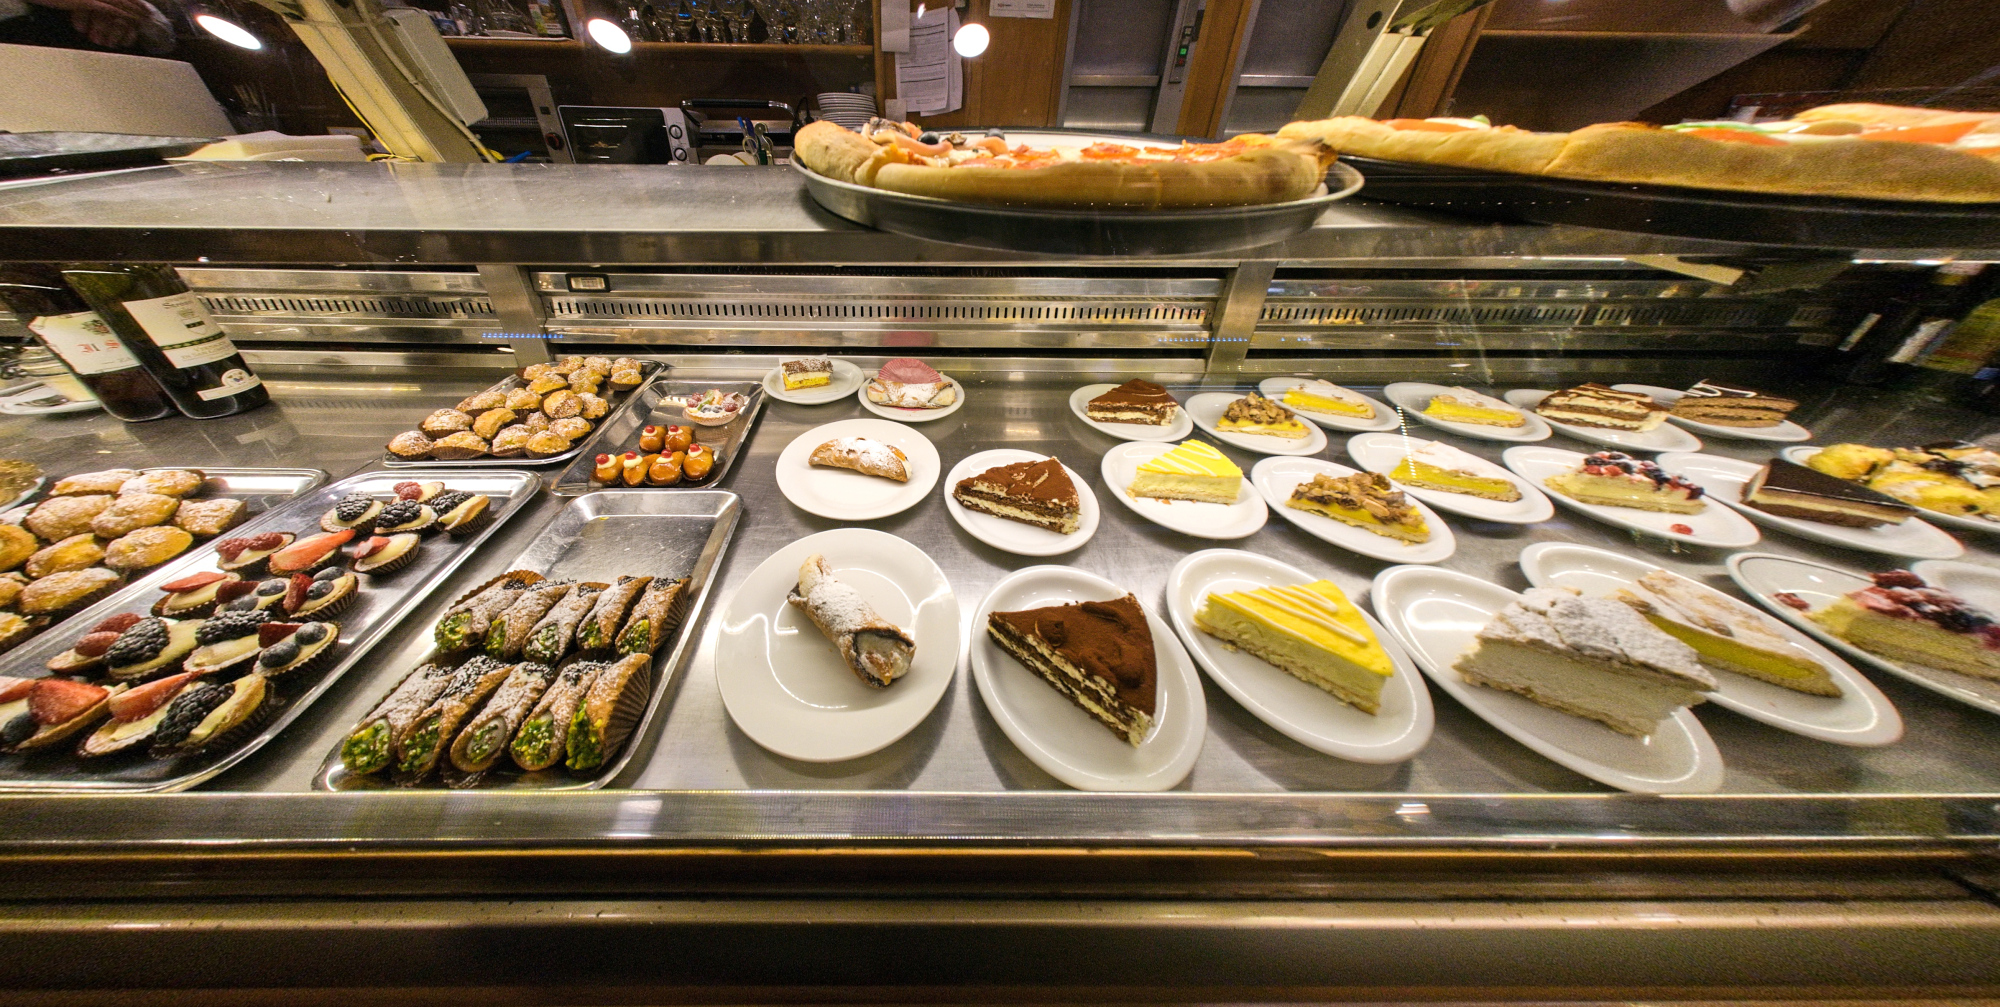
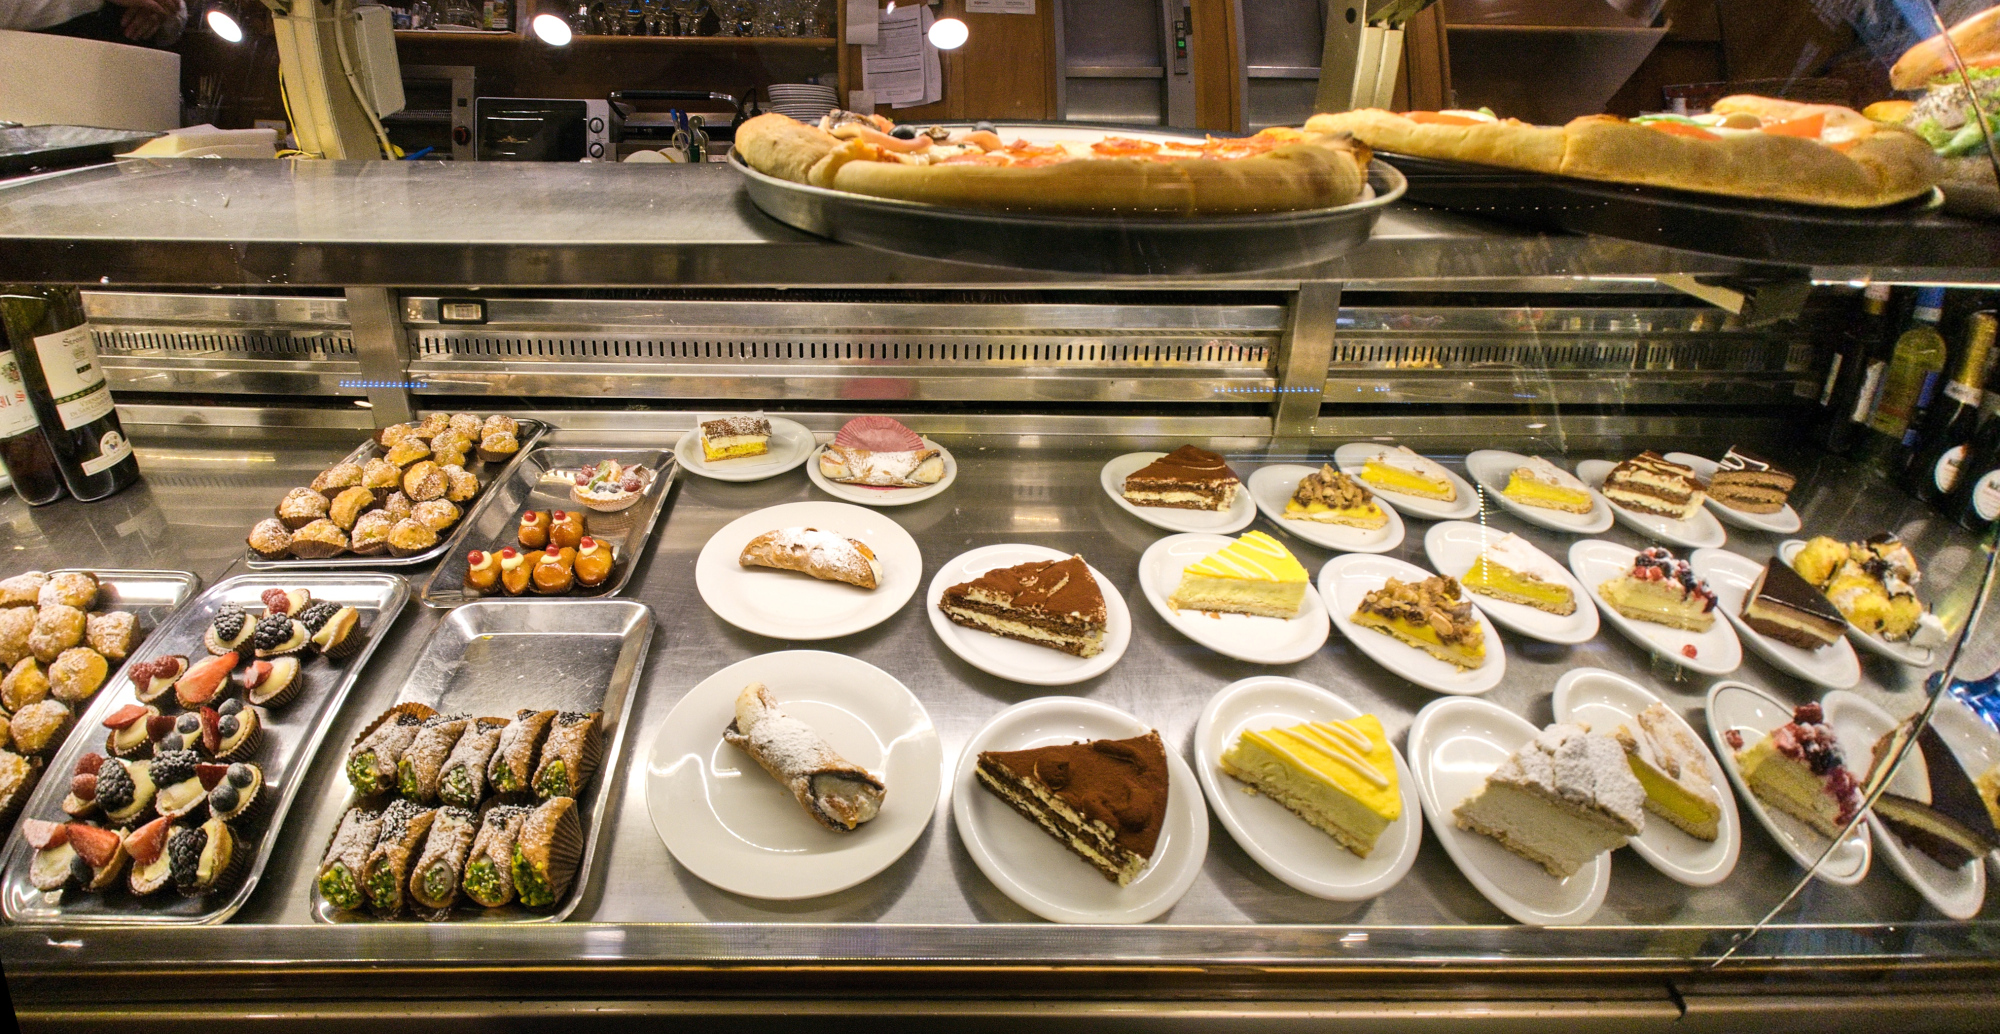
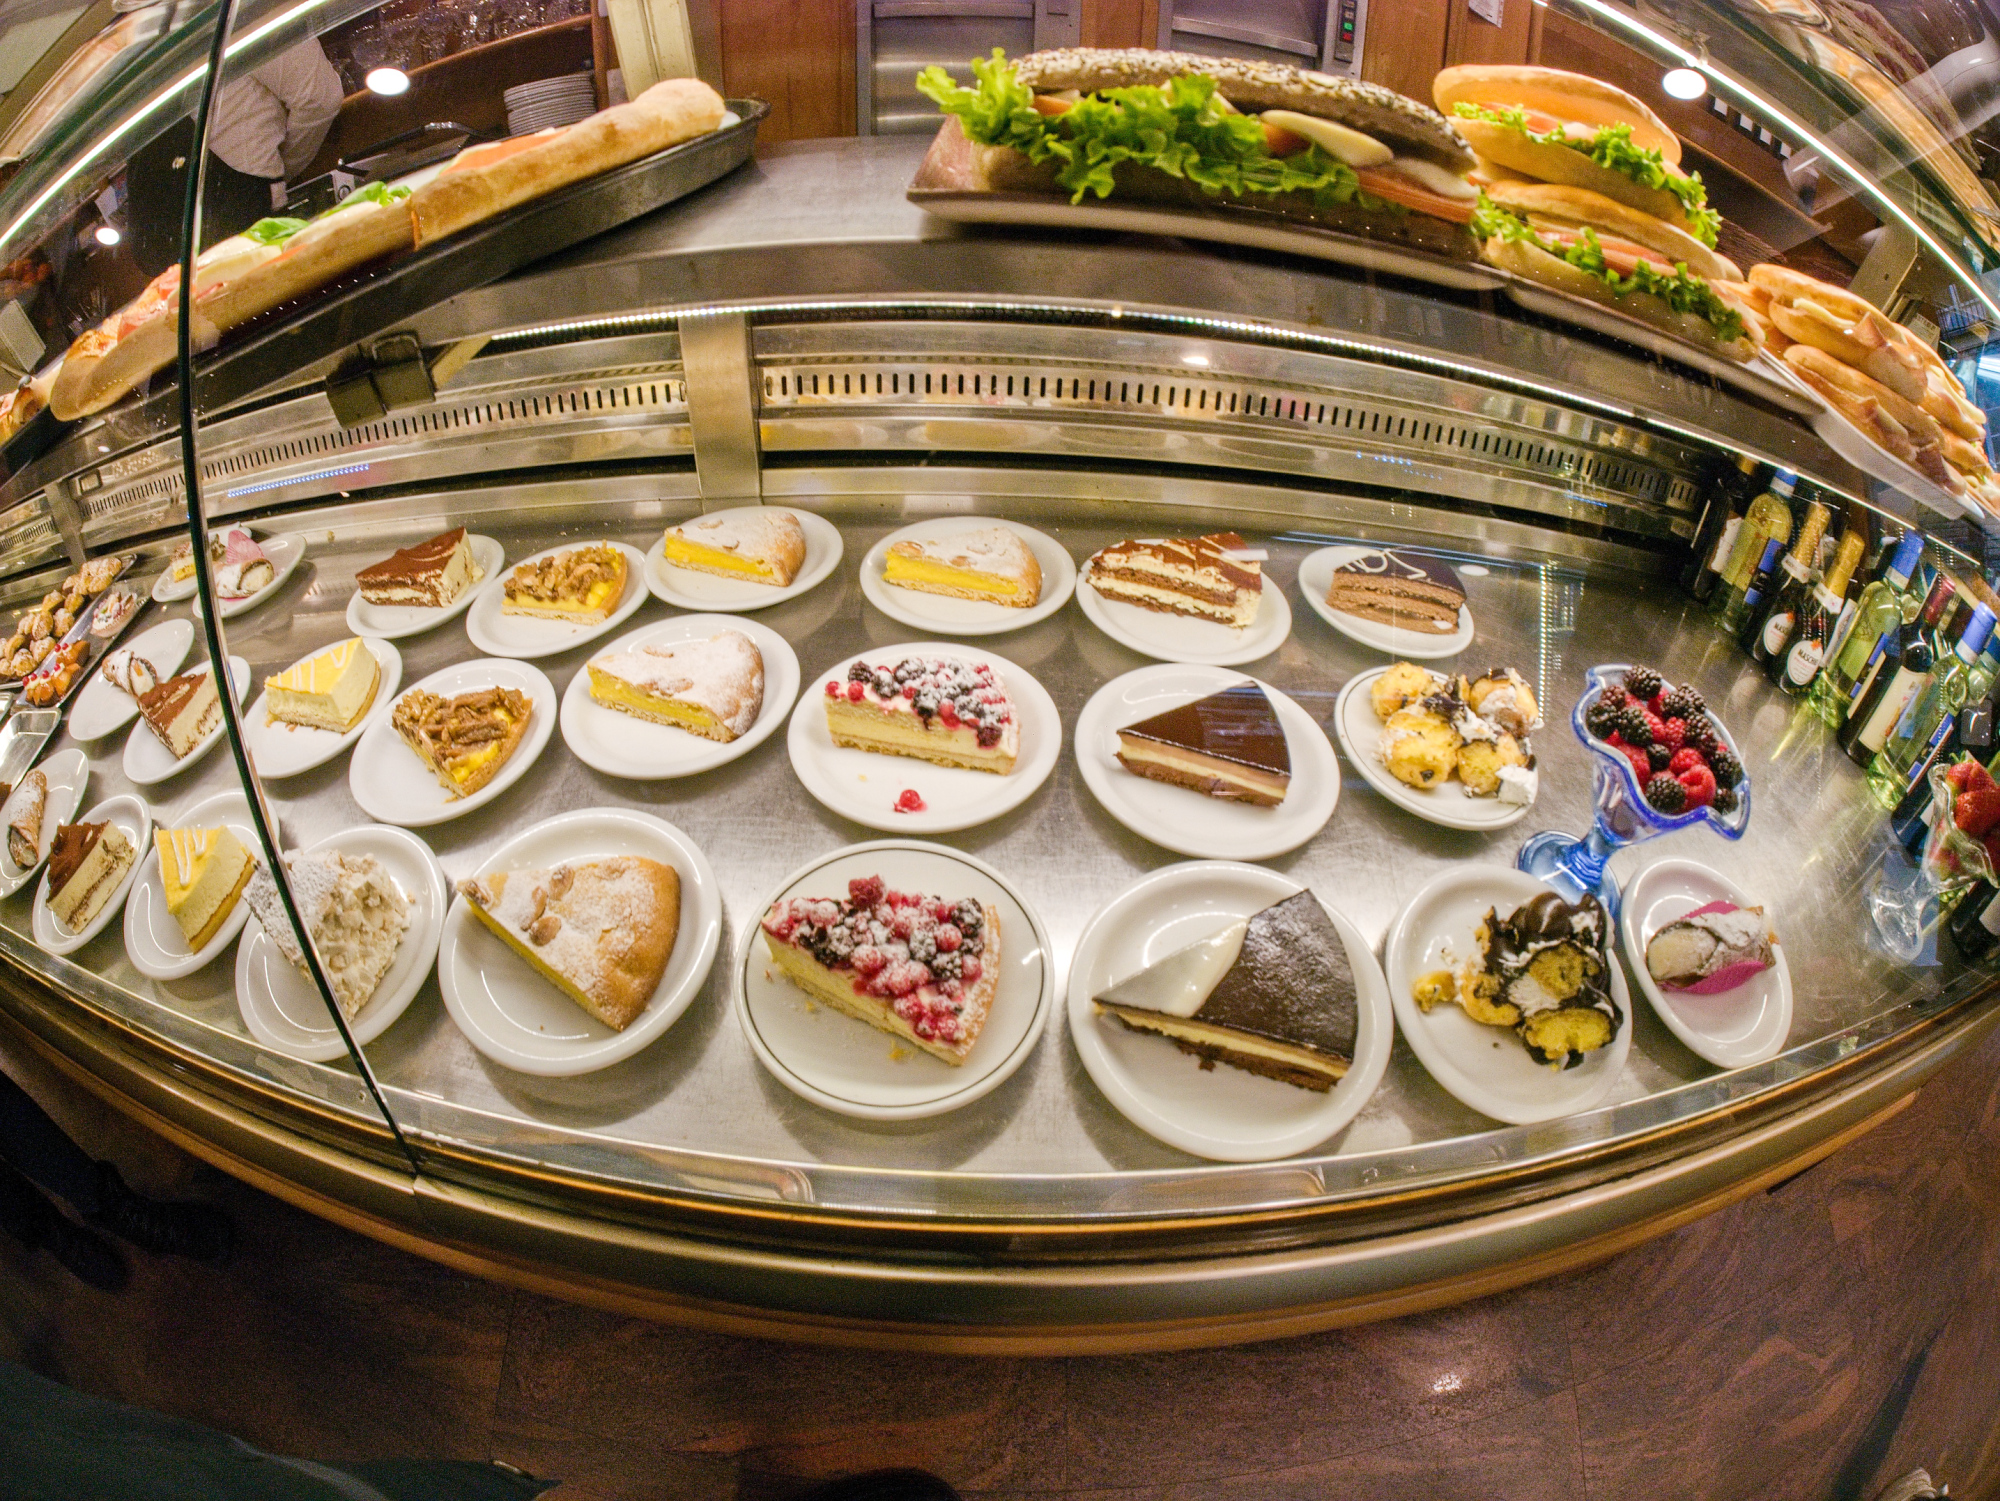
Imagine standing in front of a pastry display – the kind you would find in an Italian café, filled with cakes behind glass. In my part of the world it is a Kuchentheke. Not just a place to store and display cakes. It is where they take the stage.
Now picture a Tiramisu cake, viewed through a fisheye lens. The distortion, the curvature, the way the image wraps around the edges – all of it hints at the need for a projection method that can handle such transformations. This blog explores how panoramic projections like Transverse Mercator relate to real-world visual experiences, starting with this sweet example: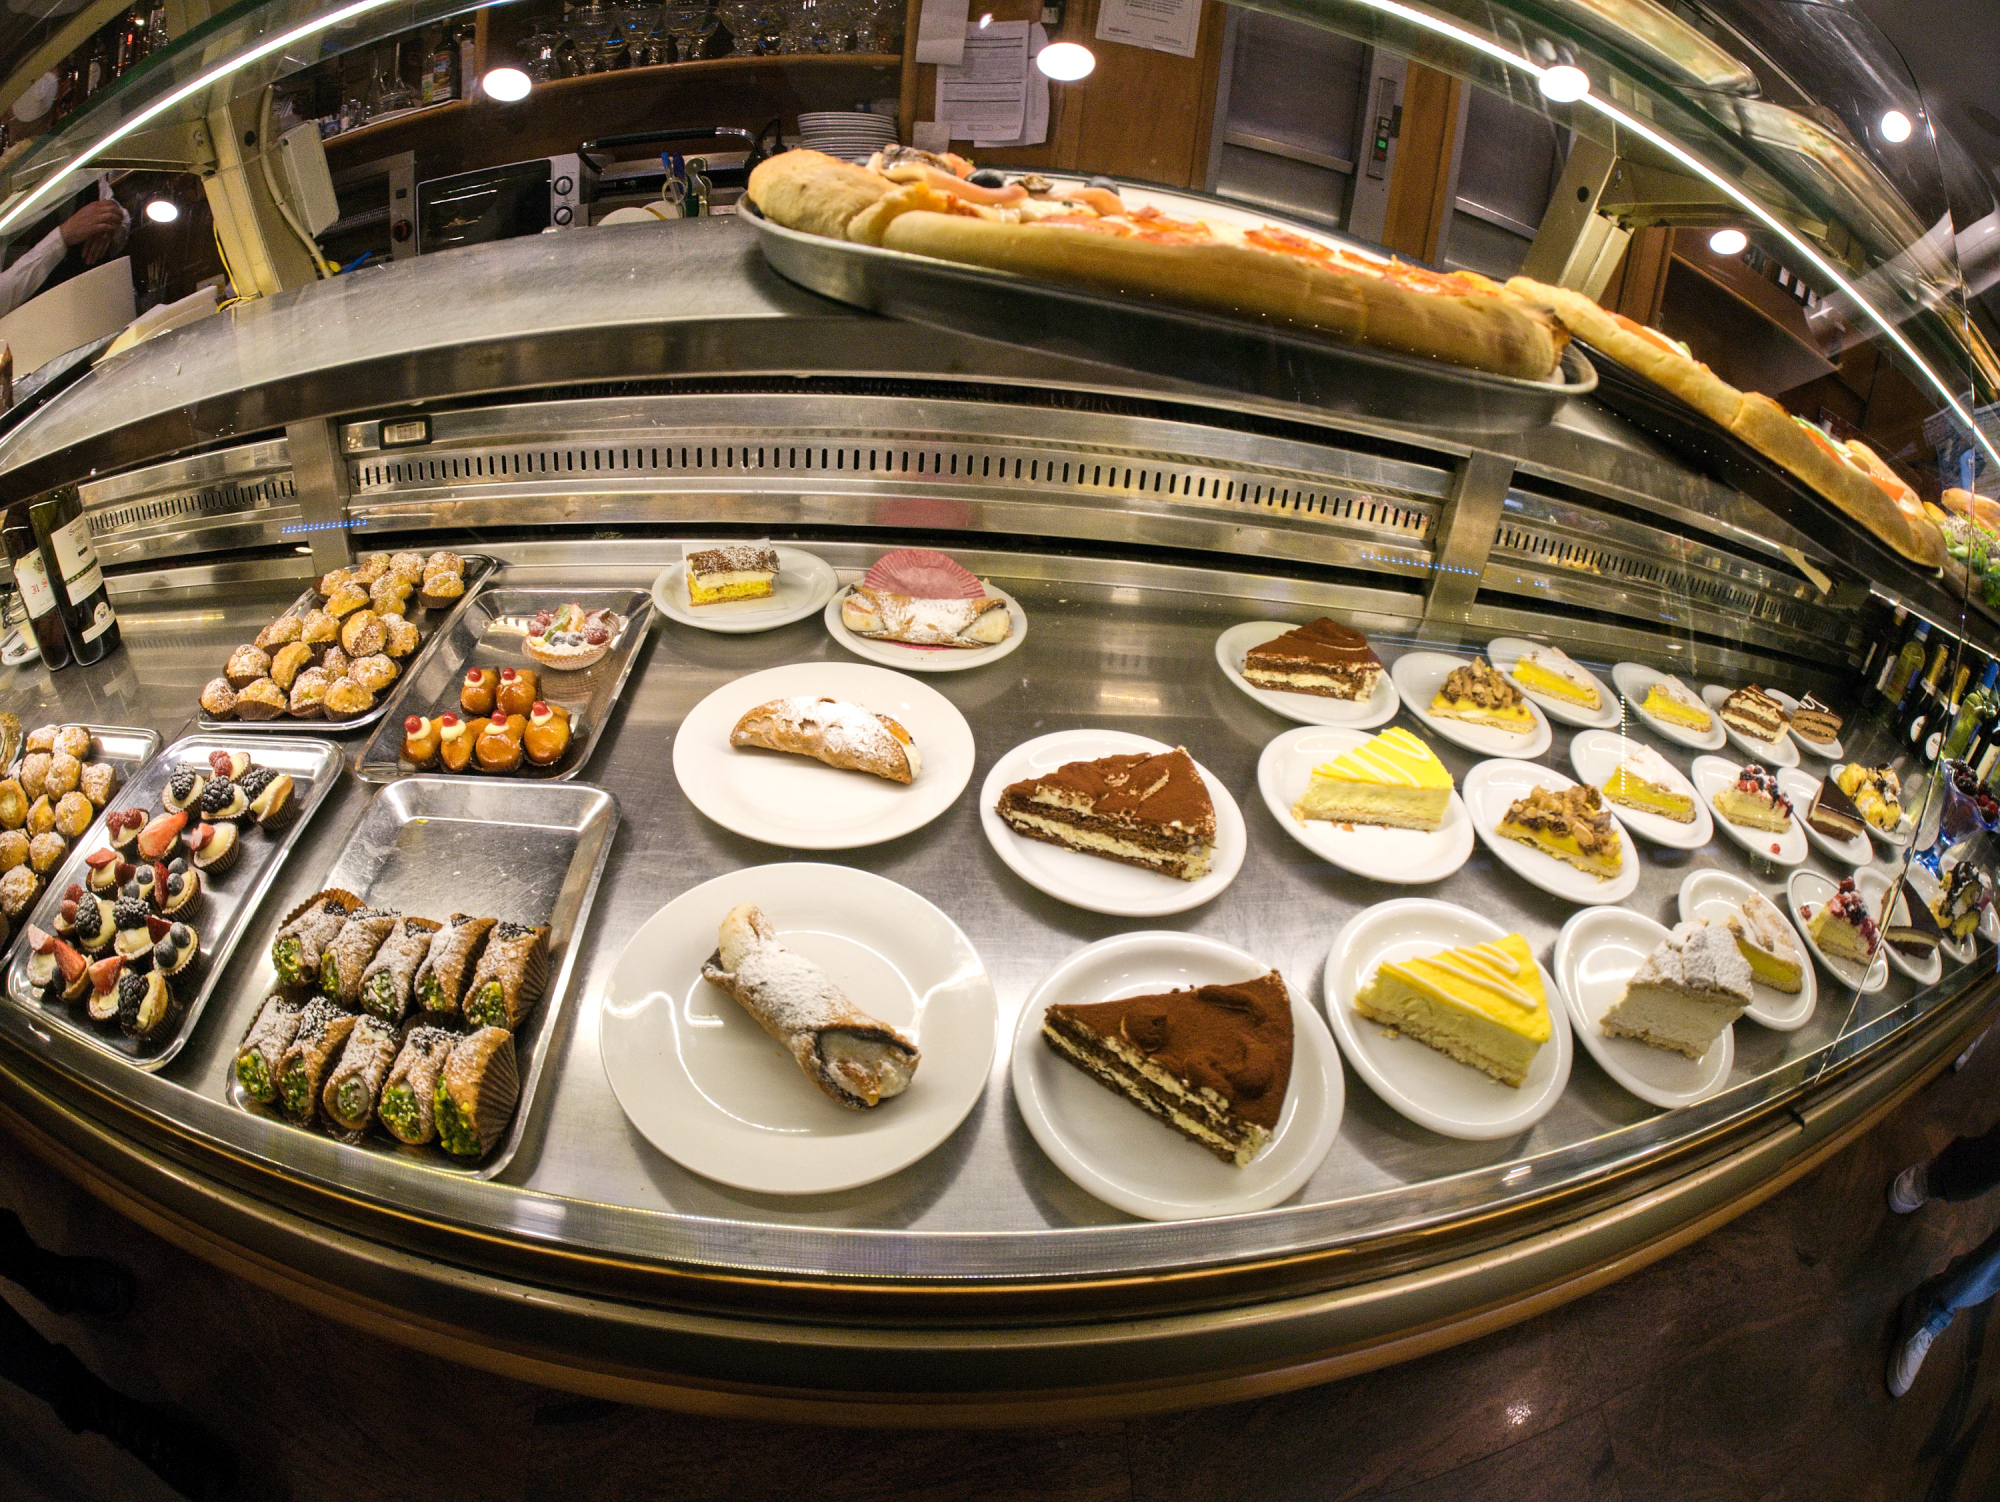
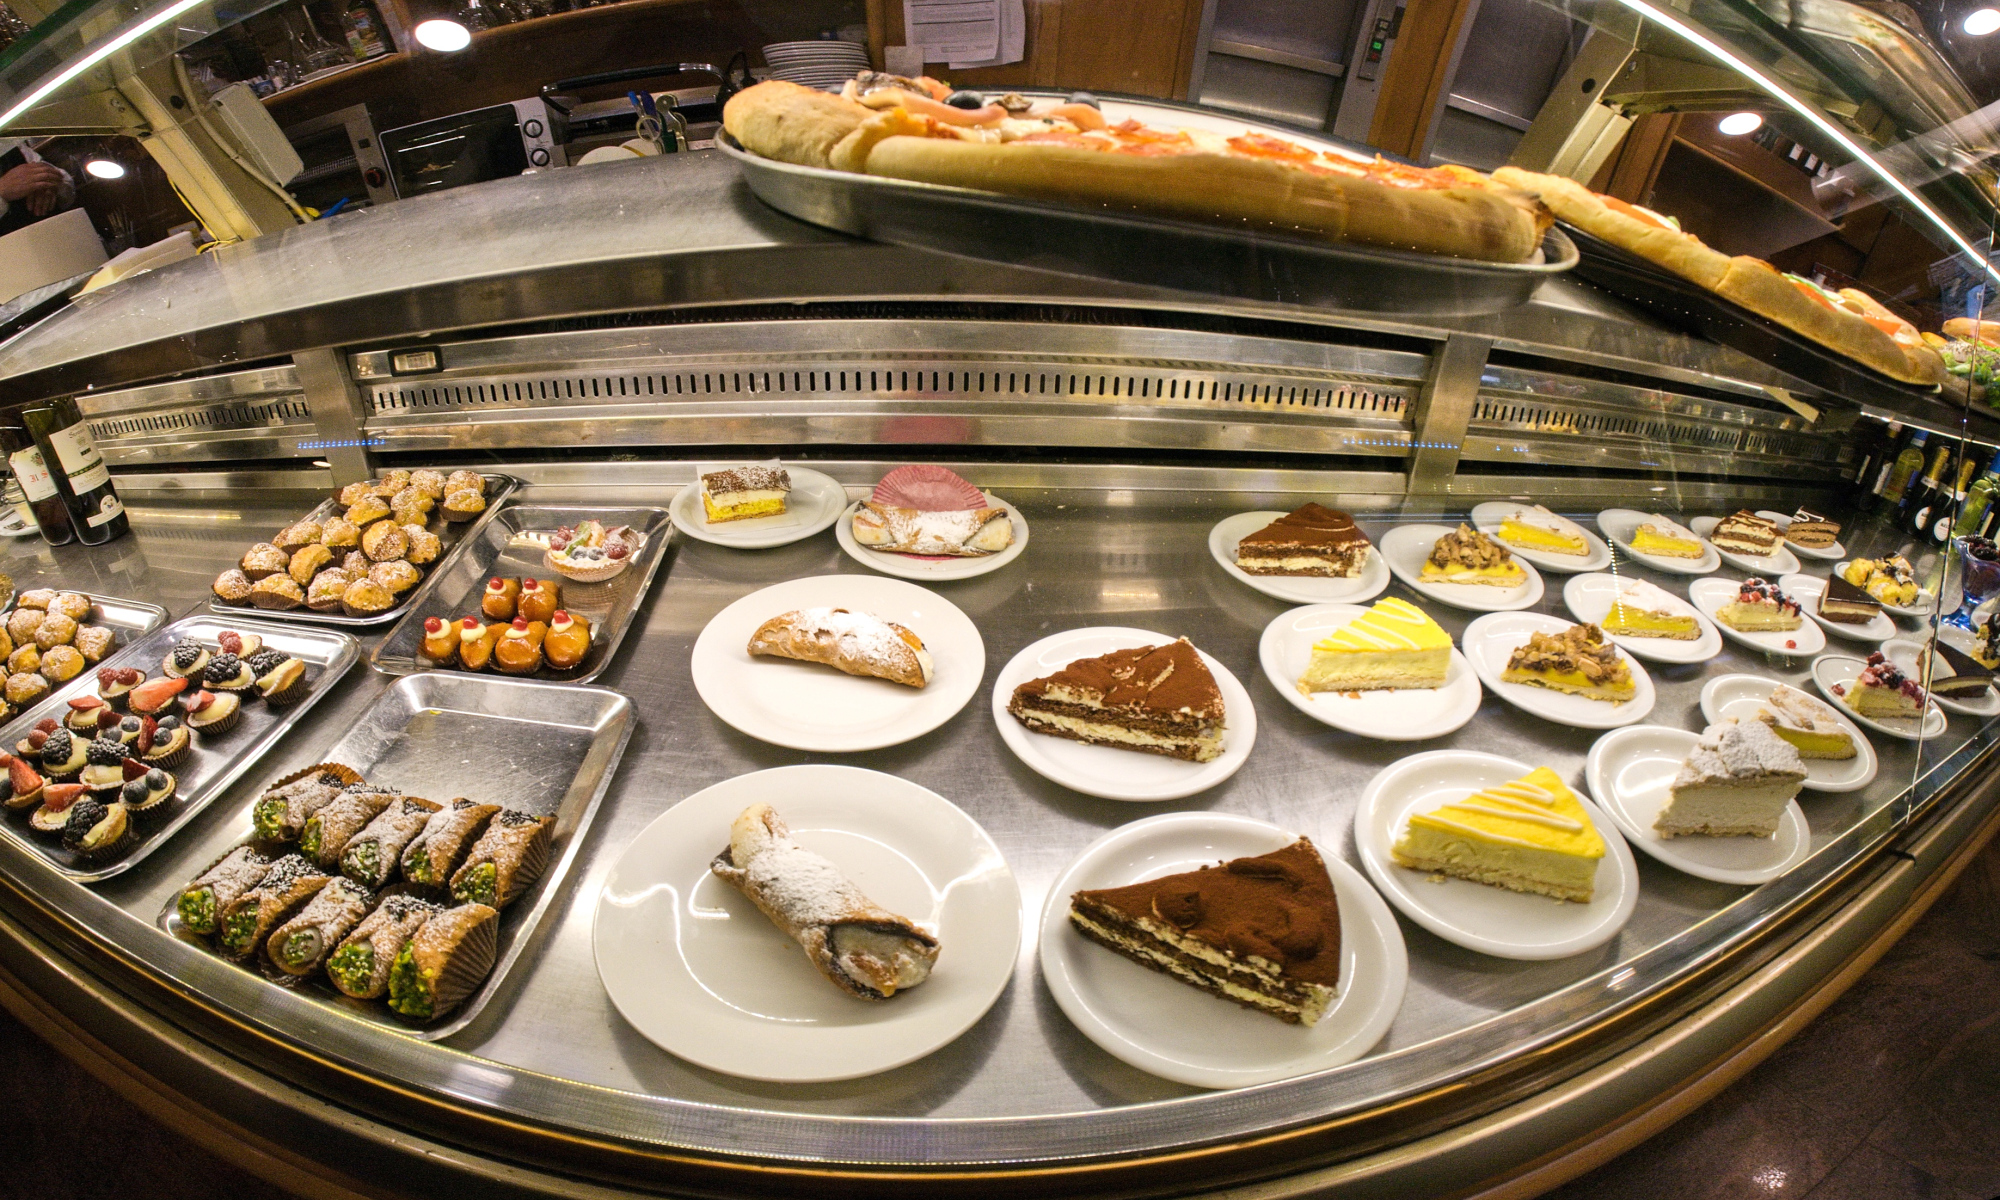
❌ Equirectangular Projection
The equirectangular projection maps latitude and longitude directly onto a flat grid, making it easy to process and display panoramic images. However, with wide fields of view, it introduces noticeable distortion at the top, bottom, and sides. Straight lines curve unnaturally, and objects near the poles or edges appear stretched. While it is widely used for 360° viewers and stitching software, it is not ideal for realistic close-up scenes.
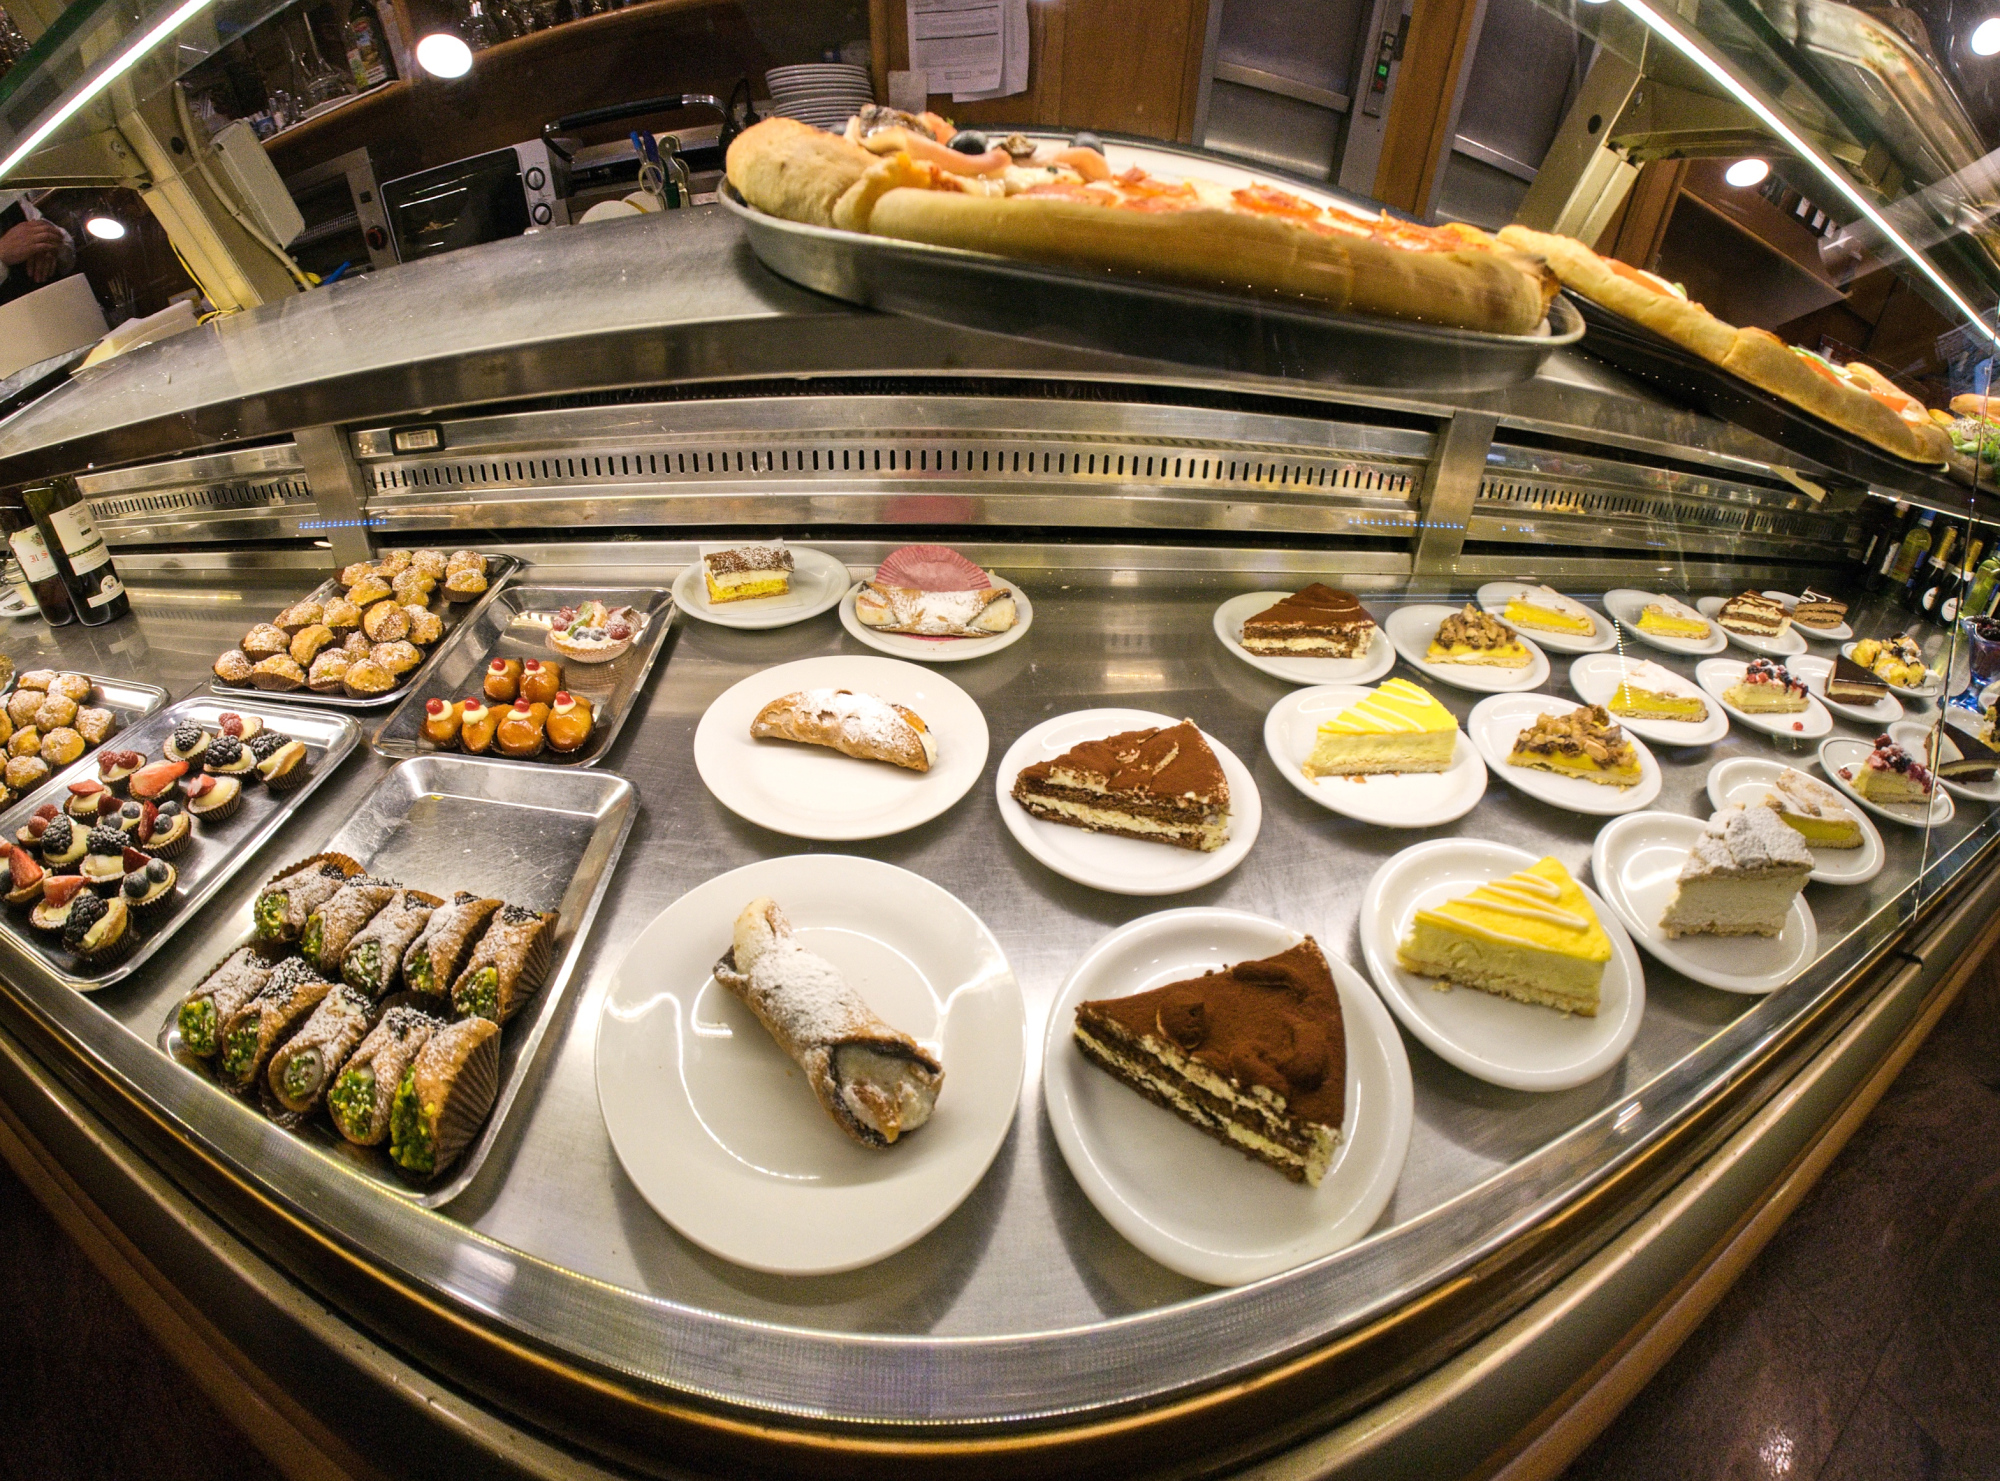
❌ Cylindric Projection
Unlike the equirectangular projection, the cylindrical projection introduces more distortion, especially in vertical lines since the vertical projection is rectilinear. This makes the center of the image appear more prominent, while the sides curve away, creating a tunnel-like effect. It is useful for immersive panoramas, but in wide-angle scenes, it can exaggerate the central area and distort peripheral objects.
❌ Rectilinear Projection
The rectilinear projection keeps straight lines straight, which is useful for architectural photography. However, when applied to wide-angle panoramic images, it introduces strong stretching at the edges. Objects on the left and right sides appear unnaturally large or distorted, especially in close-up scenes like a pastry display (Kuchentheke) photographed with a fisheye lens.
✅ Transverse Mercator Projection
The classic Mercator projection is widely known for its use in navigation maps, where it preserves angles and represents lines of constant bearing as straight. The Transverse Mercator is a rotated variant, where the cylindrical surface is aligned along a central meridian instead of the equator. This makes it especially useful for mapping narrow regions that extend north–south, such as countries or cities, with minimal distortion near the central axis.
In panoramic photography, the Transverse Mercator projection can be creatively applied to emphasize the central vertical axis of an image. It helps reduce distortion toward the edges and provides a more balanced appearance in wide-angle scenes, such as standing in front of a pastry display (Kuchentheke) and capturing it with a fisheye lens. The result is a projection that keeps the center prominent while minimizing distortion on the sides.
Only a few horizontal control points are needed to achieve good alignment. For this type of optimization, at least three horizontal control points are required.
Once the optimization is complete, the areas marked by green lines in the image will be perfectly horizontal.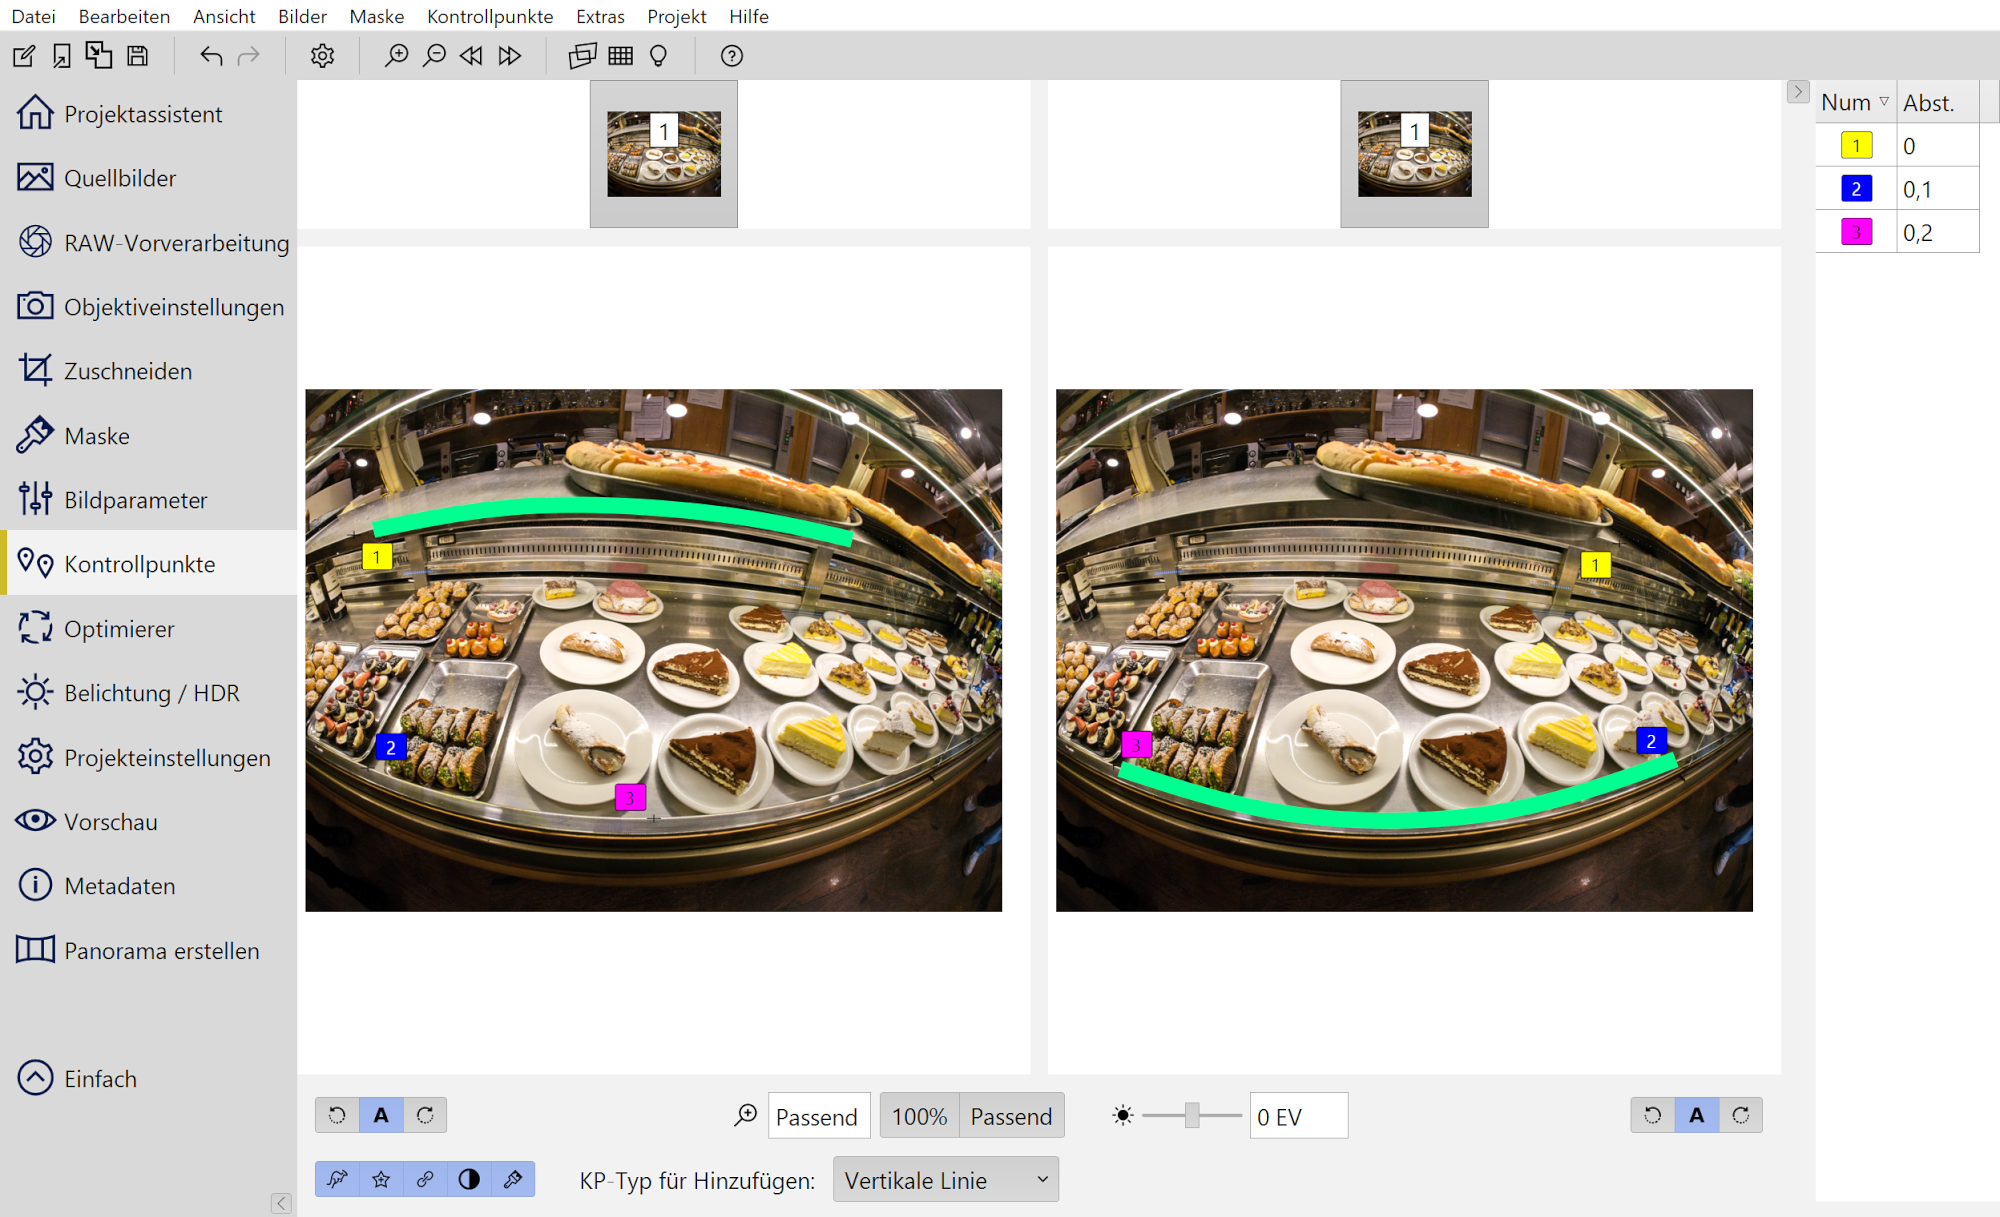
Only yaw, pitch, and roll angles need to be optimized.
Usually it gets you a perfect result.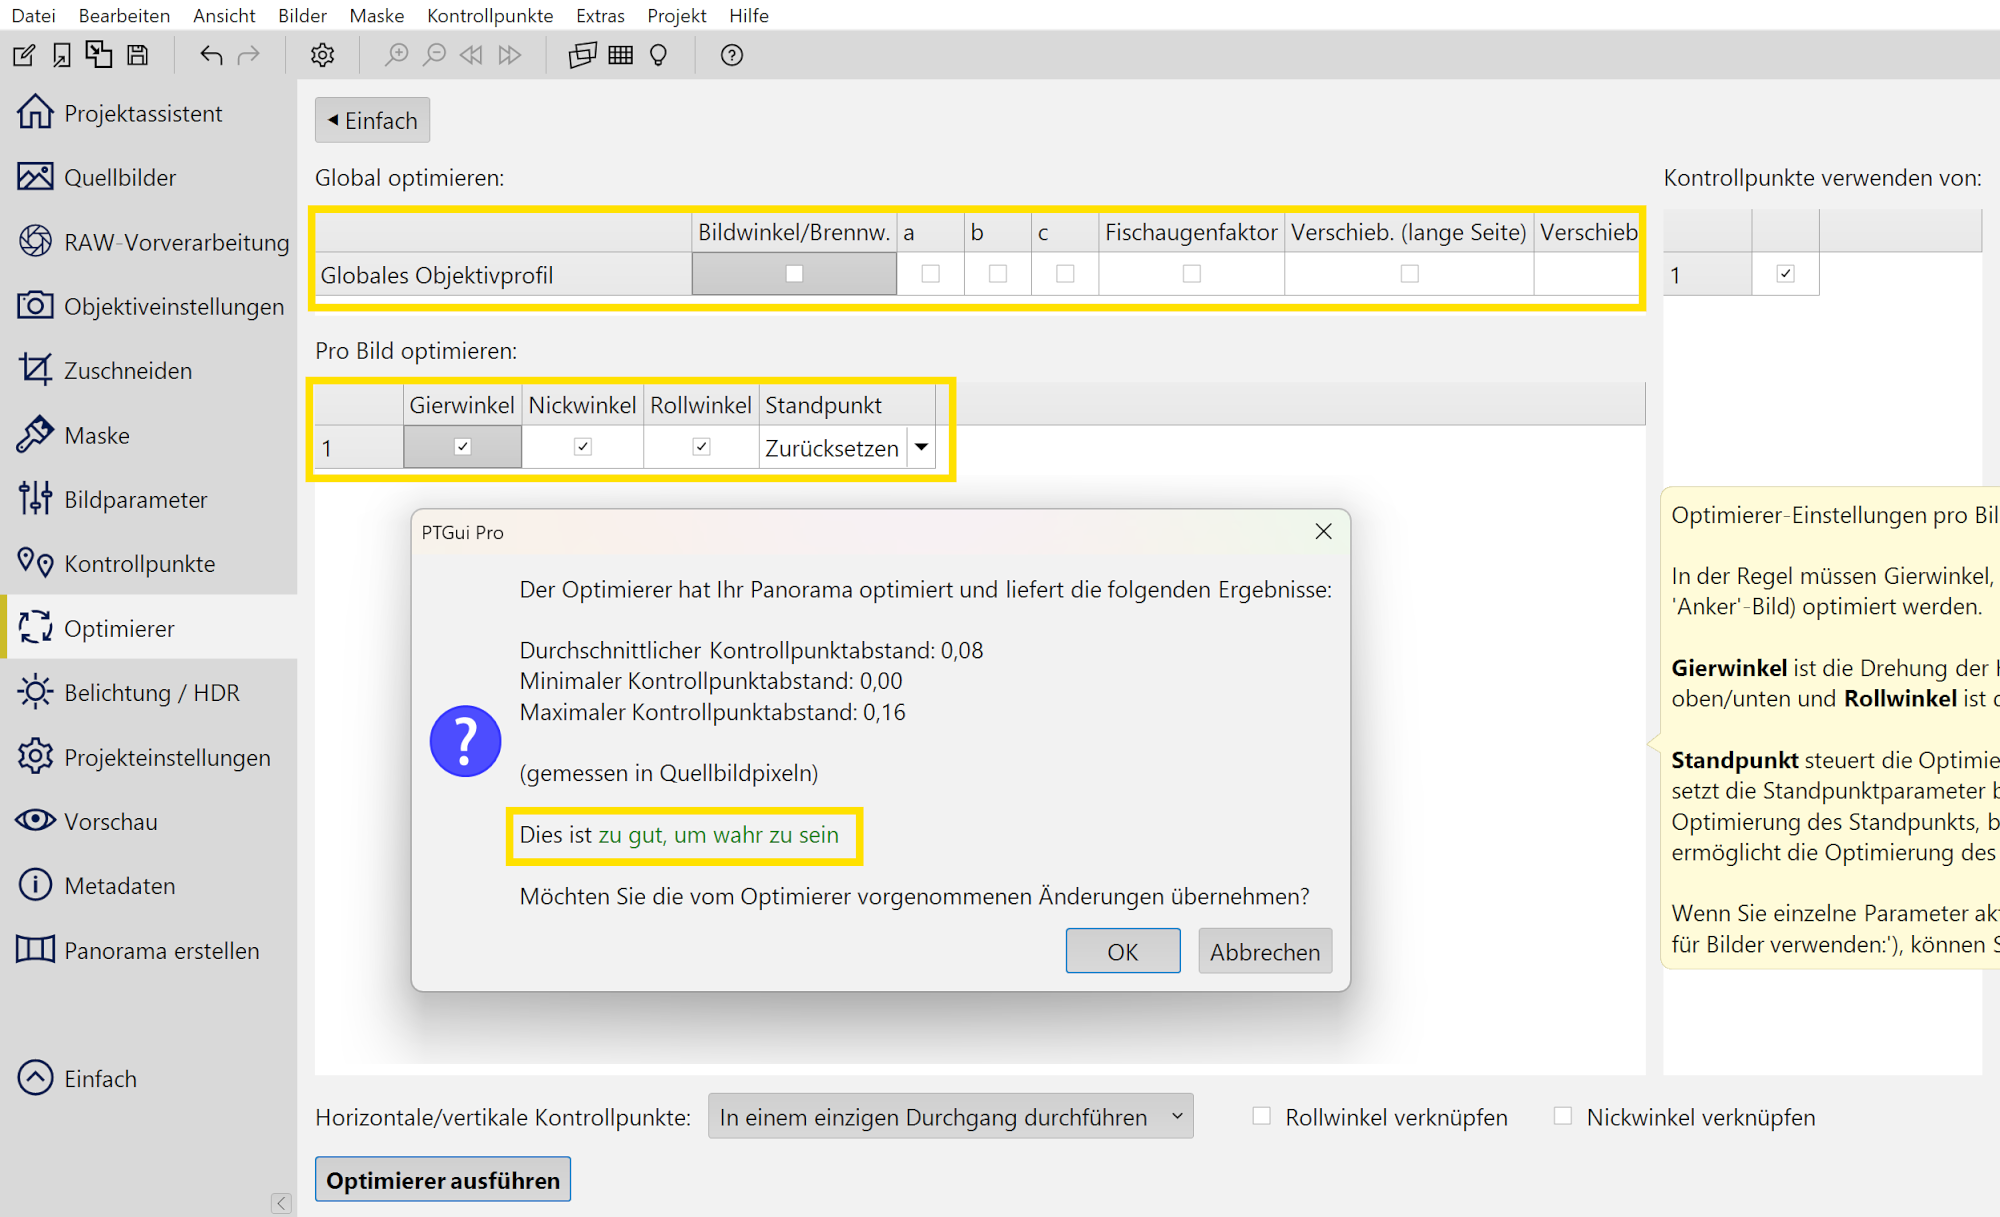
More of the same scene:

From A Day in Florence, Italy
🍰See also Panotools projection, The Balcony Panorama, Panotools projections example and Stereographic projection.