Installing AREDN firmware on a MikroTik SXTsq Antenna
This guide documents the installation process of AREDN on a MikroTik SXTsq Lite2 using the PXE/TFTP method.
Although written for the SXTsq Lite2, most steps also apply to other MikroTik devices using RouterBOOT and Etherboot.
Please check out the official documentation first: http://docs.arednmesh.org/en/latest/
Prerequisite
The installation of the AREDN firmware is using a direct connection to the device without a firewall or wlan.
- Download the KERNEL and the SYSUPGRADE-V7 bin files from
https://downloads.arednmesh.org/afs/www/
(Please note that the screenshot shows the current version as of writing)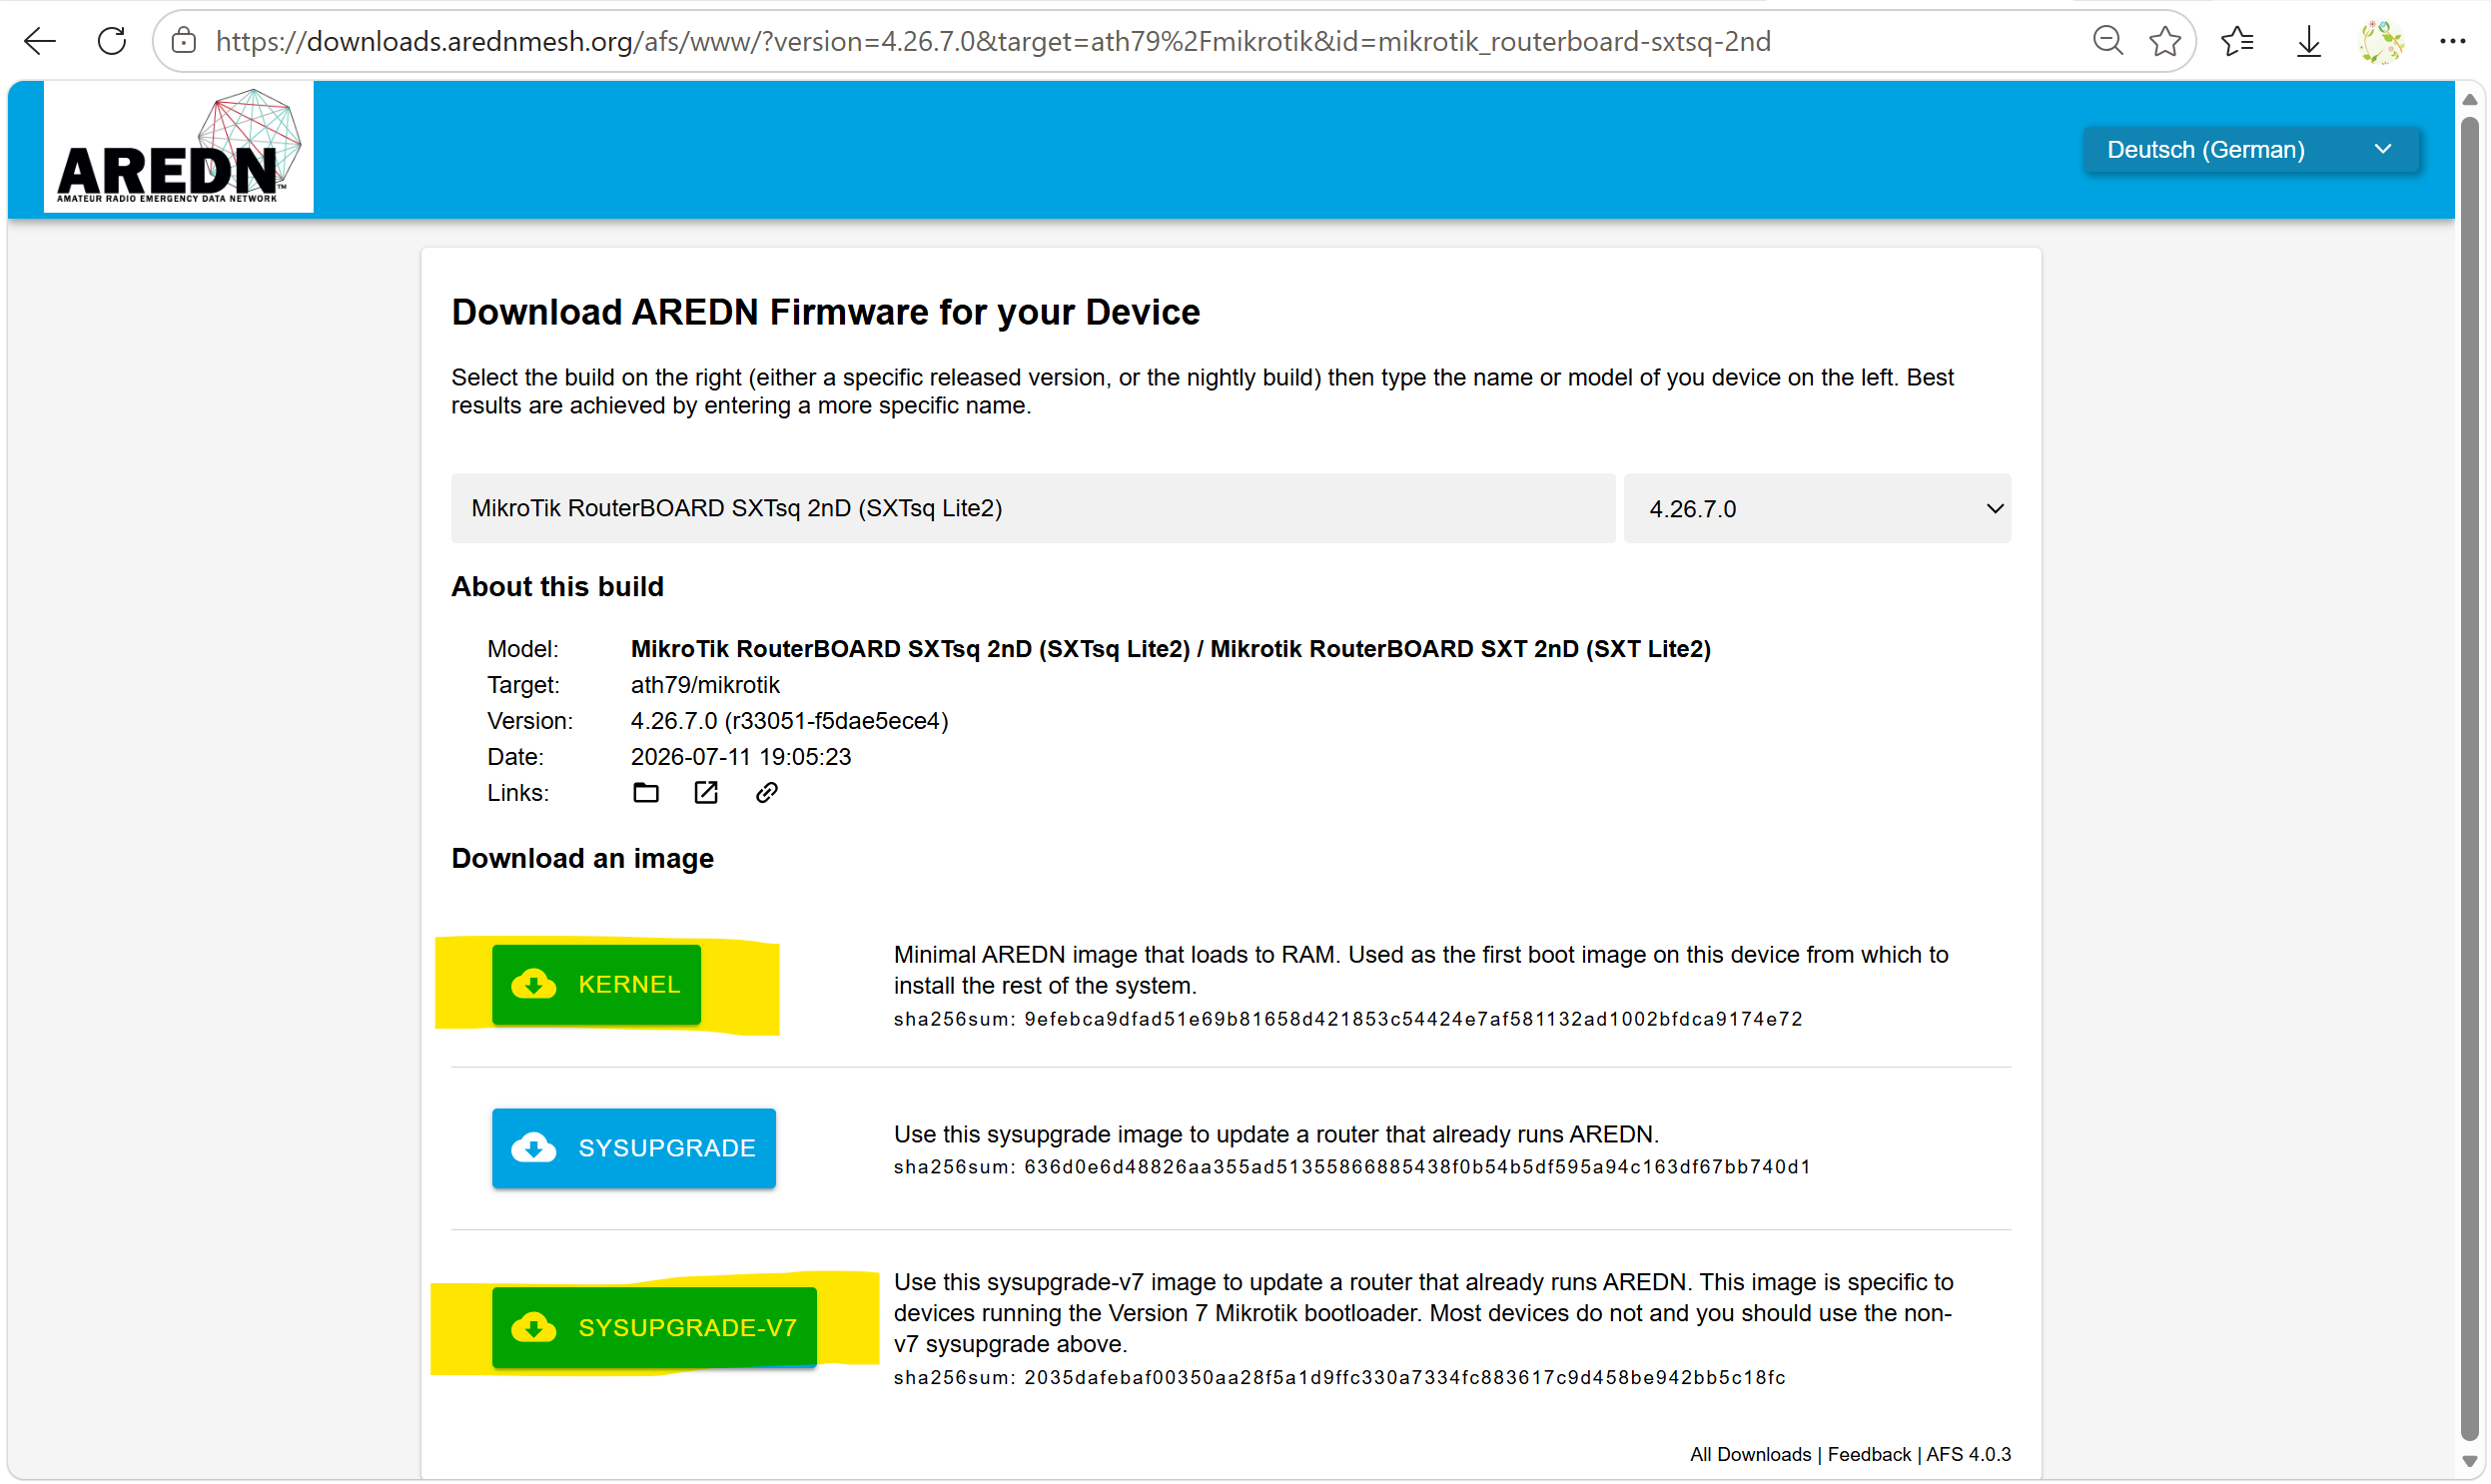
-
Tiny PXE version 1.0.0.23 https://github.com/erwan2212/tinypxeserver/blob/main/pxesrv.zip
Note: Version 1.0.0.24 caused DHCP socket errors during testing. Example errors:16:41:56 DHCPd:REQUEST received, MAC:D0-EA-11-94-AB-C7, XID:464E87C0 16:41:56 DHCPd:BOOTP REQUEST 16:41:56 DHCPd:REQUEST does not match a known offer, MAC:D0-EA-11-94-AB-C7, XID:464E87C018:42:44 DHCPd:DISCOVER received, MAC:00-E0-4C-68-0A-86, XID:8DF01C2D 18:42:45 send_dhcpoffer:Socket Error # 10049 Cannot assign requested address.Version 1.0.0.23 worked correctly.
-
NetInstall tool https://mikrotik.com/download/tools
-
Original Router OS image to restore the Antenna https://mikrotik.com/download?architecture=mipsbe
in System Package click on RouterOS -
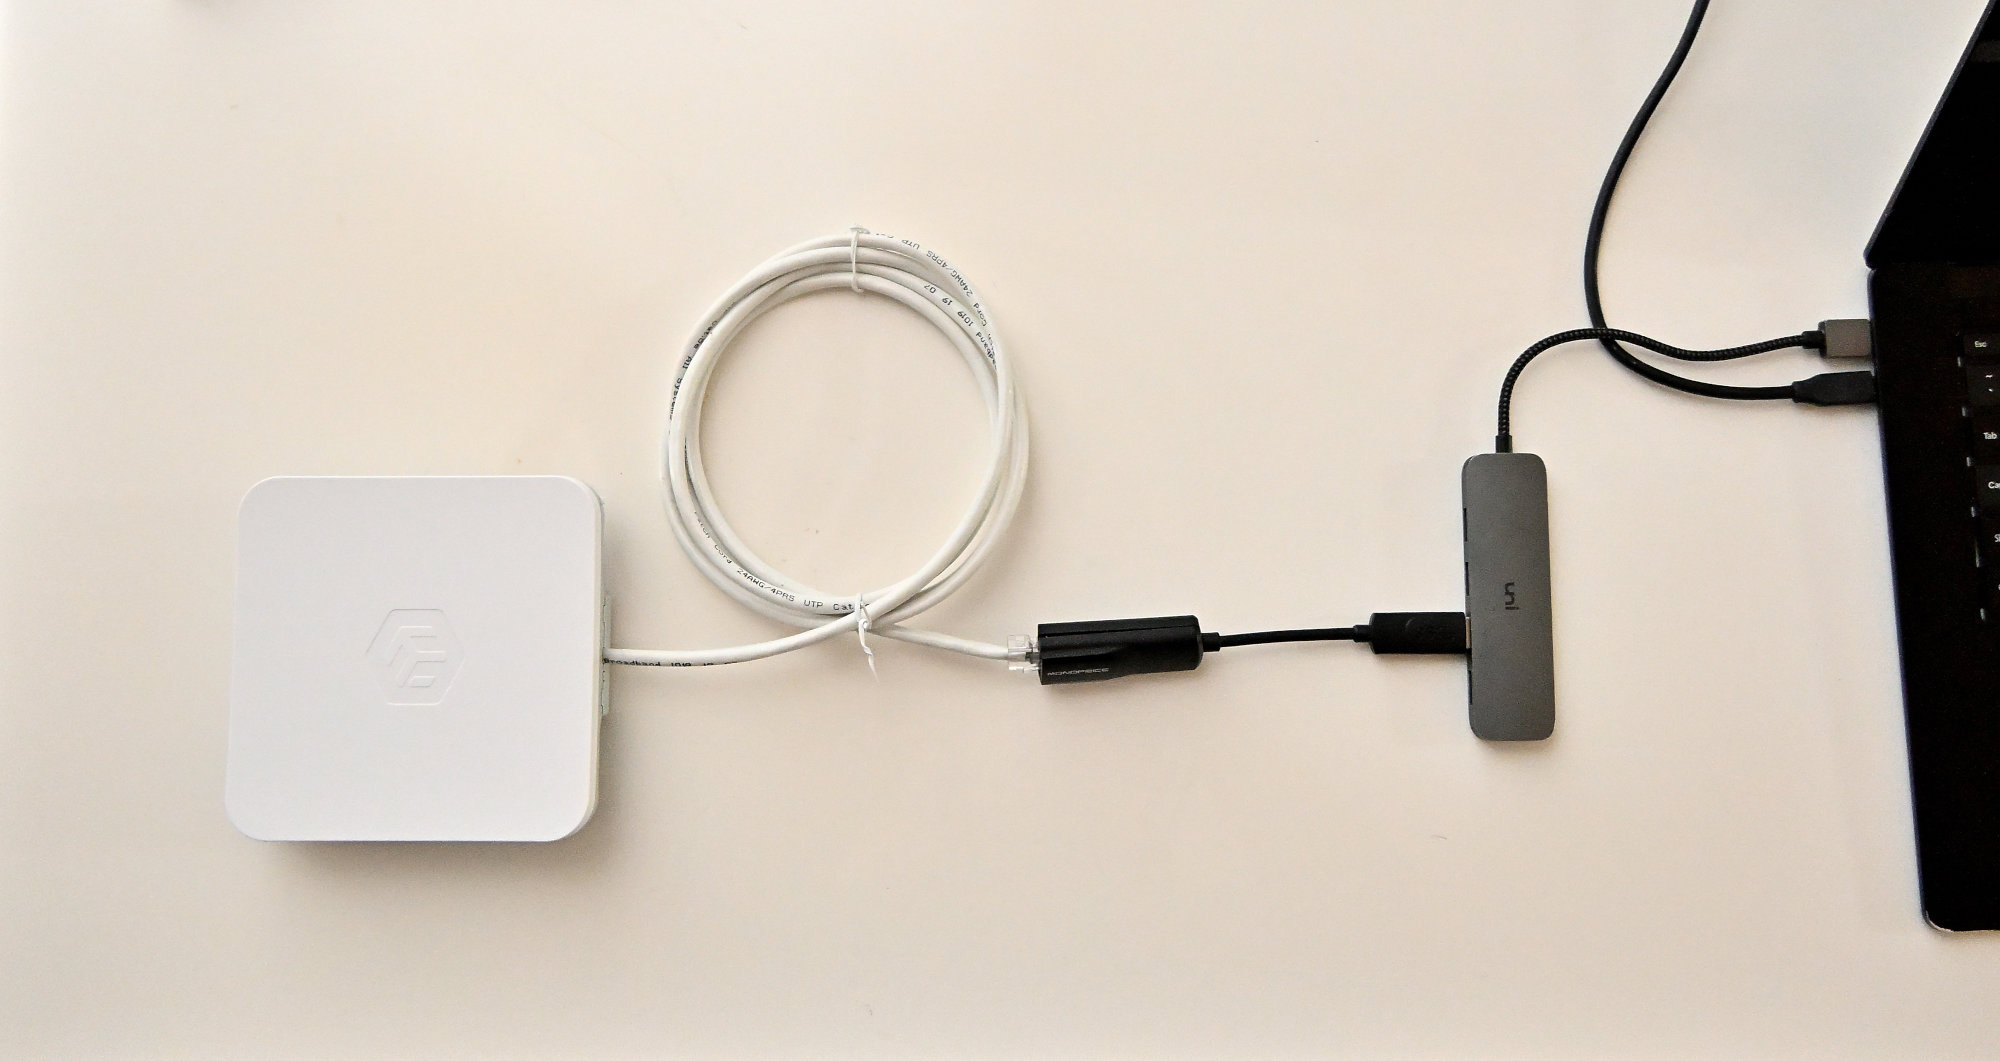
Connect the Antenna (or any Mikrotik device you are flashing) to the PCs Ethernet port:
Connect to the router via WinBox or SSH and run:
/system/device-mode/printExample:
routerboard: noIf
routerboardis set tono, RouterBOARD settings cannot be modified. In this case, run:/system/device-mode/update routerboard=yesThe router responds with something similar to:
update: turn off power in 5m to activate changesPower-cycle the device within the specified time.
Verify:/system/device-mode/printExpected:
routerboard: yesCheck current settings:
/system routerboard settings printConfigure Ethernet boot:
/system routerboard settings set boot-device=try-ethernet-once-then-nandVerify:
/system routerboard settings printExpected:
boot-device: try-ethernet-once-then-nand
boot-protocol: bootp
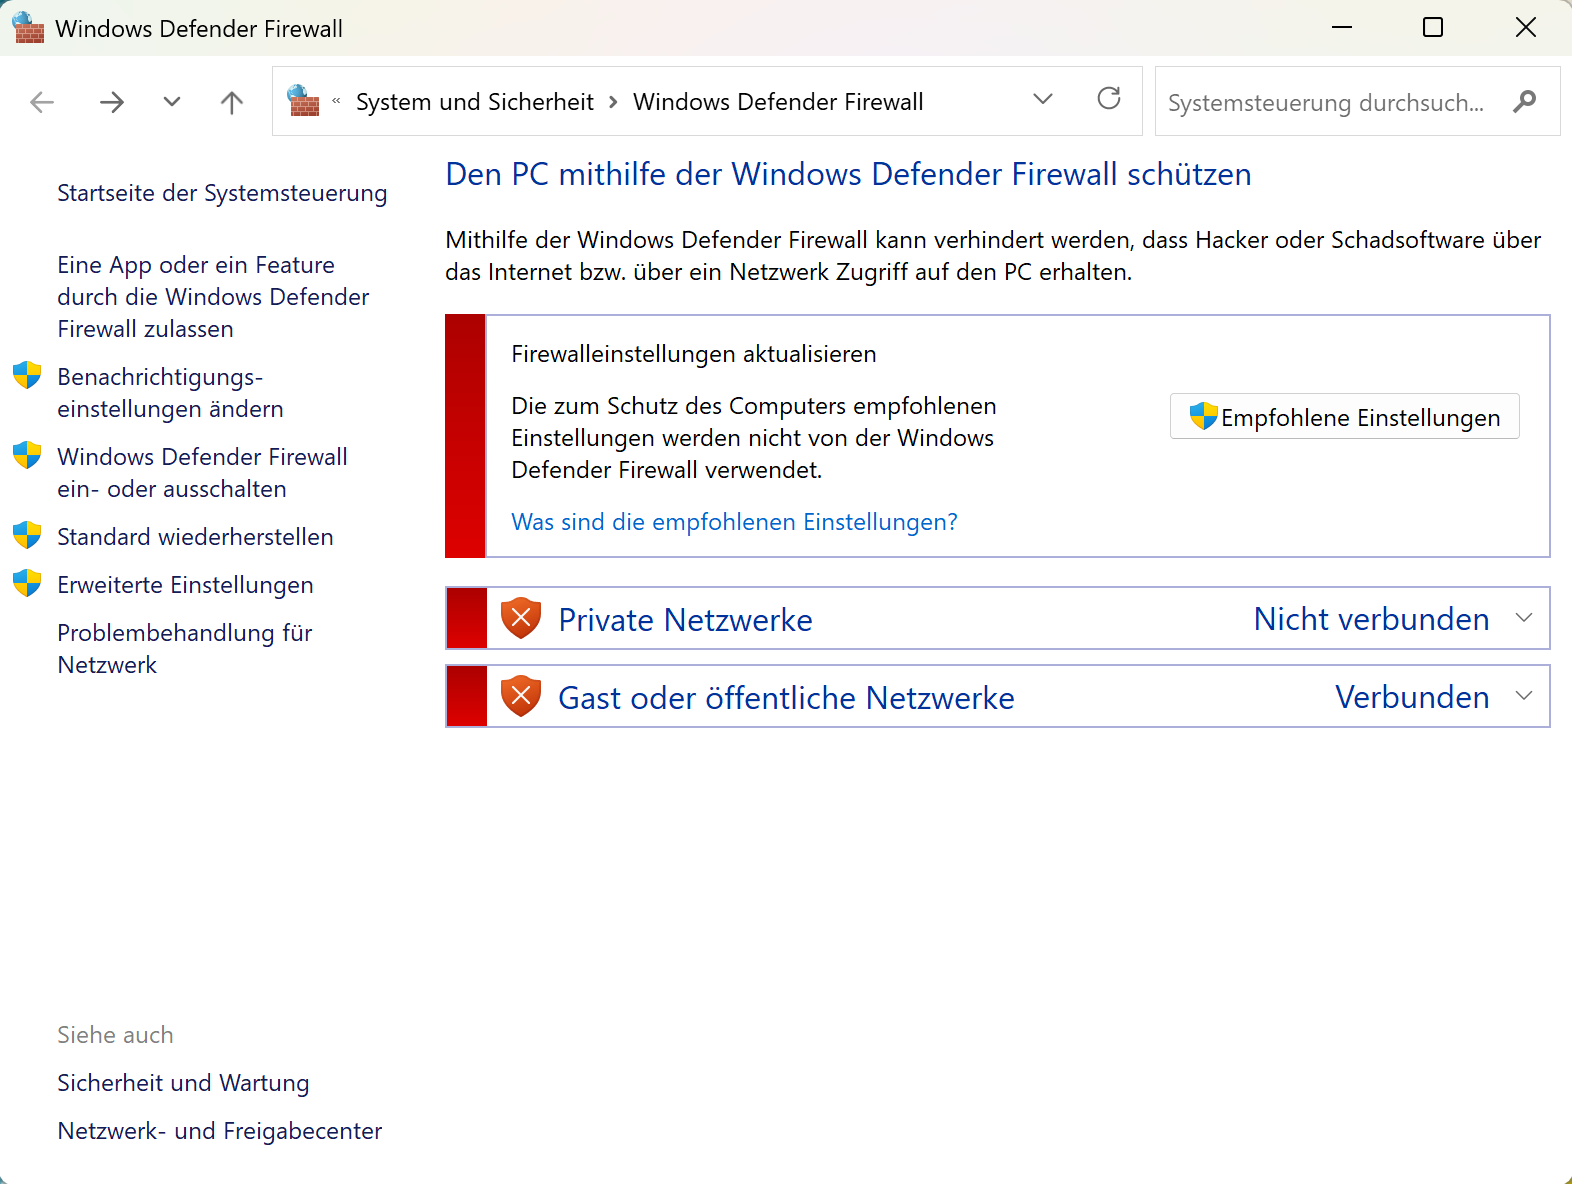
Set Firewall Off
Disconnect from the Internet by switching off the WLAN connection.
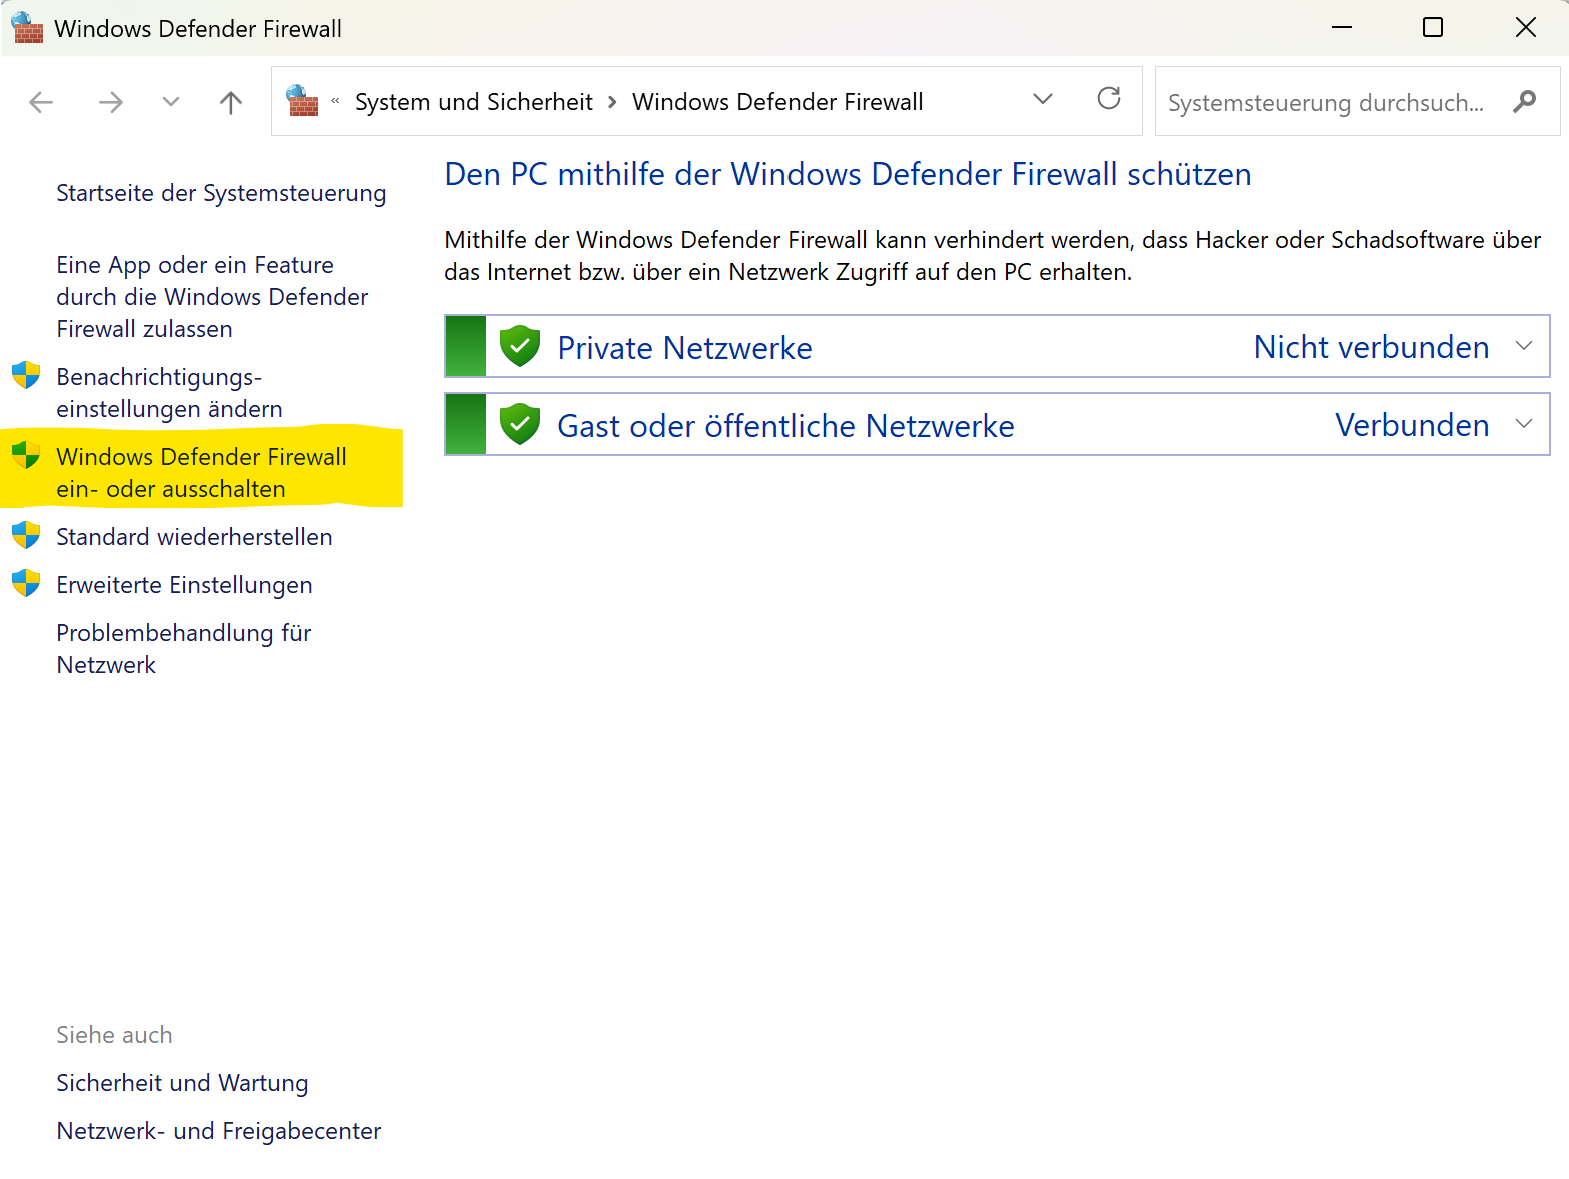
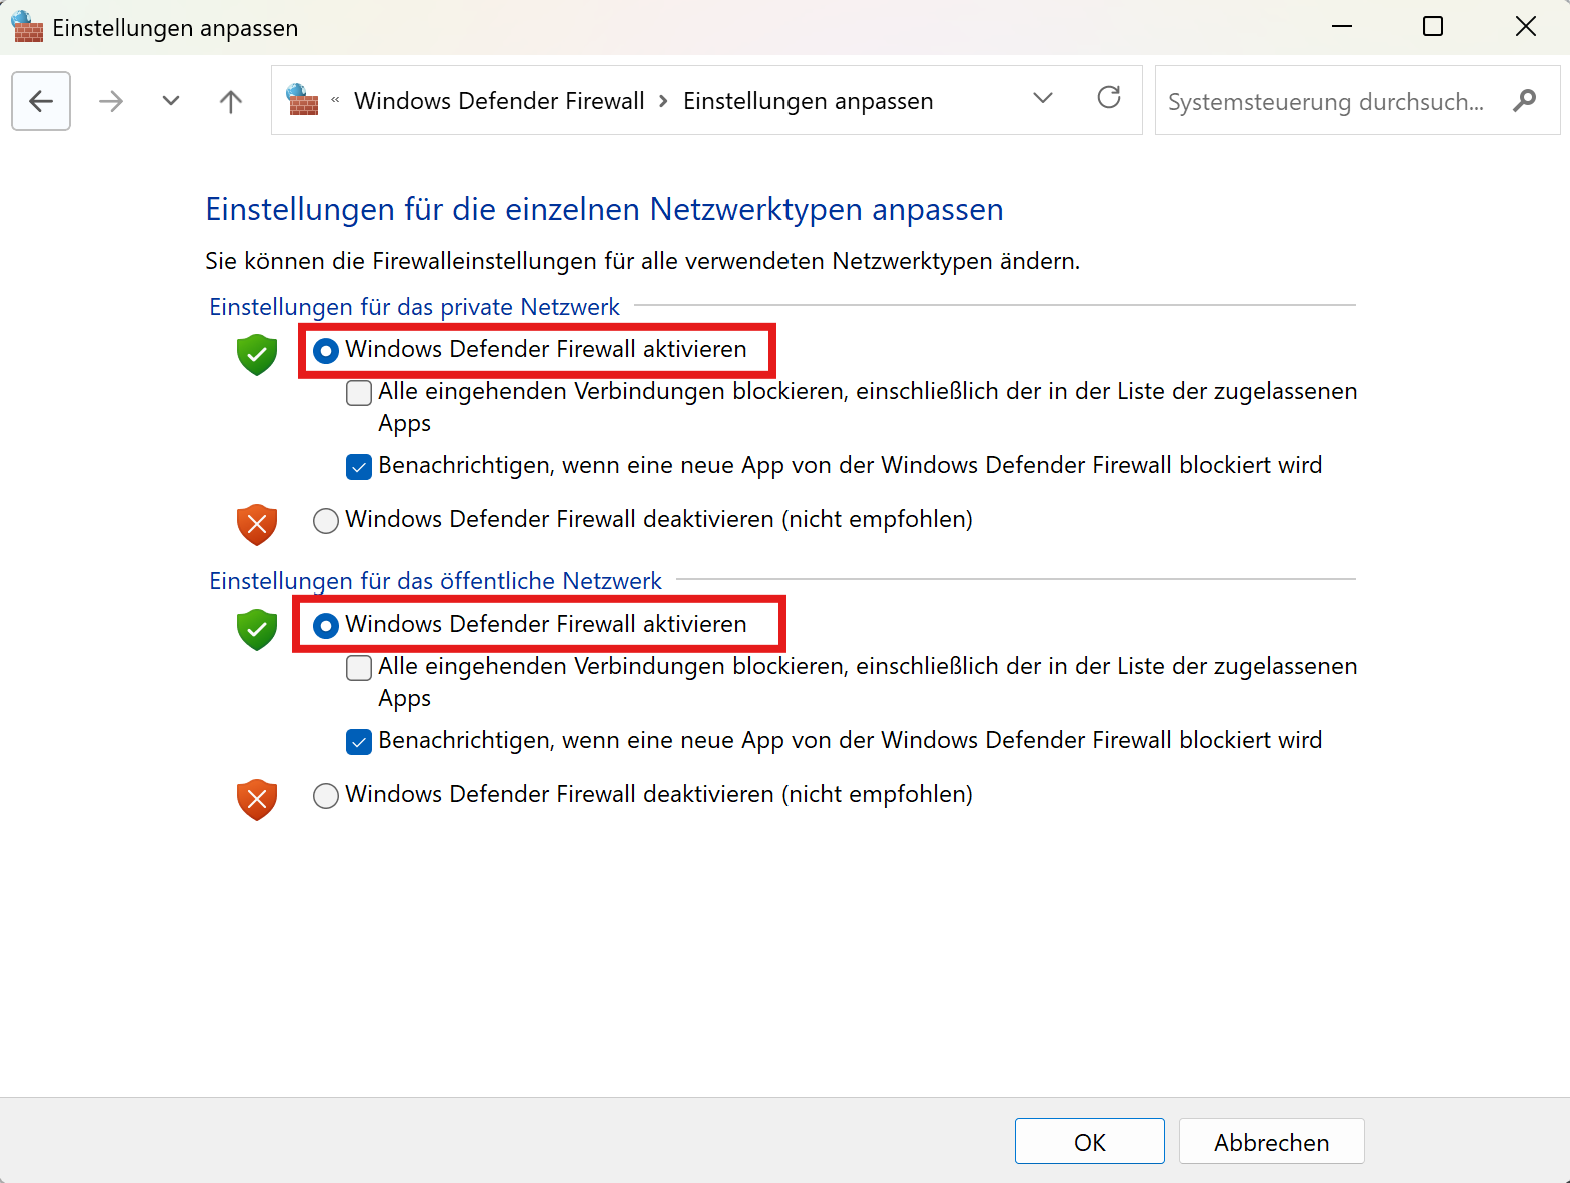
In the windows settings, enter 'Firewall' to get this dialog. Click the highlighted topic to switch the firewall on or off.
Note: All screenshots from a live system. The language varies, but the tech stays the same.
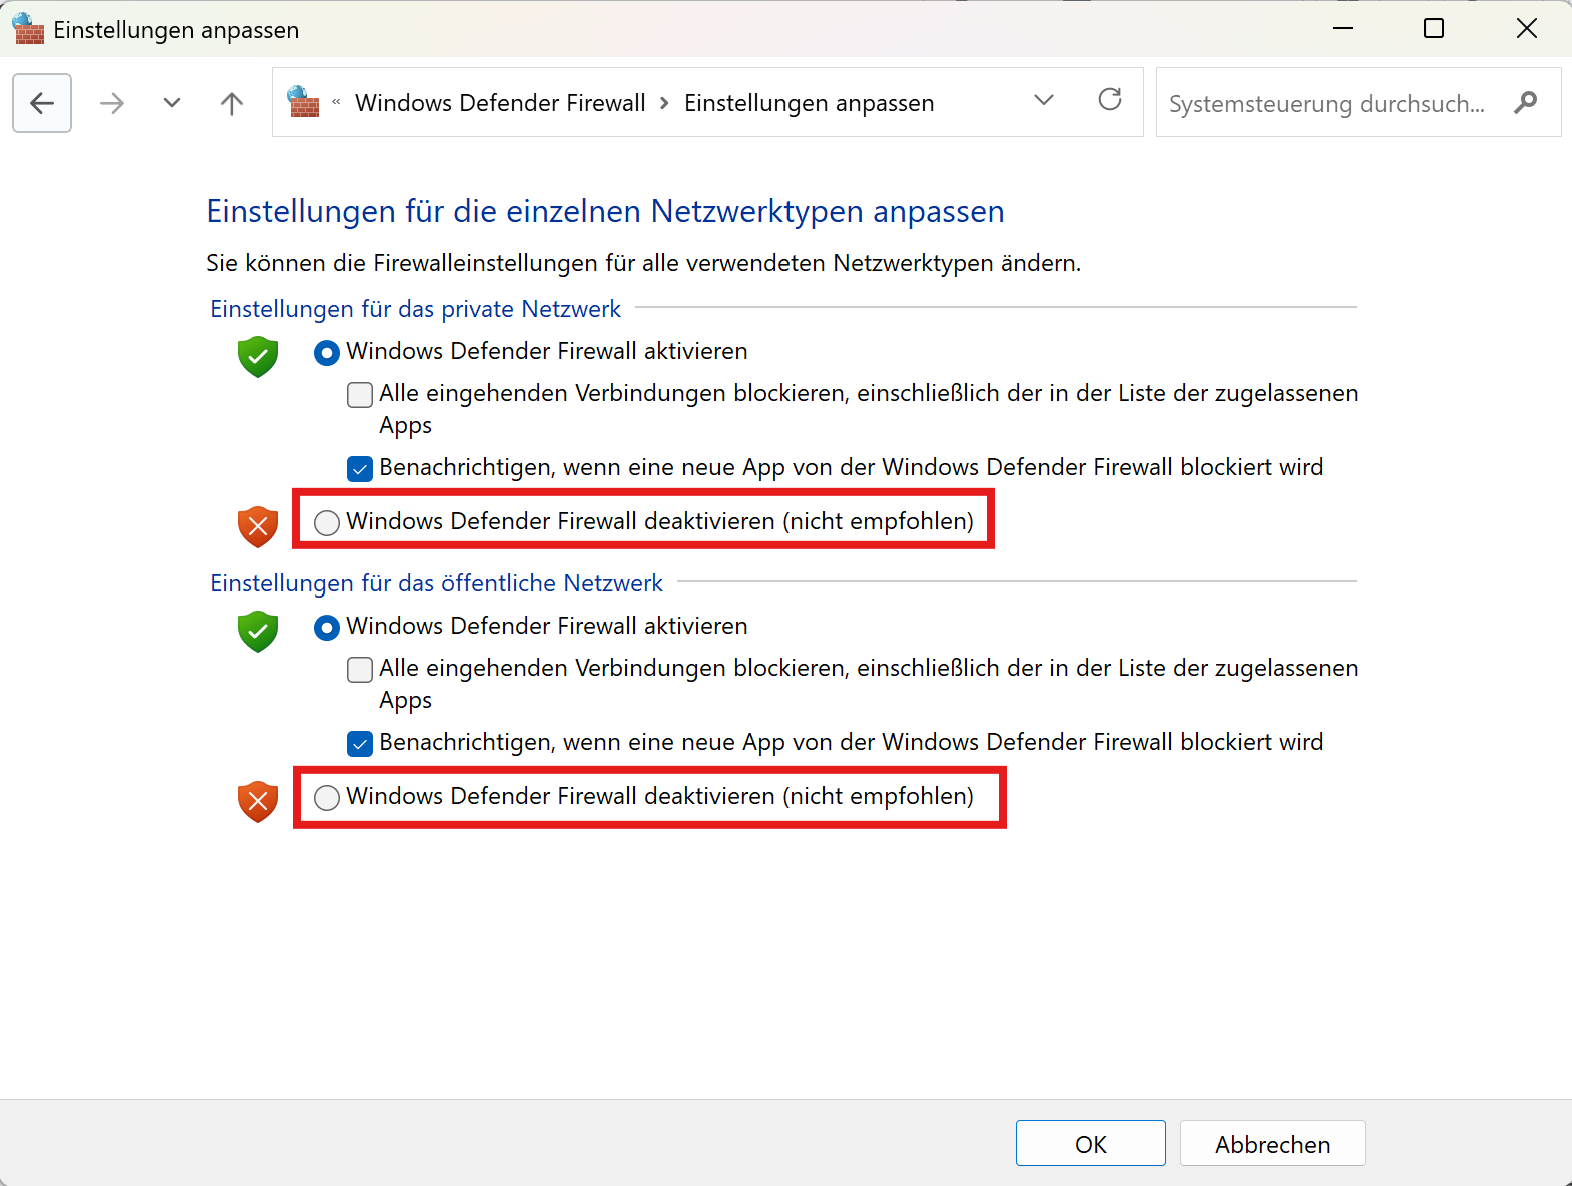
Click the deactivate option for both the private and public:
The dialog now shows the firewall set to off:
Set static IP for your computer
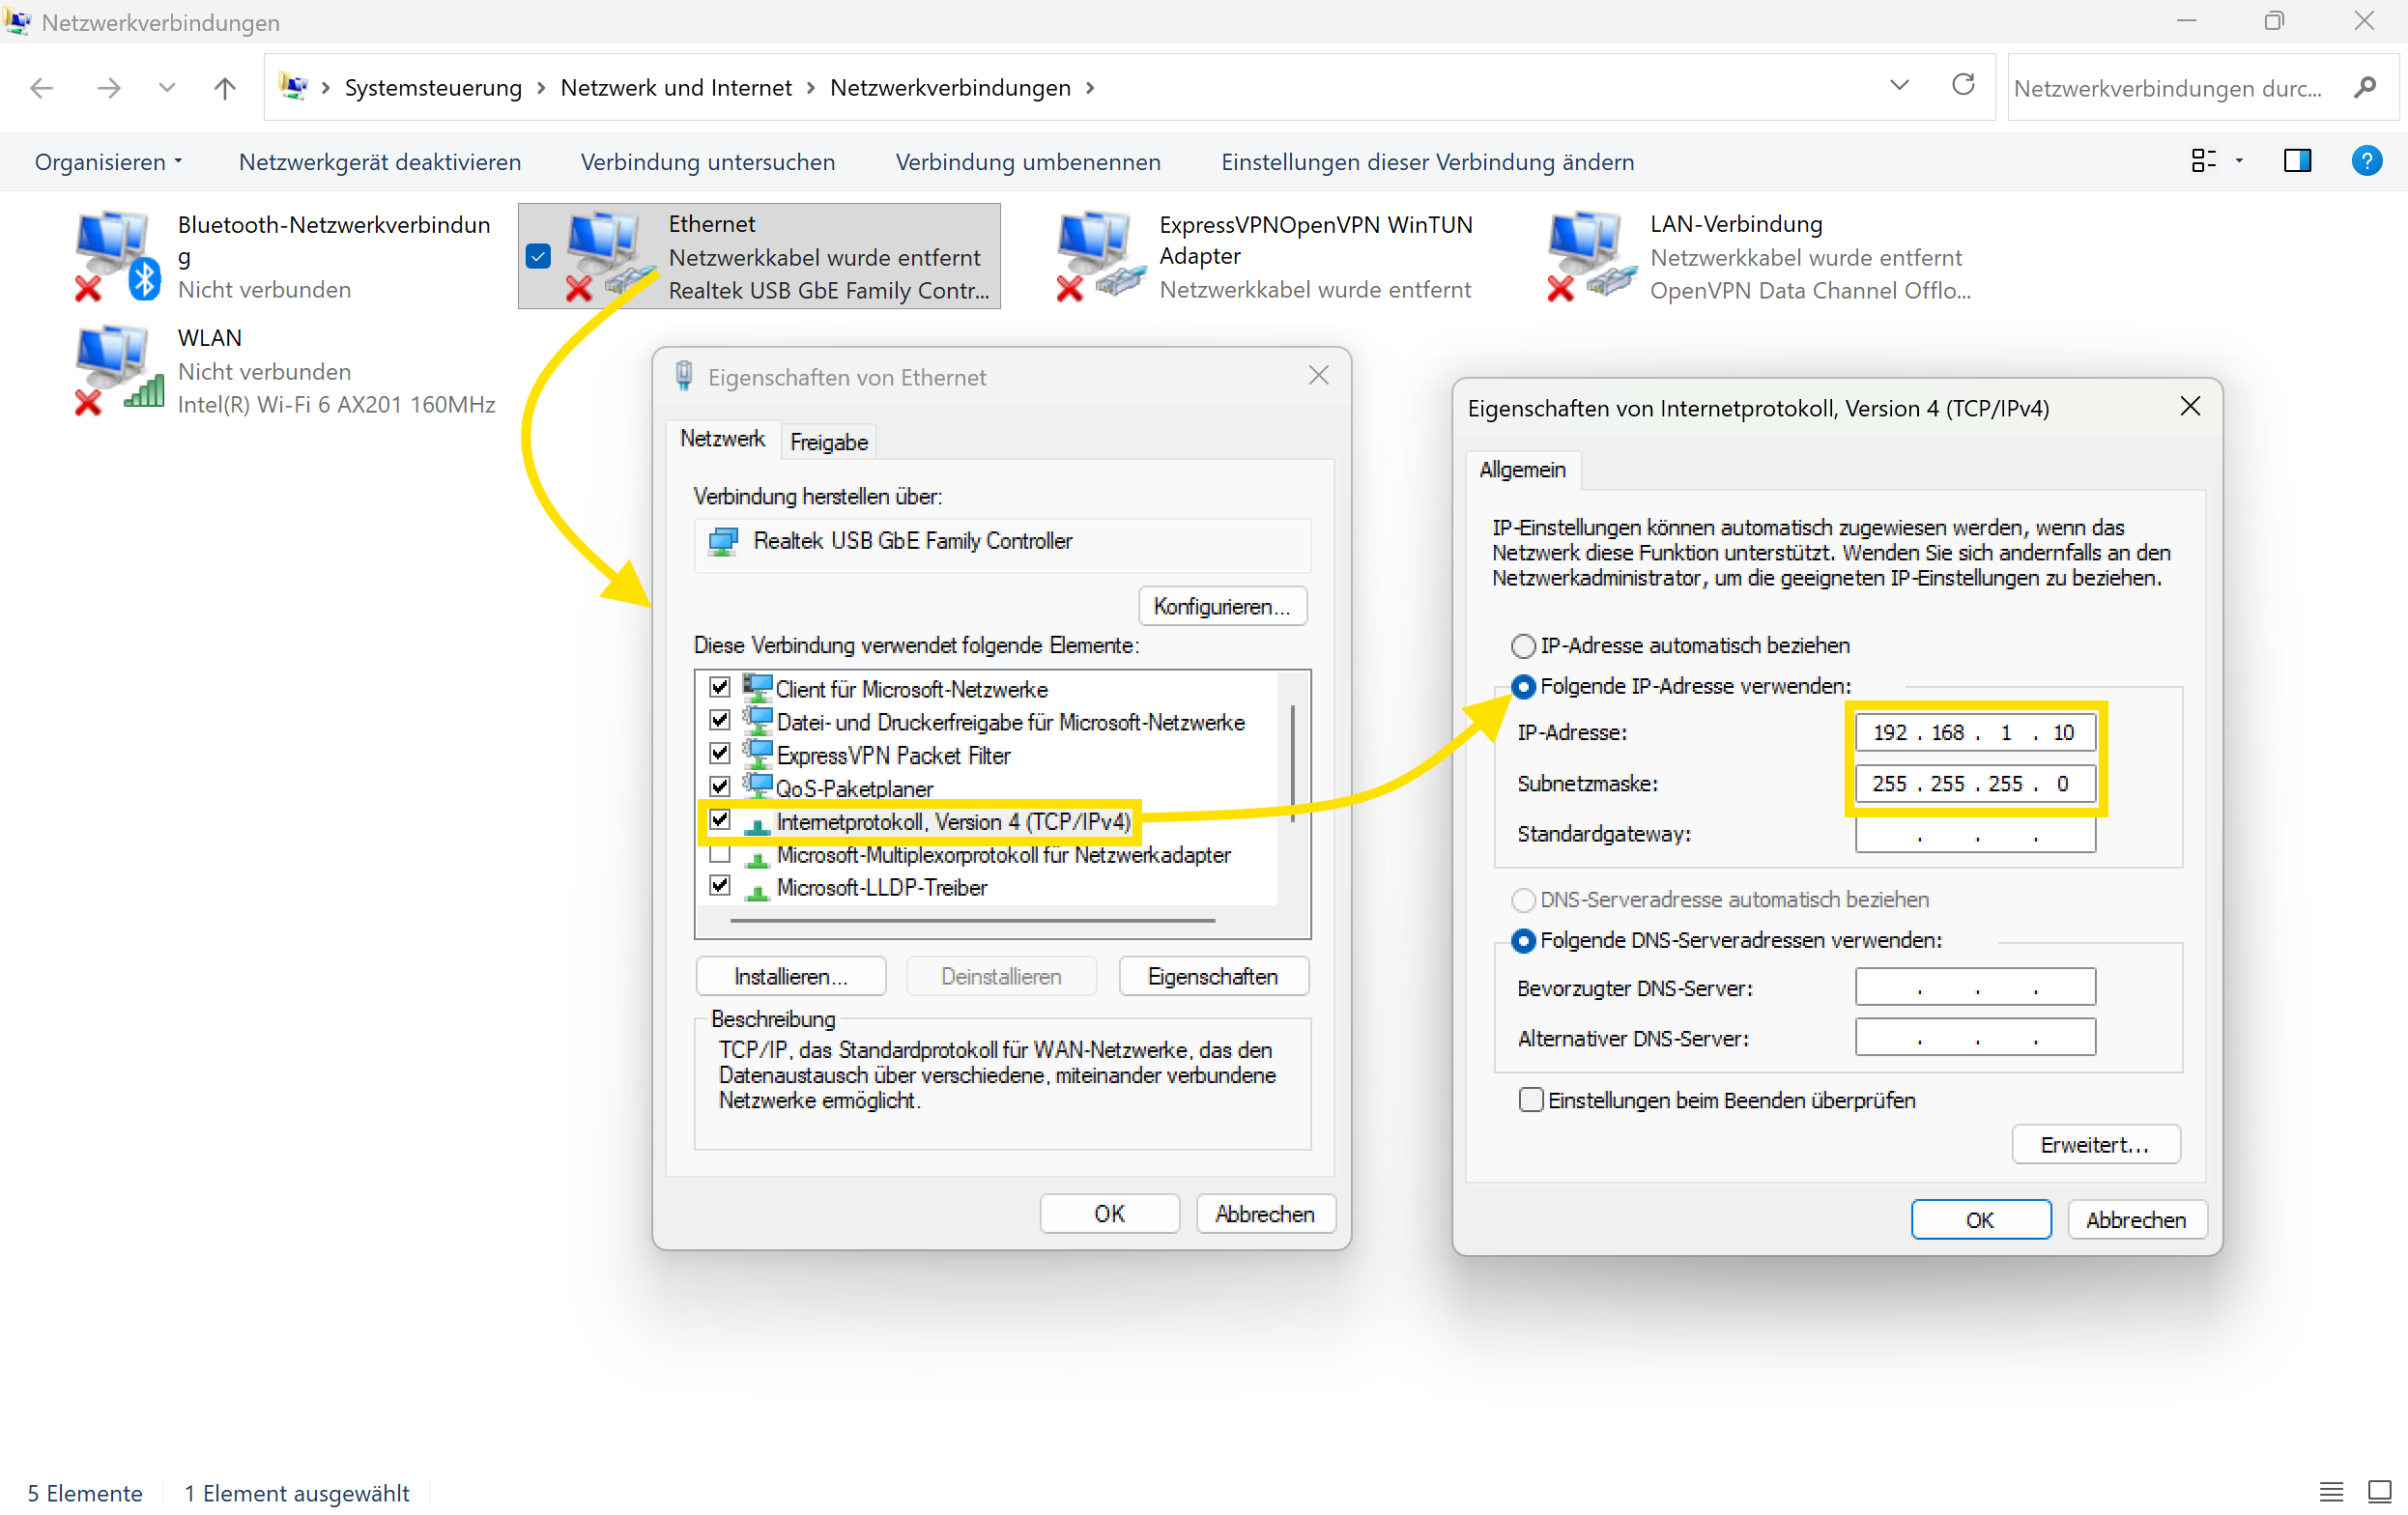
Open the network adapter connection dialog.
You can enter ncpa.cpl in the windows start menu.
(ncpa.cpl stands for Network Control Panel Applet)
- Right click the Ethernet adapter
- Select Internet protocol Version 4 (TCP/IPv4)
- Set the IP address to 192.168.1.10
- Set the Sub net mask to 255.255.255.0
- Unset the DNS server auto selection
Install
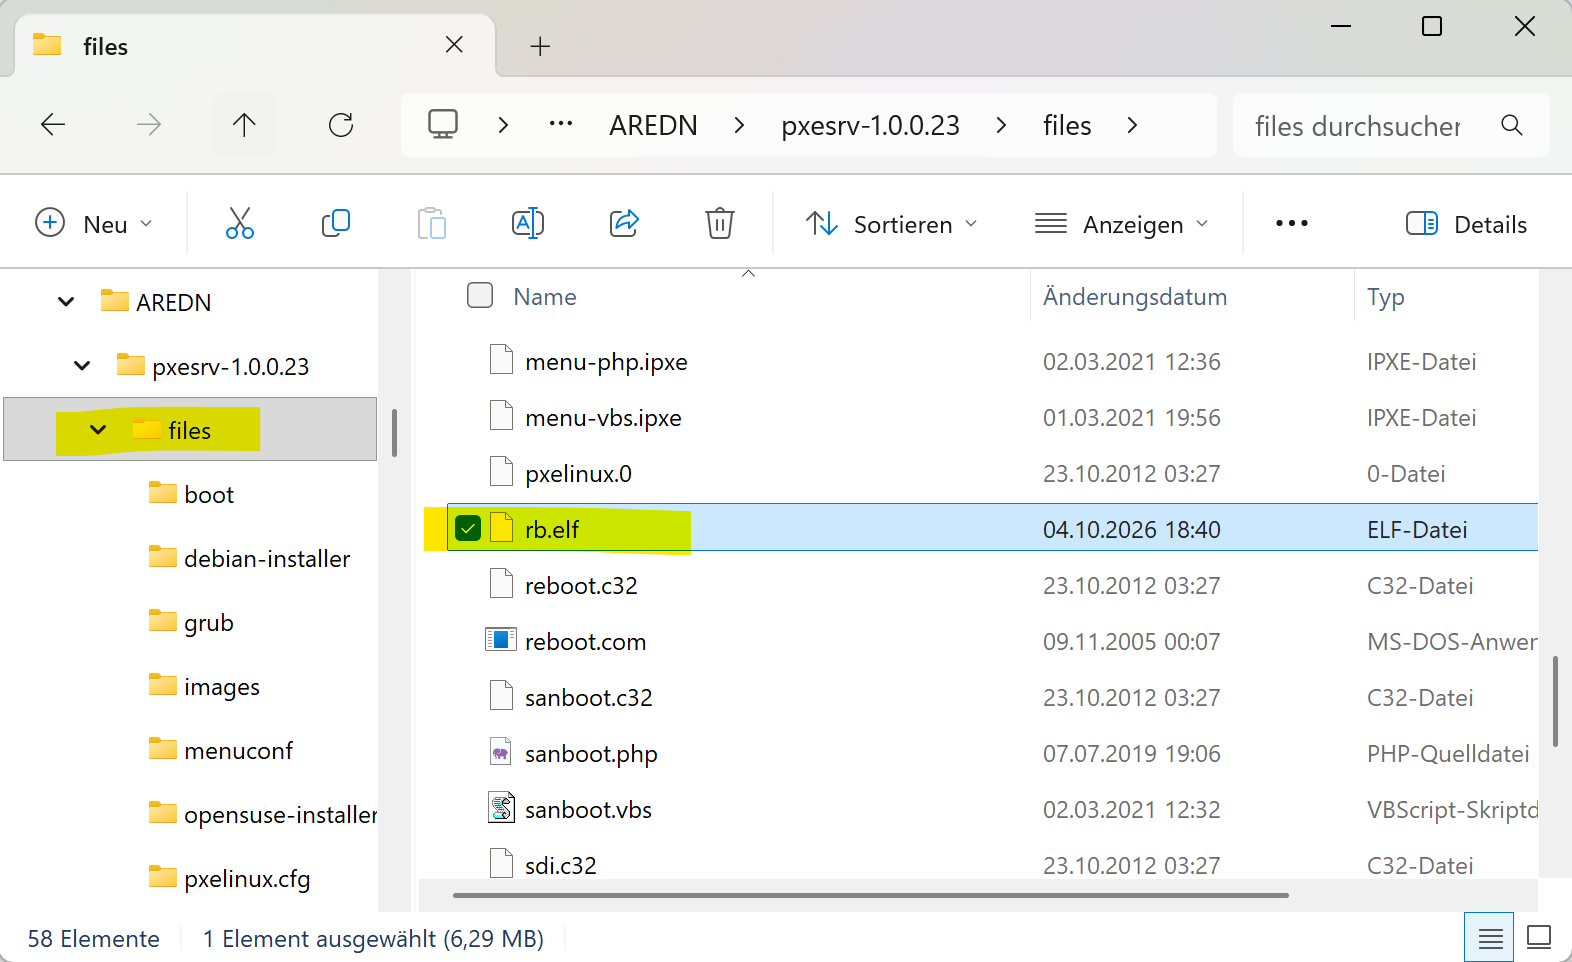
Unzip the pxesrv.zip to a folder.
Copy the initramfs-kernel.bin file, in this example aredn-4.26.7.0-ath79-mikrotik-mikrotik_routerboard-sxtsq-2nd-initramfs-kernel.bin to the subfolder files in your pxesrv folder as the file rb.elf.
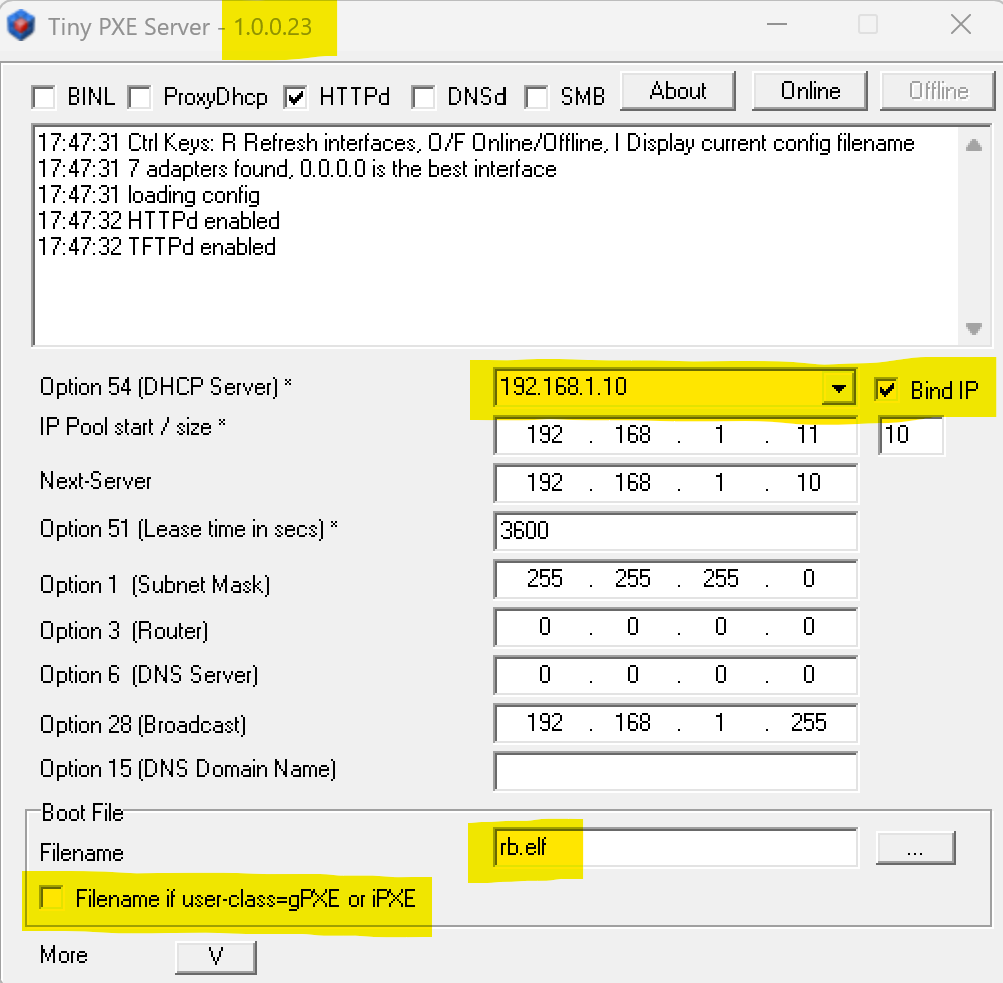
Run pxesrv.exe from your pxesrv folder as admininstrator.
-
Confirm Option 54 to have 192.168.1.10 and the Bind IP option is set.
-
Select the Boot File rd.elf you just copied/renamed in the files folder.
-
Uncheck option Filename if user-class=gPXE or iPXE
-
Click Online
First Node Setup
Unplug the power of the Antenna and press the reset button.
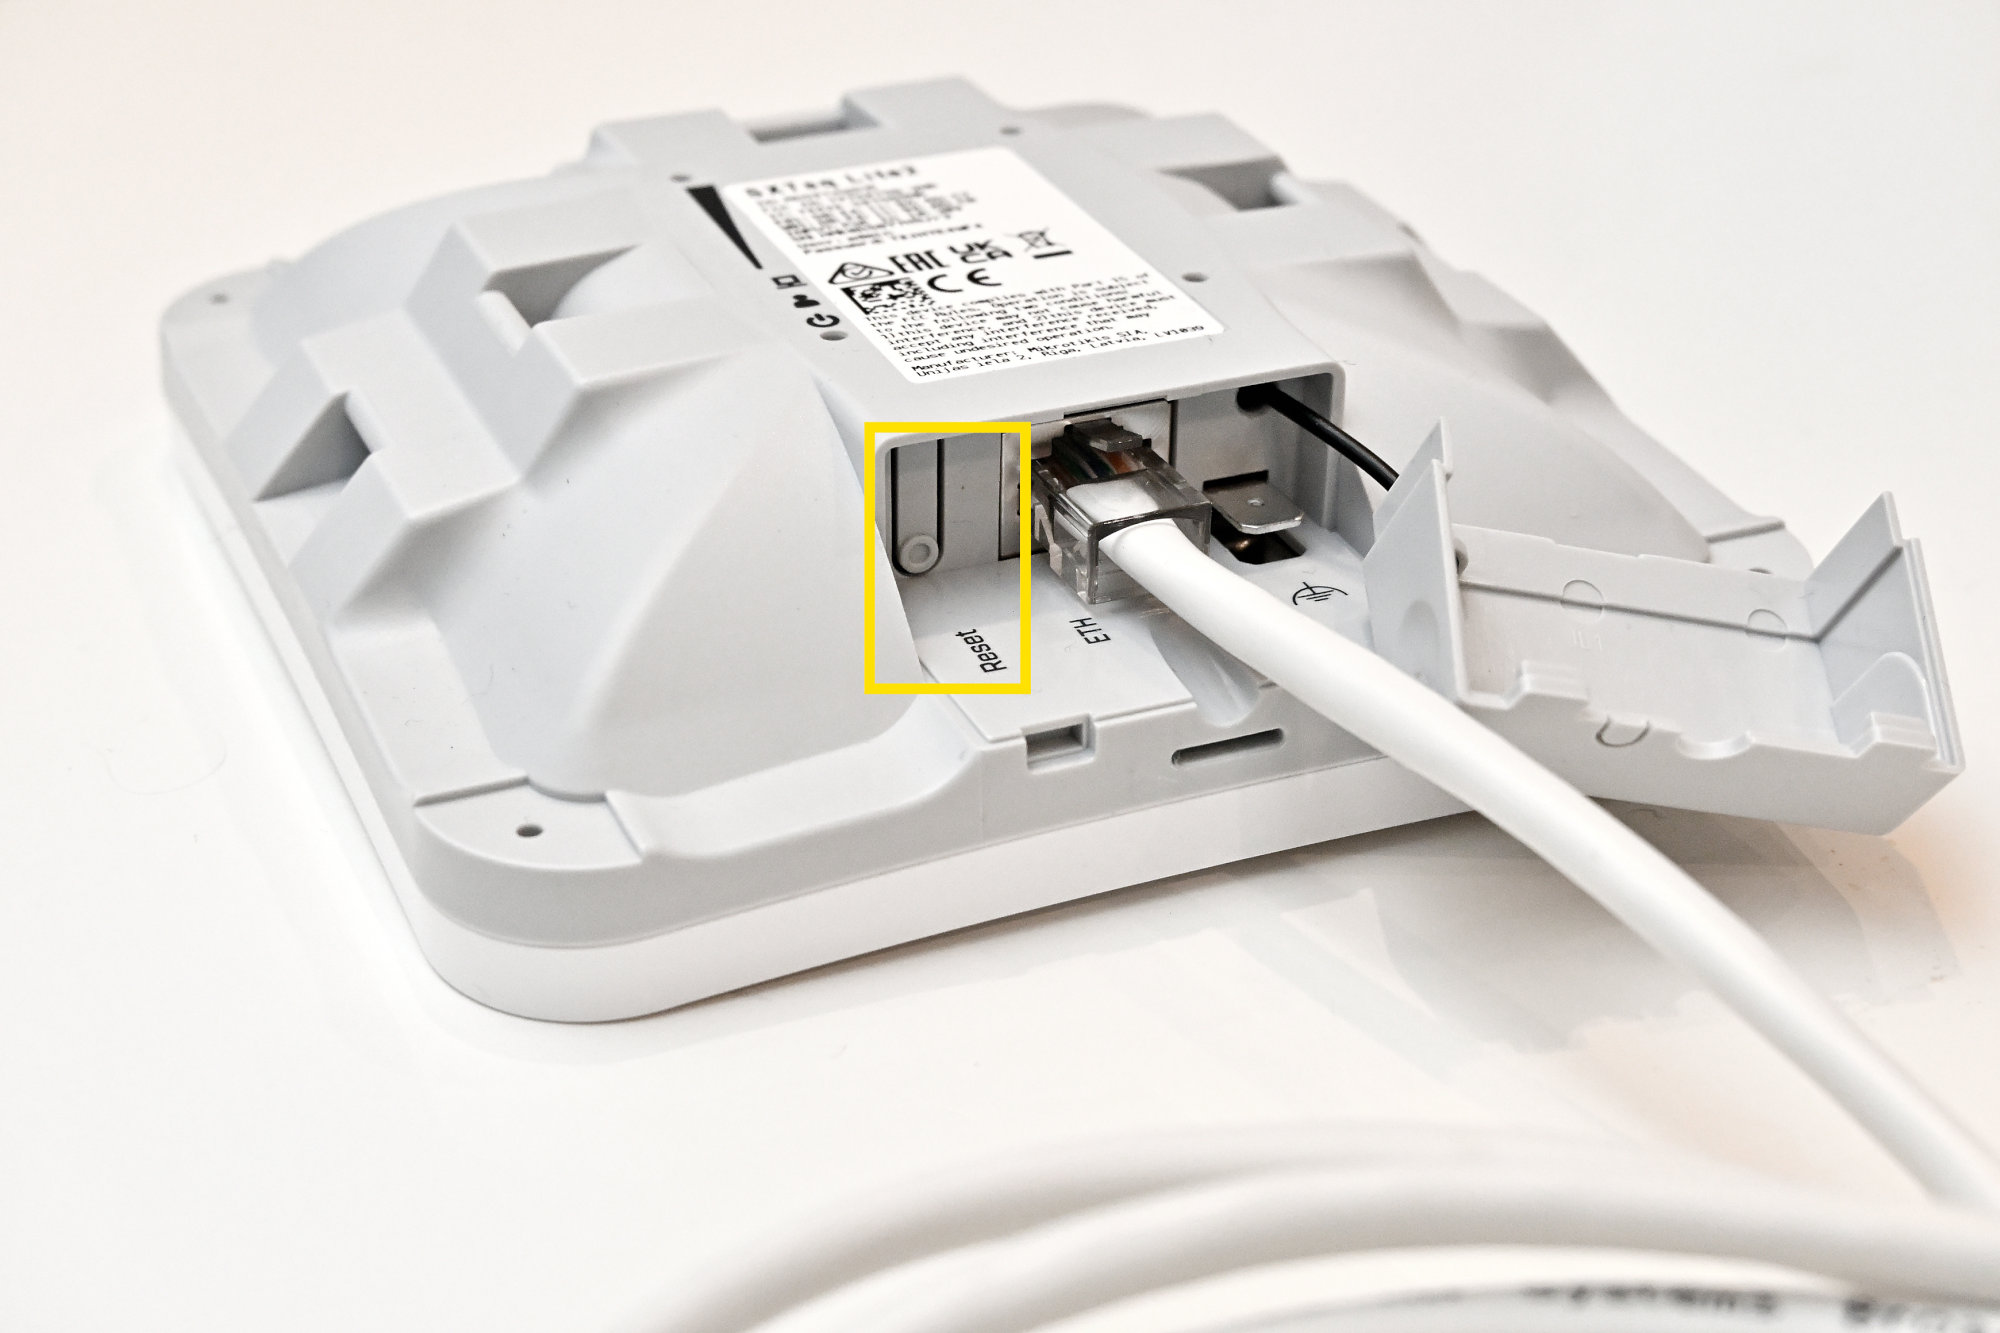
While keeping the reset button hold, plug the antenna back in. Keep the reset button hold until you see TFTPd:DoREadFile:rb.elf
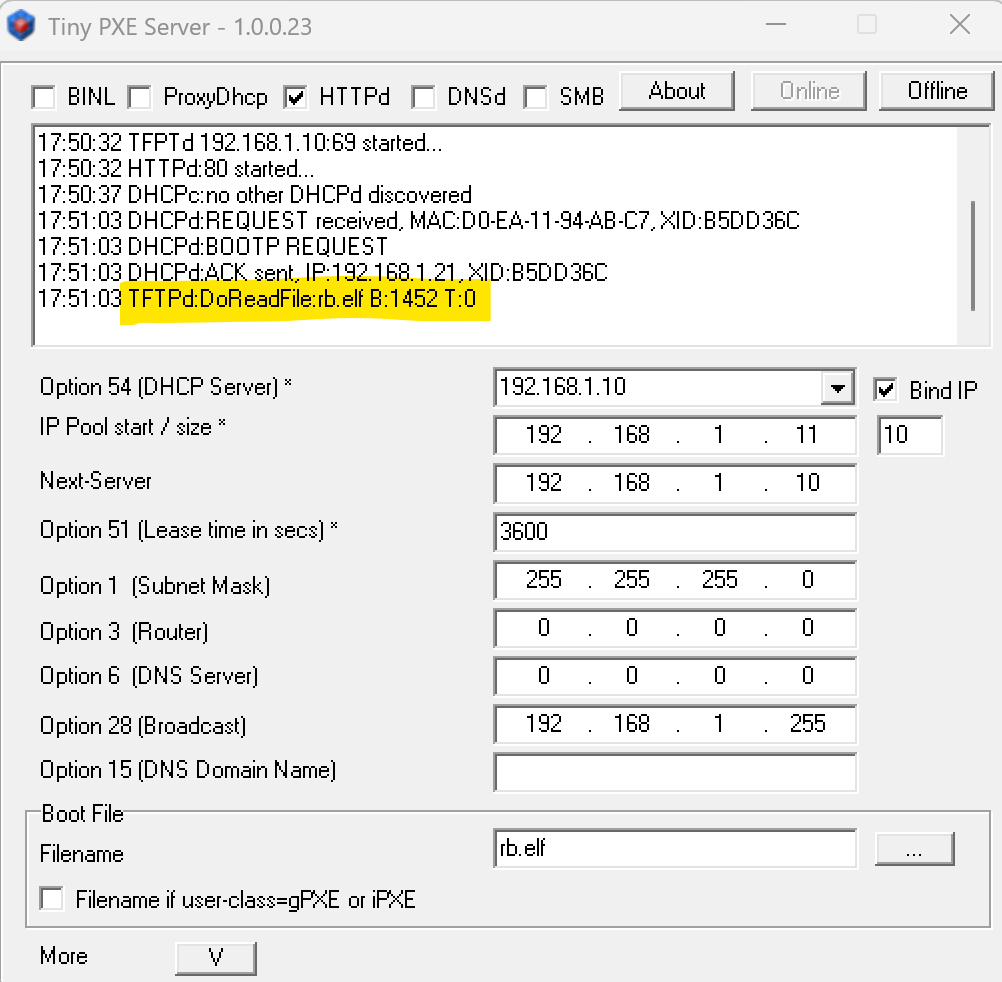
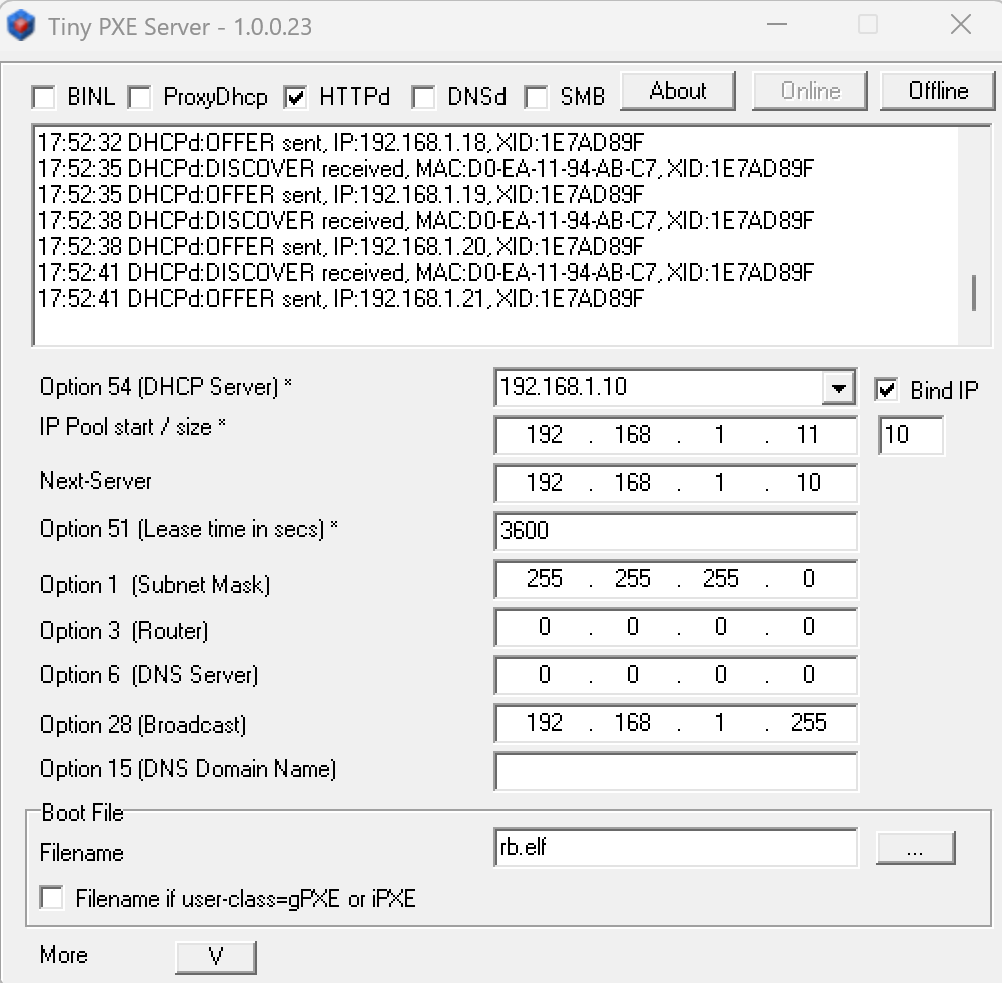
The first boot image is getting installed. It is temporary so do not unplug the power once it finished.
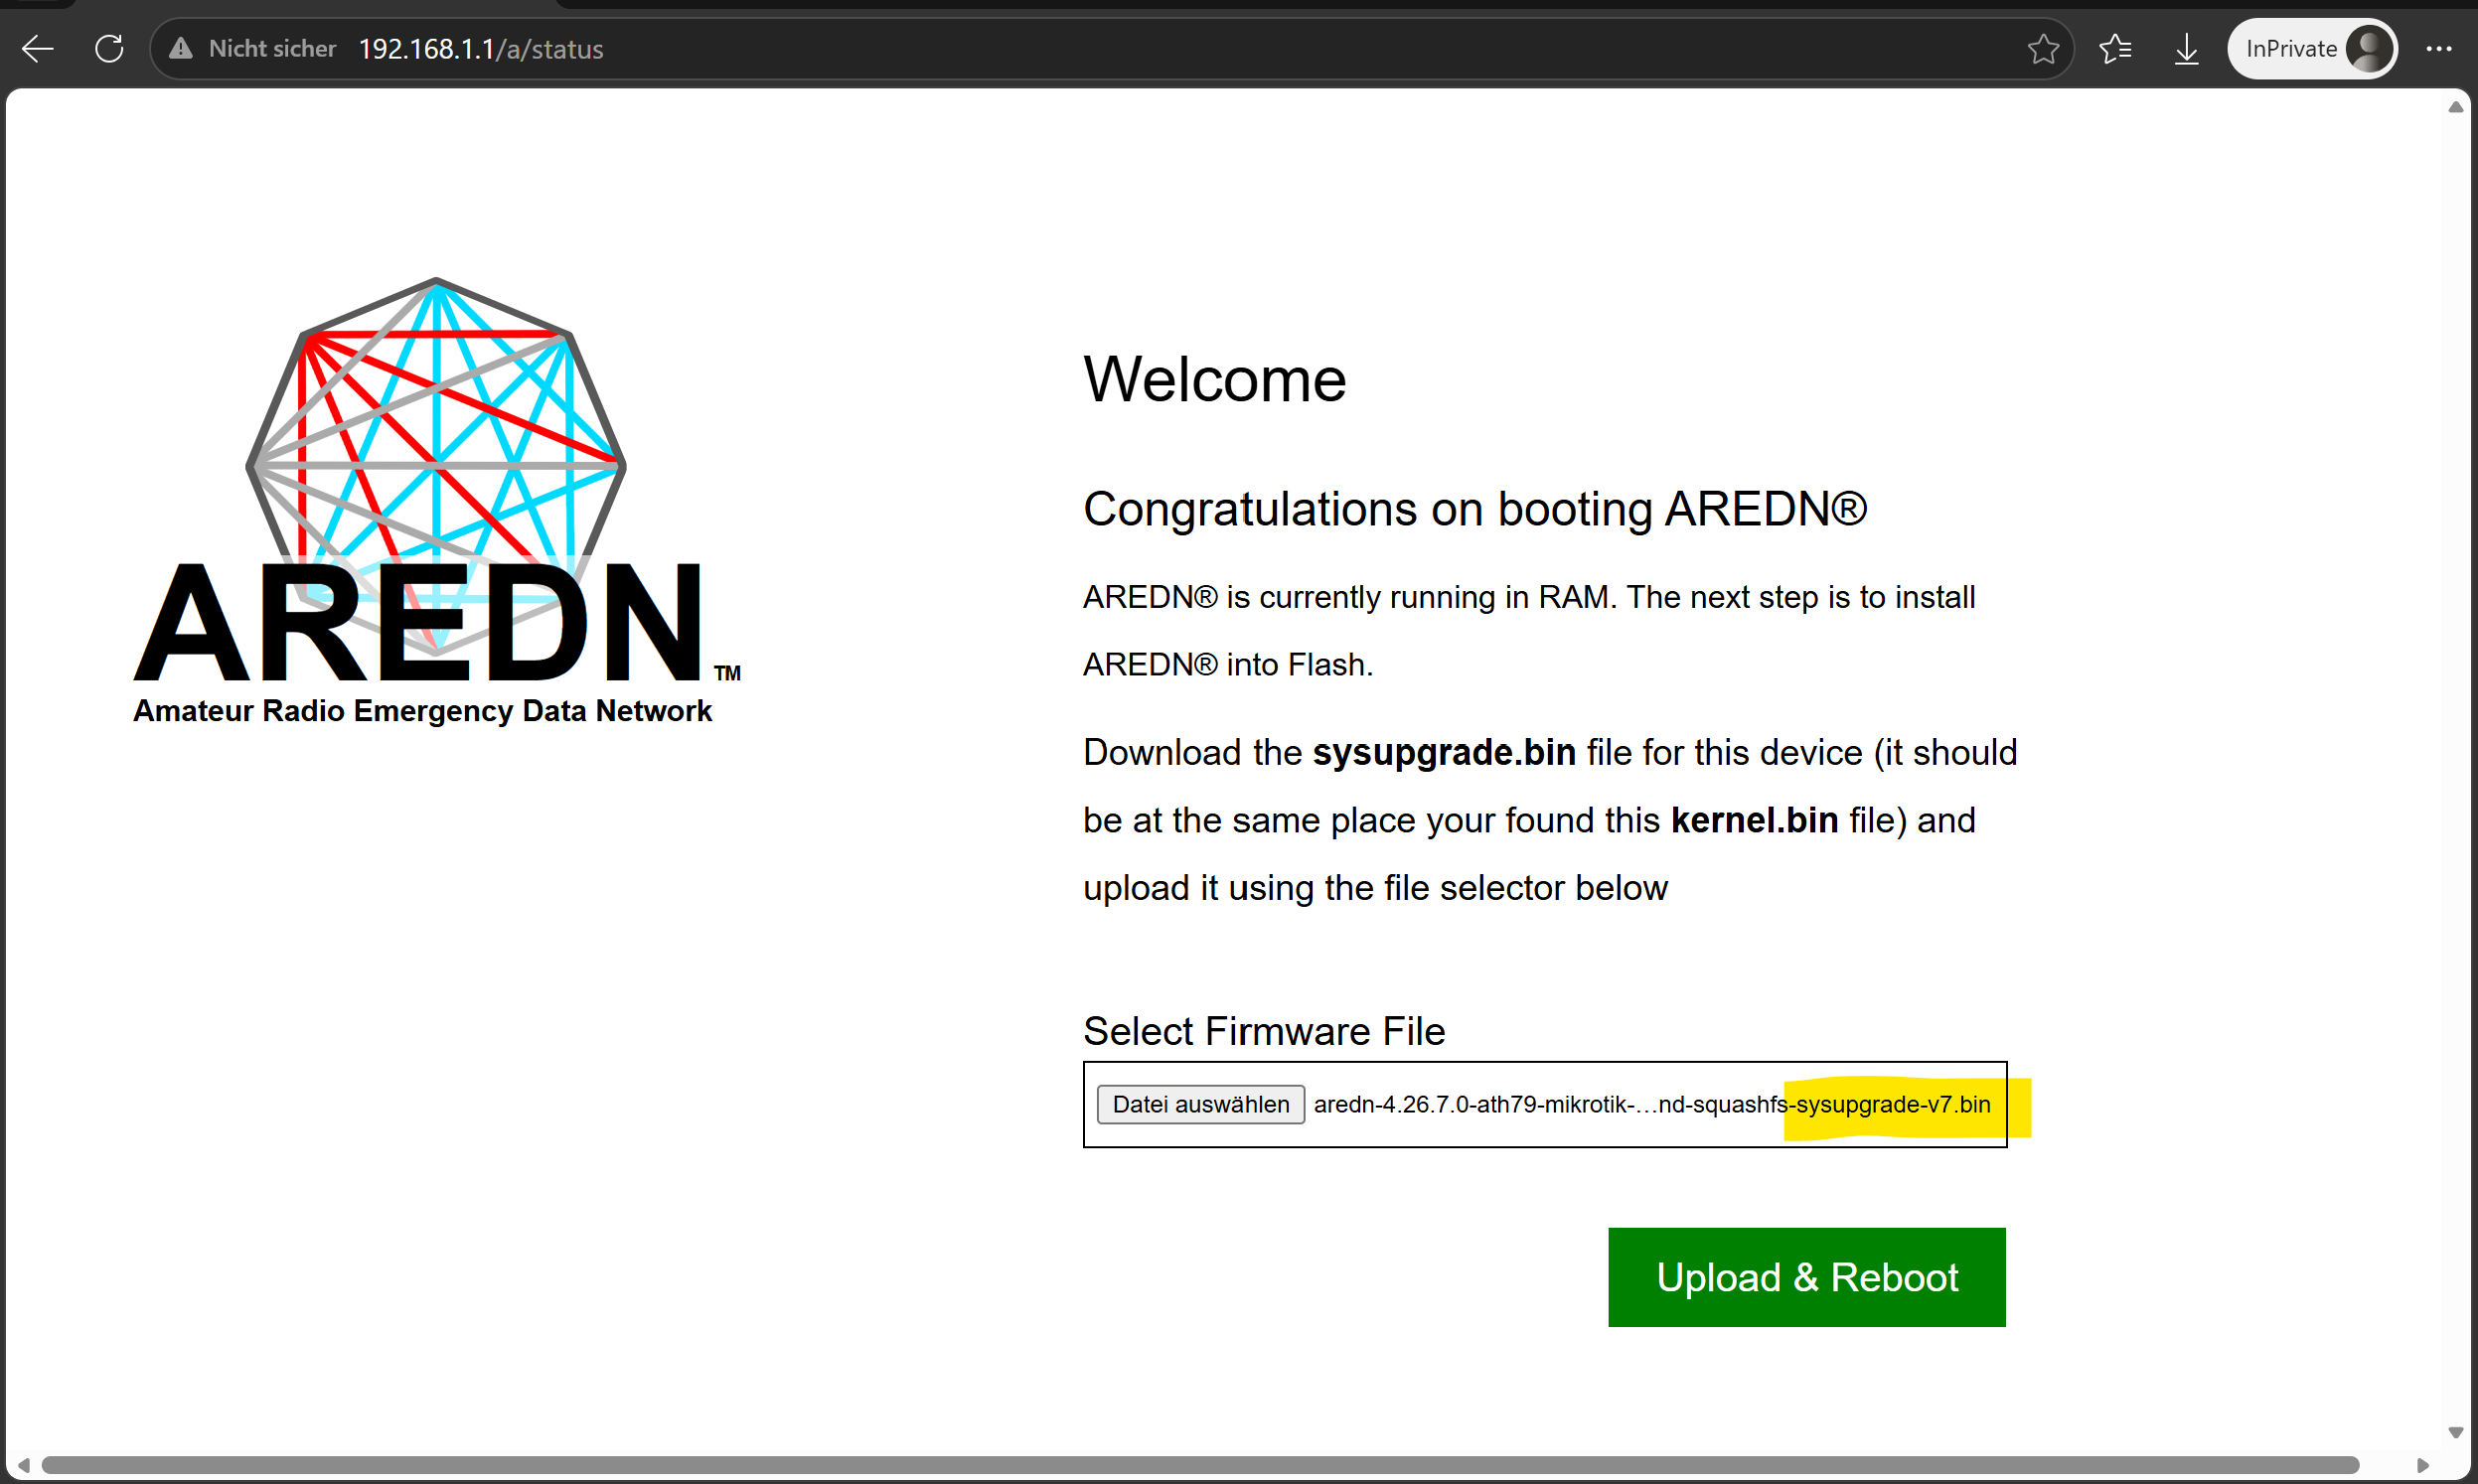
Once the transfer is done, launch 192.168.1.1 in an in-private browser window and select the second AREDN firmware file ending in -sysupgrade-v7.bin. Click Upload & Reboot
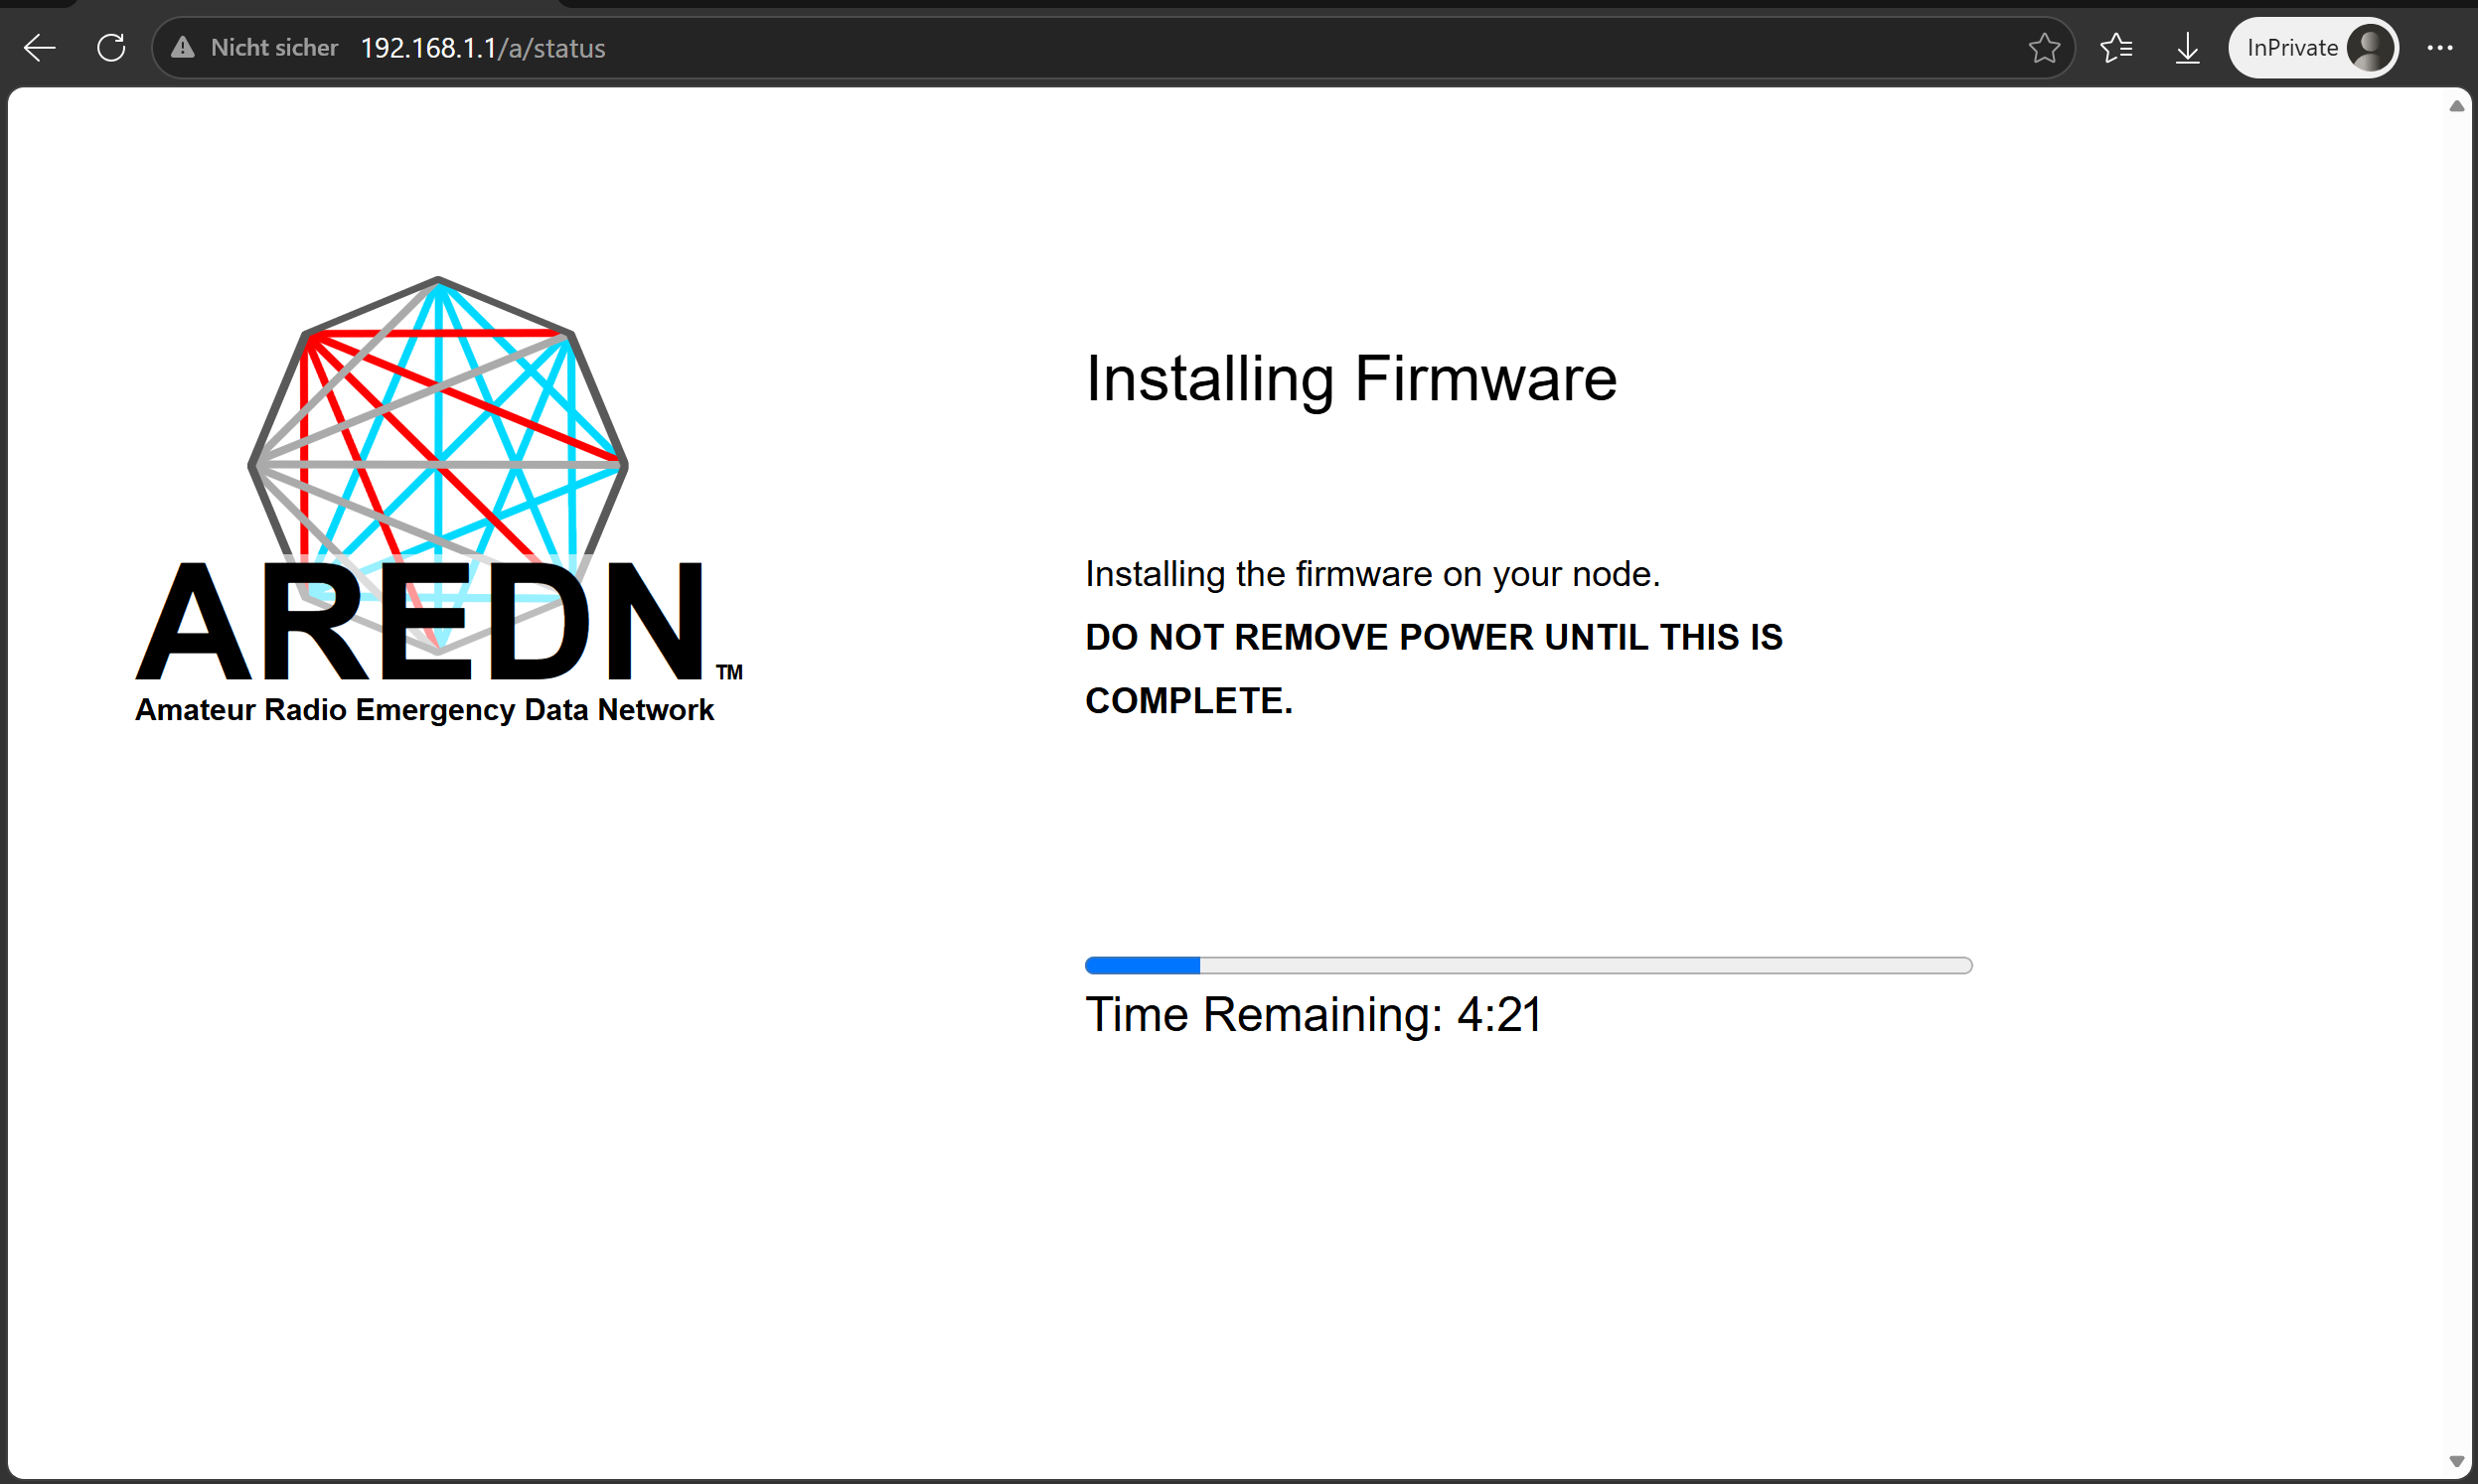
AREDN Firmware is getting installed:
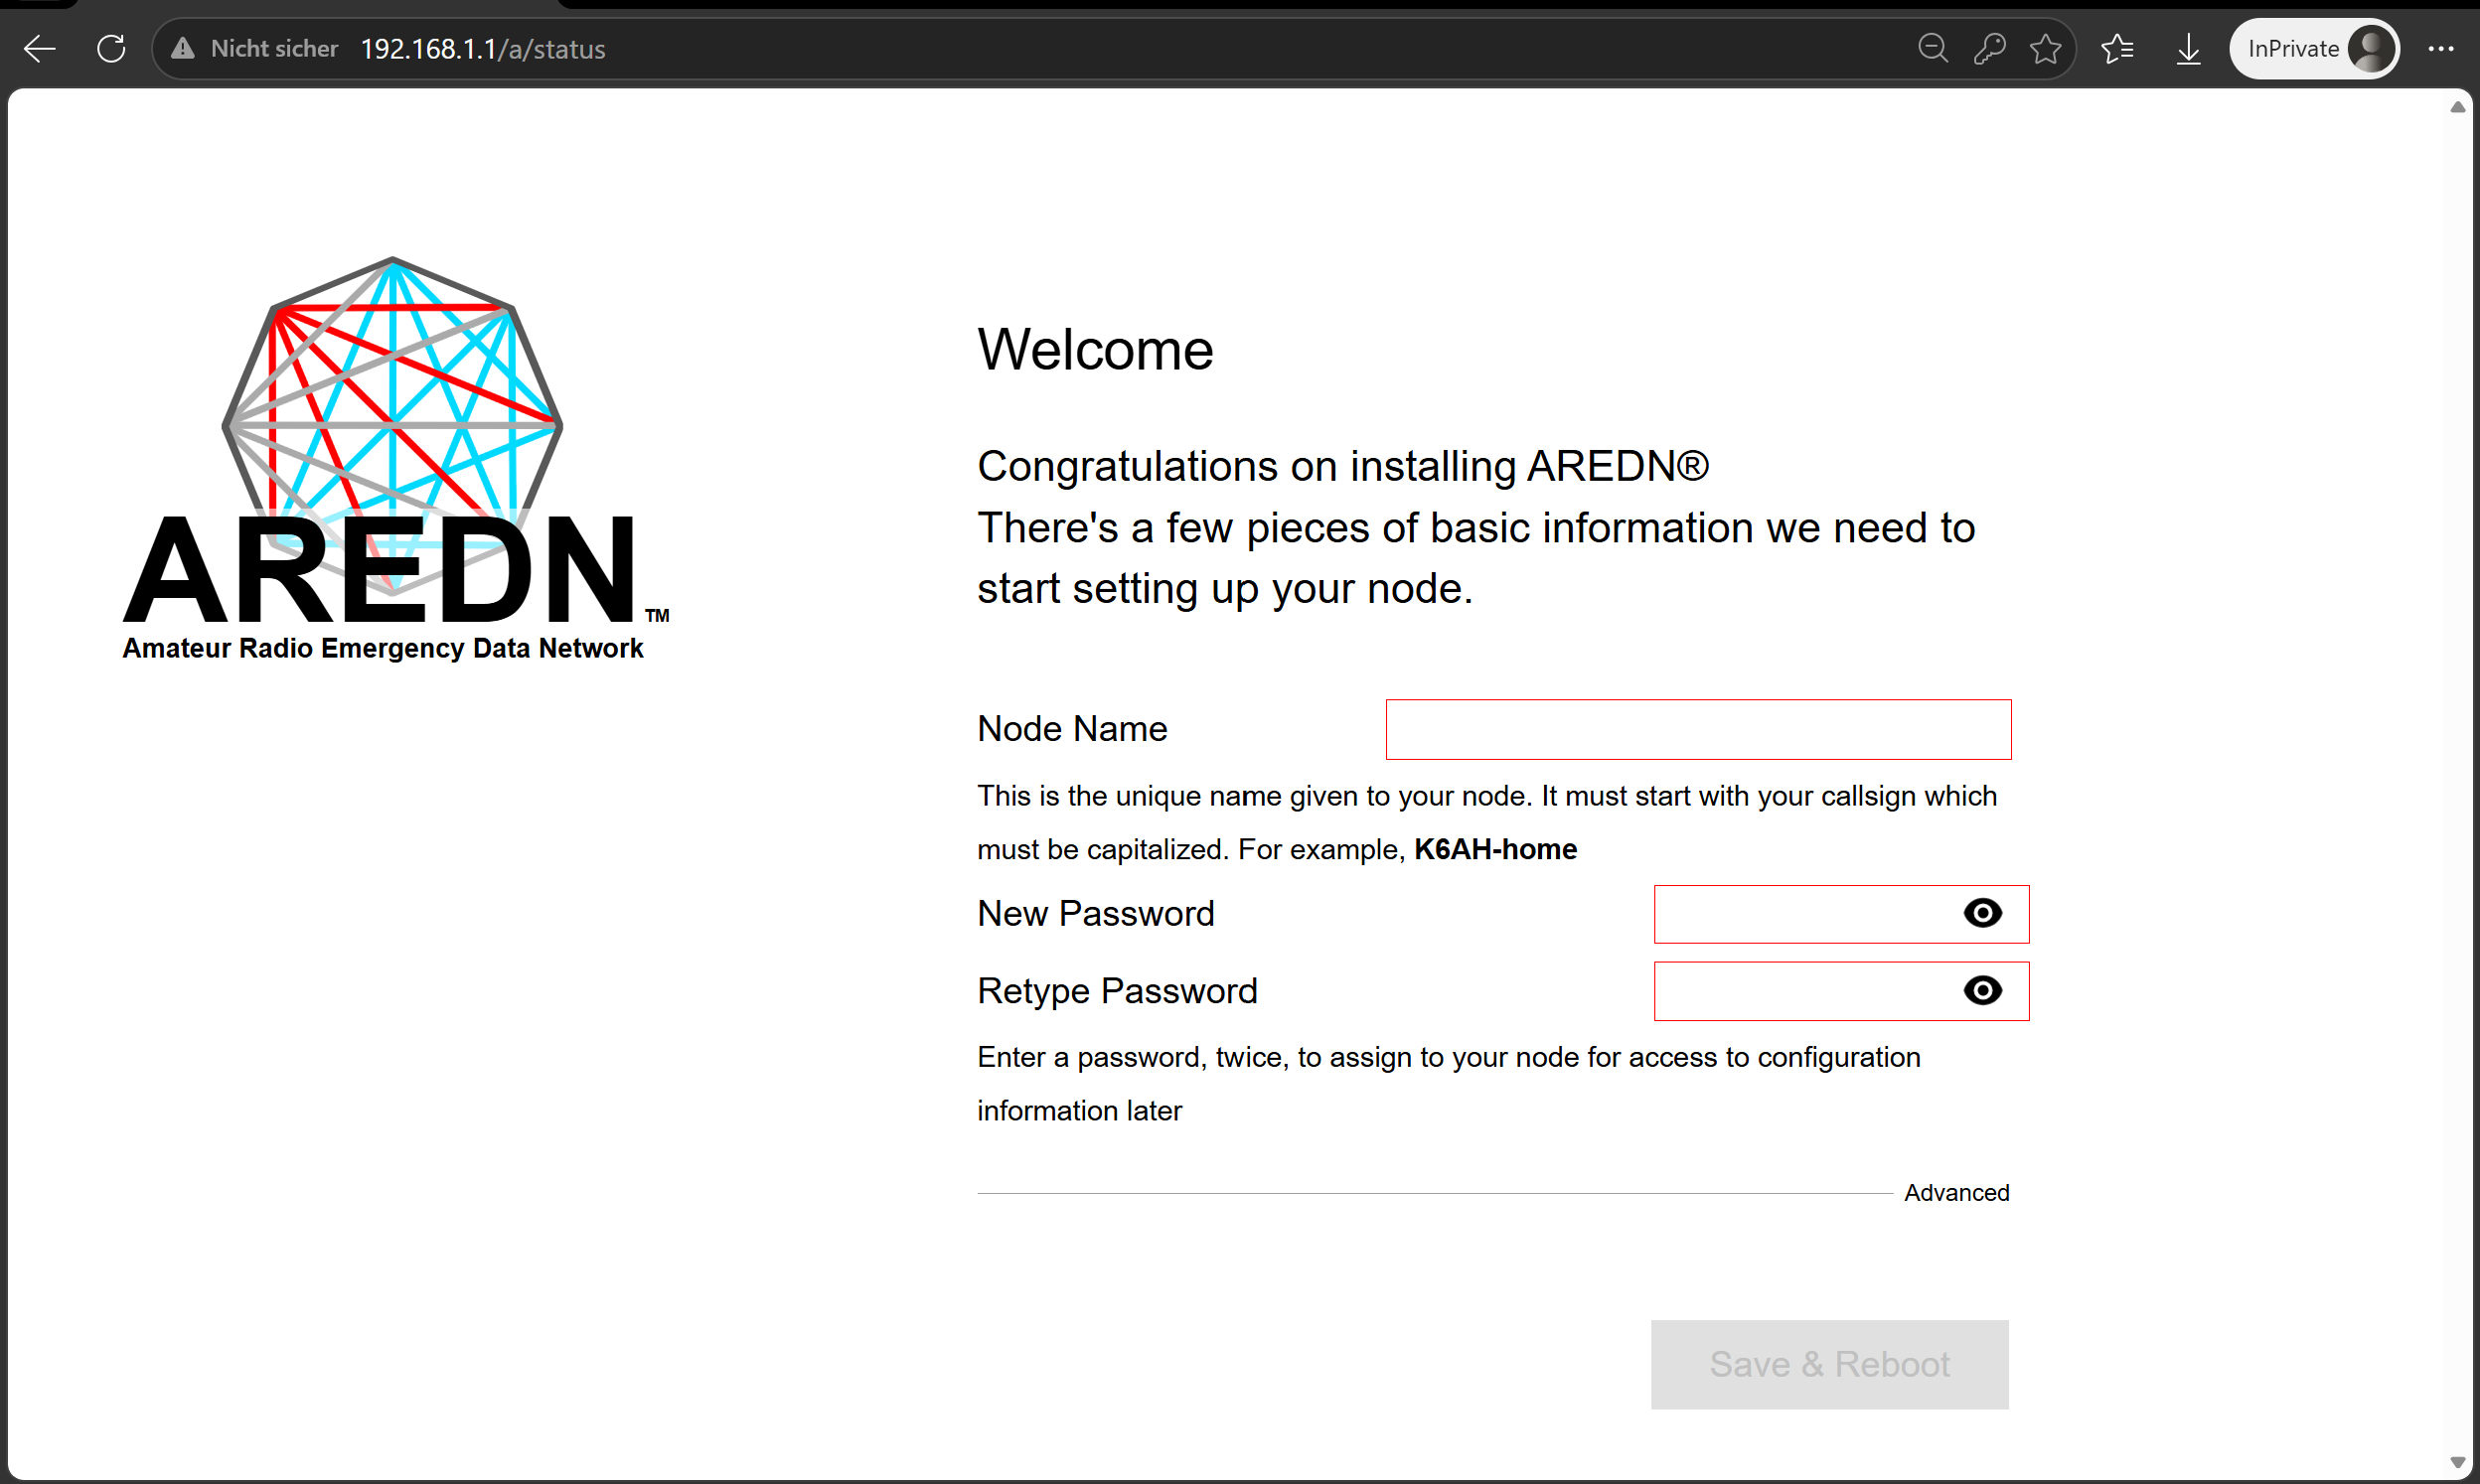
Set Node Name and password and click Save & Reboot
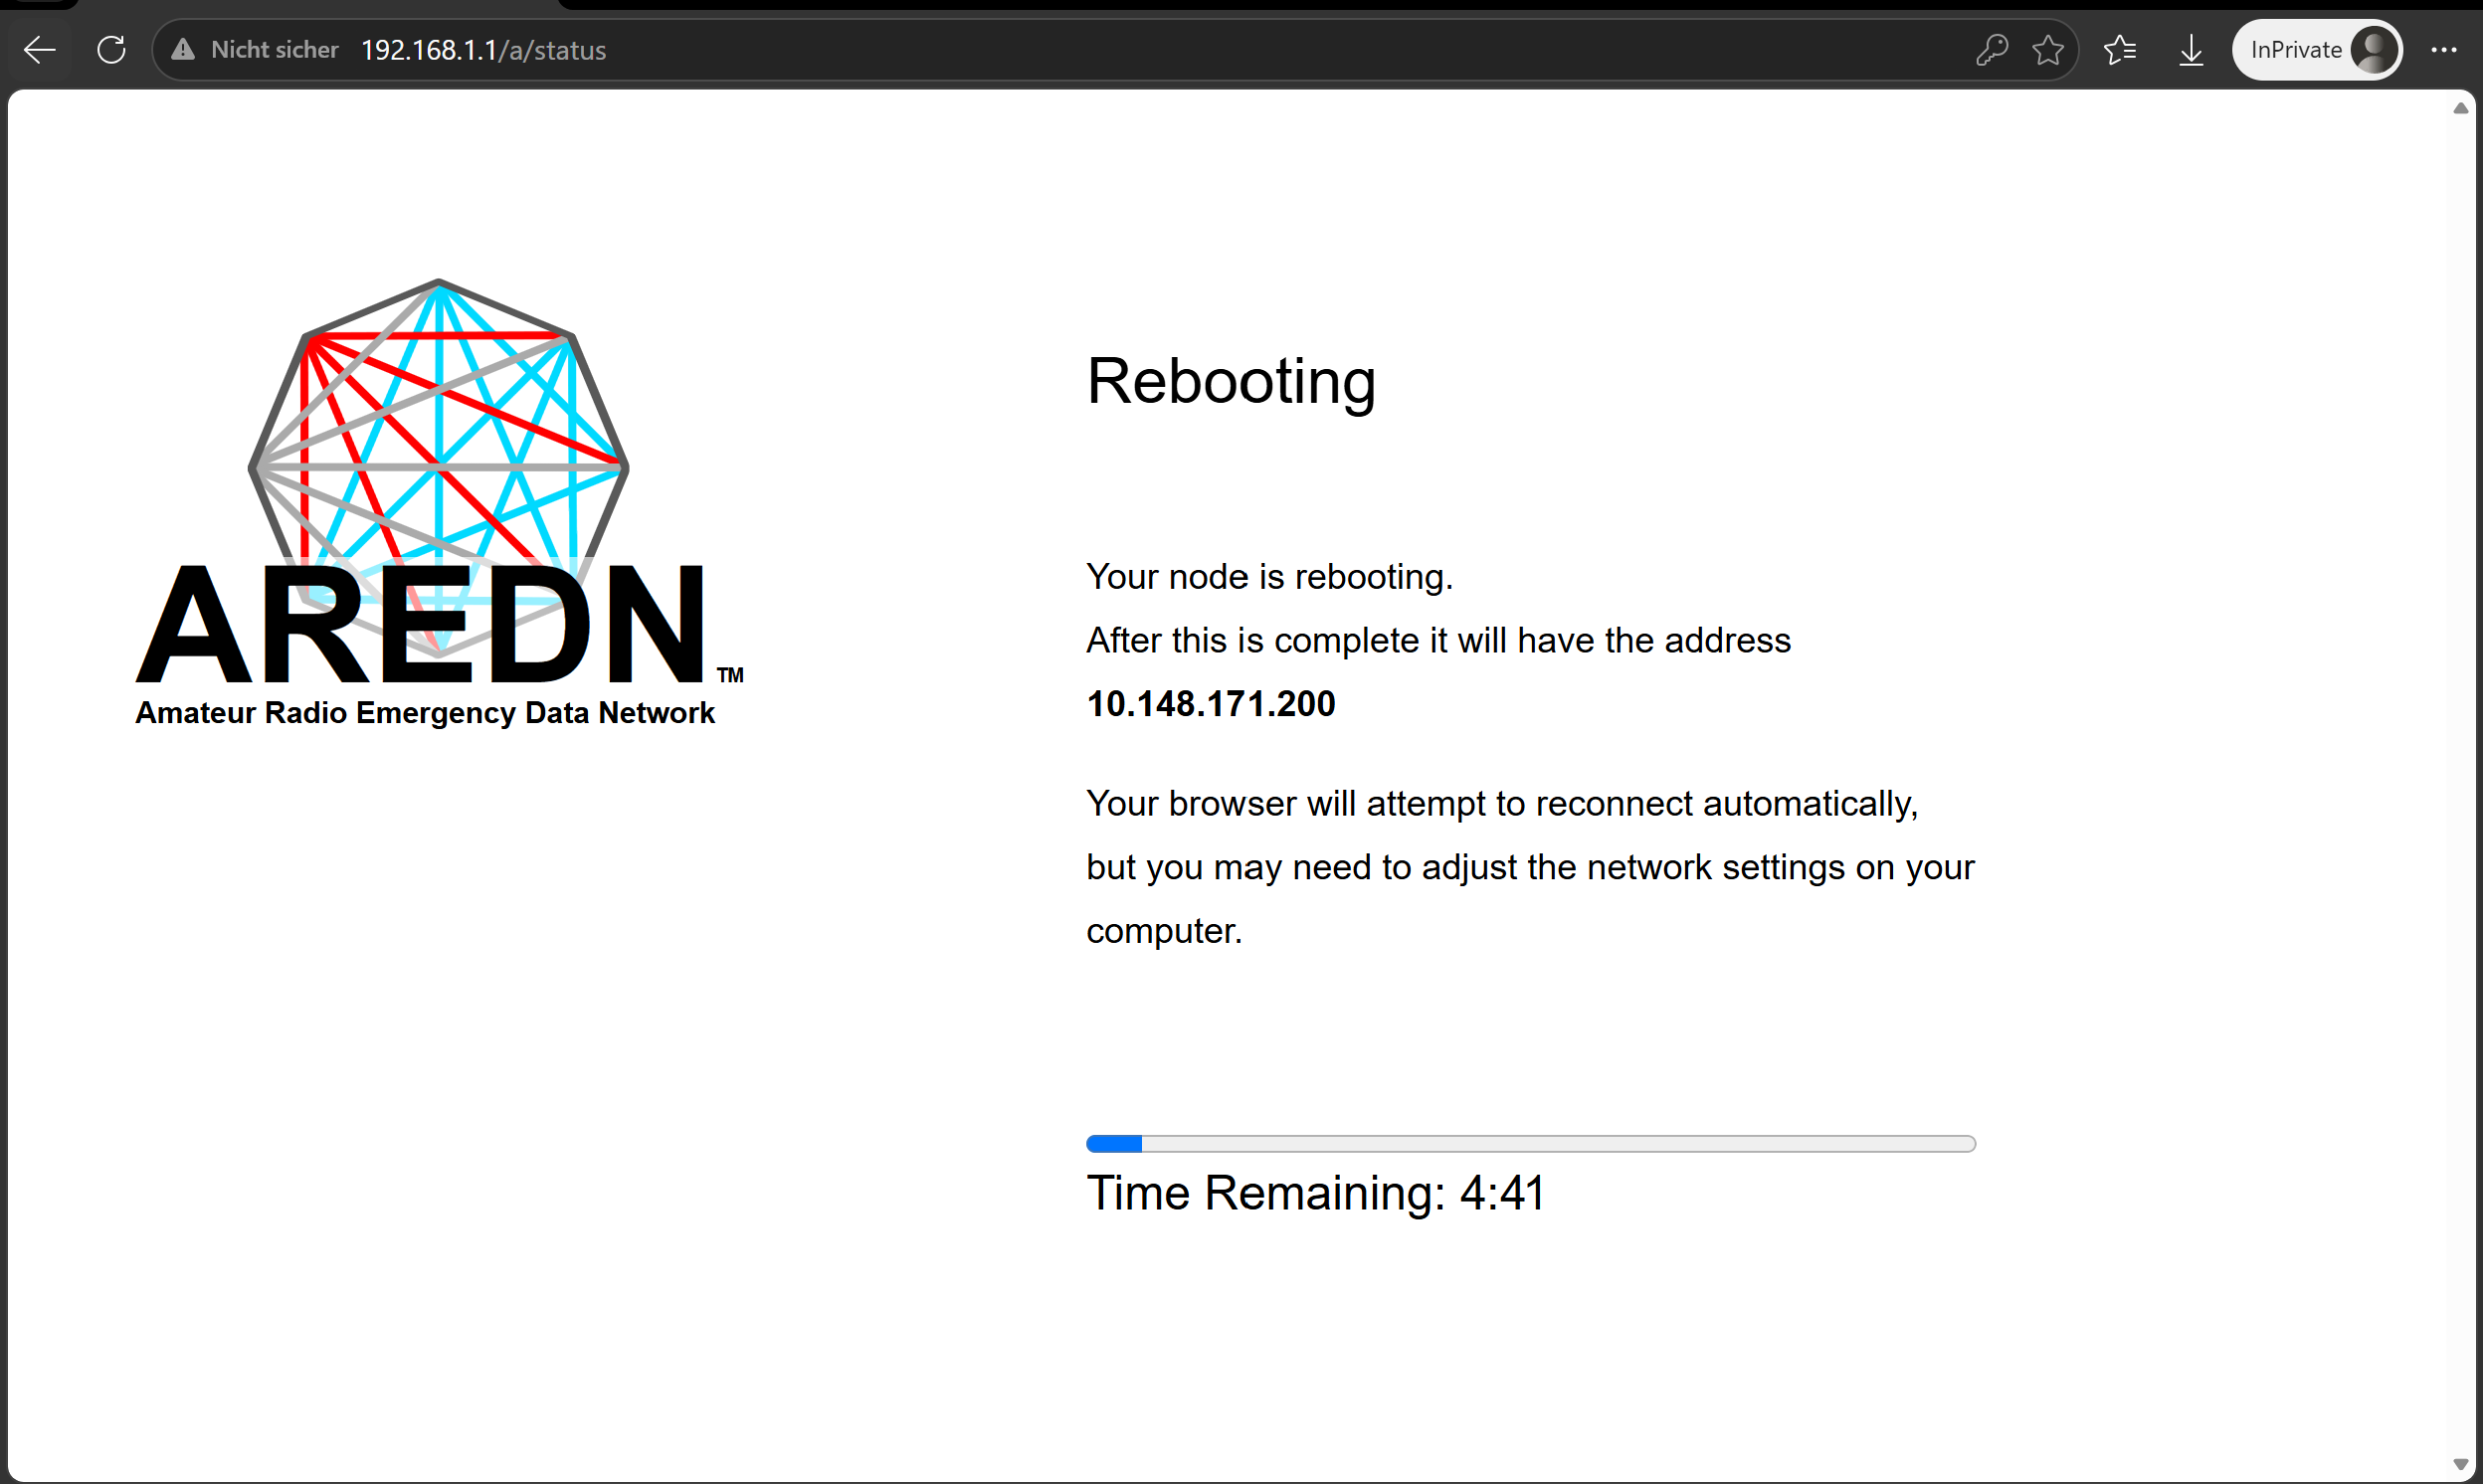
Once the node rebooted, enable back the firewall and then restore the Internet connection:
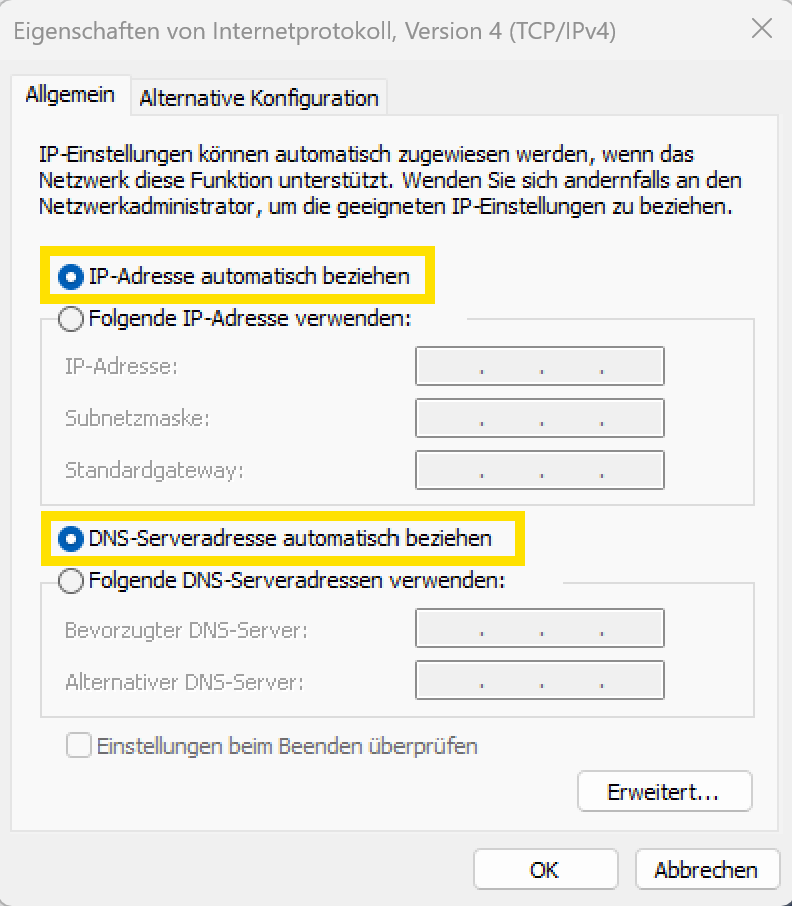
Set the IP-Address back to auto:
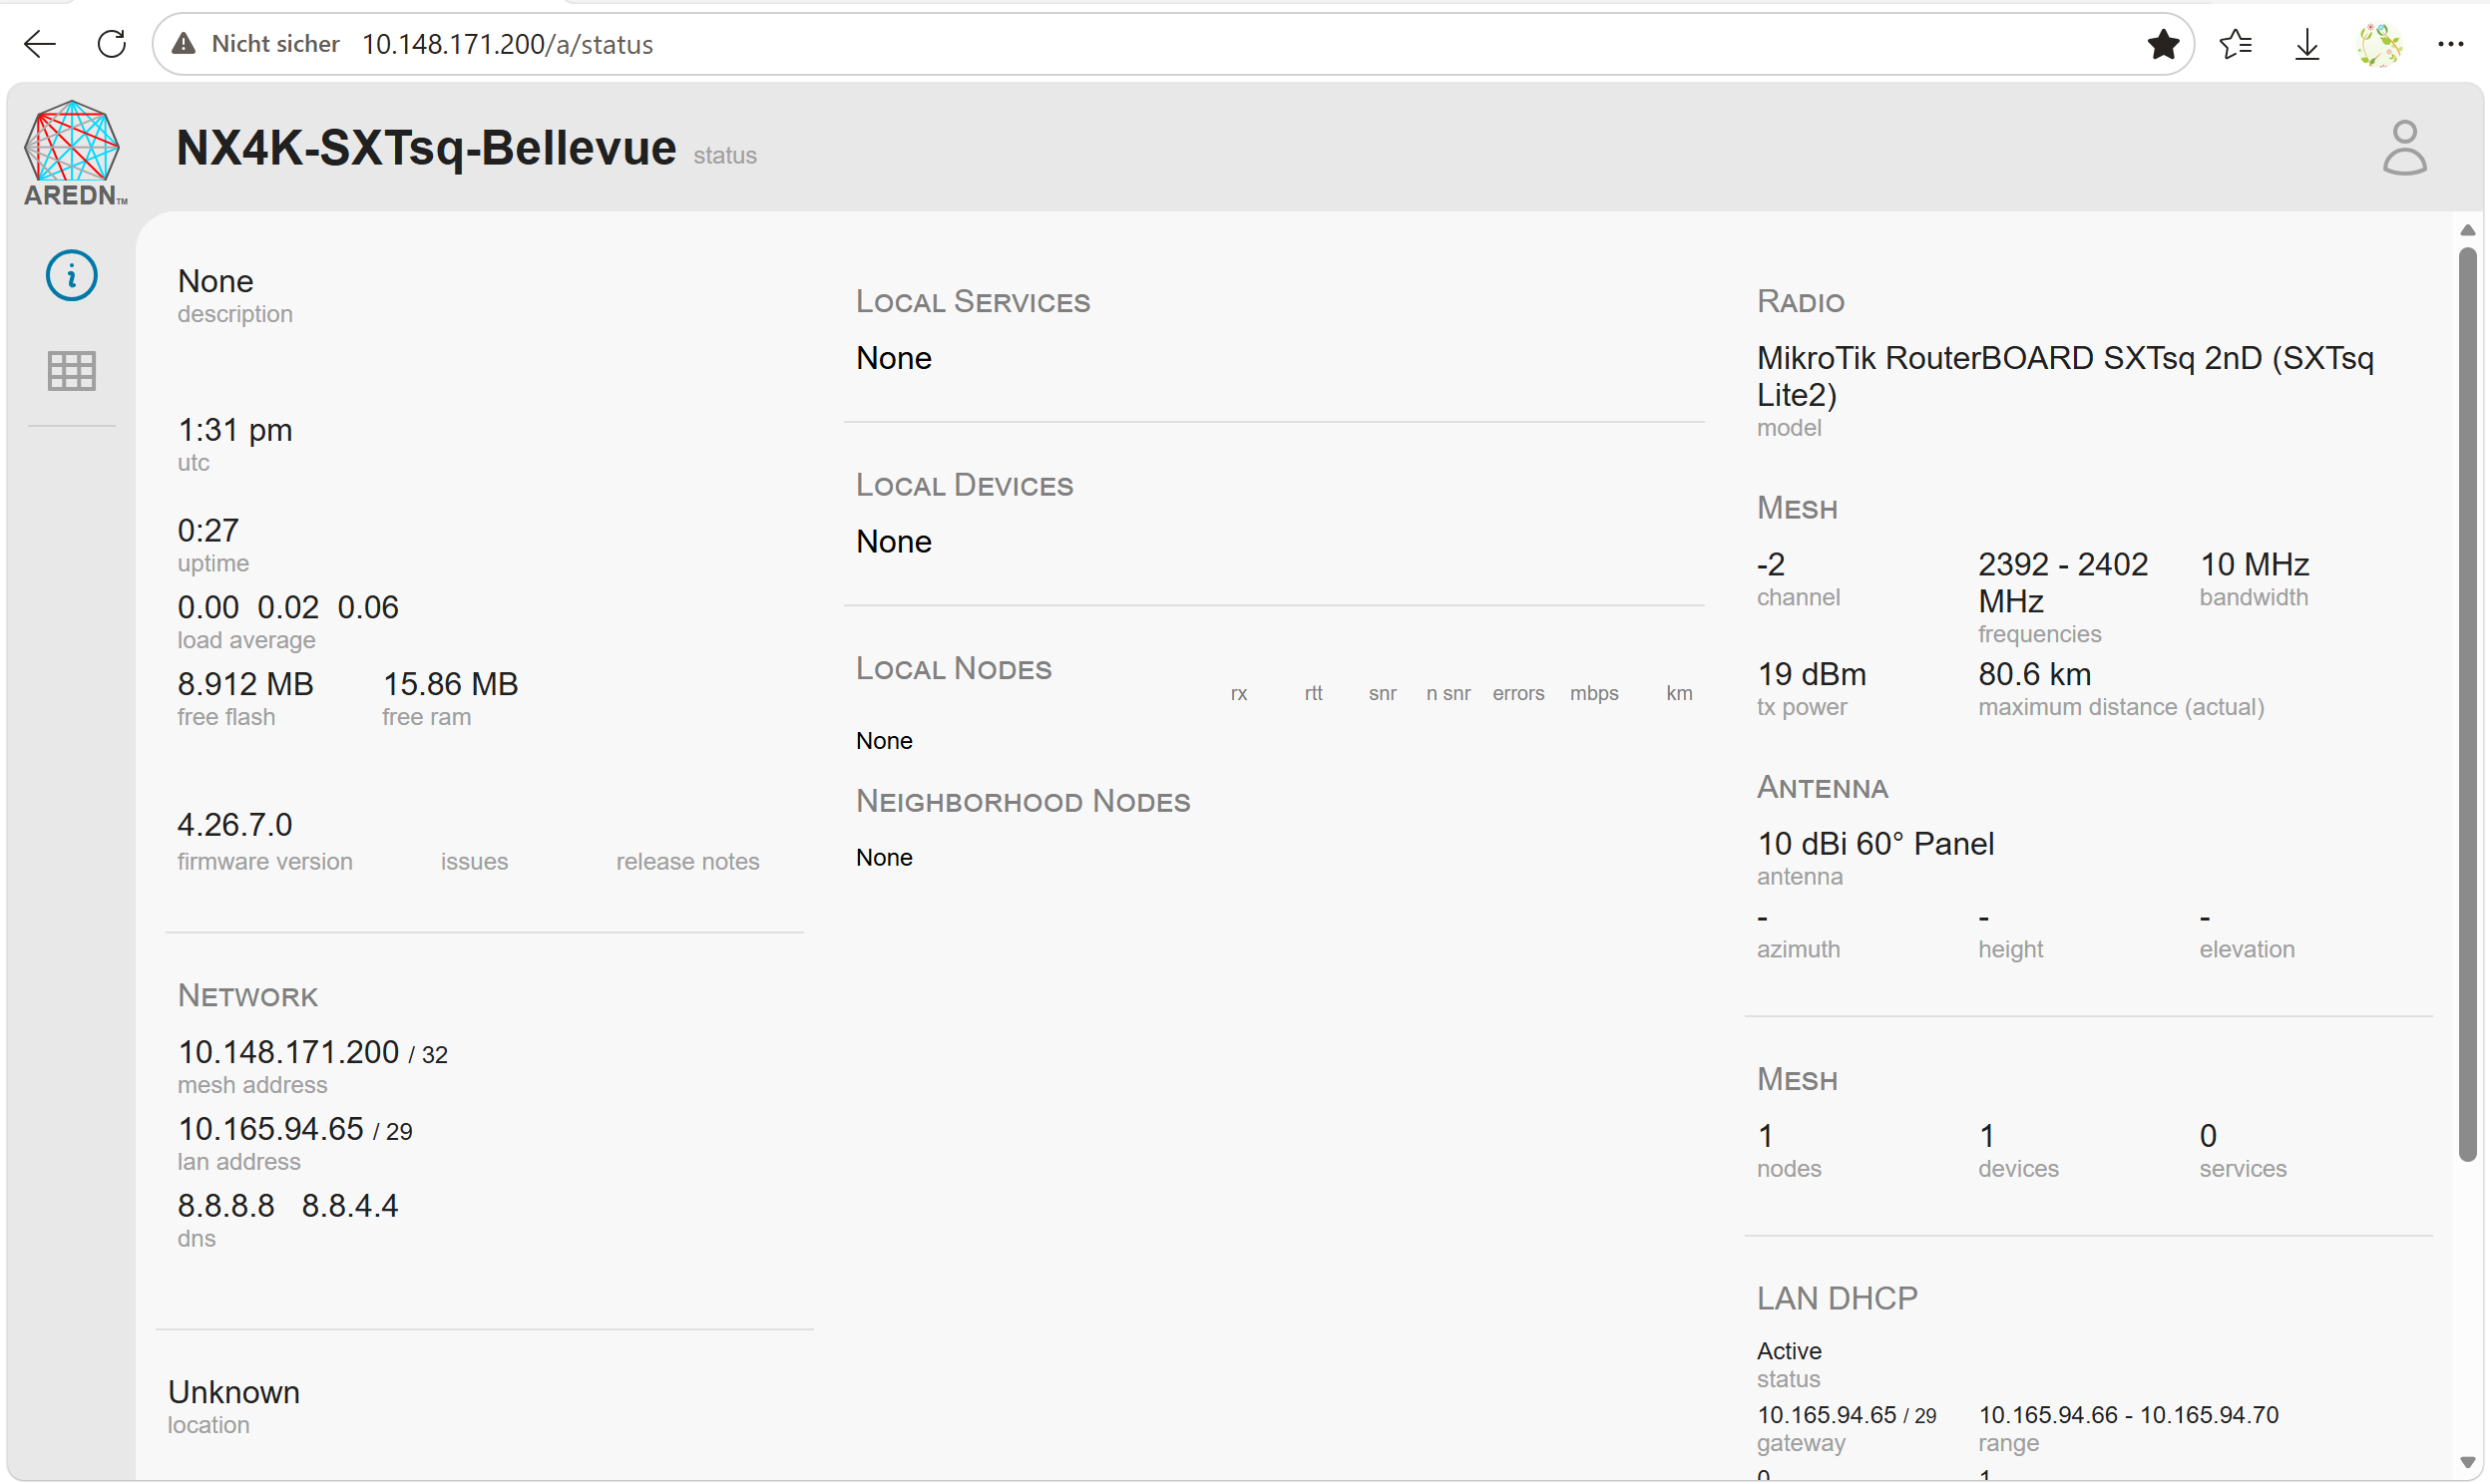
Use an in-private browser window to avoid any cached content or settings and open http://10.148.171.200
You should see a page similiar to this:
This concludes the Mikrotik-Firmware update.
GL.iNet AR750 router setup
If your router is not already flashed for AREDN, follow these steps:
Flashing the AREDN firmware onto a factory-fresh GL.iNet AR750 is straightforward, but you must use the correct physical port and bootloader menu.
Because the router's recovery mode cannot assign IP addresses automatically, you must configure your computer manually first.
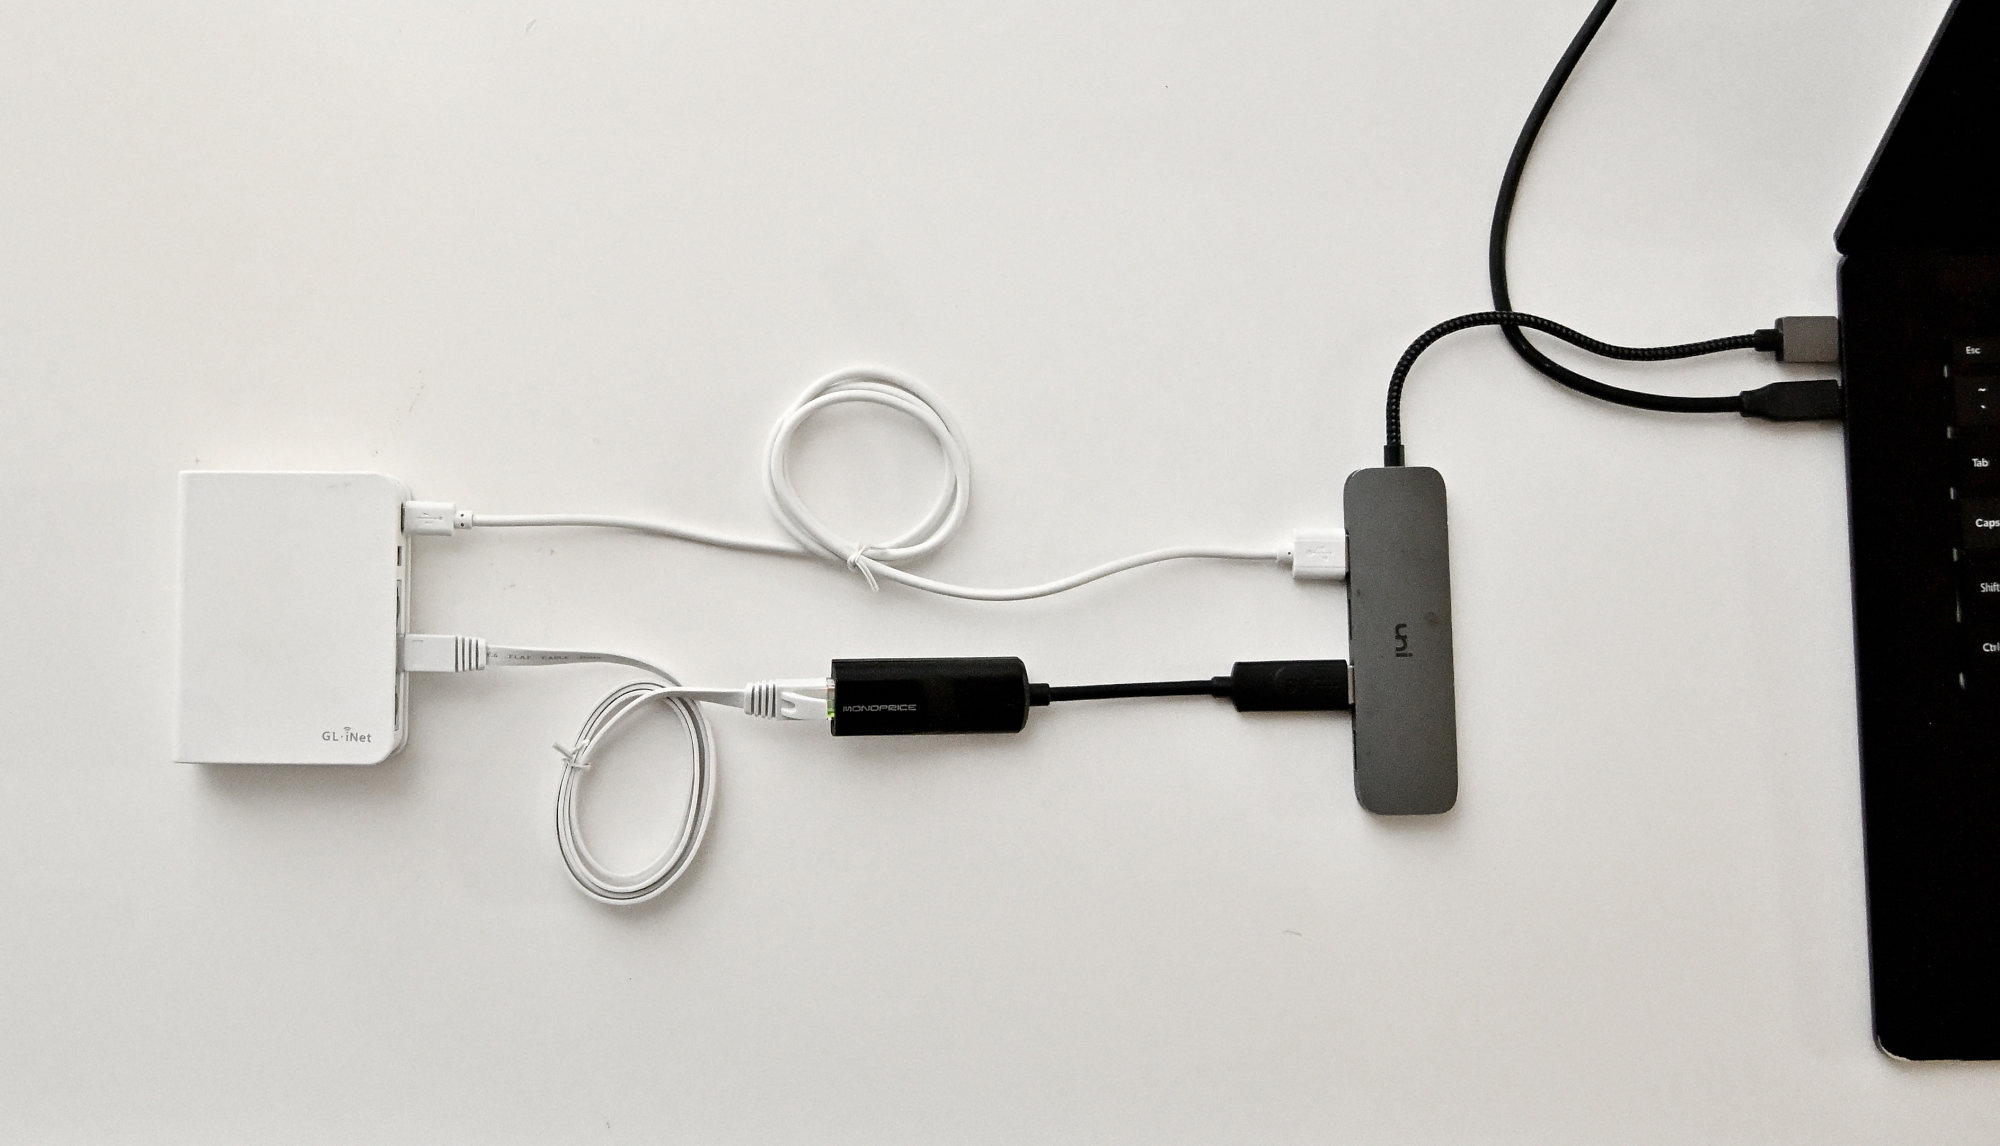
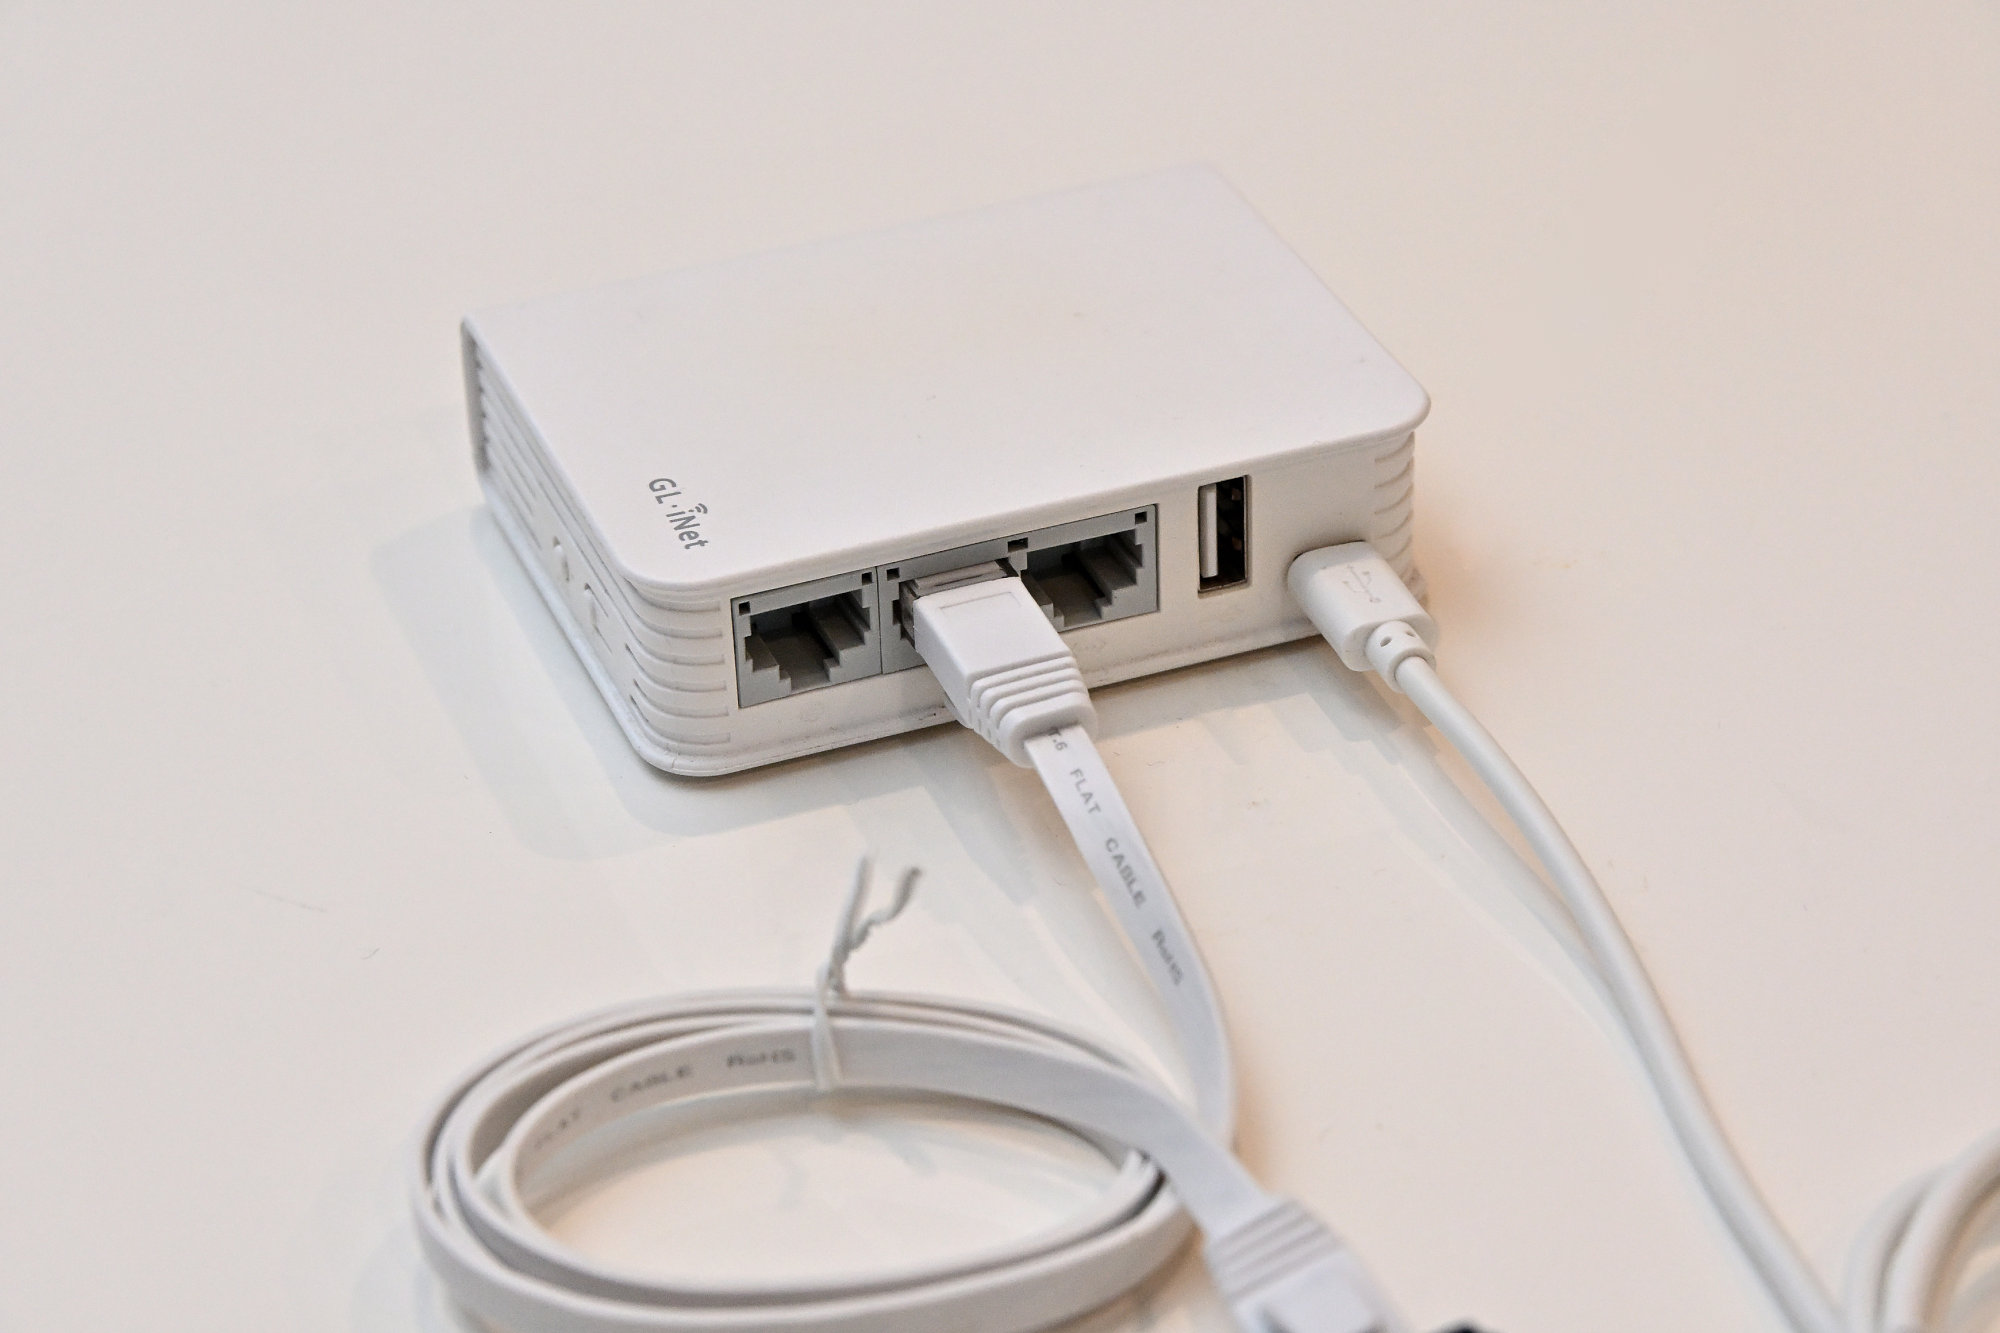
- Take an Ethernet cable and plug it into the middle LAN port of the AR750. Connect the other end directly to your PC.
- Open your computer's network adapter settings (IPv4) and change it from DHCP to Manual (Static IP).
- Enter the following exact values:
- IP Address:
192.168.1.2 - Subnet Mask:
255.255.255.0 - Gateway:
192.168.1.1
- IP Address:
Now, we set the AR750 into its built-in web recovery mode.
- Unplug the power cable (Micro-USB) from the AR750.
- Use a paperclip or a pen to press and hold the Reset button on the side.
- Plug the power cable back in while keeping the Reset button pressed.
- Watch the front LEDs: The power light will turn on, and the Wi-Fi LED will start flashing (about 5 times).
- After several seconds, when the flashing changes, release the Reset button.
Your AR750 is now hosting a minimal web interface specifically designed for manual firmware installation.
- Open your web browser and navigate to
http://192.168.1.1 - You will see a simple interface titled "GL.iNet Firmware Update".
- Click Choose File and select your downloaded AREDN factory firmware file (ends in
.binor.img). - Click Update firmware.
⚠️ Important: Wait a few minutes. Do not unplug the power while the router is flashing.
Once complete, the router automatically reboots into AREDN.
- Go back to your computer's network adapter settings and switch IPv4 back to Automatic (DHCP).
- Plug an internet-connected cable from your home router into the LAN port of the AR750.
- Open your browser and type
http://local.meshto begin the initial AREDN setup wizard.
Mikrotik and AR750 Router Setup
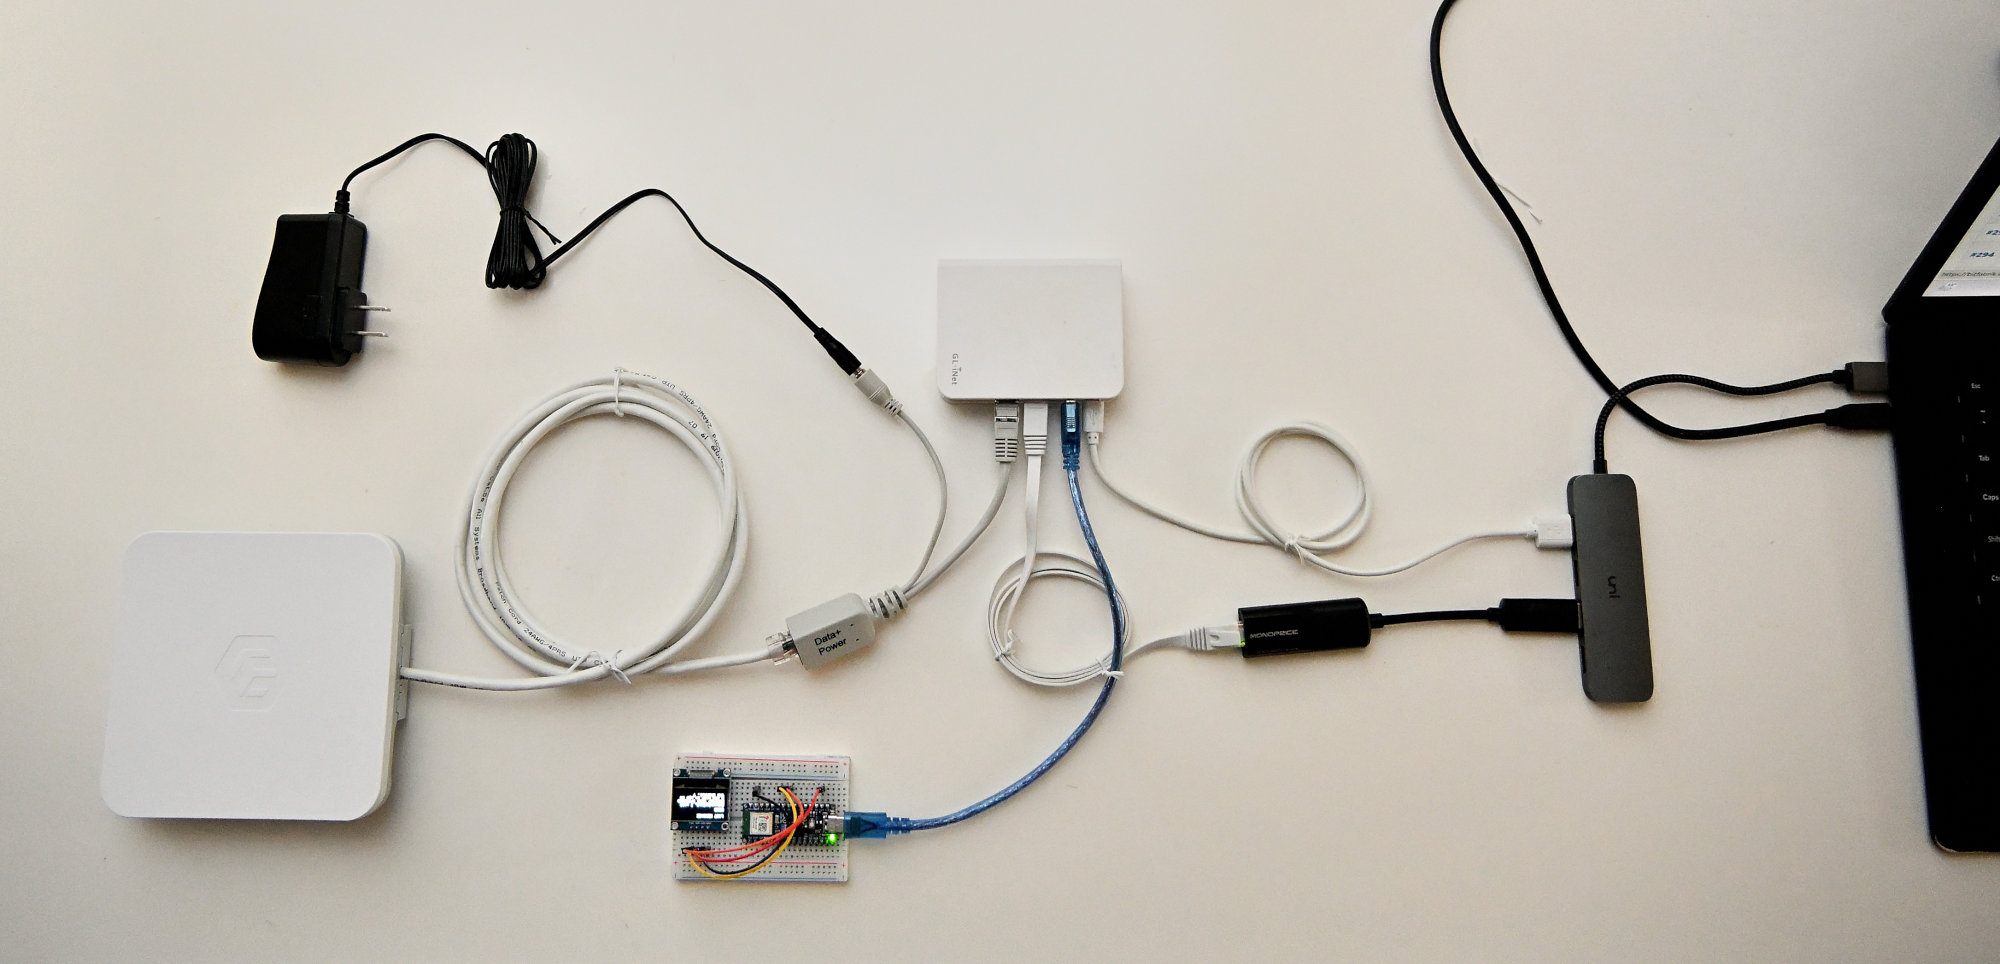
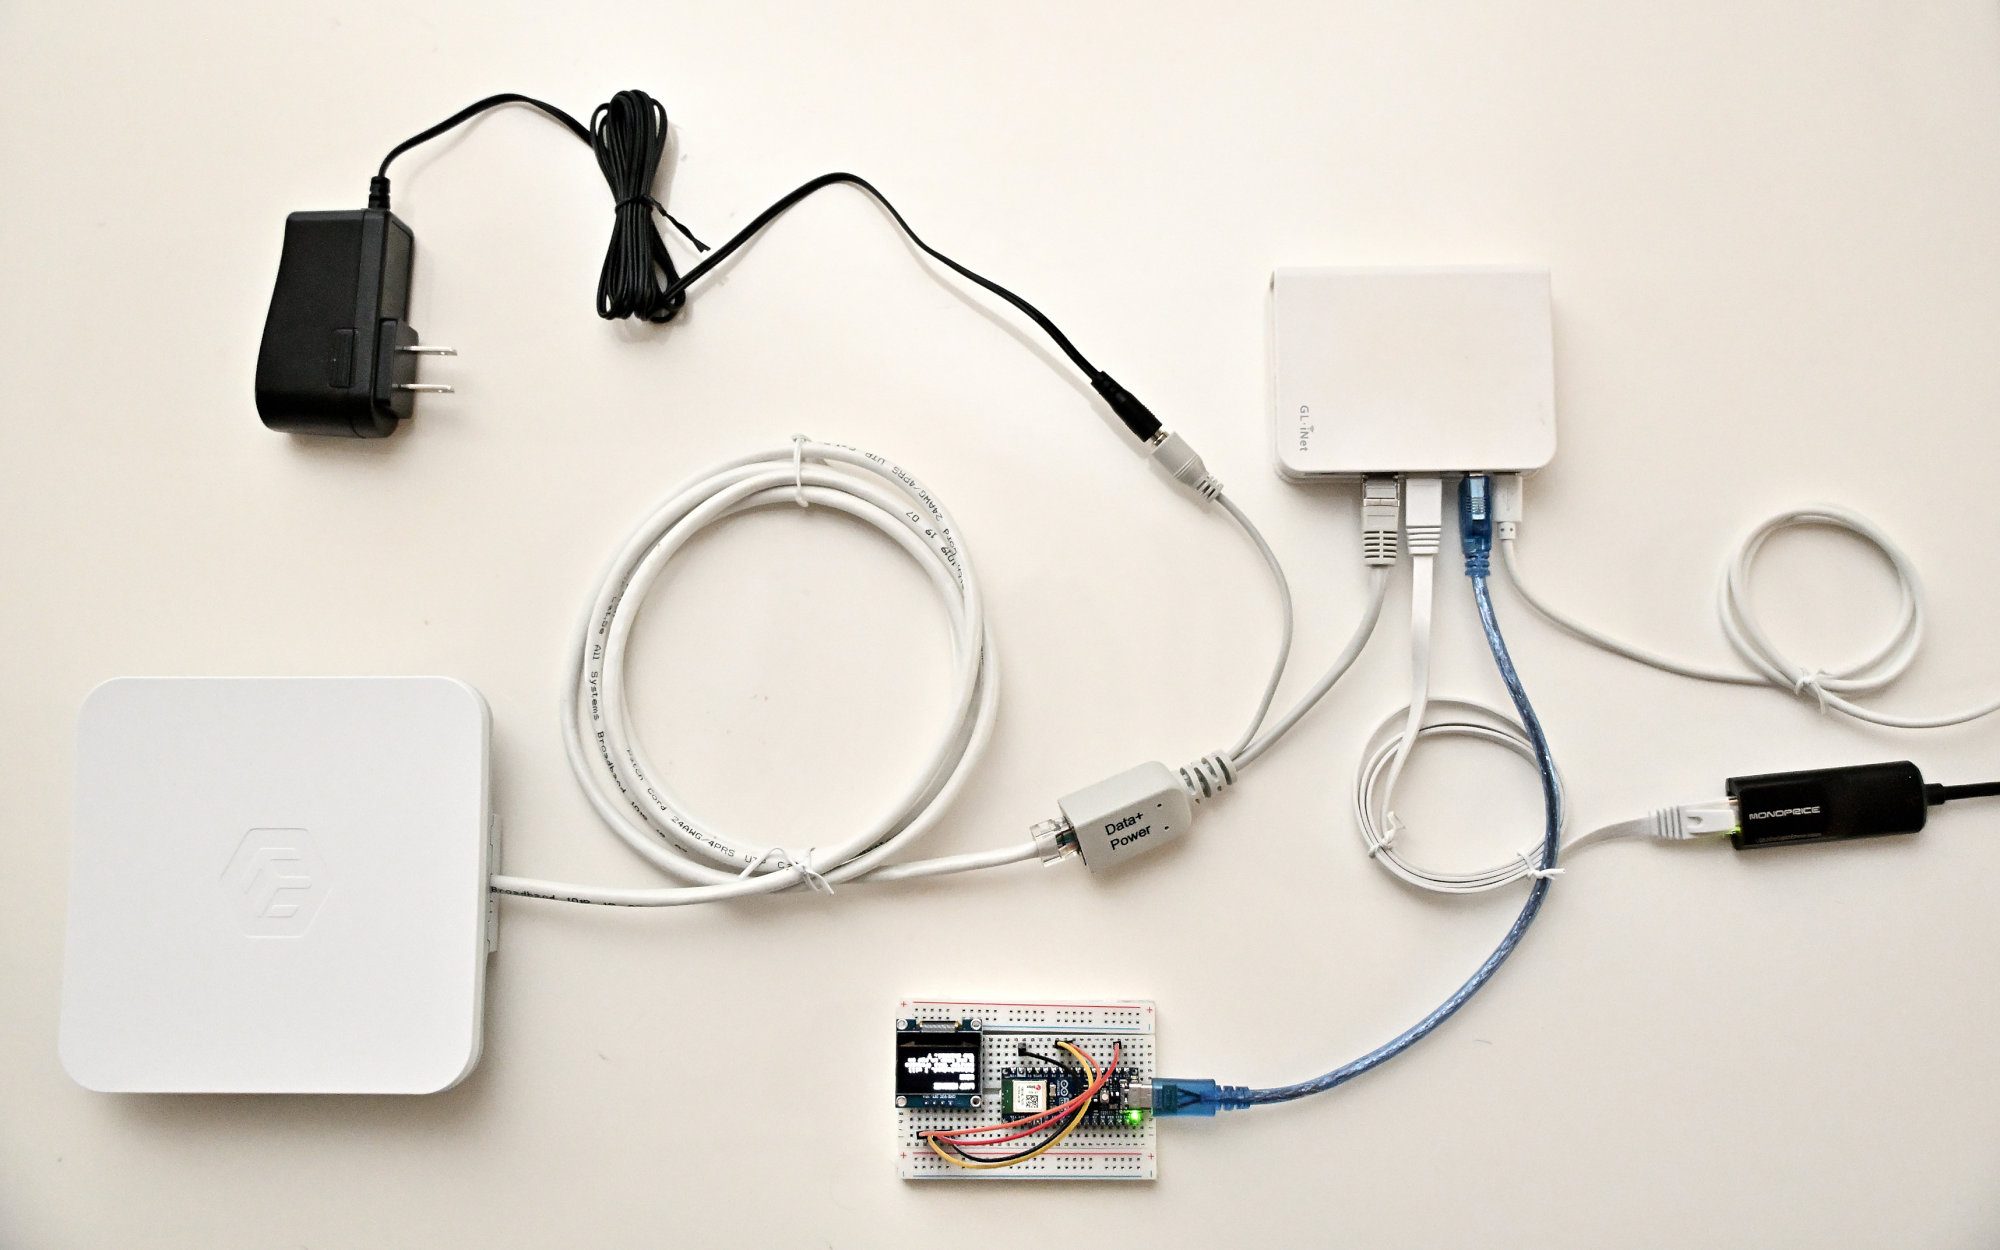
Mikrotik gets connected to the middle port for the DTD connection (VLAN-2).
PC goes to the right side LAN port.
Later, the Home-Router goes to the left side WAN port (with the globe symbol) to allow internet connection for the AREDN devices.
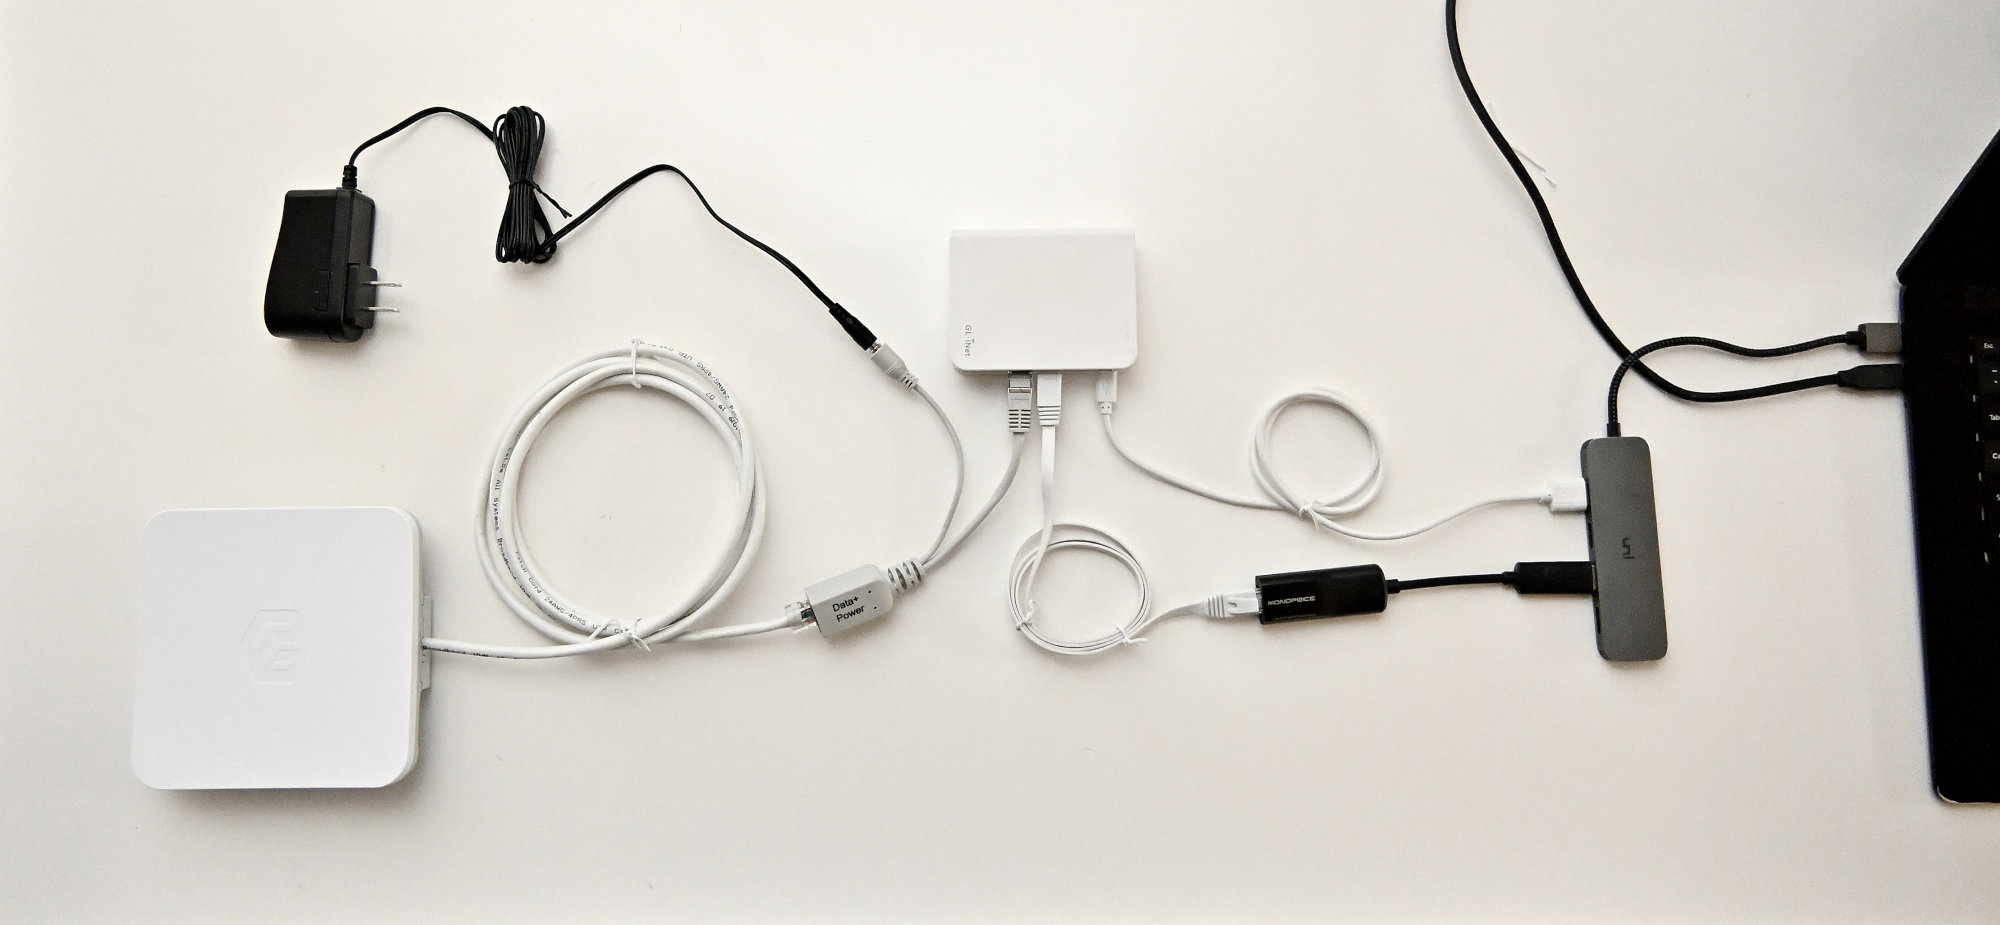
Setup with added Message Board
Restoring Original MikroTik Firmware
Download:
- MikroTik Netinstall https://mikrotik.com/download/tools
- RouterOS package https://mikrotik.com/download?architecture=mipsbe
Select the SXTsq device and the downloaded original firmware:
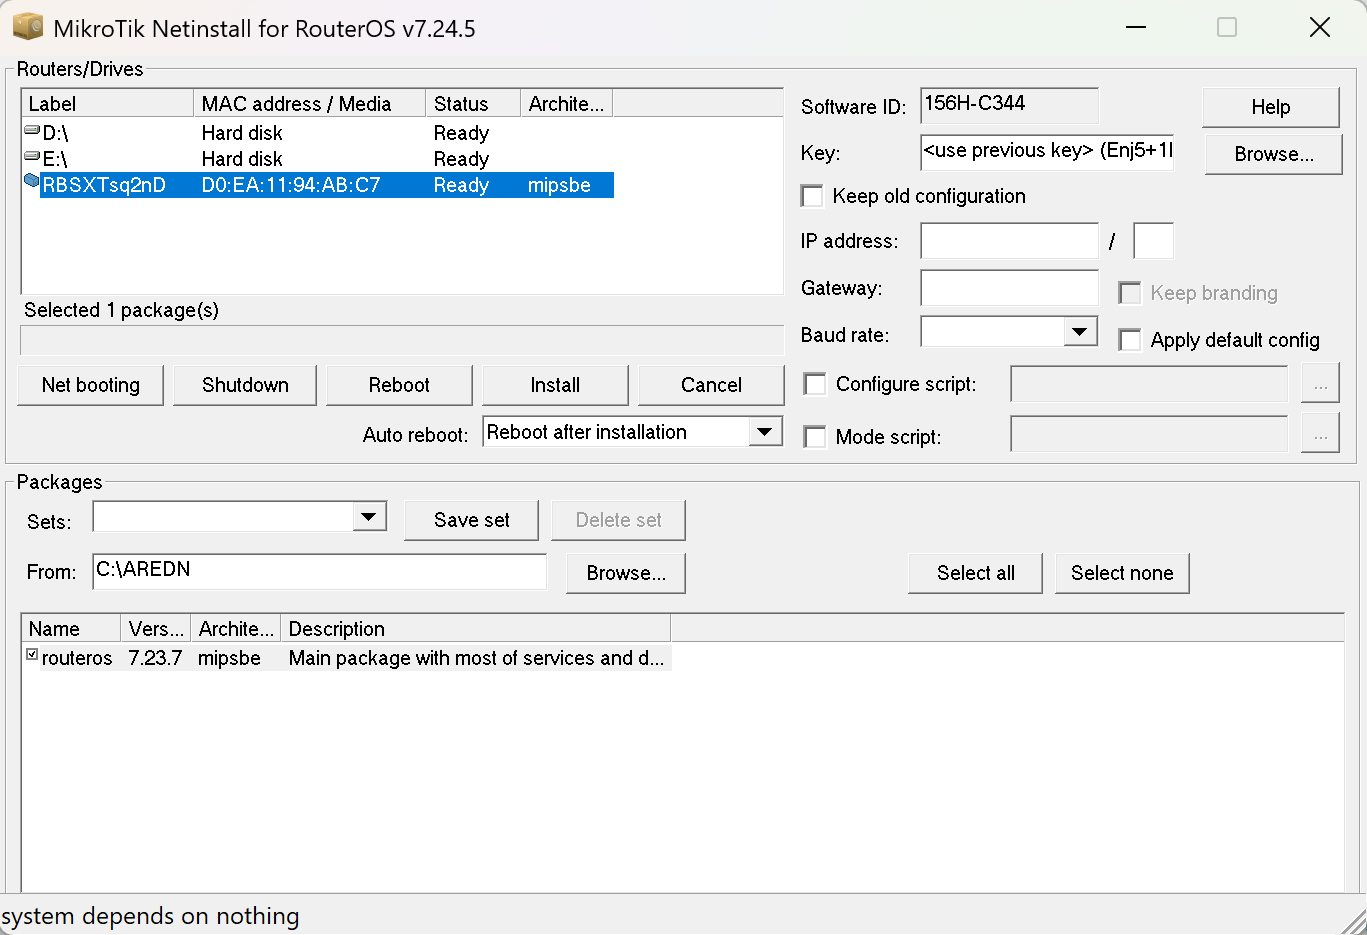
Click Install
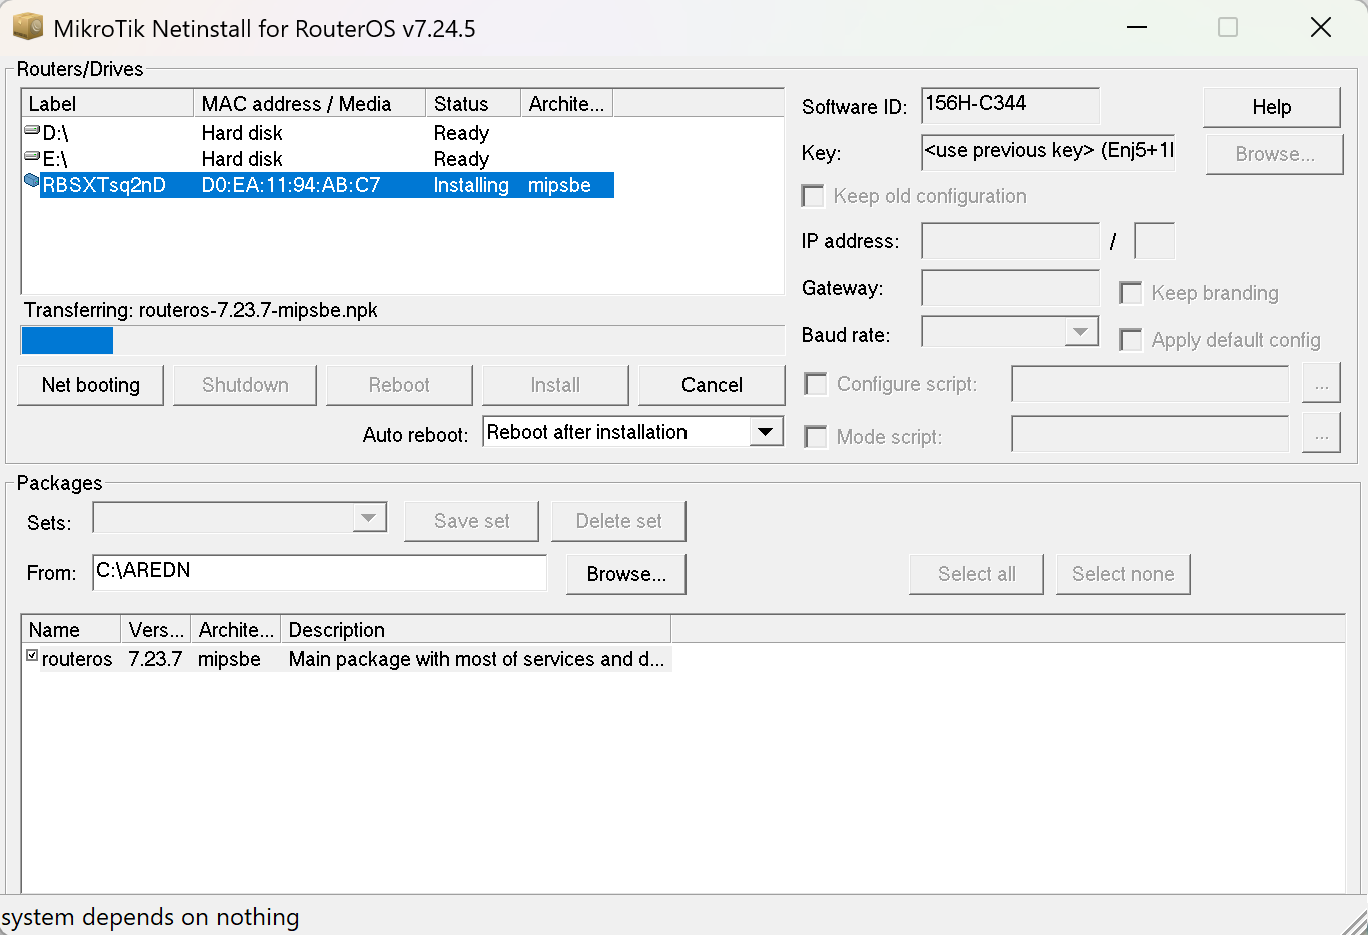
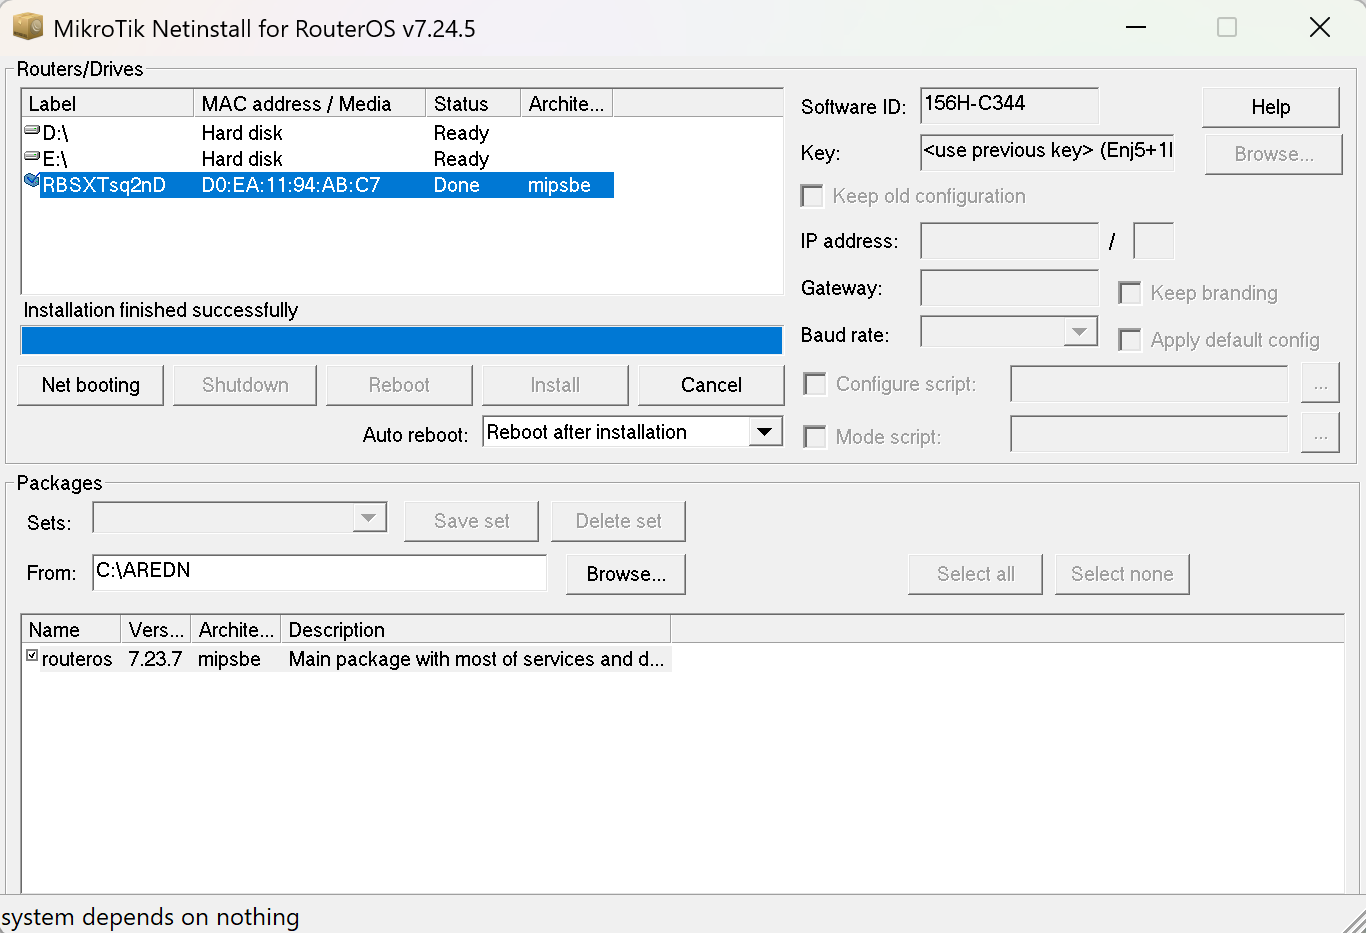
Status Done is displayed when install finished successfully.
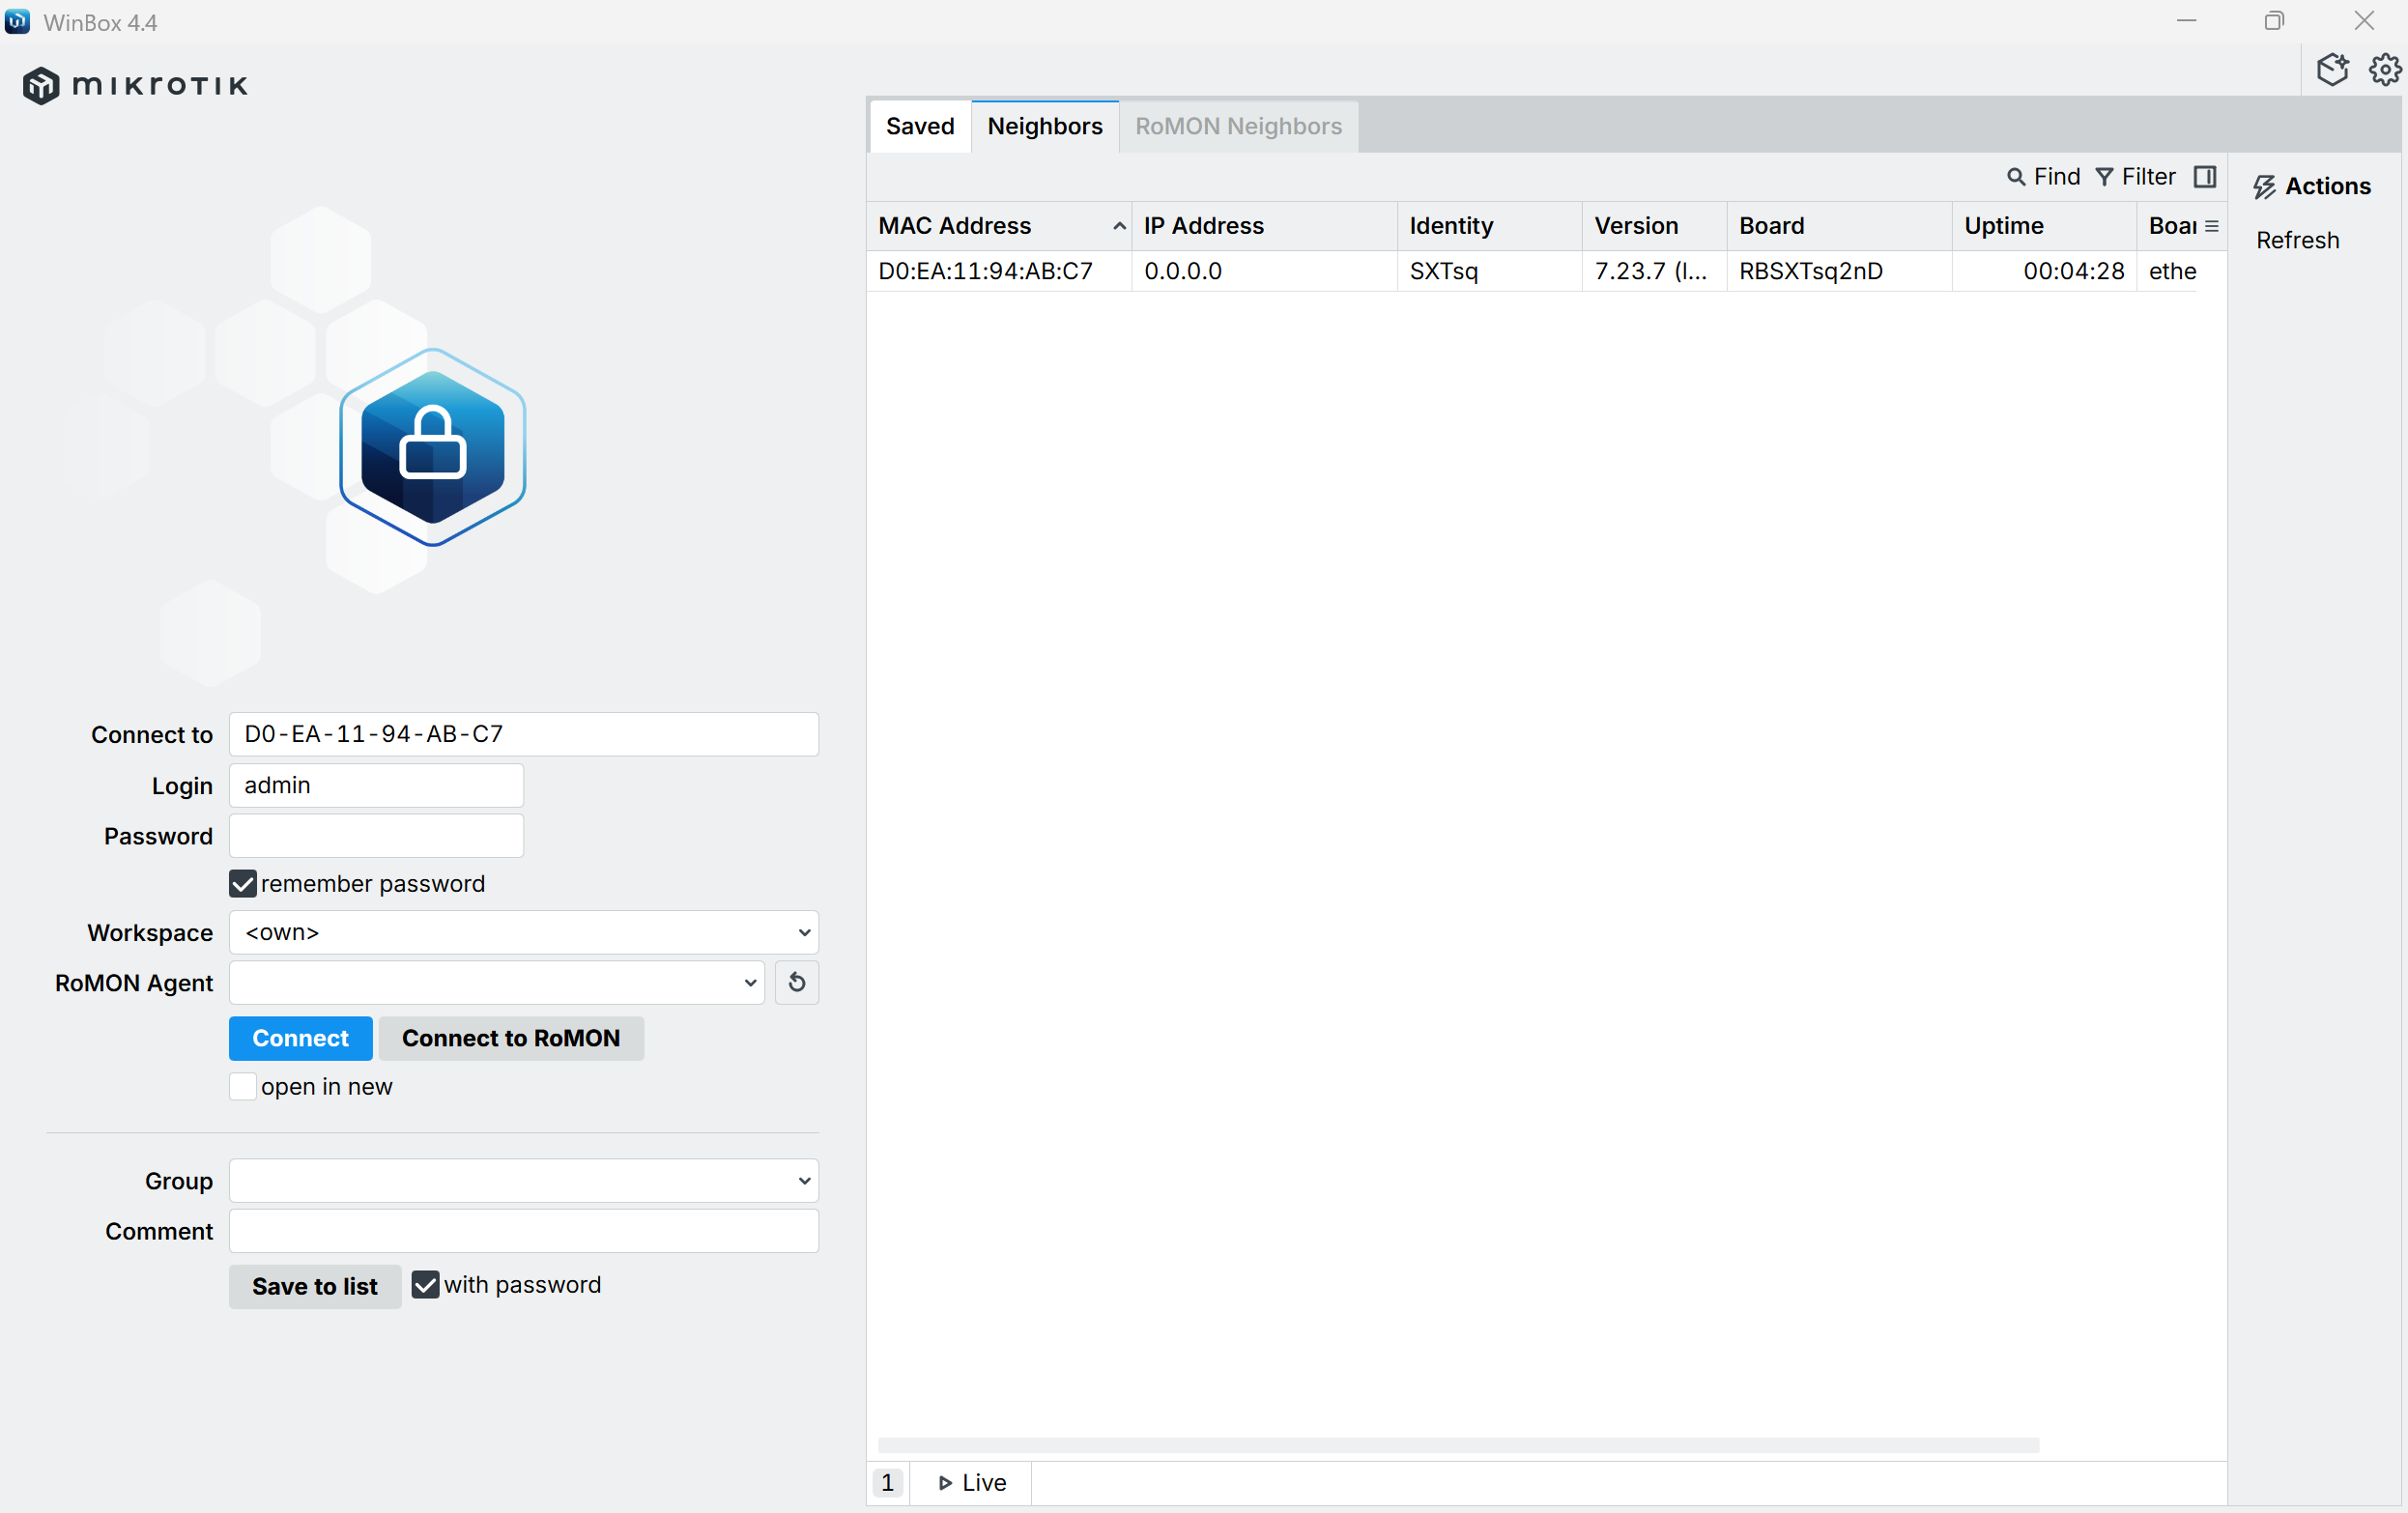
Start WinBox, set firewall on, wlan on, and IP-Address back to auto as described in the chapter above.
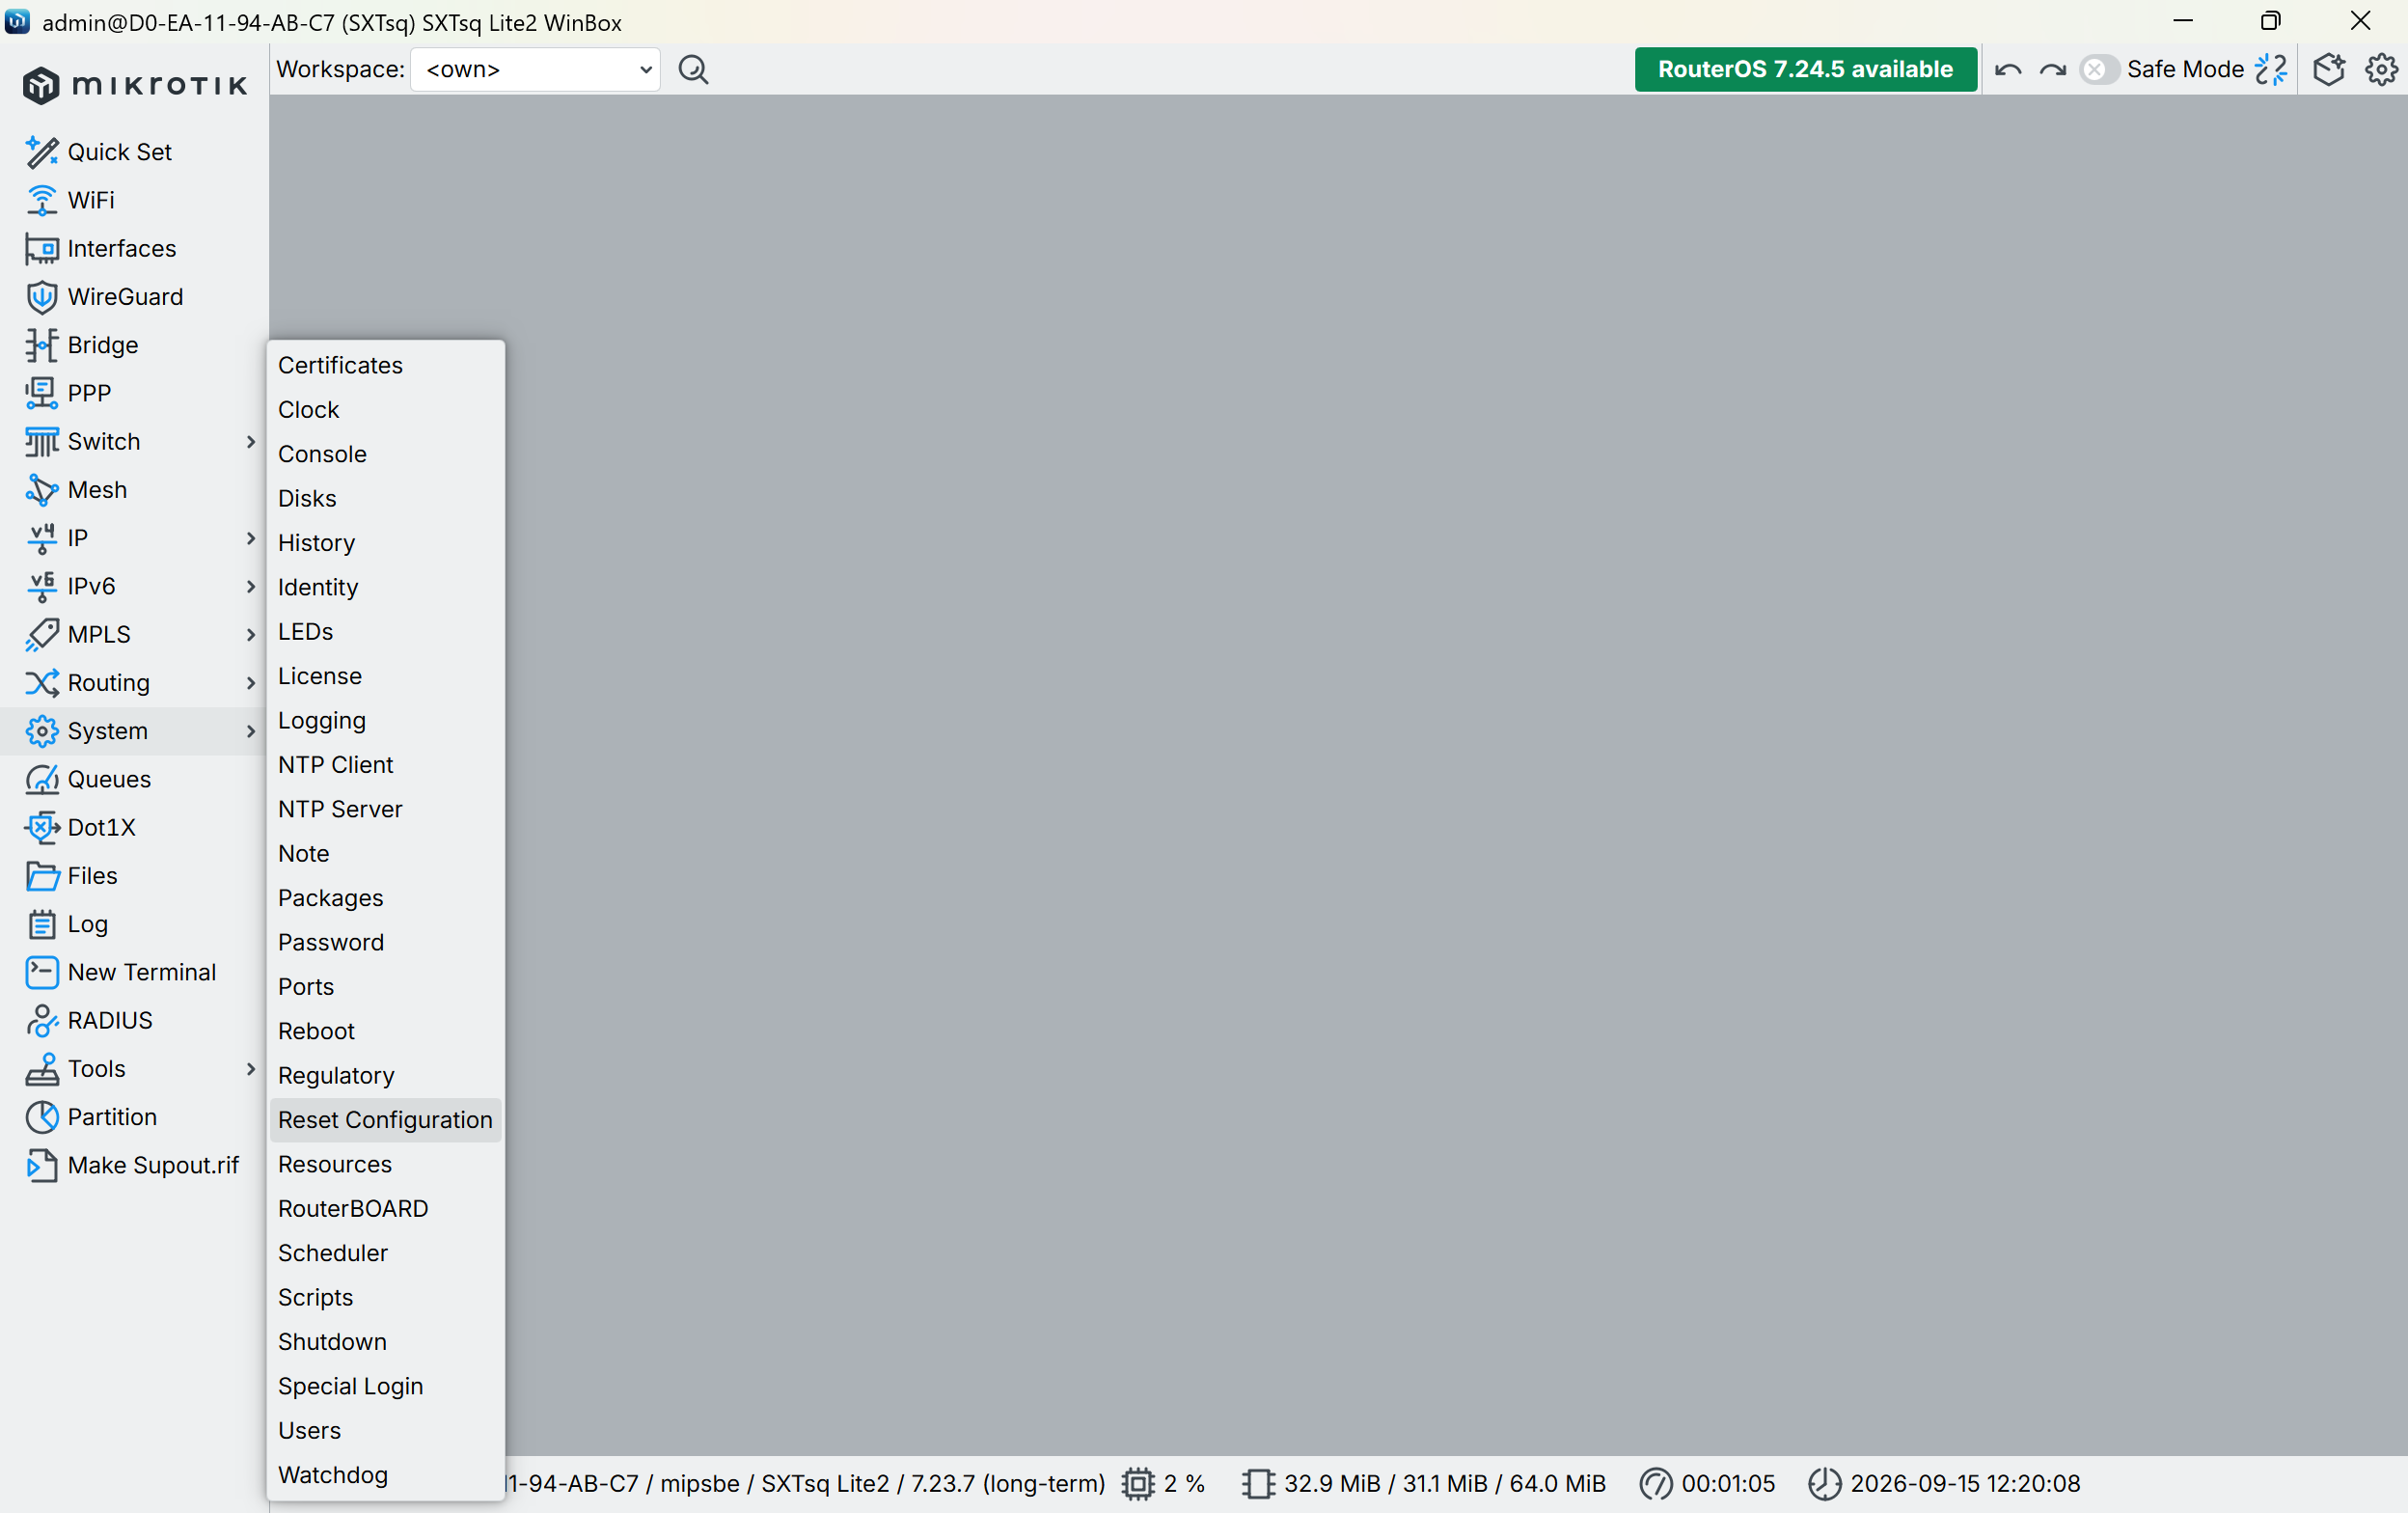
Select System - Reset configuration
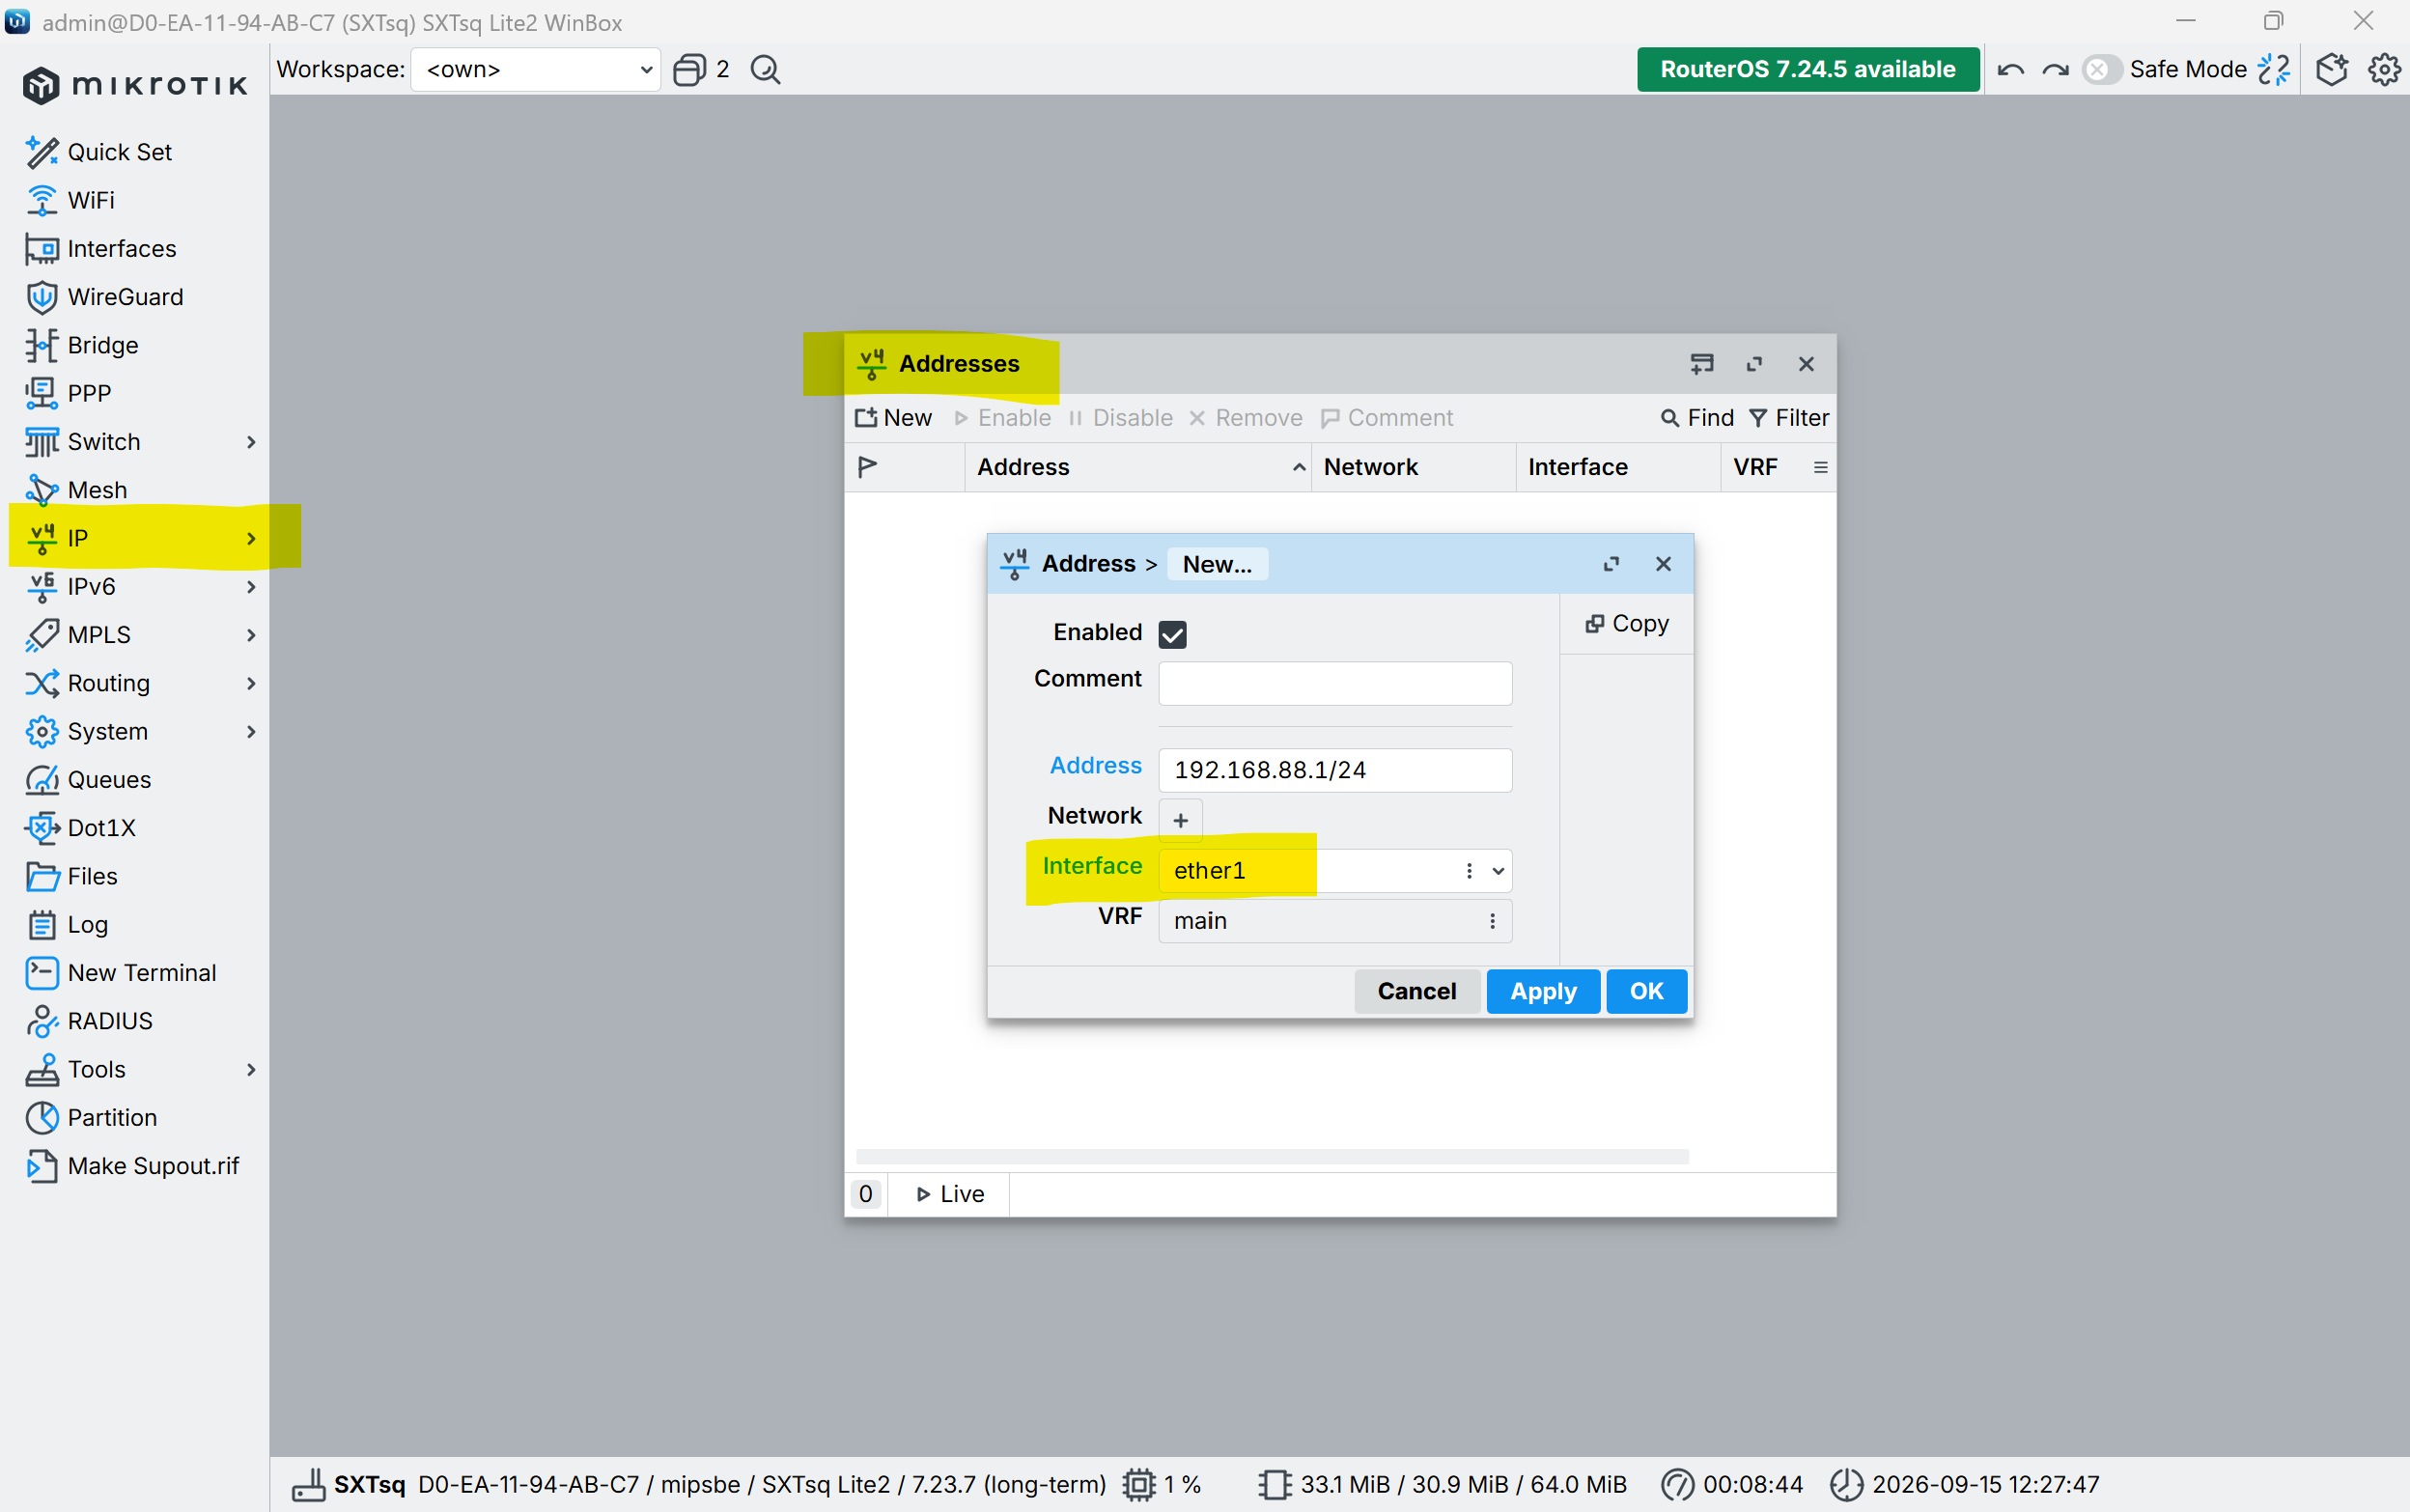
Note: if http://192.168.88.1 does not work, set the address:
Why Can't I Access local.mesh From My Home Network?
When you first connect your newly flashed AREDN router (like the GL.iNet AR750) to your home network, you will likely notice that you can see the router's IP address inside your home router's dashboard, but when you type http://local.mesh into your browser, you get a 'Site cannot be reached' error.
Why does this happen? And how do you fix it without breaking your home internet?
The Technical Reason: A Tale of Two DNS Servers
When your PC is connected to your normal home Wi-Fi, your home router acts as your DNS Server. Its only job is to translate domain names into IP addresses.
- If you type
google.com, your home router asks the internet, gets the IP, and loads the page. - If you type
localnode.local.mesh, your home router searches the global internet for the.meshextension. Since.meshdoes not exist in the public domain space, your router responds with "Server not found."
Your home network does not know that the AREDN router sitting next to it holds the map to the .mesh universe.
❌ What NOT to do
You could try to fix this by adding static routing tables to your Windows PC, modifying your operating system's hosts files, or configuring custom DNS forwarding rules inside your primary home router.
Don't do this. It creates IP conflicts, breaks your VPNs, and will likely lock you out of your internet or your AREDN node entirely.
The Solution: Connect Directly to the AREDN LAN
The official way to work with AREDN is to completely separate the two worlds. Instead of trying to reach the node through your home network, connect directly onto the AREDN network.
- The WAN Port (the port with the globe icon) of your AR750 plugged into your home router allows your AREDN node to access the internet (needed for updates or setting up tunnel connections).
- The Device Connection: Look for the unencrypted Wi-Fi network broadcasting from your AR750 (the default SSID is
AREDN-LAN). - Switch Networks: Disconnect your laptop or phone from your home Wi-Fi and connect to
AREDN-LAN.
By connecting directly to the AREDN Wi-Fi access point, you are changing who is in charge of your network. Your computer is now connecting directly to the AR750's internal DNS server.
Now, when you type http://local.mesh, the AR750 instantly recognizes the request, resolves the name, and opens up the AREDN dashboard.
The WAN port is for the router to connect to the internet. The LAN port (and AREDN Wi-Fi) is for devices to connect to the Mesh.
When you want to experiment with Amateur Radio Mesh networks, simply switch your Wi-Fi to AREDN-LAN.