-
June Solstice Moon 🔭🌓
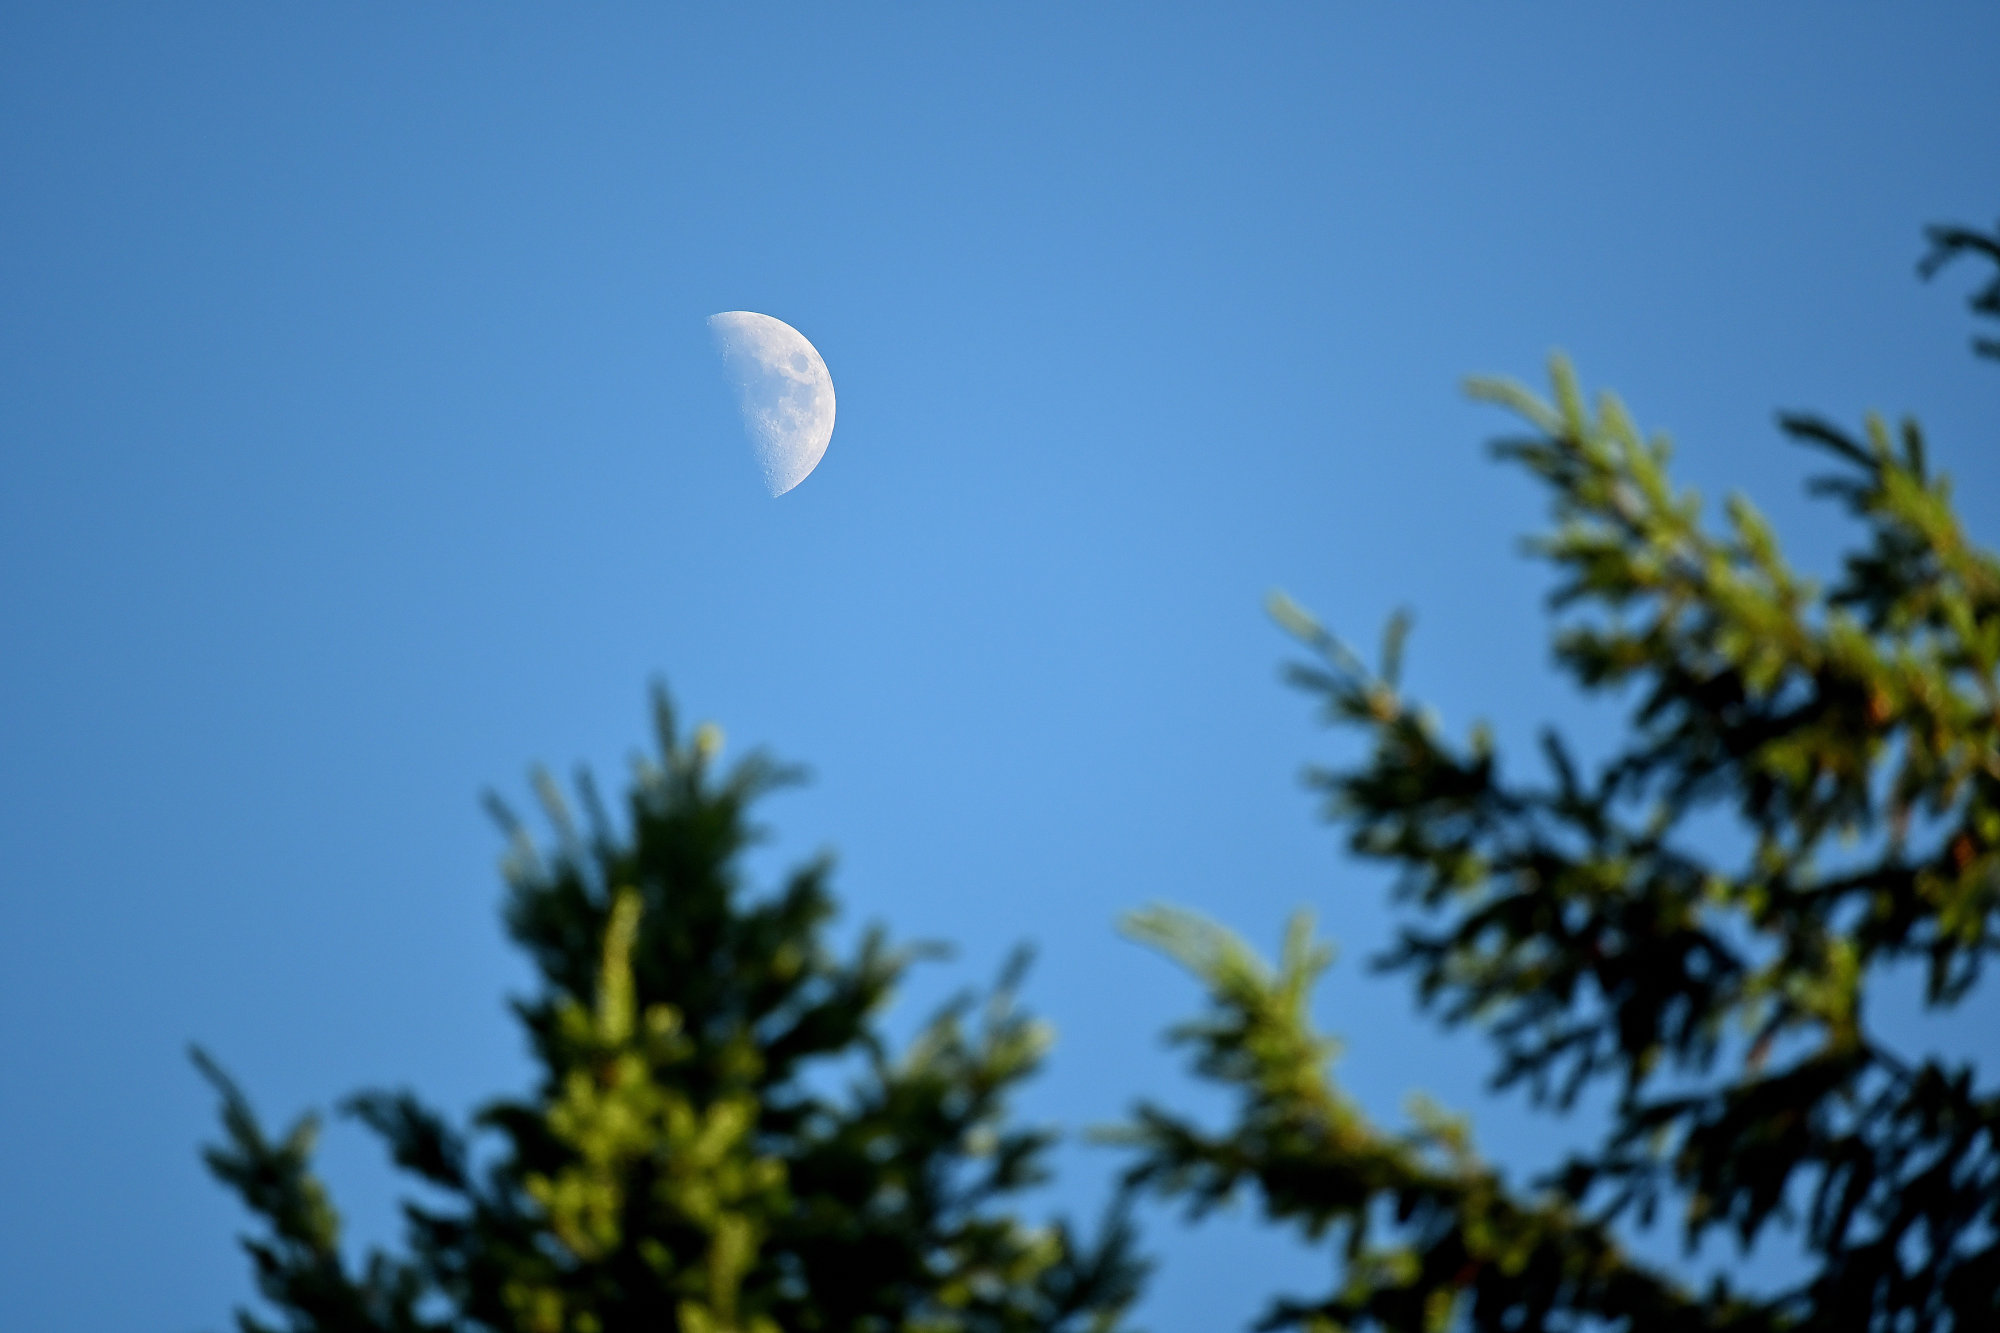
June 21st, 2026, 19:191. Summer solstice: the Sun reached its northern limit, the day stretched as far as it could, and the Moon was already visible in the blue evening sky.
The day was clearly not finished. The sky was still blue, the trees were still in sunlight, and the Moon had already arrived.
Not bright enough to take over, not faint enough to ignore. Just early.
Another moon sighting. No agents on duty this time, but the sky was clearly being monitored: Zunehmender Halbmond 🌓🌛.
Taken handheld with my Z50 and the NIKKOR Z DX 50-250 mm 1:4,5-6,3 VR. The tripod stayed inside.
1/500s f/6,3 ISO 250/25° 50-250mm f/4,5-6,3 VR f=250mm/375mm
The second image is a crop from the original 5568 × 3712 photo. The crop is 1015 × 677 pixels.
The lens was at 250 mm on a Nikon Z50. With the 1.5× APS-C crop factor, the EXIF reports this as 375 mm in 35 mm equivalent terms.
The additional digital crop factor can be calculated from the diagonal ratio:
$$ c_\text{digital} = \frac{\sqrt{5568^2 + 3712^2}} {\sqrt{1015^2 + 677^2}} $$
$$ c_\text{digital} = \frac{6692}{1220} \approx 5.49 $$
So the cropped image has an effective 35mm-equivalent focal length of:
$$ f_\text{eq,crop} = 250\,\text{mm} \times 1.5 \times 5.49 $$
$$ f_\text{eq,crop} \approx 2057\,\text{mm} $$
Or, starting from the EXIF equivalent focal length:
$$ 375\,\text{mm} \times 5.49 \approx 2057\,\text{mm} $$
In framing terms, the result is about 2050 mm full-frame equivalent.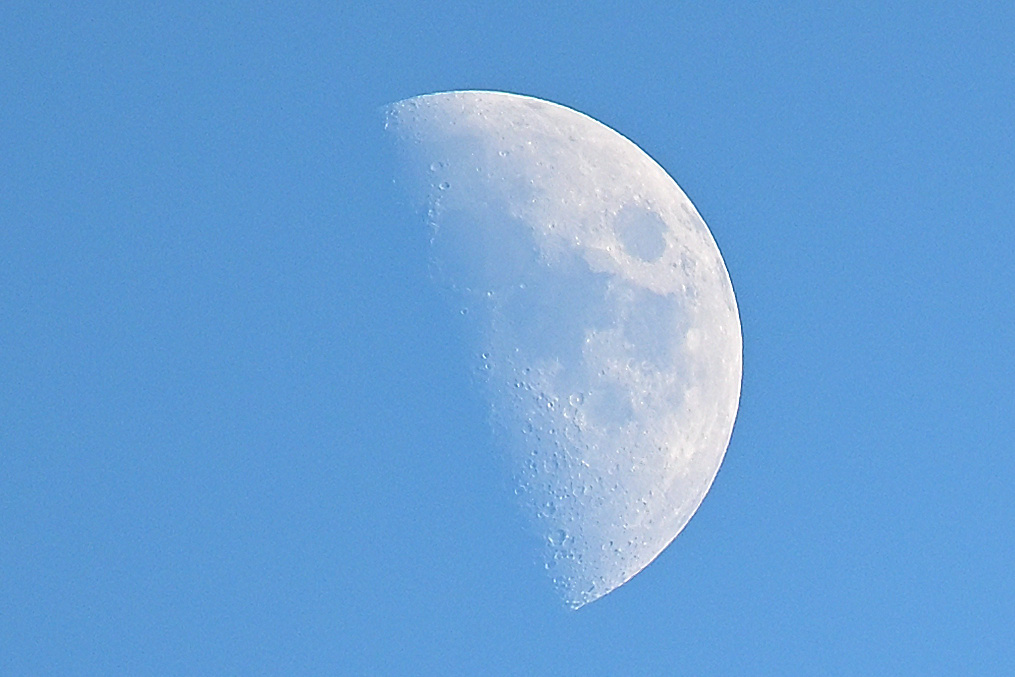
It started as 250 mm and ended up at 2050 mm. With one more zero and some cropping, the Z50 became a small handheld observatory for one evening.
-
19:19 is photo time. The solstice itself had already occurred at 01:24, when the Sun reached its northernmost declination and began its slow return south. ↩
-
-
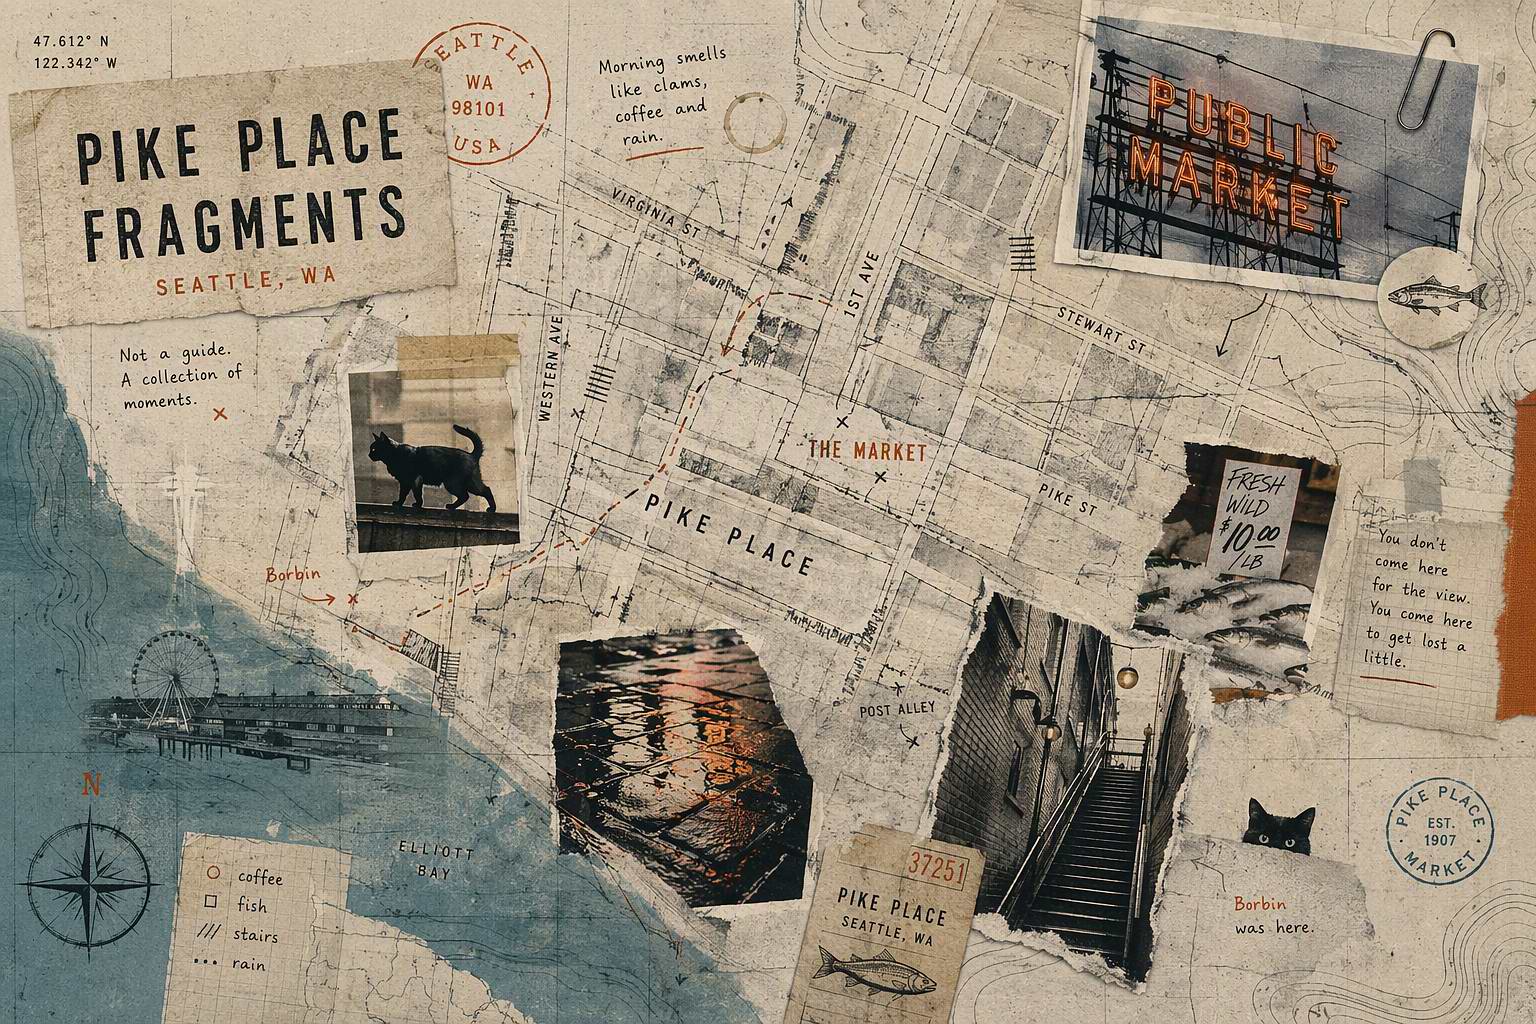
Pike Place Fragments
On a bright Seattle day, Pike Place Market is every bit the postcard, but it keeps opening up in other directions too. The familiar sights are still there, of course, but the place also pulls toward the water, into side streets, through shop windows, and into small moments that are easy to miss. Somewhere between stairs, neon reflections, fish crates and narrow alleys, Pike Place slowly turns into something larger than its landmarks. These photos are a walk through those other sides of Pike Place, with good weather doing more than its fair share of the work.
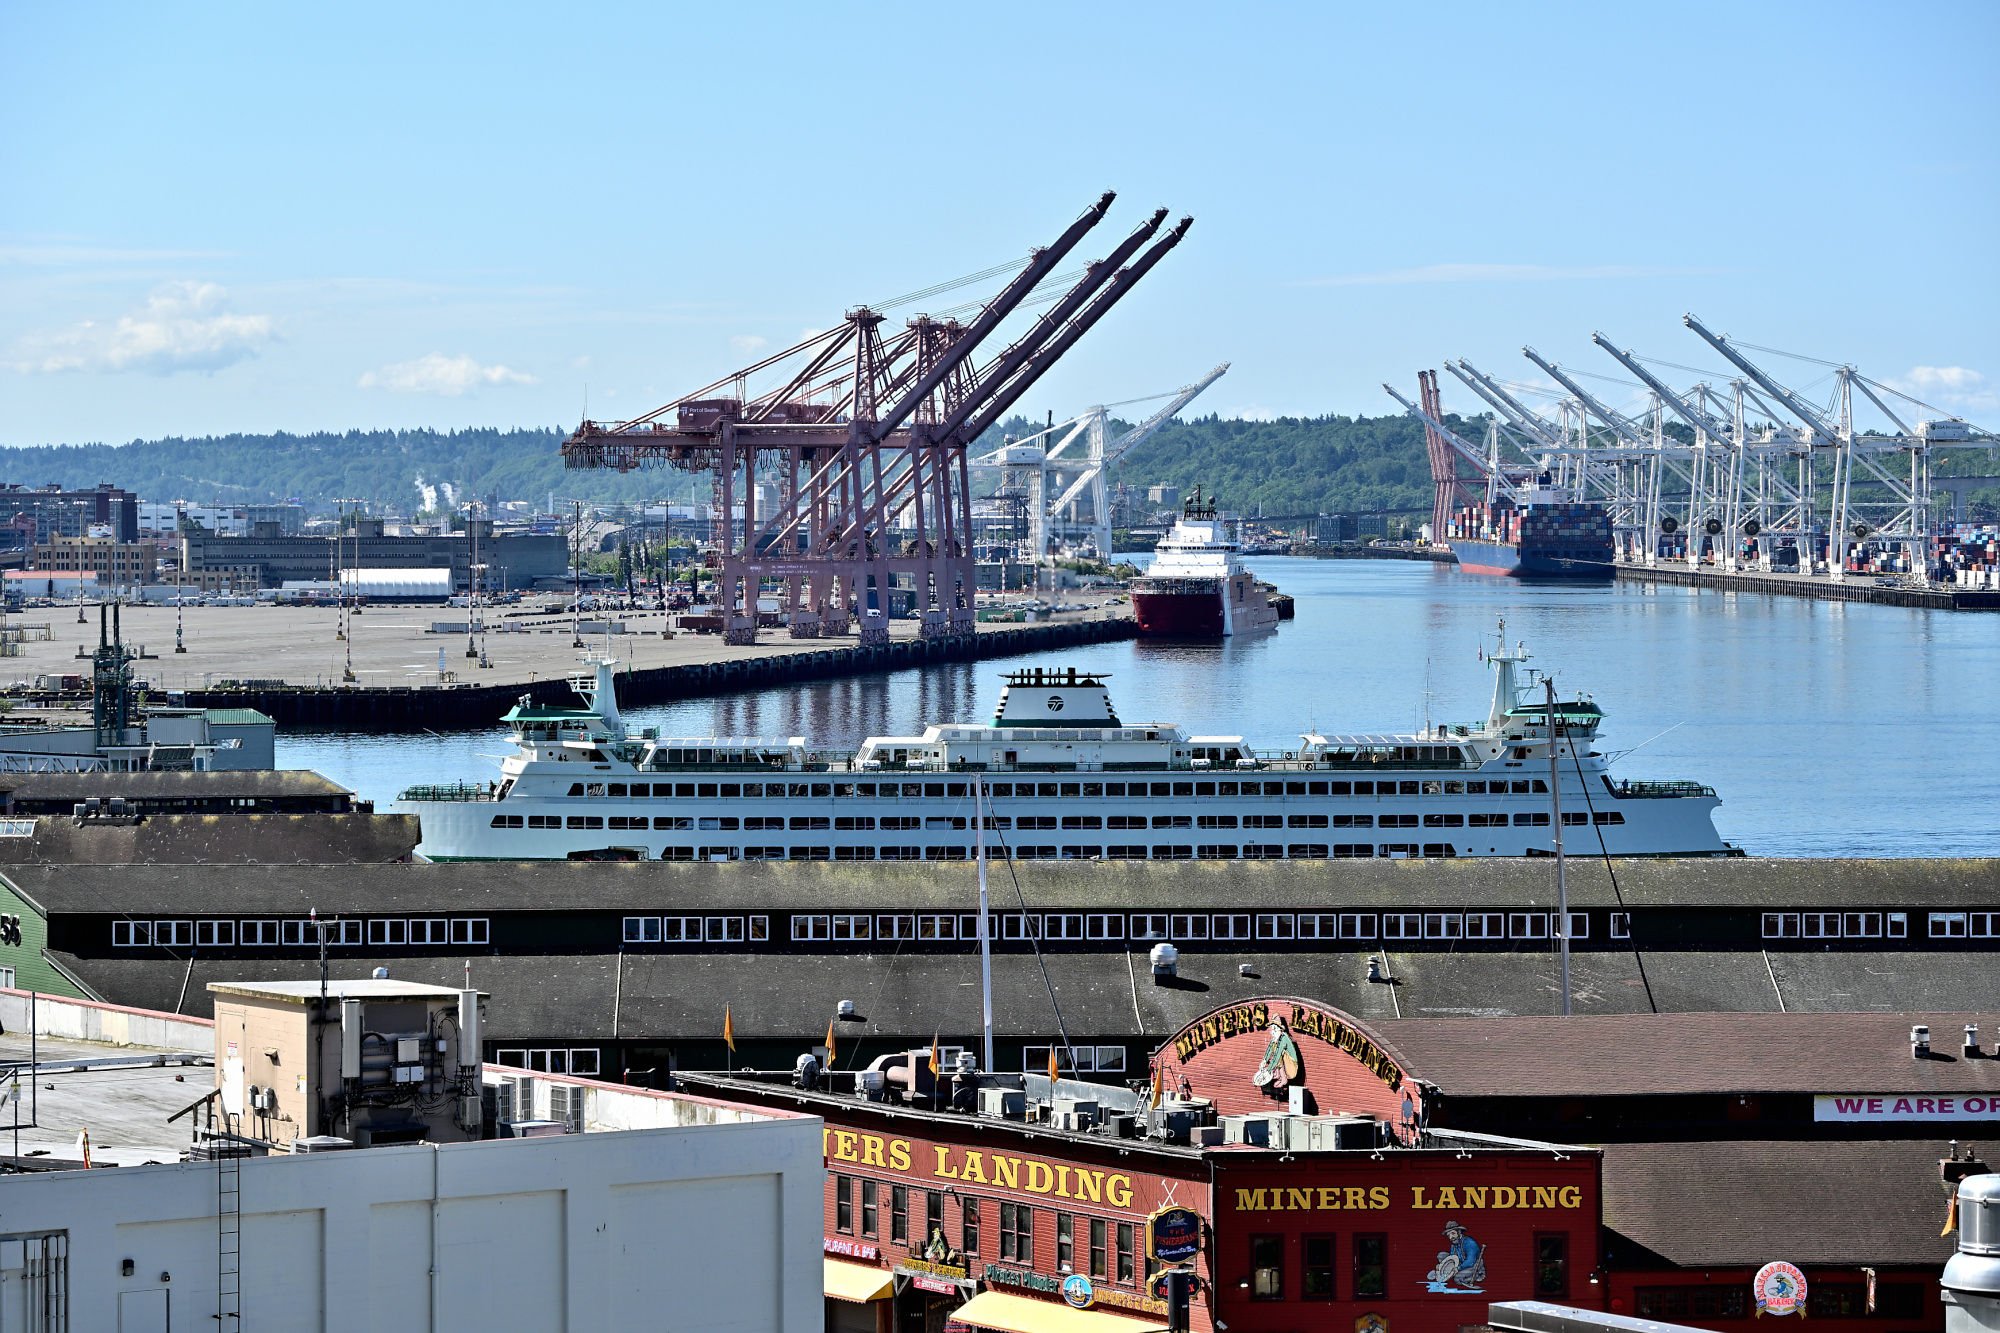
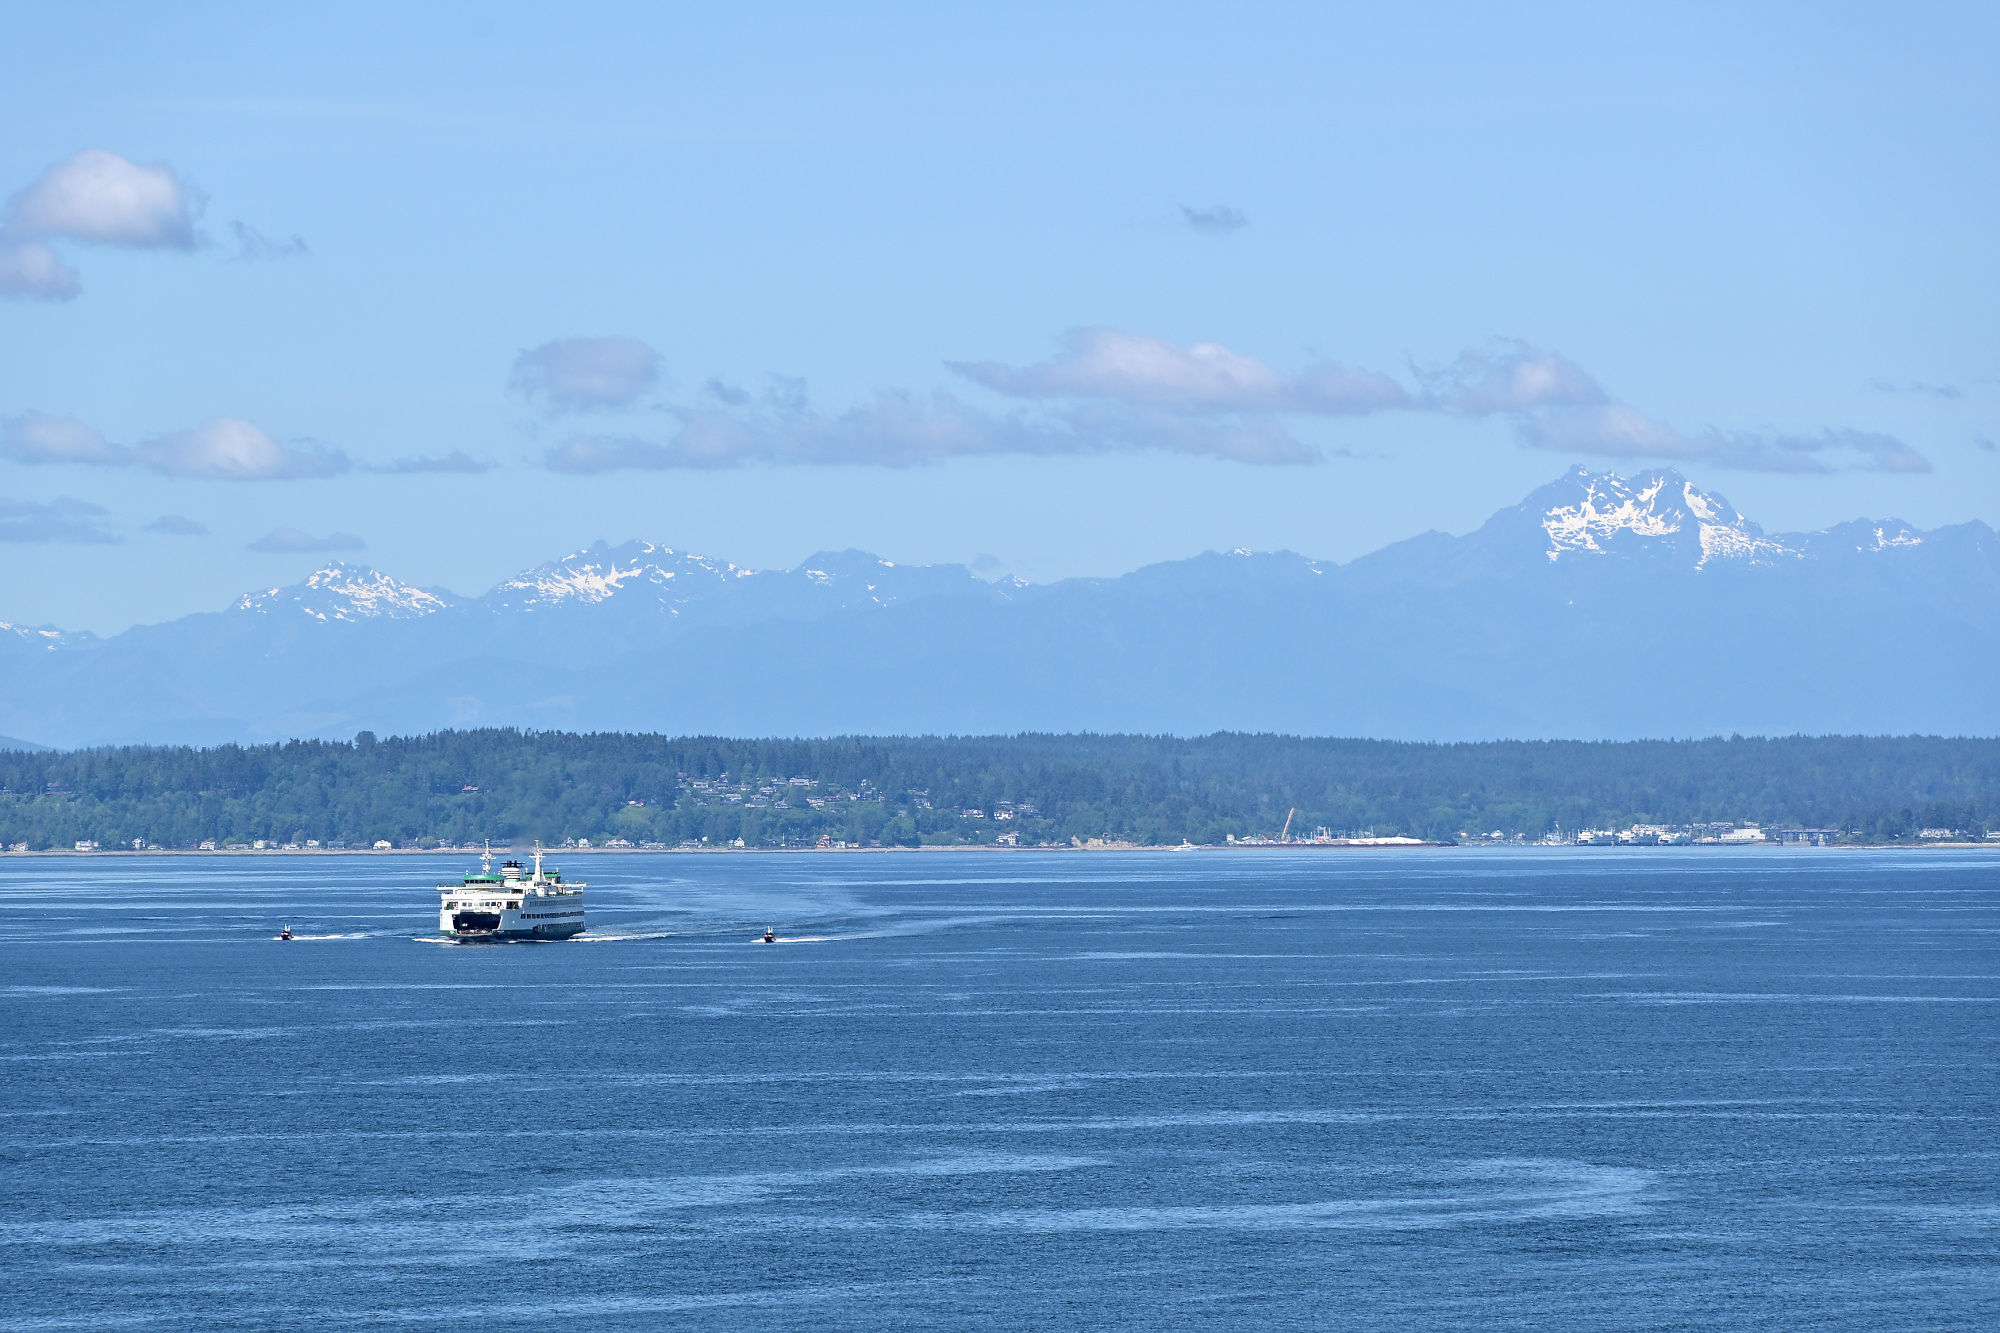
Before the market takes over, the waterfront has already started the conversation.
Sunshine, harbor cranes, and a ferry coming in from the Sound: Seattle starts the day looking busy.
1/400s f/7,1 ISO 100/21° 18-140mm f/3,5-6,3 VR f=68mm/102mm
Puget Sound looks almost too relaxed here, considering how quickly the market picks up speed. From City View Park, this is also where Seattle lines up for its city views and panoramas.
1/640s f/6,3 ISO 100/21° 18-140mm f/3,5-6,3 VR f=140mm/210mm
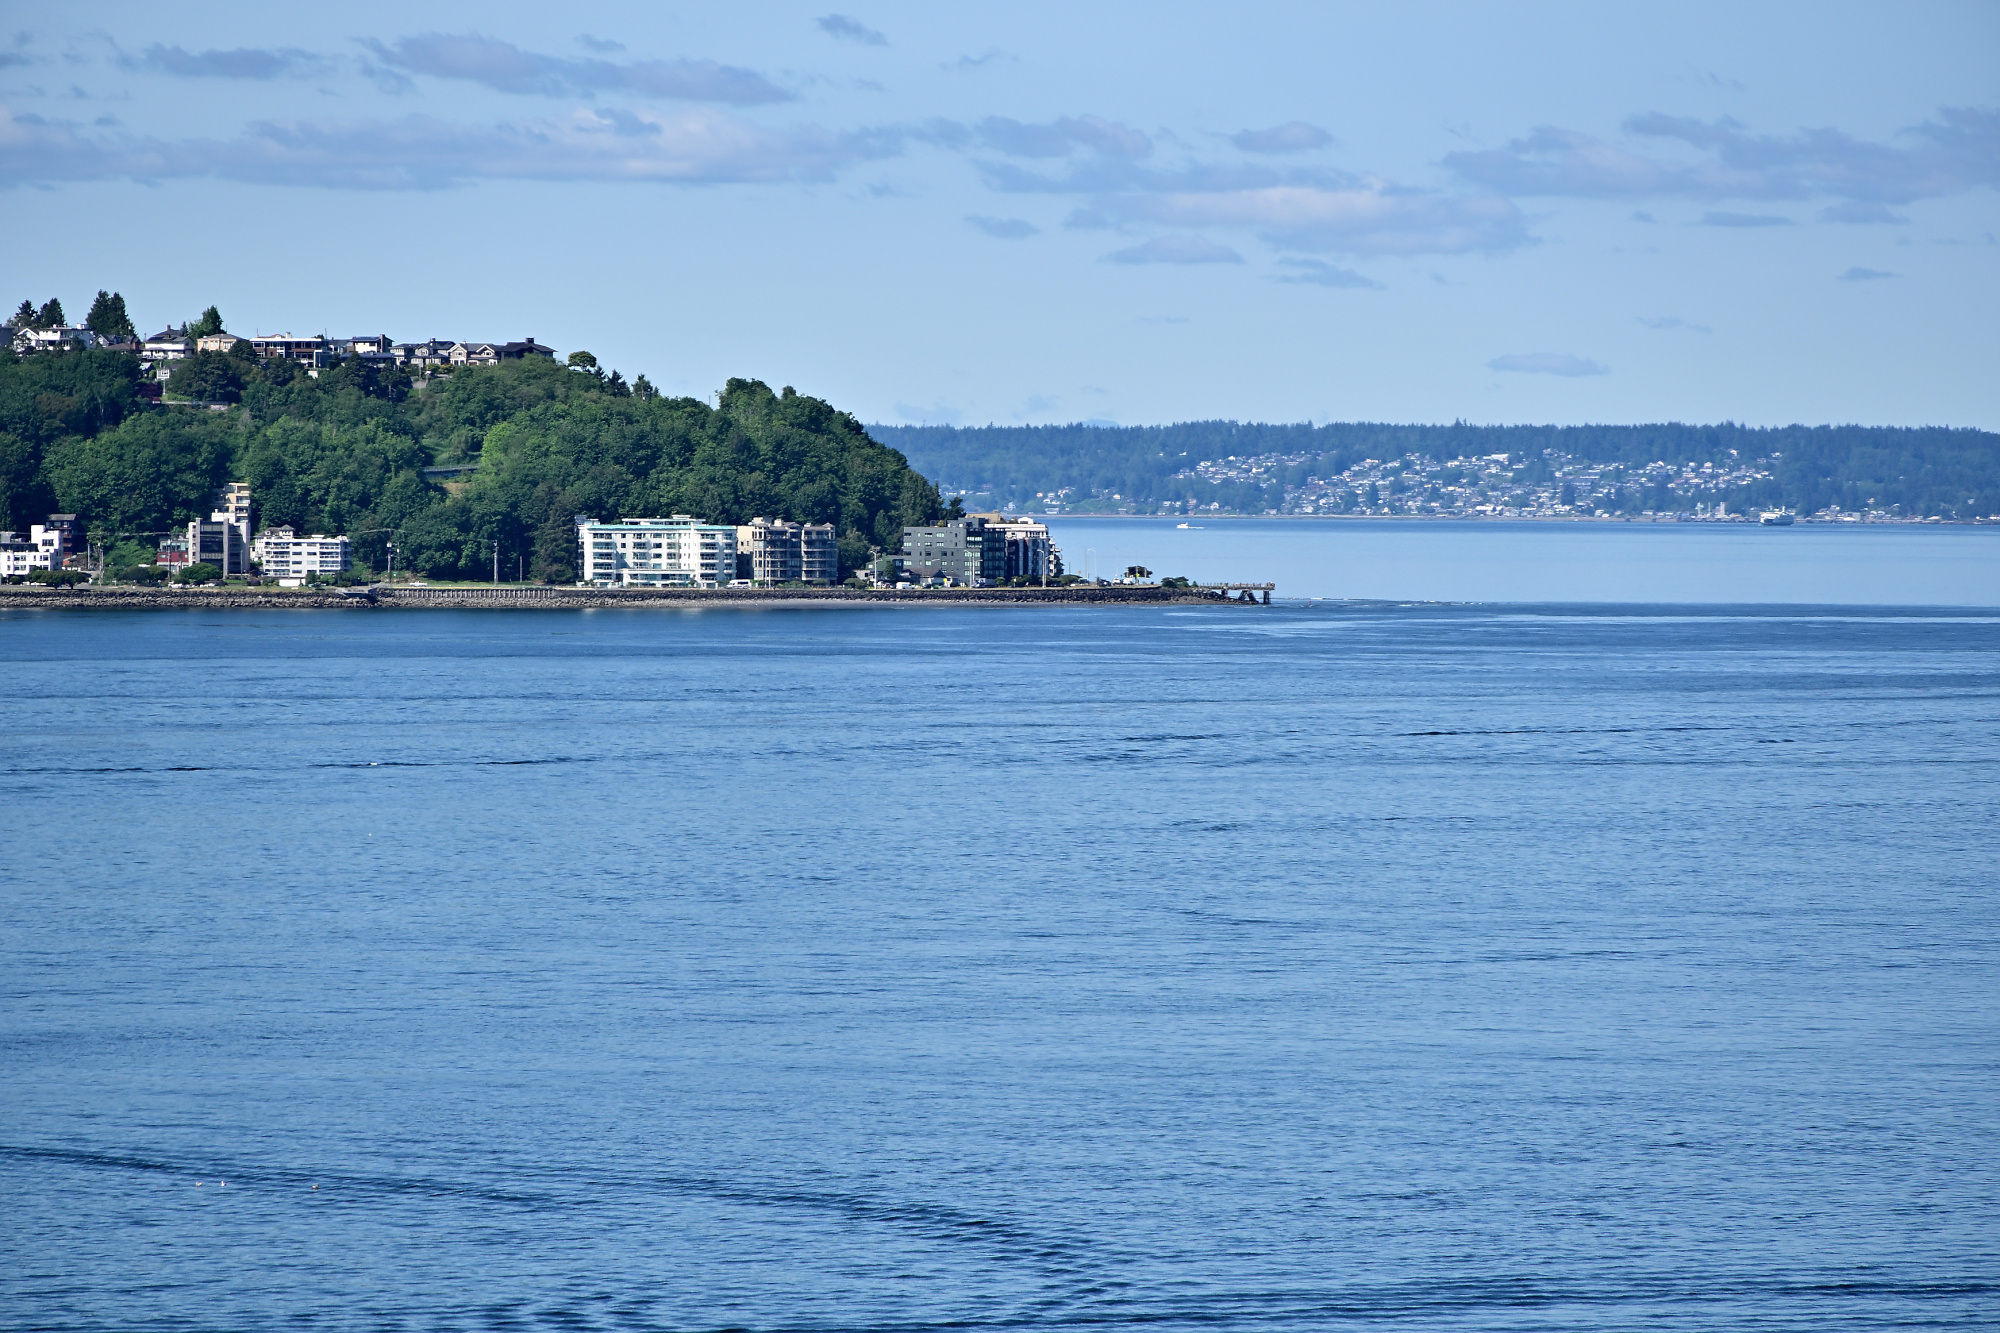
A quiet stretch of blue, while the city keeps refusing to pause.
1/500s f/10 ISO 200/24° 18-140mm f/3,5-6,3 VR f=140mm/210mm

On the waterfront, something is always moving.
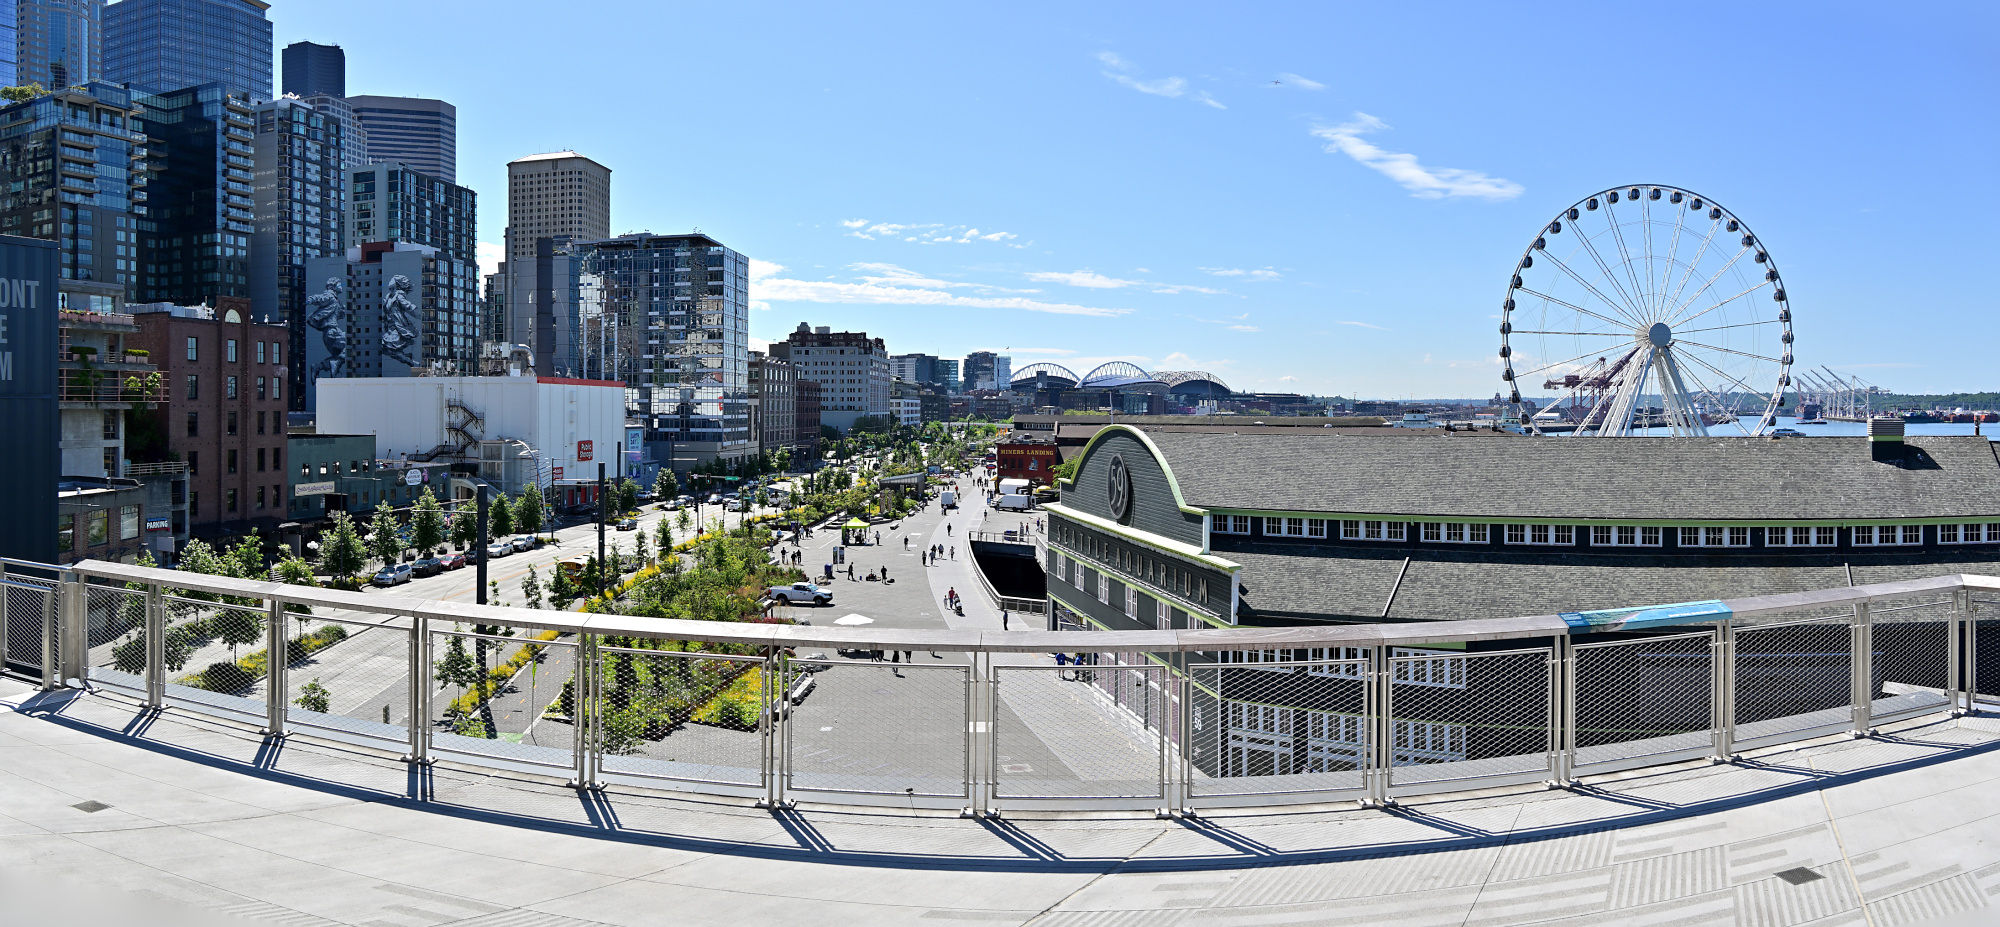
1/400s f/7,1 ISO 100/21° 18-140mm f/3,5-6,3 VR f=18mm/27mm
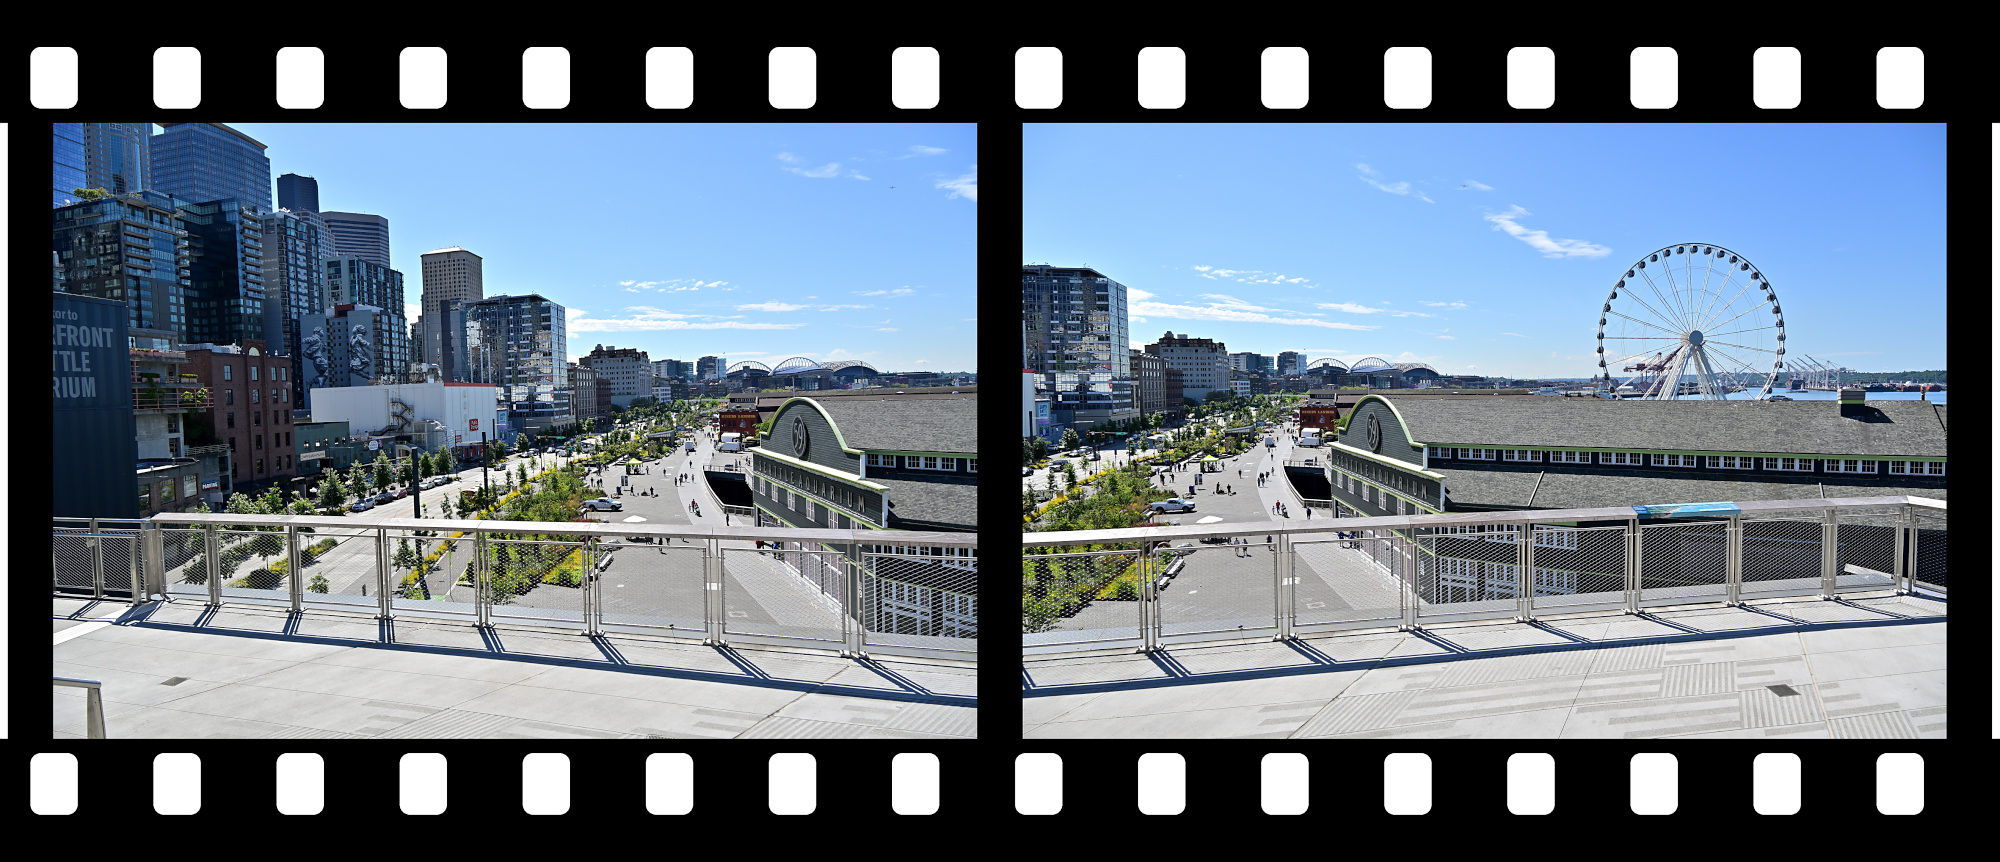
A closer look at the waterfront before the market takes over again.
1/400s f/7,1 ISO 100/21° 18-140mm f/3,5-6,3 VR f=70mm/105mm
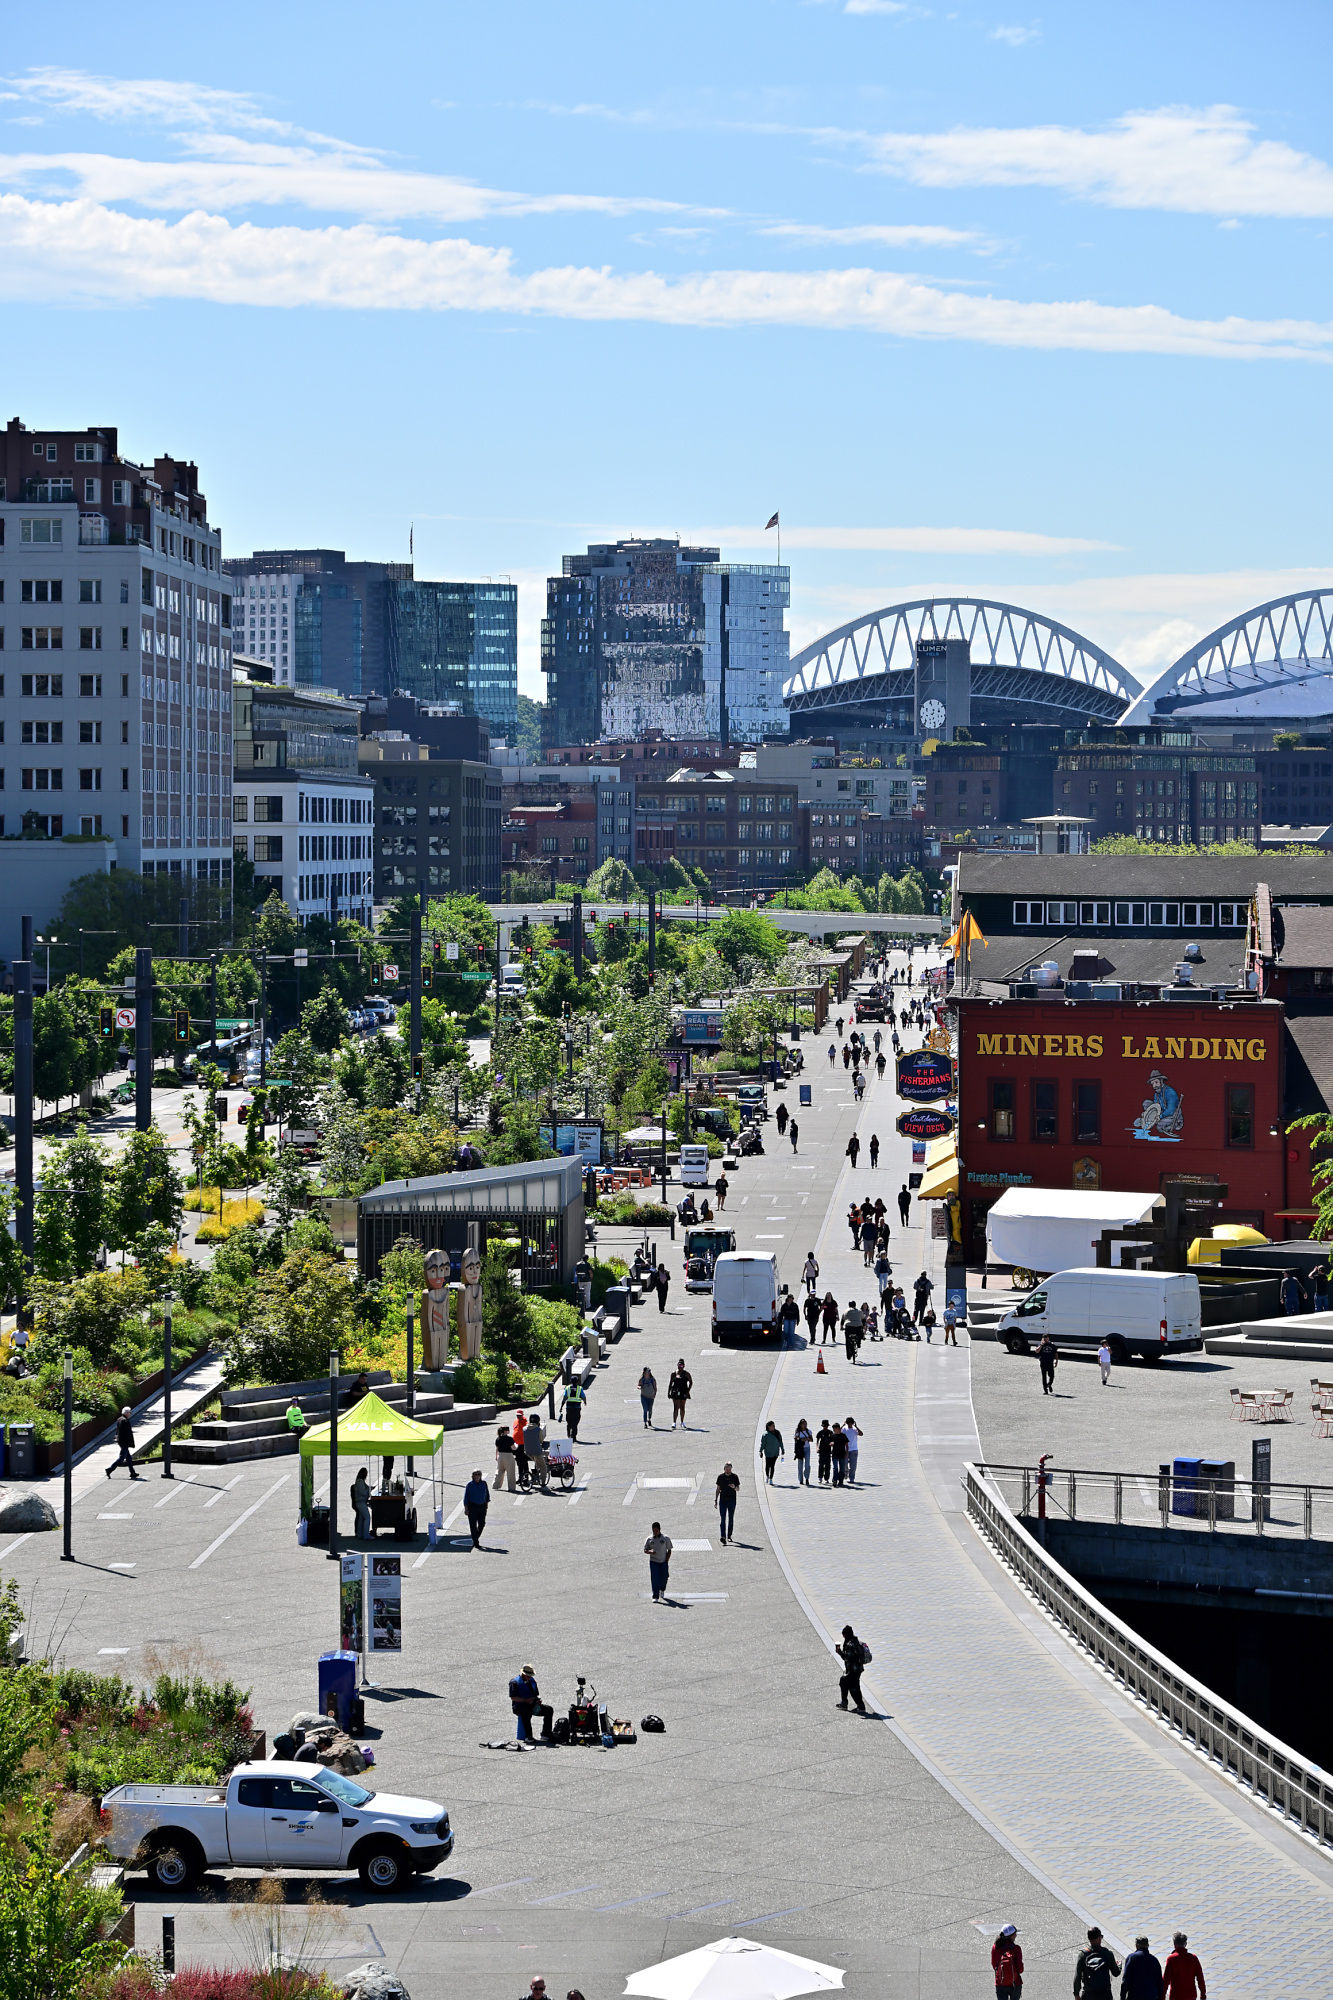
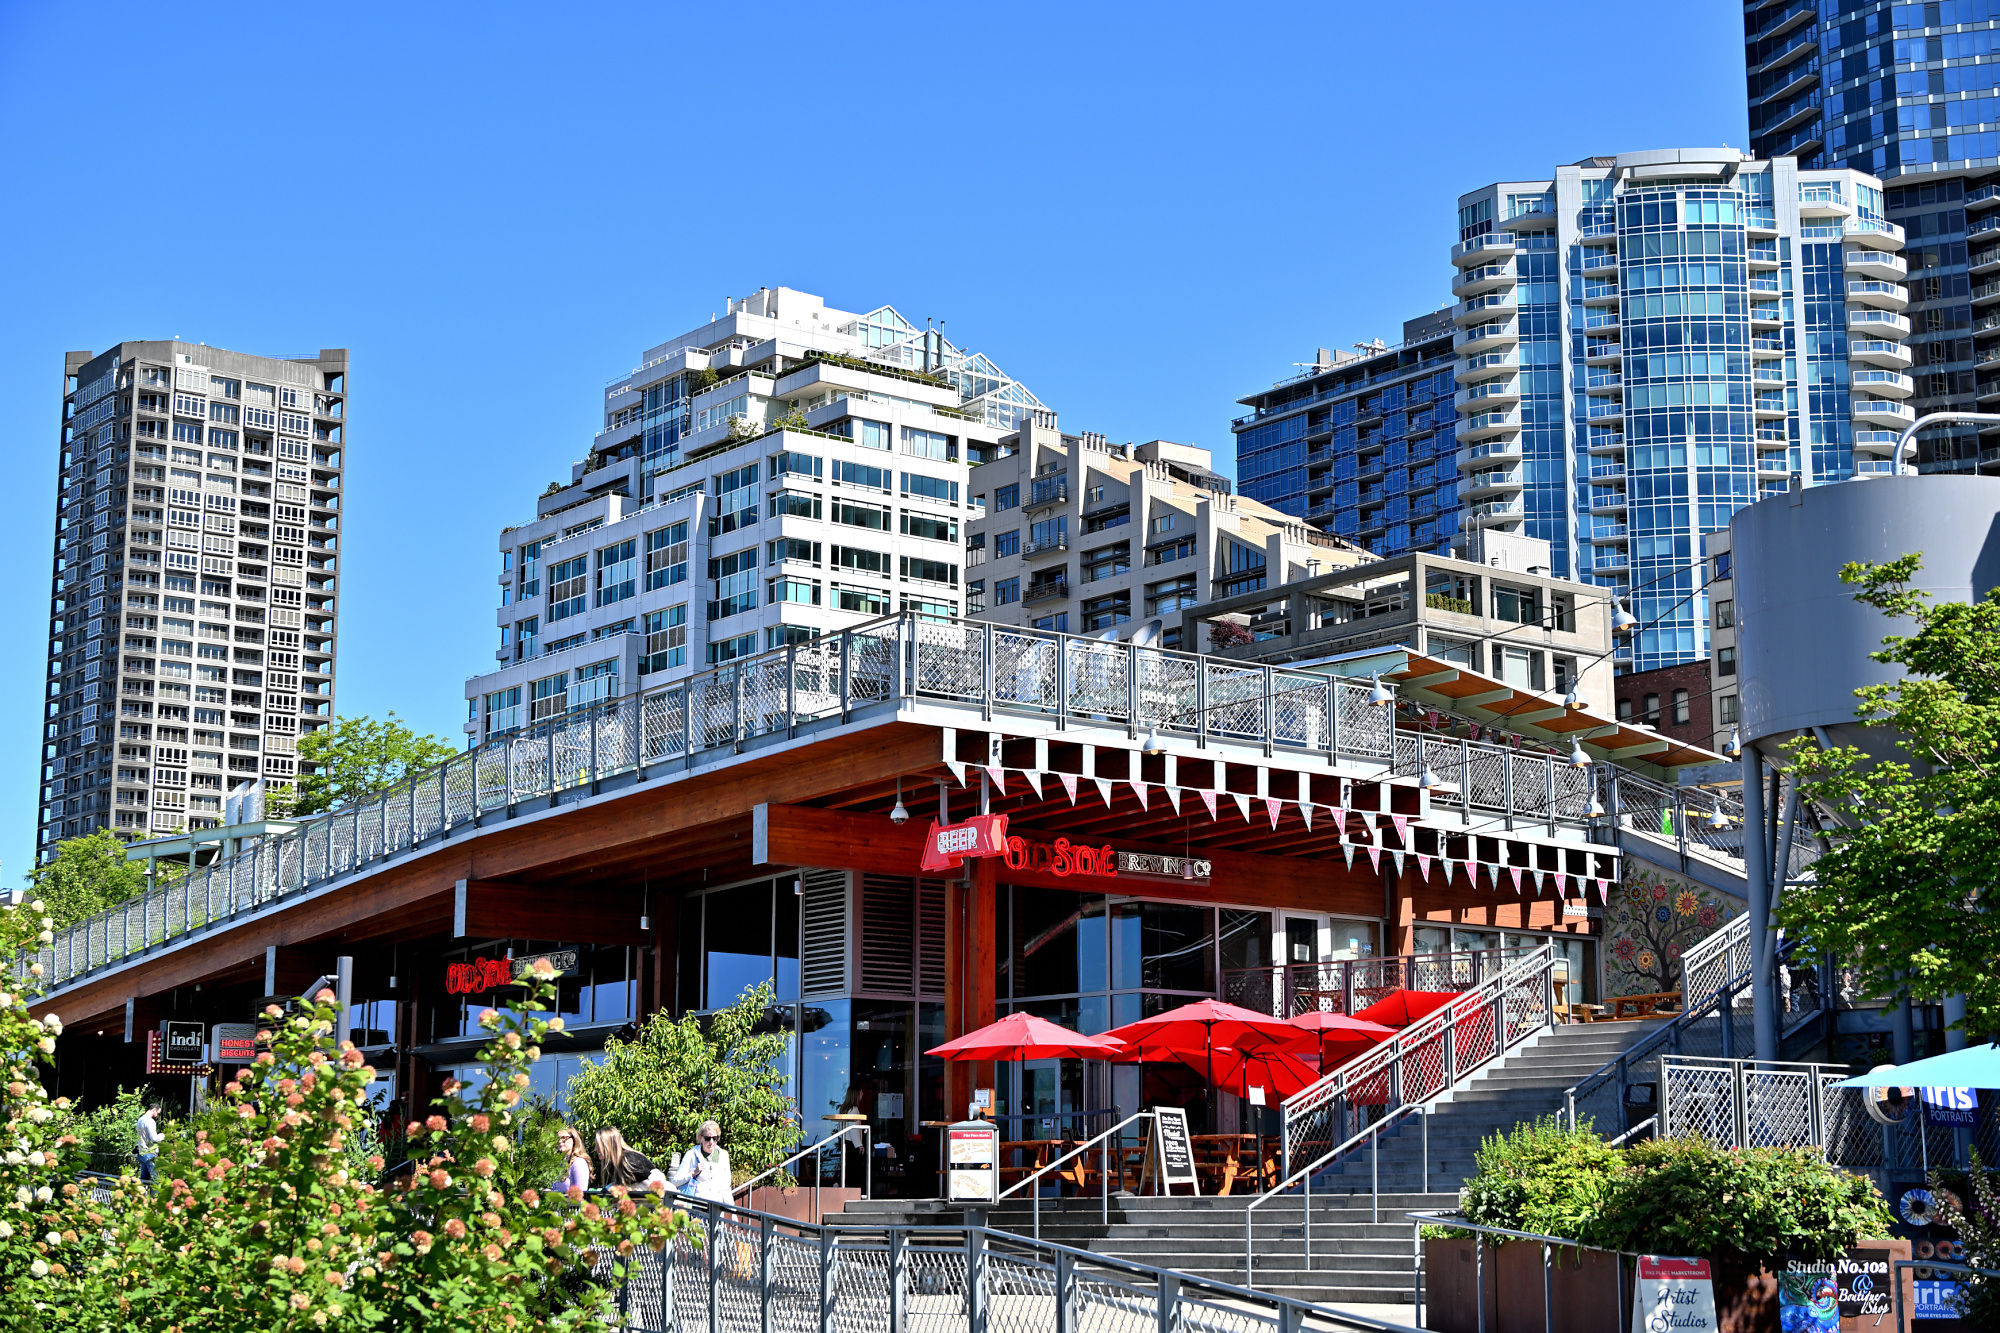
The market edge is all stairs, rails, rooftops, and the promise of something around the corner.
1/320s f/6,3 ISO 100/21° 18-140mm f/3,5-6,3 VR f=35mm/52mm
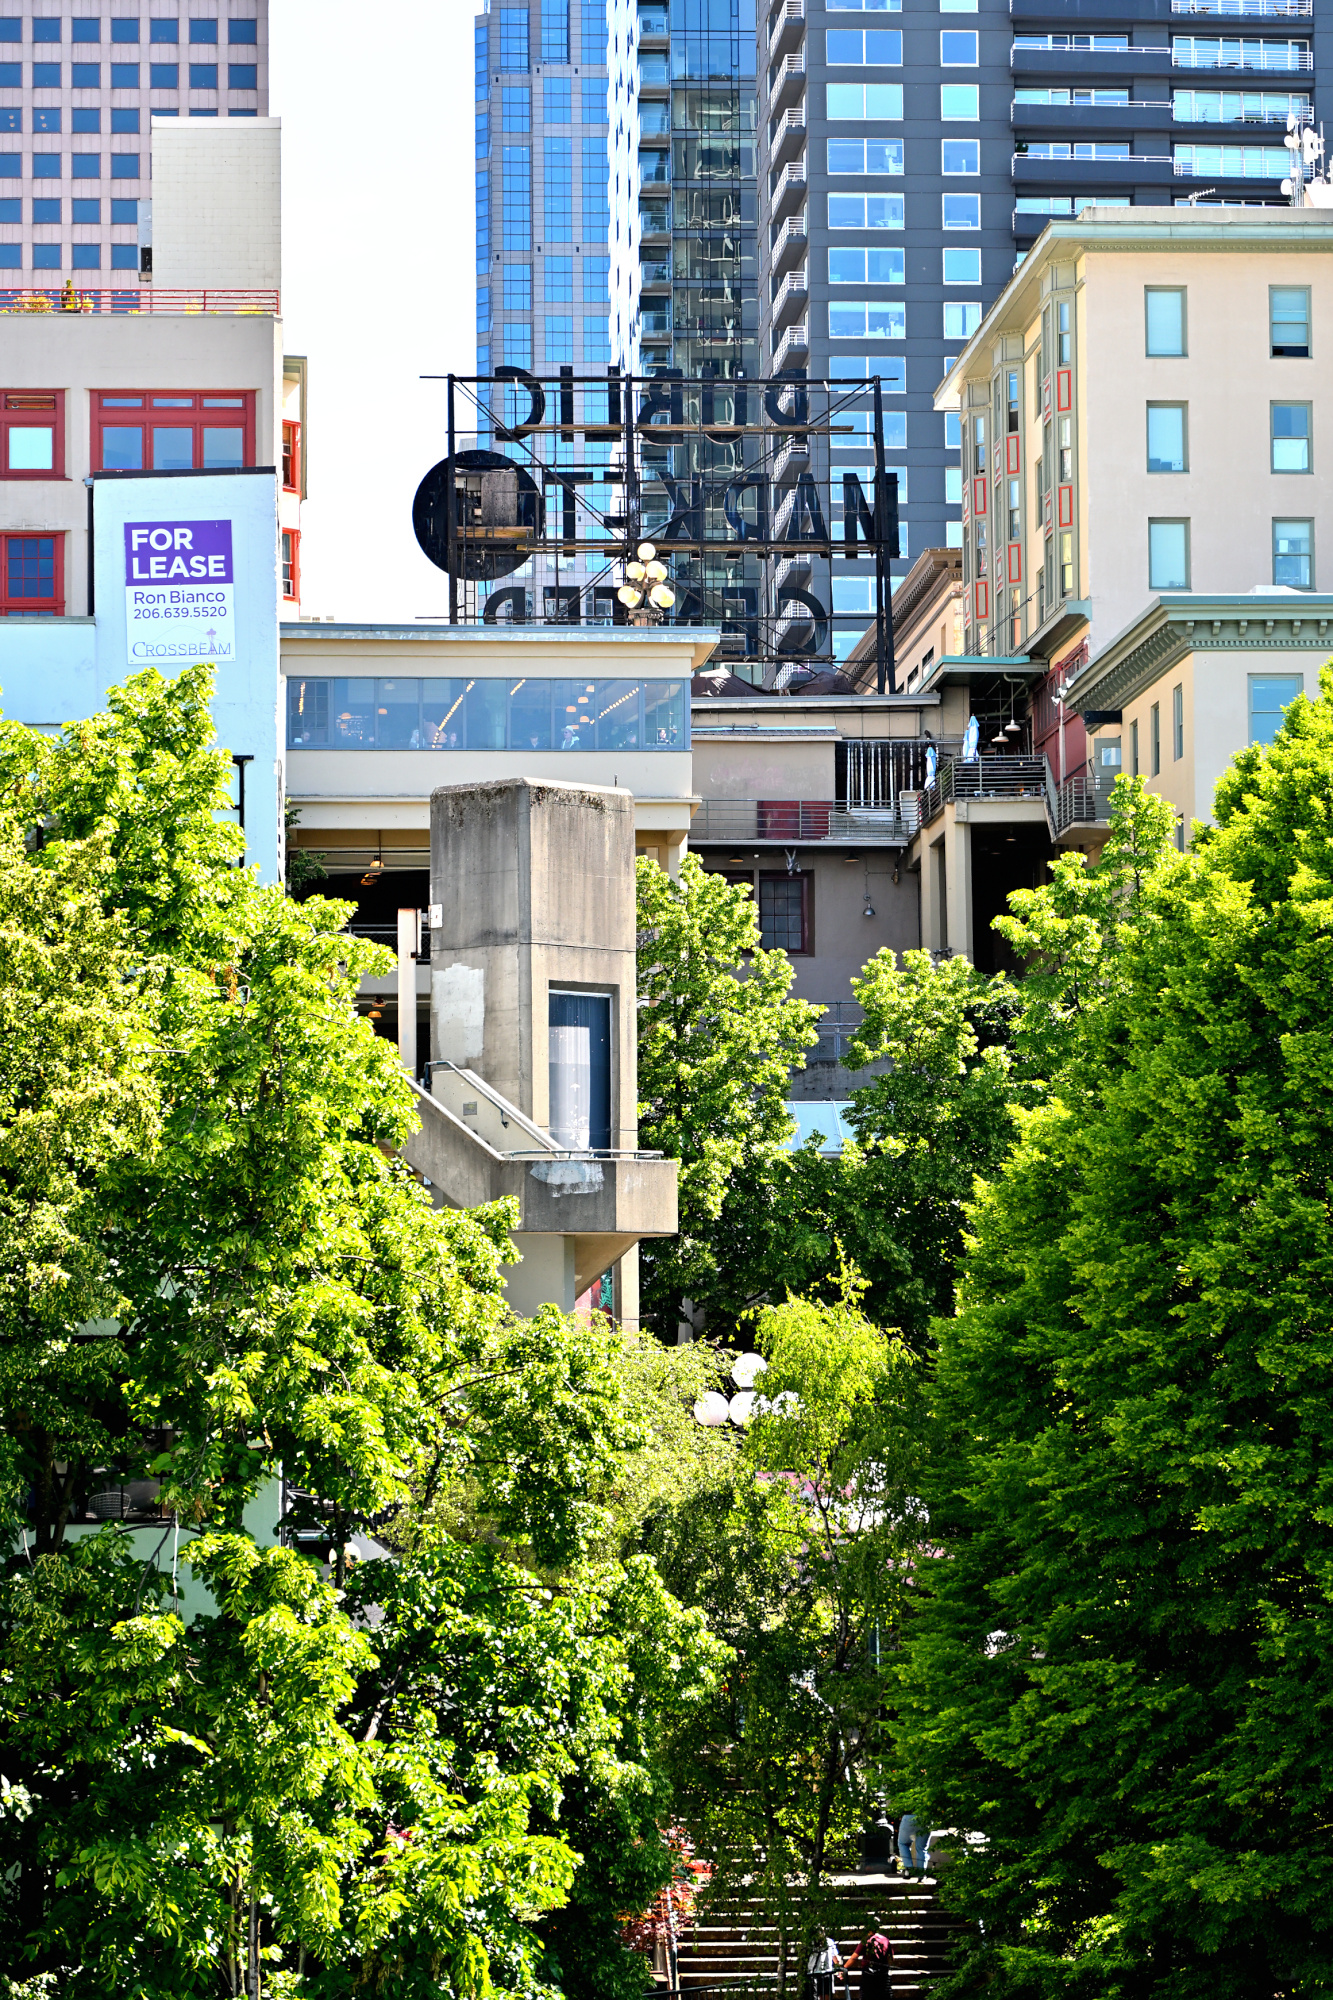
The famous red sign, seen from behind, still knows exactly how famous it is.
1/250s f/5,6 ISO 160/23° 18-140mm f/3,5-6,3 VR f=61mm/91mm
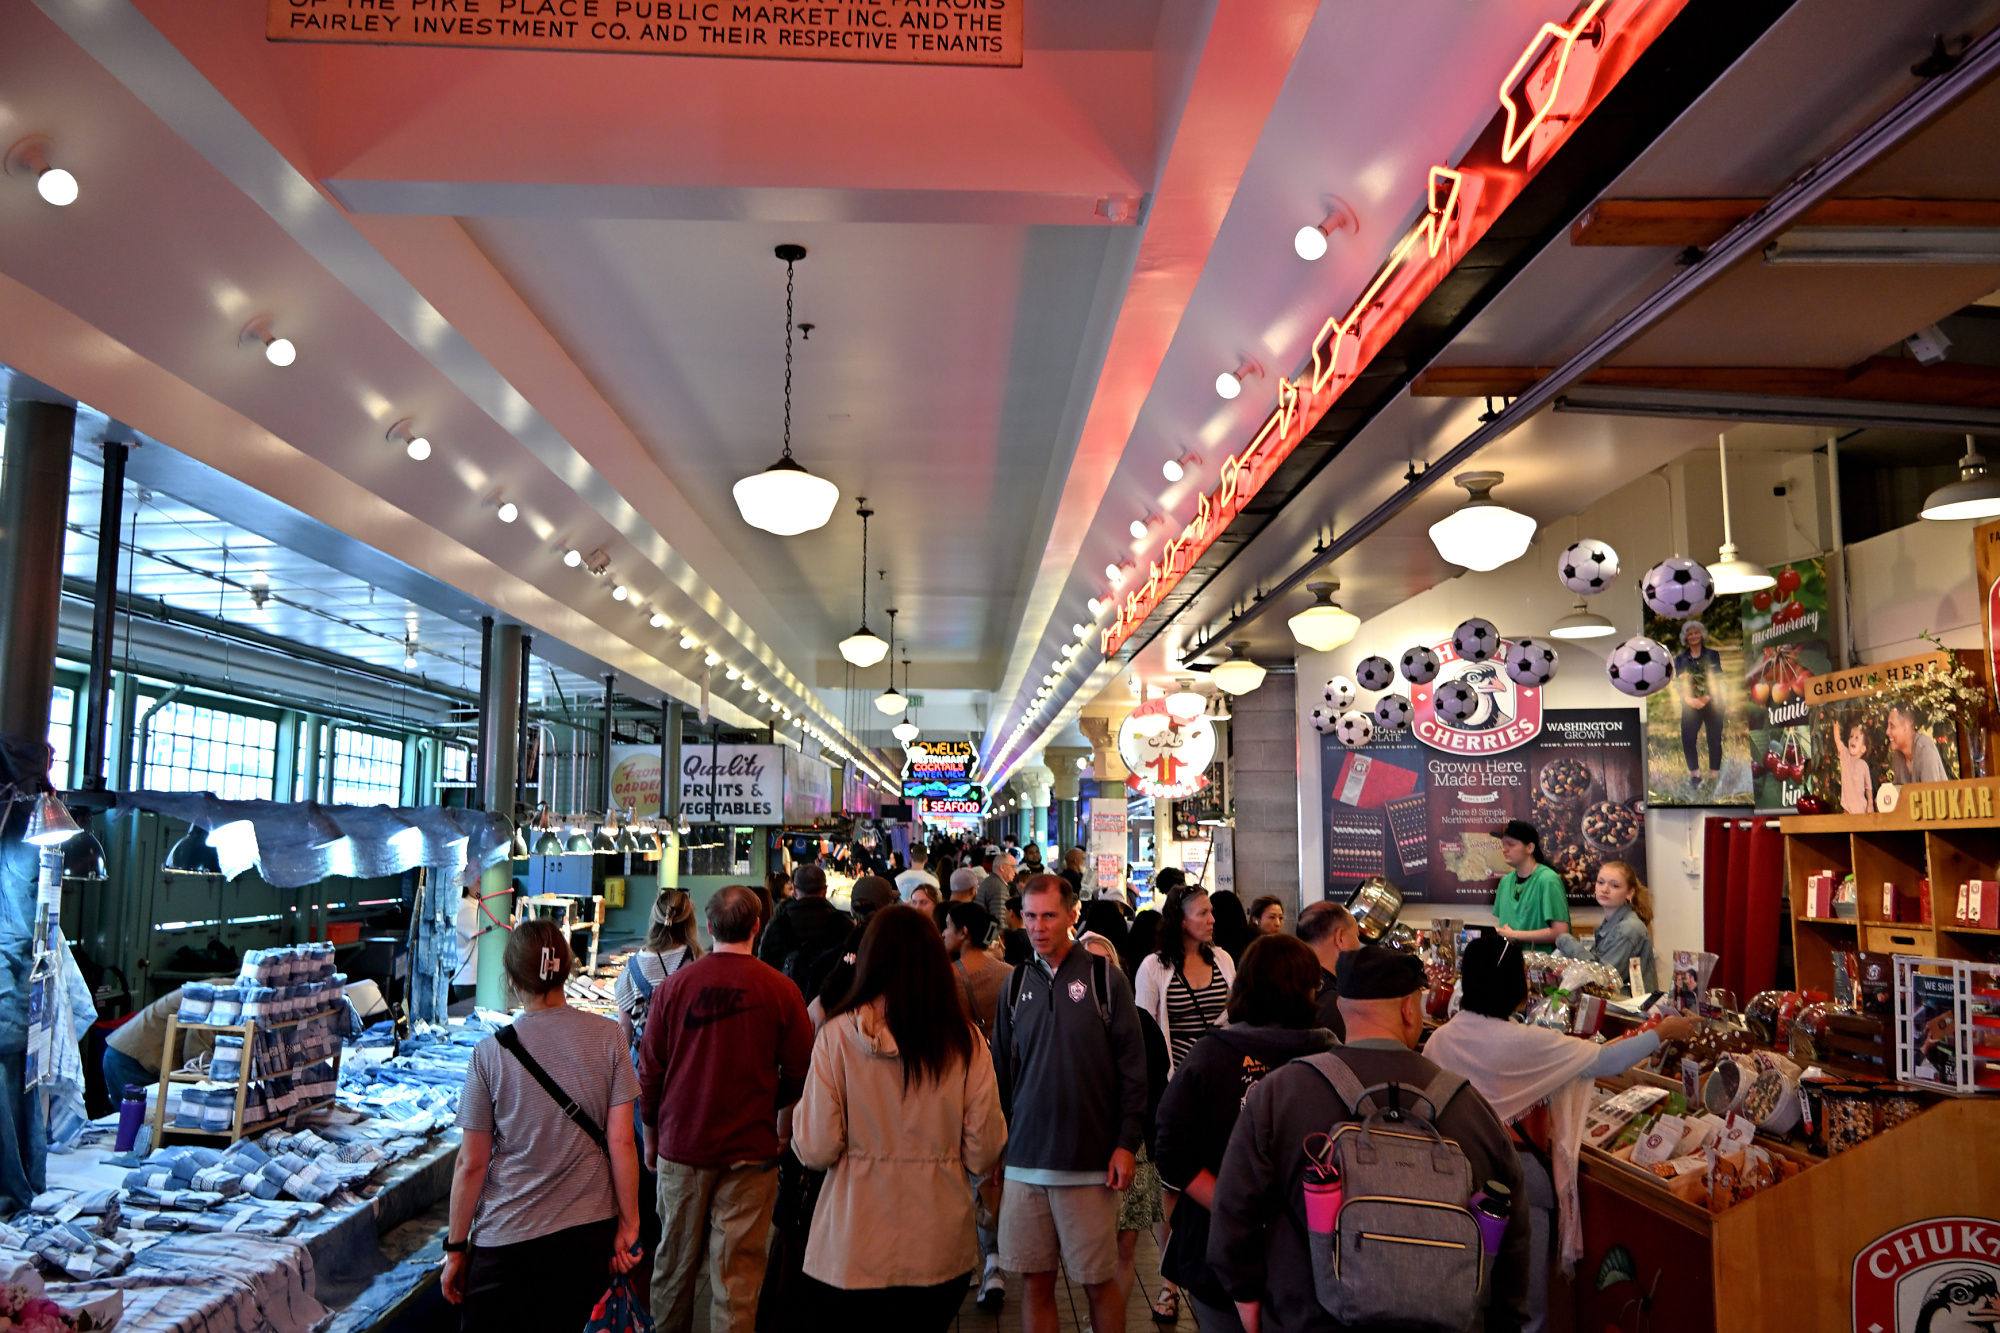
Inside the market, everything gets closer, brighter, and slightly less interested in personal space.
Inside, the market becomes a moving mix of lights, signs, and people with somewhere to be.
1/125s f/3,5 ISO 900 18-140mm f/3,5-6,3 VR f=18mm/27mm
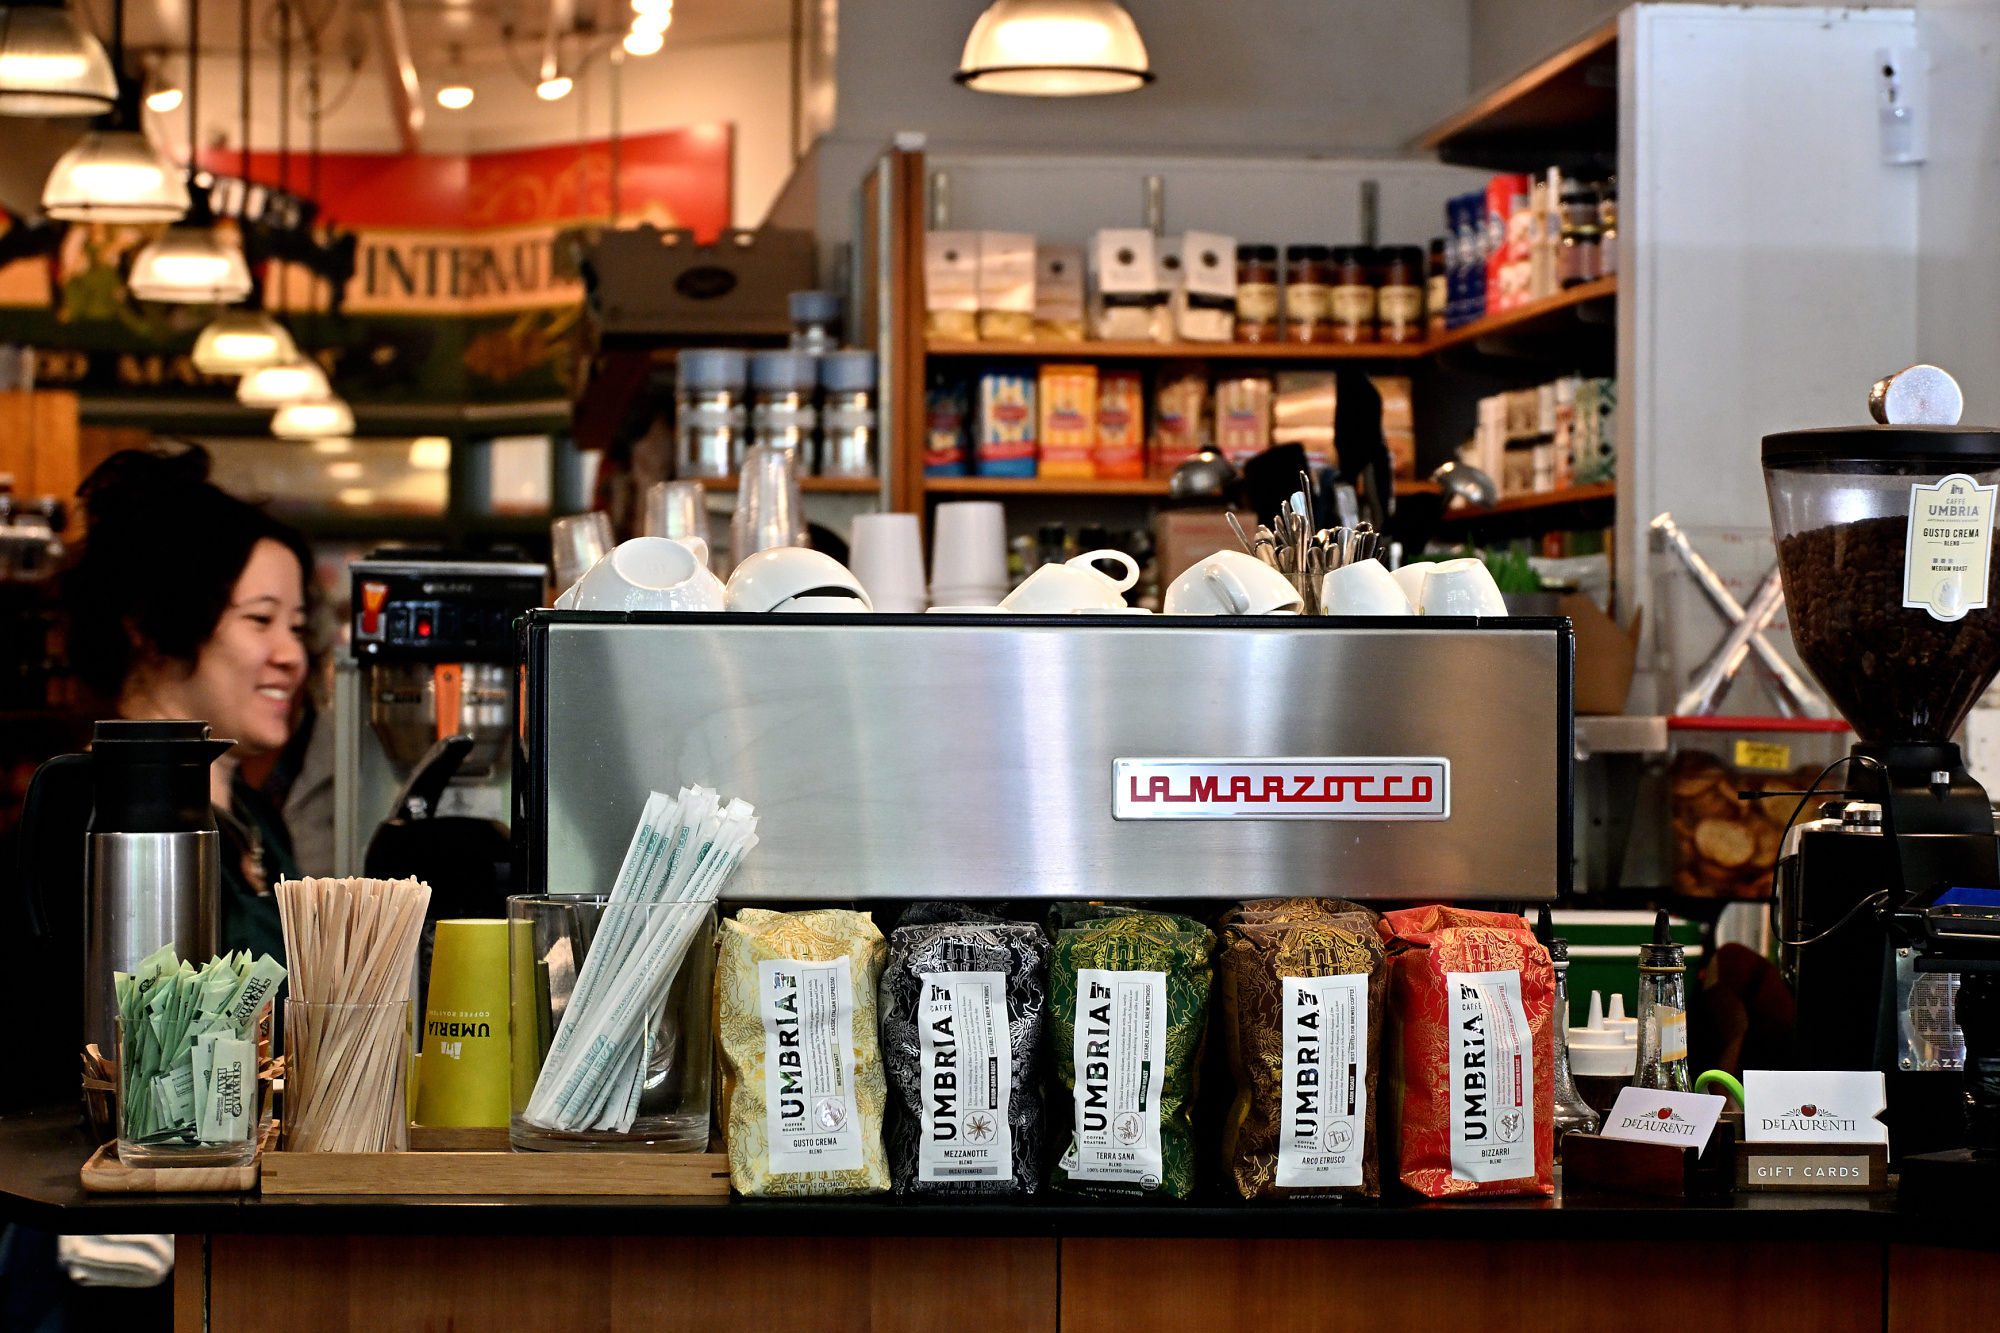
Coffee appears here less as a beverage and more as a basic Seattle utility.
1/125s f/5 ISO 1600/33° 18-140mm f/3,5-6,3 VR f=57mm/85mm
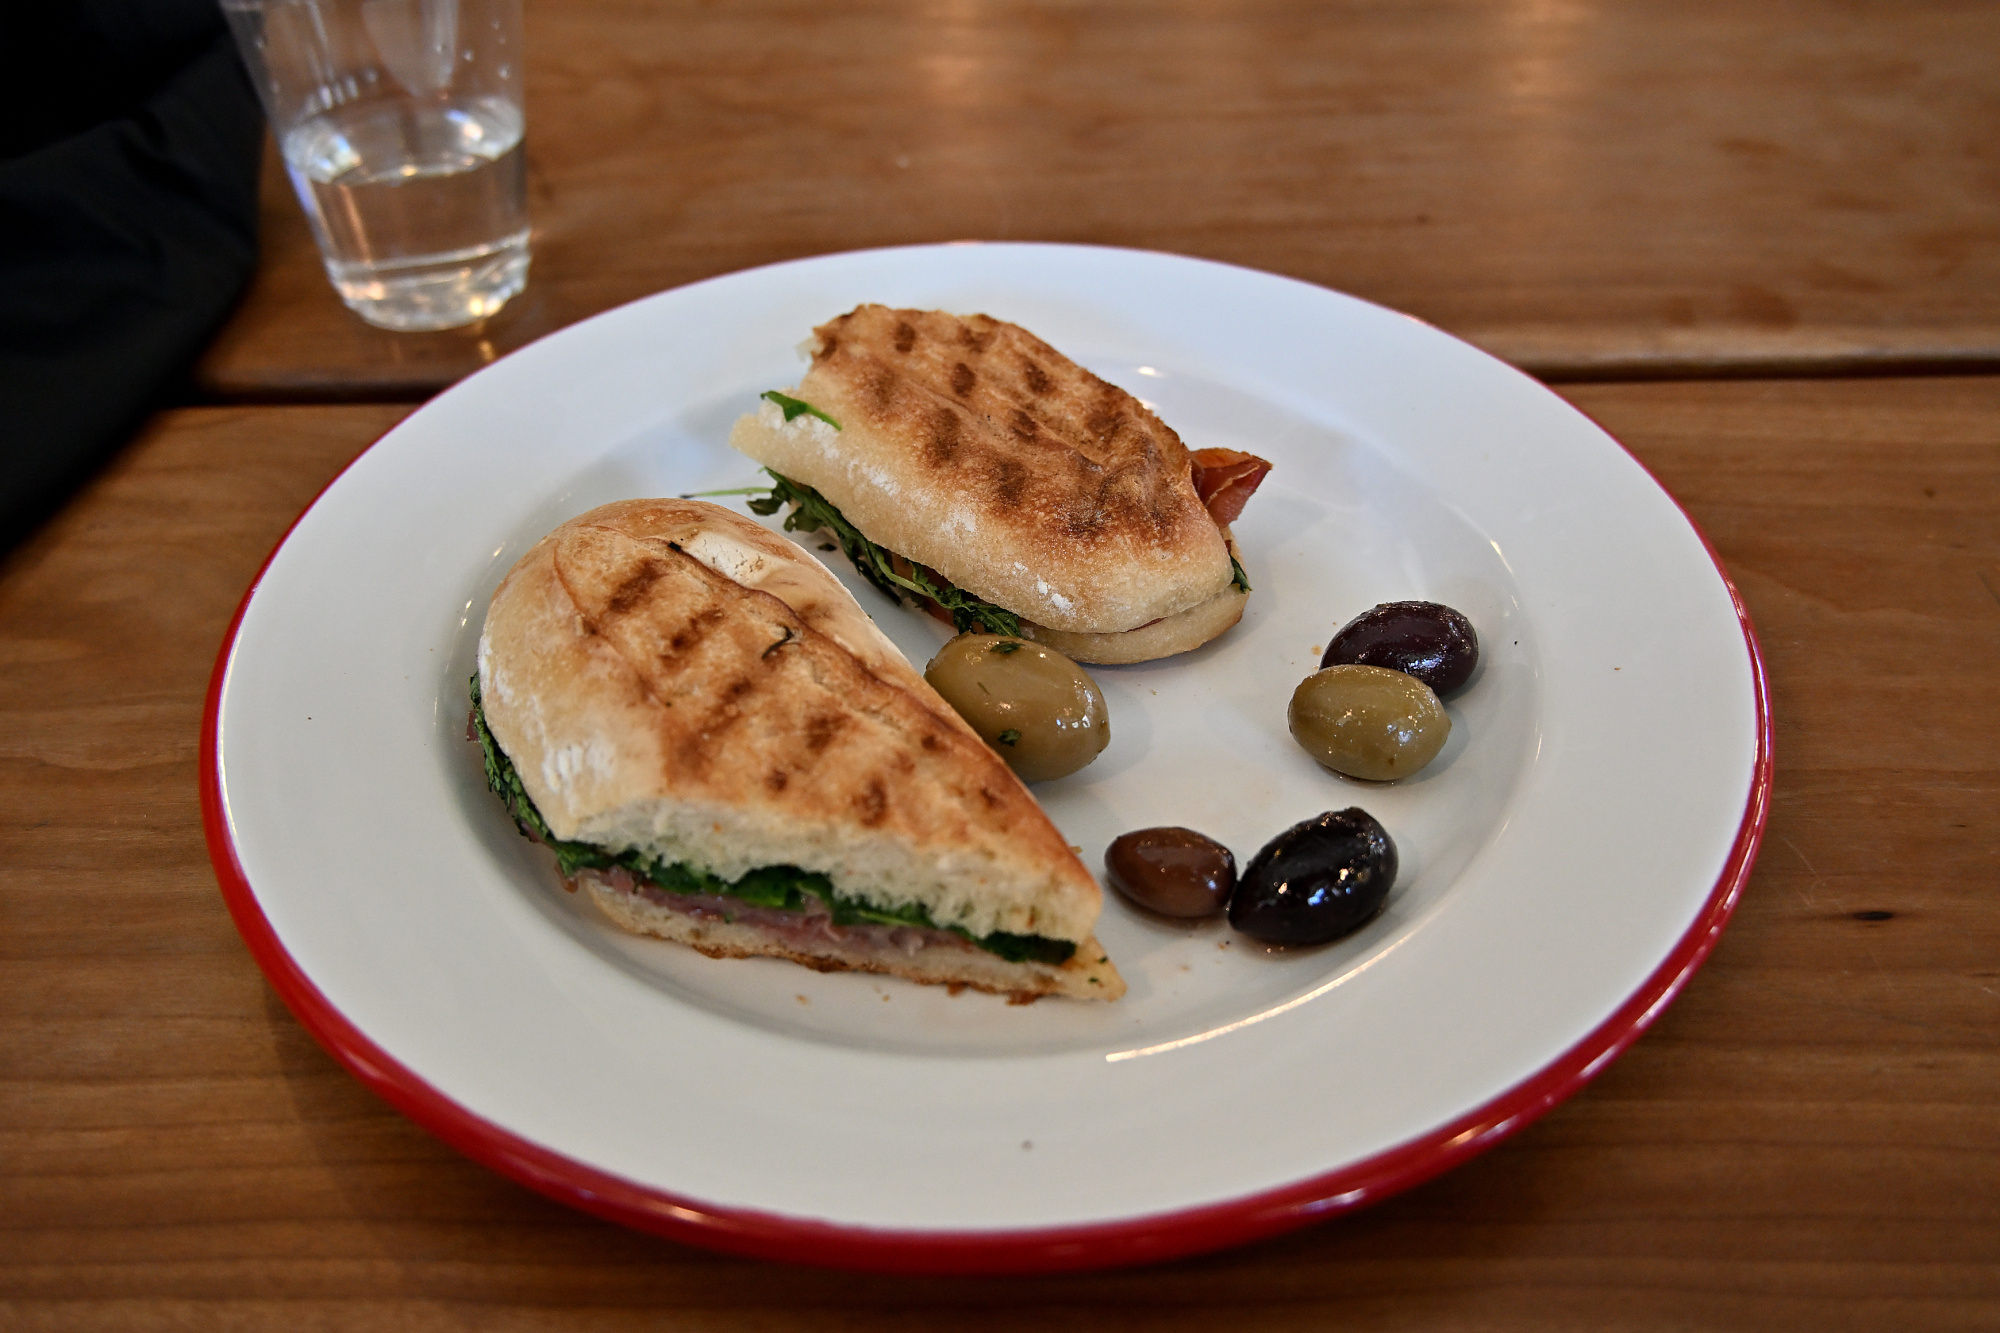
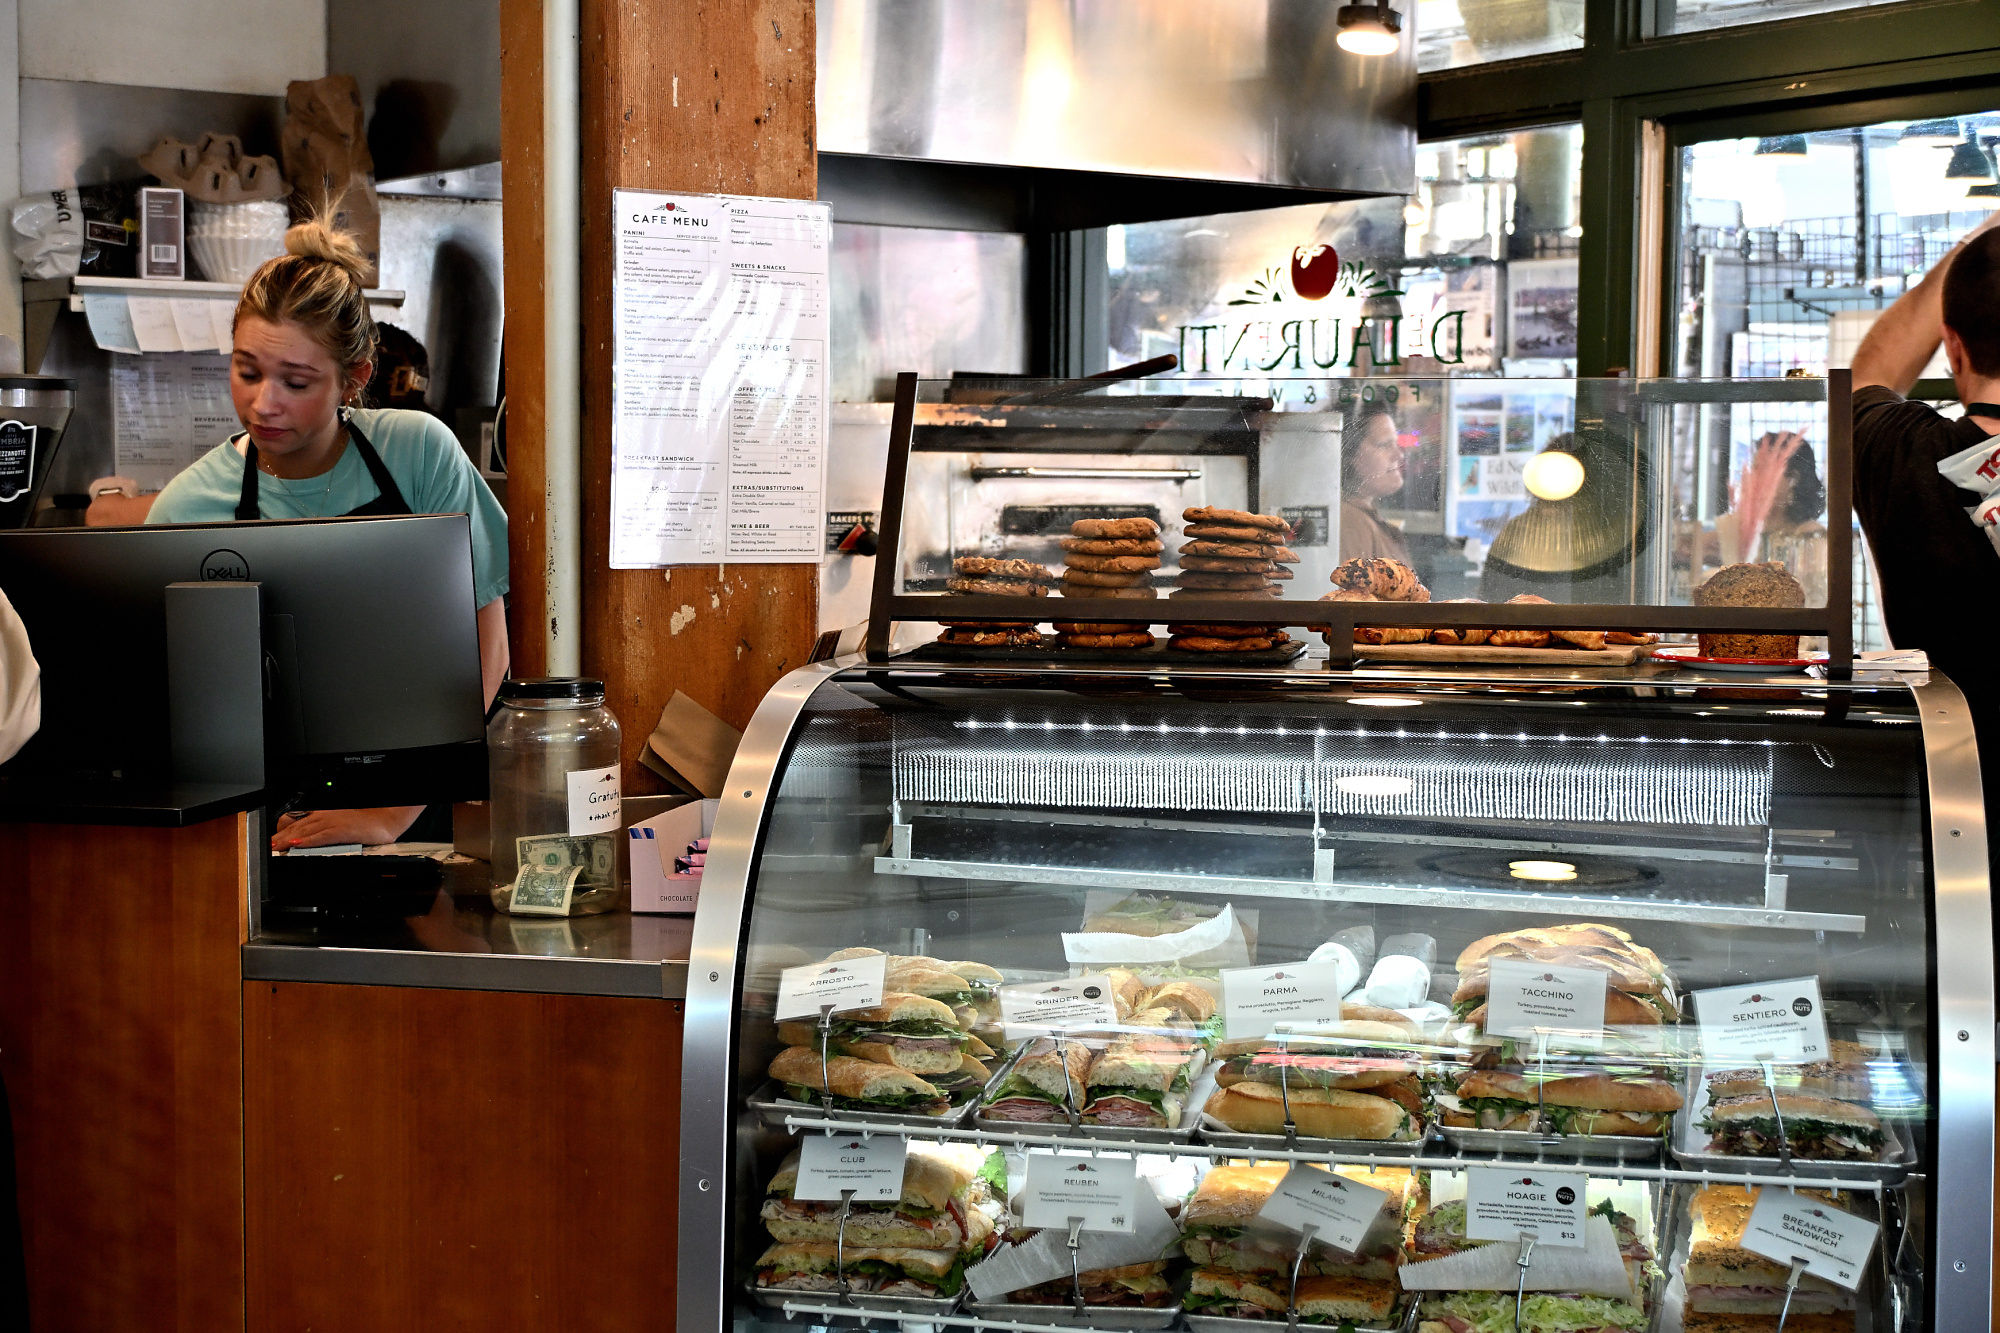
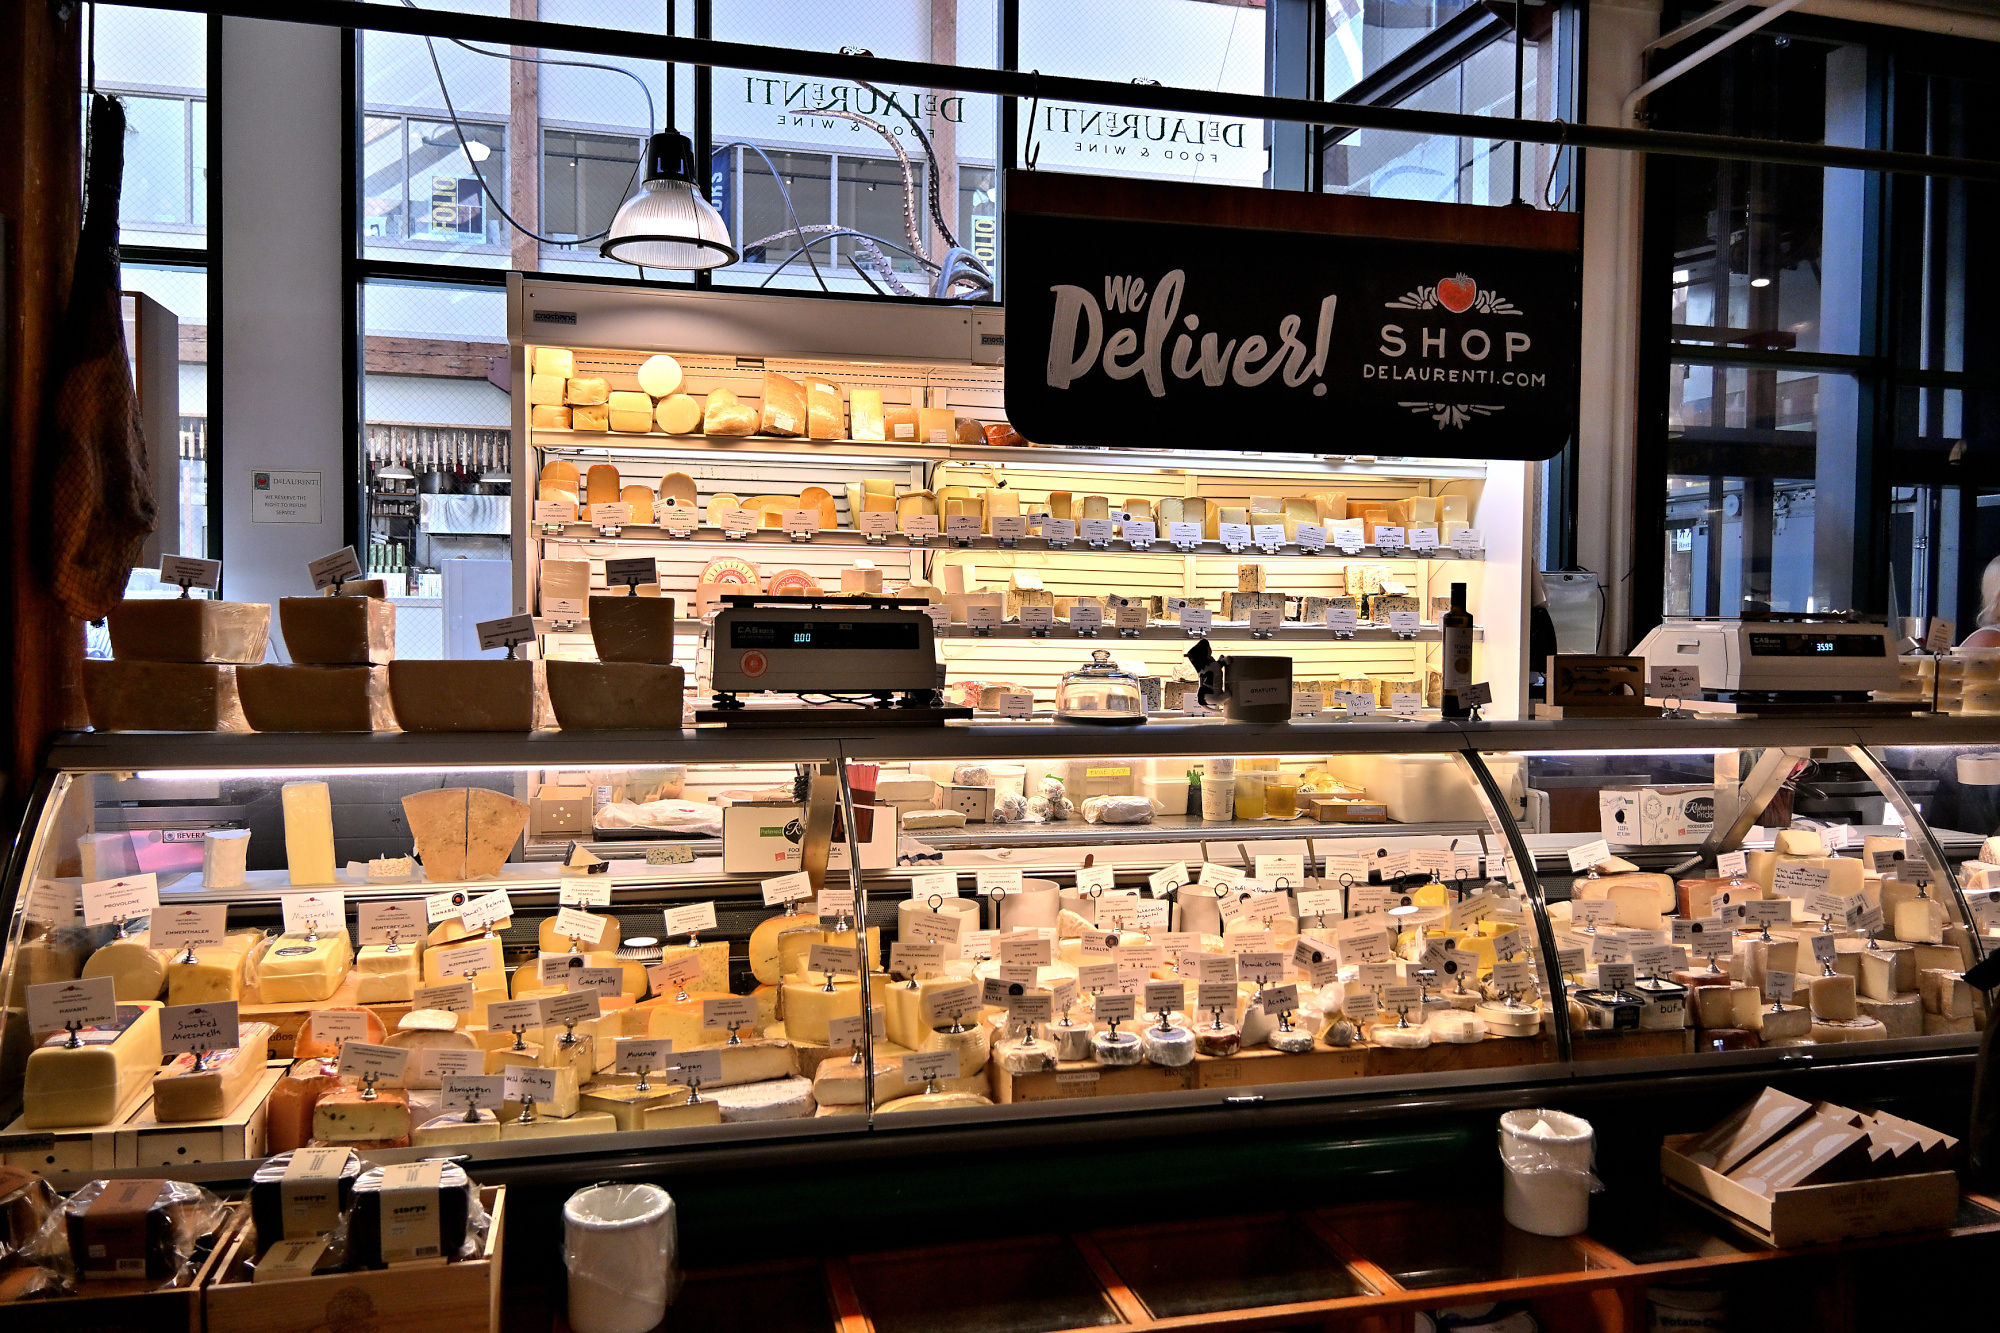
A small plate taking itself exactly as seriously as an Italian deli masterpiece should.
1/250s f/4 ISO 1100 18-140mm f/3,5-6,3 VR f=22mm/33mm
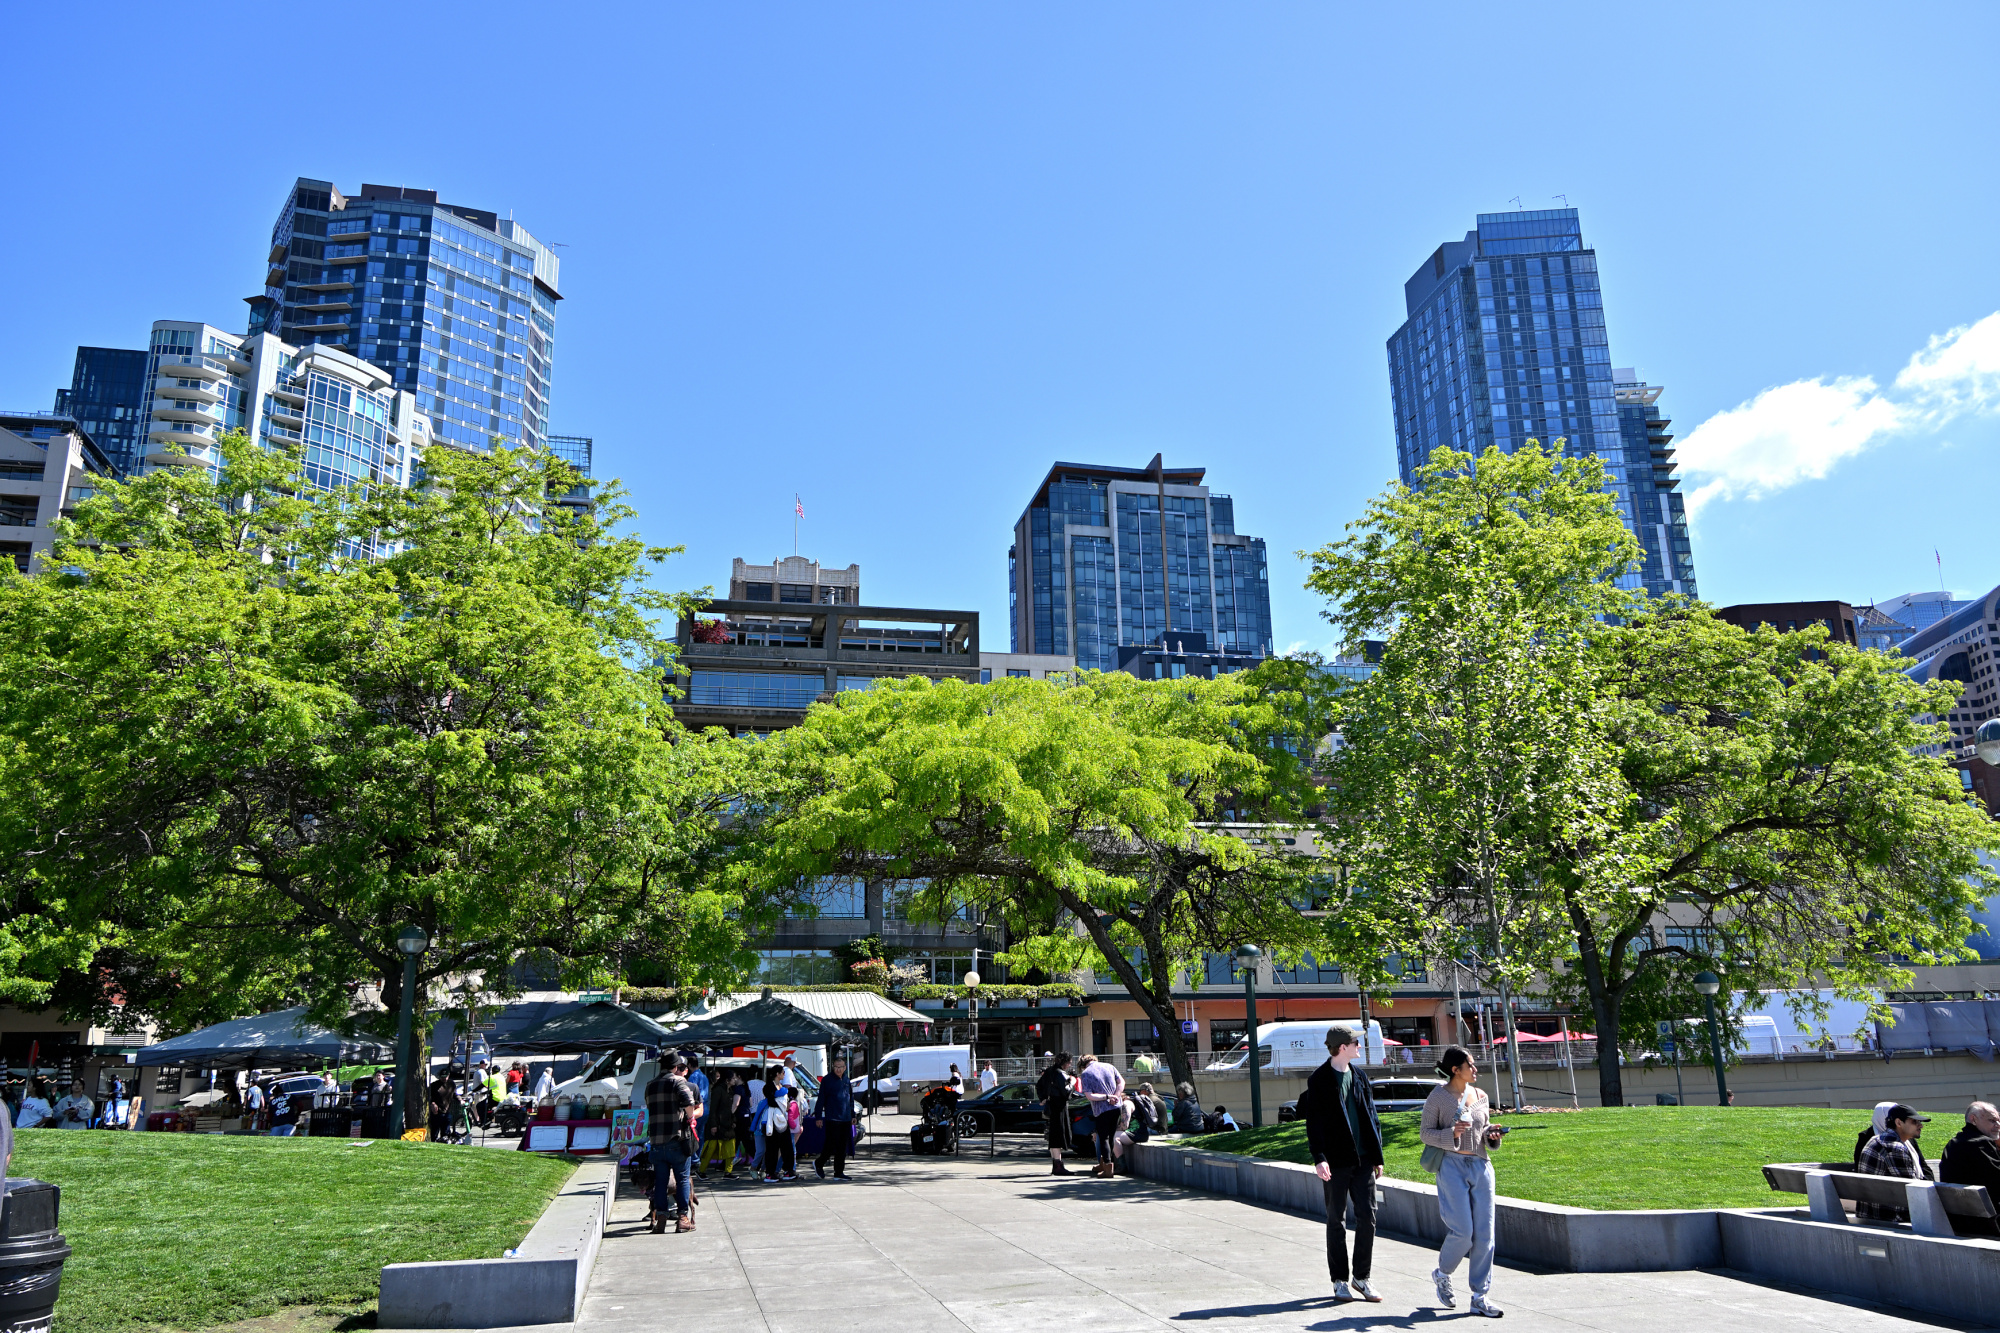
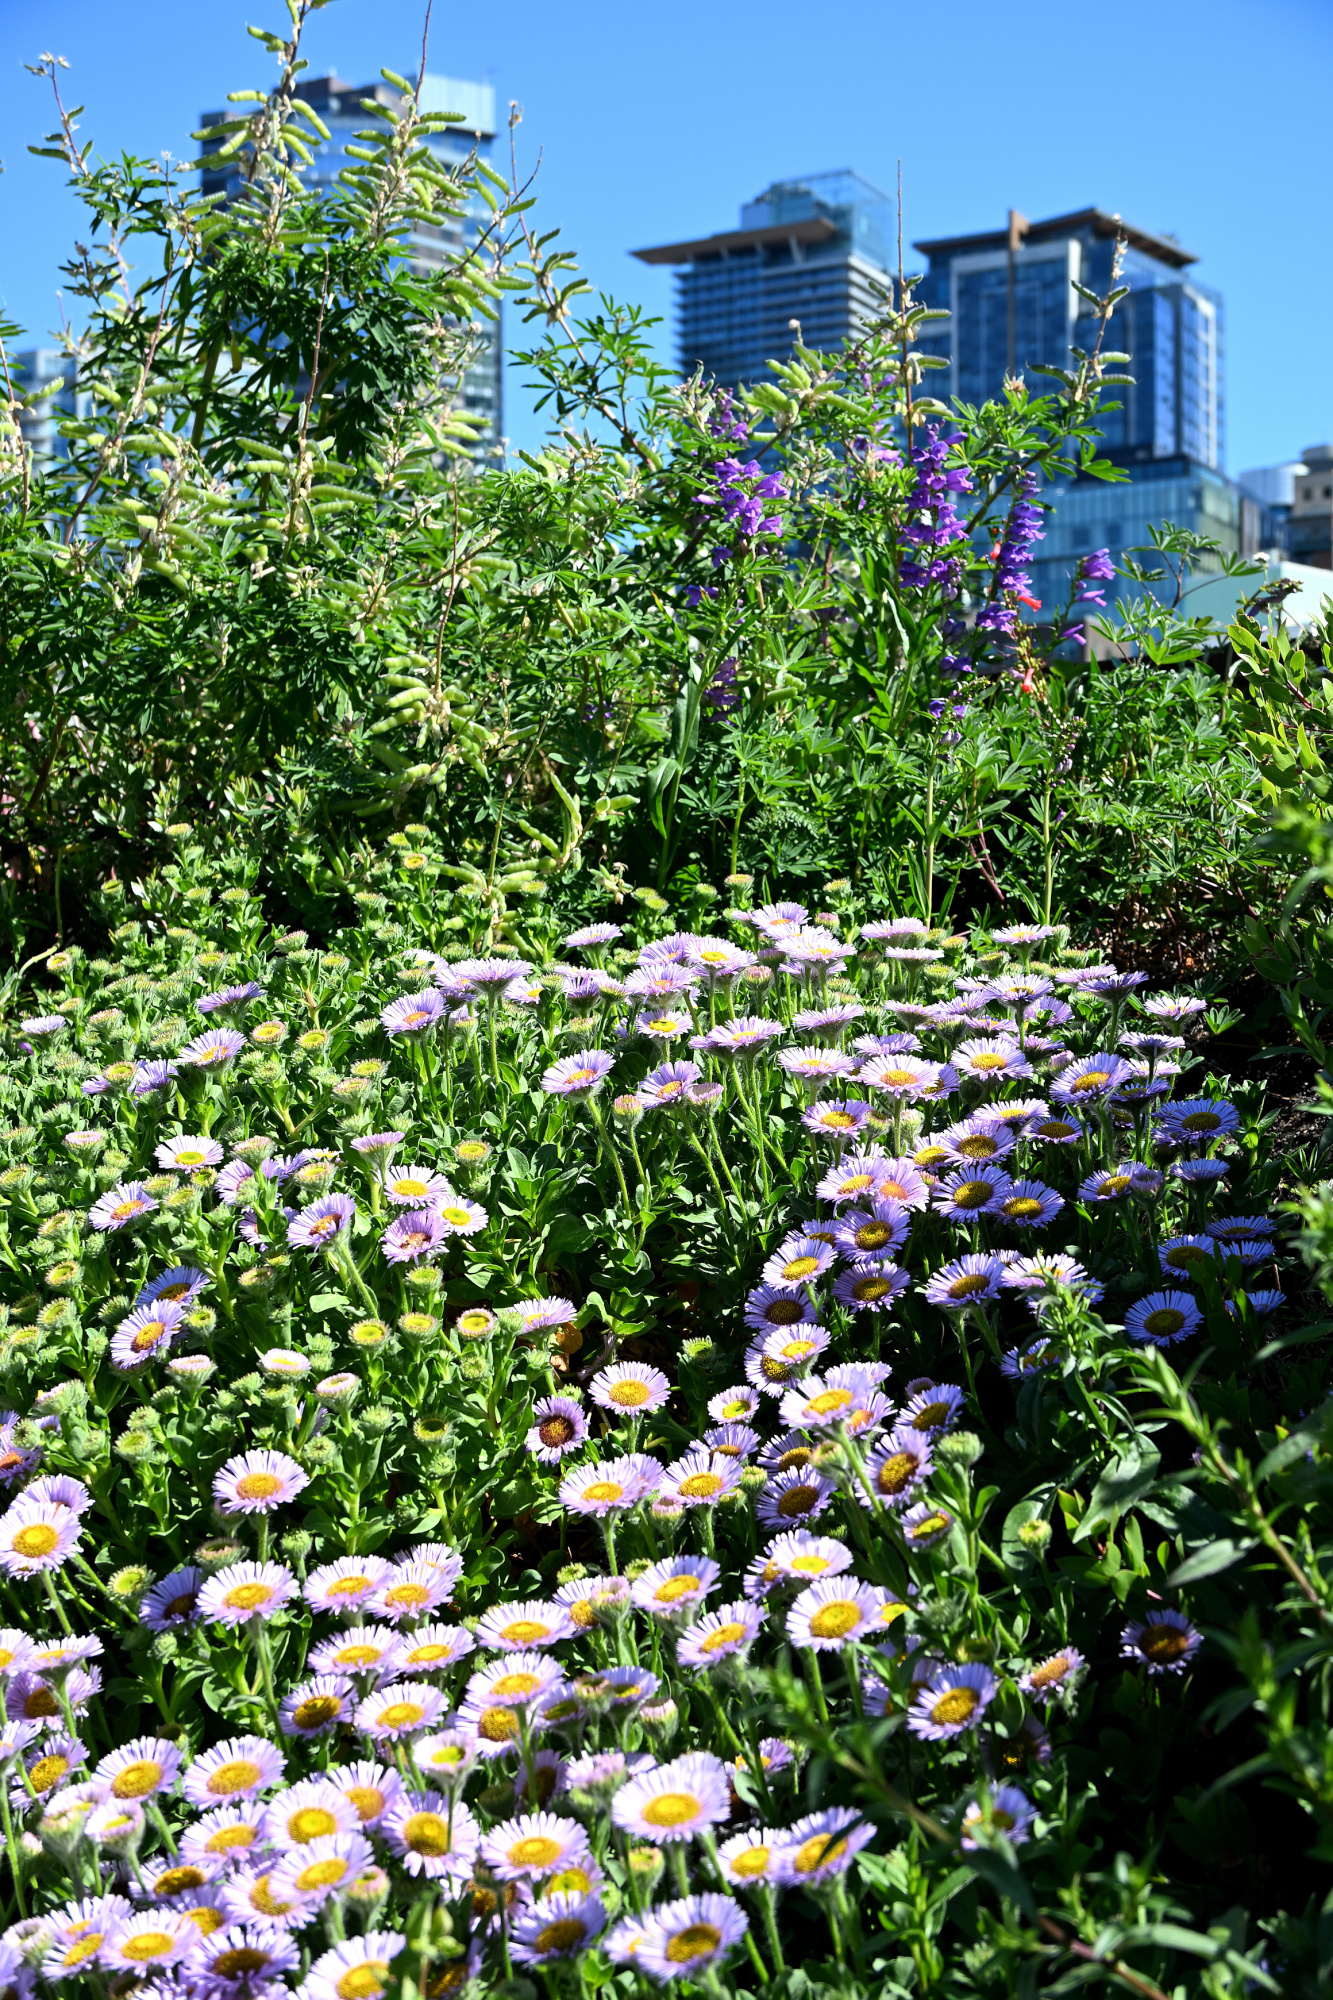
Outside for a moment, Pike Place remembers it has a sky.
Green space, blue sky, and the rare Seattle feeling that the weather is on your side.
1/320s f/6,3 ISO 100/21° 18-140mm f/3,5-6,3 VR f=18mm/27mm
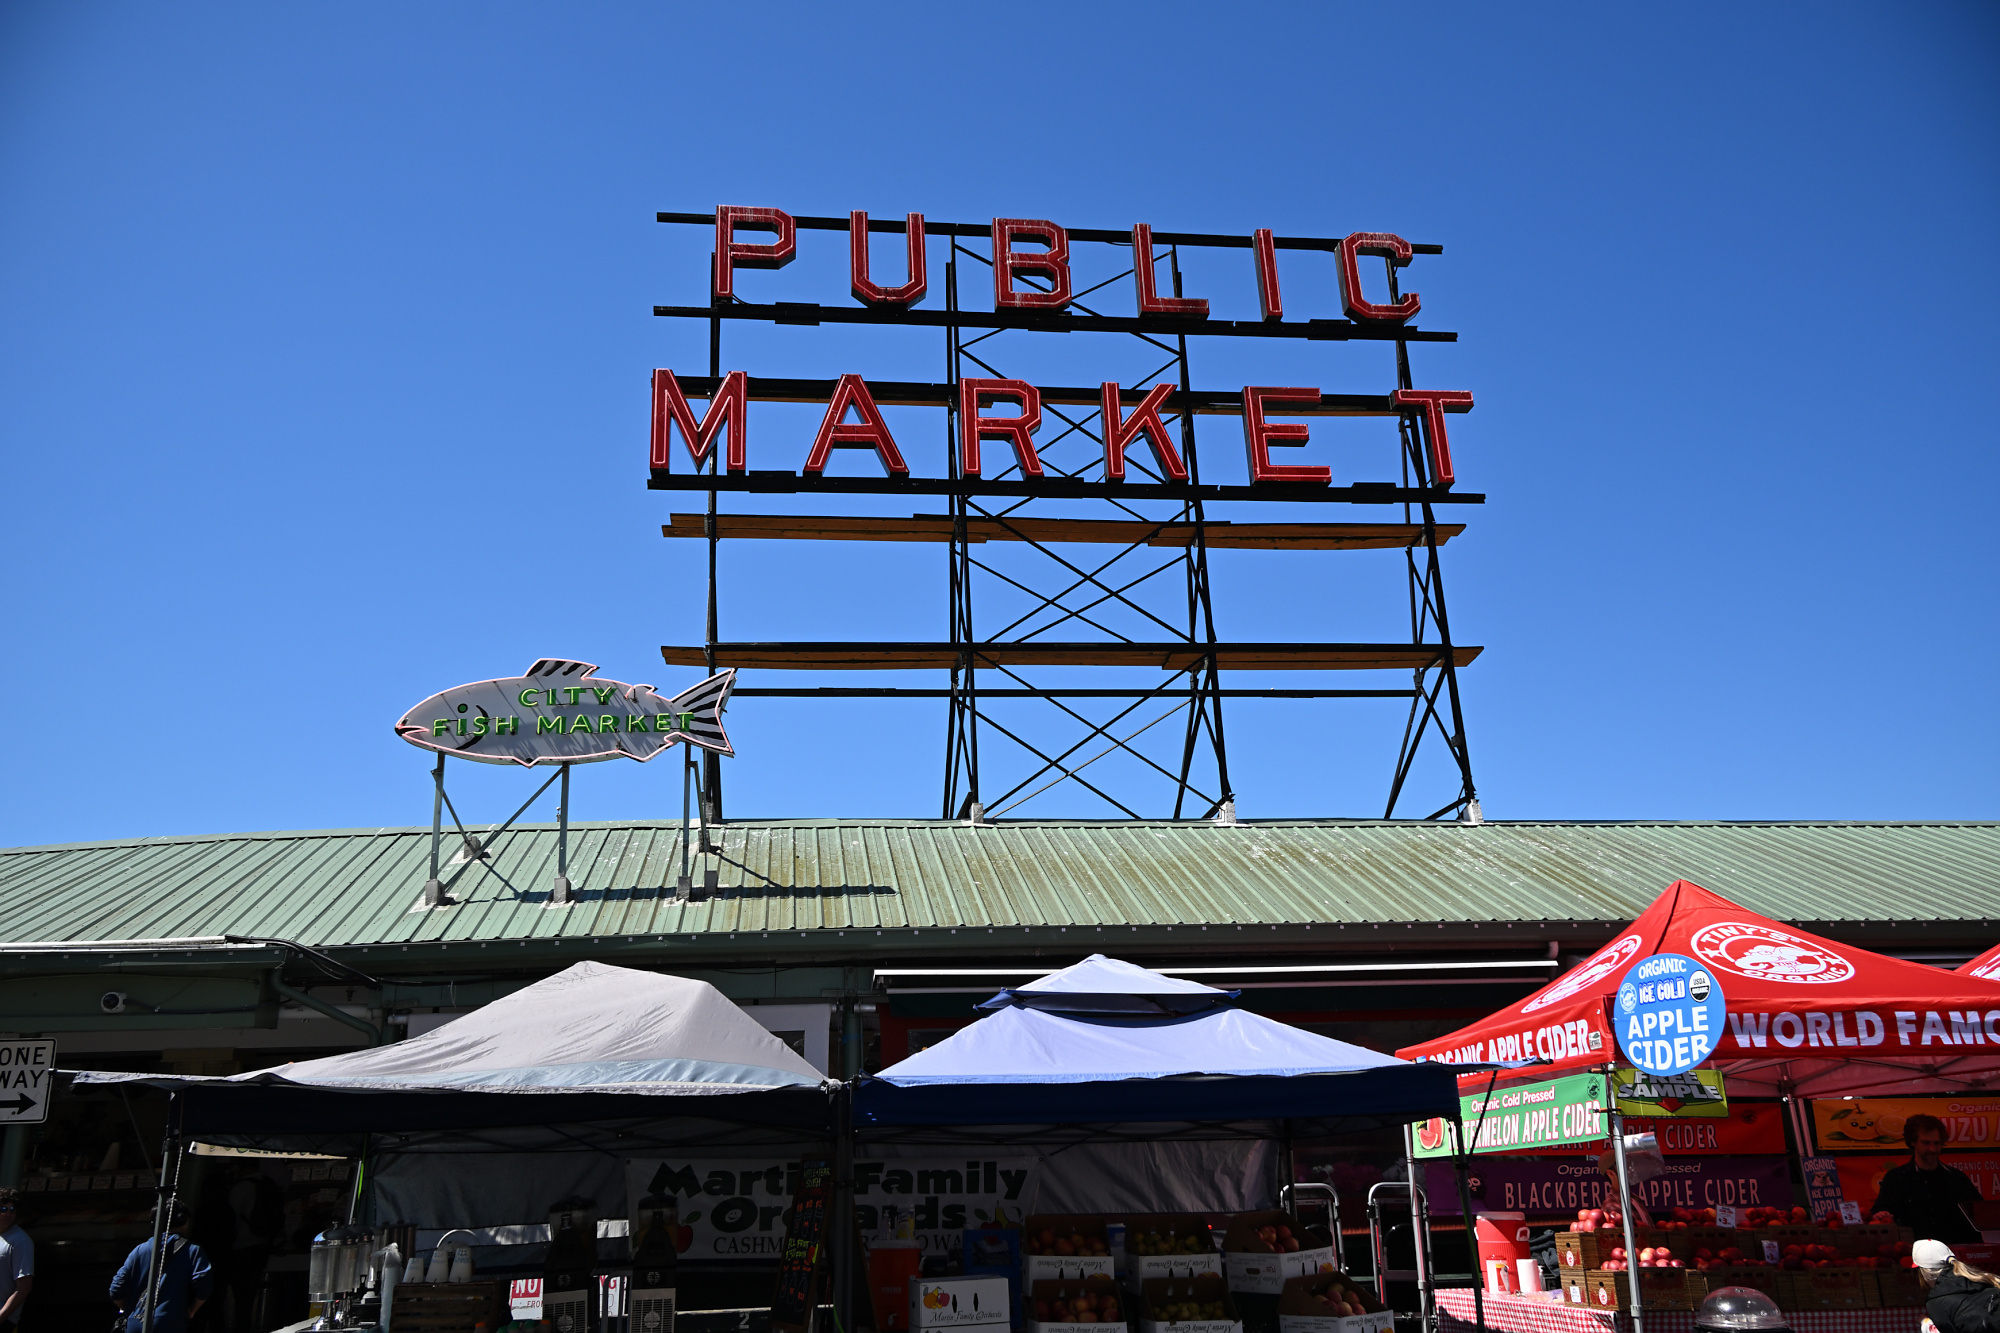
A second sign rises above the hall, making sure nobody forgets where they are.
1/400s f/7,1 ISO 100/21° 18-140mm f/3,5-6,3 VR f=18mm/27mm
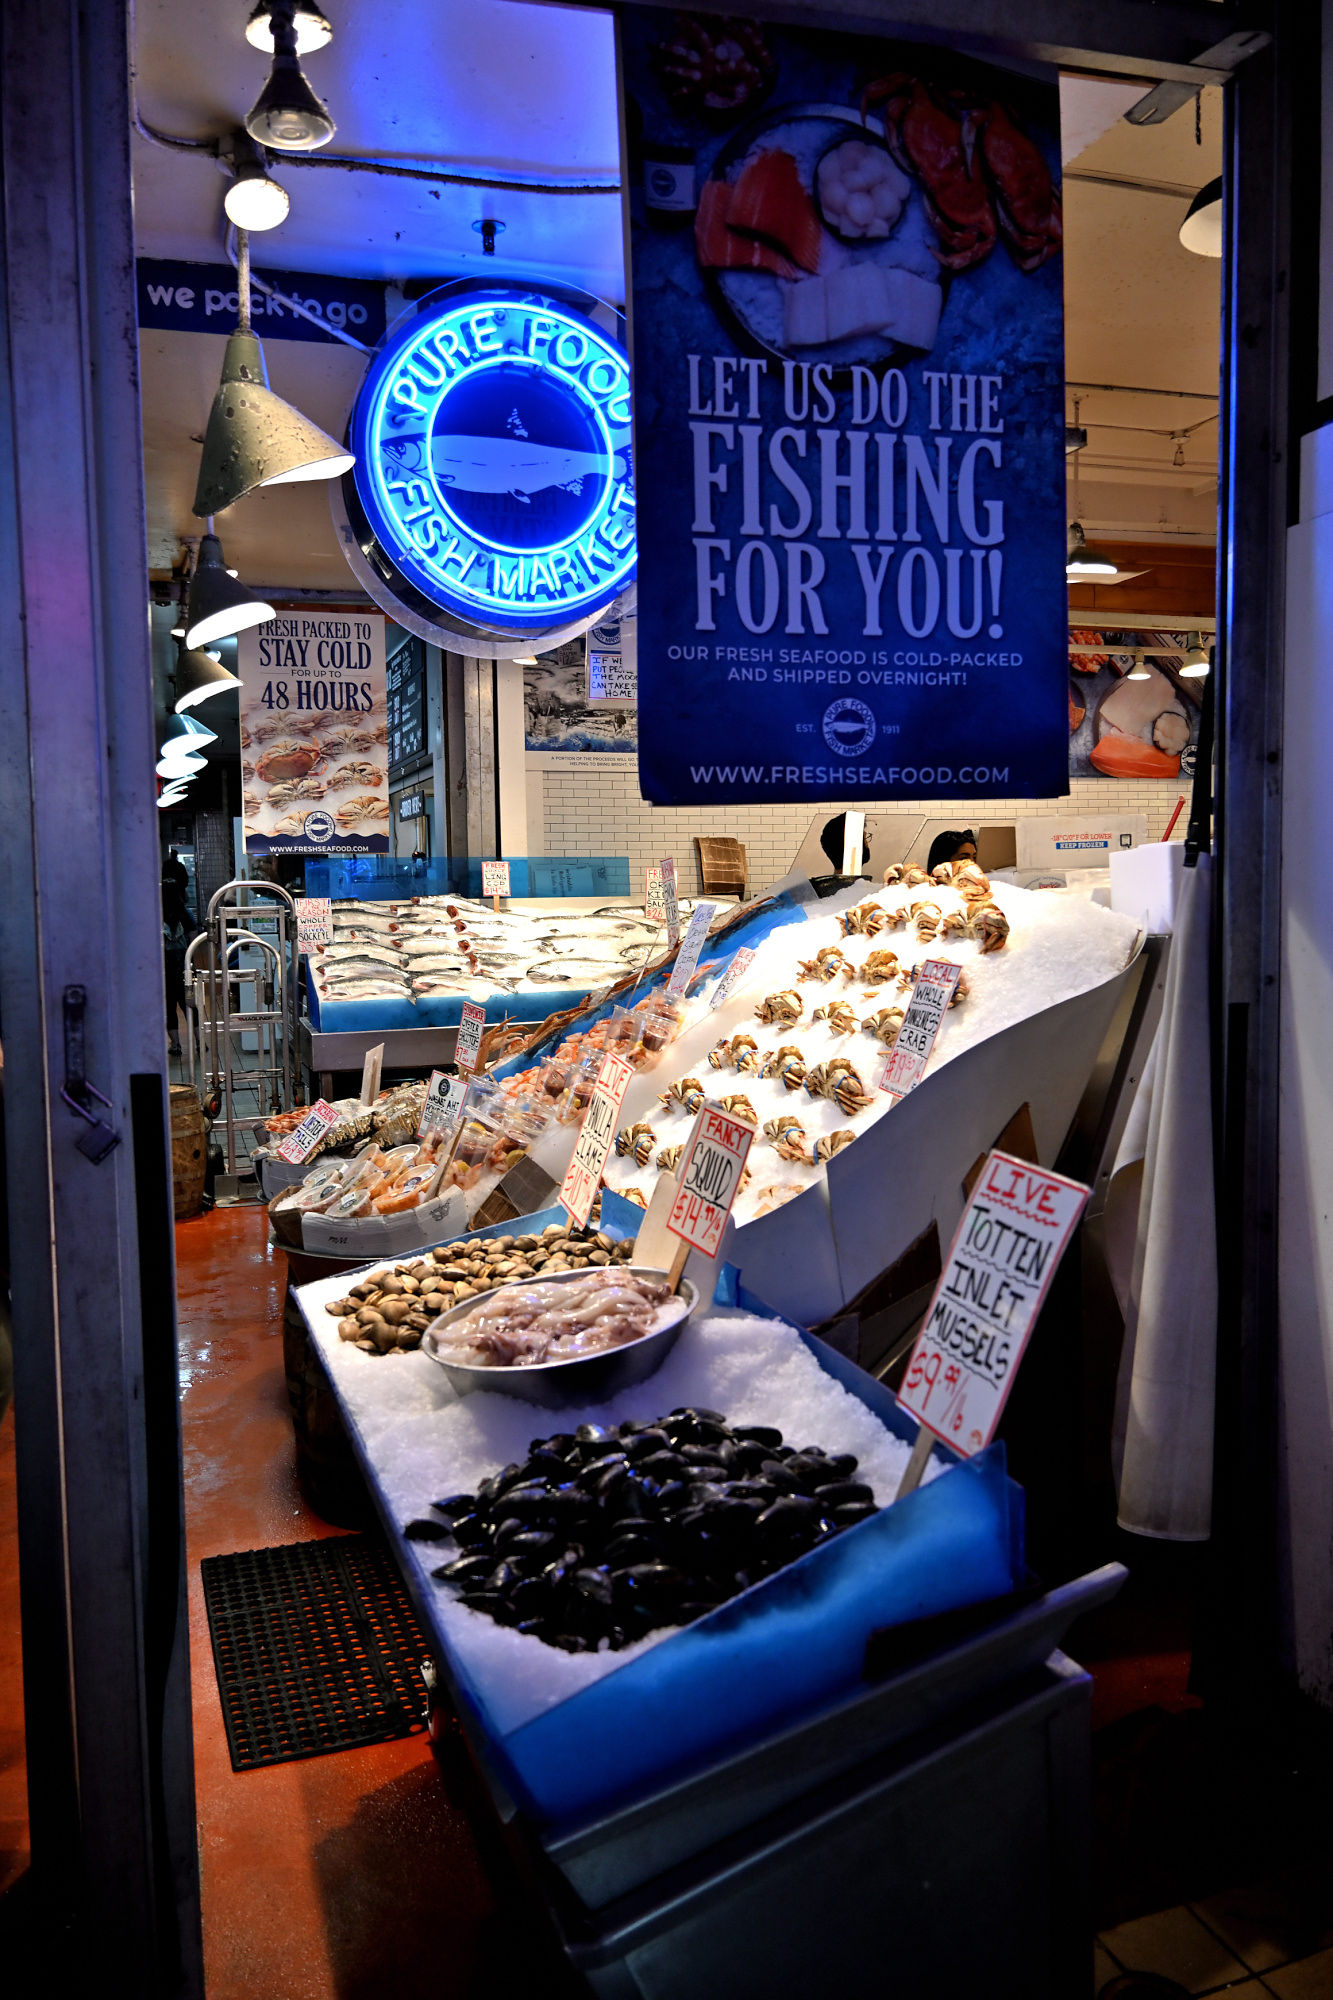
At the fish counter, Pike Place makes its case for the best seafood in the Pacific Northwest.
A fish shop corner doing several jobs at once, with no visible management structure.
1/160s f/3,5 ISO 400/27° 18-140mm f/3,5-6,3 VR f=18mm/27mm
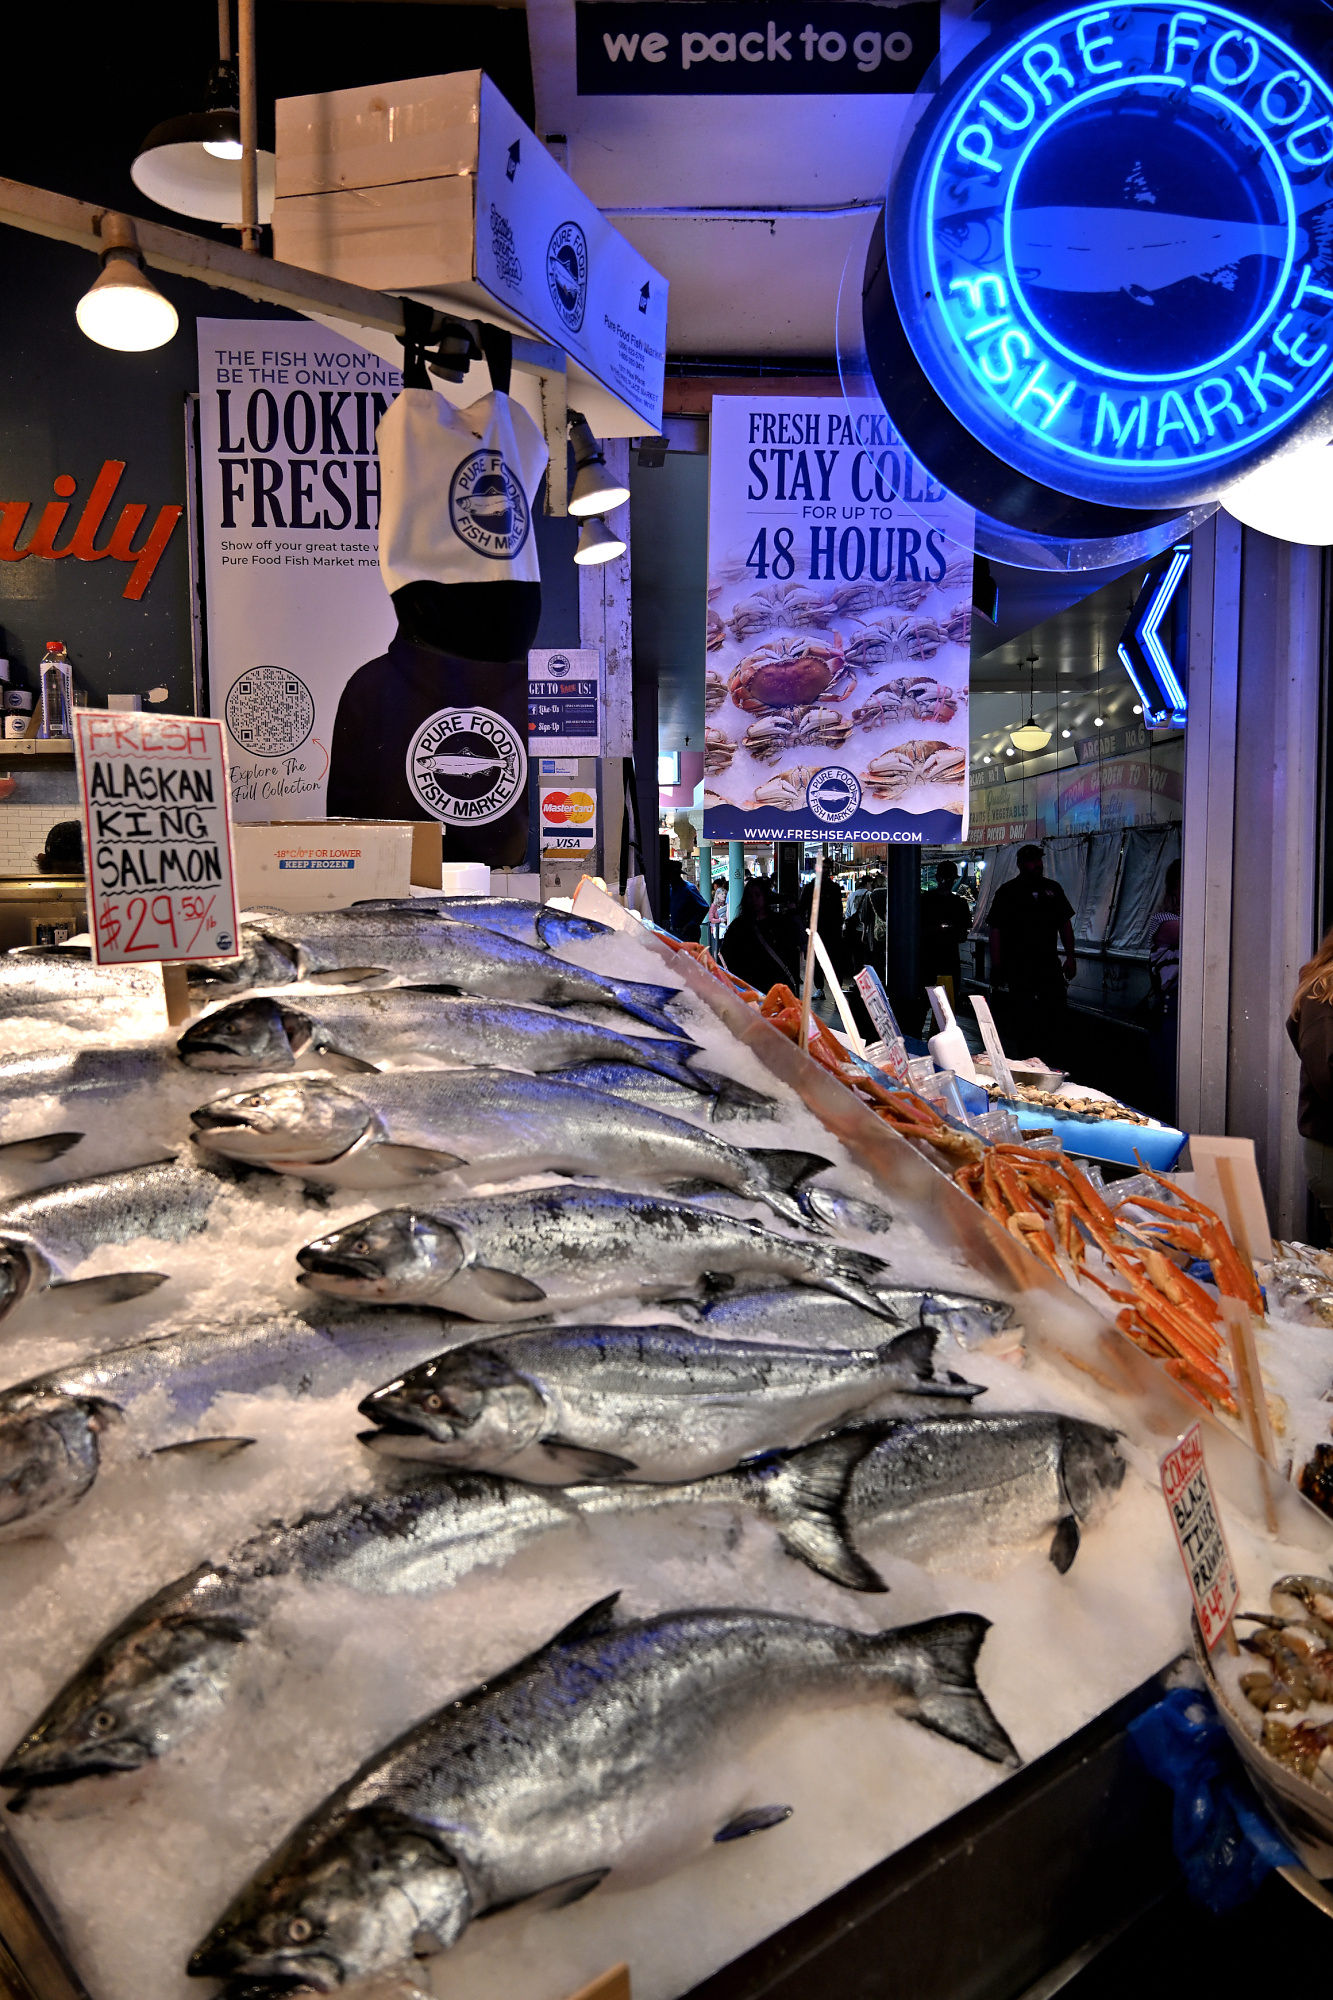
Blue signage, bright counters, and the clear sense that nobody here is under-selling the fish.
1/125s f/3,5 ISO 450 18-140mm f/3,5-6,3 VR f=18mm/27mm
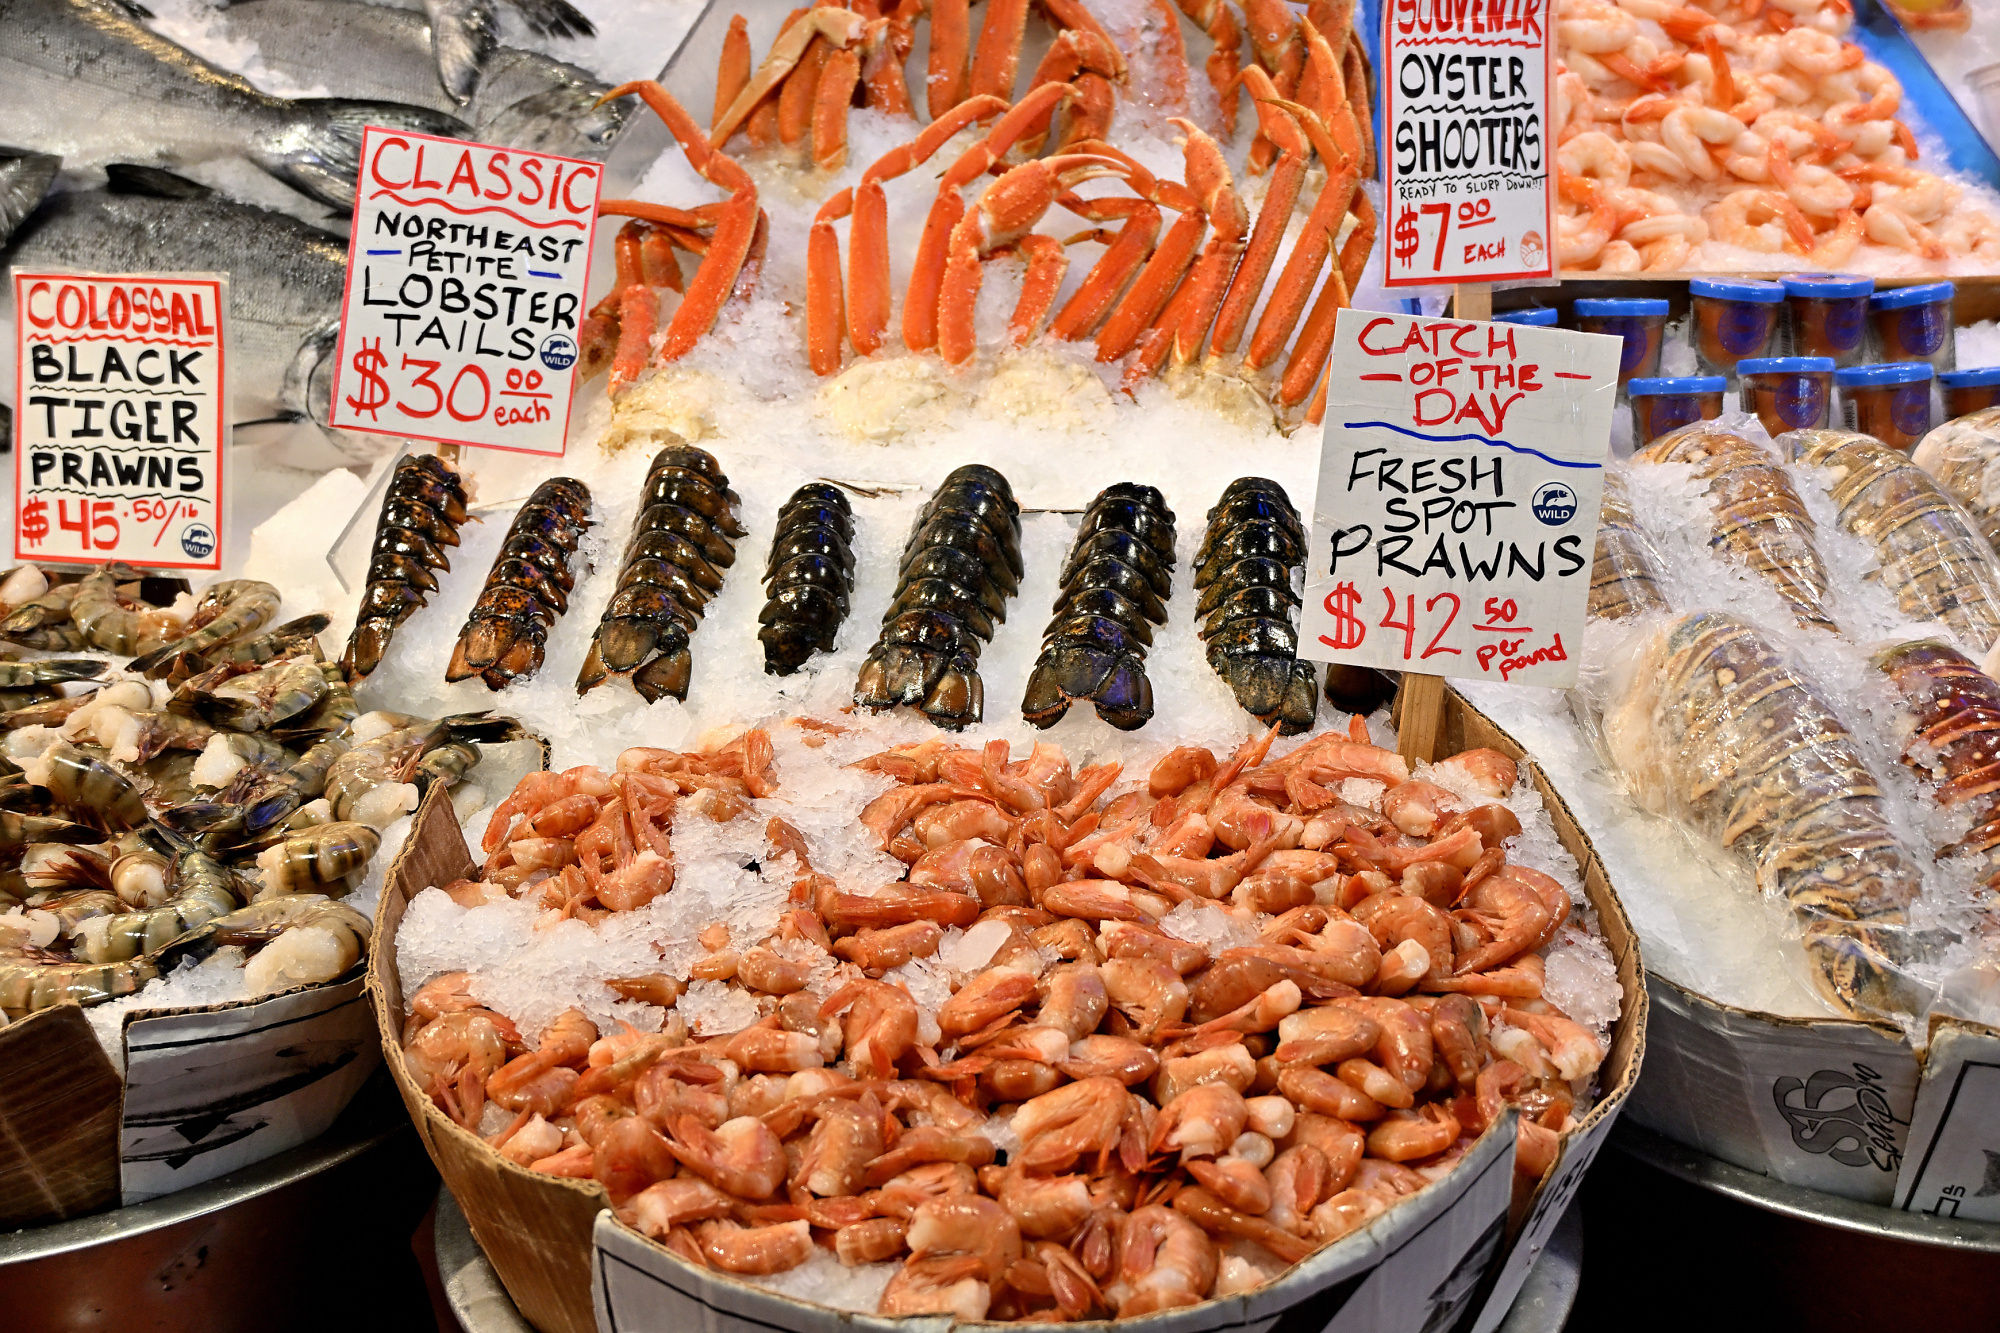
The display is so orderly that the fish almost look like they have appointments.
1/125s f/4 ISO 500/28° 18-140mm f/3,5-6,3 VR f=32mm/48mm
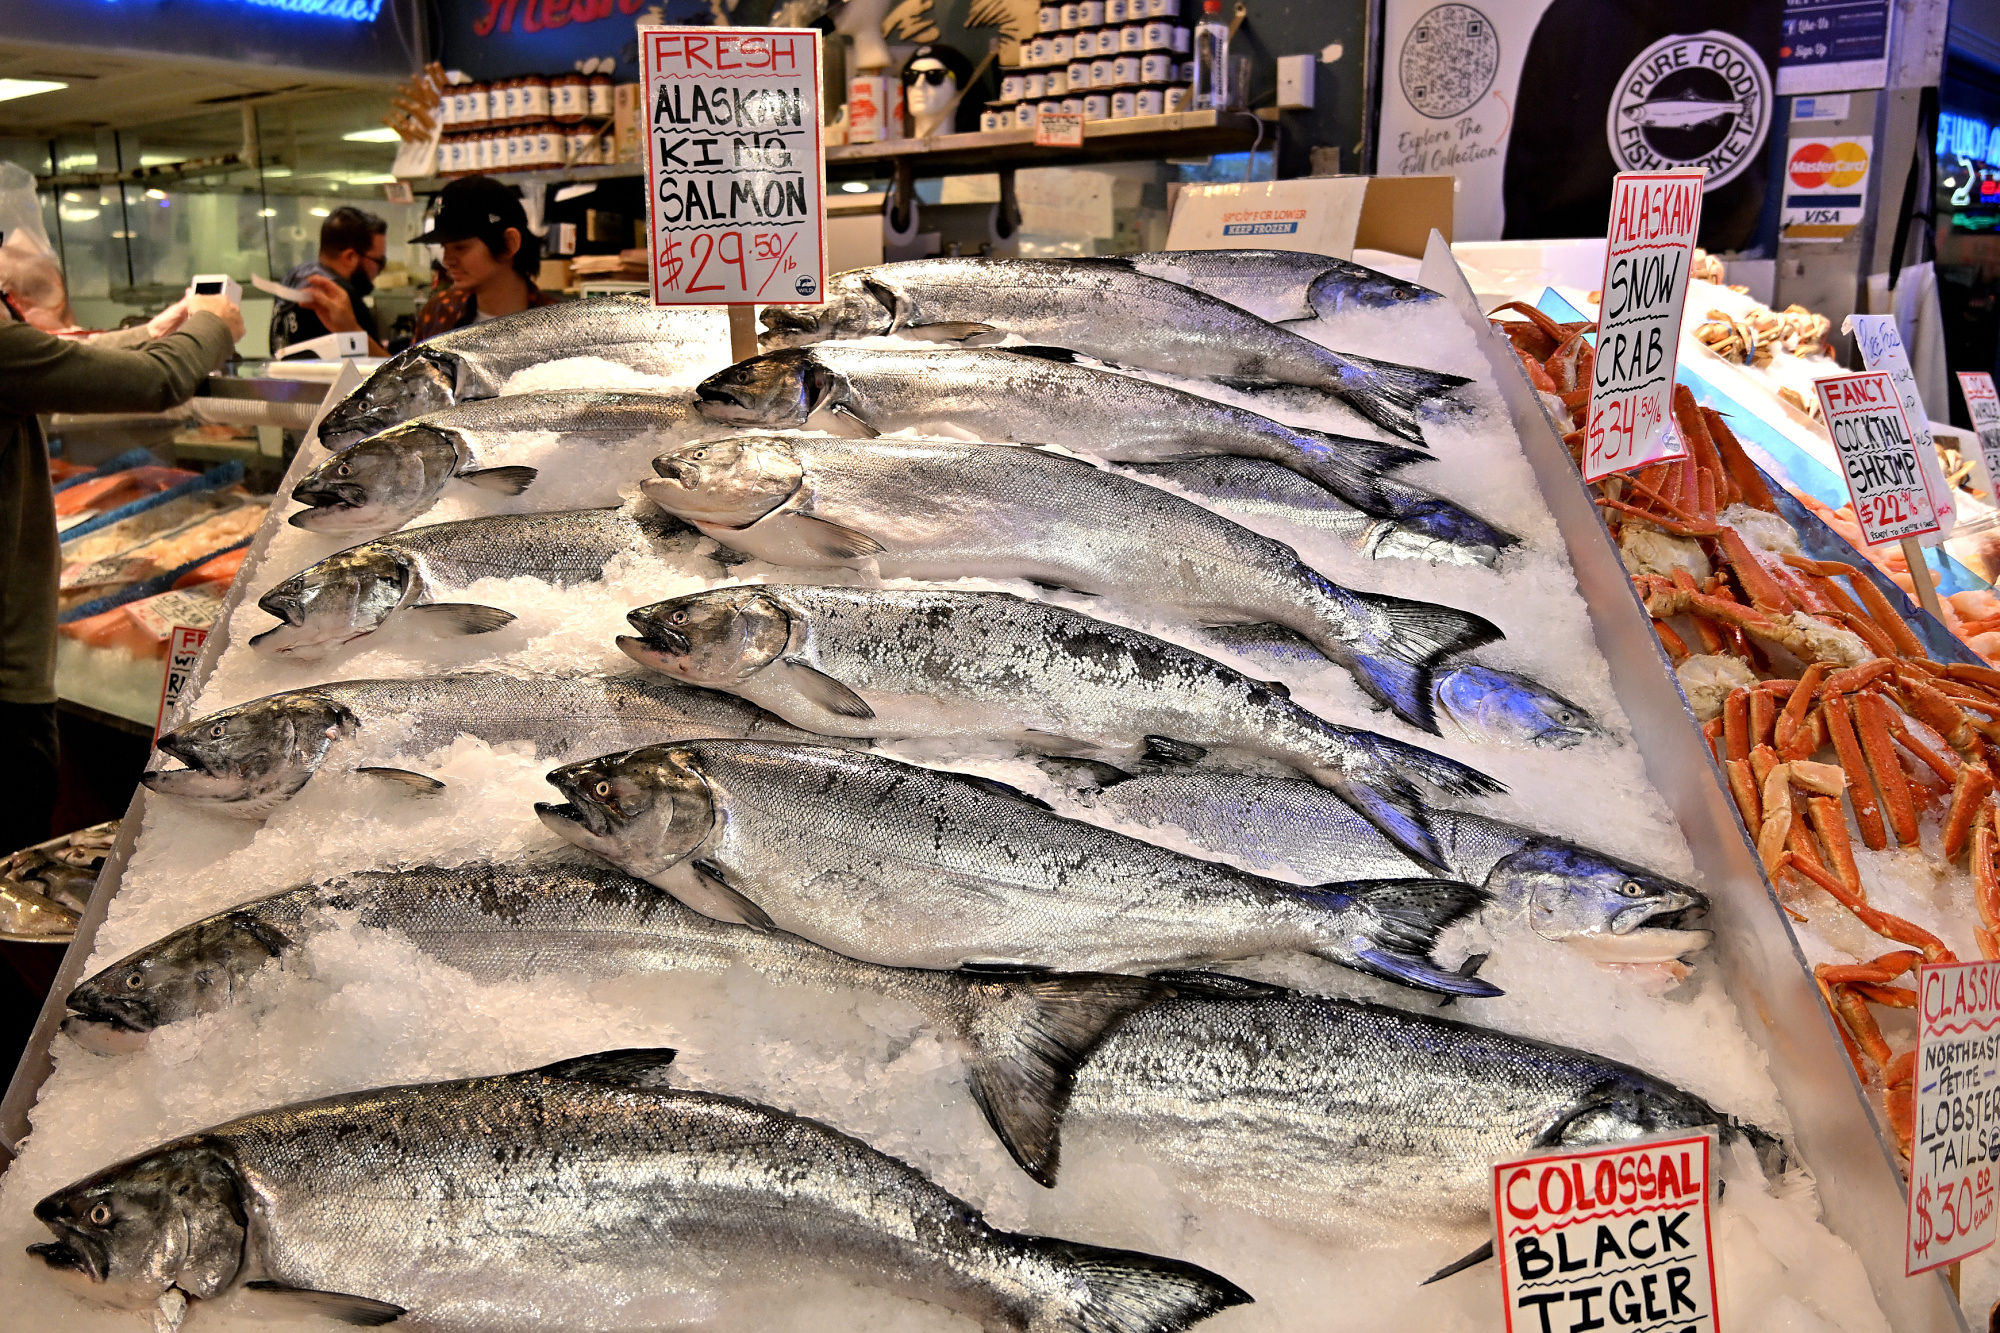
The counter is full, but nothing here seems in a hurry.
1/250s f/3,5 ISO 400/27° 18-140mm f/3,5-6,3 VR f=20mm/30mm
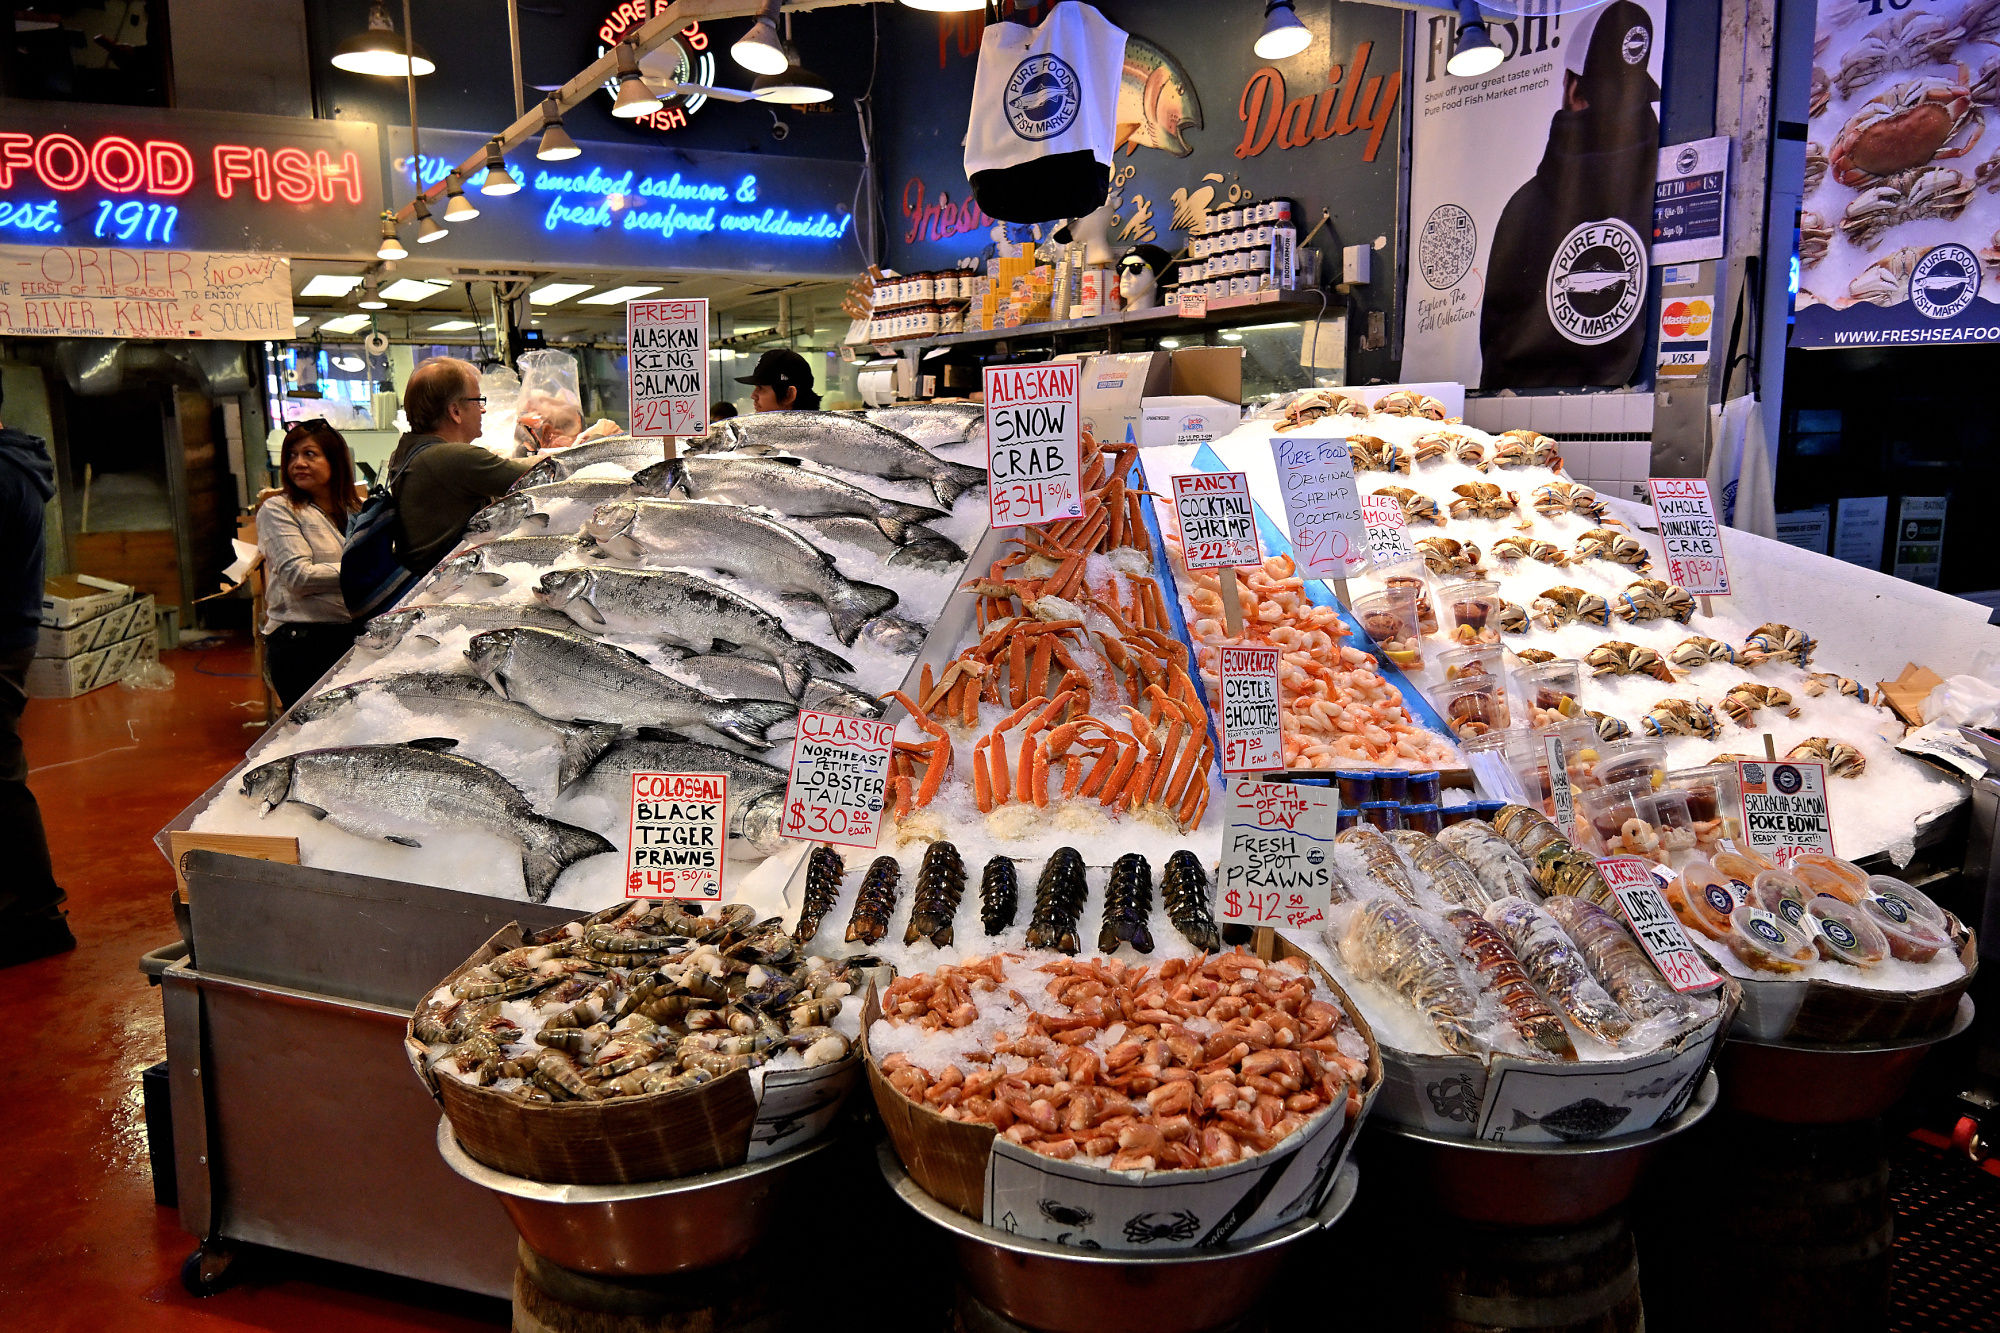
Here the whole display gets its moment, full but still holding itself together.
1/250s f/4 ISO 640/29° 18-140mm f/3,5-6,3 VR f=18mm/27mm
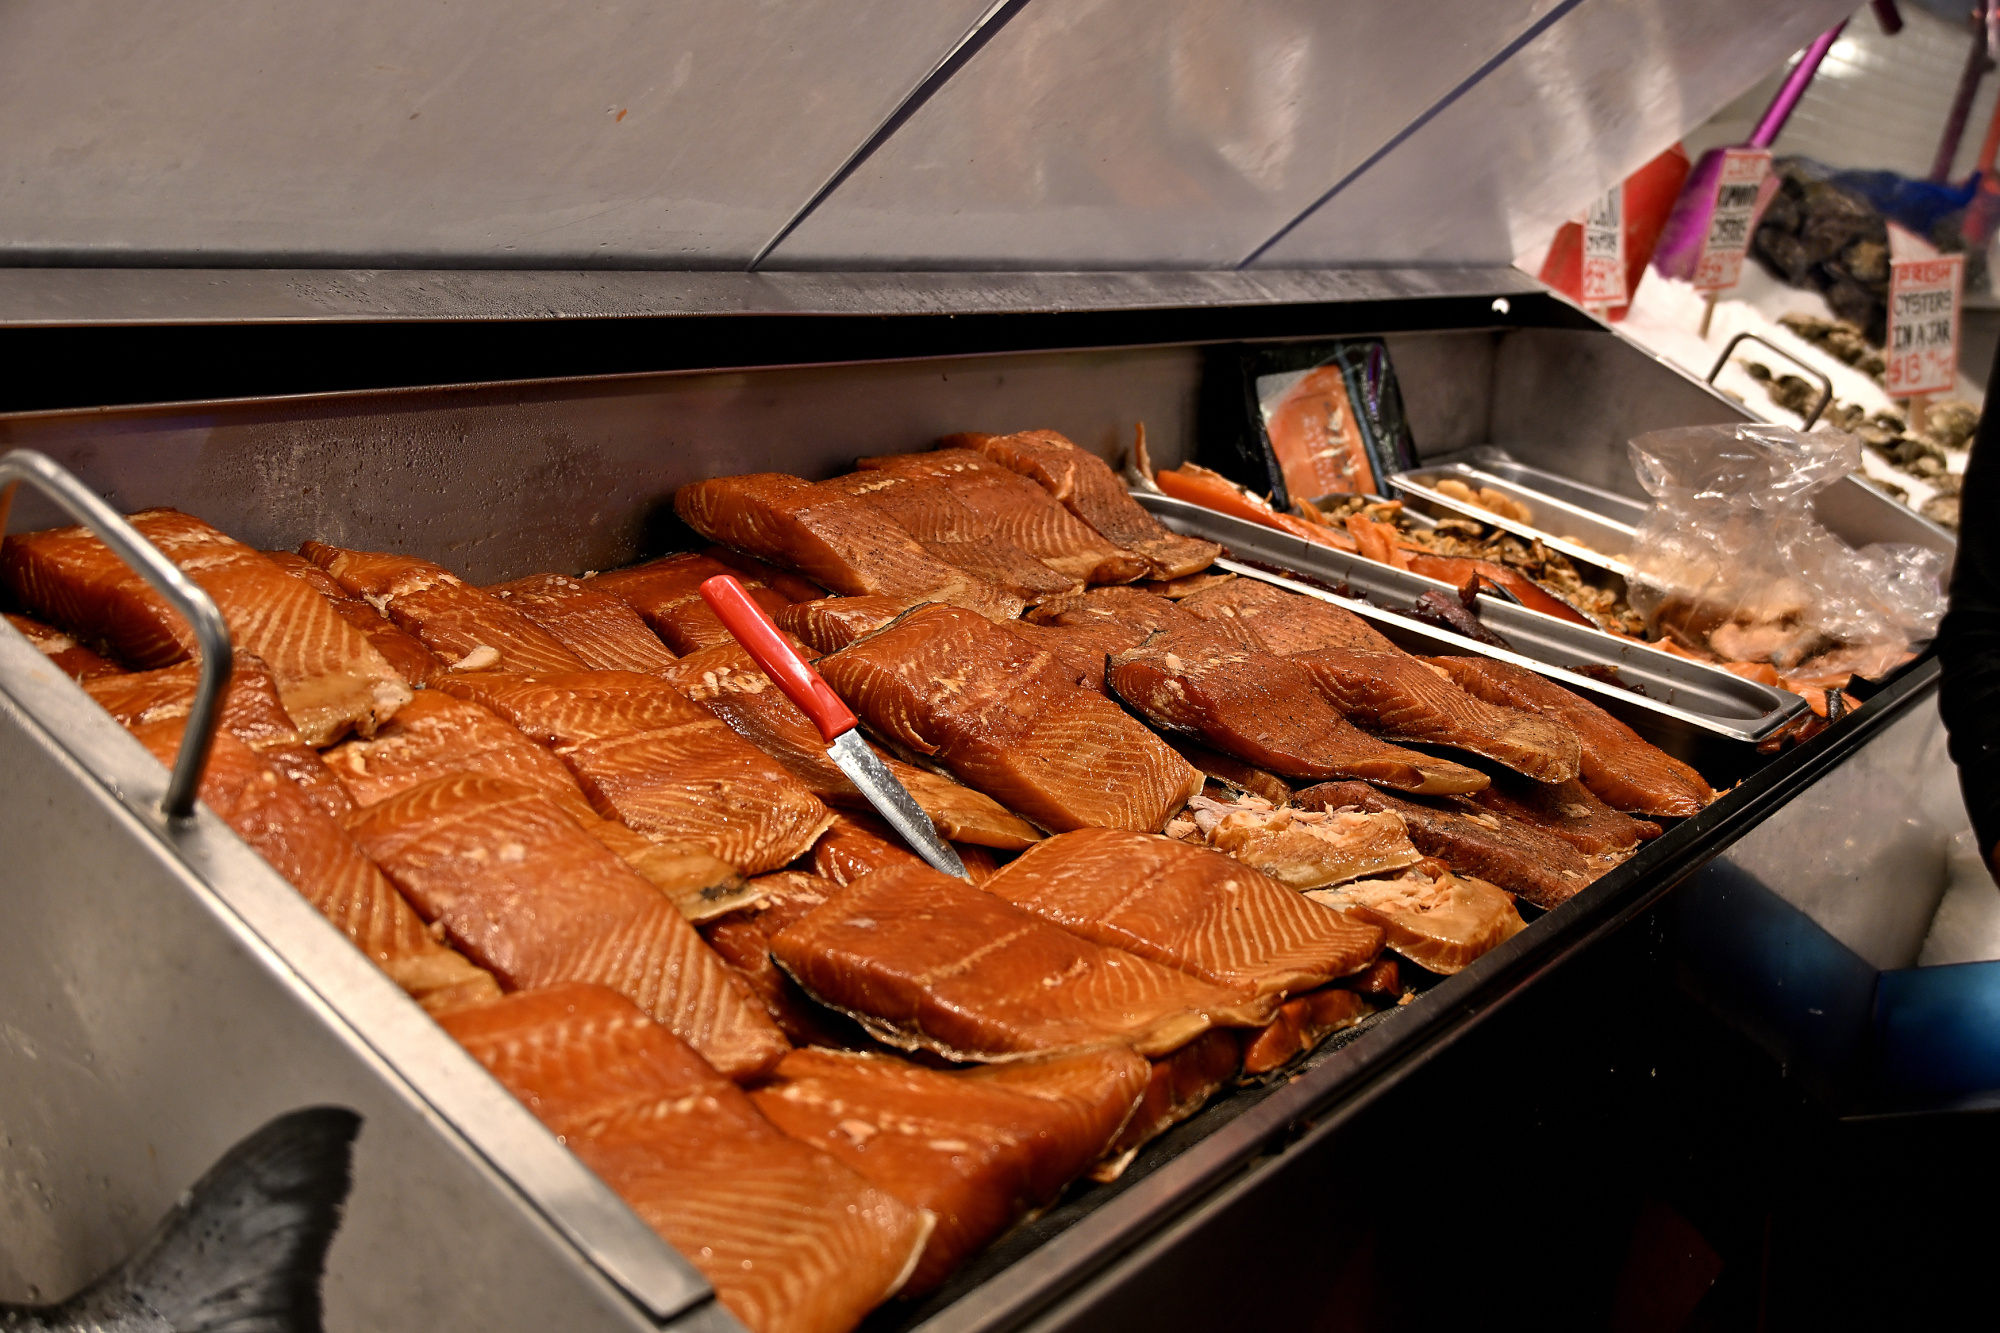
Smoked salmon in tidy rows, with the quiet confidence of being the best there is.
1/160s f/3,8 ISO 400/27° 18-140mm f/3,5-6,3 VR f=26mm/39mm
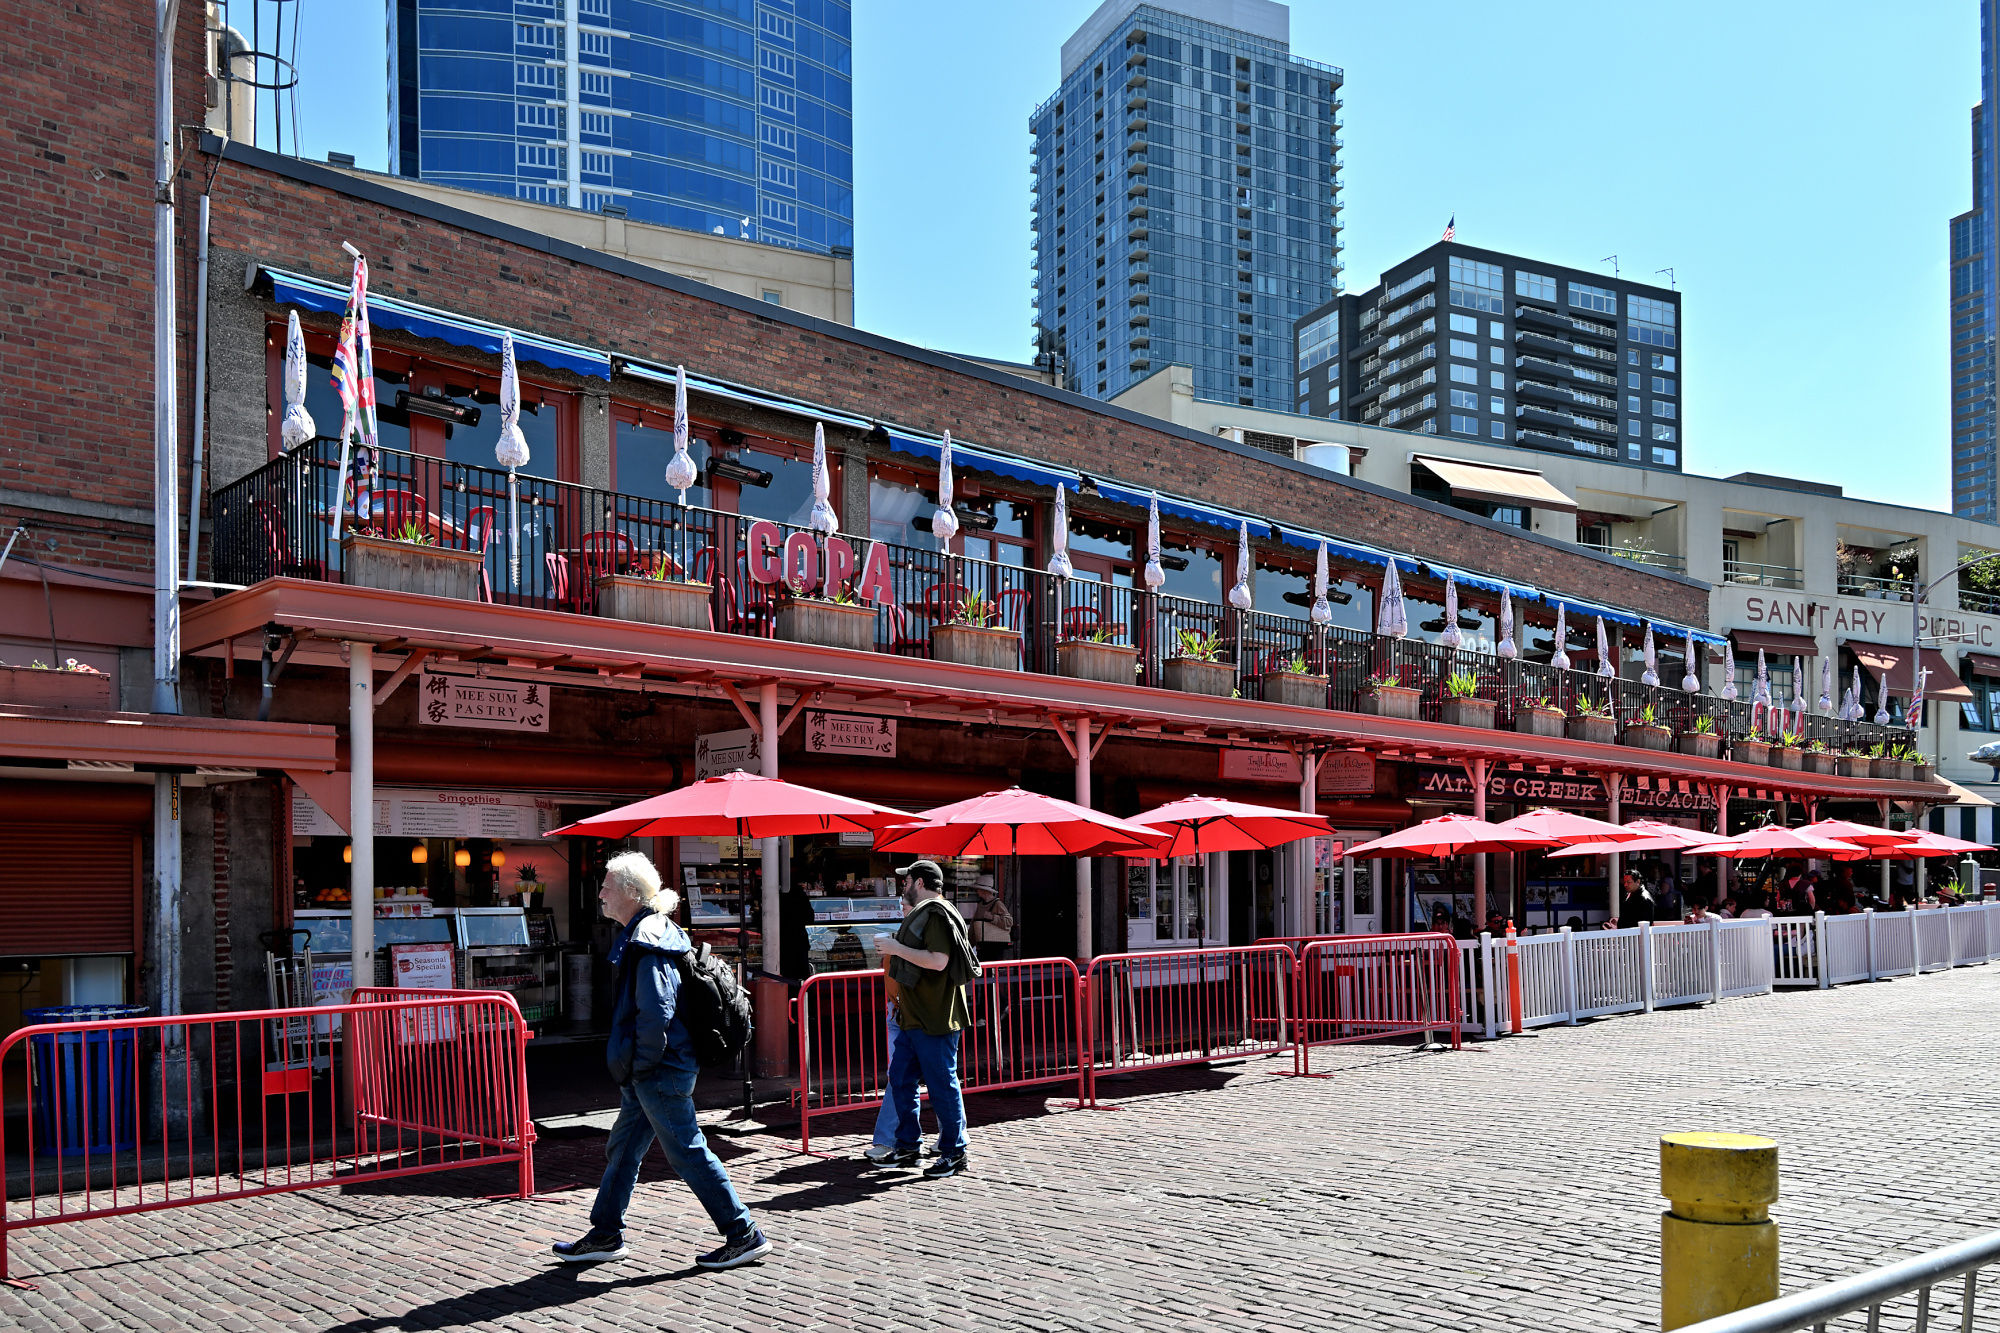
Away from the big fish counter, the market becomes a collection of smaller temptations and useful excuses.
Red umbrellas, brick, and just enough shade to make the street feel briefly organized. Hidden in plain sight is a weekend refrain that has been part of this corner for decades.
1/250s f/5,6 ISO 110 18-140mm f/3,5-6,3 VR f=18mm/27mm
These Italian deli masterpieces wait here before their turn on the plate, already the best reason to come back.
1/125s f/4,2 ISO 900 18-140mm f/3,5-6,3 VR f=34mm/51mm
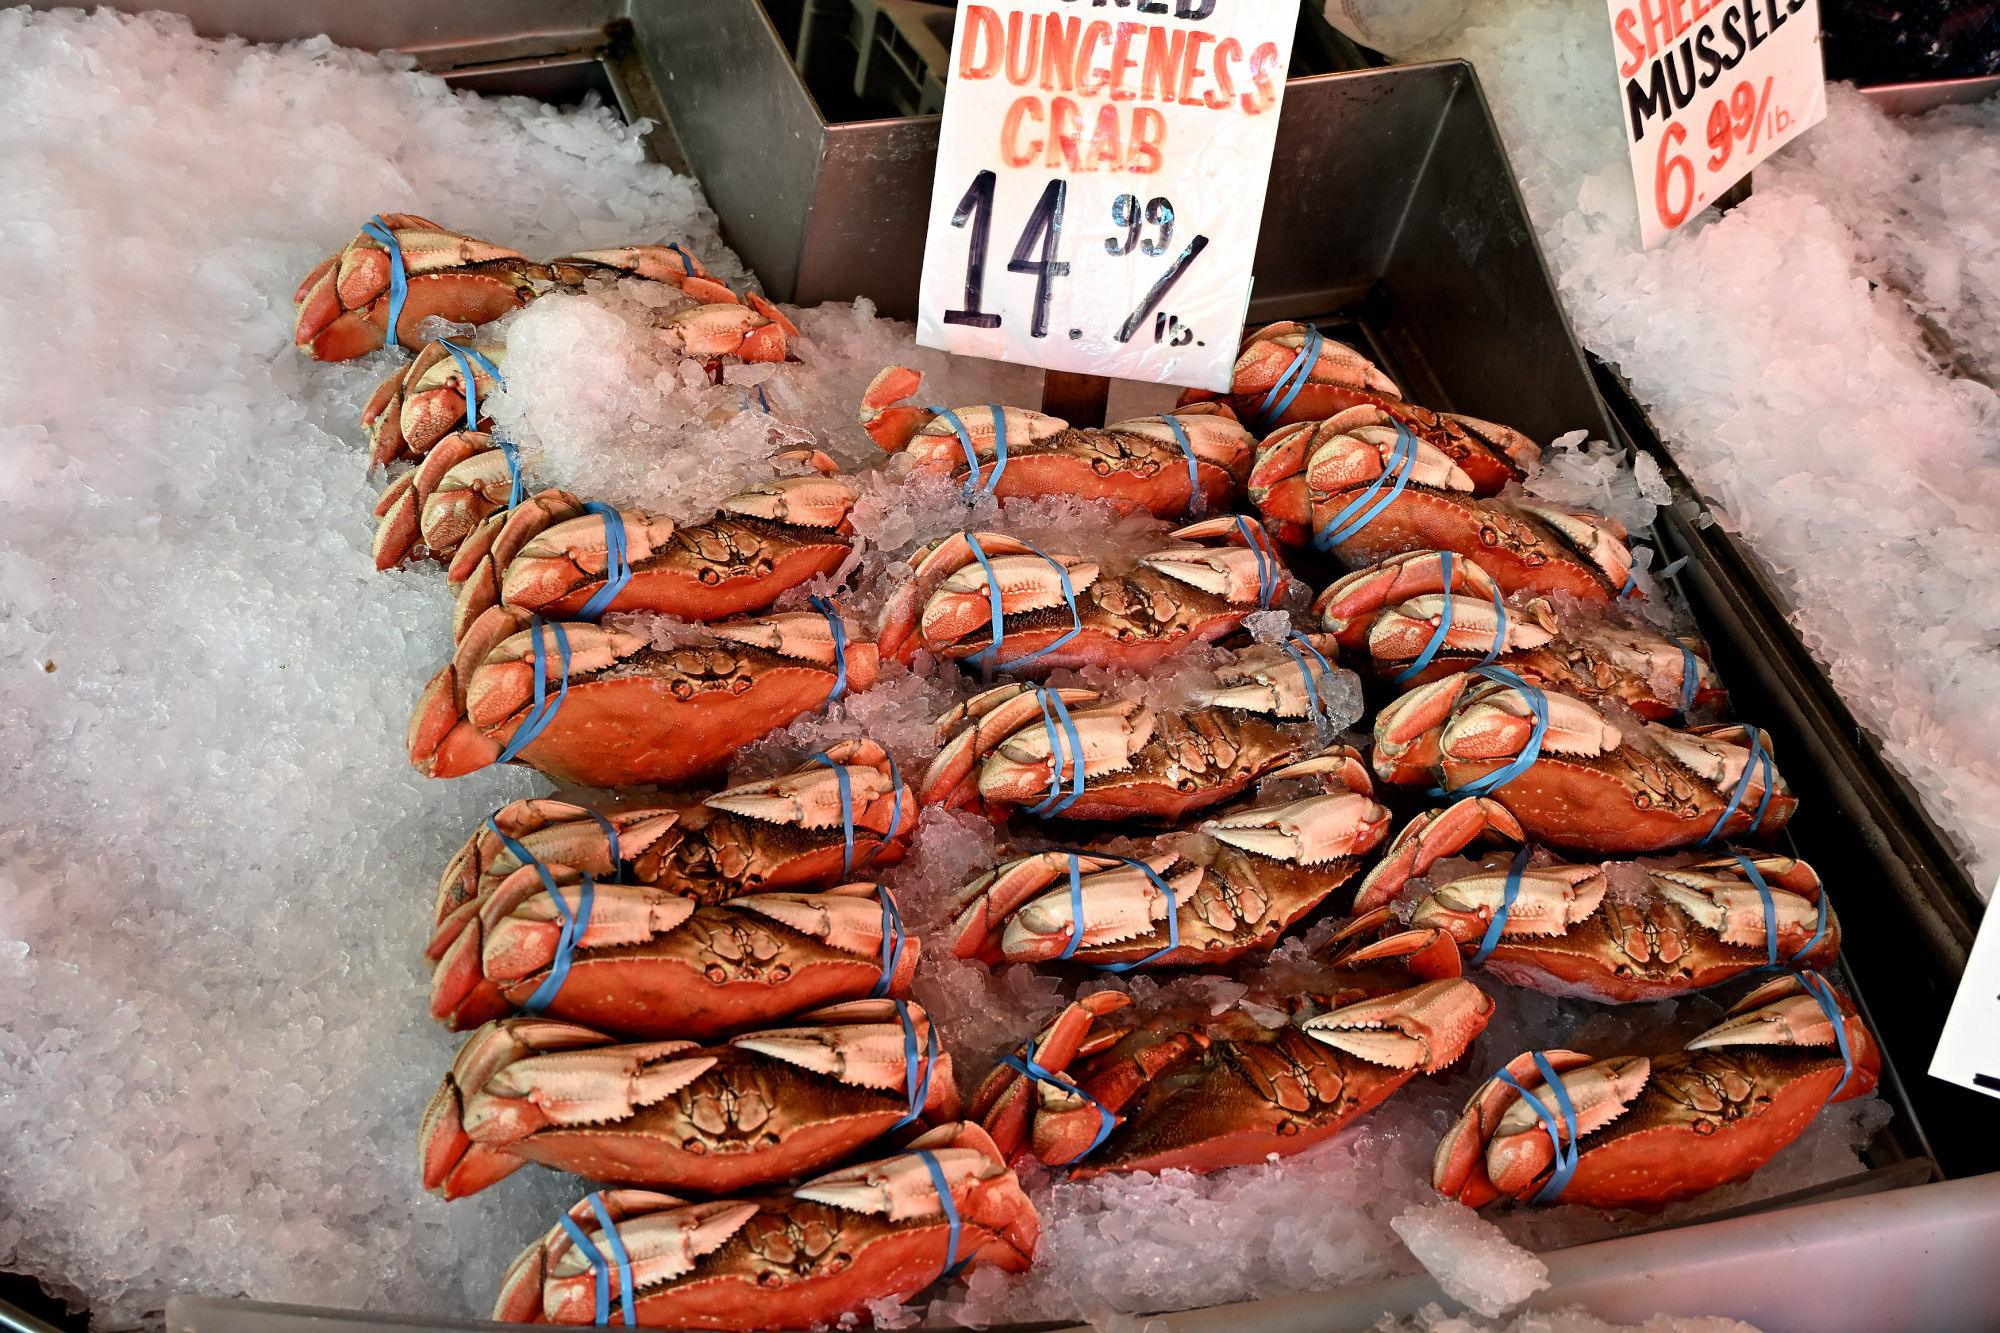
Another fish counter, because Pike Place apparently believes one seafood argument is not enough. The crabs look like they are waiting for a sponge, a starfish, and a squirrel to settle the business plan.
1/125s f/4 ISO 400/27° 18-140mm f/3,5-6,3 VR f=30mm/45mm
This is the kind of deli where leaving empty-handed starts to look like a personal failure.
1/250s f/4 ISO 400/27° 18-140mm f/3,5-6,3 VR f=18mm/27mm
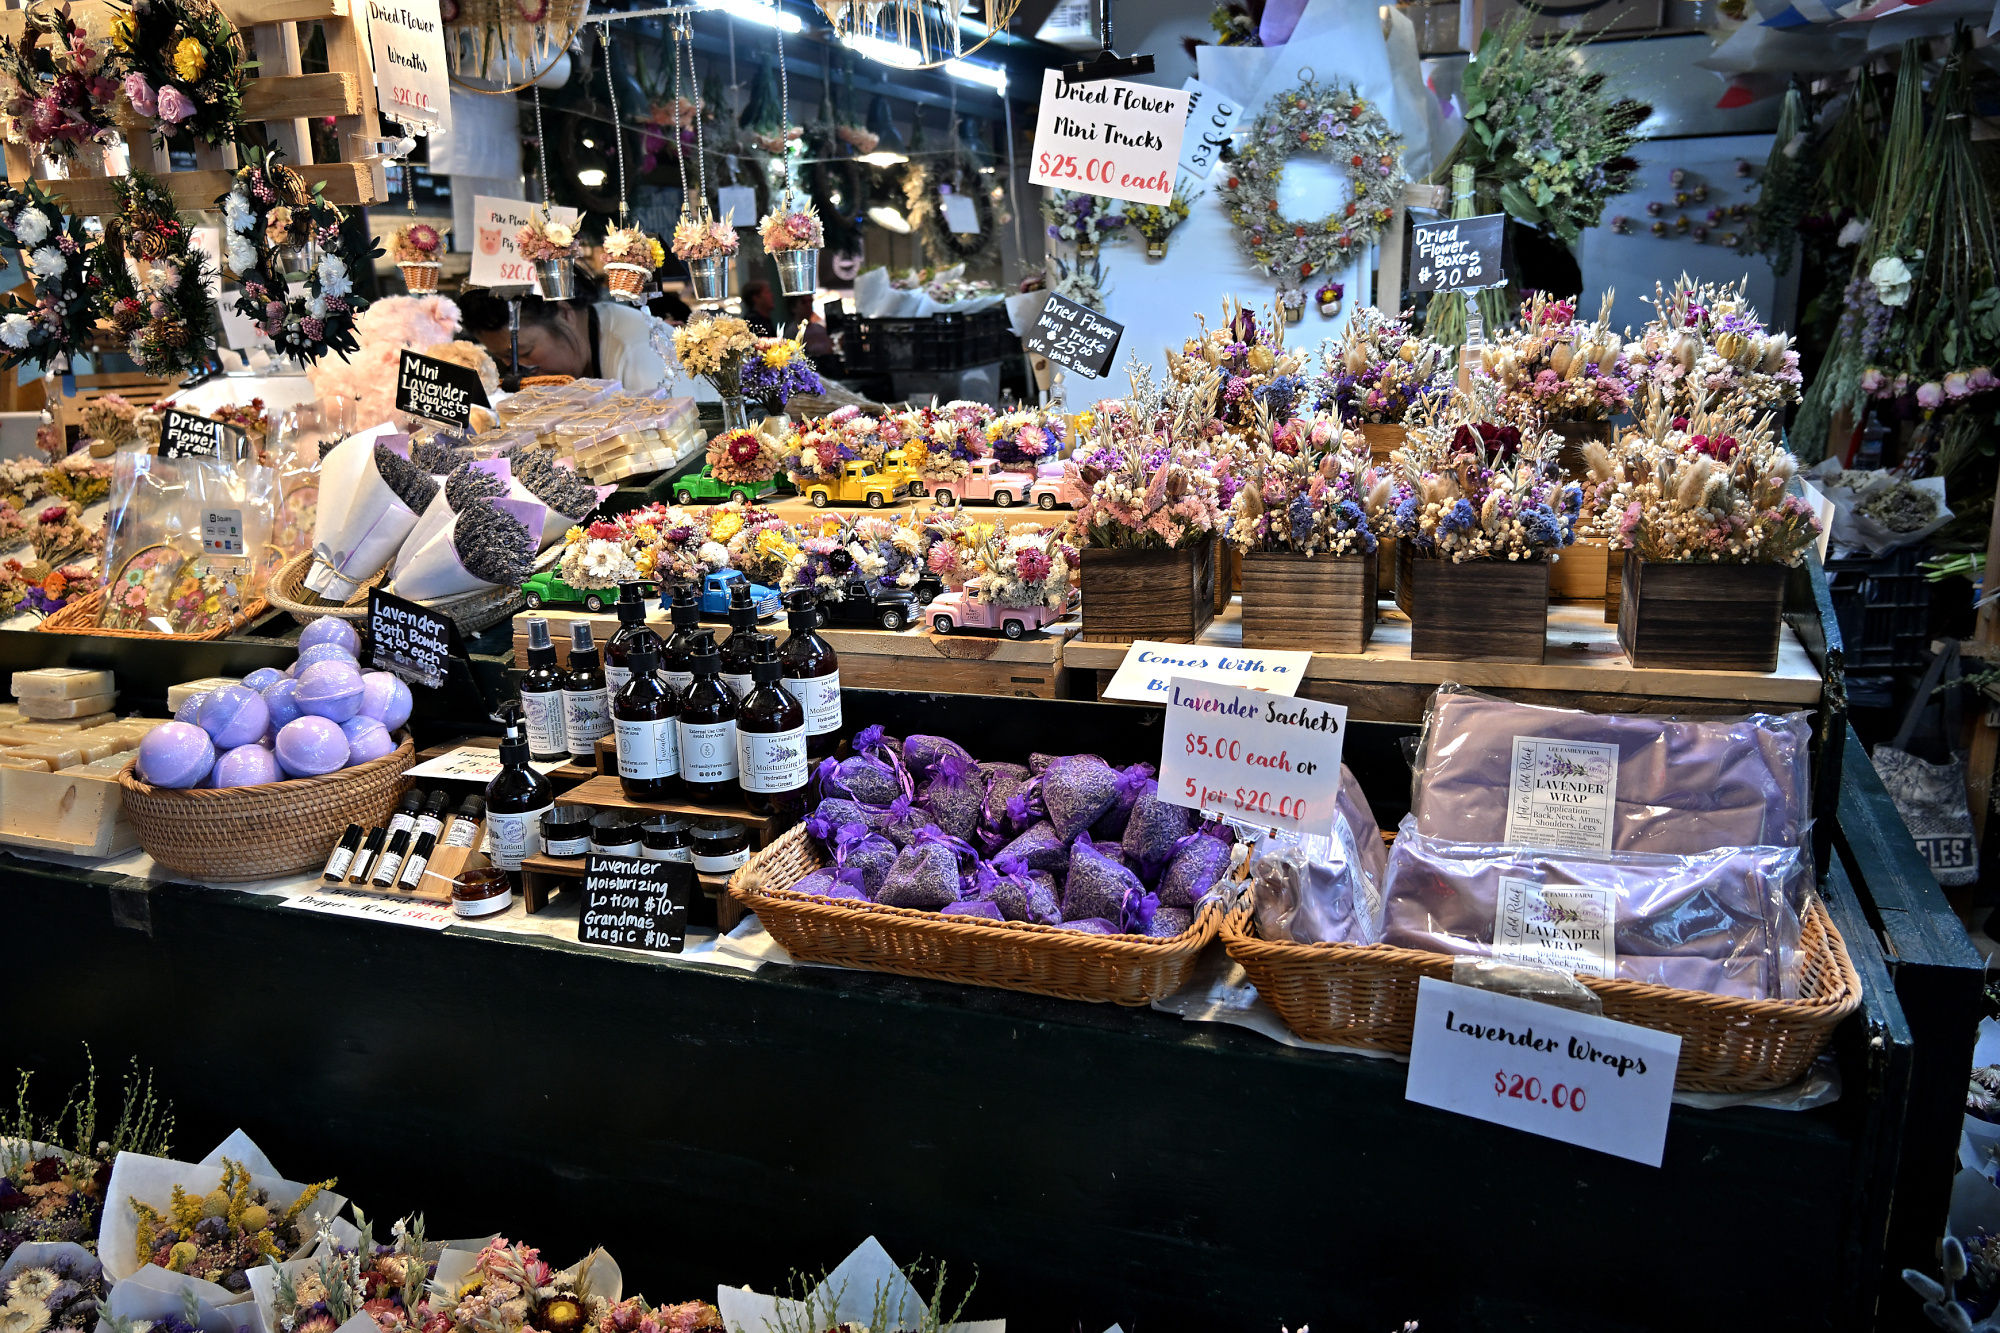
Soap on one side, honey on the other, and somehow the arrangement makes perfect market sense.
1/125s f/3,8 ISO 400/27° 18-140mm f/3,5-6,3 VR f=26mm/39mm

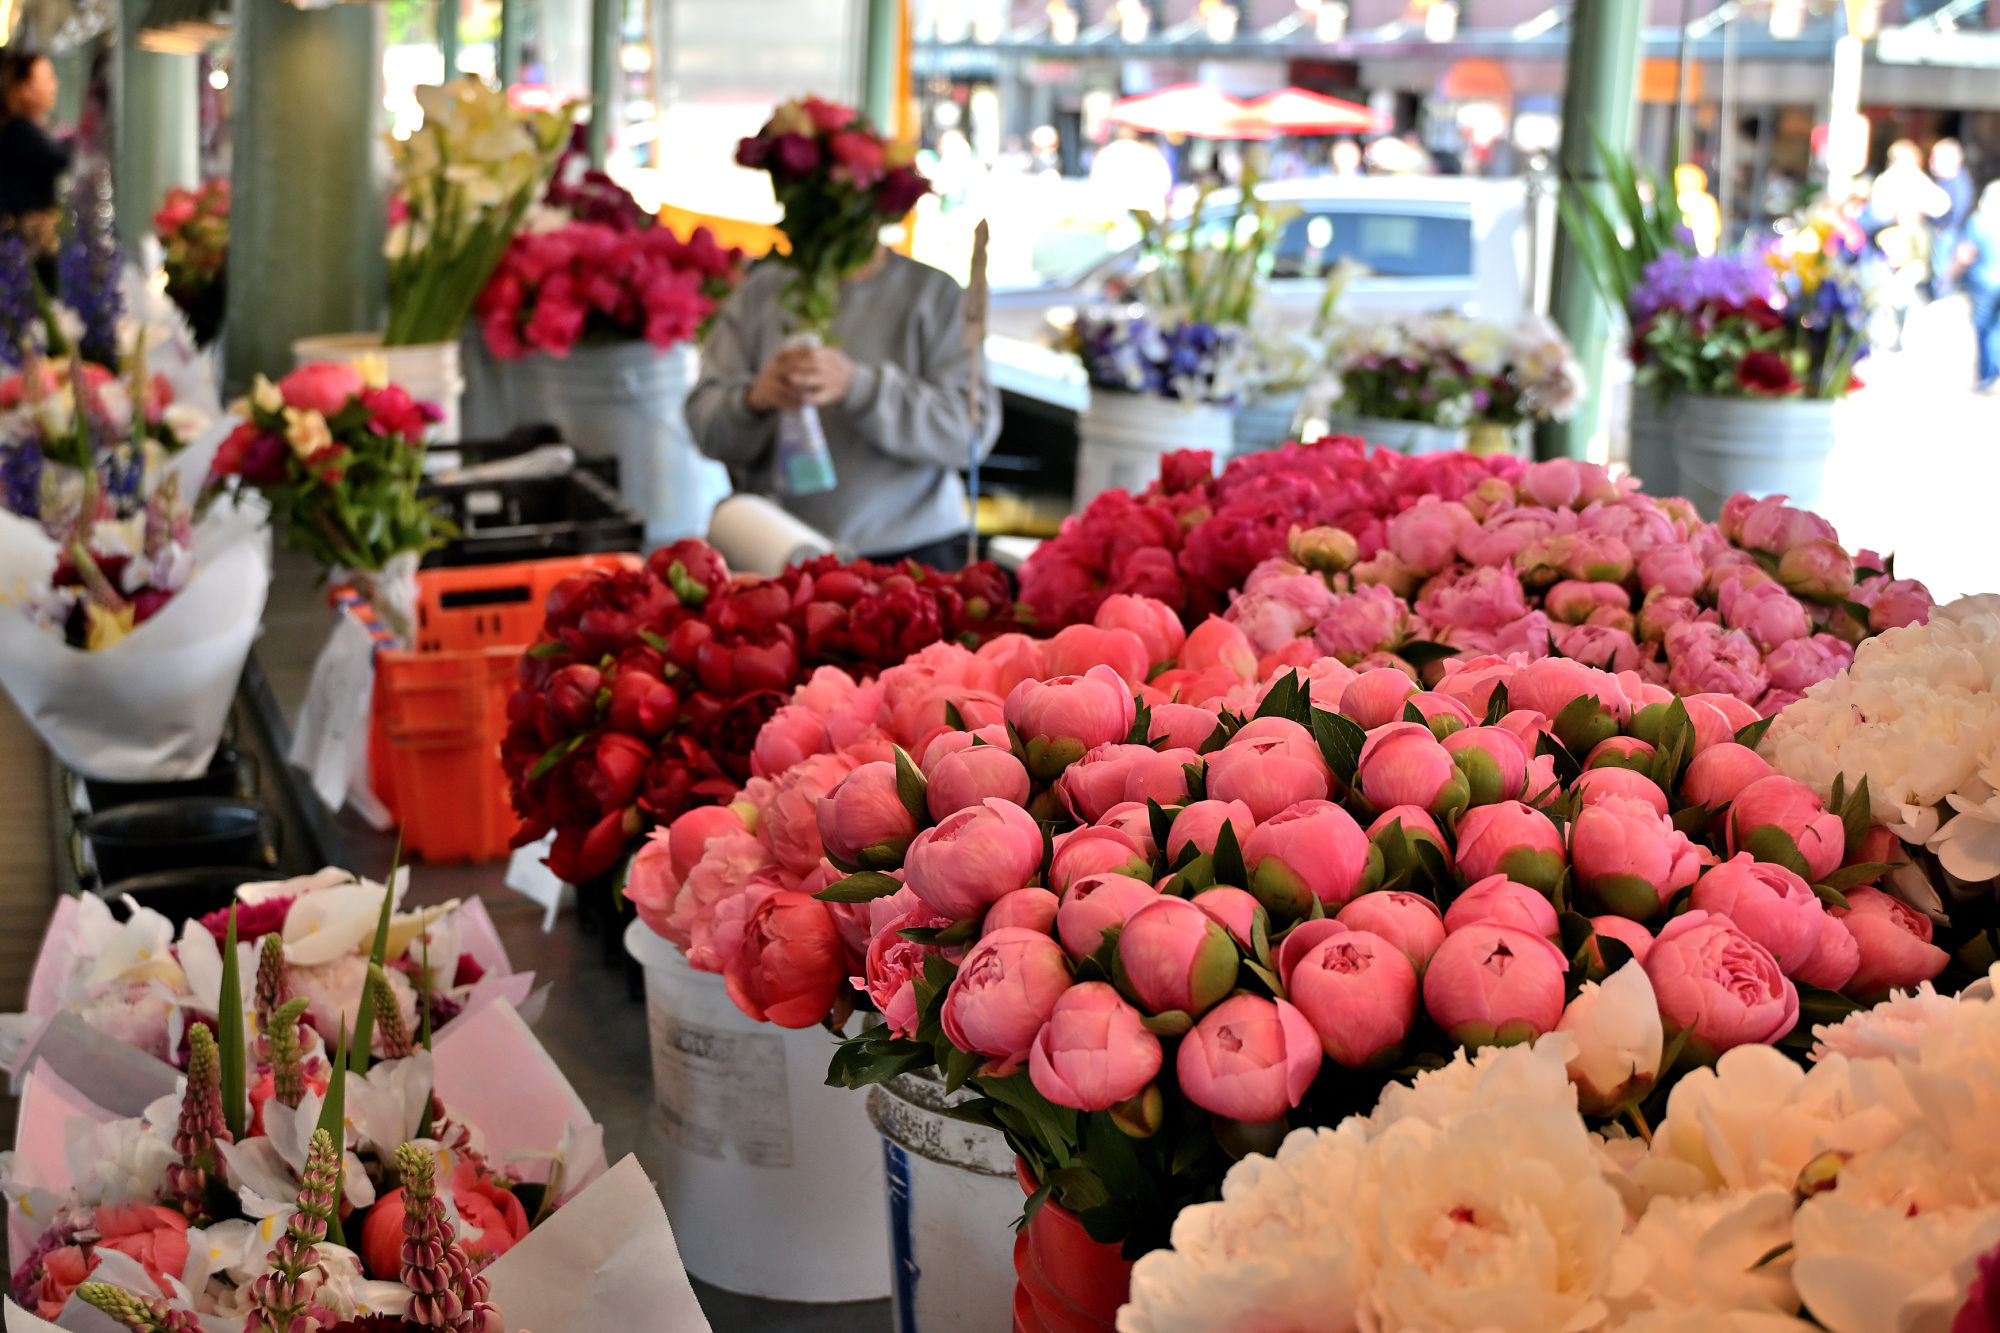
Every bouquet seems to be trying to outdo the one next to it.
1/200s f/4,2 ISO 400/27° 18-140mm f/3,5-6,3 VR f=34mm/51mm
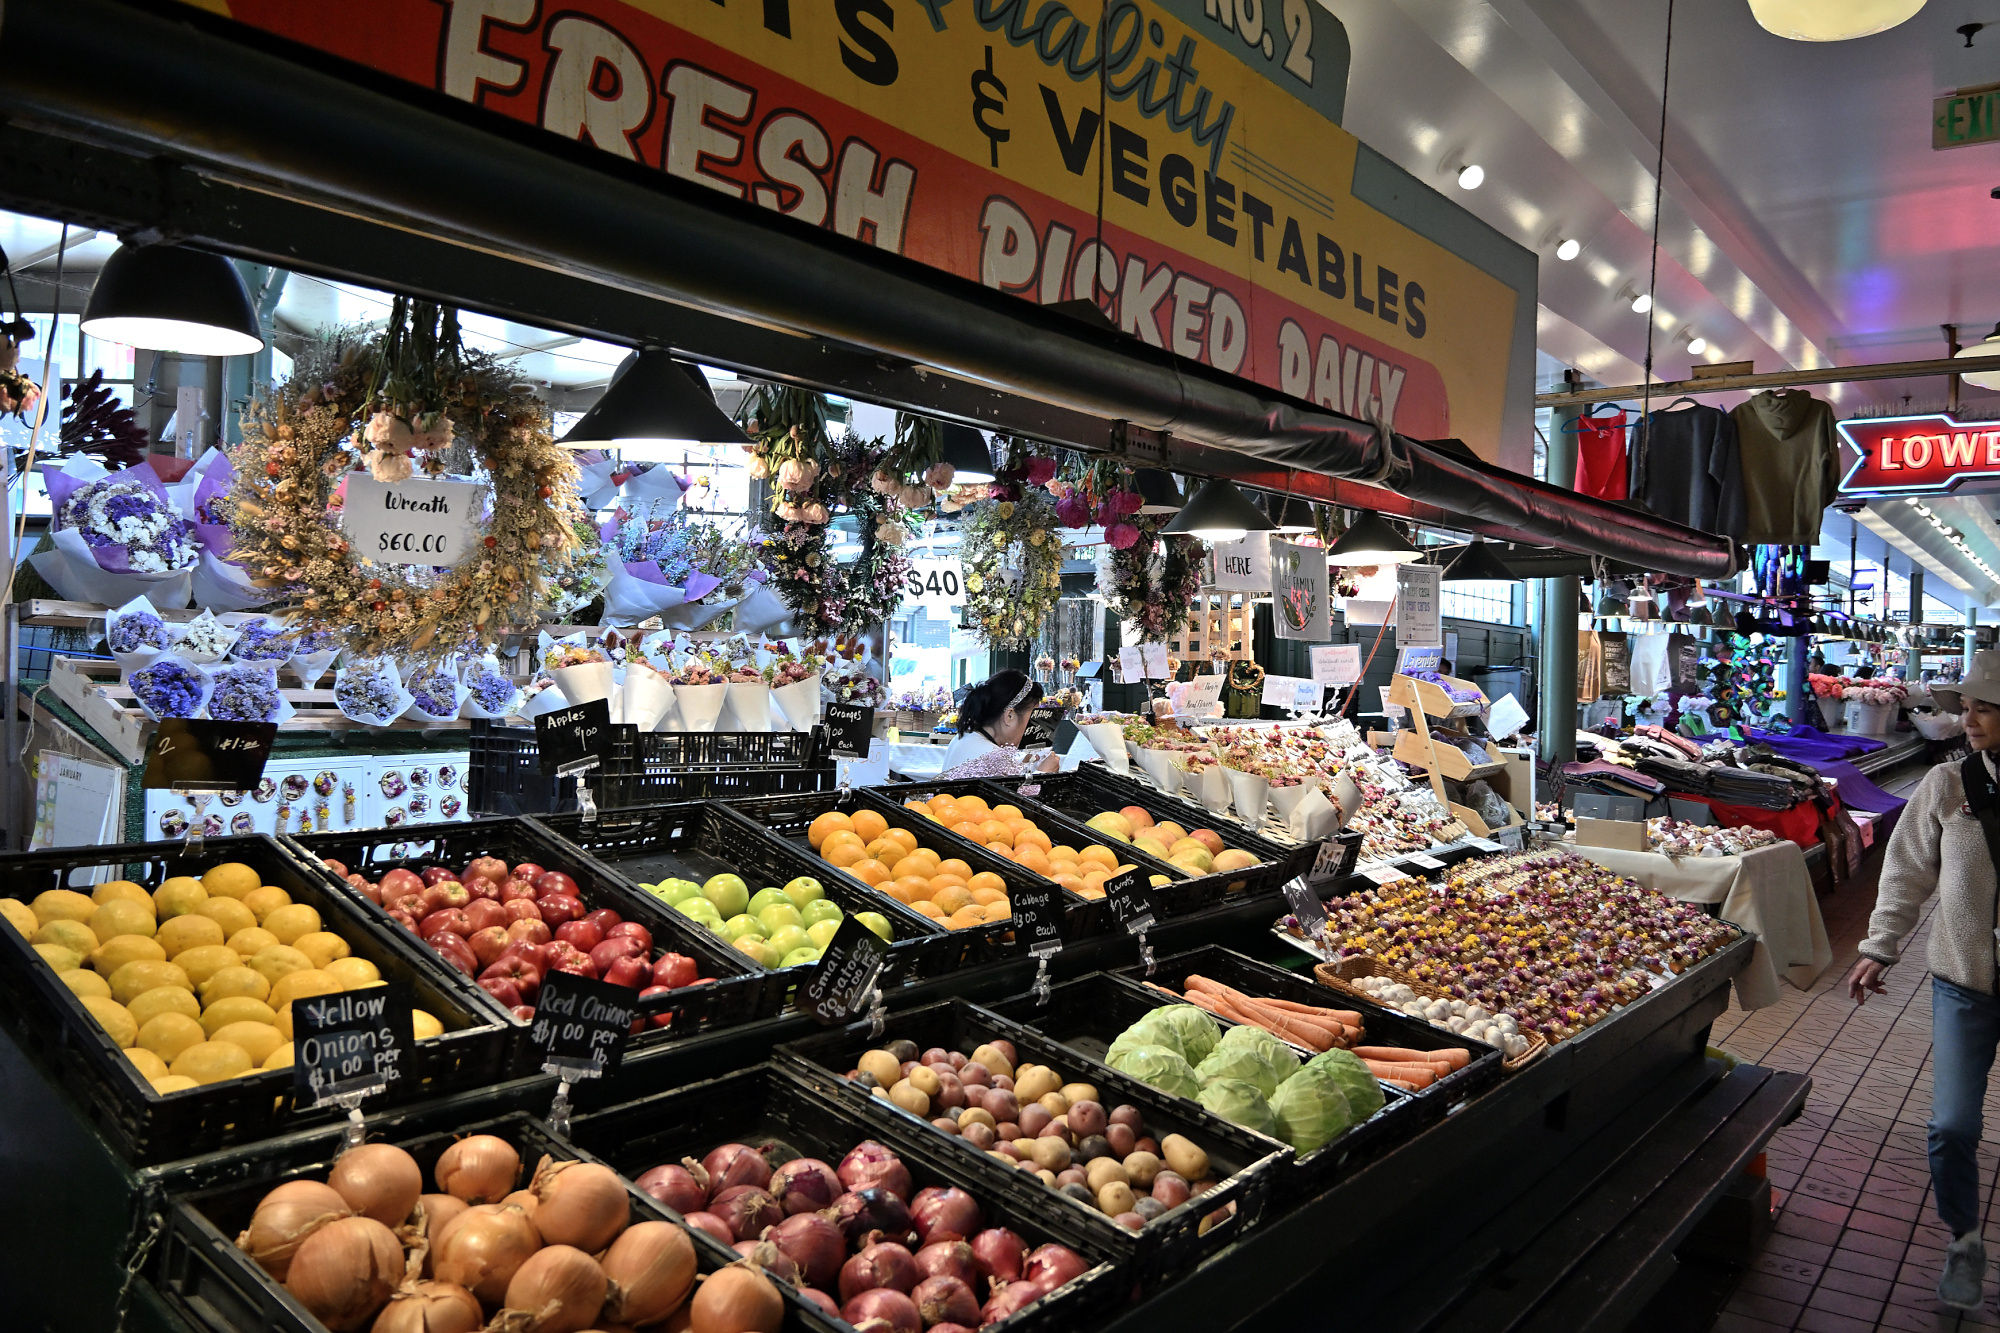
The produce stand has enough options to make a simple decision feel optimistic.
1/125s f/3,5 ISO 1250/32° 18-140mm f/3,5-6,3 VR f=18mm/27mm
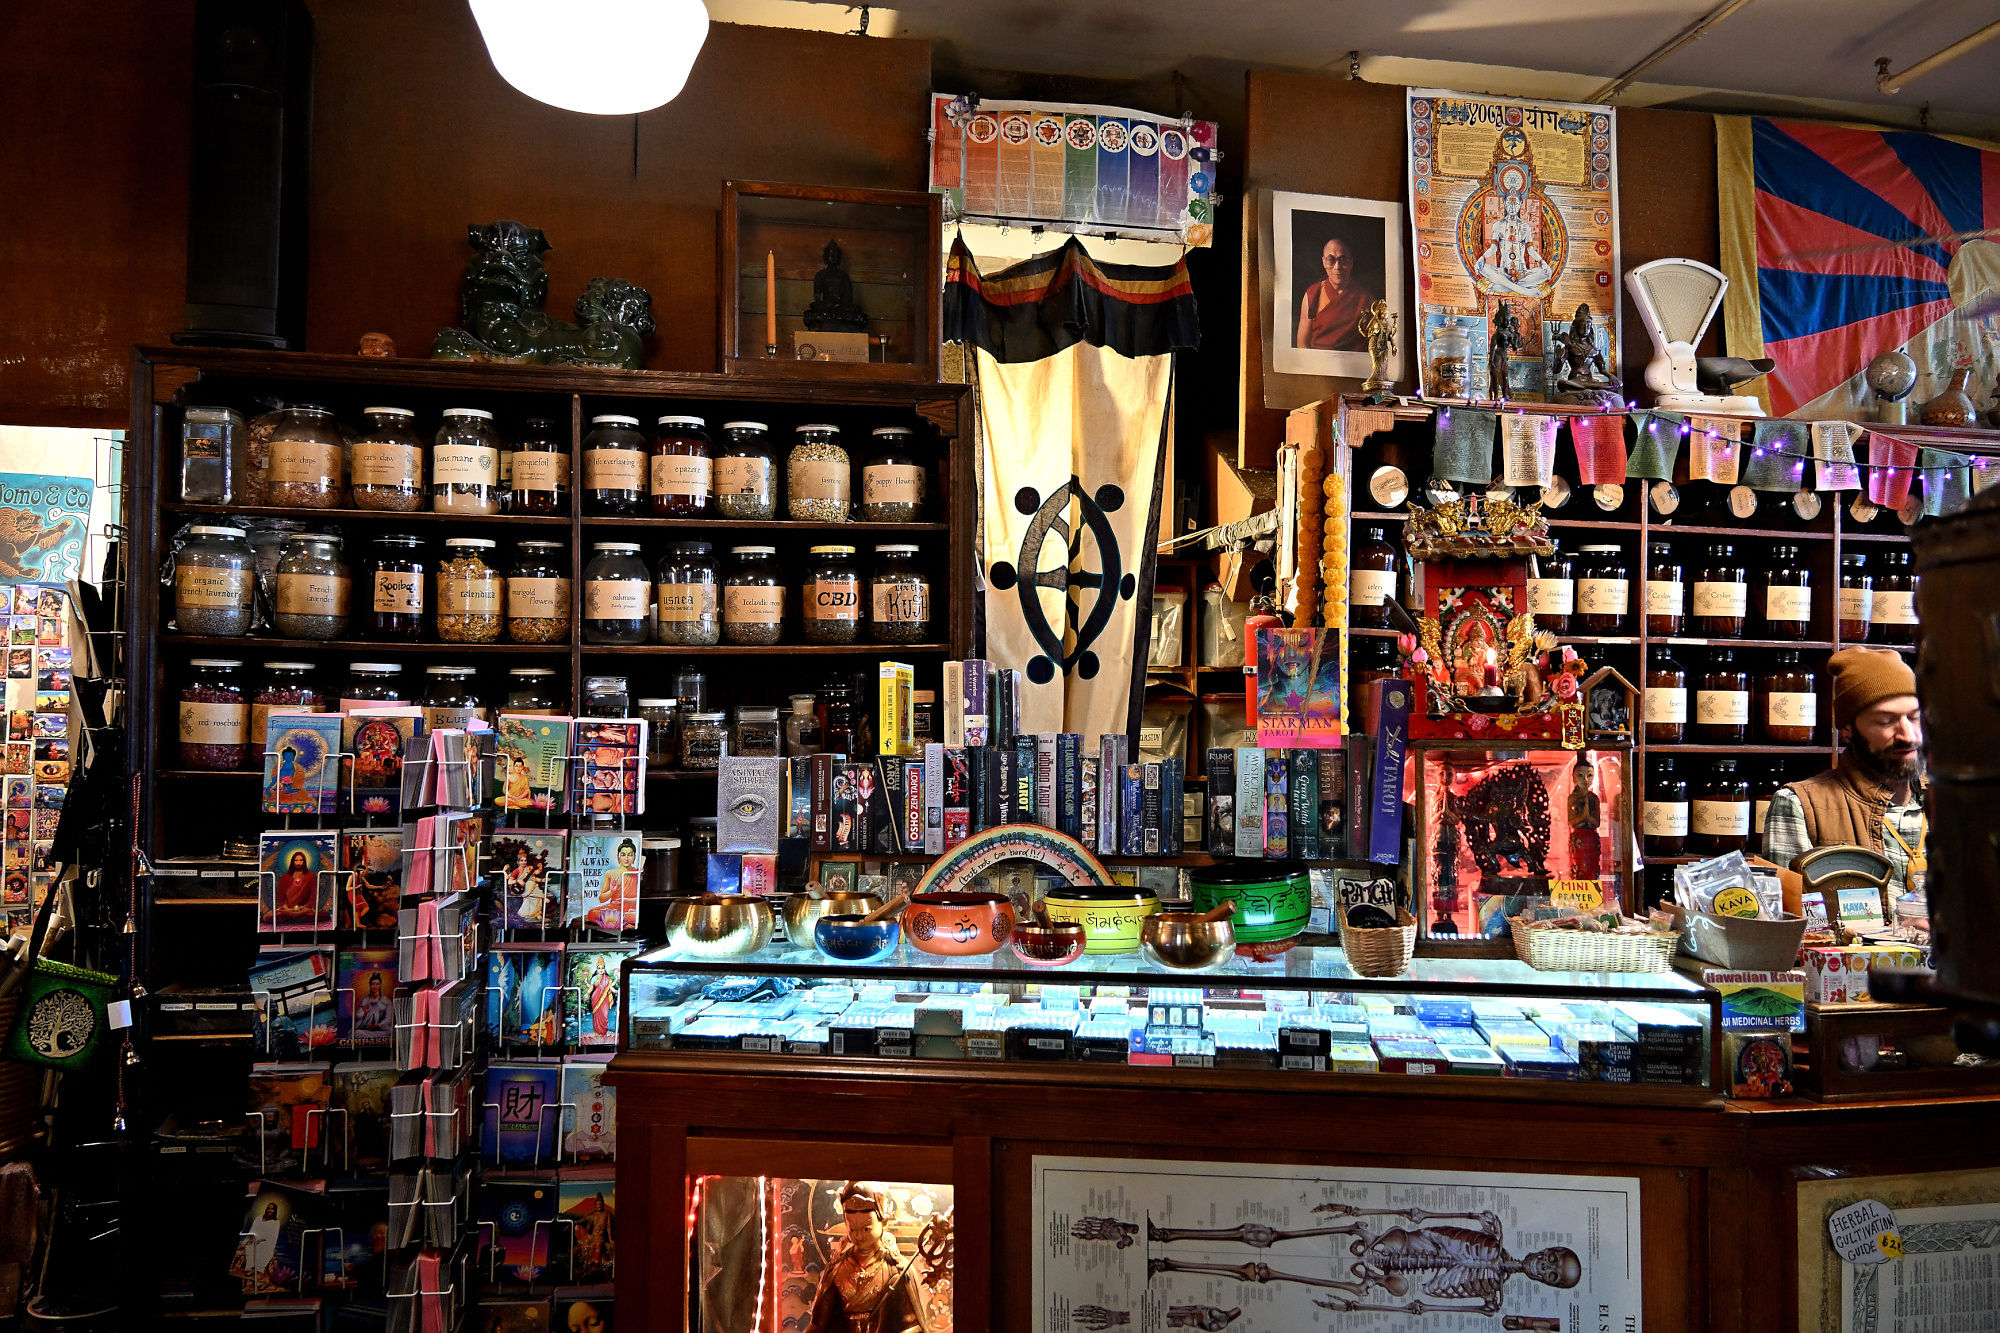
The shelves offer several small mysteries, most of them sealed in jars.
1/30s f/4 ISO 1100 18-140mm f/3,5-6,3 VR f=18mm/27mm
Dried flowers, making a quiet case for being just as beautiful.
1/125s f/3,5 ISO 800/30° 18-140mm f/3,5-6,3 VR f=18mm/27mm
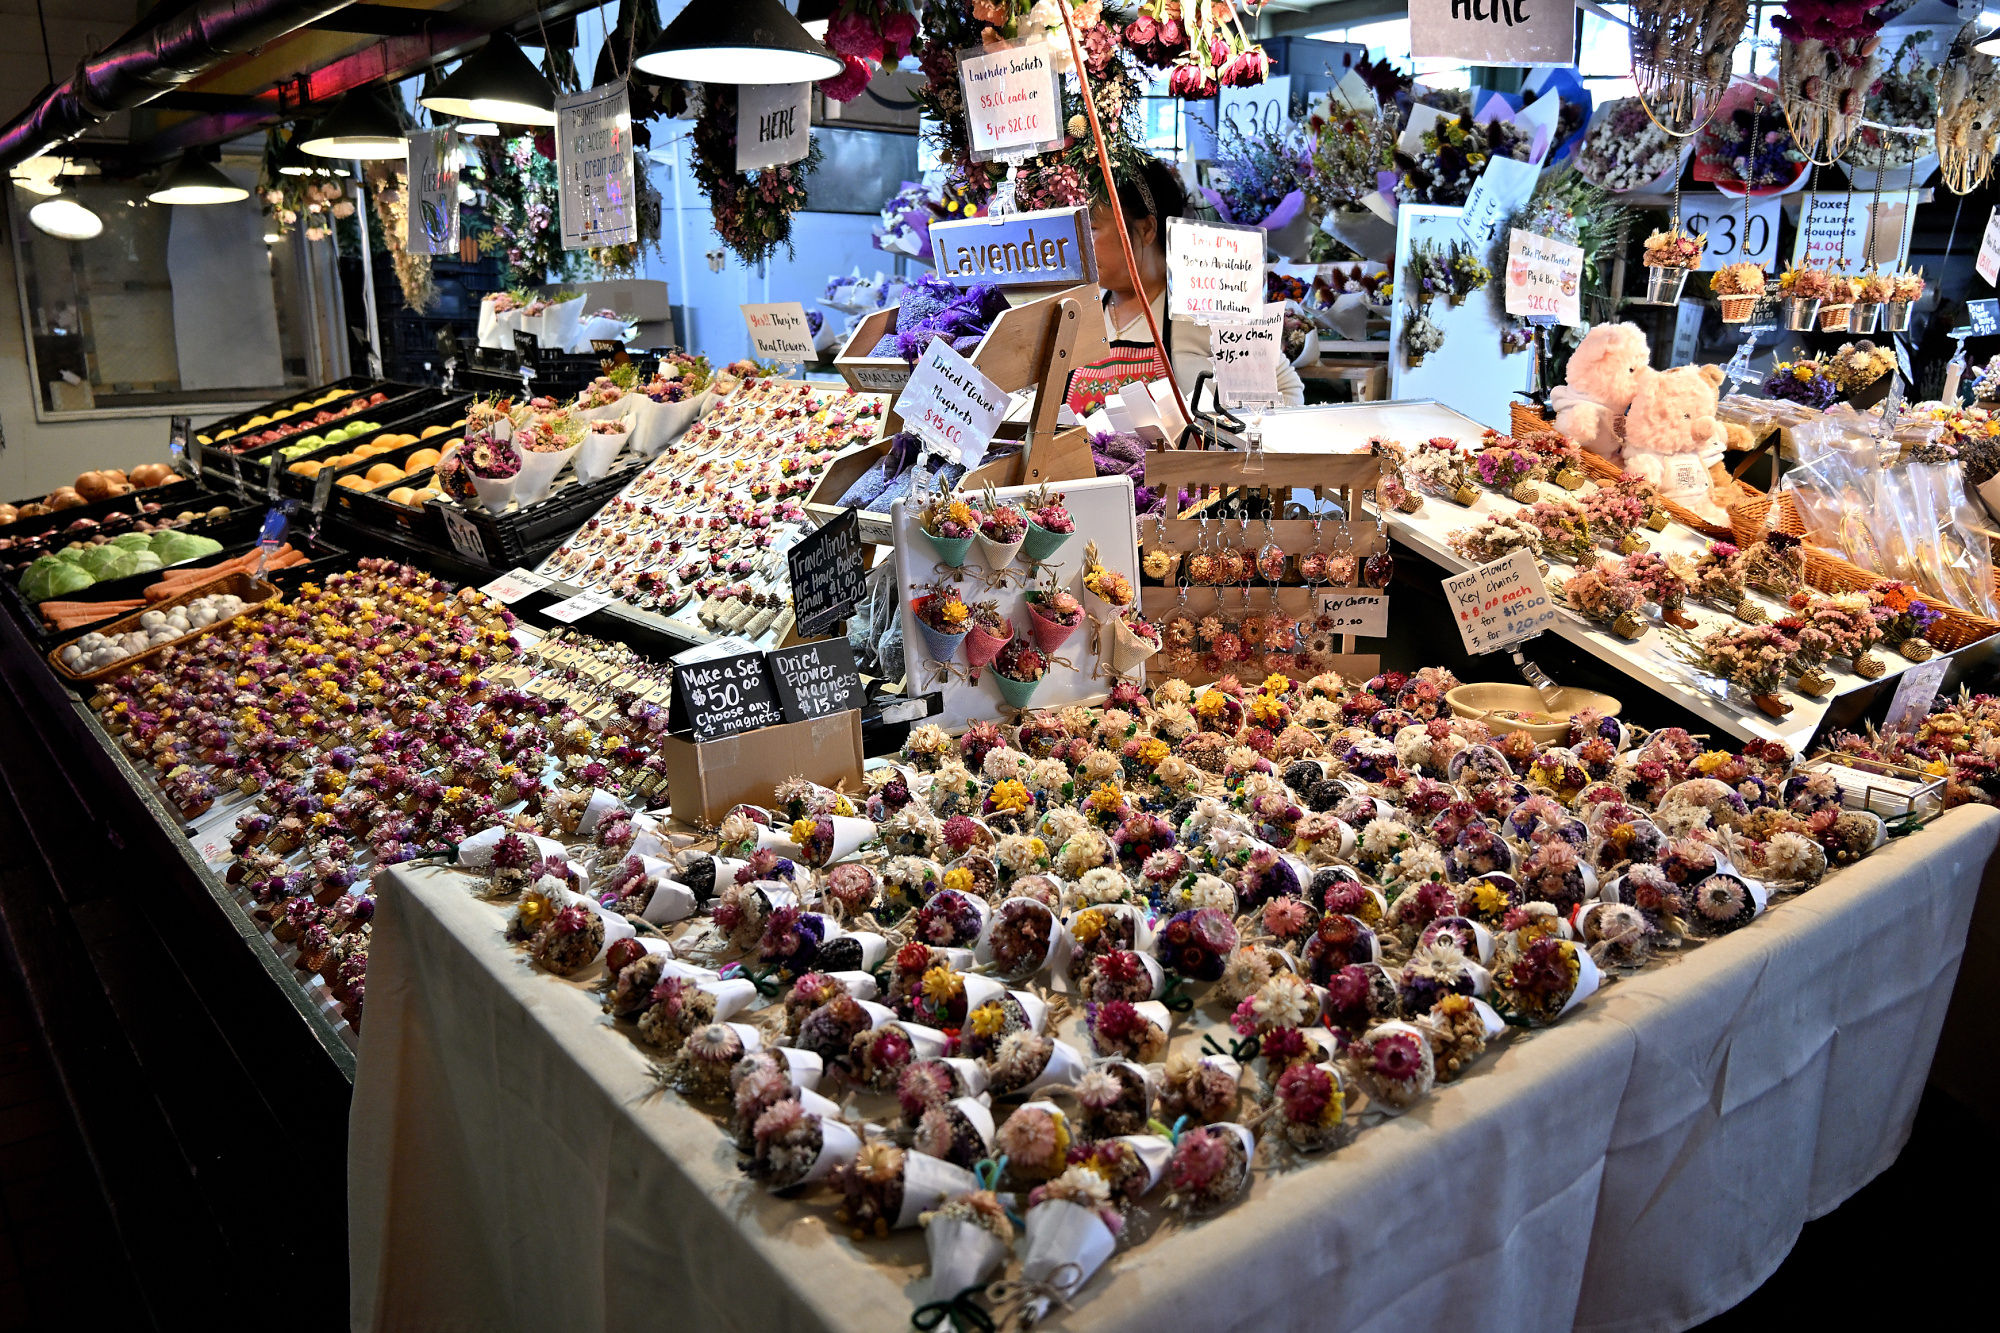
The dried bouquets keep making their quiet case.
1/125s f/3,5 ISO 800/30° 18-140mm f/3,5-6,3 VR f=18mm/27mm
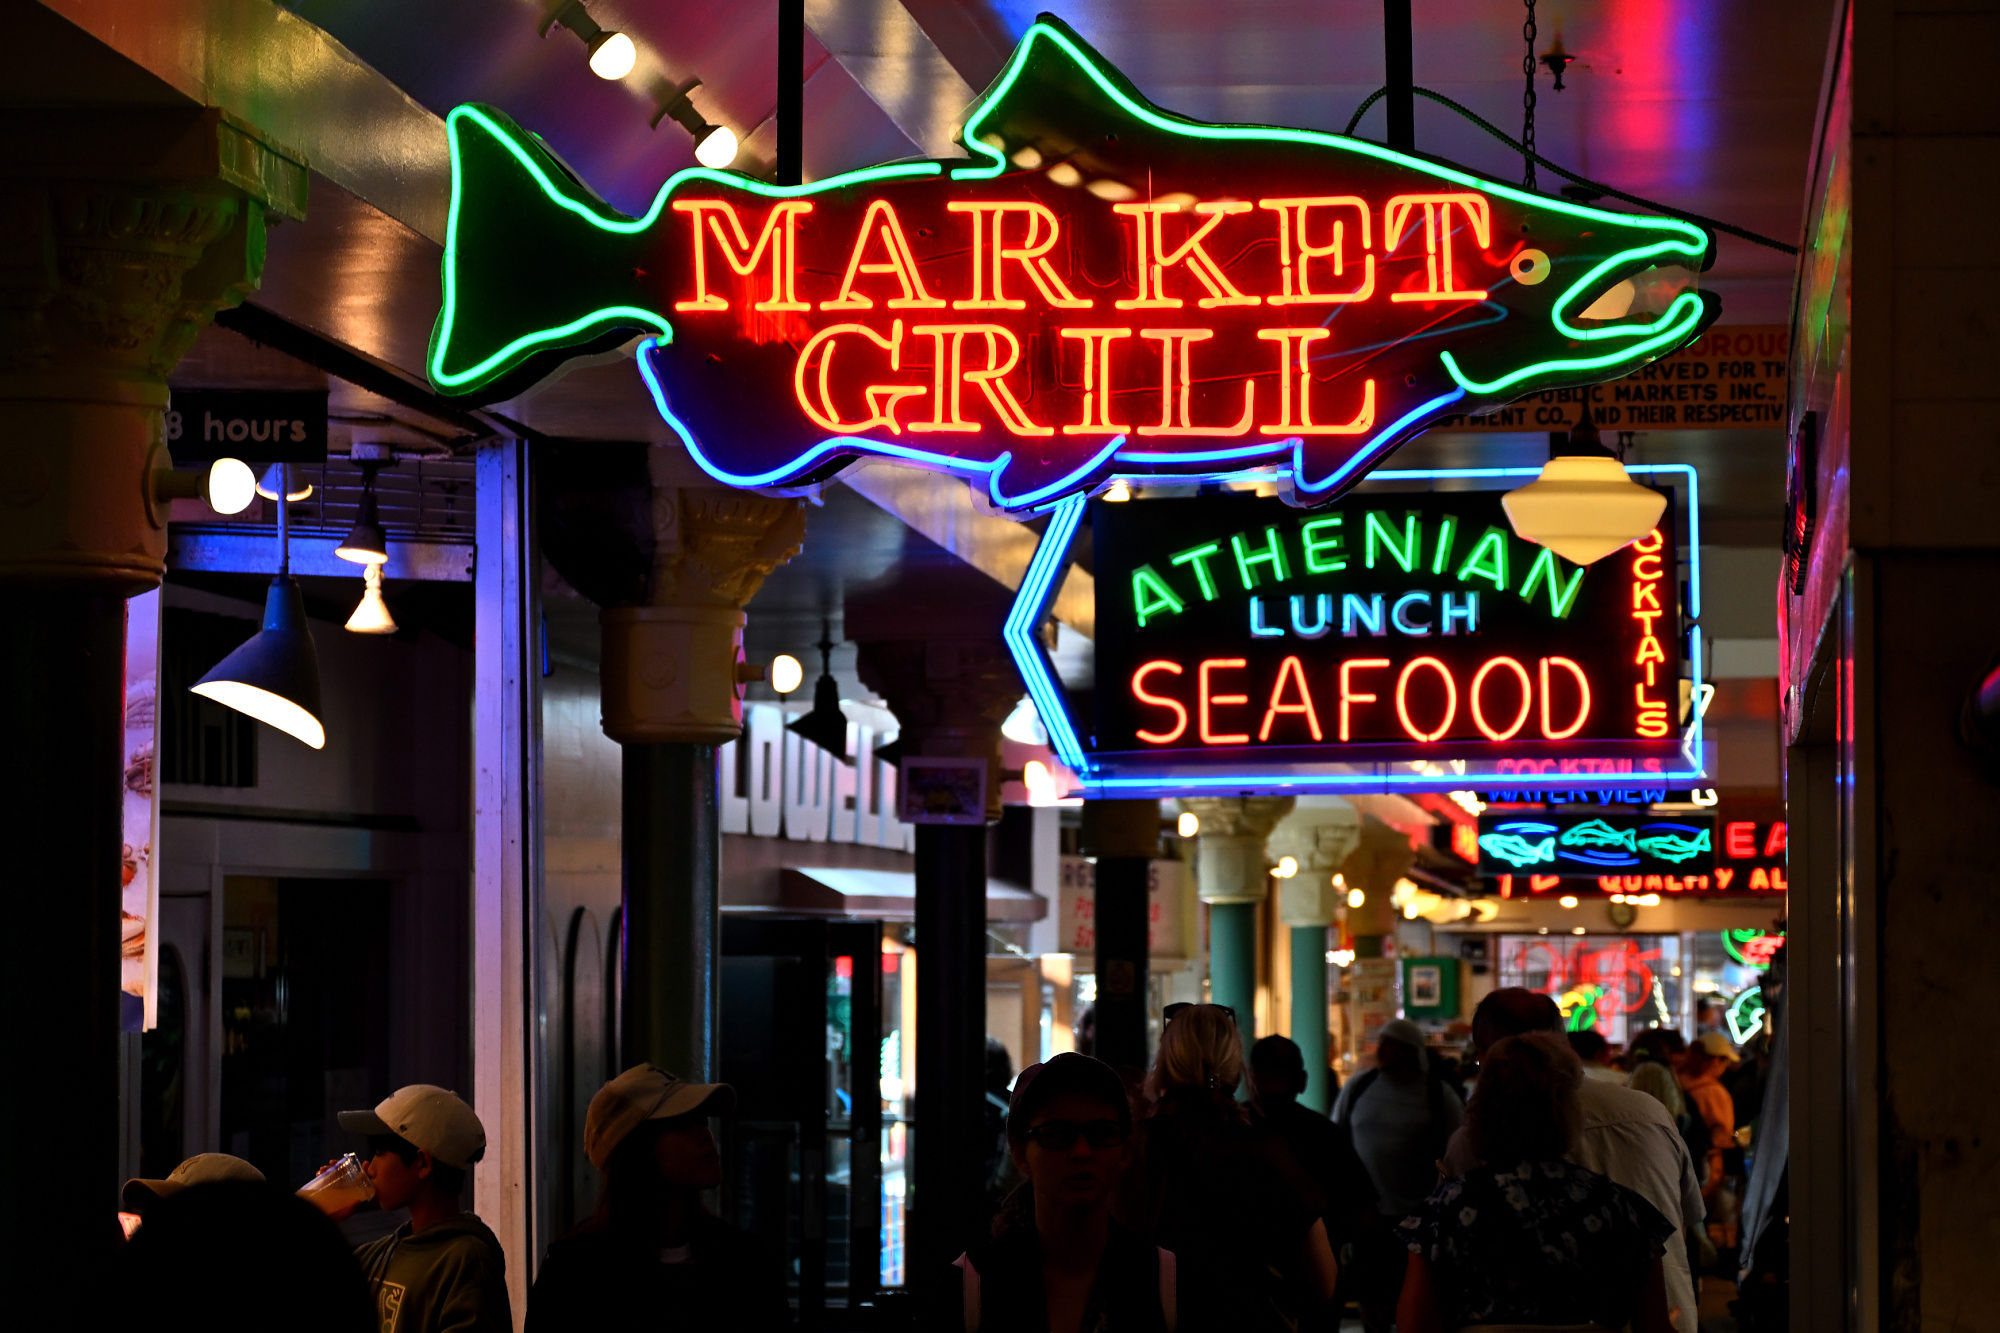
The neon fish sign has no interest in being subtle, which is probably for the best.
1/125s f/5,3 ISO 720 18-140mm f/3,5-6,3 VR f=77mm/115mm
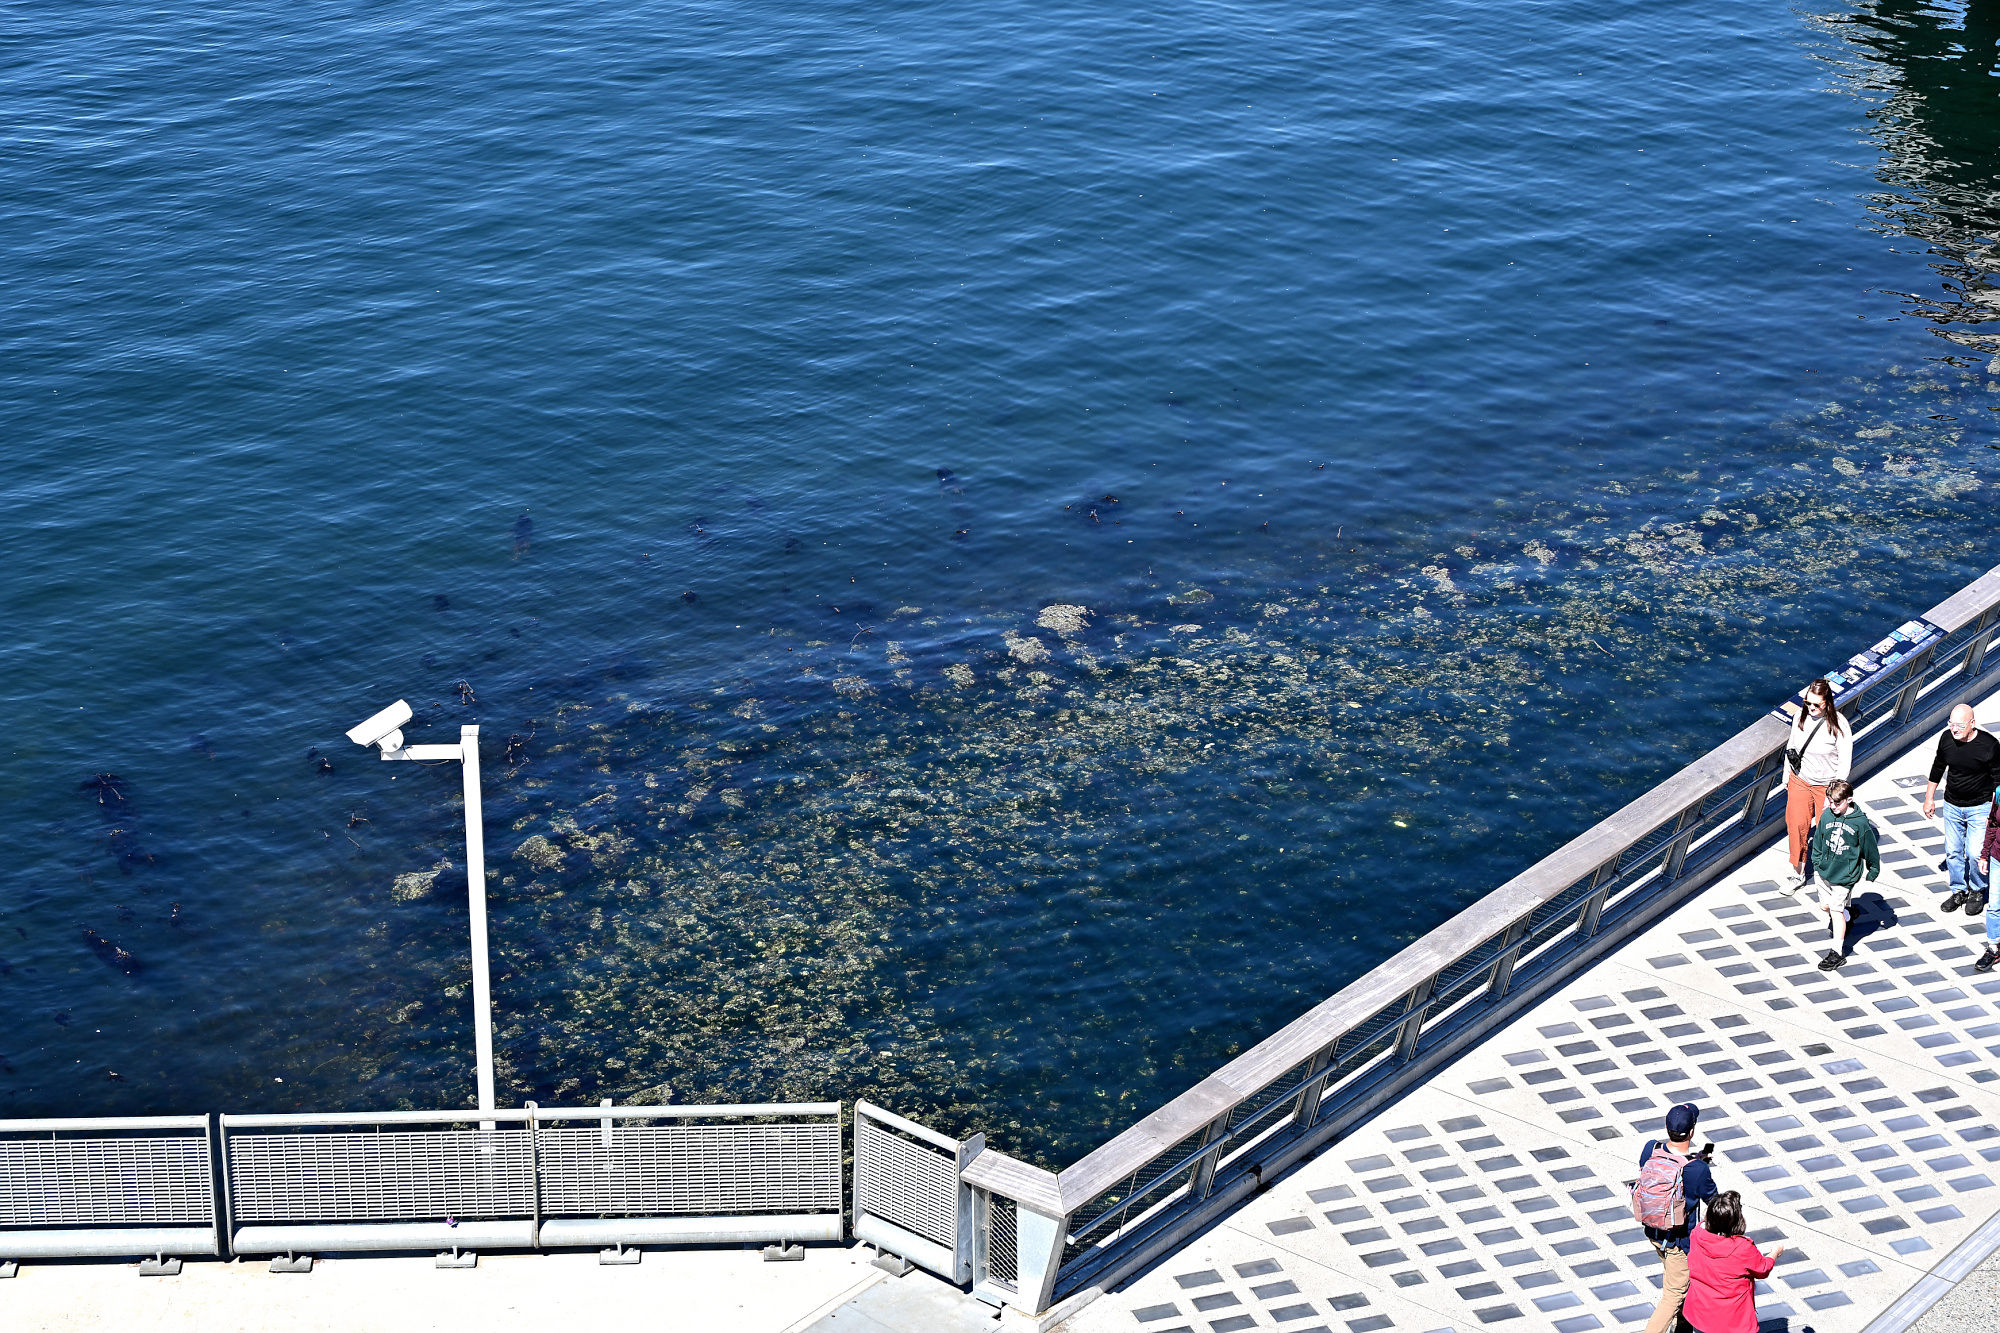
Eventually Pike Place opens back out toward streets, water, and light.
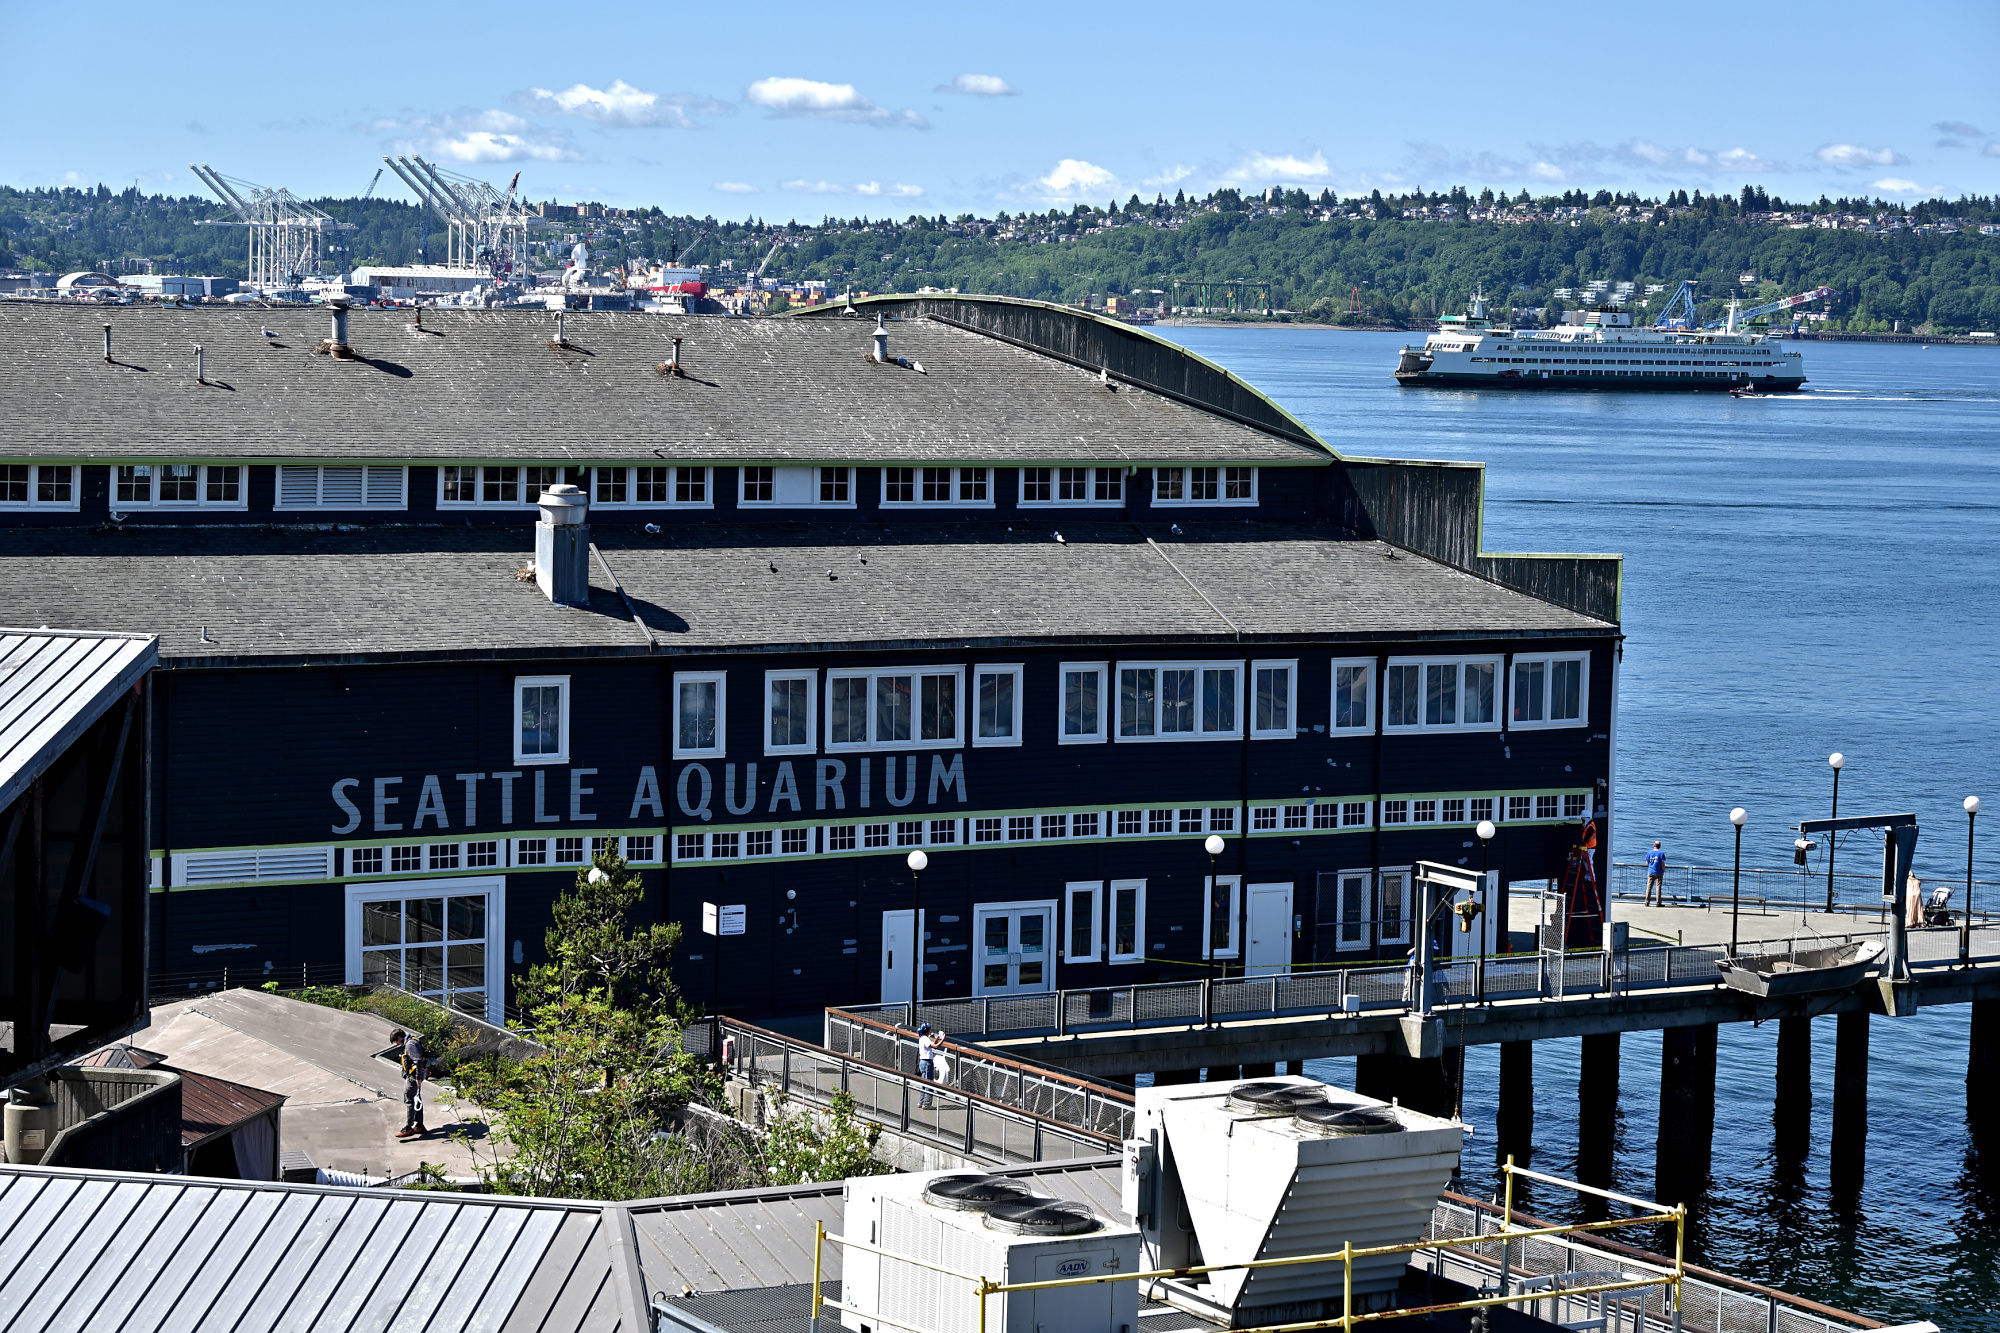
The Seattle Aquarium keeps watch over Puget Sound.
1/250s f/5,6 ISO 100/21° 18-140mm f/3,5-6,3 VR f=48mm/72mm
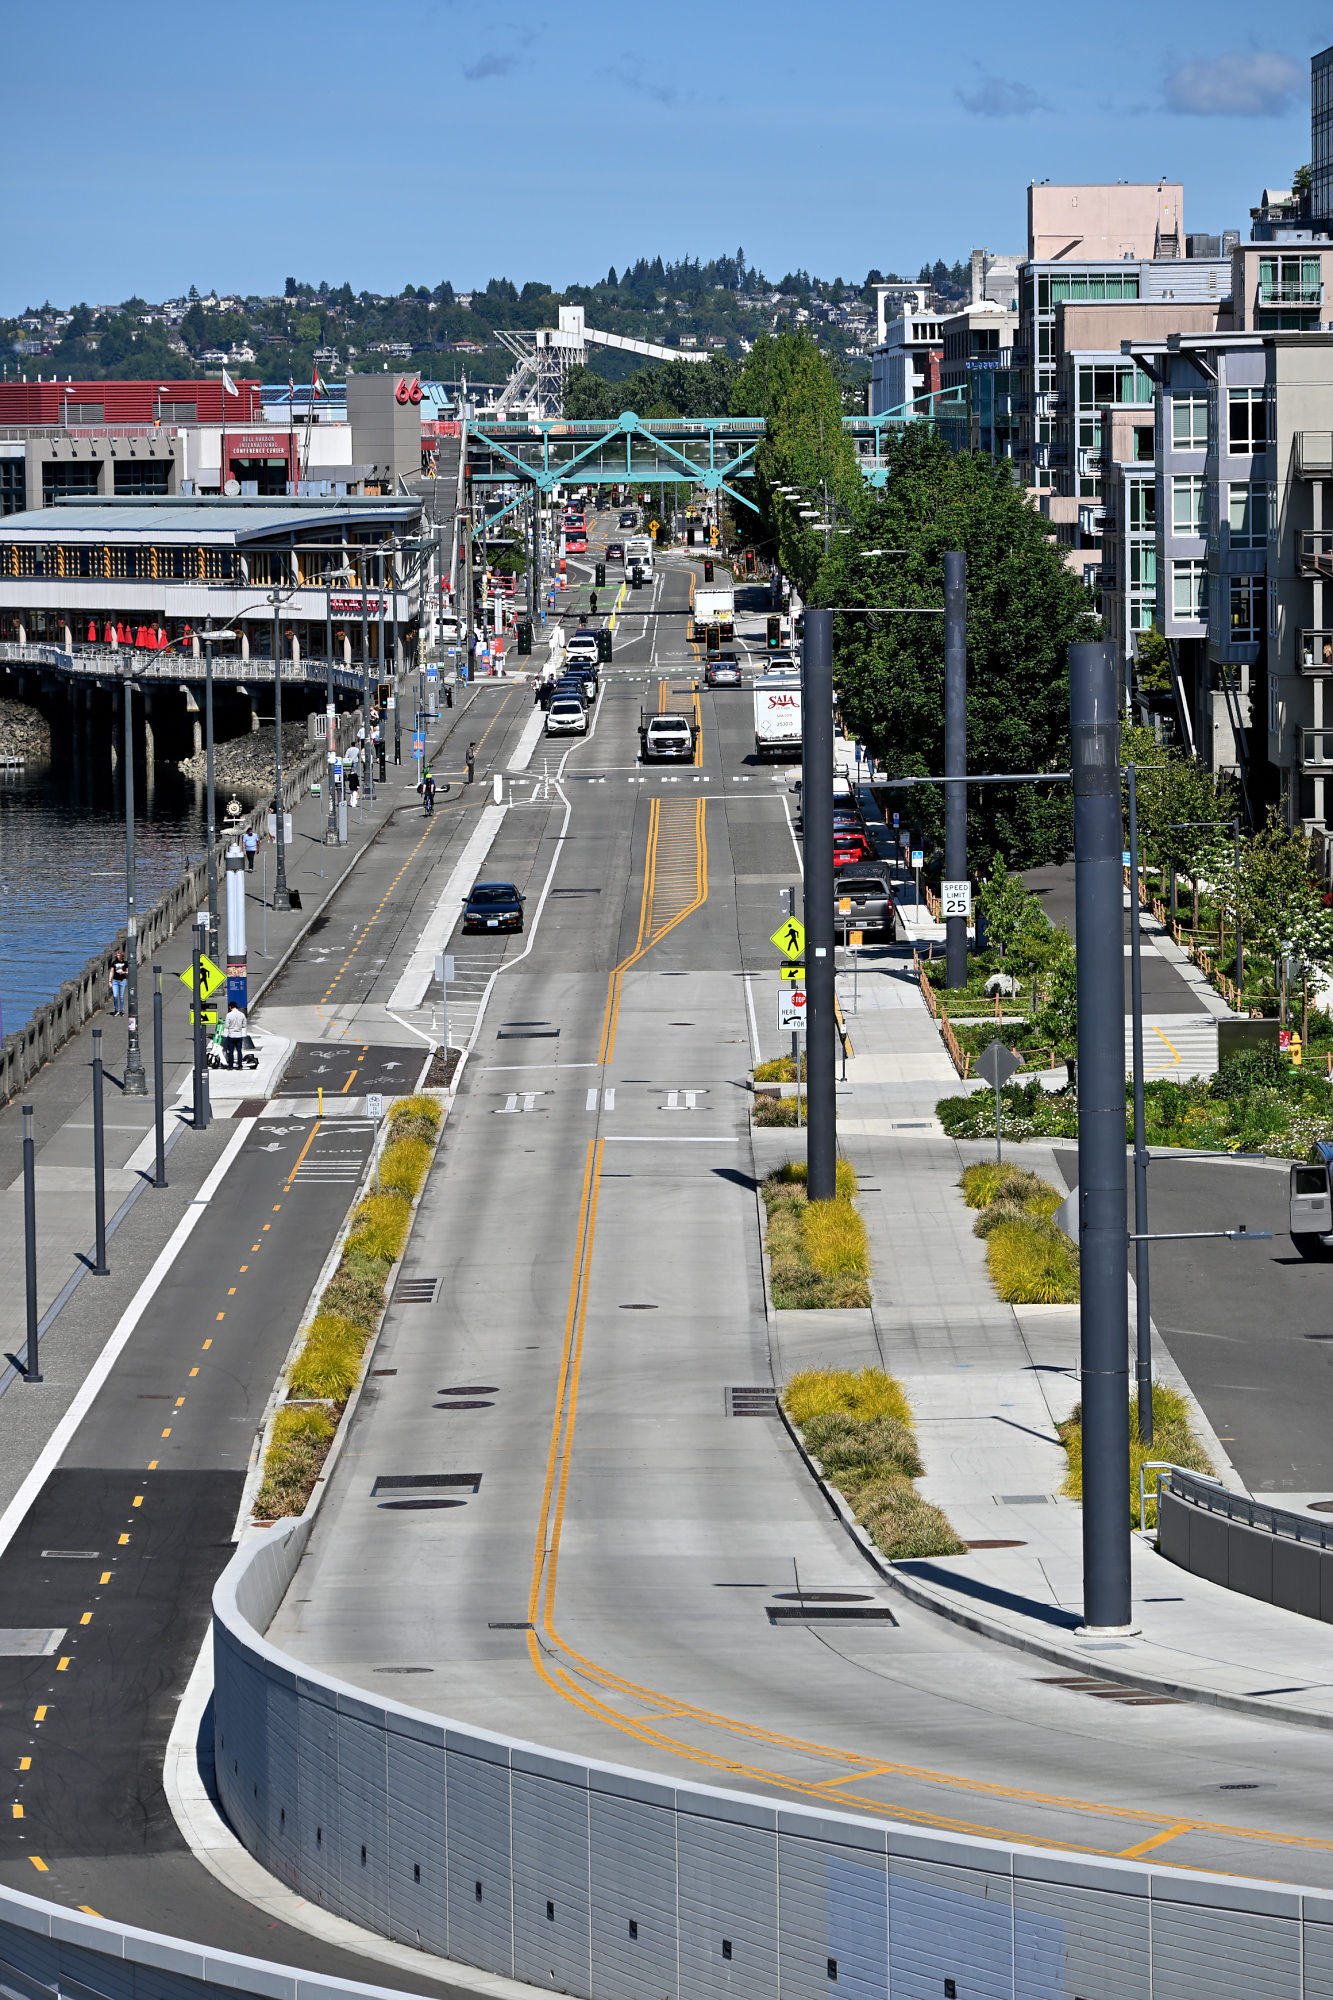
The waterfront drops away below, because Seattle likes its views with a little vertical planning.
1/250s f/5,6 ISO 125/22° 18-140mm f/3,5-6,3 VR f=51mm/76mm
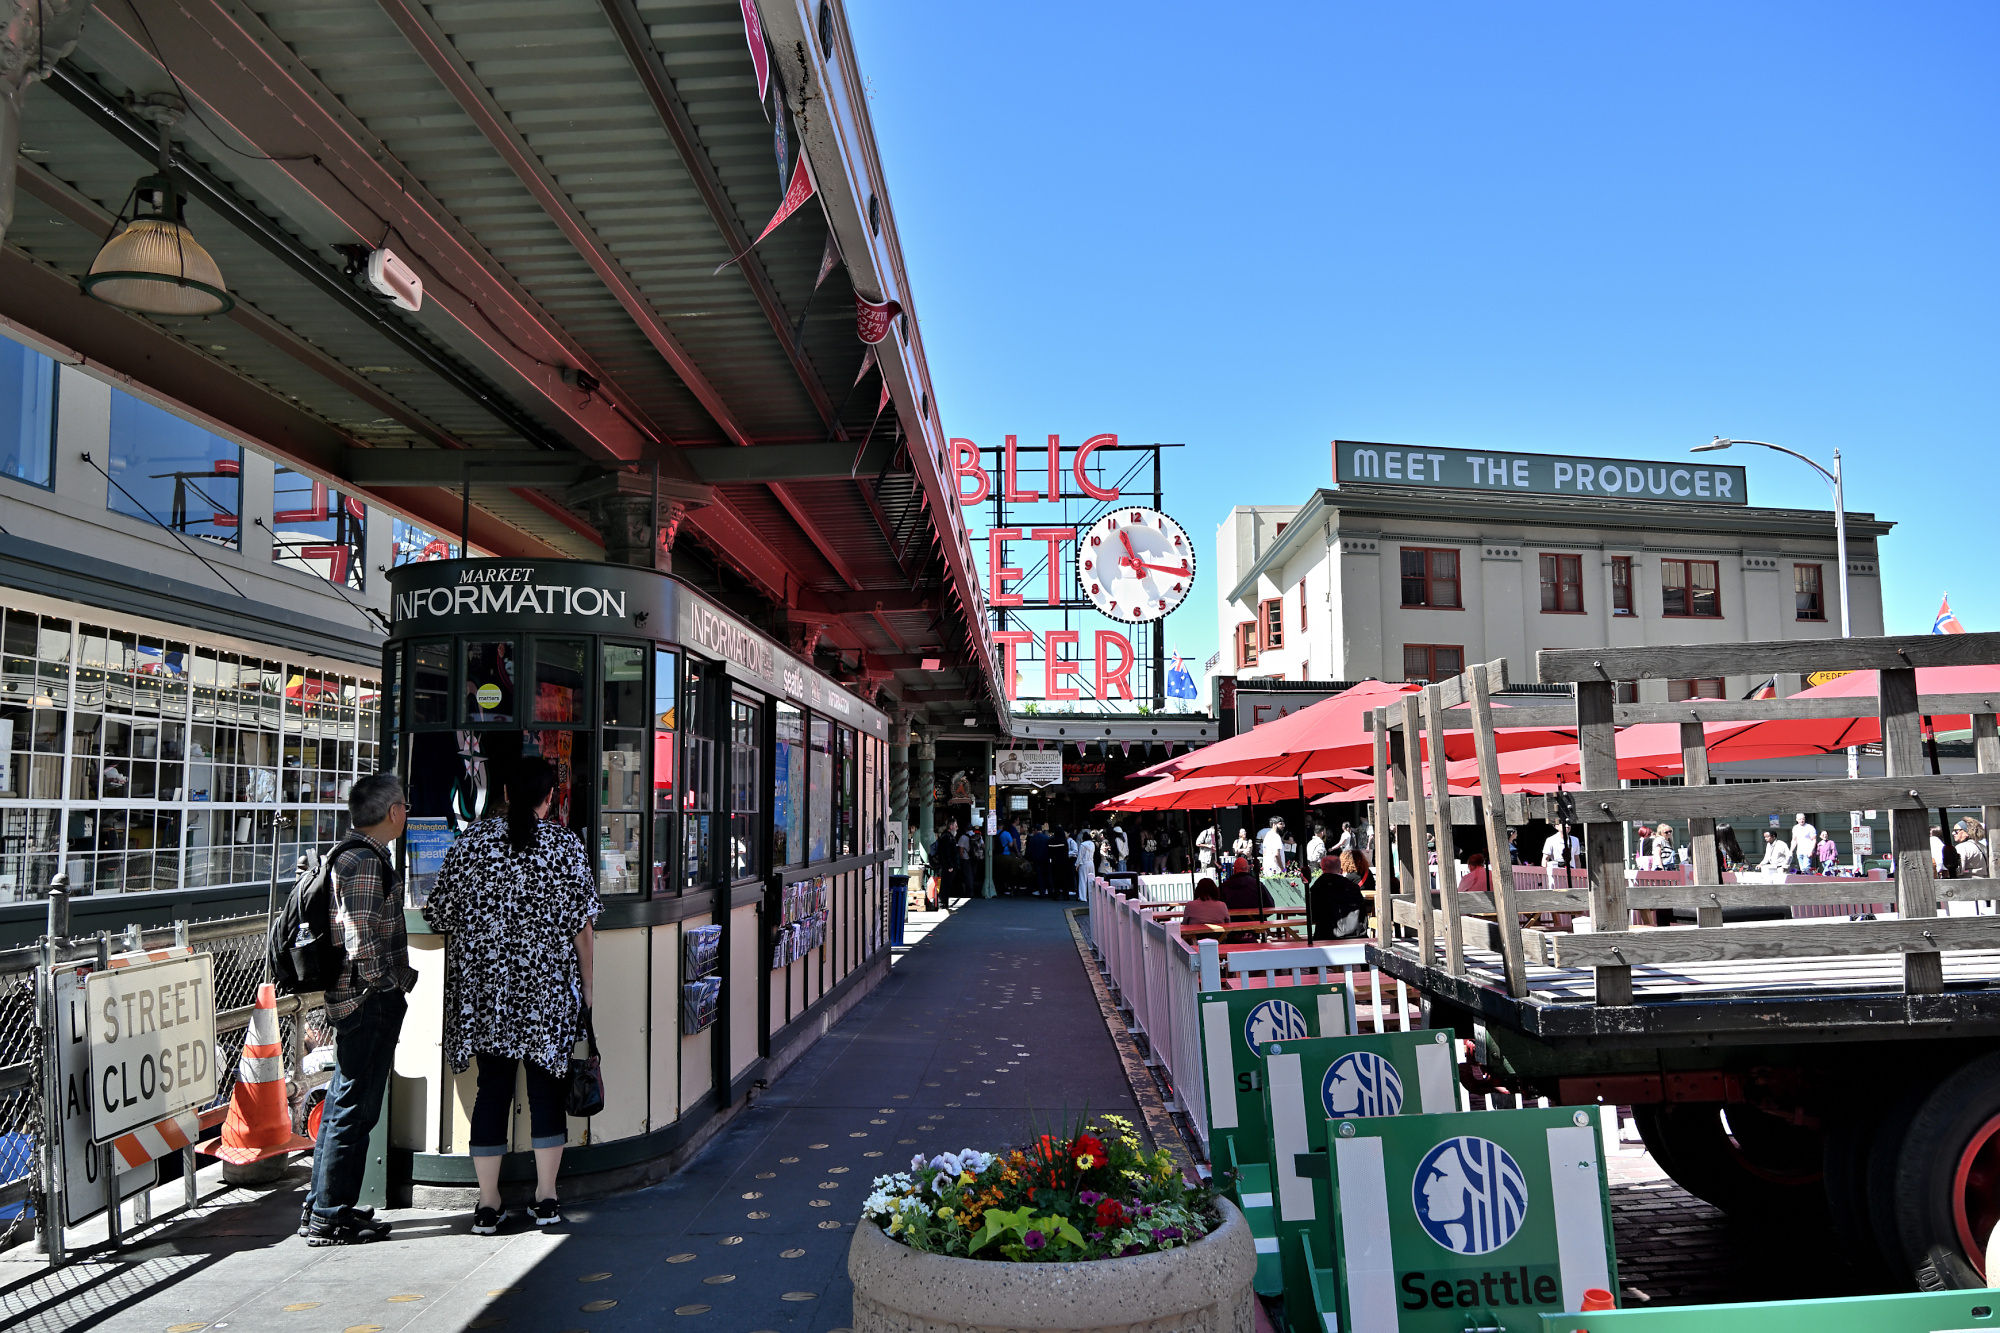
Back at the main market square, Pike Place does not need the whole sign to be recognizable.
1/250s f/5,6 ISO 200/24° 18-140mm f/3,5-6,3 VR f=18mm/27mm
Down by the water, the city finally leaves a little space between things.
1/500s f/8 ISO 100/21° 18-140mm f/3,5-6,3 VR f=85mm/127mm
Green, blue, and concrete doing their best to make infrastructure look relaxed.
1/320s f/6,3 ISO 100/21° 18-140mm f/3,5-6,3 VR f=31mm/47mm
One last stretch of water, because some endings are better when they keep things simple.
1/500s f/11 ISO 200/24° 18-140mm f/3,5-6,3 VR f=130mm/195mm
Taken with my Nikon Z50II.
-
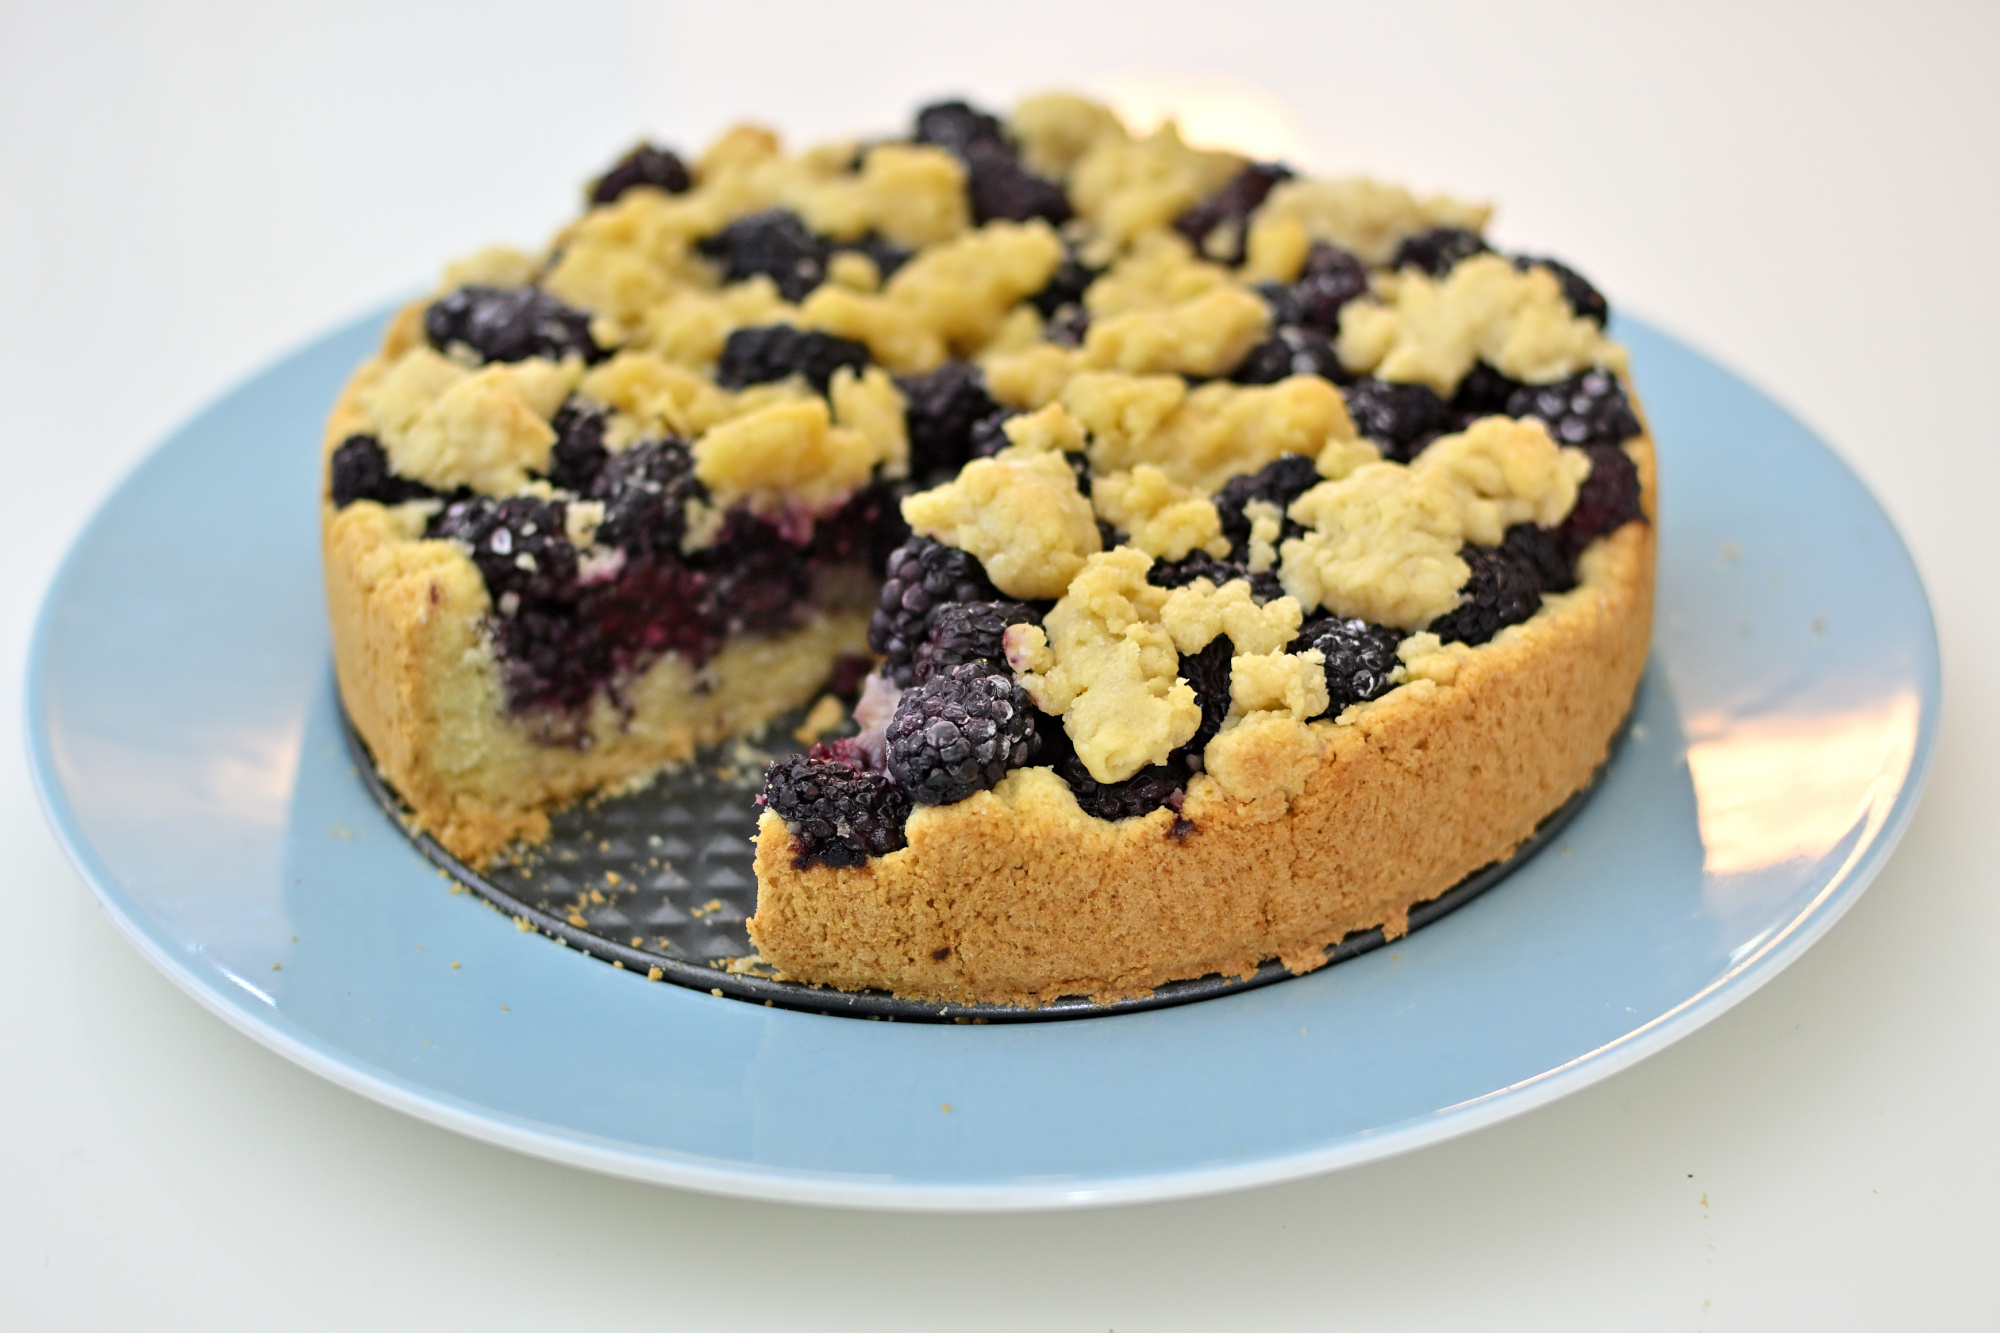
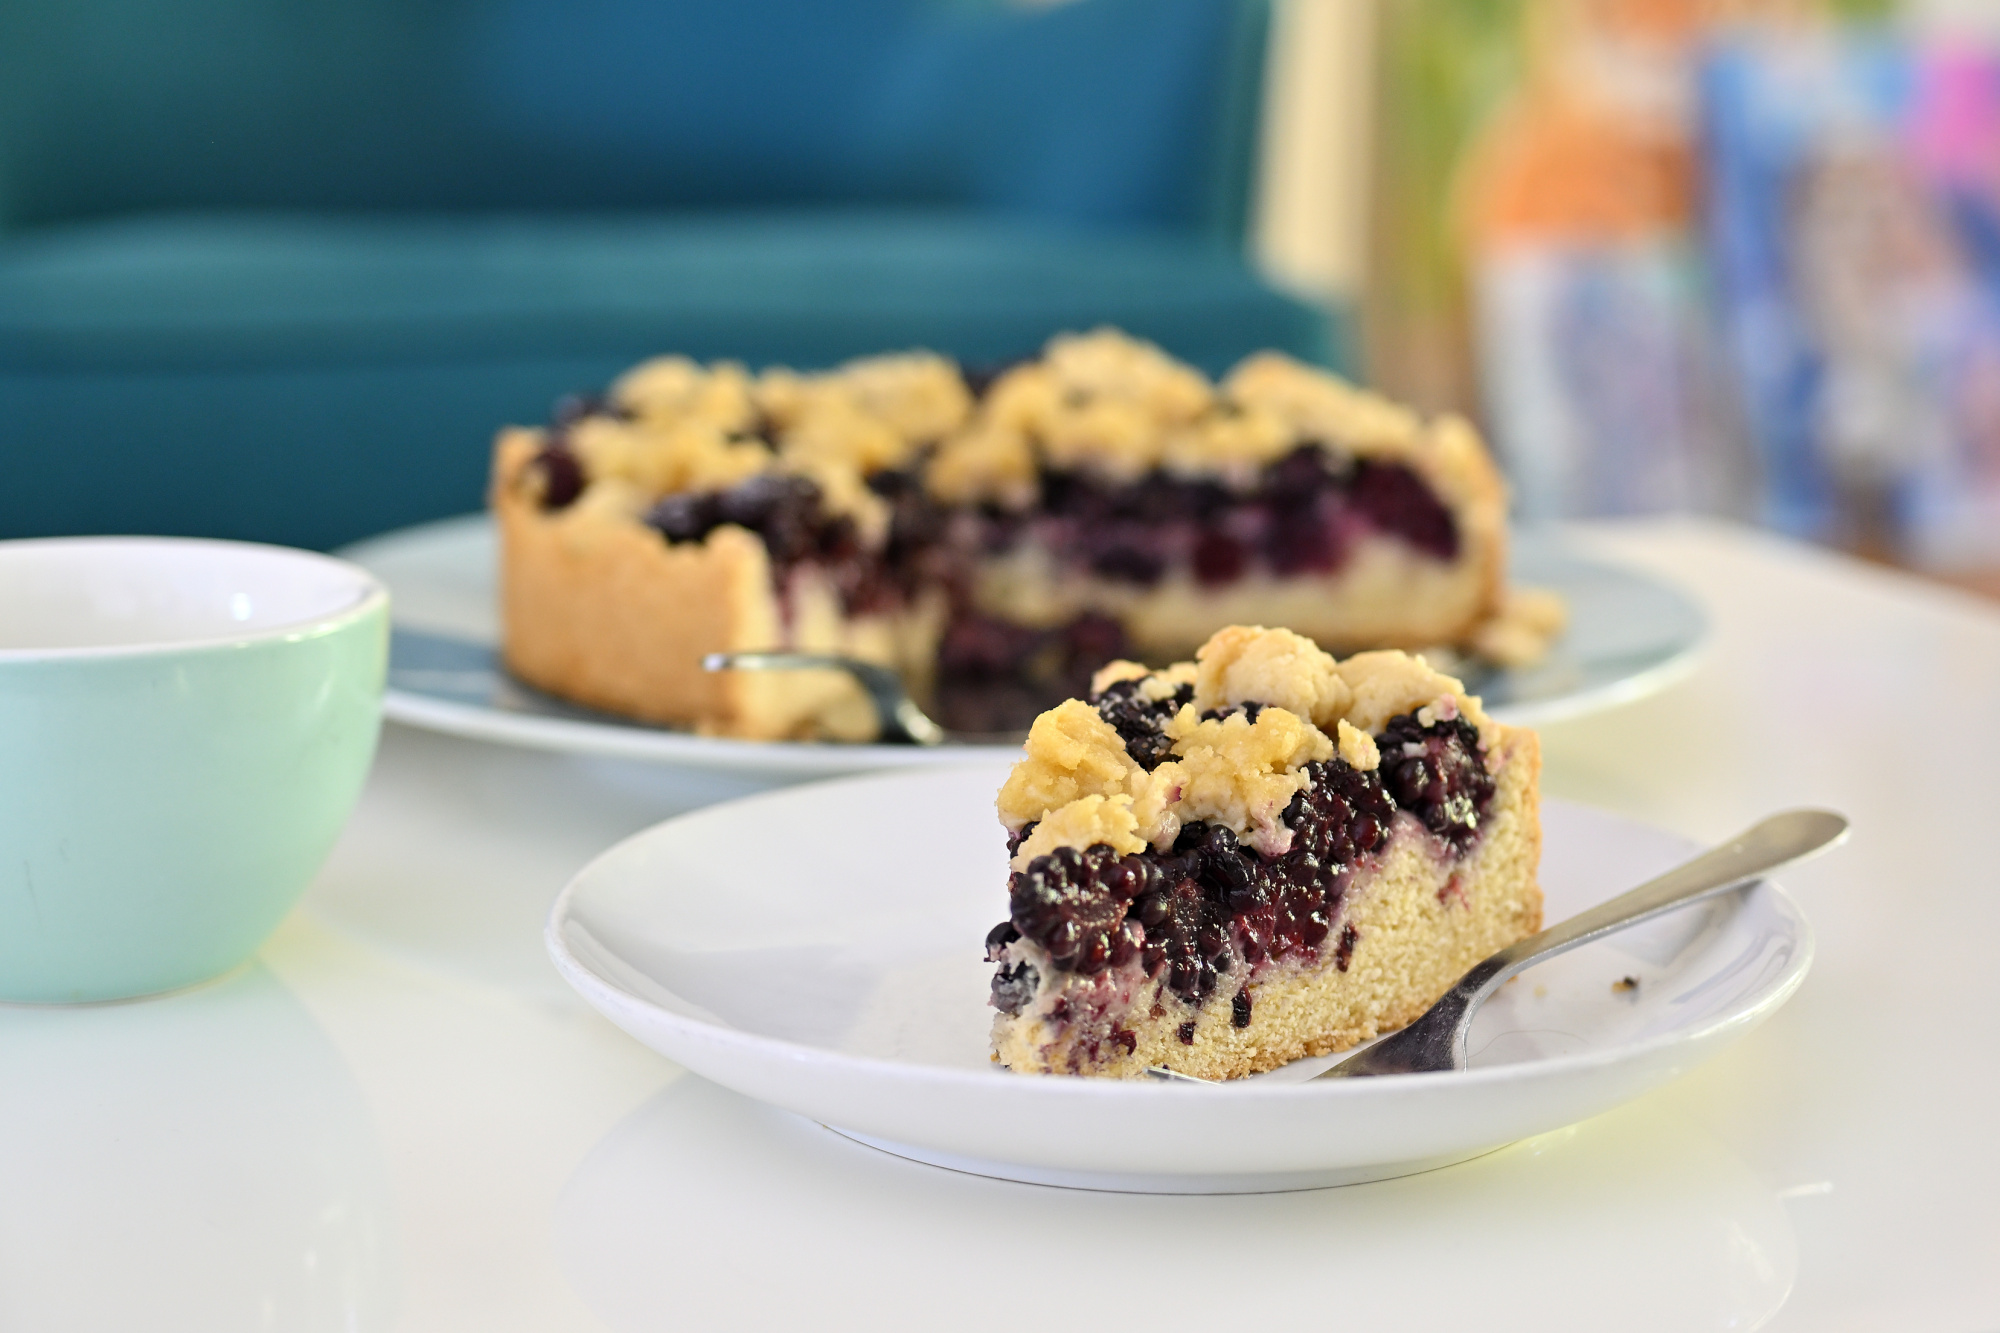
Kirschstreusel 🍒🥧
Sonntag. Ein Ablauf, der sich nicht anmeldet.
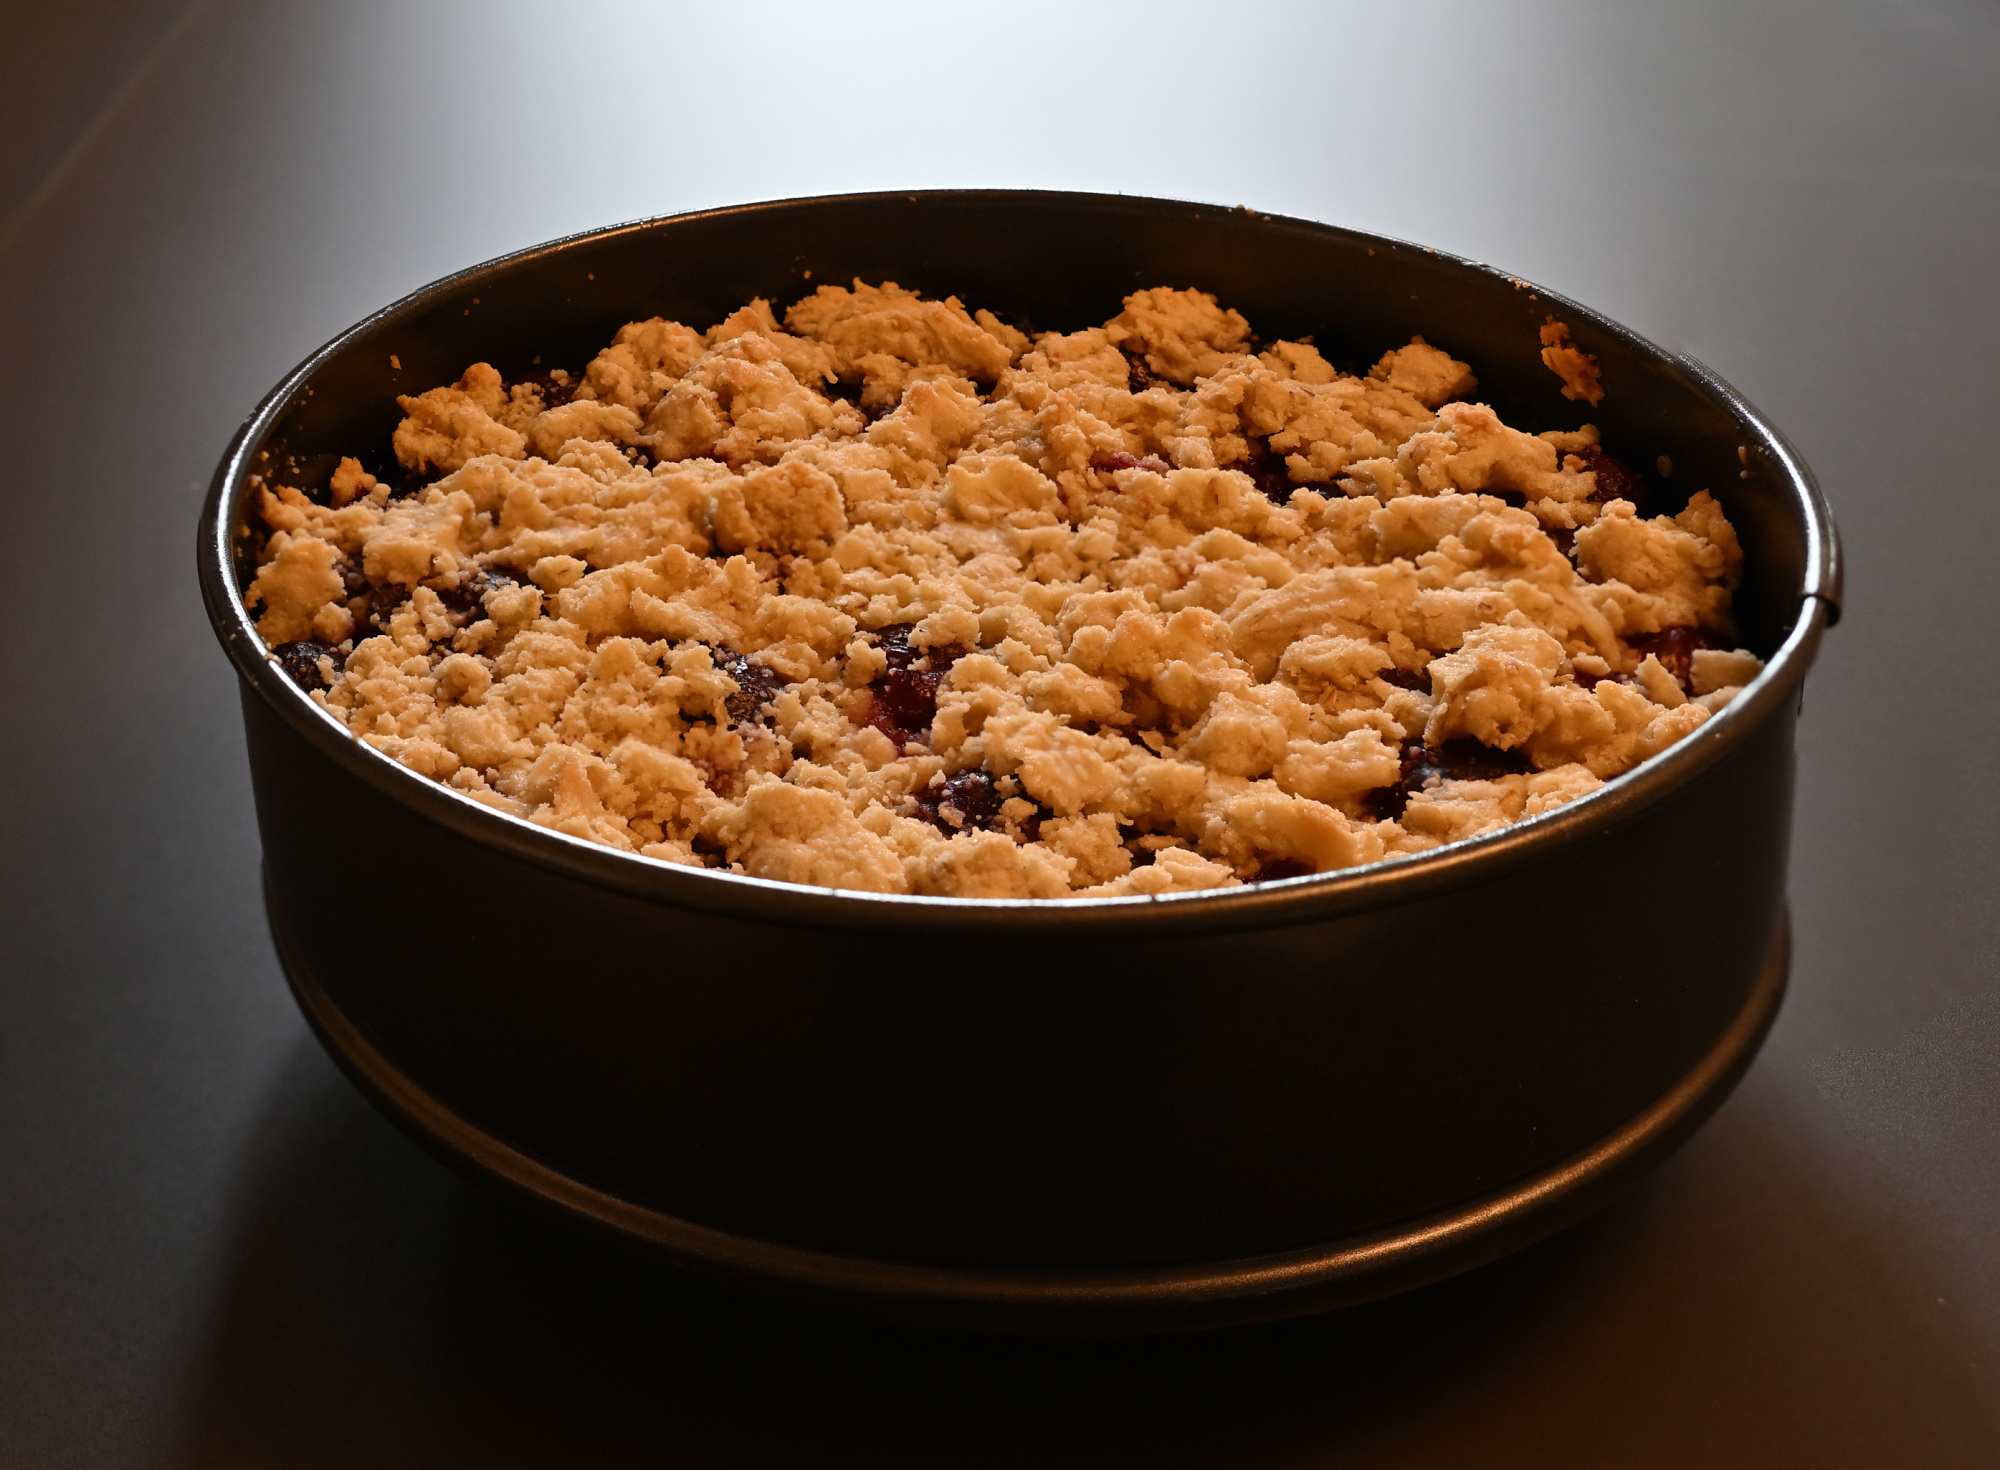
Der Ofen ist schon auf Temperatur, bevor überhaupt entschieden ist, ob das Ergebnis dokumentiert werden soll. Der Kirschstreusel ist zu diesem Zeitpunkt noch eher ein Versprechen. Die Oberfläche unfertig, die Struktur noch im Übergang. Die Hitze beginnt langsam Ordnung zu schaffen.
Währenddessen passiert etwas, das sich so nicht wiederholen lässt. Die Streusel verändern ihre Farbe nur wenig, von trocken zu goldbraun, mit diesem kurzen Punkt davor, an dem die Textur kippen würde. Messen kann man den Moment nicht wirklich. Man erkennt ihn eher.
1/250s f/2,8 ISO 3200/36° 16-50mm f/2,8 VR f=31mm/47mm
Danach kommt die Phase, in der alles noch zusammenhält. Der Kuchen bleibt in der Form, als müsste er selbst kurz prüfen, ob er stabil genug ist, um als Objekt zu existieren. Die Kirschen haben dabei ihre eigene Dynamik. Was vorher locker geschichtet war, ist jetzt gebunden, aber nicht starr. Oberfläche und Inneres passen langsam zusammen.
Erstellt mit Focus stacking
1/50s f/5 ISO 1000/31° 16-50mm f/2,8 VR f=33mm/49mm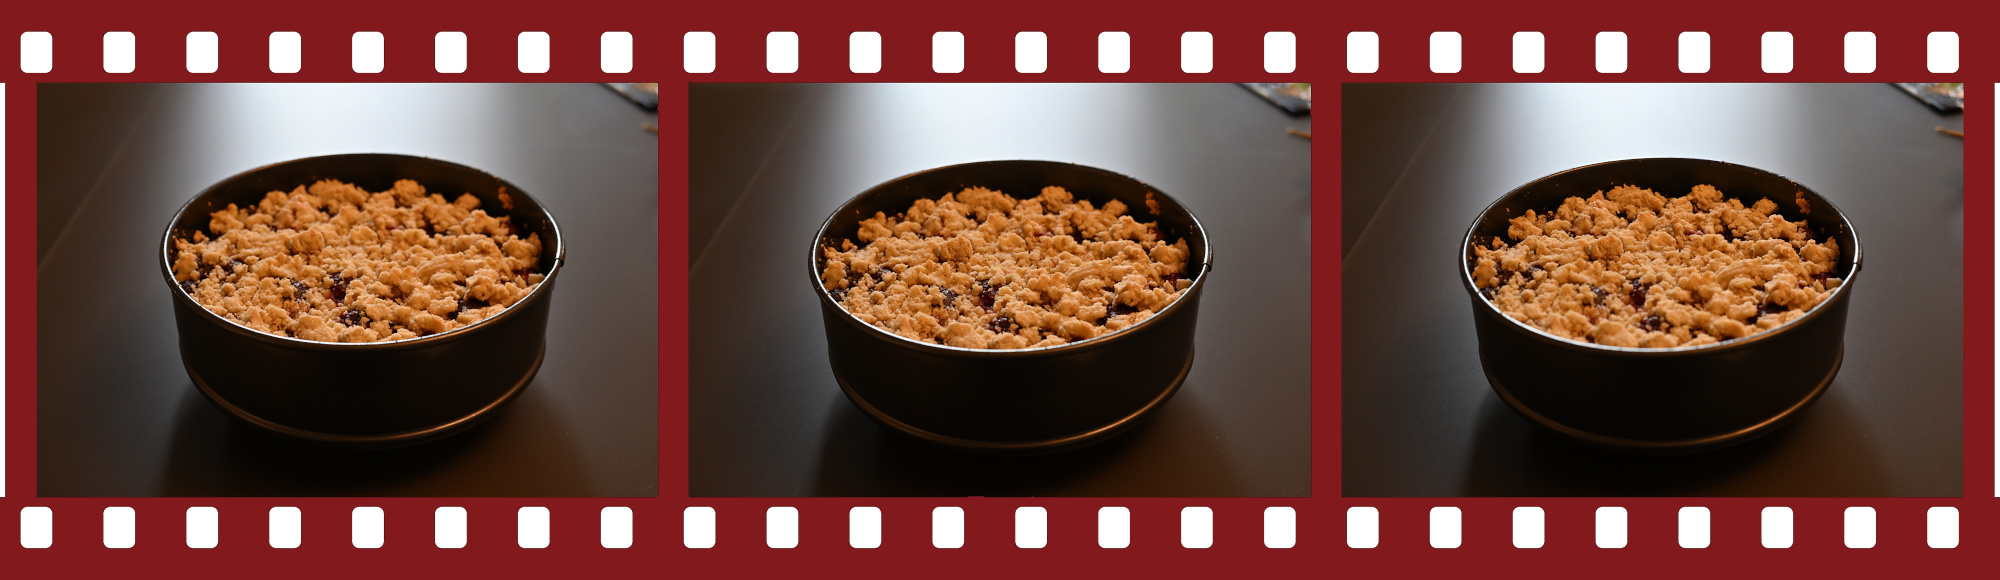
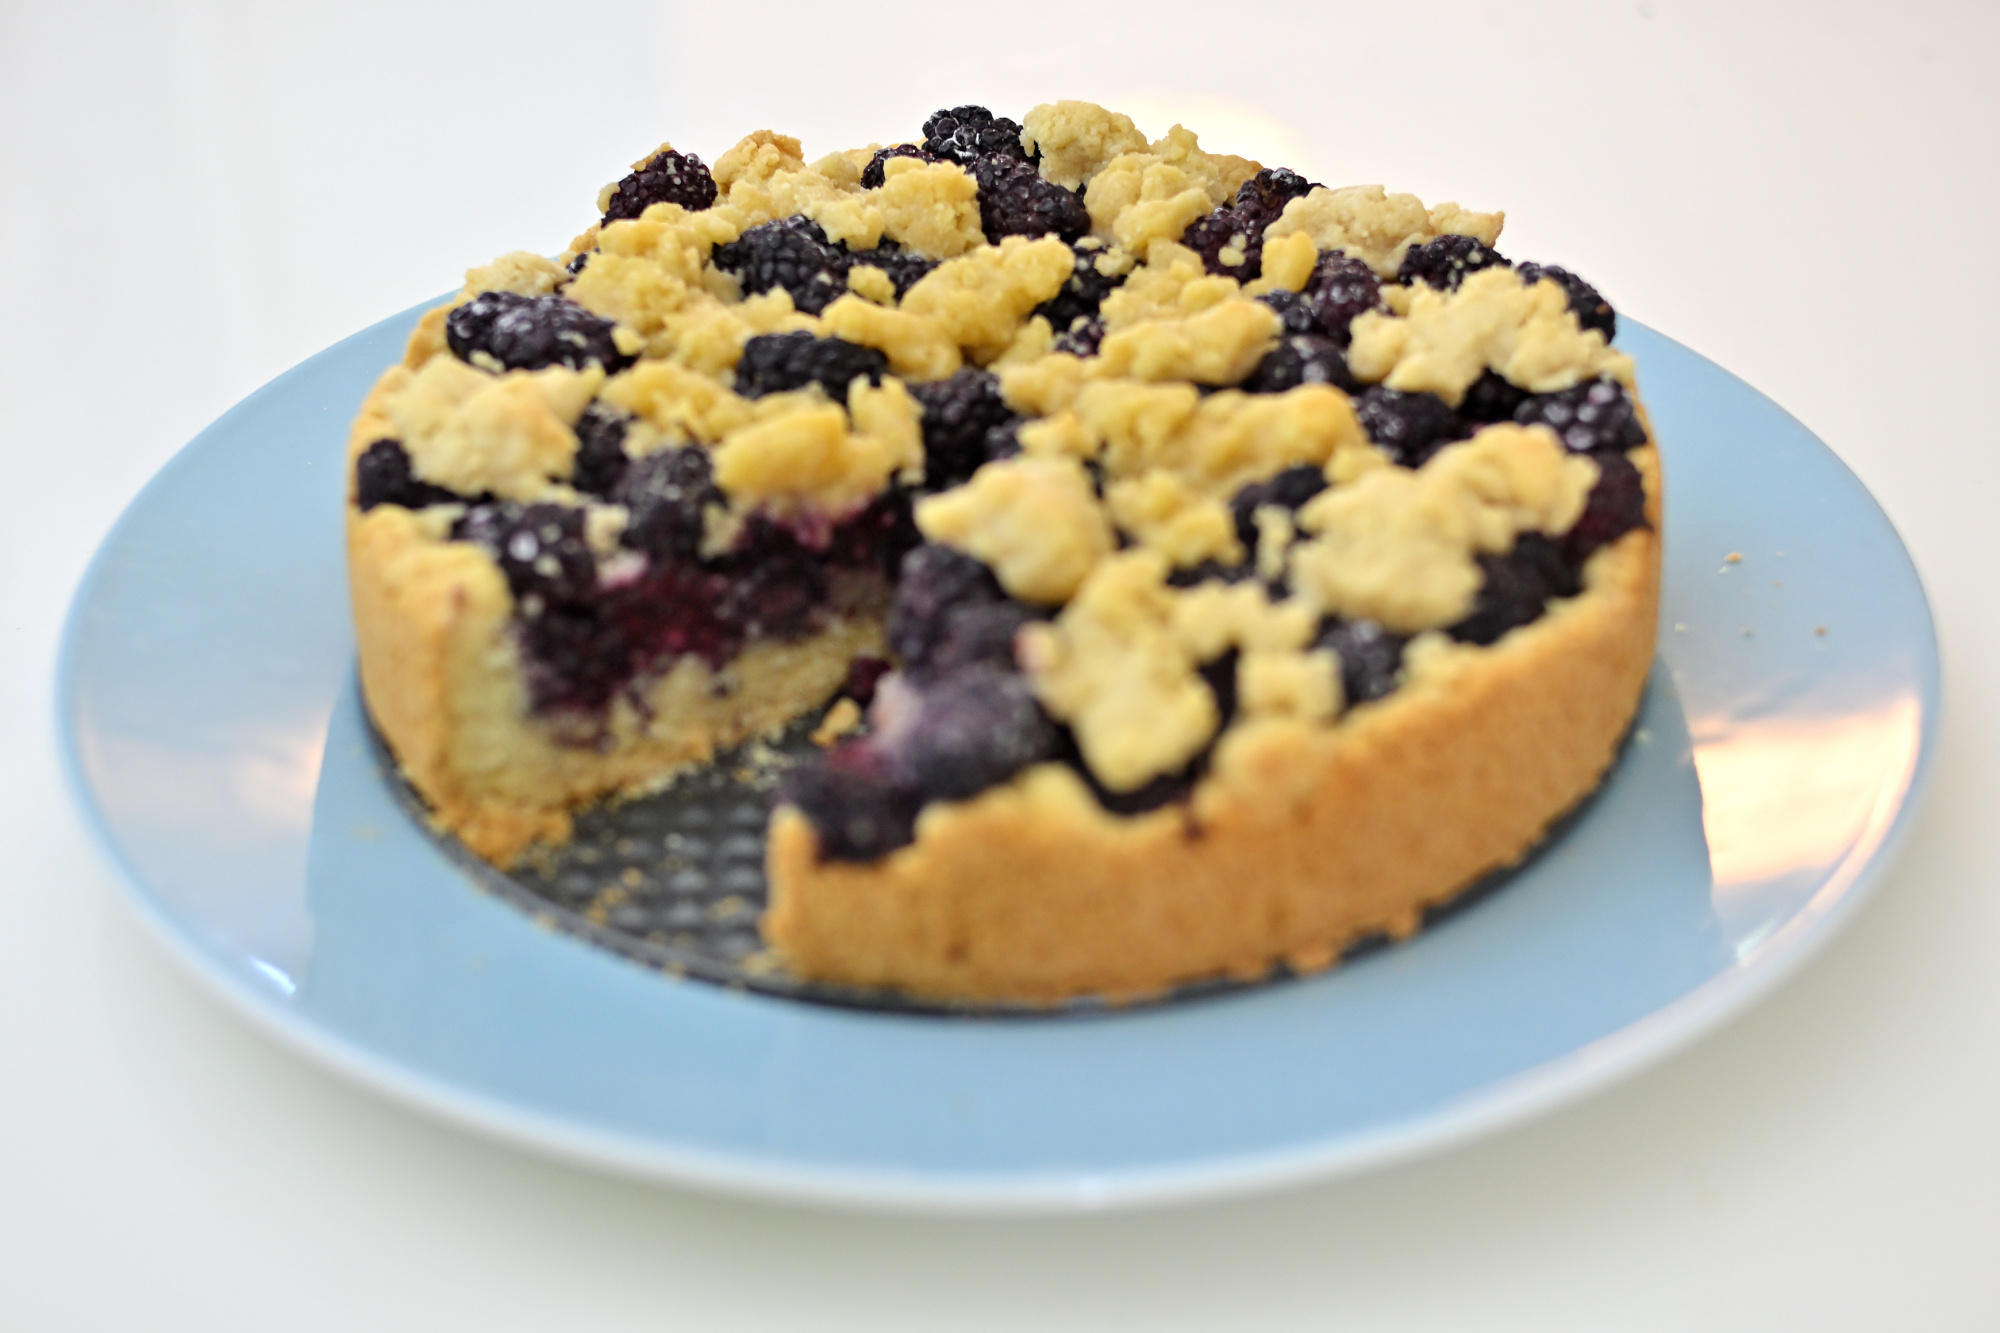
Auf dem Teller ist es wieder ein Übergangszustand. Abkühlen klingt passiv, ist es aber nicht. Dampf verschwindet, die Struktur zieht sich minimal zurück, Spannungen lösen sich. Die Oberfläche verliert etwas Glanz und gewinnt dafür an Klarheit. Ein kurzer Moment, in dem sich entscheidet, ob etwas als Bild bestehen bleibt oder nur als Erinnerung.
Erst mit dem ersten Schnitt wird es eindeutig. Die innere Struktur wird sichtbar. Schichtung, Verteilung, kleine Unregelmäßigkeiten, die vorher unsichtbar waren. Keine perfekte Geometrie, aber eine, die funktioniert.
und nimmt sich einen moment zeit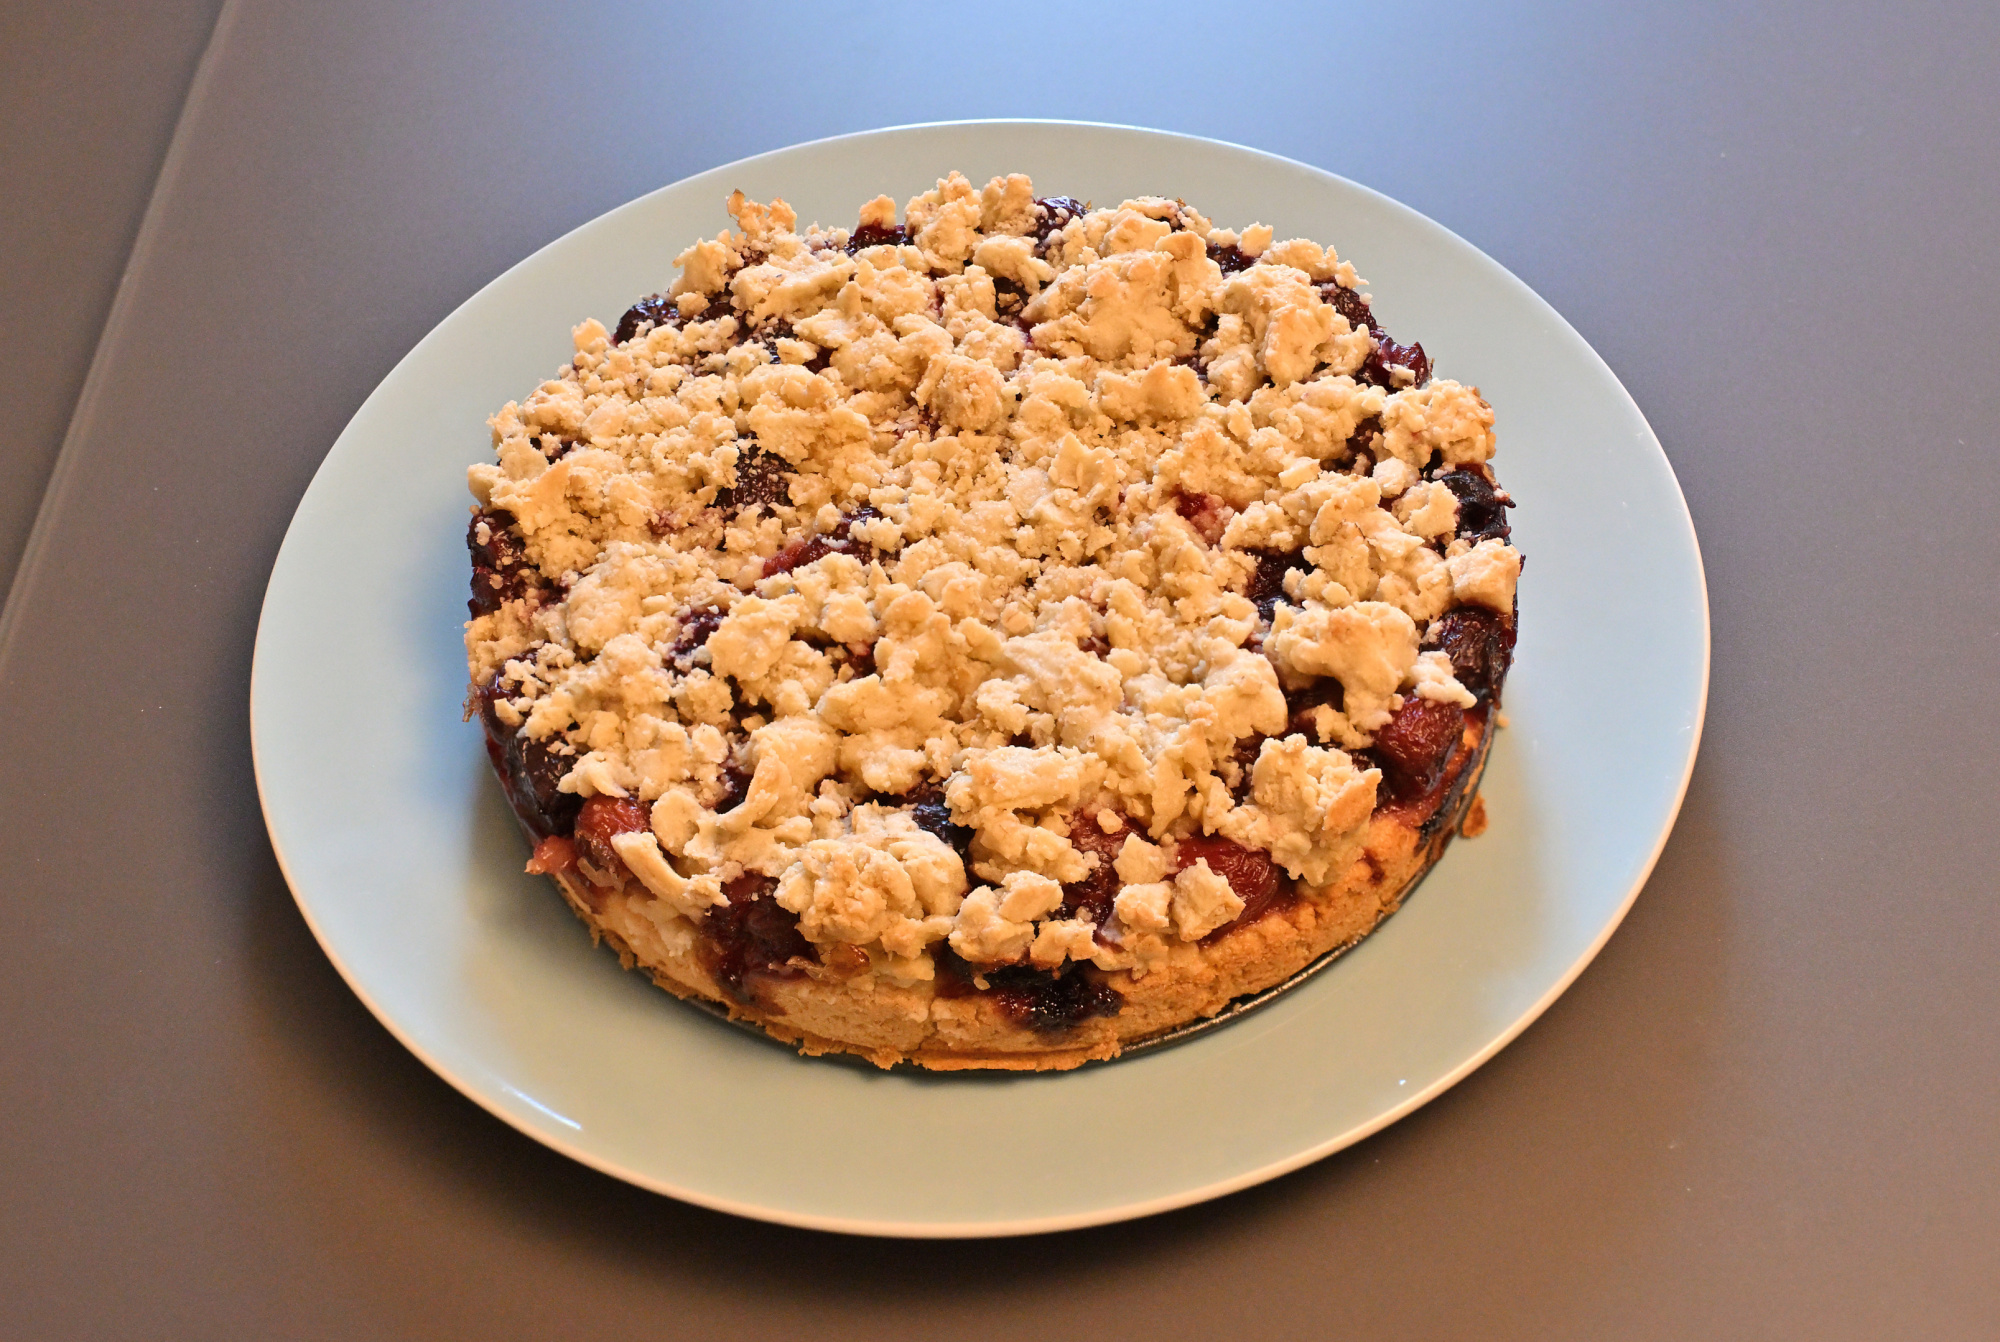
Das auch mit Focus stacking
1/50s f/5 ISO 1000/31° 16-50mm f/2,8 VR f=33mm/49mm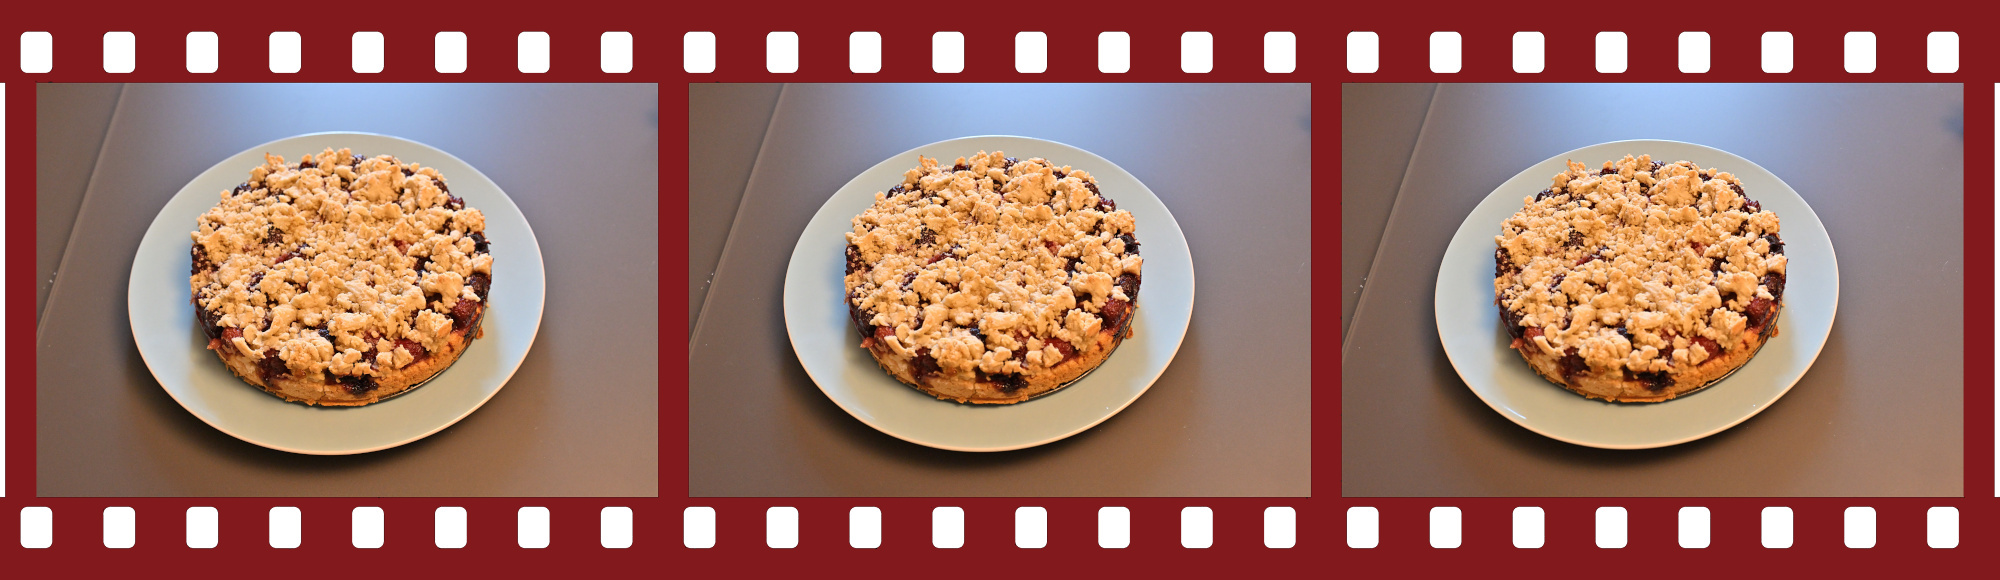
und wartet kurz bevor es weitergeht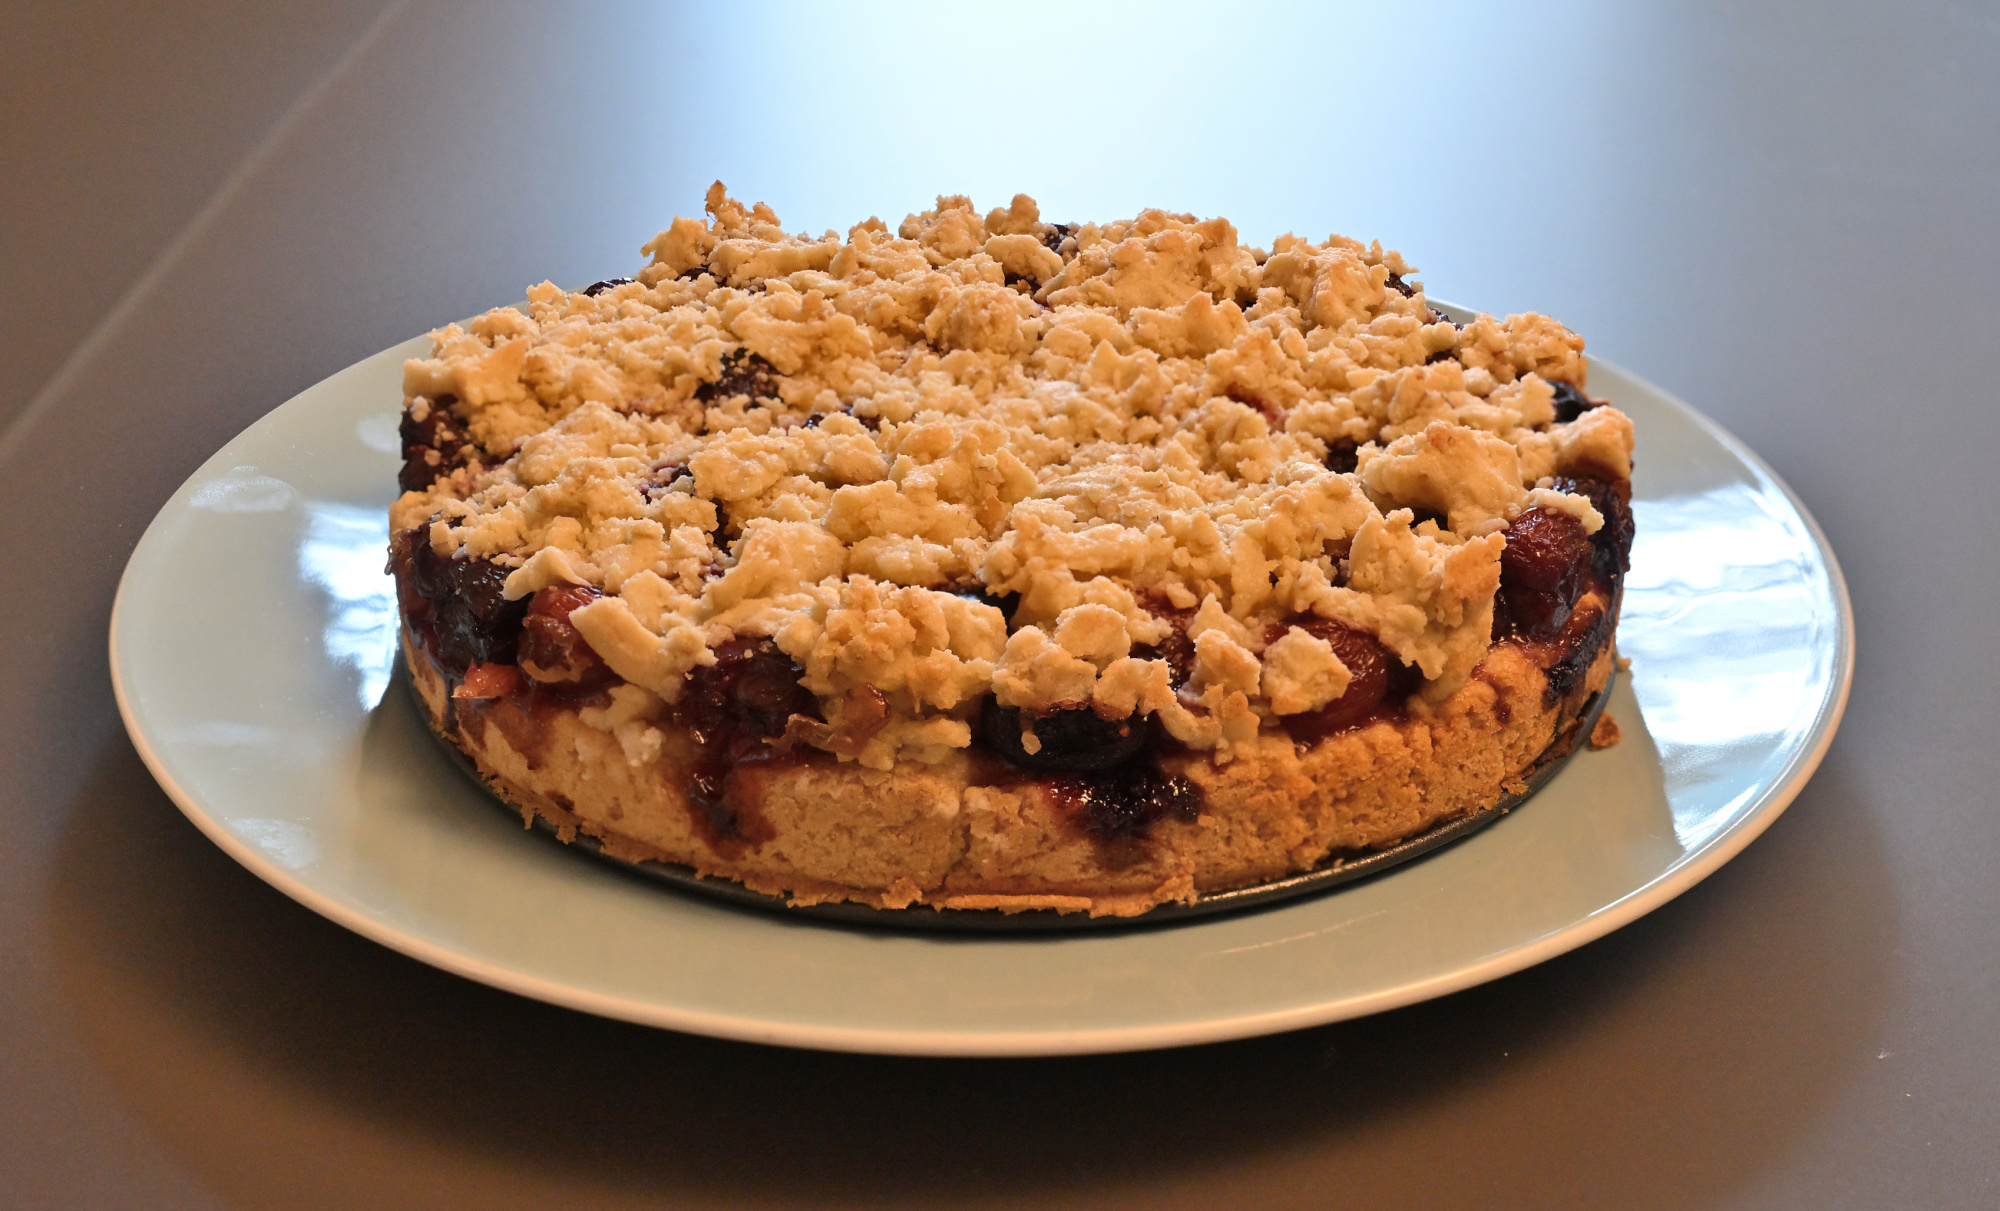
Und das auch
1/50s f/5 ISO 1000/31° 16-50mm f/2,8 VR f=33mm/49mm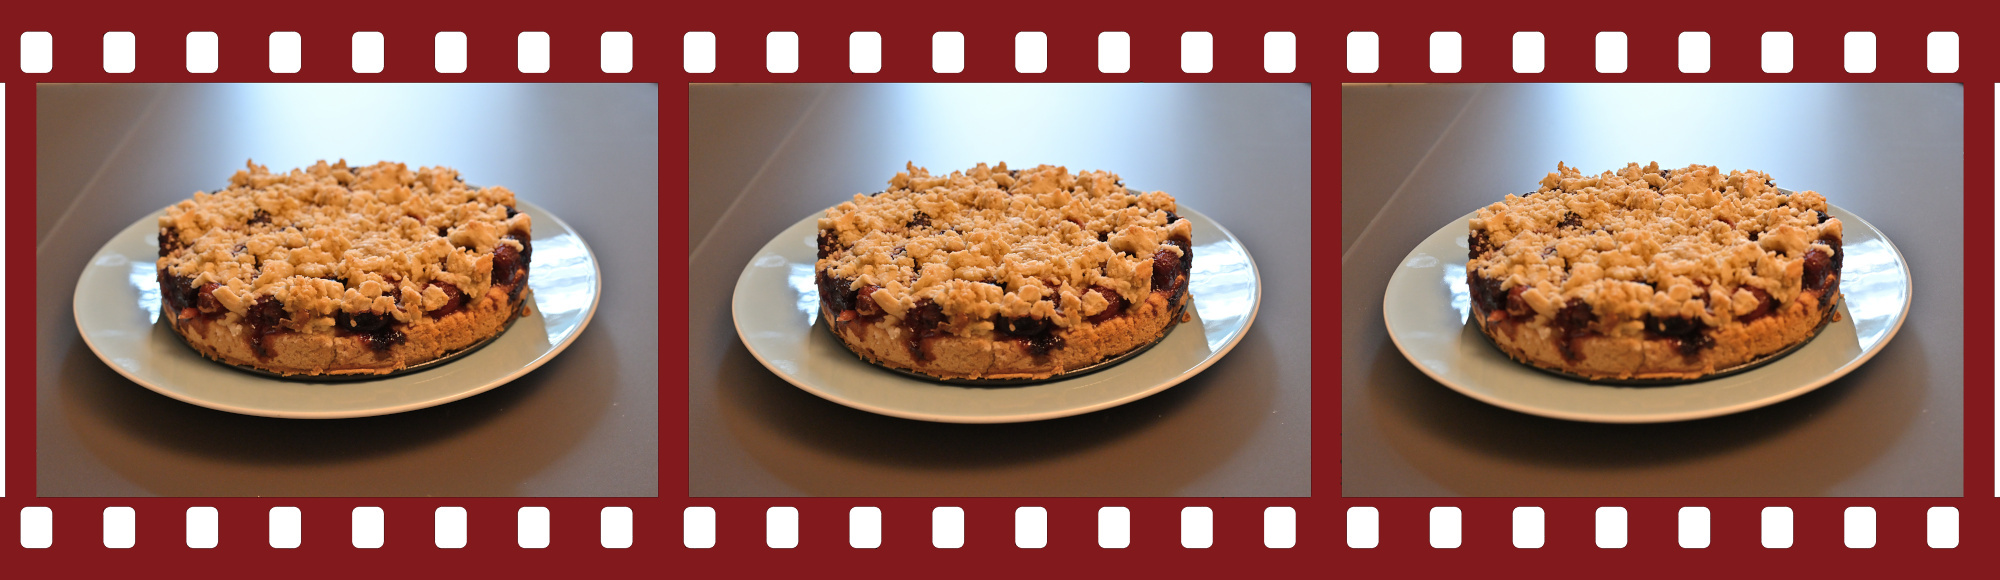
und passt jetzt schon fast vollständig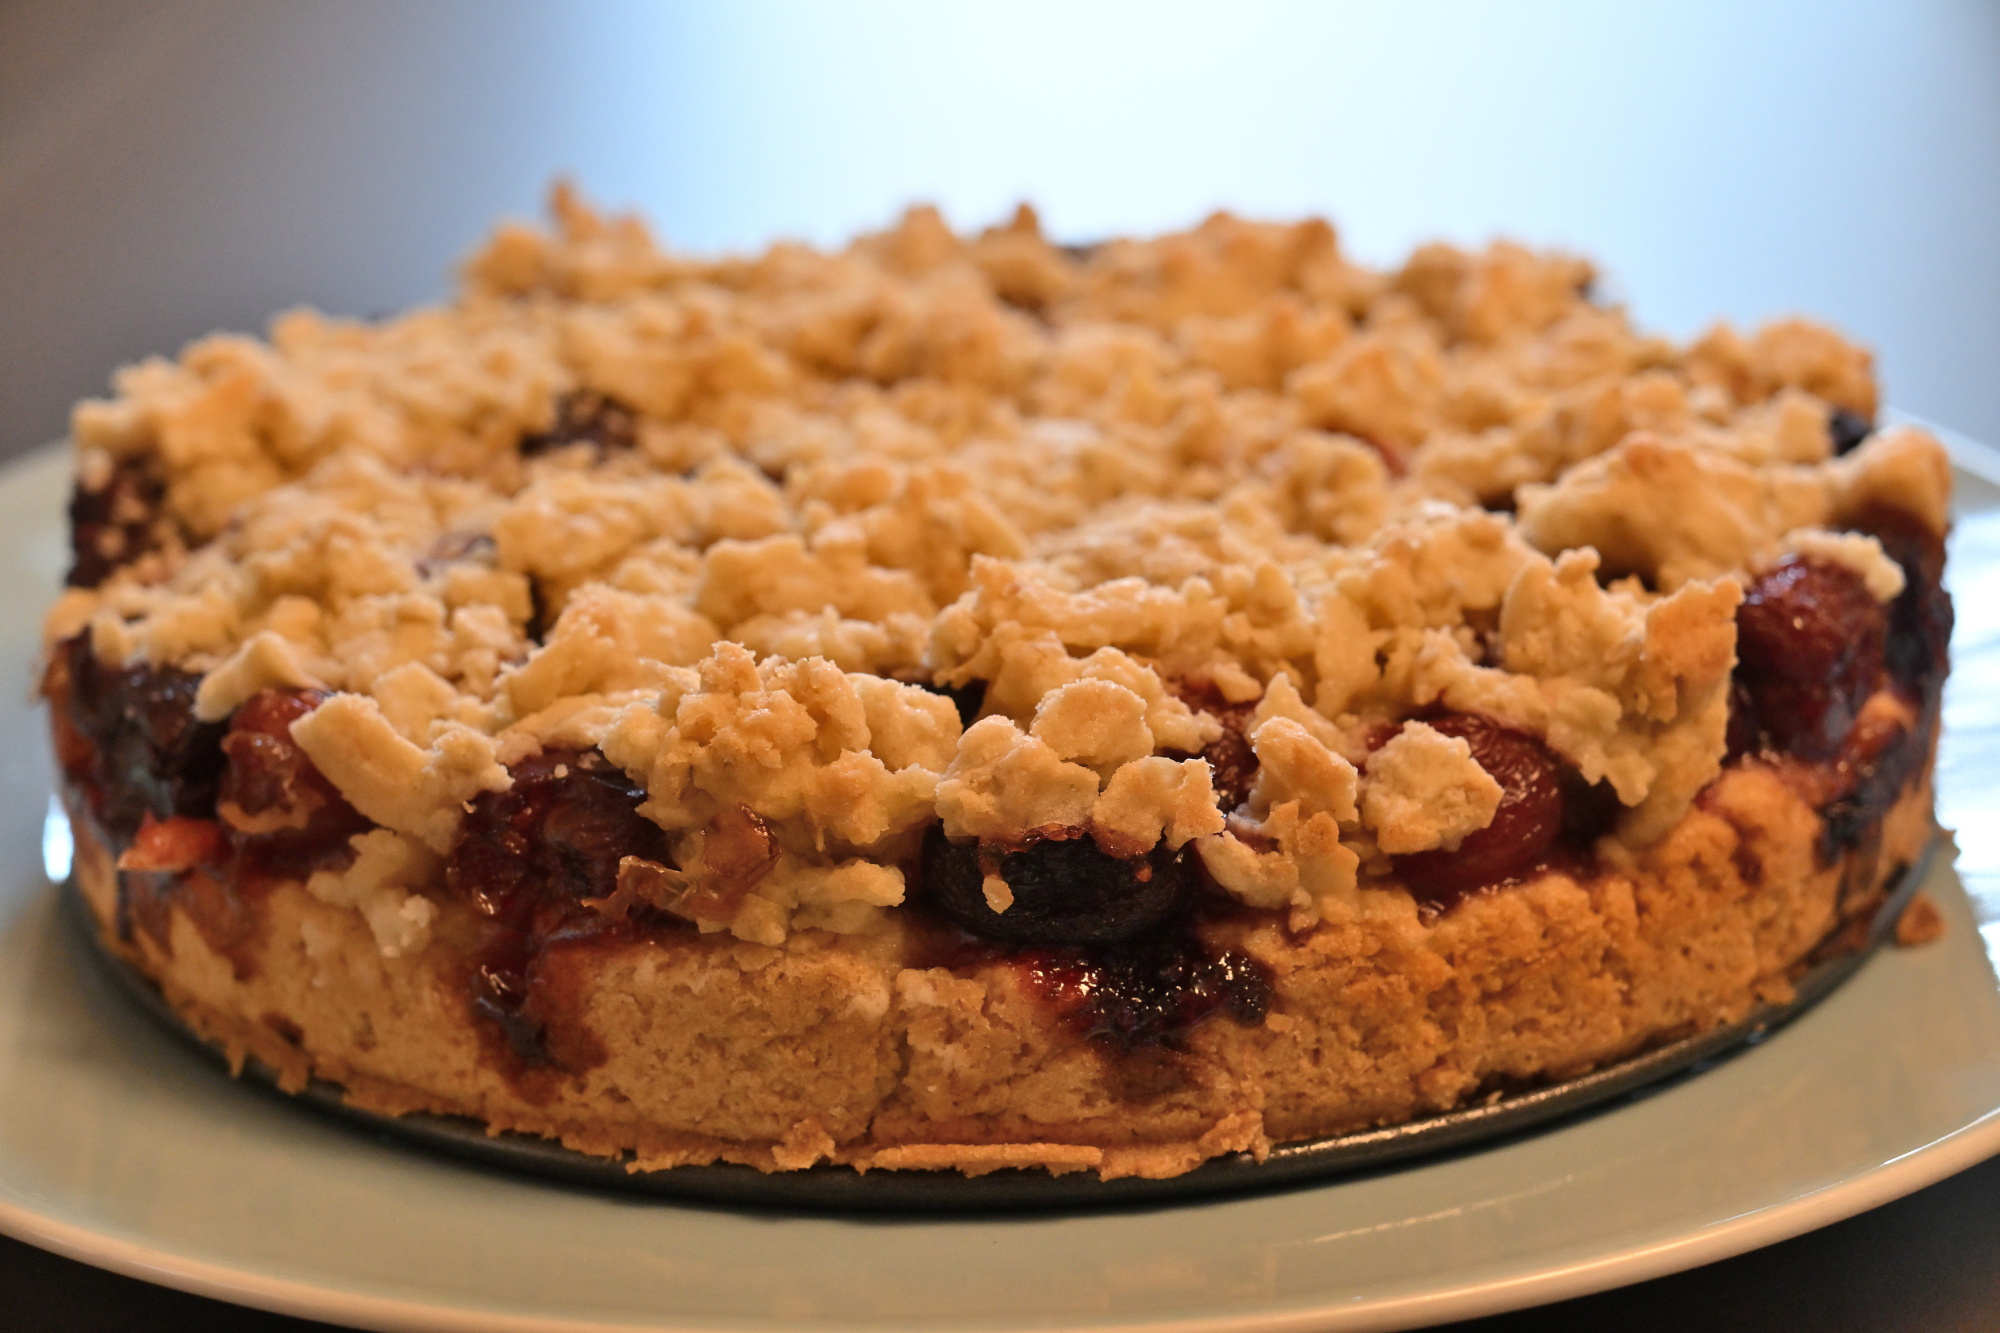
und übernimmt jetzt einfach2
1/100s f/2,8 ISO 100/21° 16-50mm f/2,8 VR f=41mm/61mm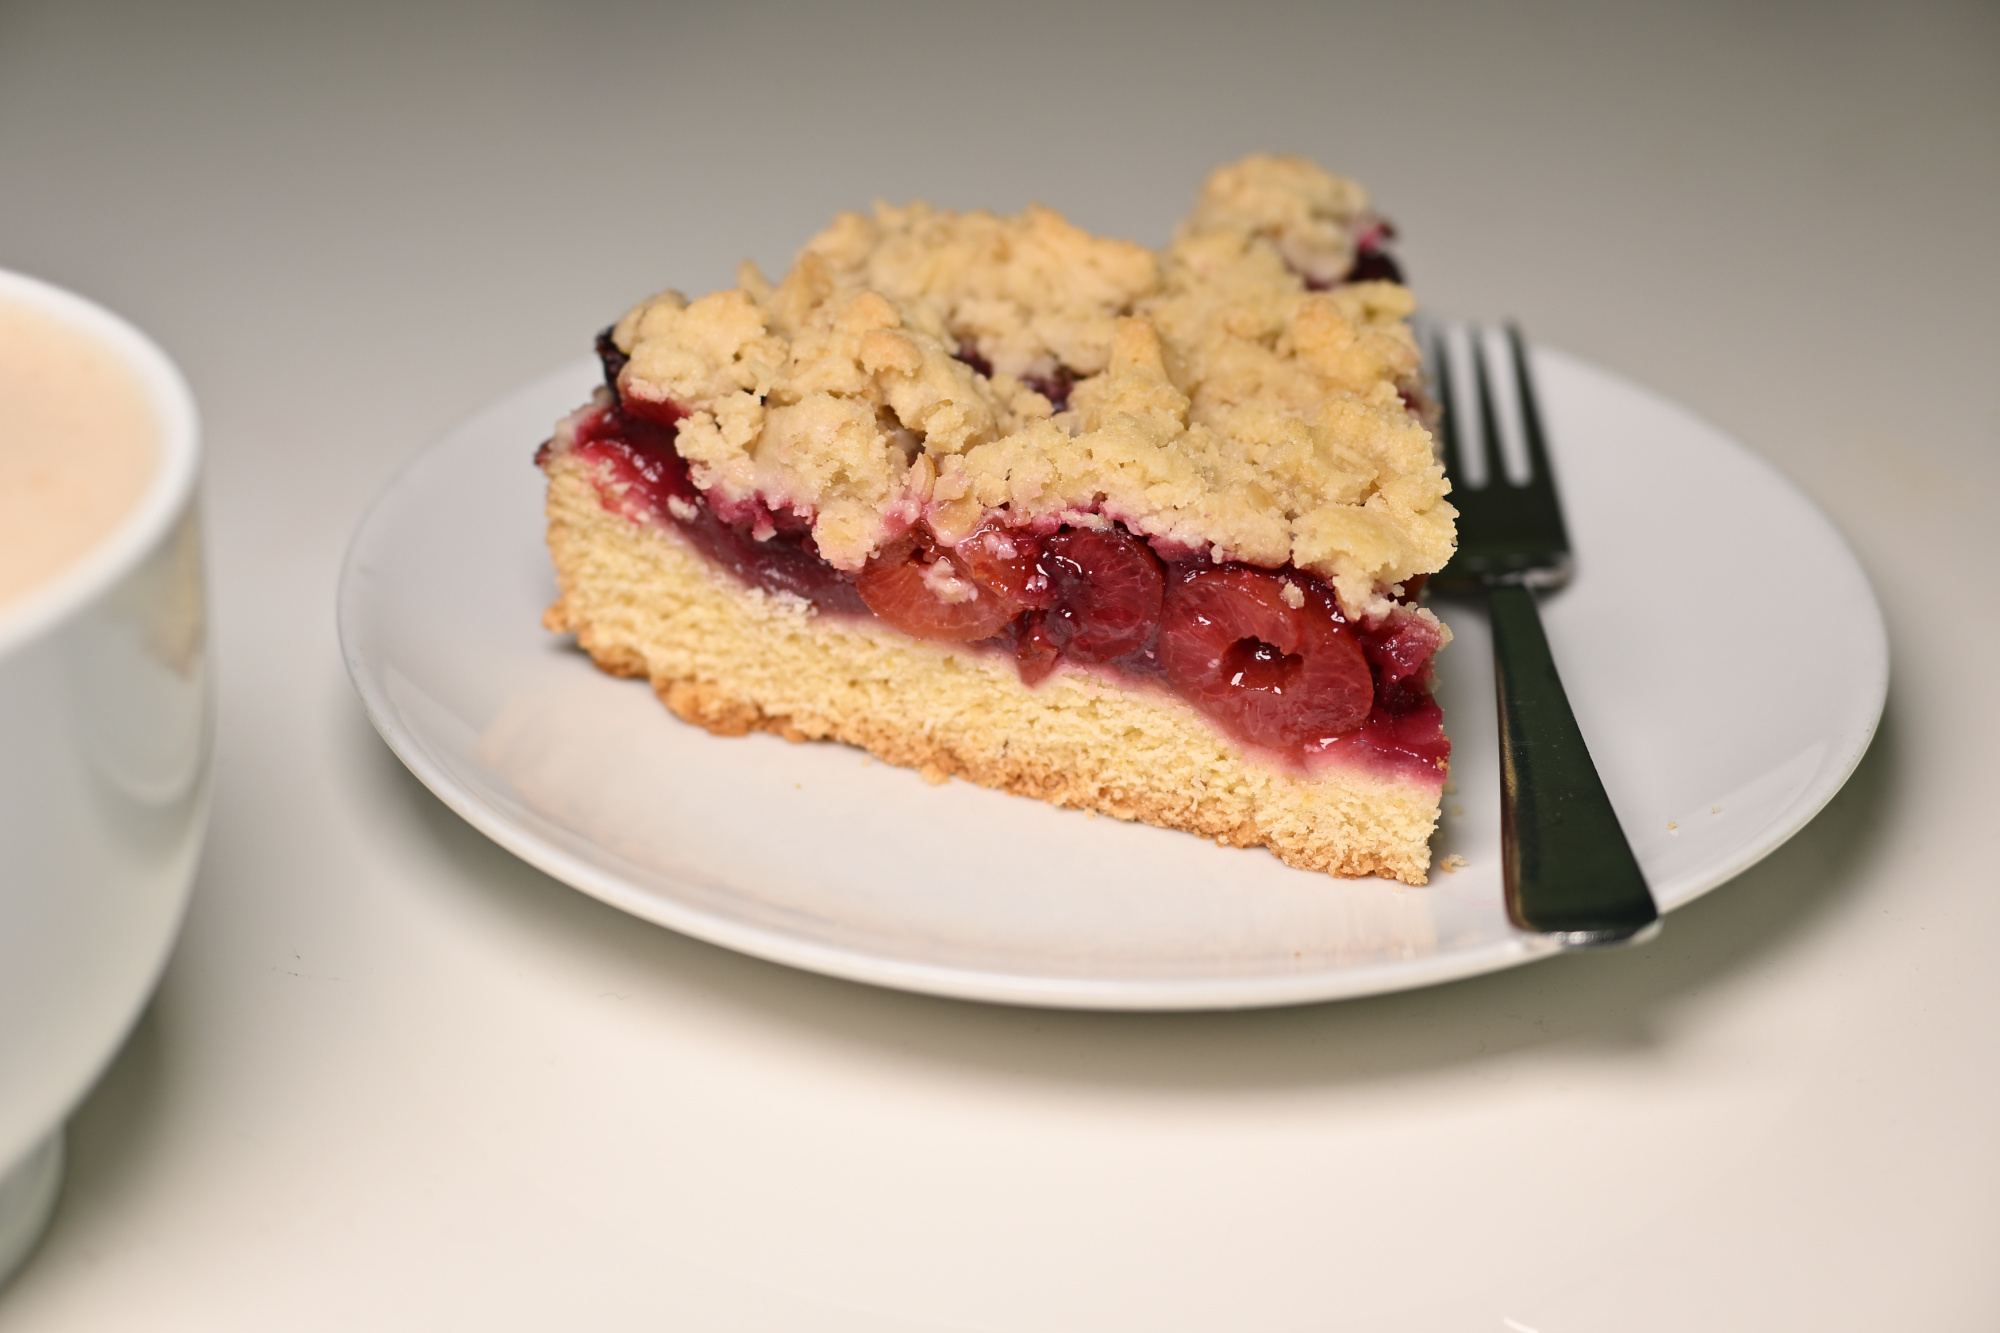
Kaffee trifft Kuchen ohne große Planung. Das Stück ist noch leicht warm, der Kaffee etwas zu heiß, aber das gleicht sich schnell aus. Man probiert kurz, schaut hin, und es passt. Auf dem Teller liegt noch ein zweites Stück. Erst einfach nur da, dann doch angeschnitten.
Für einen besonderen Sonntag genau richtig. Es bleibt eben nicht bei einem Stück.
-
Der Kuchen war diesmal pünktlich beim Shooting. Die Maske saß nicht immer, und bei der Pose gab es offenbar mehrere Meinungen.

↩
-
-
When Focus Follows the Subject
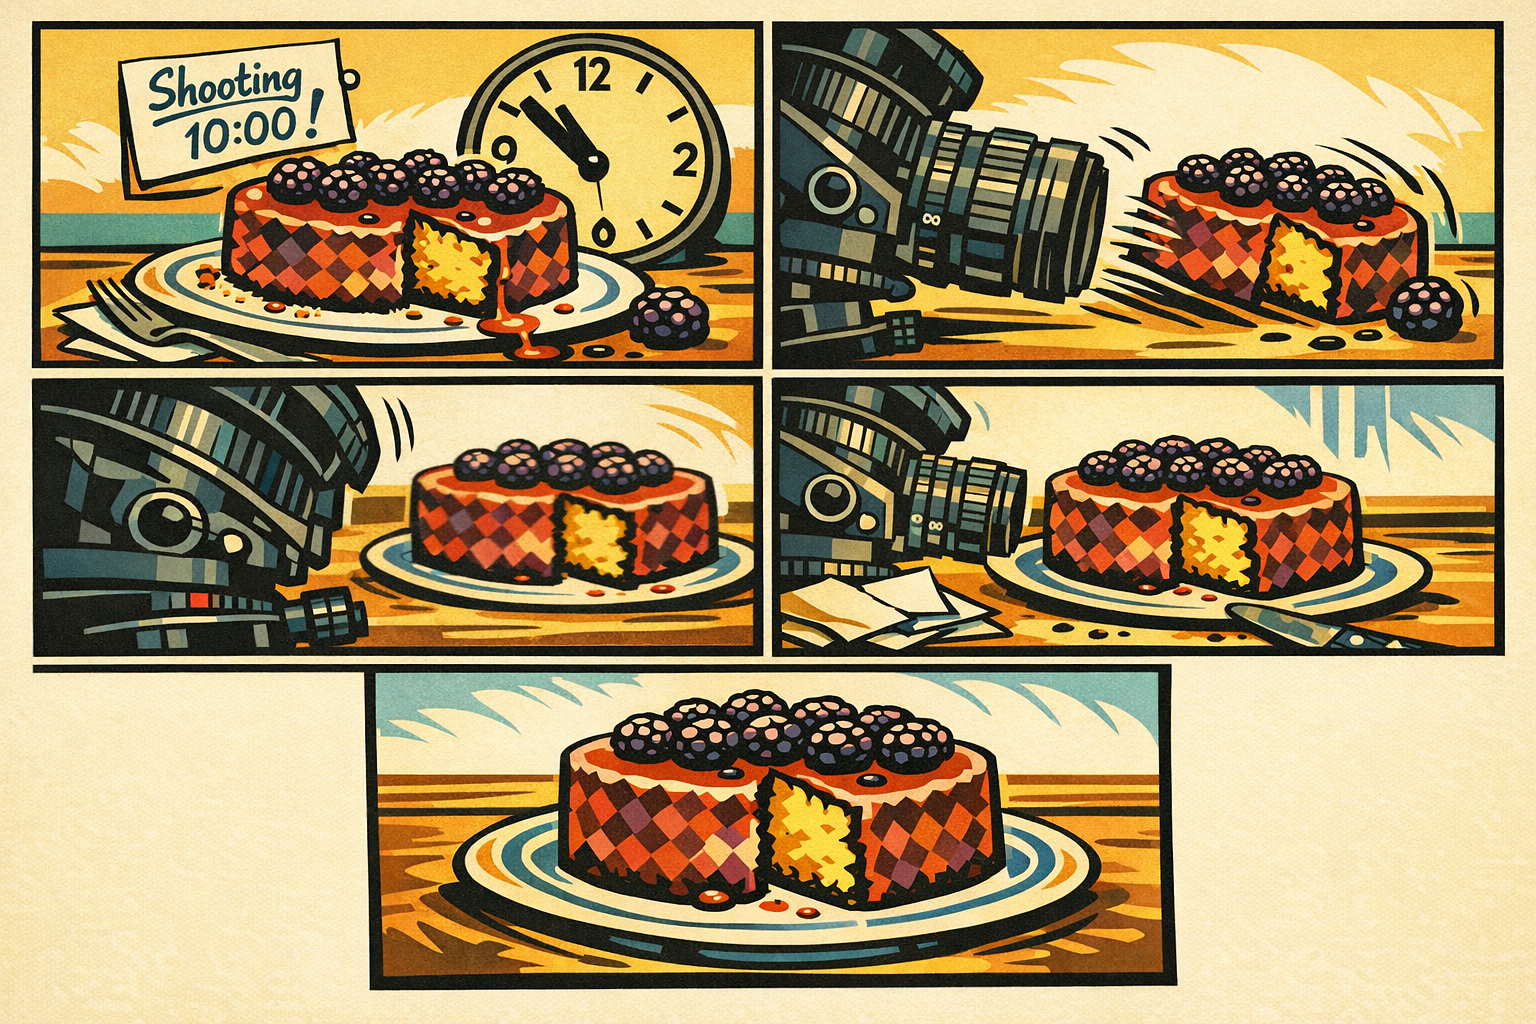
The cake was late for the shoot. One piece was already gone, but there was still time for a quick addition to the family photo album.
In earlier cake sessions, the usual approach was focus stacking: several frames with different focus points, later combined into one final image. That works well, but it also takes time, and this cake was clearly not in the mood for a longer production.
So this time the job went to a tilt adapter and a 35mm3 lens. Instead of building the result from several images, the goal was to get the whole subject sharp in a single frame.
A tilt setup does not simply give more depth of field. What it changes is the angle of the focus plane. Instead of running straight through the scene, the sharp area can be tilted to follow the subject. For something photographed from the side, that makes a real difference. The sharpness no longer has to run mainly from front to back; it can follow the shape of the cake much more naturally.
That is what makes this so interesting. This cannot really be done in software without looking fake. The actual tilt effect has to come from the optics.
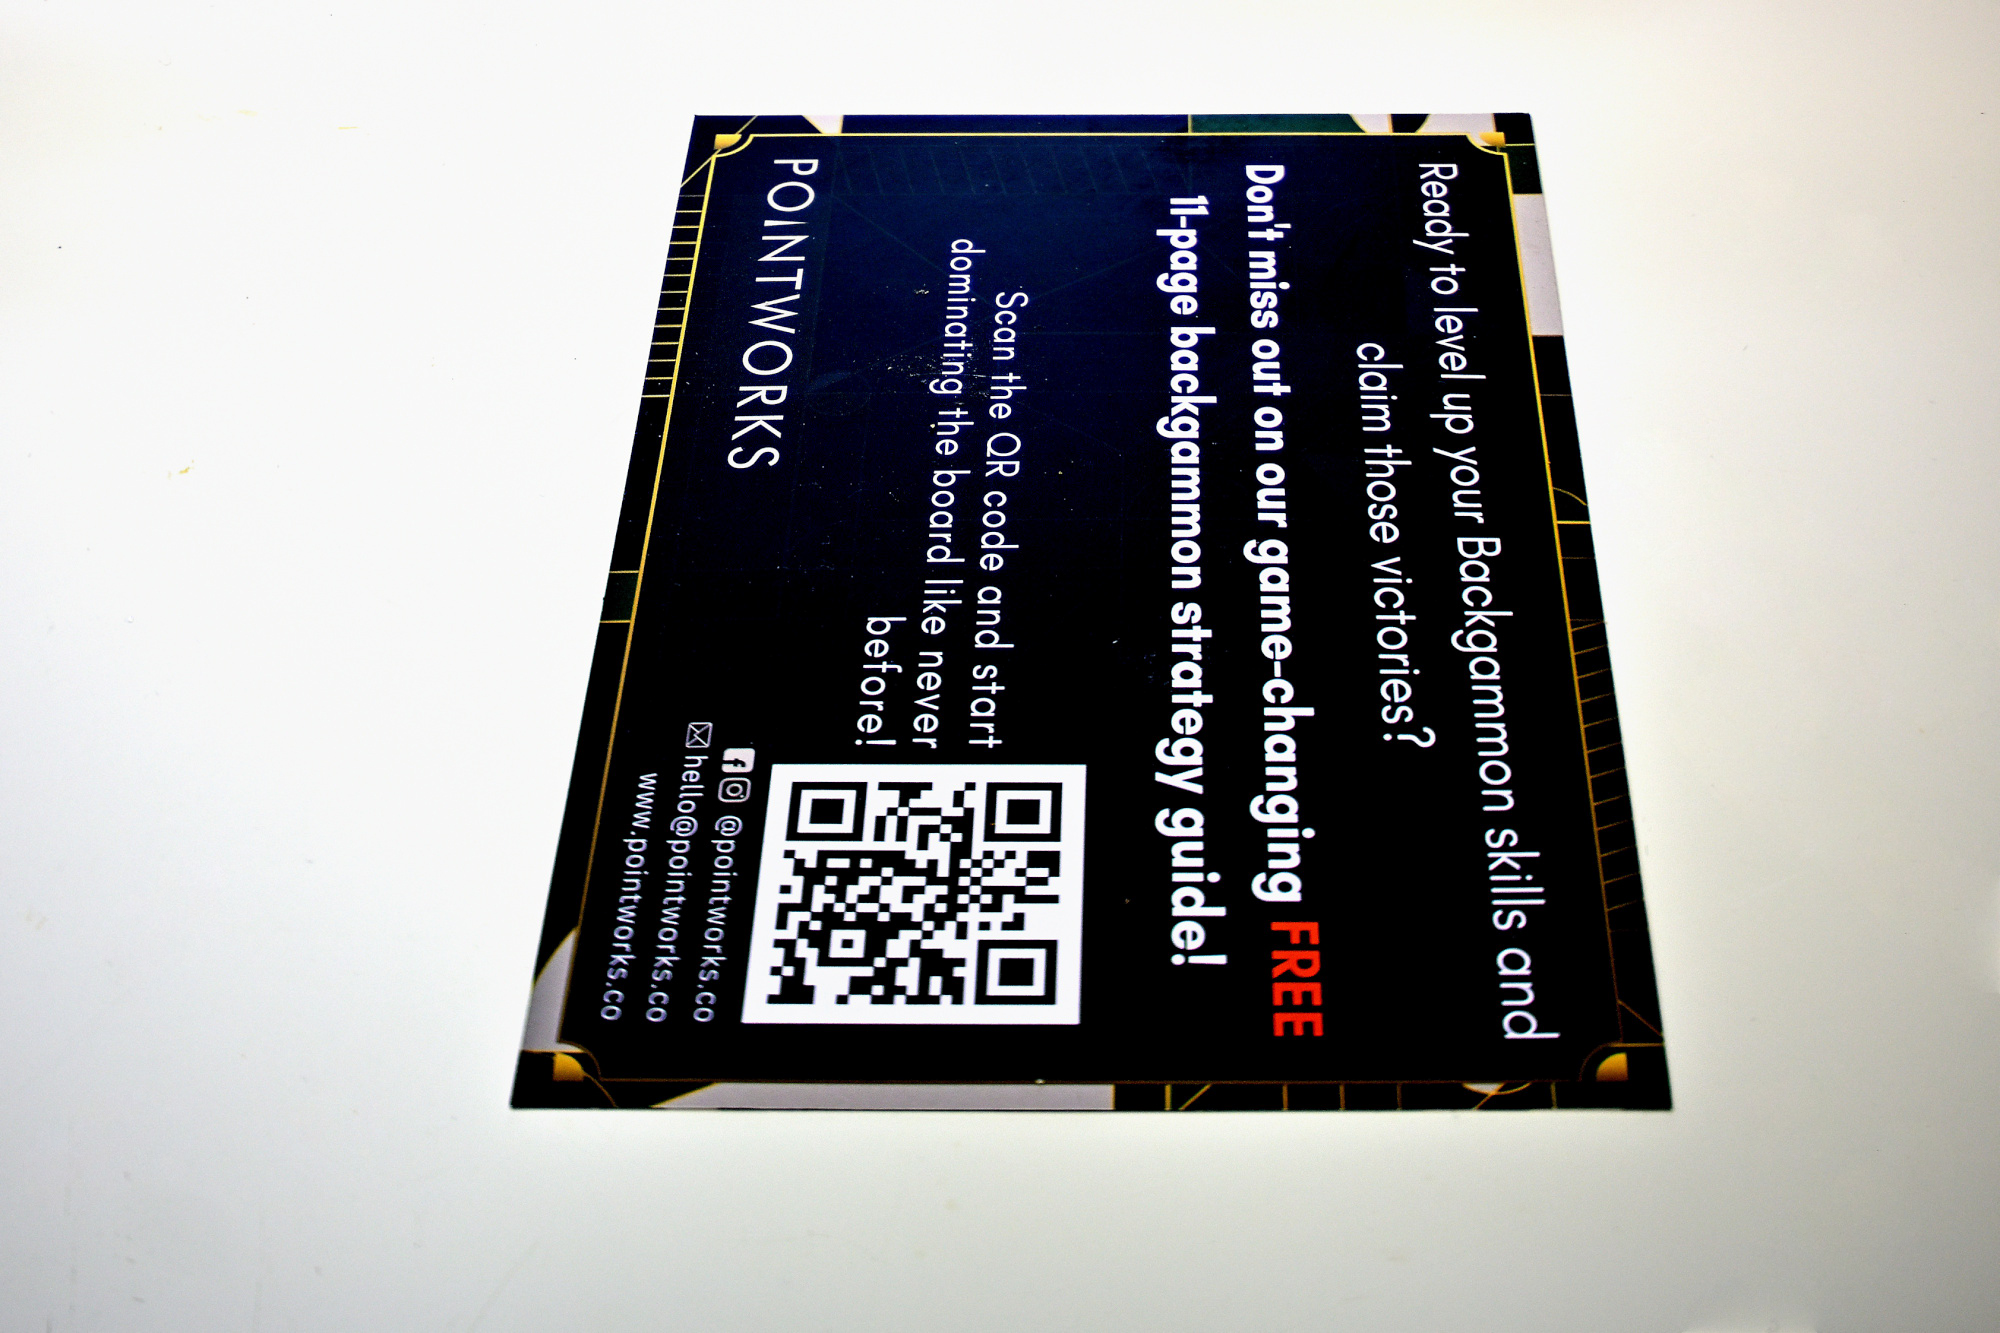
A quick text test
A simple text card as a test subject. With the tilted setup, the whole card stays sharp even though it sits at an angle. The current shooting angle is already very close to the limit of the setup, and at f/2 it gives a good impression of what the tilt adapter can do.
1/40s f/2 ISO 320/26° f=35mm
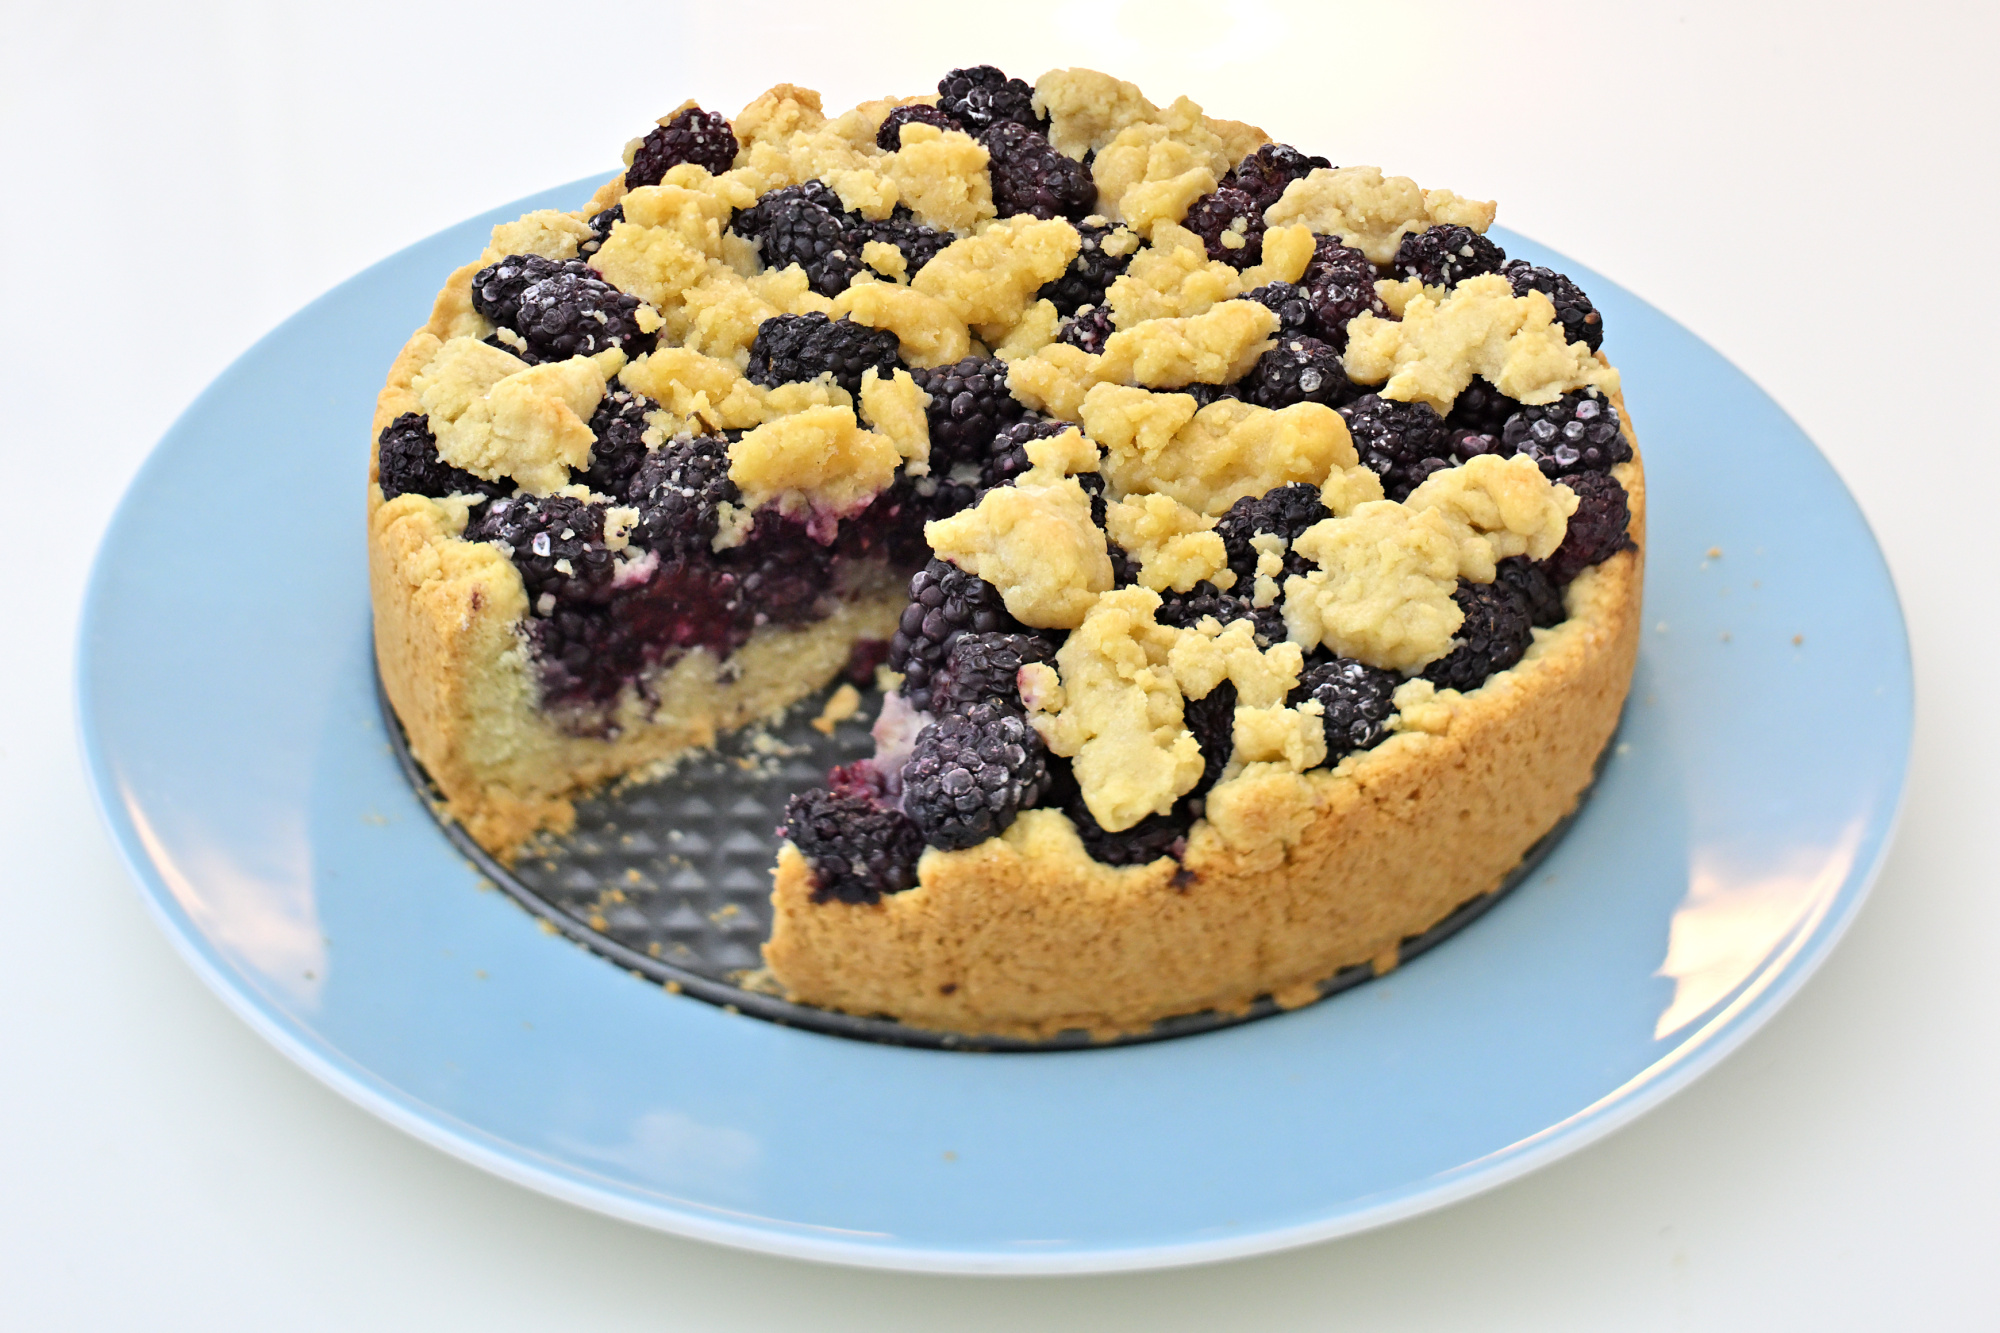
The Cake
Here is the actual subject. One piece of the round cake is already missing, because cakes do not always wait patiently for the photographic process to begin.
Even the sugar coating tells part of the story, with a few visible traces of a rather hurried arrival.
1/40s f/2 ISO 800/30° f=35mm
Same angle, no tilt: focus at the front The same view, but with the tilt set to zero. Focus is placed on the front part of the cake, and the rest falls away much more quickly.
1/40s f/2 ISO 320/26° f=35mm
Same angle, no tilt: focus at the back Again the same angle and no tilt, but this time focused farther back. The difference is easy to see, and it shows quite nicely what the tilt setup changes.
1/40s f/2 ISO 320/26° f=35mm
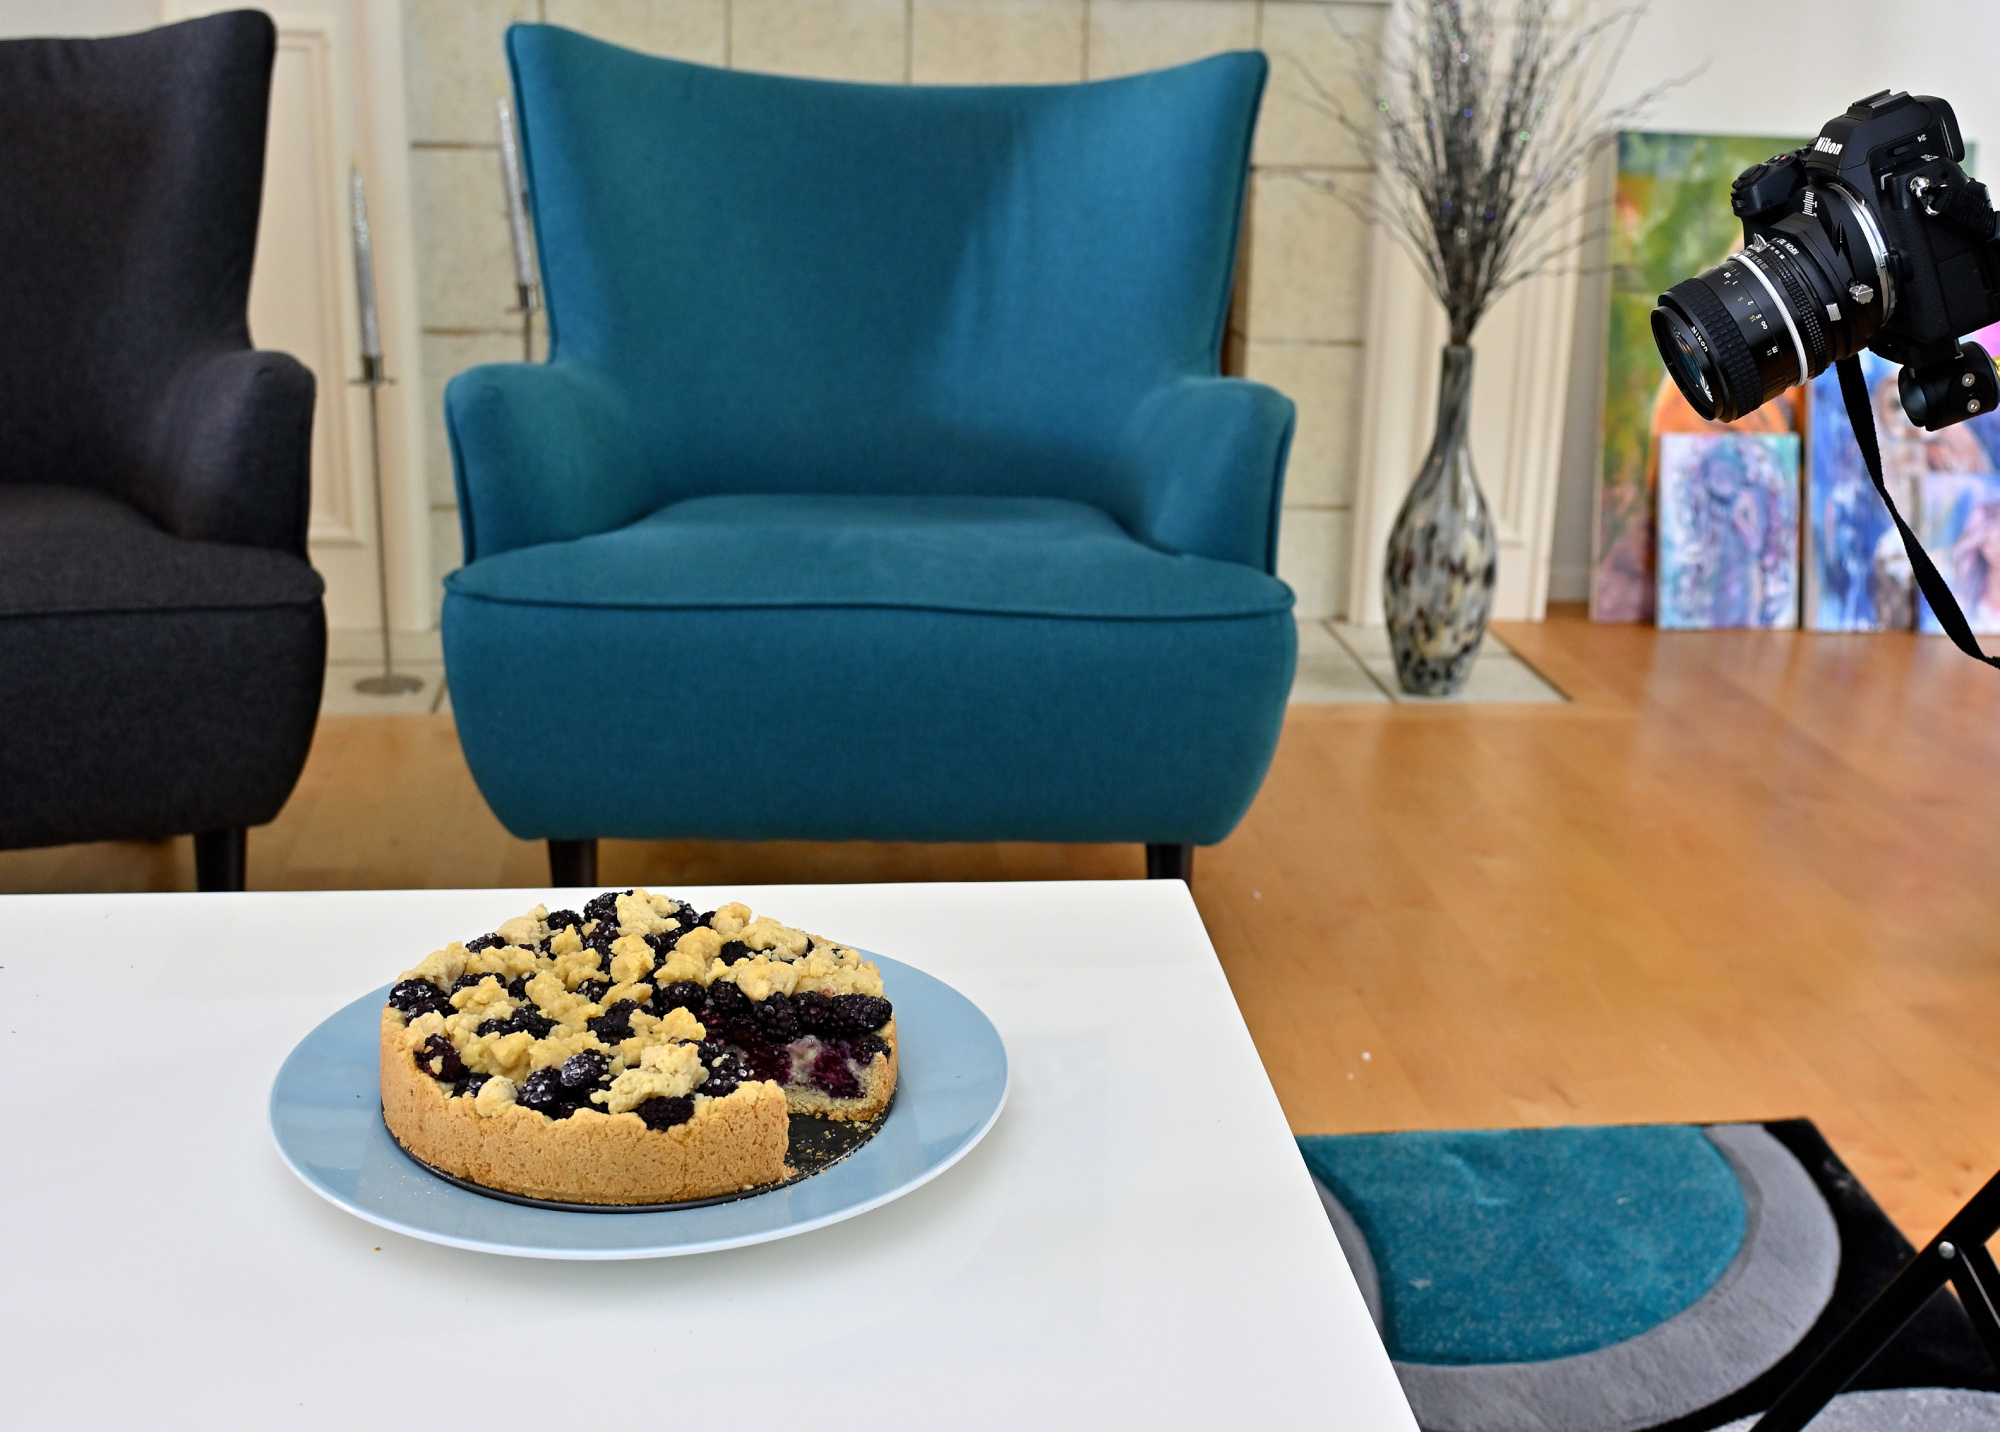
The Setup
The full setup with the cake on the table and the camera floating in the air, carefully aligned and locked onto the target.
1/25s f/4 ISO 400/27° 16-50mm f/2,8 VR f=25mm/37mm
Tilt adapter and 35mm lens
A closer look at the camera with the tilt adapter and the 35mm f/2 lens. A small addition, but one that changes the way this kind of image can be made.
1/30s f/3,2 ISO 400/27° 16-50mm f/2,8 VR f=33mm/50mm
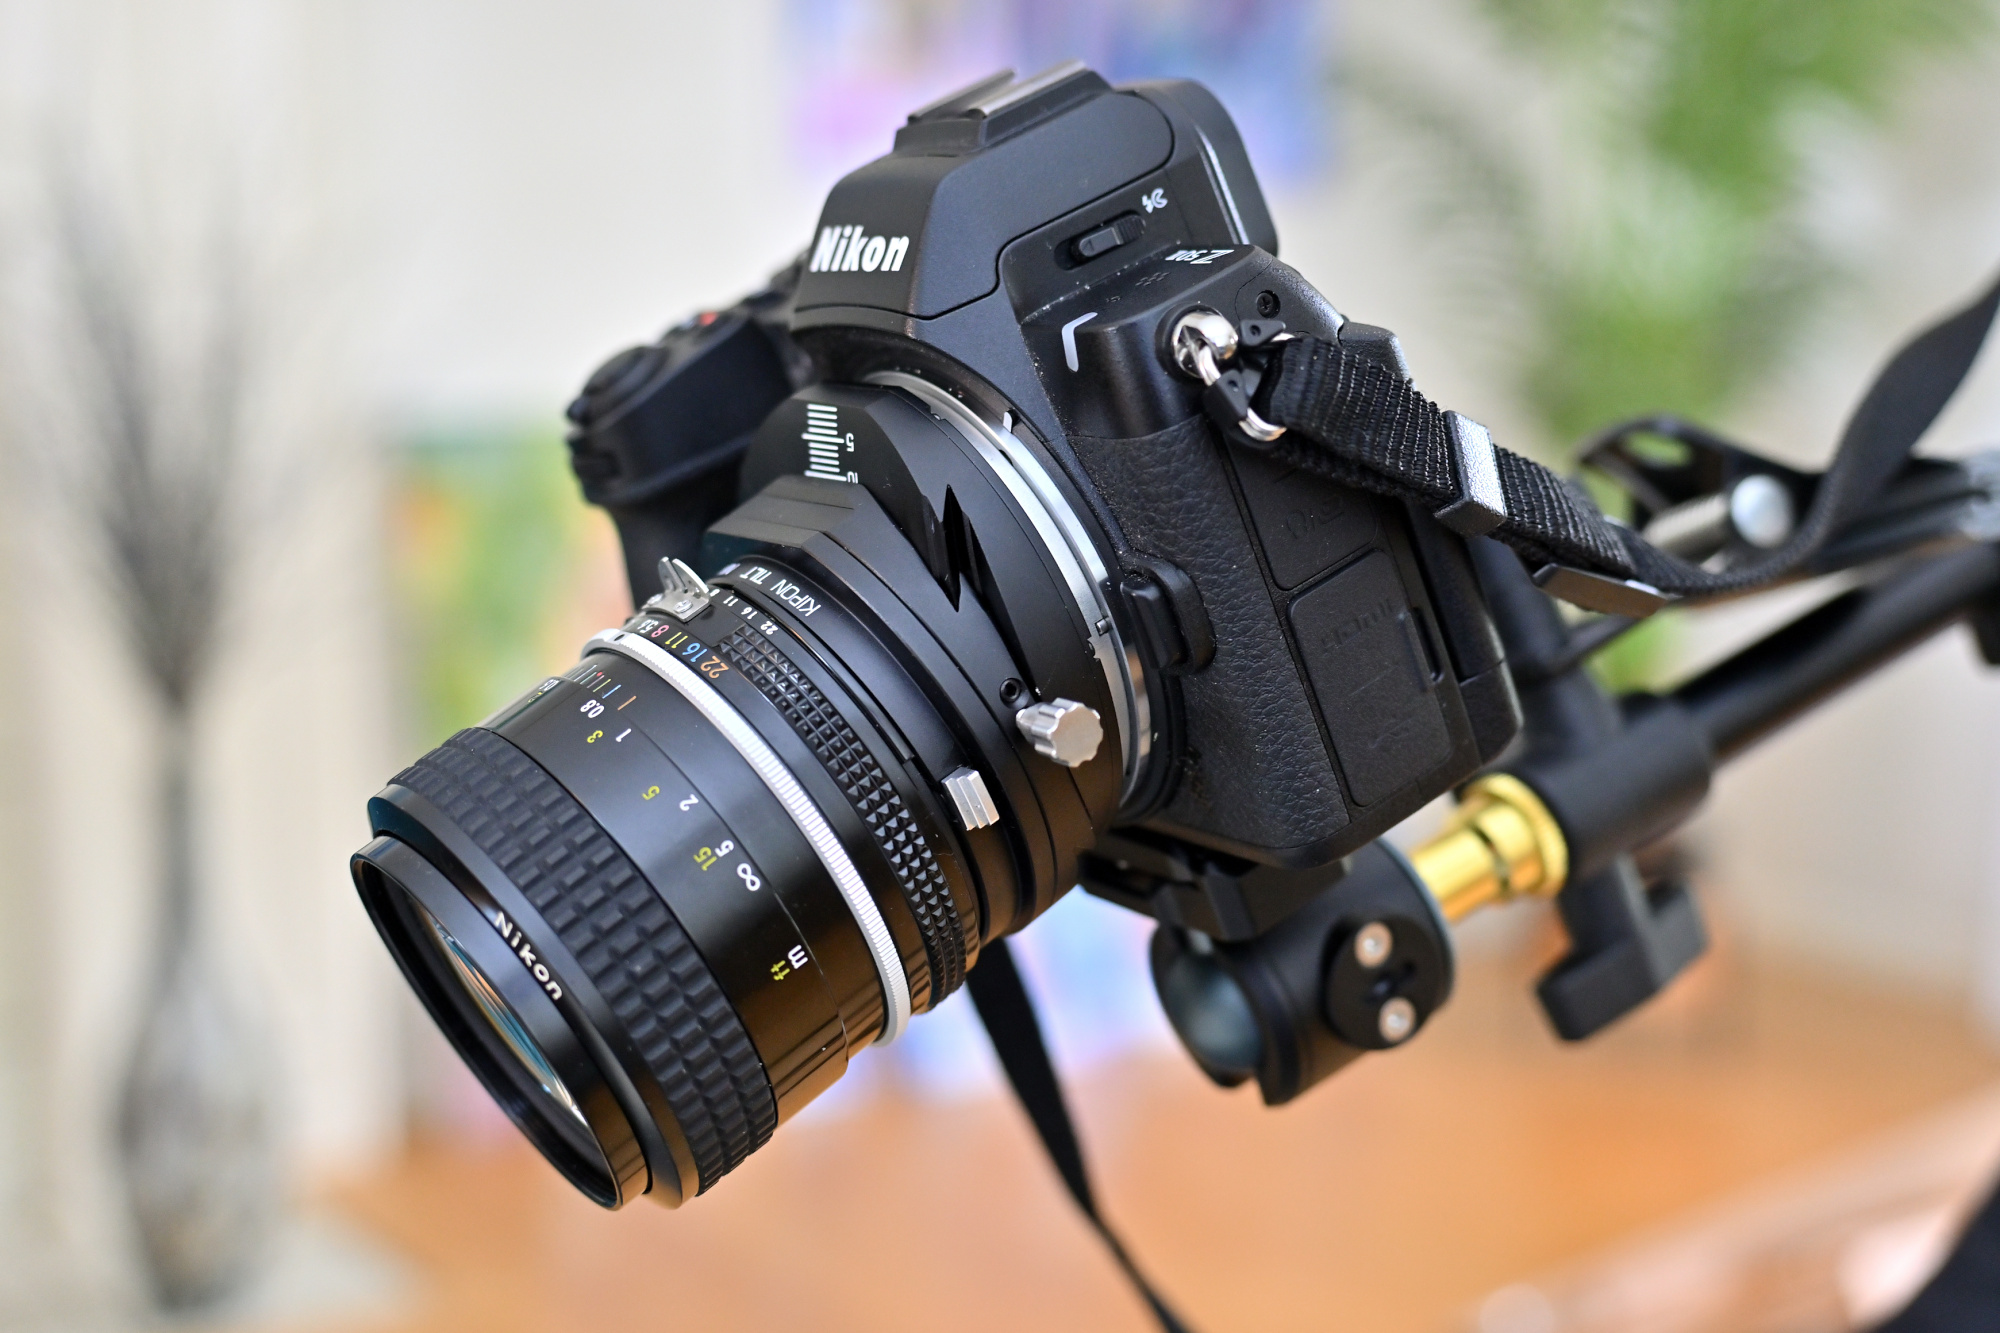
If you look closely, you can still see the fine sand from the Sarasota beaches on the camera. This sand is everywhere. The camera bag did not escape either.
Back on the Coffee Table
Once the optics had done their job, the cake could finally continue with the coffee part of the story.
1/30s f/2,8 ISO 320/26° 16-50mm f/2,8 VR f=40mm/60mm
-
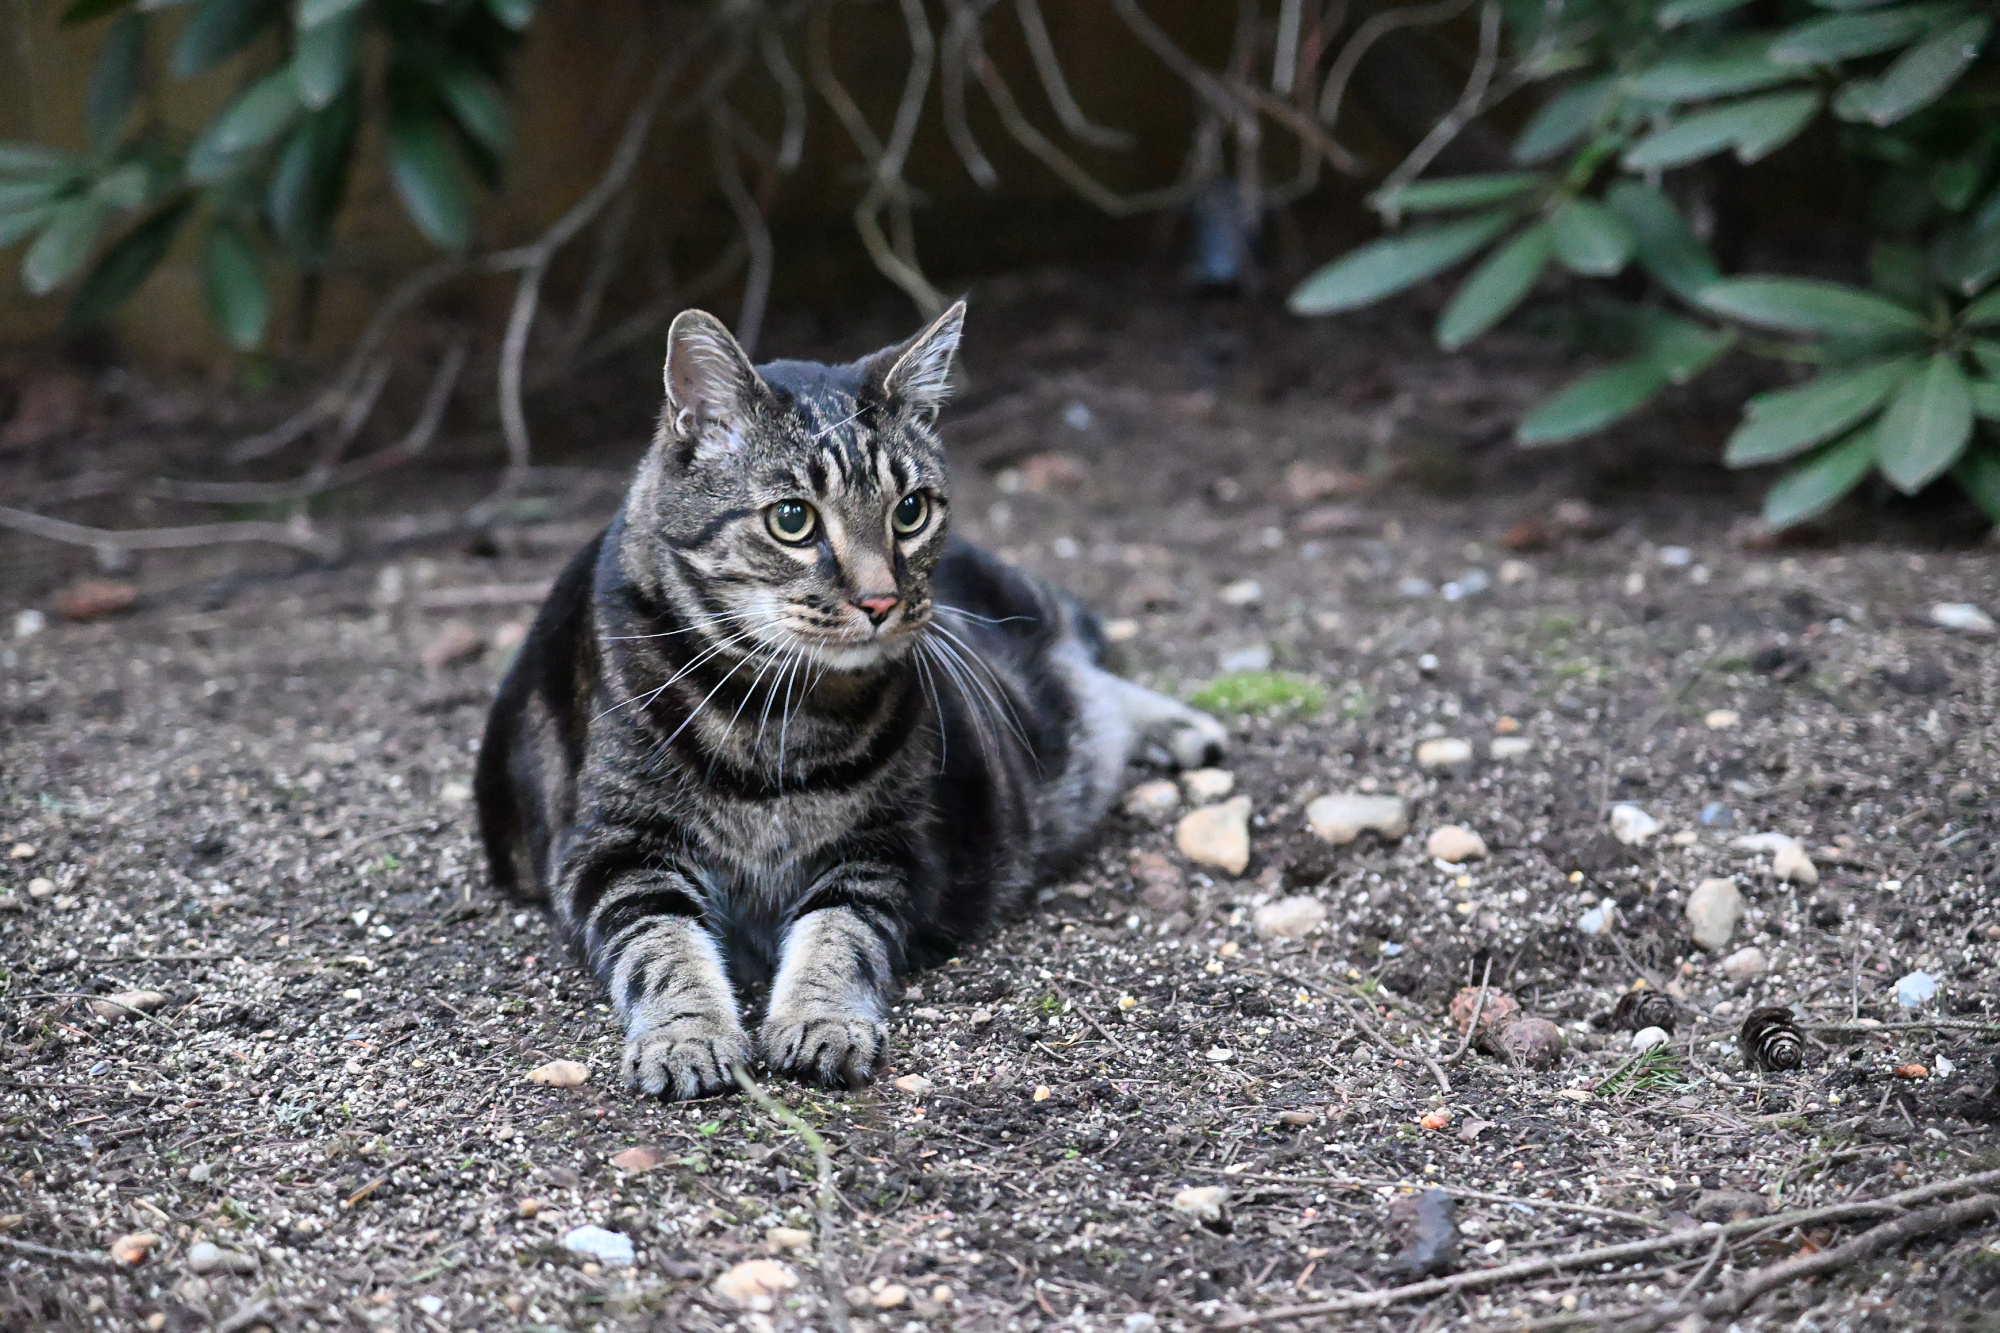
A Cat at Dusk, ISO 12800
Not every improvement in technology needs a big explanation. Sometimes it is just there in a simple picture taken late in the day, when the light is already fading and everything feels a little softer.
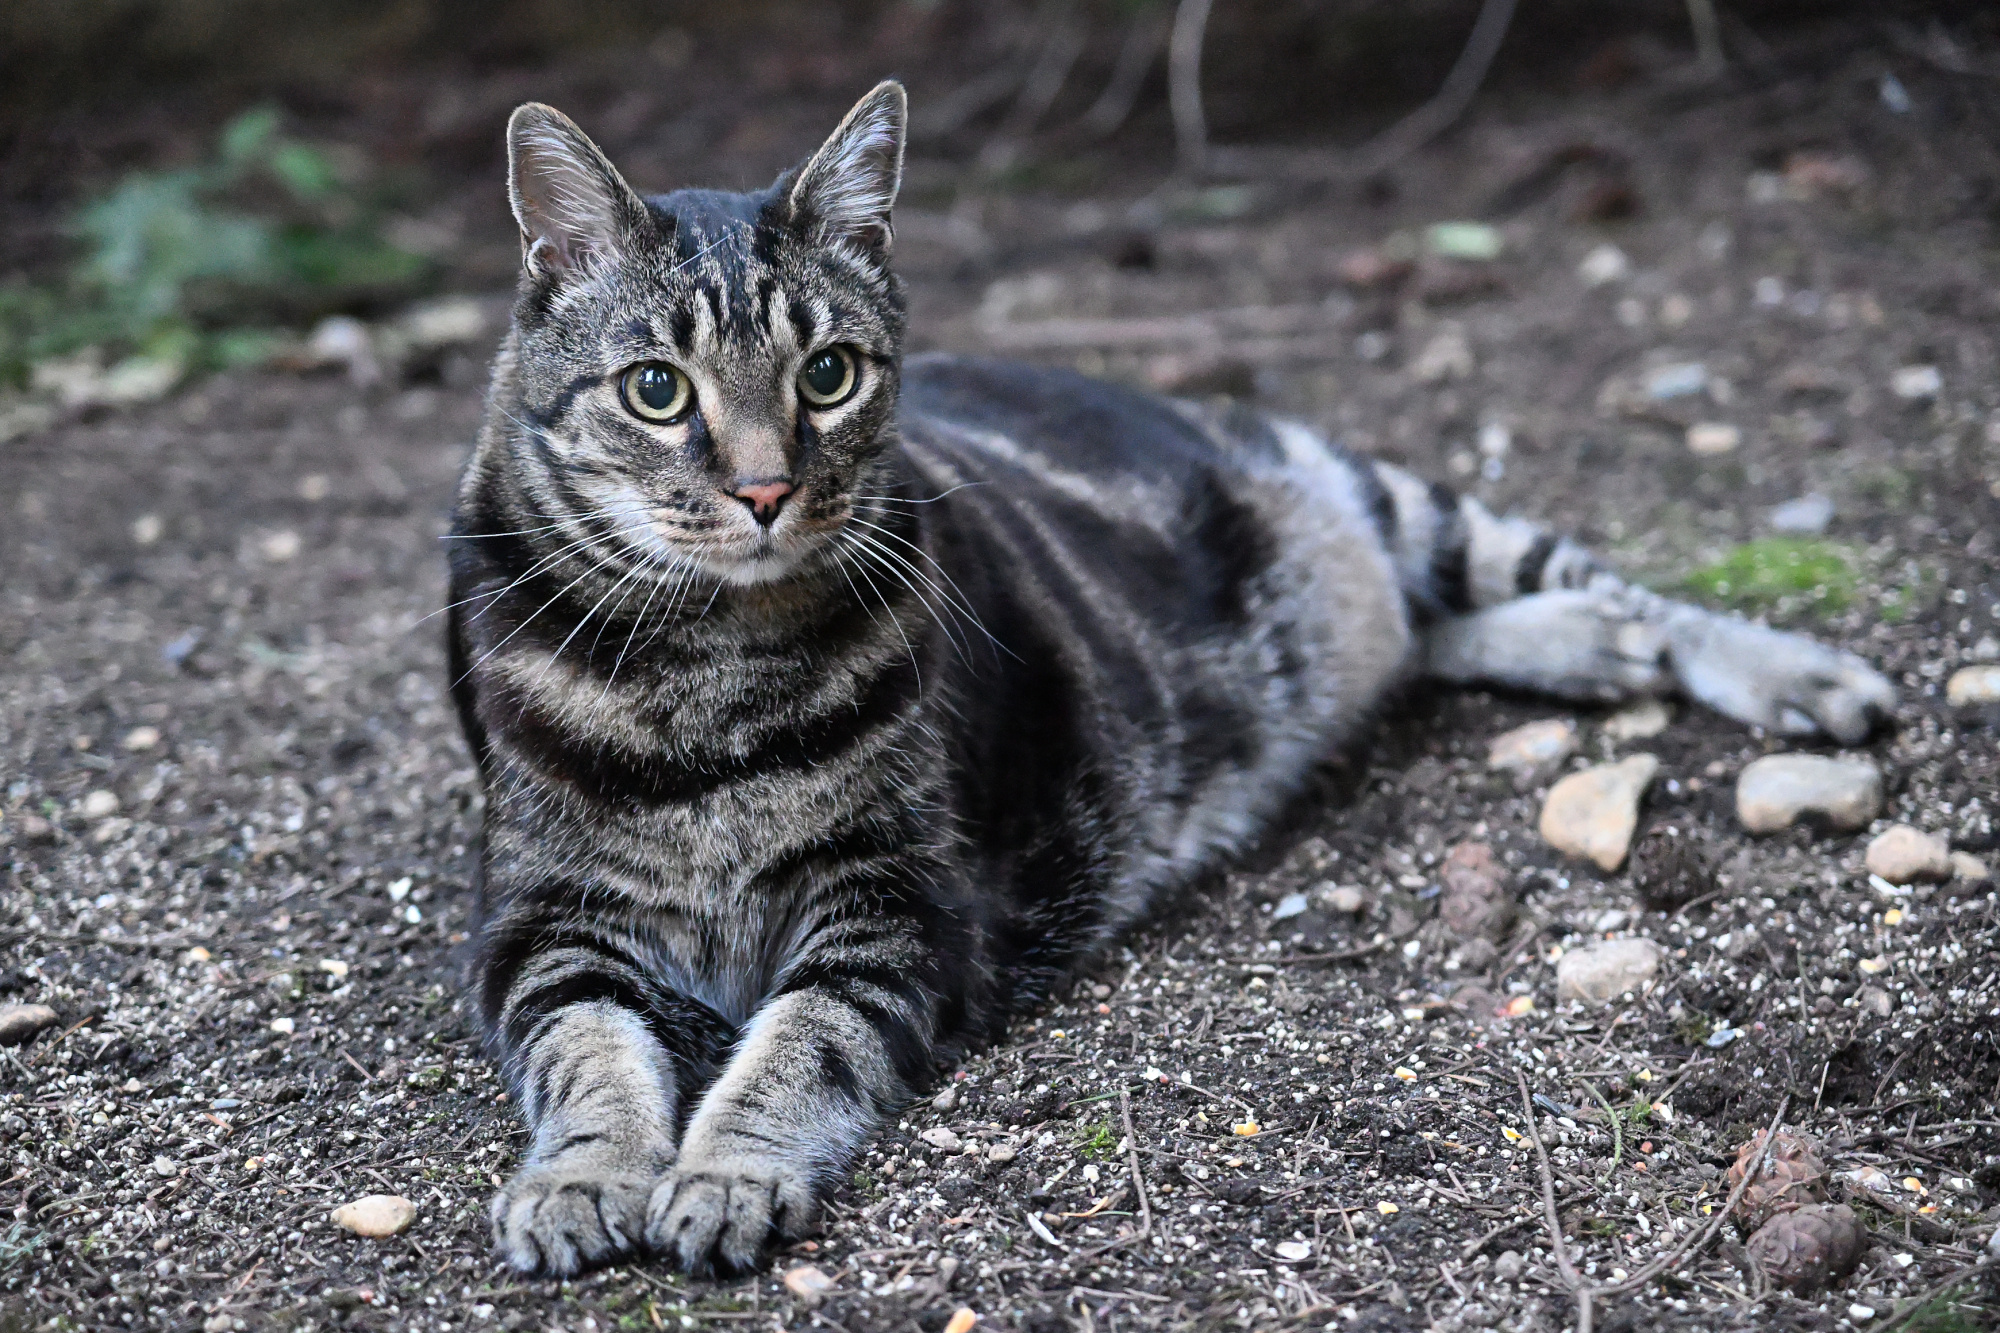
These two photos of our cat were taken at dusk with the Nikon Z50 at ISO 12800 and f/2.8. What I like about them is how calm and natural they feel. The images are sharp, the detail is there, and the whole scene keeps its quiet evening mood.
That is one of the nice things about modern cameras. They make this kind of picture easier and leave more room to focus on the subject, the light, and the moment.
Two quiet moments in the fading evening light
1/80s f/2,8 ISO 12800/42° 16-50mm f/2,8 VR f=50mm/75mm
1/80s f/2,8 ISO 12800/42° 16-50mm f/2,8 VR f=50mm/75mm
A closer look at the detail, and a nice reminder of how well this works these days.
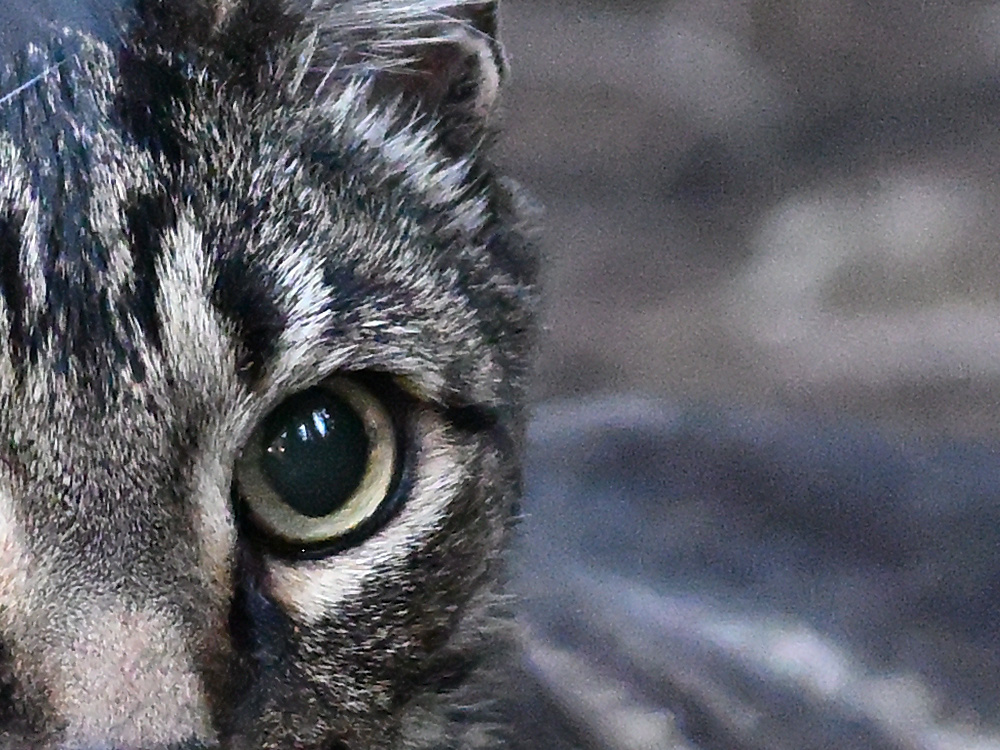
From the Z50 to JPEG for the web via Nikon NX Studio, with everything left at the default settings.
Seite 1 von 12
Ältere Beiträge →