-
cPicture 4.13
cPicture is updated to version 4.13
-
Improved folder view with more contextual information.
This new setting is off by default and can be changed in the main settings (F9).
Foldername (TotalFiles: [Raw] [Jpeg] [Video] [+Other]) (Total Size)
for example: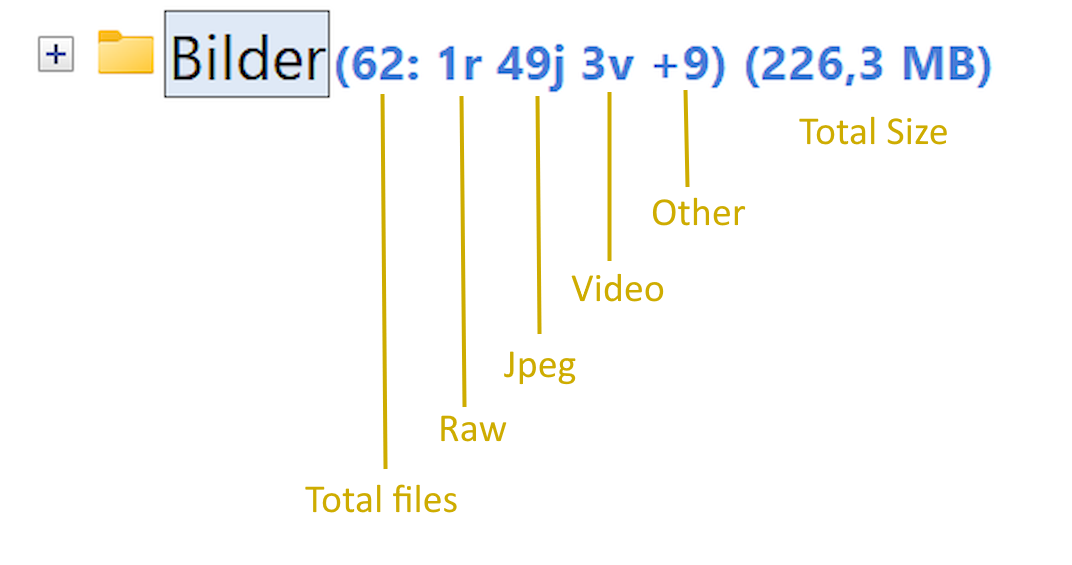
-
New video cut option to remove a section within a video
Because not every moment needs to survive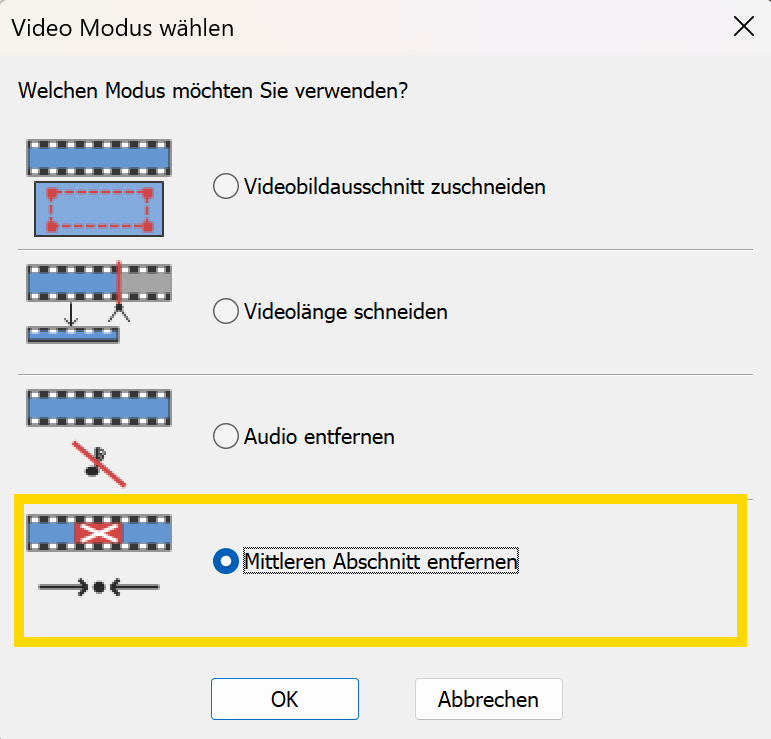
-
Added print preview
-
Added Set-Marker column to the detail view
-
Added tooltips to the detail view
Truncated data items in the detail view now show helpful multi-line tooltips, making long metadata easier to read at a glance. -
New standardized JSON-based configuration
-
Minor improvements and general maintenance
cPicture is a portable application consisting of a single executable file with optional plugins.
Use the MSI installer to install or update the application, or use the Check for updates option in the Other category.
Download German 64bit Installer MSI
Download English 64bit Installer MSIAdditional languages are available on the cPicture website. An alternative download is available on GitHub.
See the Download Instructions for details. For questions or feedback, please mail to cpicture. -
-
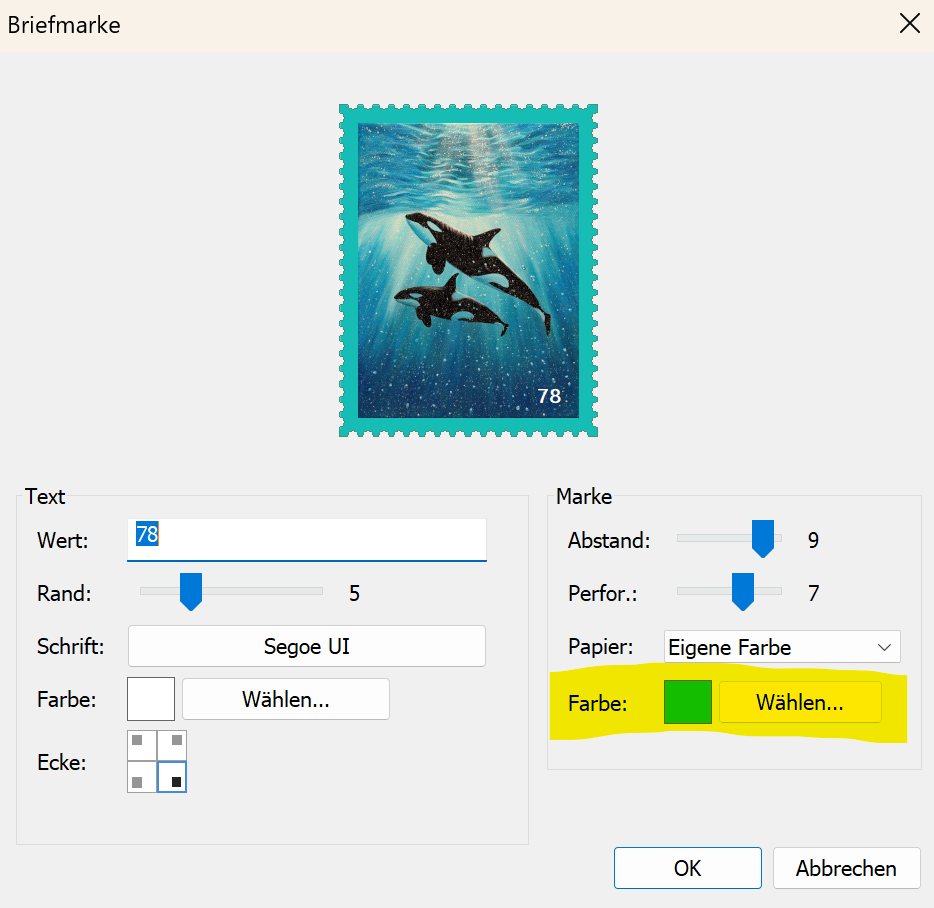
Postage Plugin update
Added a custom color option and updated the perforation calculation to avoid thin stamp corners in the postage plugin

-
Postage plugin
Postage
This function plugin turns selected pictures into postage stamps with a perforated border.
The dialog lets you configure the paper style, border spacing, text, text corner, font and text color.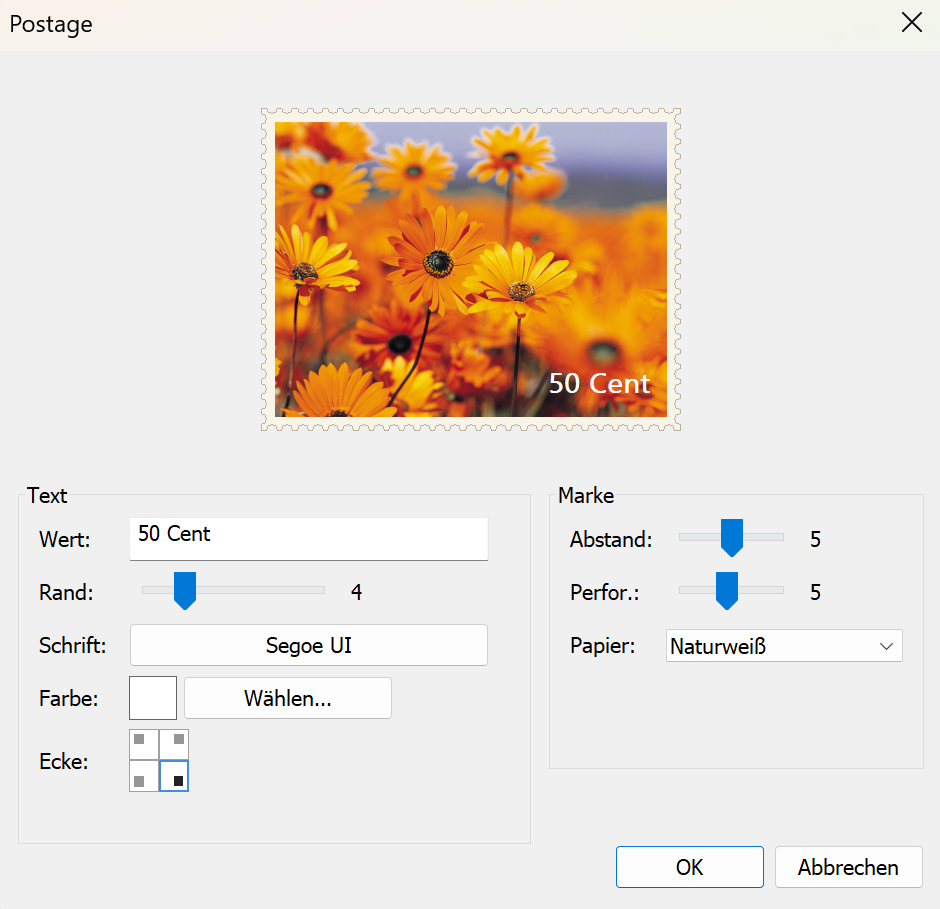

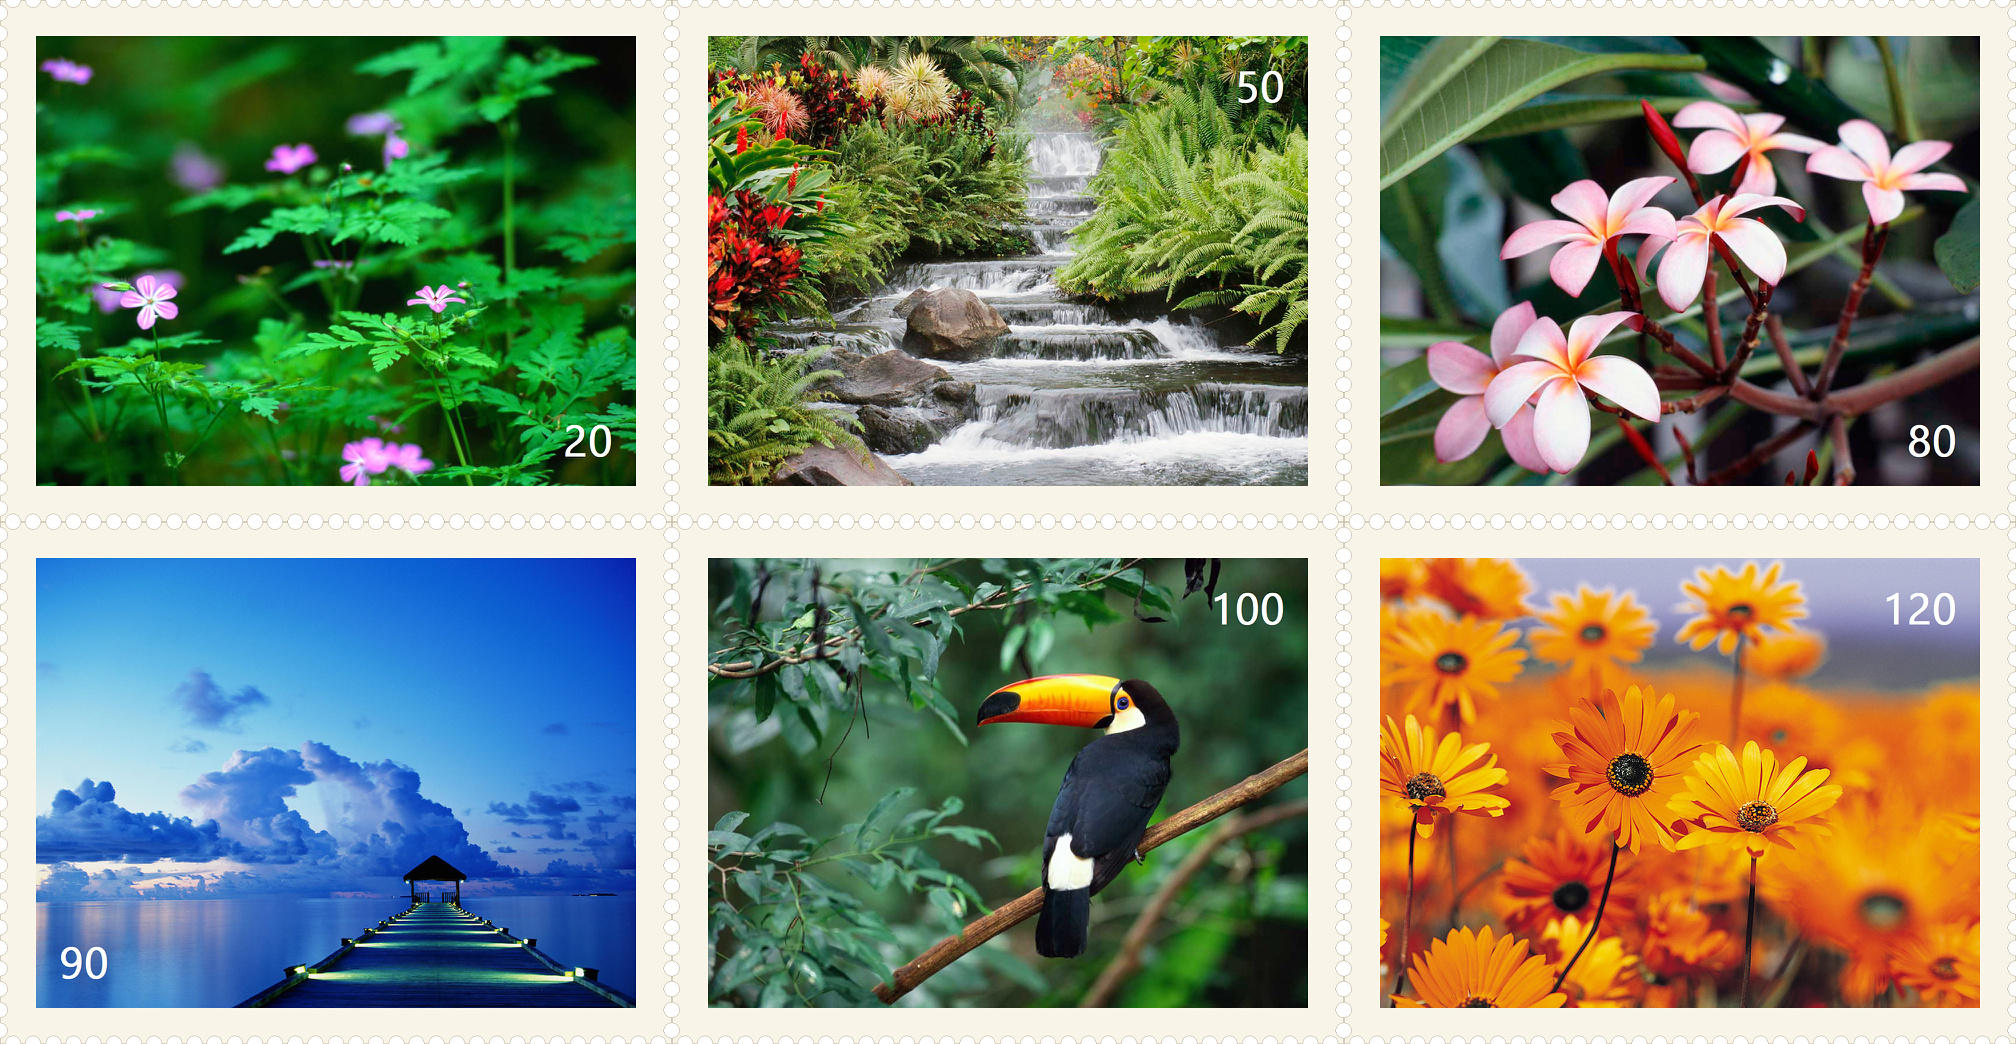 Index print created with cPicture
(Perforation 4, Distance 8, Offwhite paper with default font, Standard Index print with no border)Download the plugin from
Function plug-insmenu and selectManagein cPicture.
See the plugin overview -
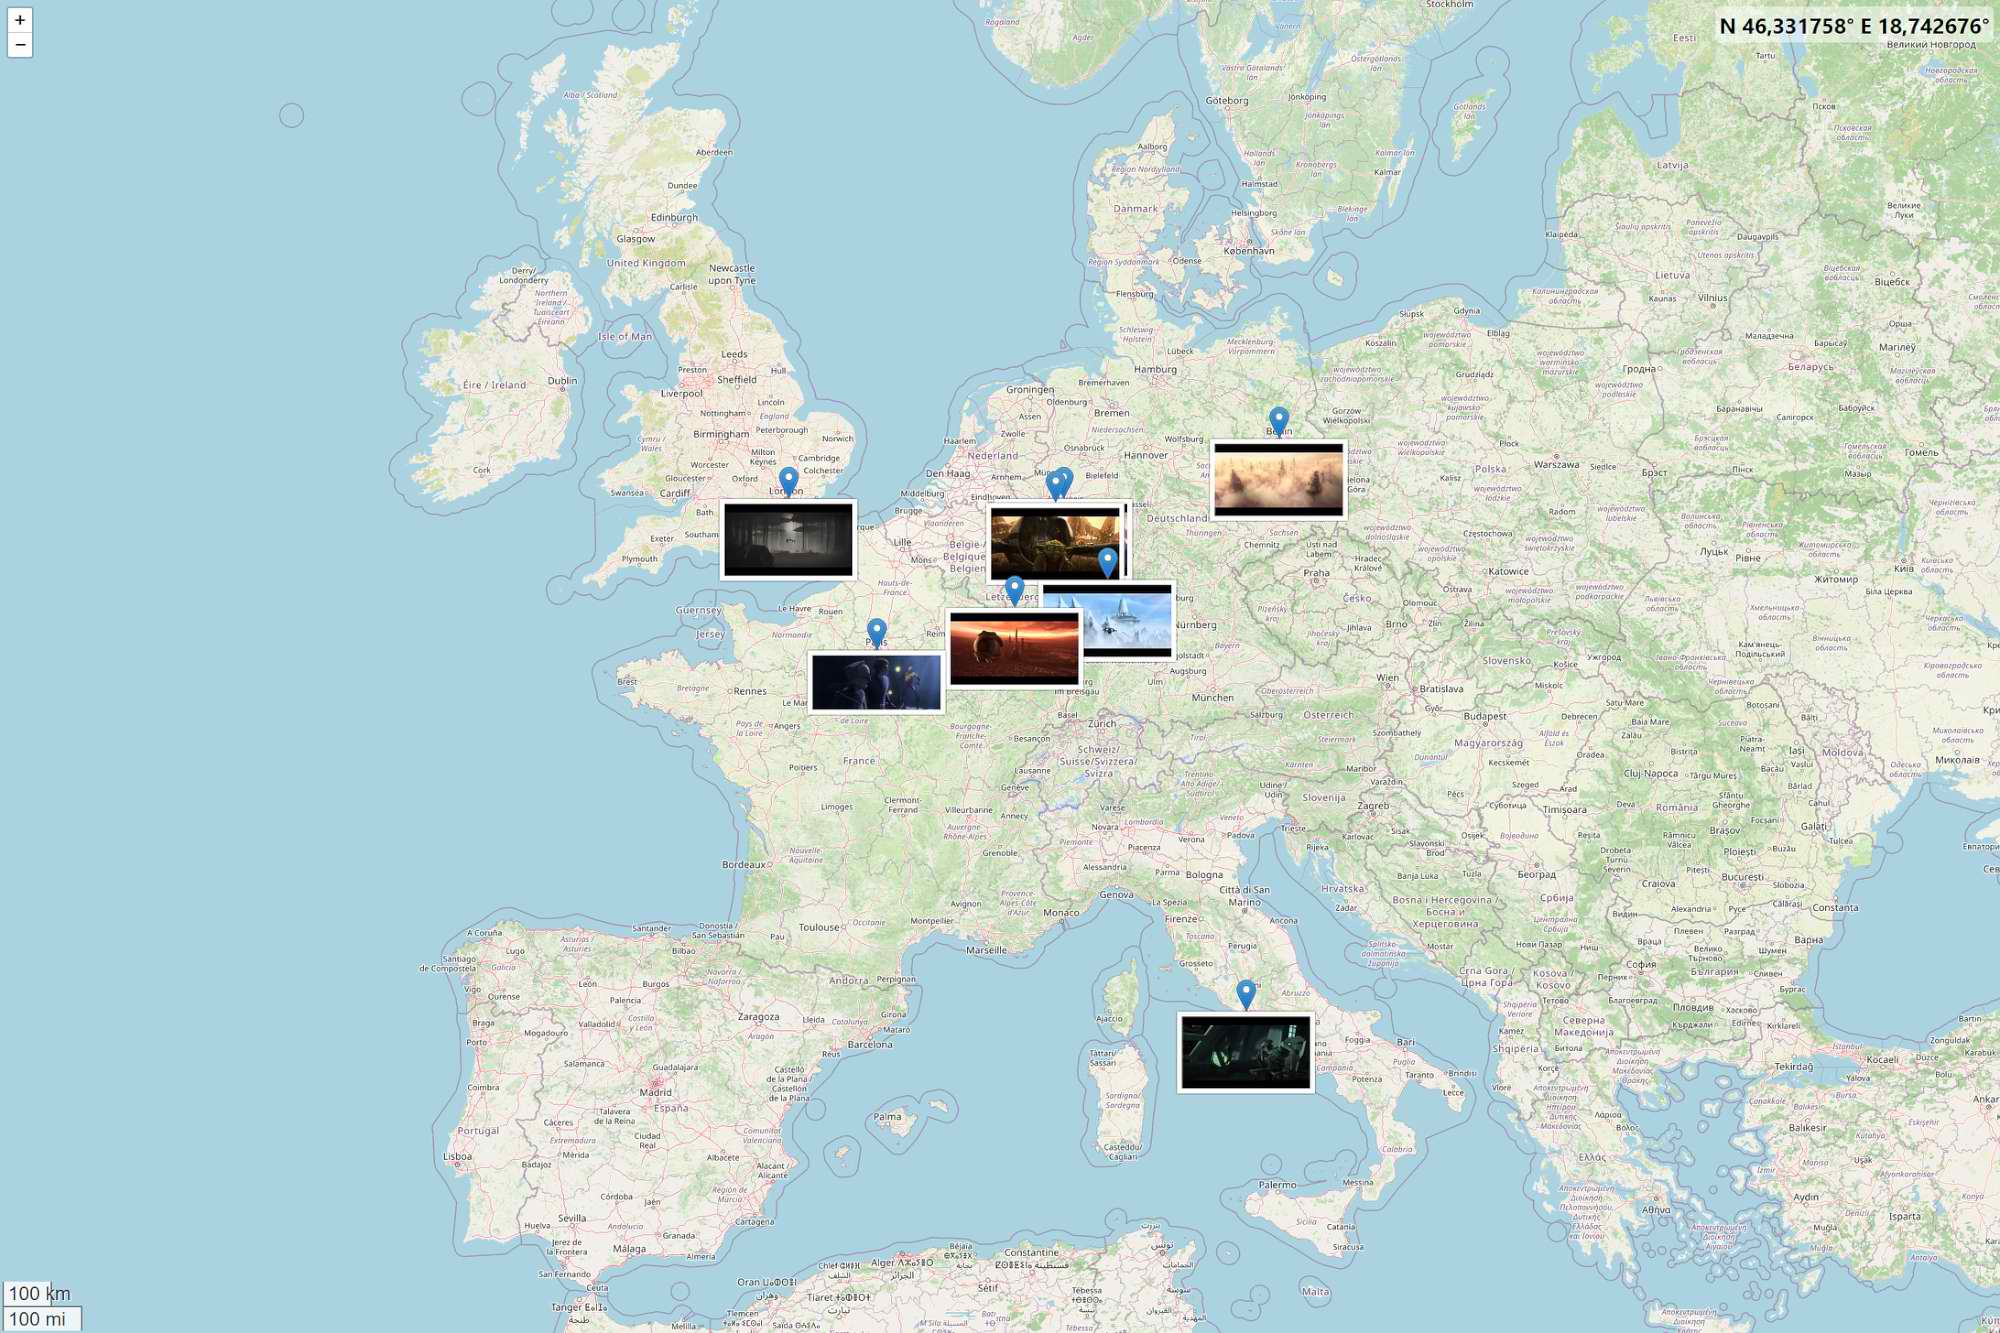
Time Capsule, X-Ray and Motion Composer plugins
Time Capsule
This function plugin creates a story poster from multiple selected pictures with title, route strip, location clusters, summary and thumbnails. The dialog lets you configure the sorting mode, location radius and thumbnail size.
The route is built from available GPS data and linked to the picture thumbnails, creating a visual summary of a trip, series or shoot.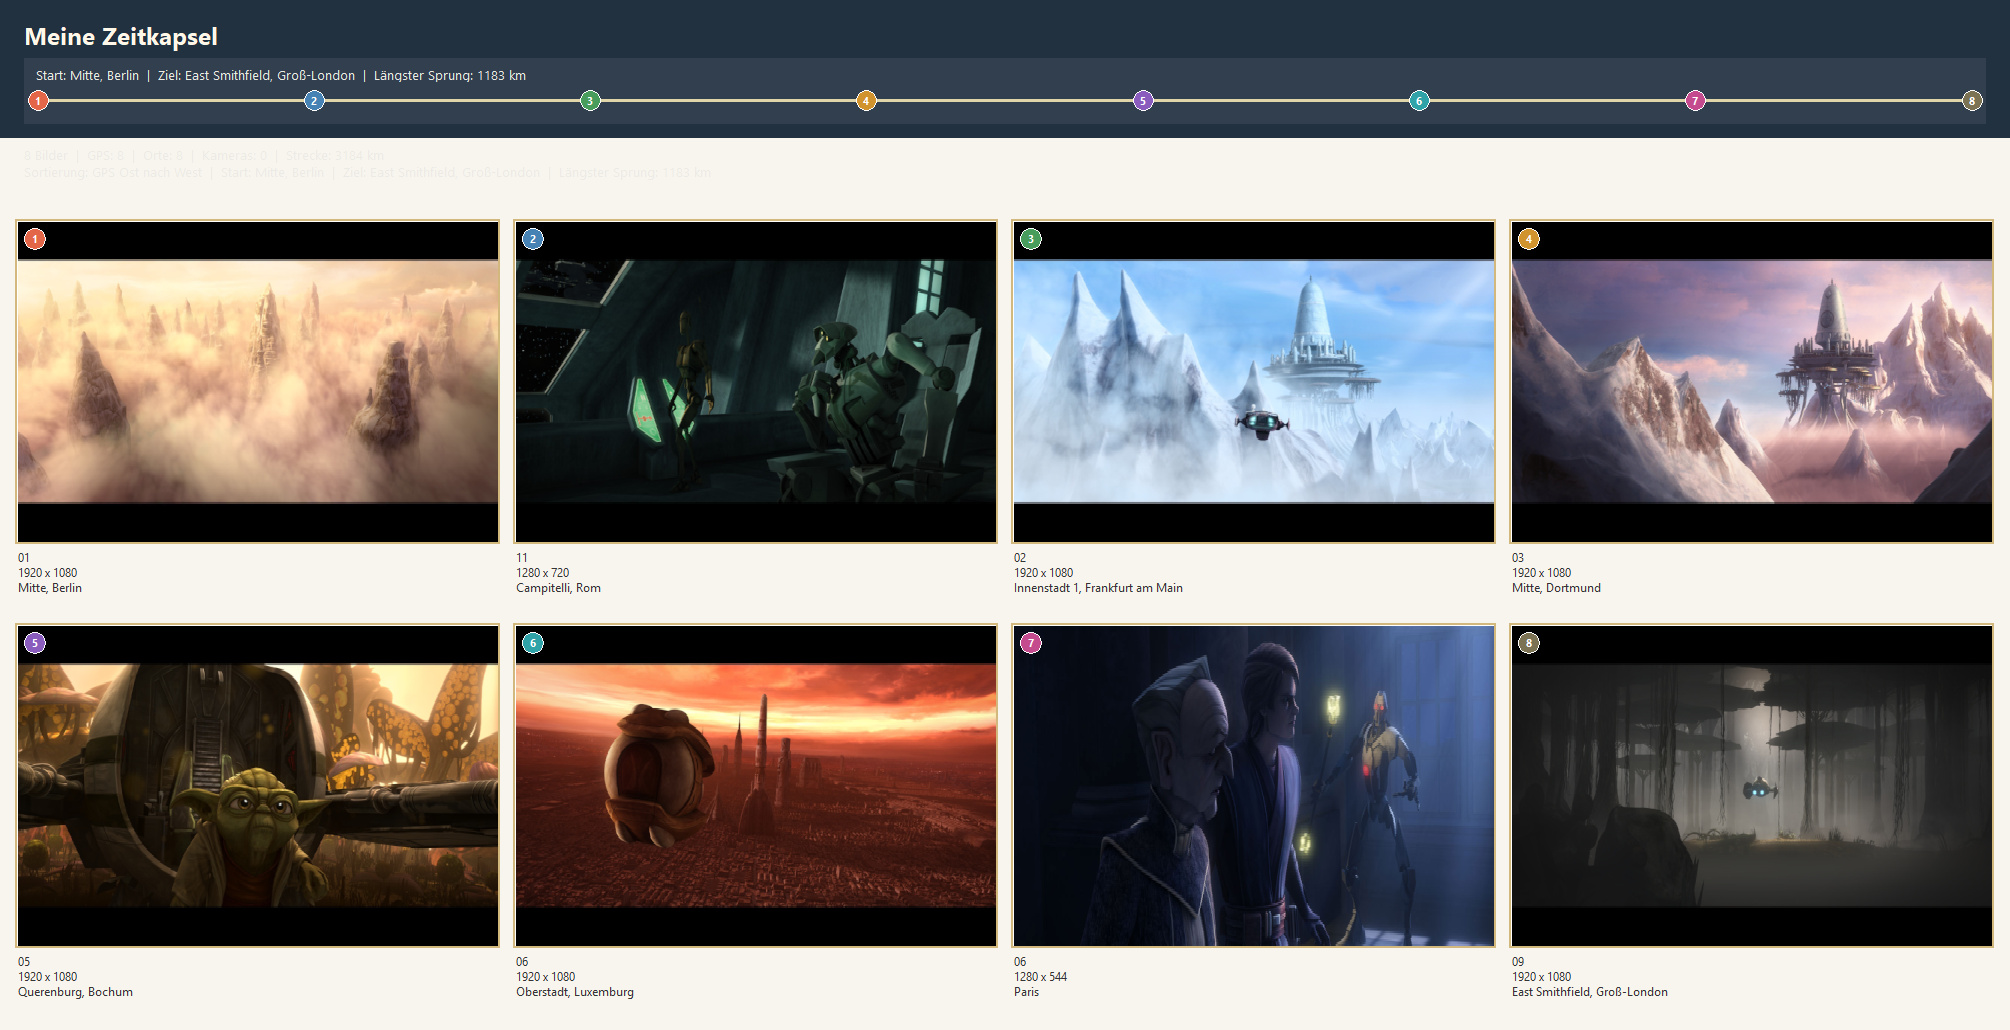
Created with cPicture's map view:
X-Ray
This function plugin creates an analysis board for each selected picture with the original view, an edge map, an 8x8 block analysis and a combined heat map. Scale, sensitivity and the optional 8x8 grid can be configured in the dialog.
The output helps highlight structures, compression artifacts and visually suspicious image regions.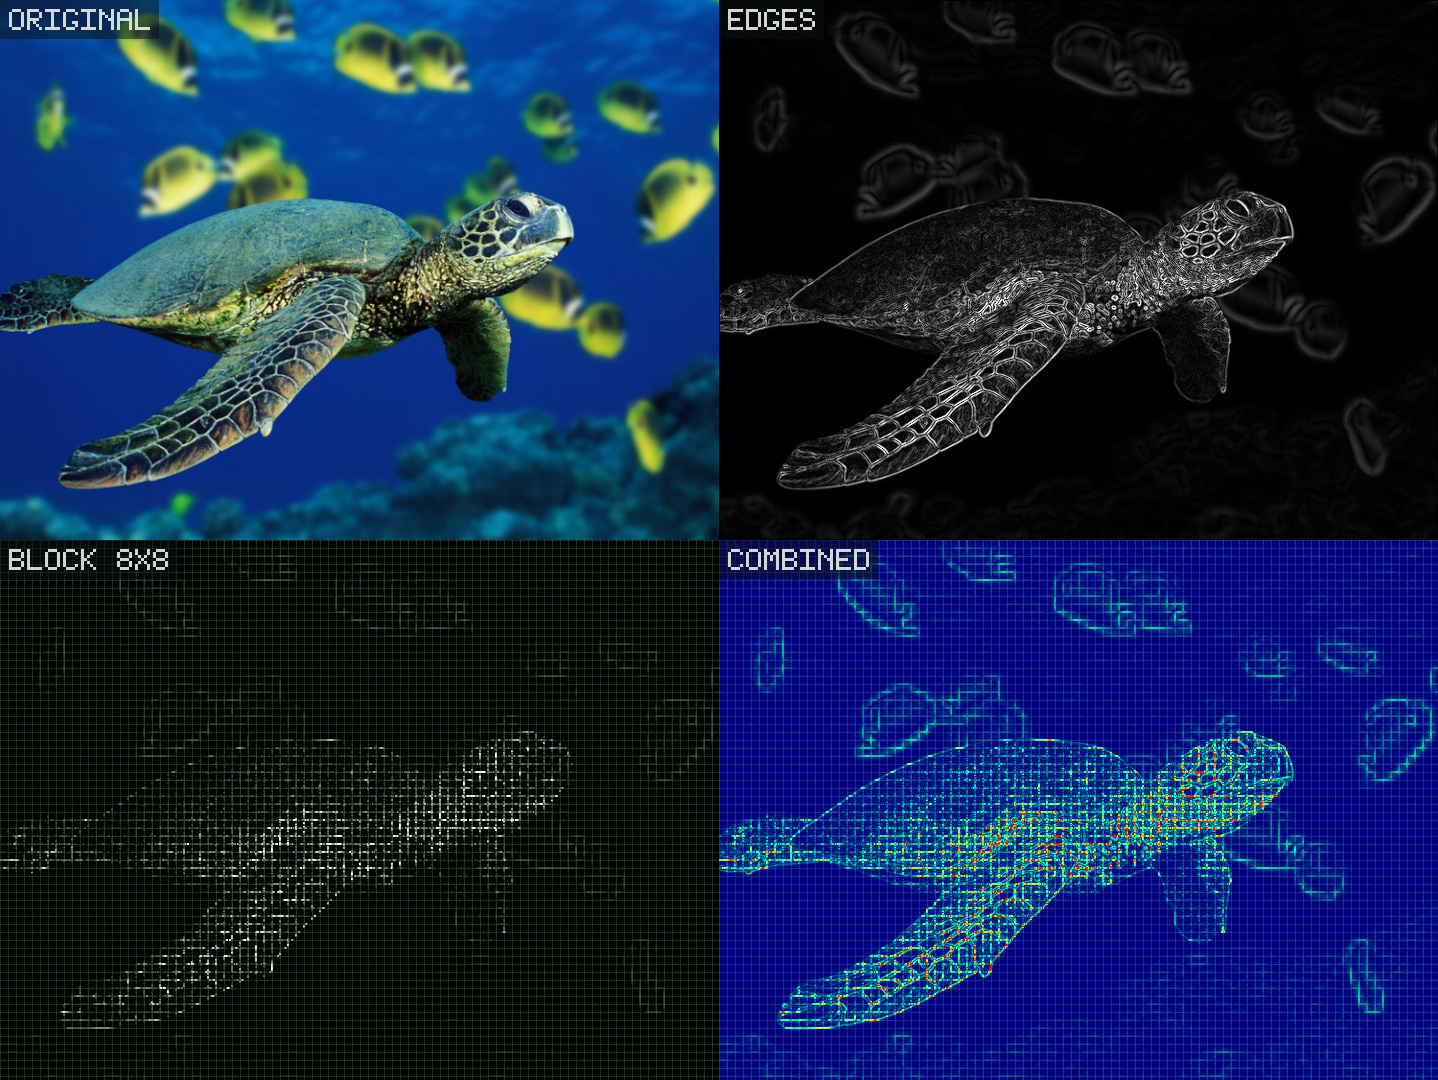
Motion Composer
This function plugin combines multiple pictures into a single composition with motion and trail effects. Output size, threshold and optional trail colorization are configured in the dialog.
It is especially useful for sequences with movement, such as people, vehicles or repeated actions.
Composed from these two pictures:
 Created with the Sample plugin #5
Download the plugin from
Function plug-insmenu and selectManagein cPicture.
See the plugin overview -
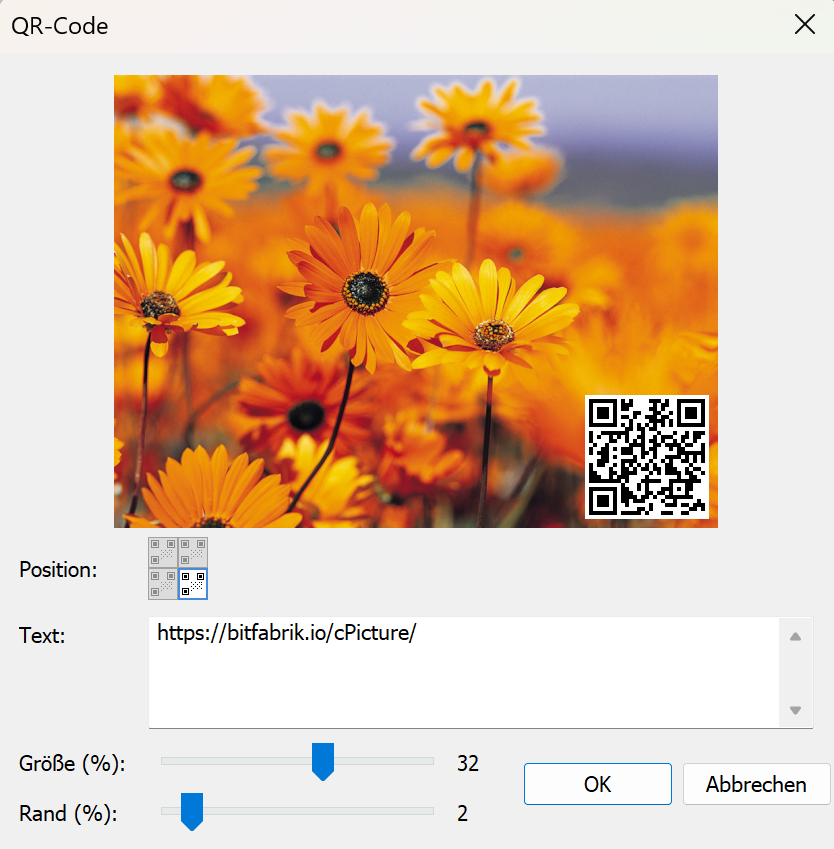
QR-Code plugin
Plugin QR-Code
Overlays a QR code onto your pictures. Enter any text or URL, choose the corner position, and adjust size and margin with sliders.
Download the plugin from
Function plug-insmenu and selectManagein cPicture.
See the plugin overview
Seite 1 von 7
Ältere Beiträge →