-
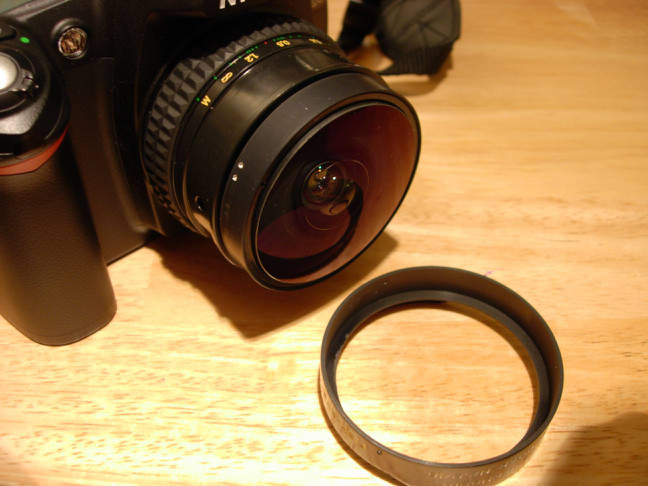
Micro 4/3 7.5mm Fisheye, Panorama - Teil 1: Der Aufbau
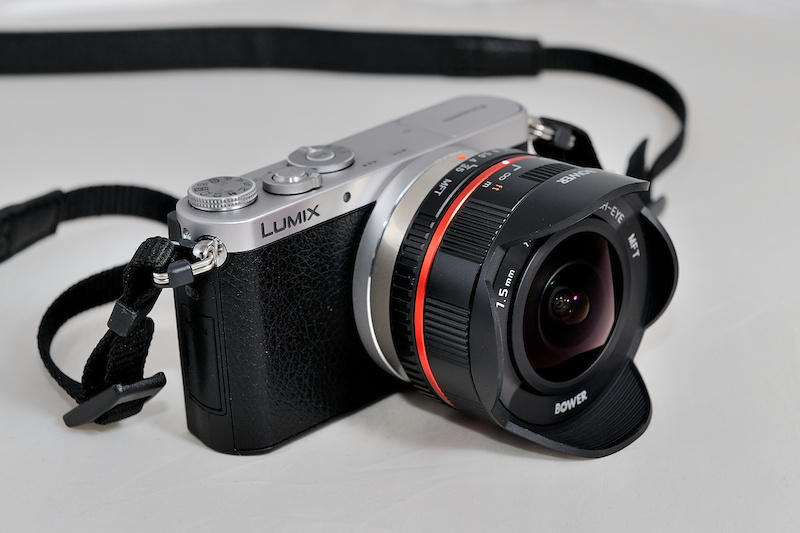
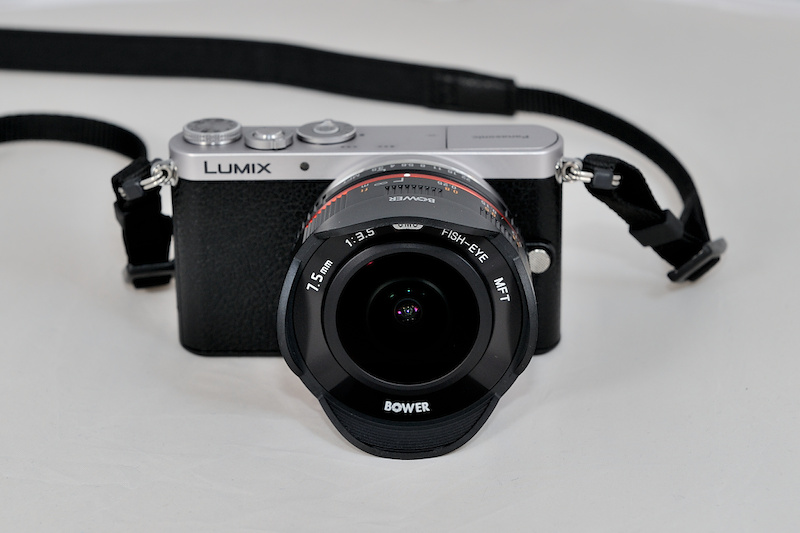
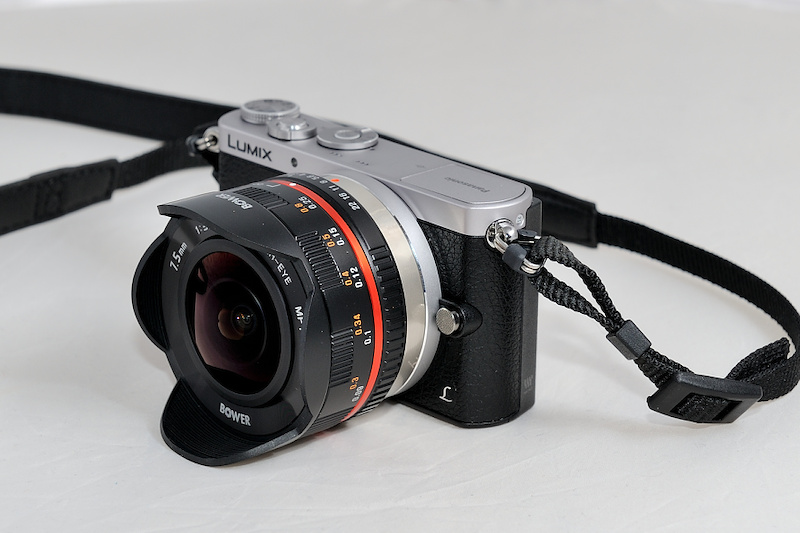
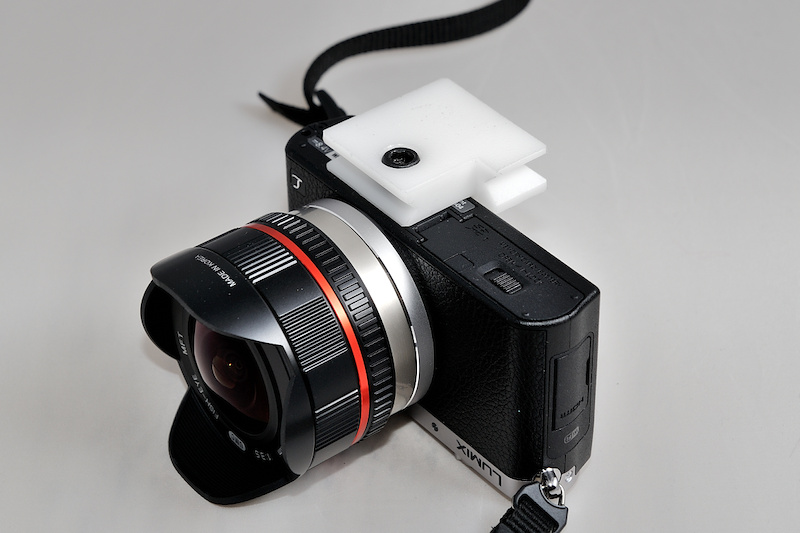
Das ist der erste Teil der Serie um ein 360°×180°-Panoramabild mit dem 7.5mm Micro 4/3 Fisheye zu erstellen. Das Objektiv ist ein 7.5mm Vollformat-Fisheye (180° diagonale) für den Micro 4/3-Objektivanschluß mit Blenden und Entfernungsring. Das Objektiv ist rein mechanisch aufgebaut und hat keine elektrischen Kontaktpunkte zur Kamera und muß daher im A-Modus und mit der Einstellung ohne Objektiv Bilder zu machen betrieben werden.
Der Aufbau
Mit einem Fischeye-Objektiv kann ein 360°×180°-Panoramabild mit minimaler Bilderanzahl erstellt werden. Mit einem Vollformat-Fischeye werden nur 6 Bilder insgesamt benötigt: 4 Bilder horizontal , ein nach oben (Zenit) und eins nach unten (Nadir).
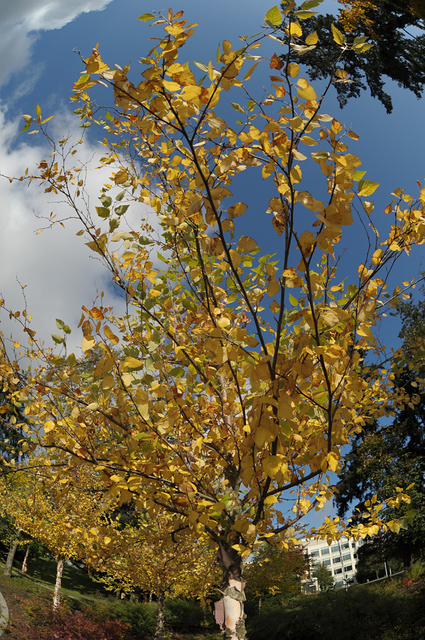
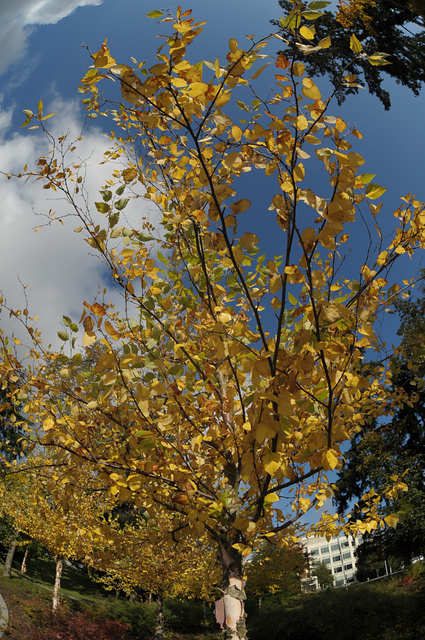
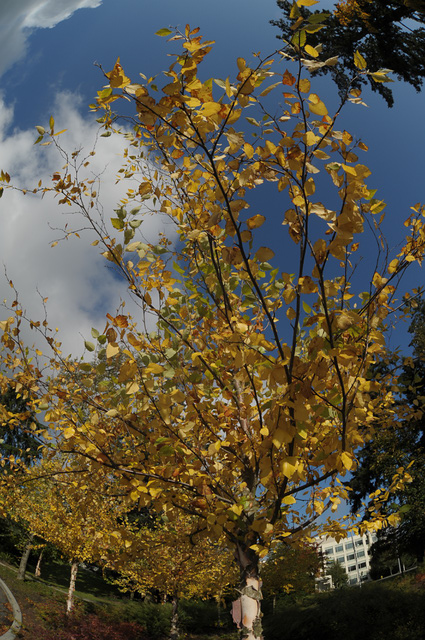
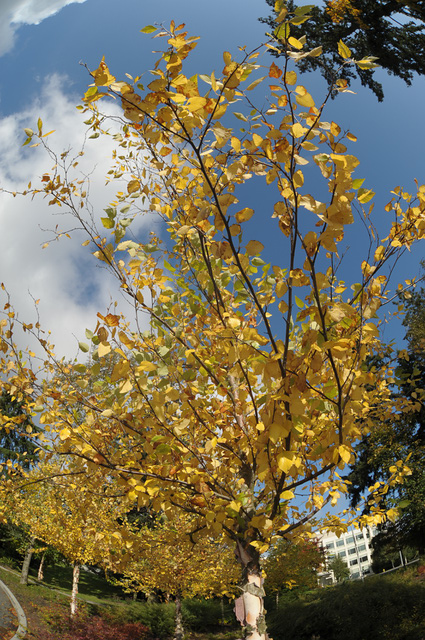
Das 7.5mm Fisheye:
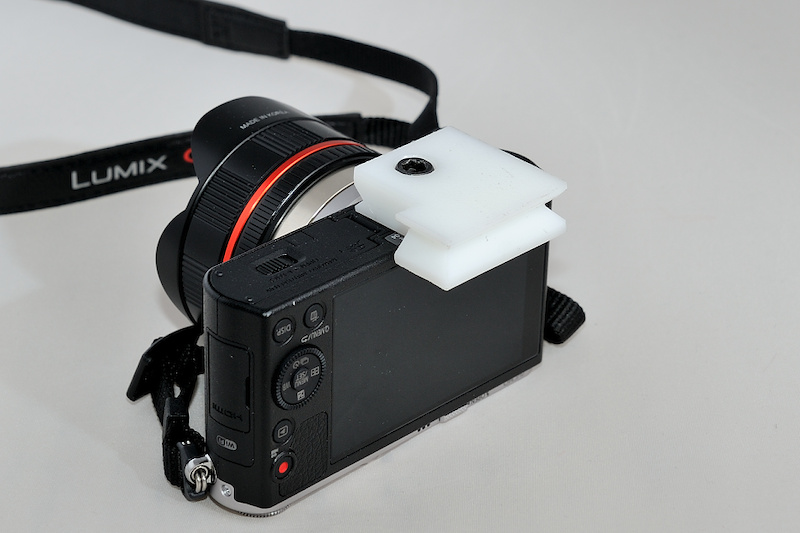
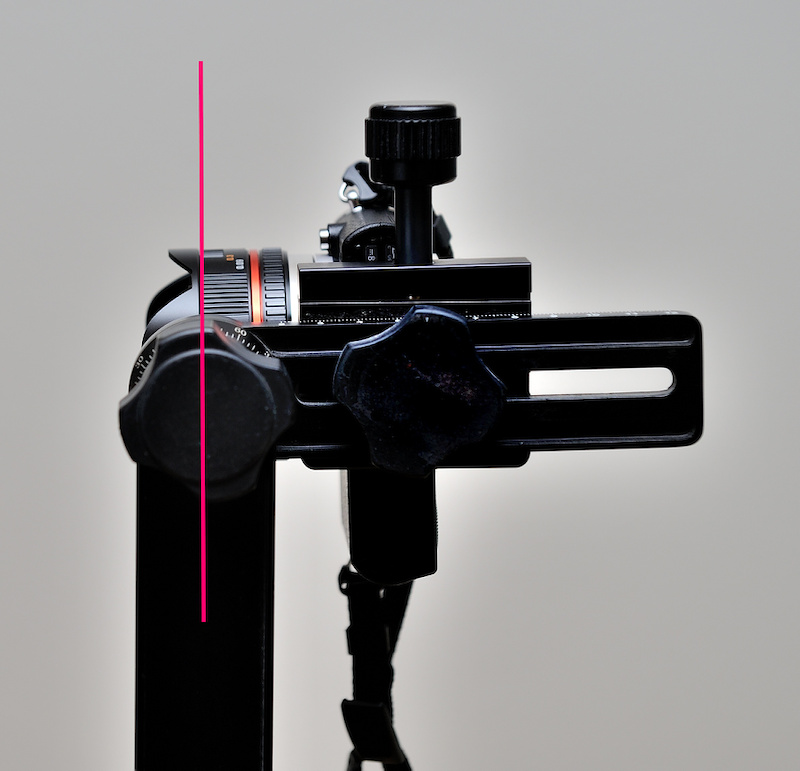
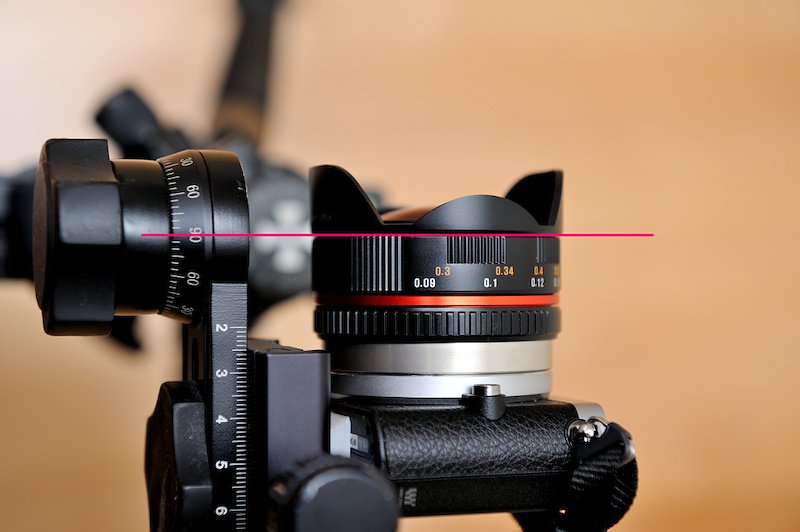
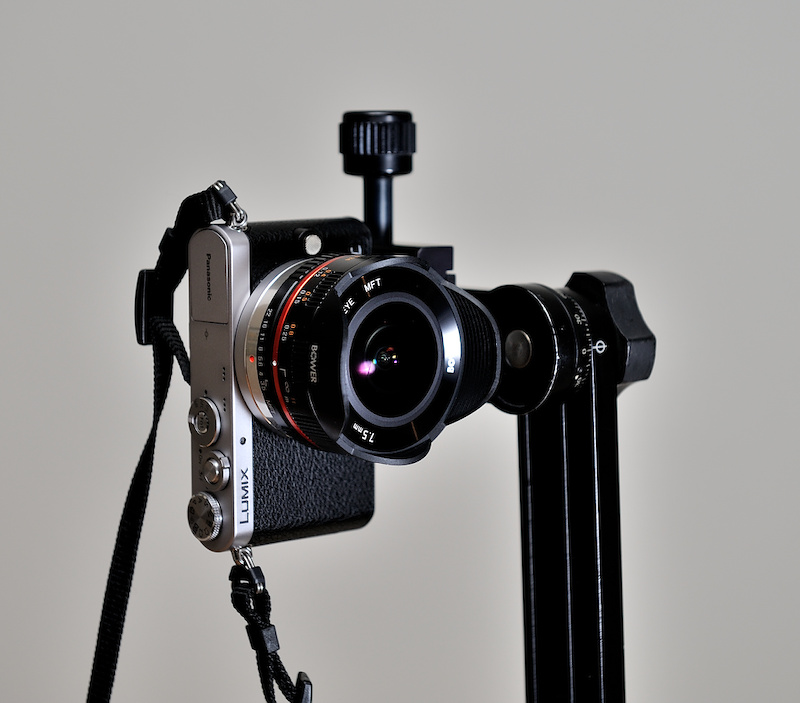
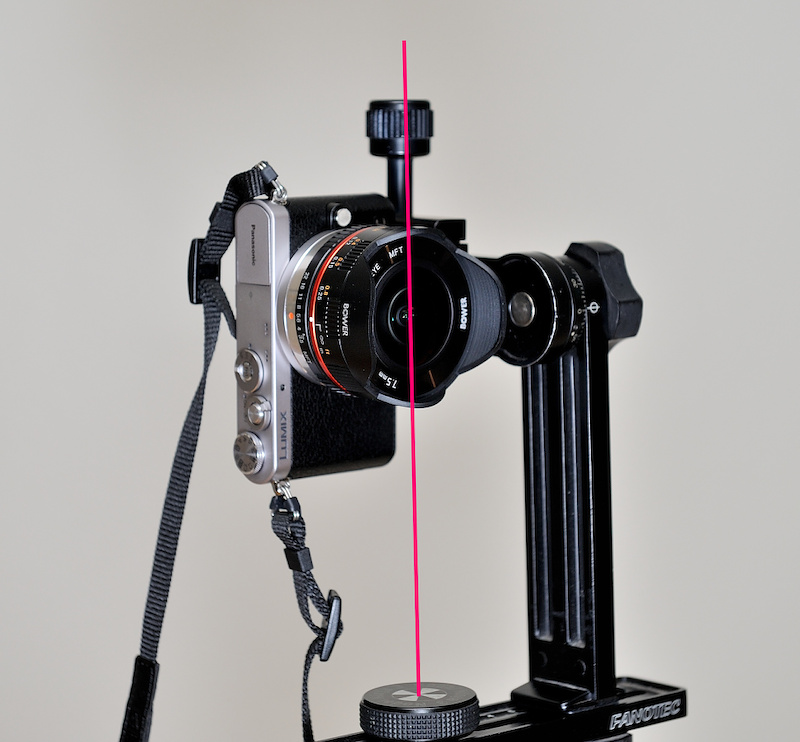
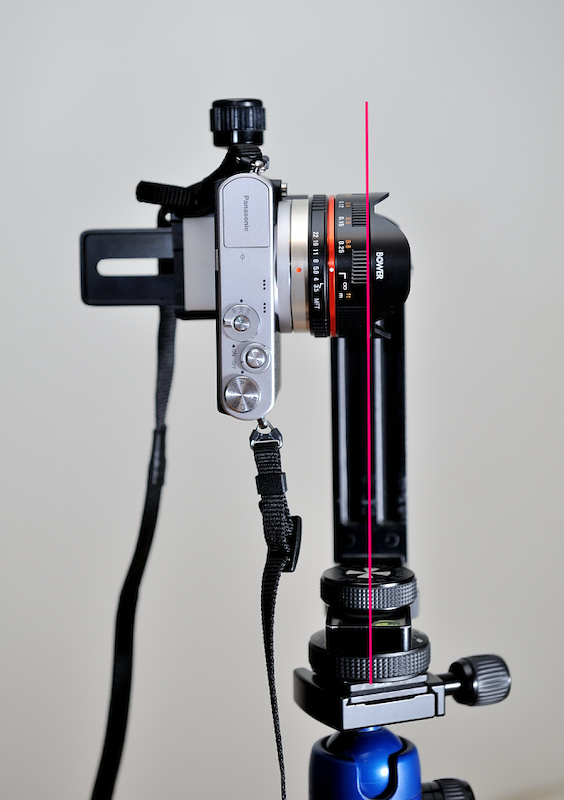
Mit einer selbstgebauten Arca-Swiss-Verbindungsplatte wird die Kamera an den Nodal-Ninja panoramic adapter angeschlossen:
Die rote Linie stellt den Nullpunkt da, um den das Objektiv gedreht wird. Der Adapter wird entsprechend angepasst:

-
Adapter für Micro 4/3 auf Nikon F
Ein selbstgemachter Adapter für FOTGA Micro 4/3 auf Nikon F.


Die einzelnen Schritte:
Zuerst wird ein 54mm Loch in eine 12mm Plastikplatte gebohrt:


Die Platte wird in einen Drehkopf gespannt, um die Außenseite zu erstellen:


Der untere Halter wird ausgerichtet und auf Maß gefräst:

Die Seiten werden mit einem 45°-Winkel eingekerbt:


Der 12mm Schlitz um die obere Platte zu halten:


Eine Seite wird aufgesägt, um den Adapter festklemmen zu können:

Ein 3.5mm Loch für das M5 Gewinde:

-
The Tower Panorama
Unlike a classic 360°×180° panorama, a tower panorama is not taken from a single center point. Imagine yourself on a tower with a viewing platform. You can walk around, but usually you cannot position yourself in the center.
The way to create a 360° tower panorama is to take multiple segments from each side. Using a fisheye to cover the entire side is not an advantage here. Taking multiple segments is better to allow for more correction of the parallax error.
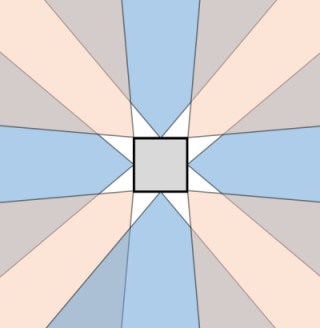
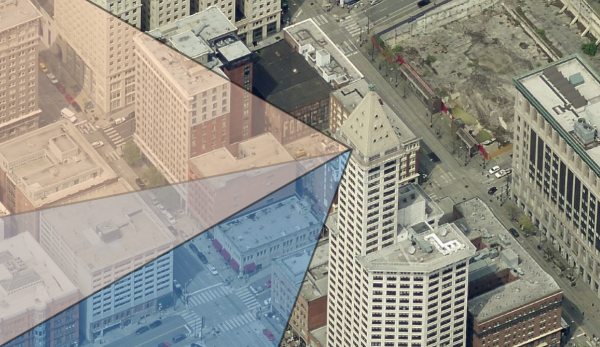
Using a wide angle lens, you would take a picture from each side and each corner as illustrated below. The blue shaded triangles is the view taken from the sides and the beige shaded triangles is the view taken from the corners. The grey part is the overlap of the pictures.
If you walk around the platform of a light tower or any other round platform, you would take equiangular steps. For example, take a picture every 45°.

Depending on the angle of view of your lens, you take one or more vertical pictures.

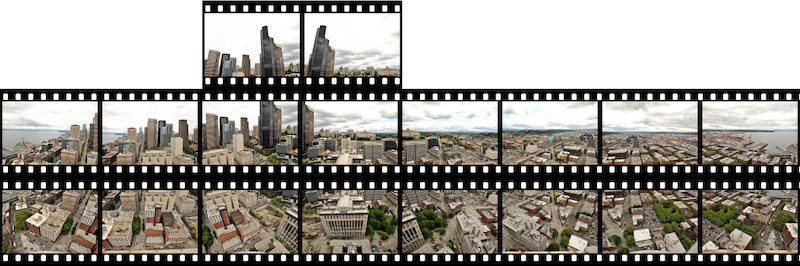
With a 24mm lens, you would need at least two pictures at each position using landscape orientation:

Here are the segments used for this example of panorama taking from the viewing platform of a tower with a square shape using a 24mm wide angle lens.
Eight horizontal segments:

Two vertical segments:
Two additional pictures were taken to capture the tall building.
Do not worry about the zenit. Usually you cannot take a full picture of the sky above because of the tower structure but you take a picture of the sky later from any place. You only need to make sure the environment match (weather, clouds, brightness, time of day, sun position).
With all taken pictures, you stitch them like any other spherical panorama, but there will be stitching errors because of the different position of each picture. If you are using PTGui, there is a very efficient way to make it perfect by using the mask tool. Decide which part you want to keep and paint the conflicting part in red to exclude it. Do not try to correct it with too many control points and individual lens parameters. There is always the possibility to post process using an editor. In this example, I had only three stitching errors around the center which were removed by using the mask feature in PTGui.
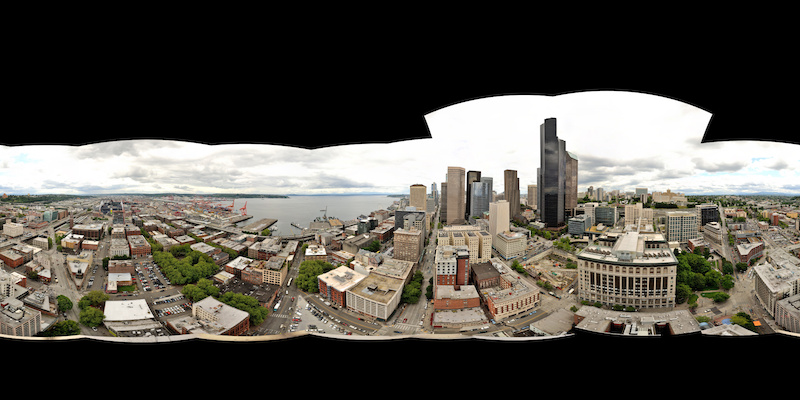
The base of the platform can be patched with an aerial view of the tower or simply colored.

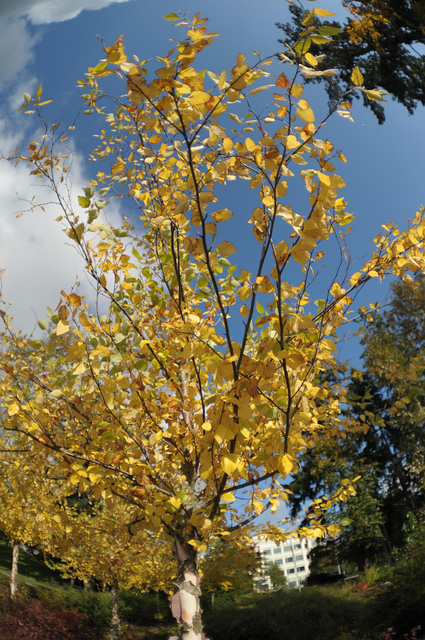
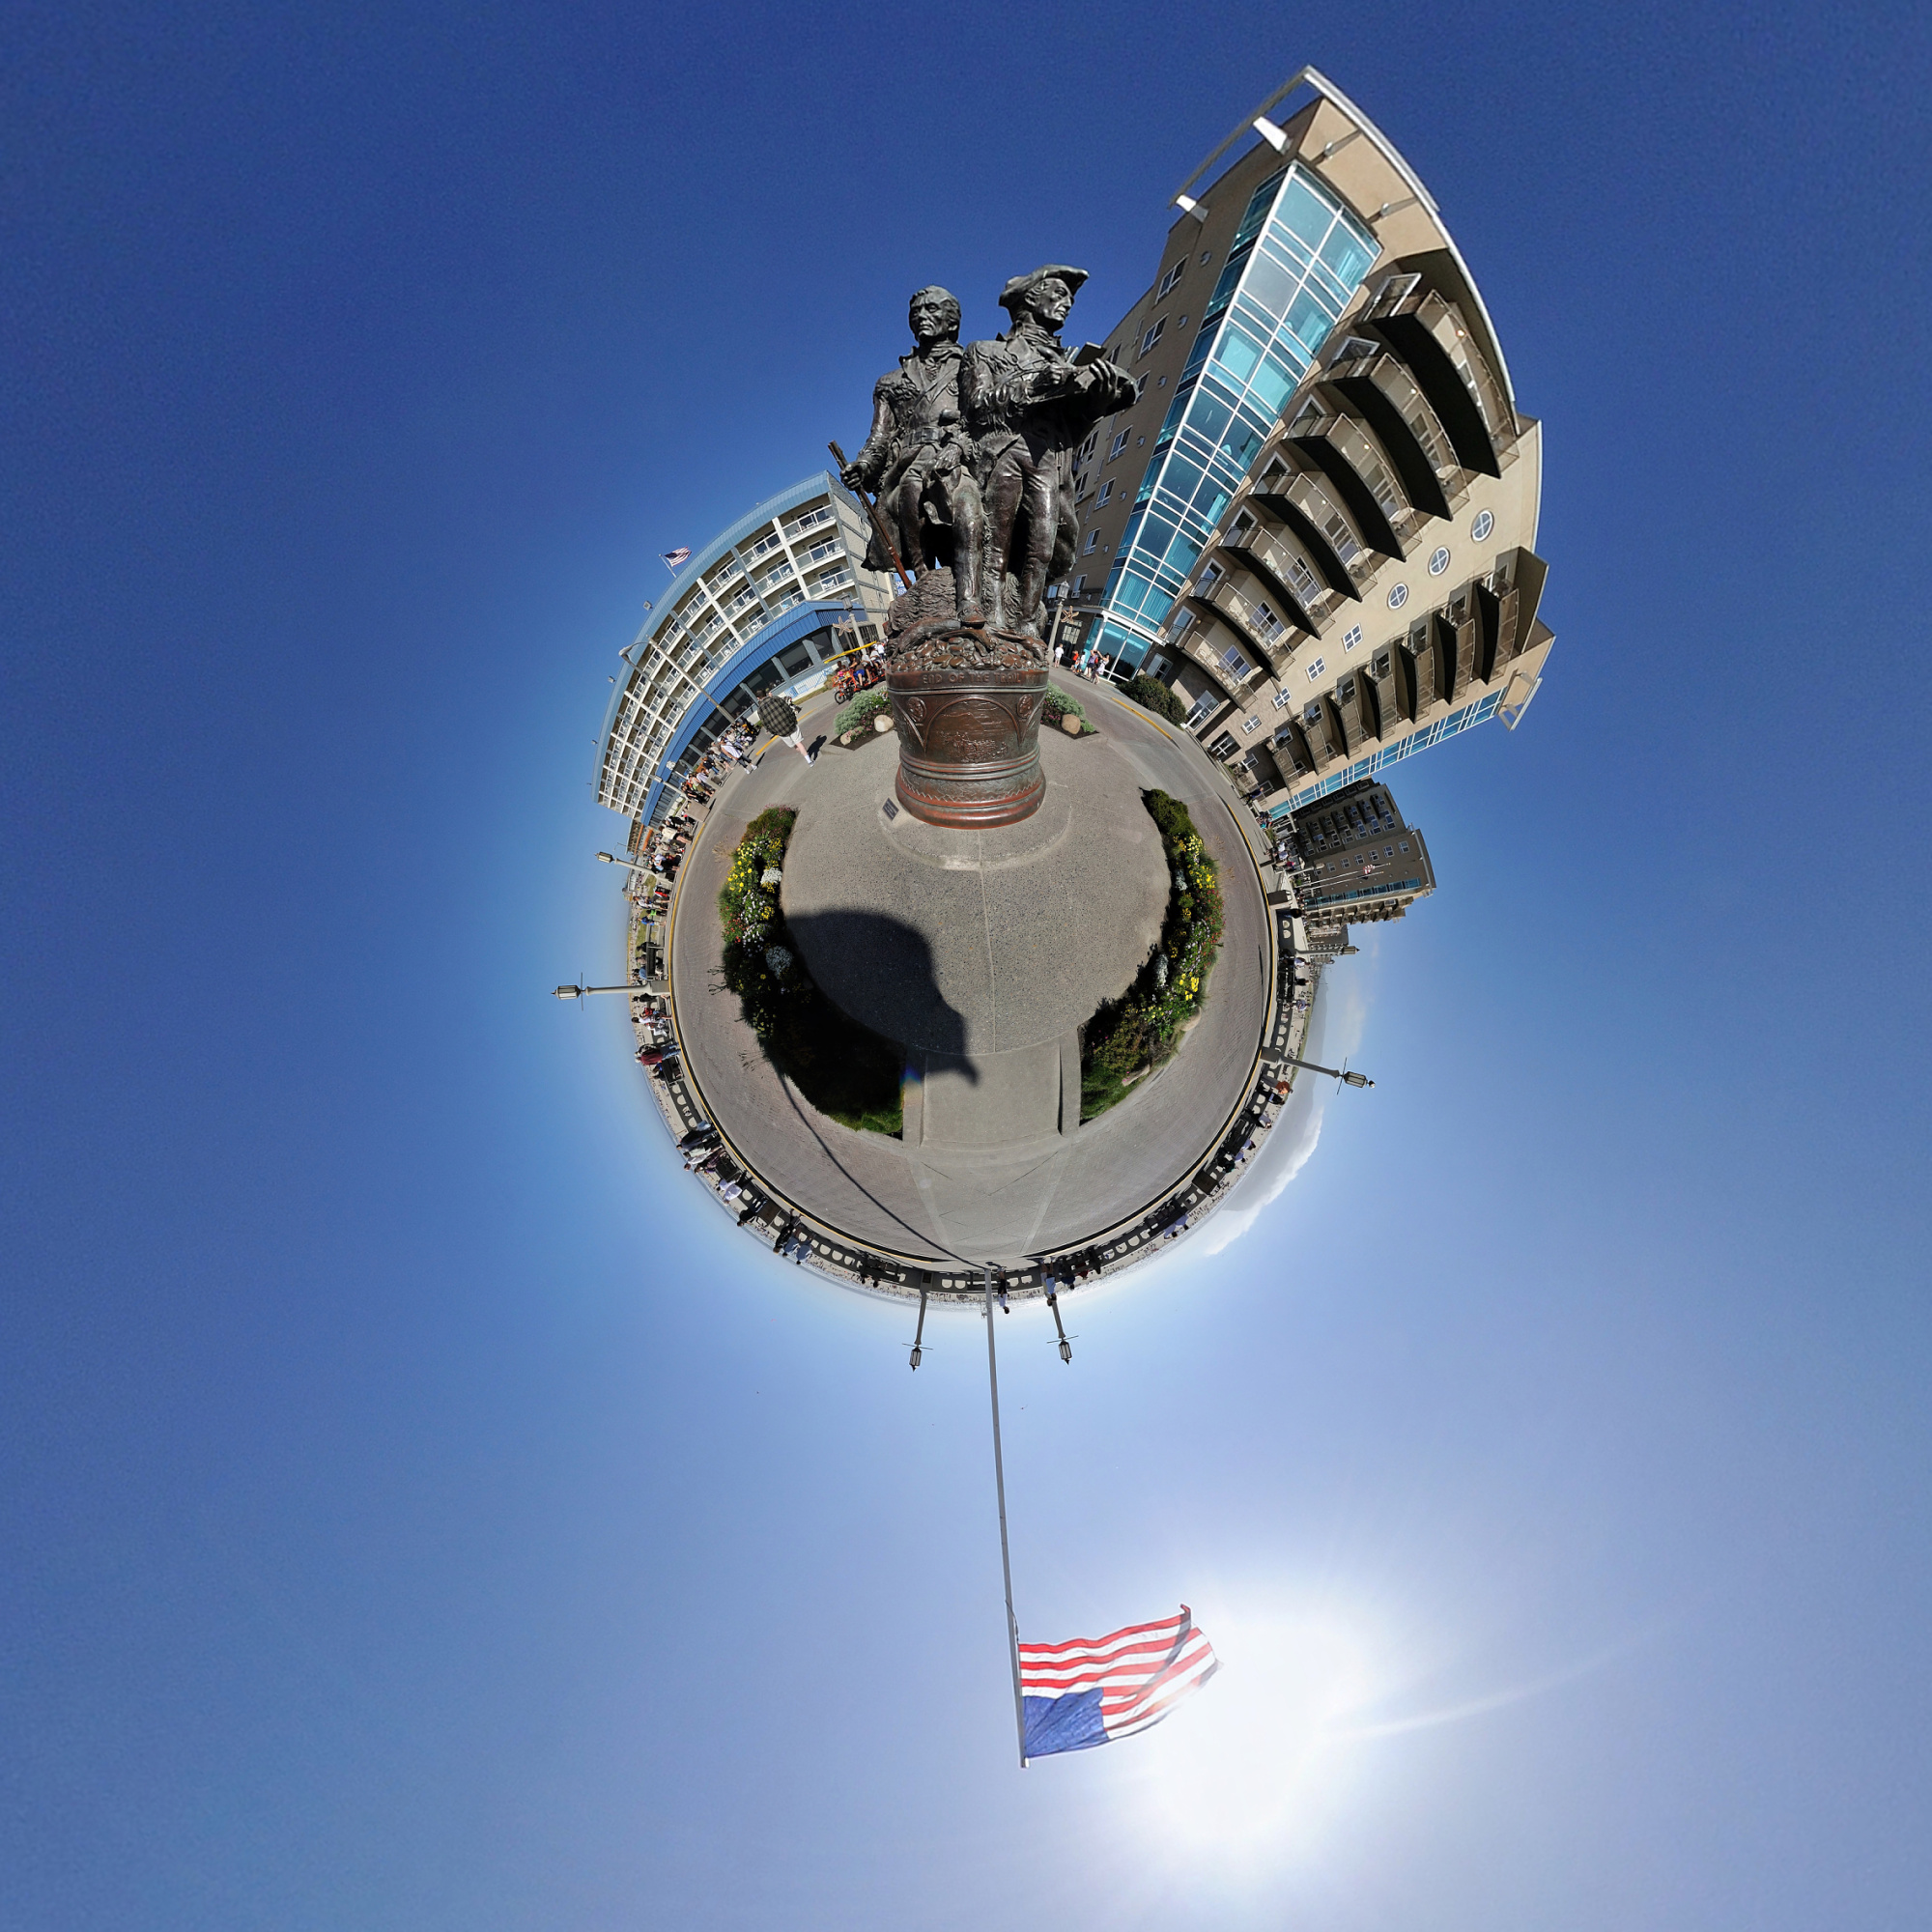
Using the stereographic projection 'little planet' you can make an impressive view from above:

-
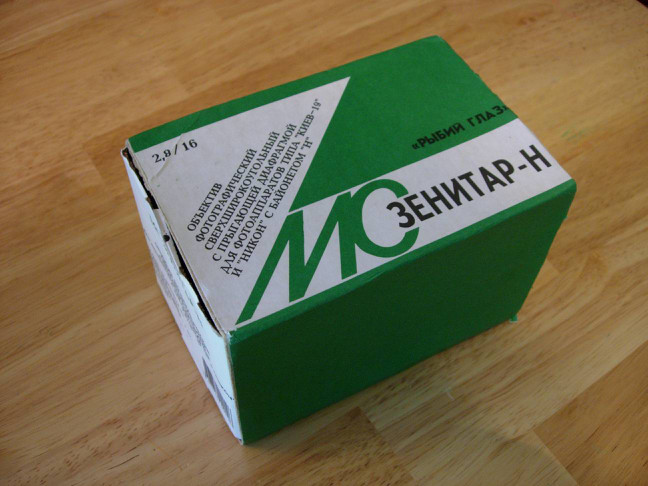
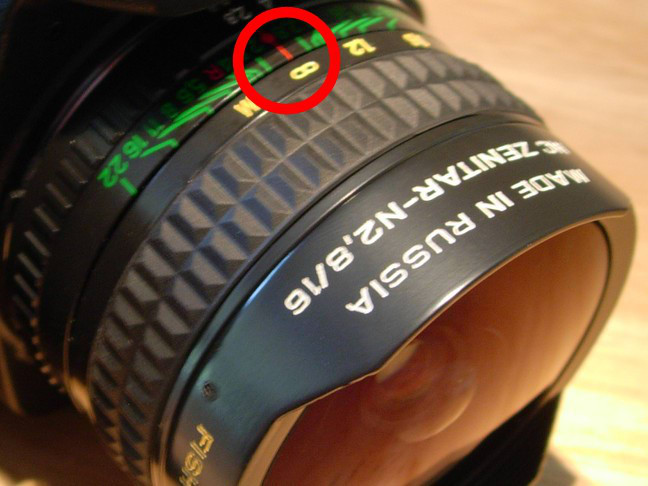
Fisheye MC Zenitar-N 16mm f/2.8 Lens
The Zenitar 16mm f/2.8 is a manual focus/aperture full frame fisheye lens manufactured in Krasnogorsk/Russia. The full frame (the covered rectangle of the projected image circle) covers 180 degree FOV in diagonal on 35mm. See http://wiki.panotools.org/Fisheye_Projection and http://wiki.panotools.org/Special_issues_with_fisheye_lenses. The lens is available for different mounts (M42, Nikon, Canon, ...). Zenitar-N is the model with a built-in Nikon F-mount and that is the model I ordered:
Here it is. Arrived in a weather proof bag from Russia:

Protected against the mail carrier:

With the seal already broken:
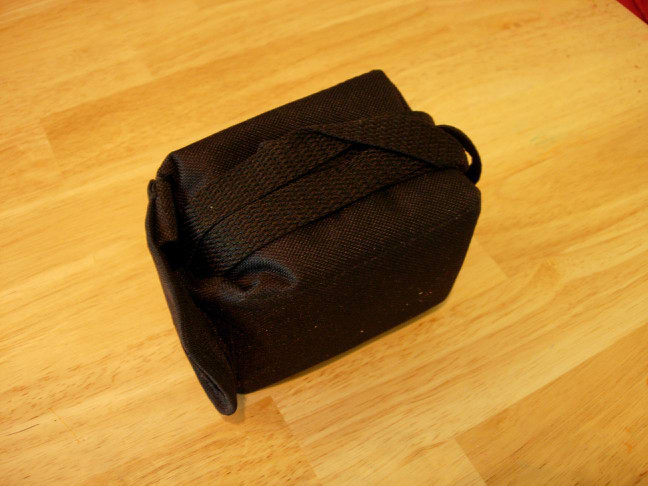
Inside the nylon case:
Wrapped in paper and authentically Russian manual:
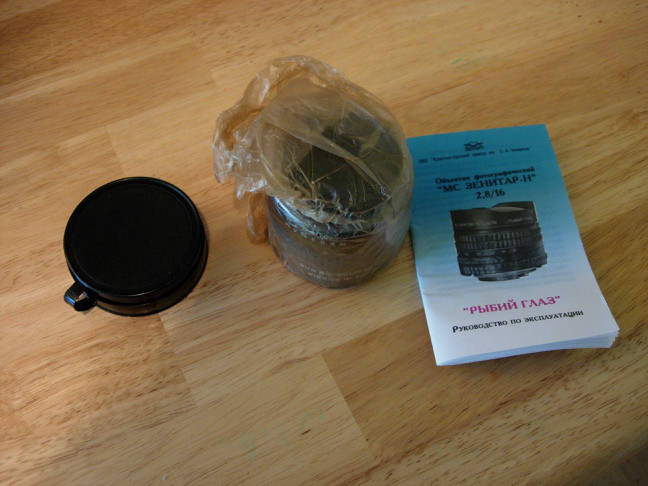
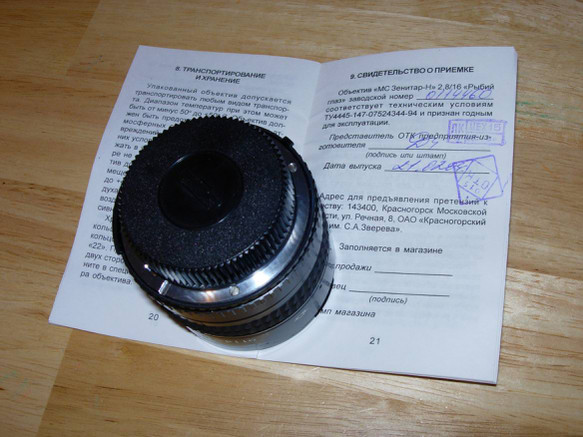
And individually certified:
And it fits on the Camera (Nikon D-50)
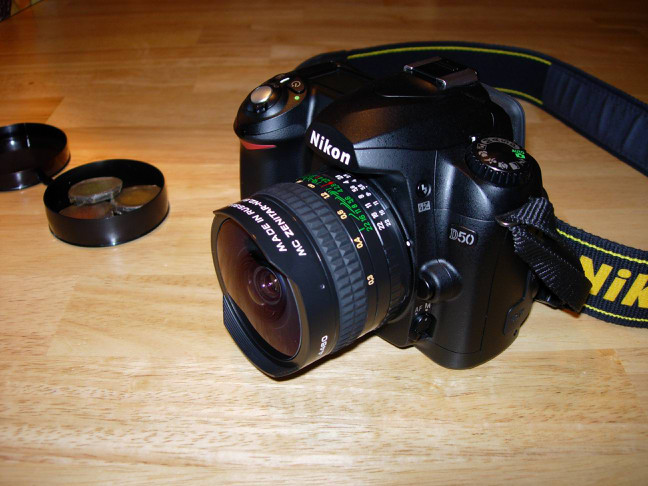
With three additional color filters available
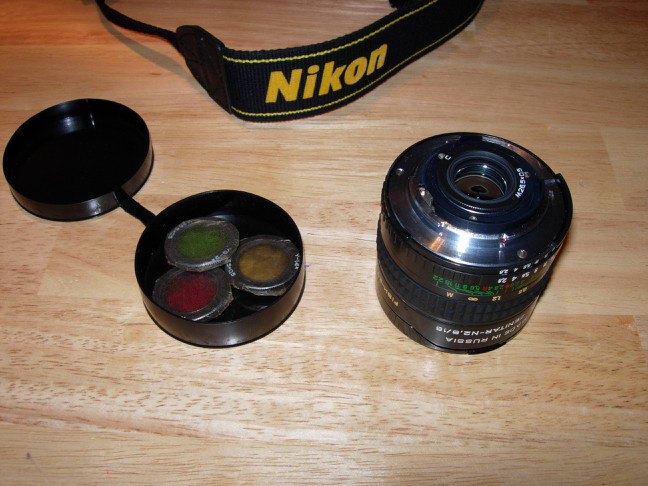
which get screwed in (at the F-Mount side):
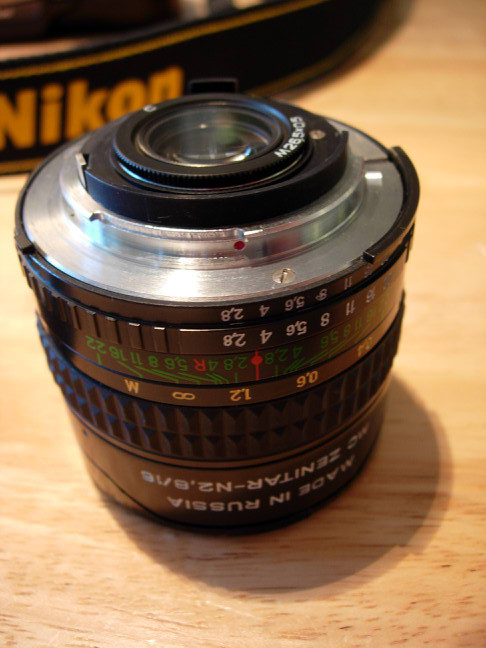
But there was problem. The lens did not focused to infinity. Instead the lens focused from 0.05m to about 1m. The picture were really sharp there, almost like a macro, but no one needs a fisheye macro. Sending back the lens? I already waited three weeks.
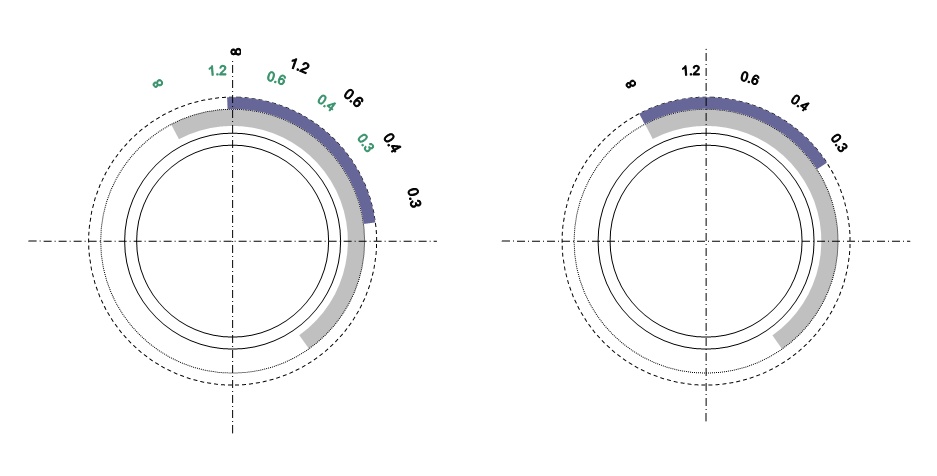
Why does the lens does not focus at infinity? For some reason the distance settings ring was not aligned with the lens setting. Infinity for the distance ring did not match the position for the internal lens ring. See the left drawing. With the wrong aligned distance ring, the distance range of the lens is shifted from 0.3m-infinity to 0.05m-1m.
How to fix this? The distance ring needs to be aligned with the internal lens ring to allow the lens to be focused to infinity. This is illustrated in the right drawing. With the new aligned distance ring, the infinity distance can now be set. The minimal distance moved up from the 0.05 to the 0.3m.
The first step is to move back the rubber ring of the distance ring. Do not use any sharp tools, just slide the rubber back on one side a little bit and go around in a few circles to move it back slowly. On the lens barrel you will see three small holes (every 120 degree around the barrel) with a very small screw inside.
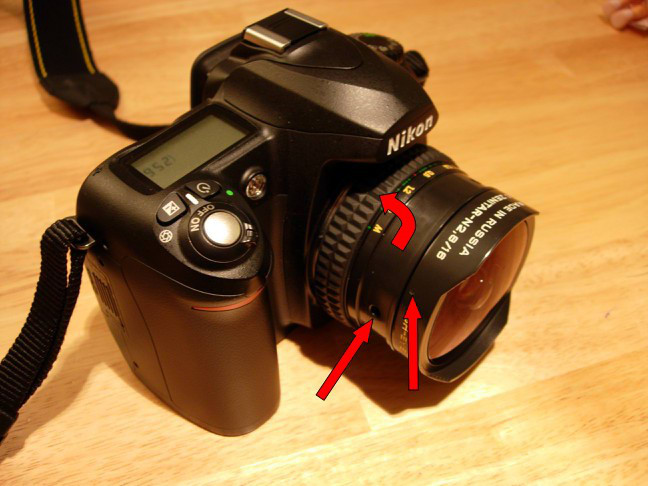
There are also three very tiny holes for the lens hood. Be careful with the tiny screws. Choose a screwdriver that matches the size perfectly. Do not use one that is too small. You might break the screw. (You screw up the lens!).
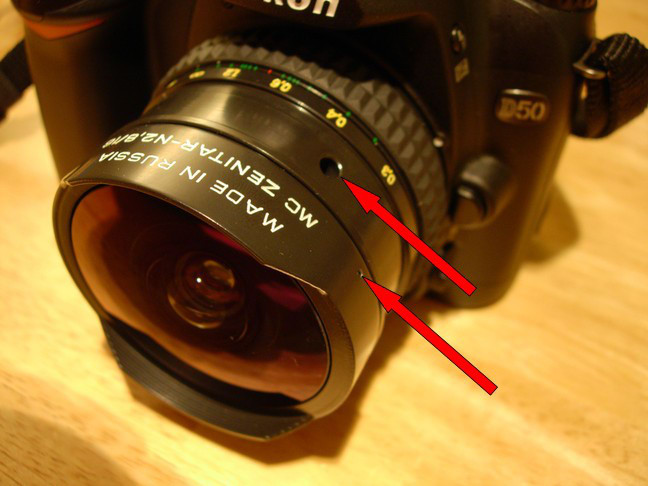
To have the lens focus to infinity, the lens hood needs to be adjusted as well. When you rotate the distance ring to infinity, the lens barrel extents towards the lens hood and might be blocked there preventing the lens extending to the infinity setting.
Do not remove the screws holding the distance ring. Just unscrew until the distance ring moves without being attached to the internal ring. Rotate the distance ring towards a smaller distance and tight the screws just to move the internal ring towards infinity. Look at the illustration above. You are moving the outer distance ring to shift the internal distance ring. For the lens I received the infinity settings was exactly at the stop position of the internal distance ring. I had to move the ring as much as possible towards the infinity setting and the adjust the outer distance ring to match the red mark with the infinity symbol. Once this is done, carefully tight the screws and slide the rubber ring back.
The Nikon D-50 for example cannot meter with this lens and the internal flash is disabled. You need to use the manual setting, set the exposure time manually and use an external flash (SB600/800) set to manual mode if you want to use a flash. At f/5.6 the lens seems to have an optimal aperture.
Some samples:


With the sun in the front:
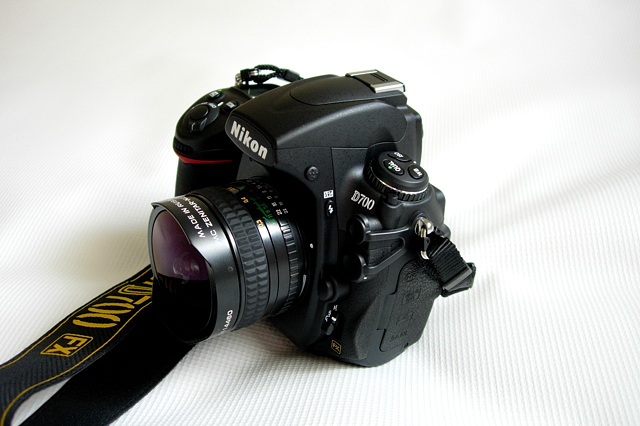
Das Objektiv Zenitar-N mit einer Nikon D700.
The Zenitar-N mounted on Nikon D700.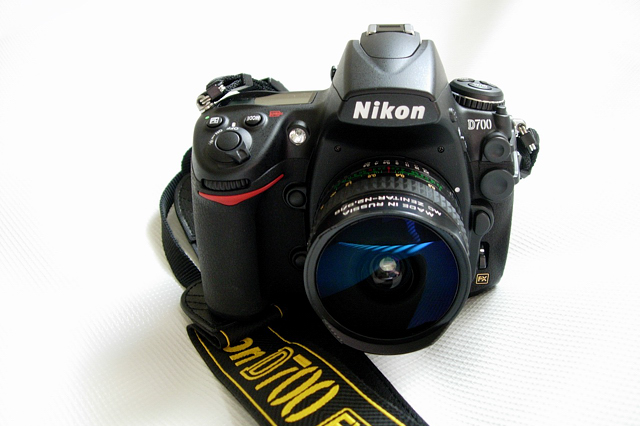
Beispielbilder mit unverkleinertem Ausschnitt des Randbereiches:
Sample pictures with 100% crop from the border:f/2.8:
100% crop:

f/4.0:
100% crop:

f/5.6:
100% crop:

f/8.0:
100% crop:

f/11.0
100% crop:

f/16.0
100% crop:

f/22.0
100% crop:

Nahaufname:
Close focus:
Unverkleinerter mittiger Bildausschnitt:
100% center crop:
Entfernung auf Unendlich:
Infinity focus:
100% crop

Gegenlicht:
Lens flare:
-
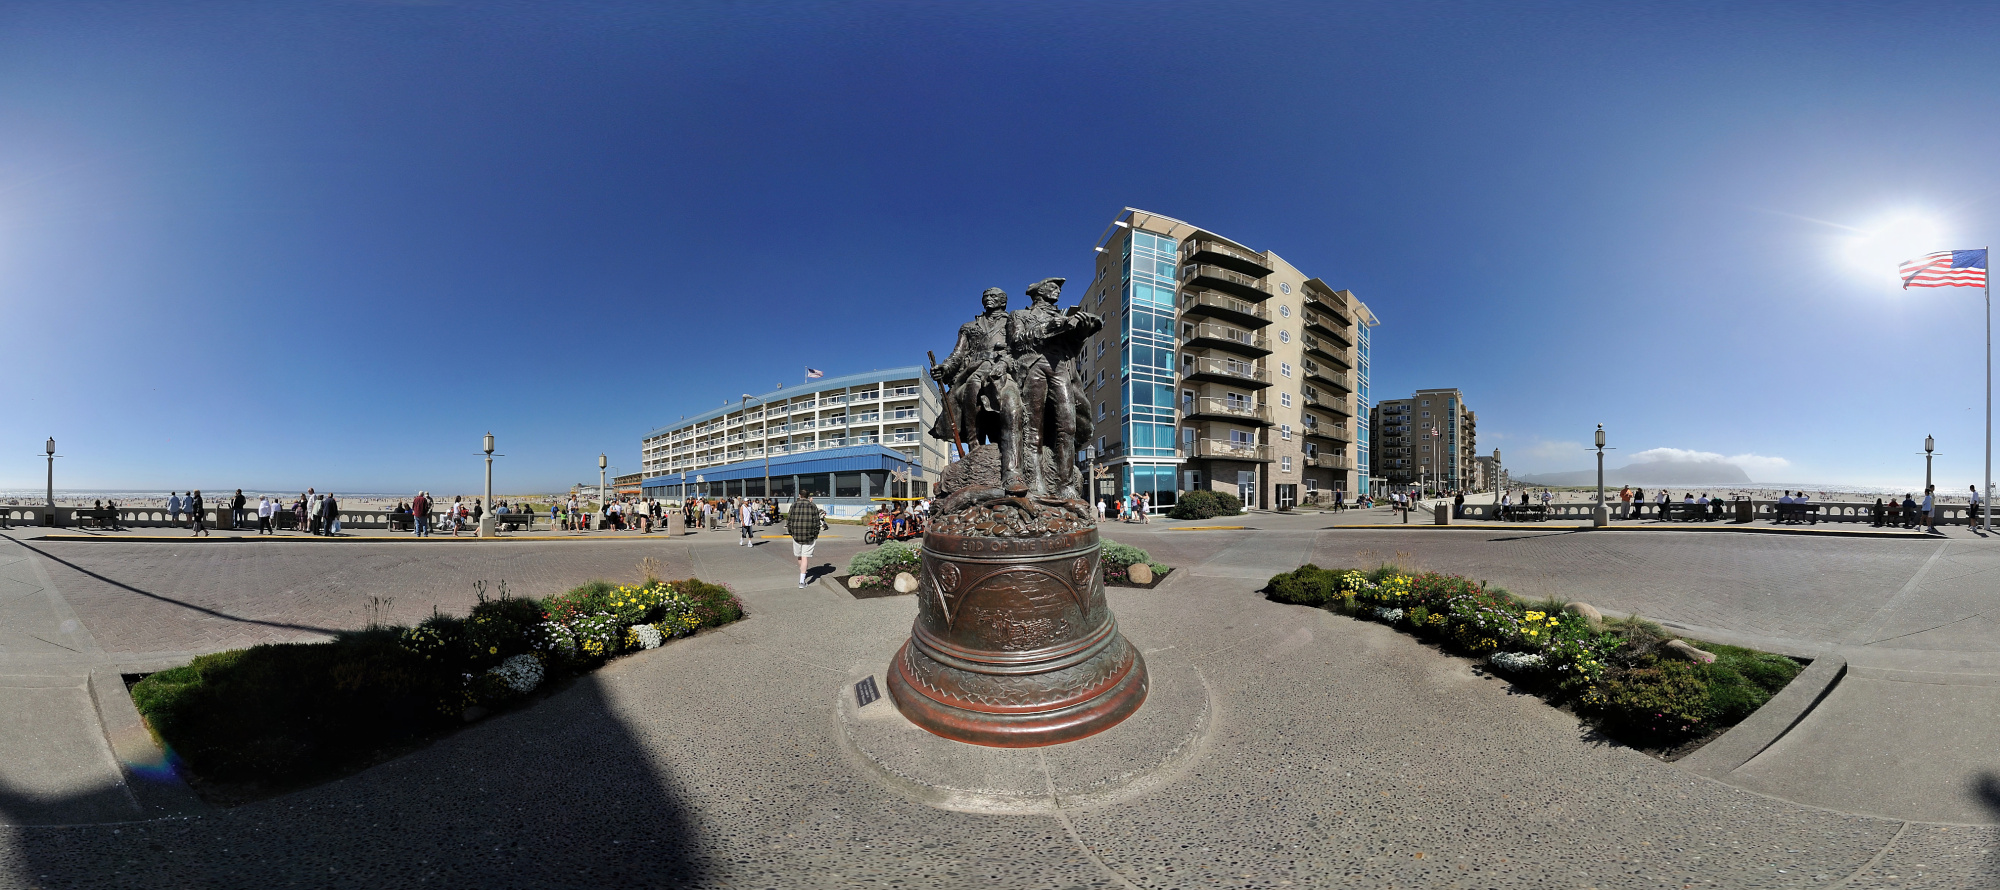
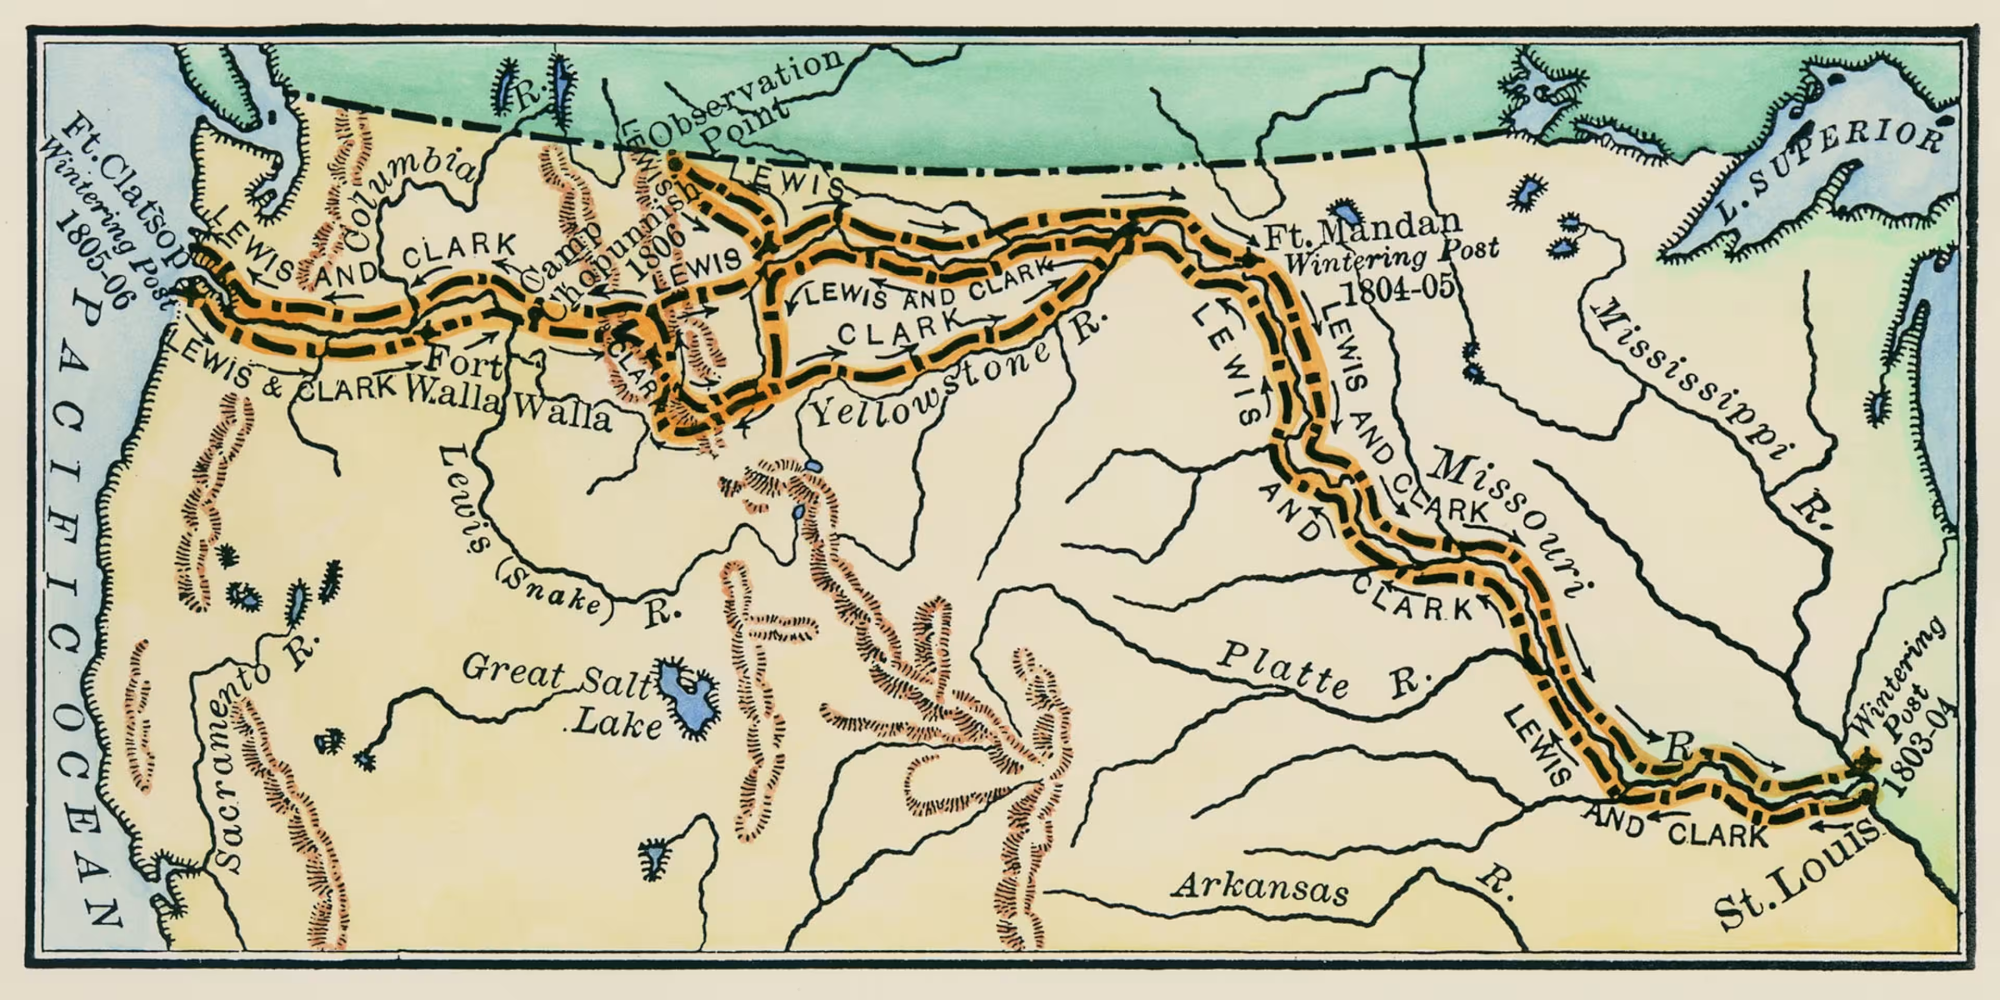
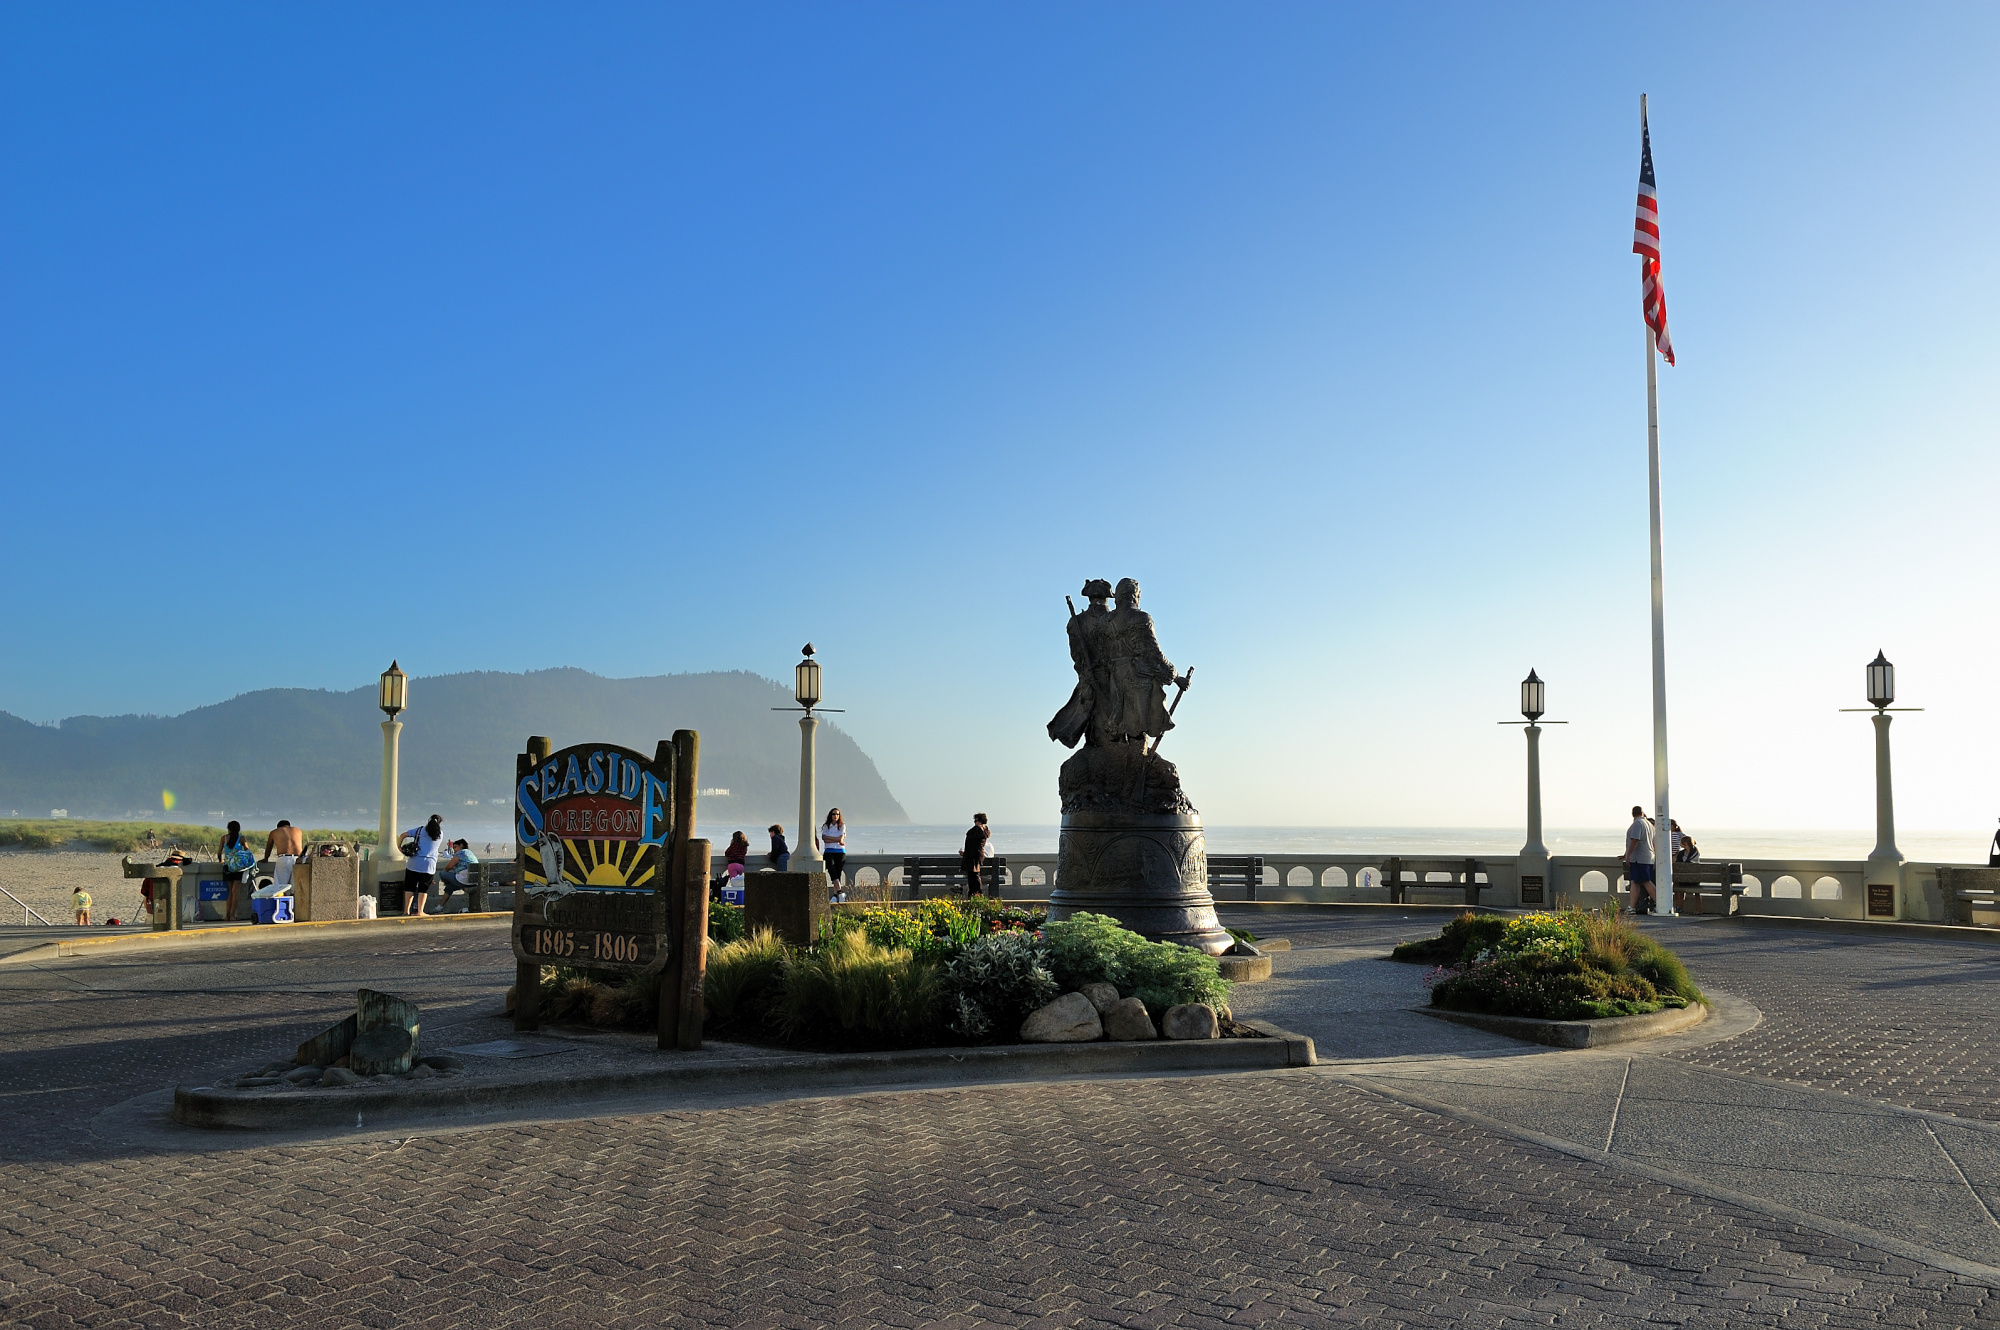
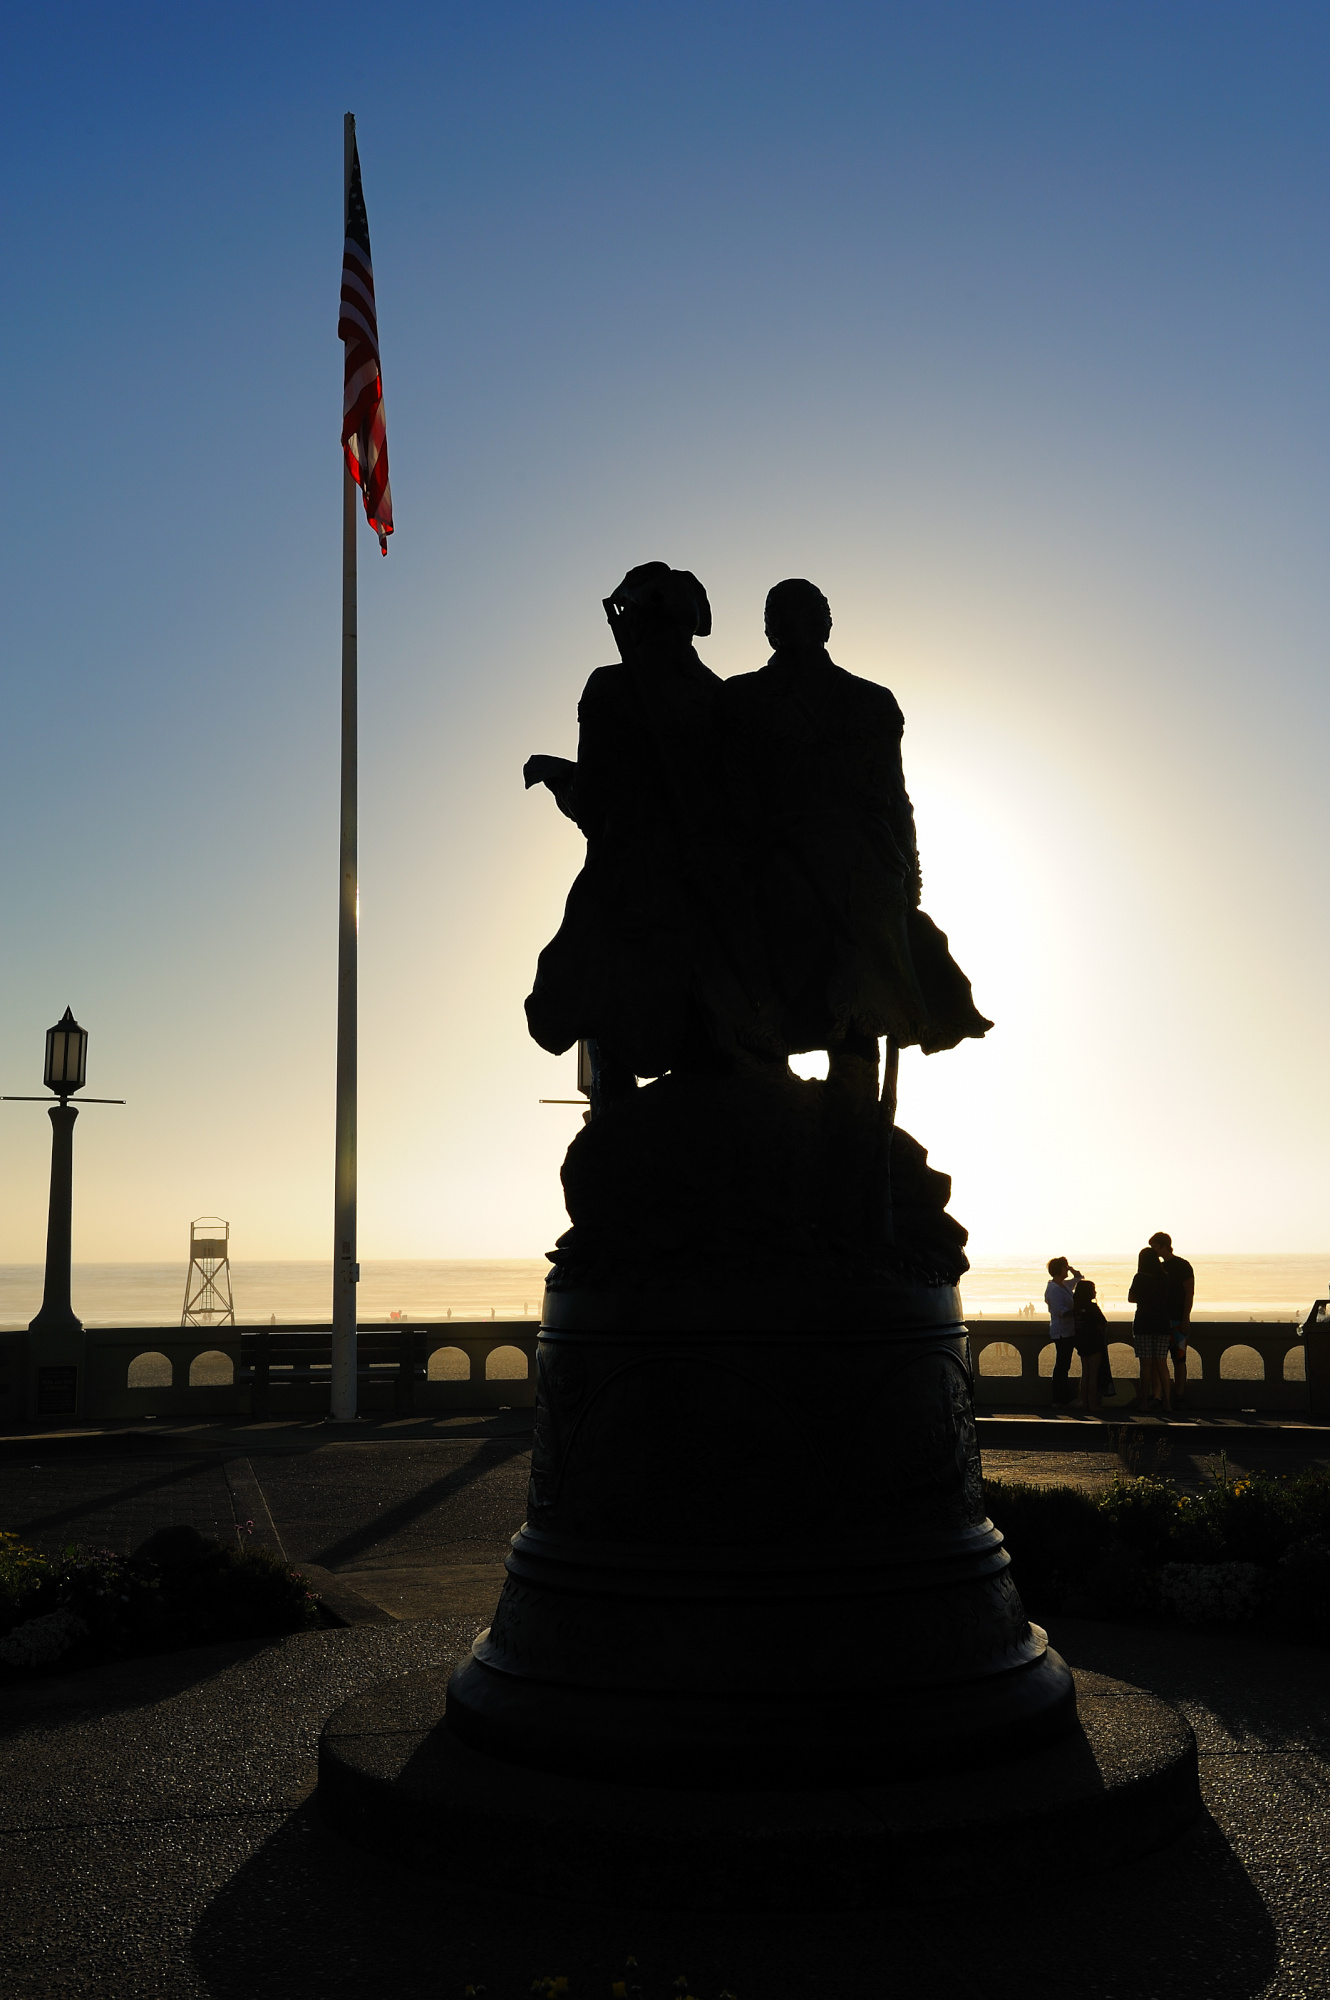
Lewis and Clark, The End Of The Trail
Seaside, OR
Finally, a sunny summer day. And a busy one too! I captured a 360°×180° panorama from the Lewis and Clark statue at the end of the trail.
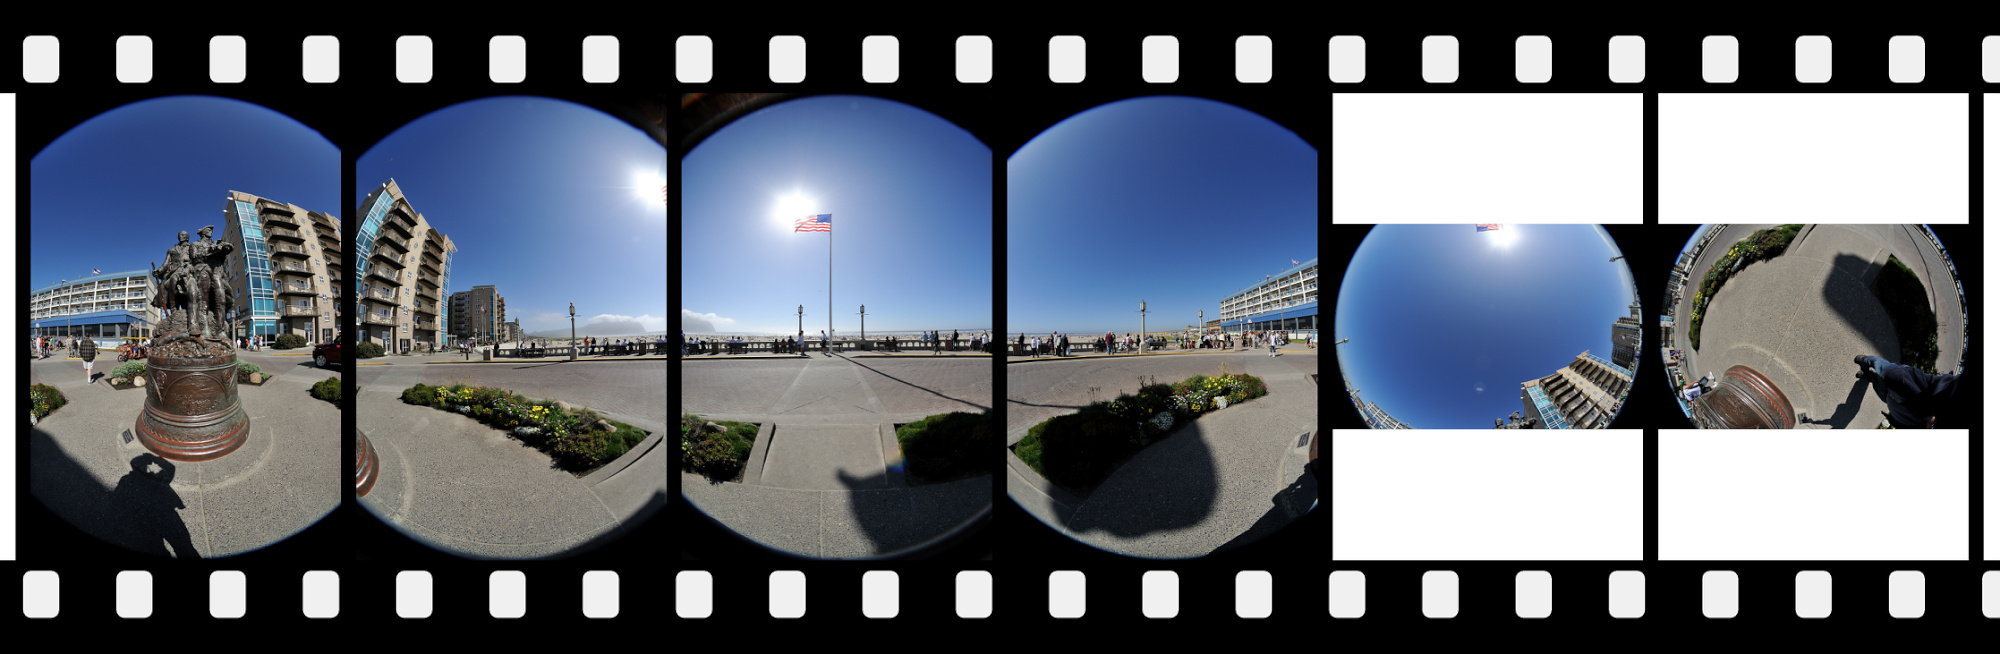
This is a handheld spherical panorama created using the 4+Z+N method: four horizontal shots, one up (Zenit), and one down (Nadir), taken with my Nikon D700 and a Sigma 8mm fisheye lens.
Later, I returned with a tripod, only to find the statue's base in deep shade. On my next attempt, the heads of Lewis and Clark were perfectly aligned with the flag's shadow. A third try? The flagpole's shadow already stretched from top to bottom of the statue. By then, the sun was low, casting long shadows across everything. In the end, the very first handheld version had the best lighting of the day.
Each image needed its own lens parameters, but parallax errors were inevitable when shooting handheld. After some careful control point adjustments, the panorama started to take shape.
Interactive Panorama Lewis and Clark, The End Of The Trail
Nikon D700 1/1000s f/5,6 ISO 100/21° f=8mm
The Trail
Nikon D700 1/320s f/9 ISO 200/24° 24-70mm f/2,8G f=31mm
Nikon D700 1/640s f/13 ISO 200/24° 24-70mm f/2,8G f=38mm
DSC_1776.jpg
Nikon D700 1/200s f/7,1 ISO 200/24° 24-70mm f/2,8G f=70mm
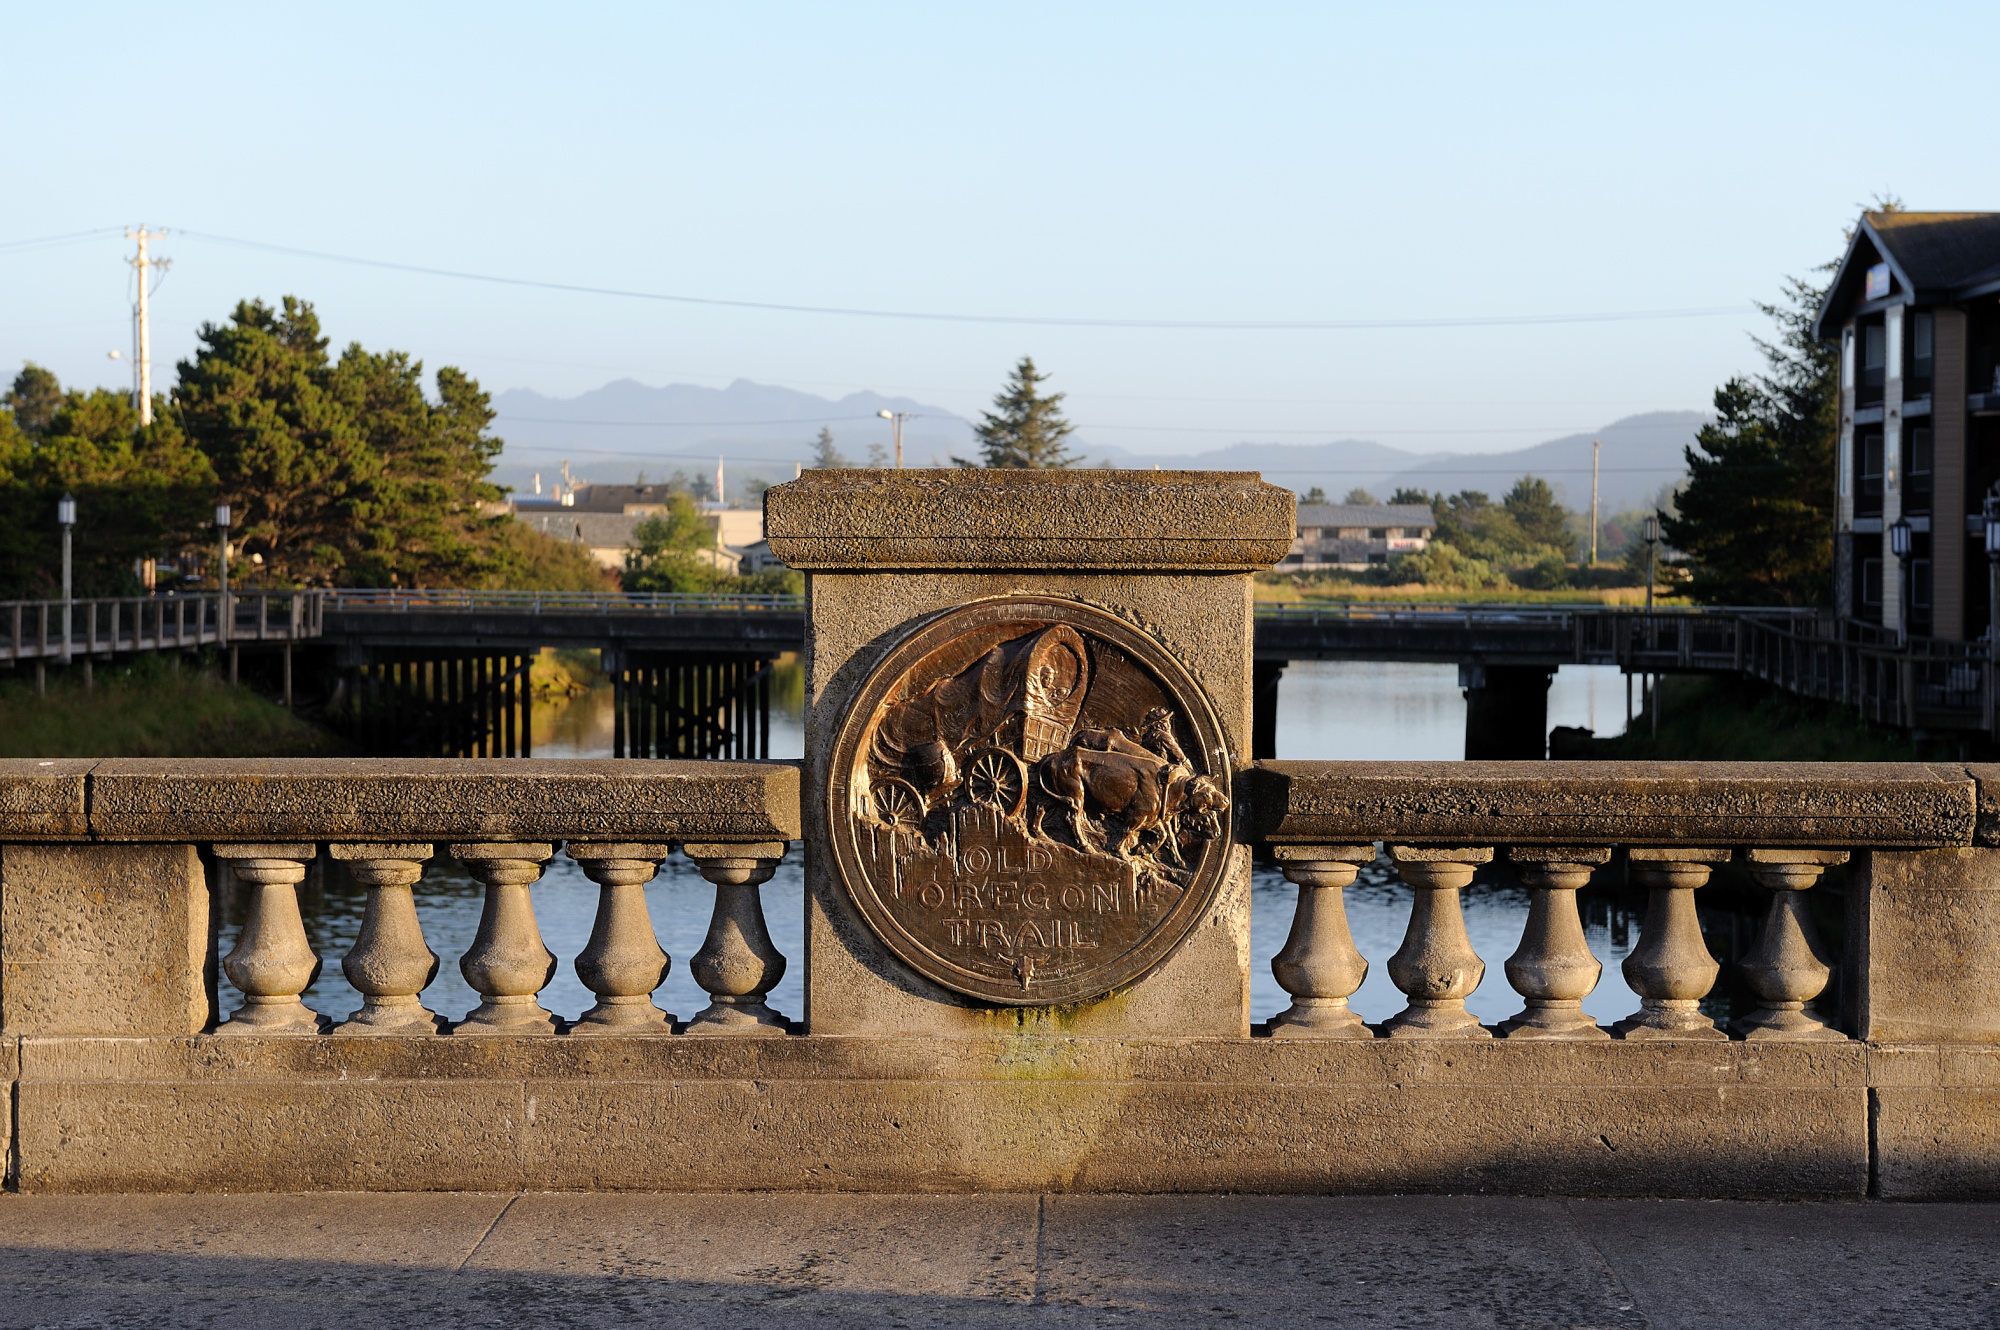
Nikon D700 1/640s f/13 ISO 200/24° 24-70mm f/2,8G f=55mm
← Neuere Beiträge
Seite 22 von 22