| CJ750 toolbox | |||||
| Installing a Niehoff WA 709
regulator in a 12 volt Chang by Richard Cook Other folks had really done all the research on this and I referred to the articles in the toolbox. The regulator is for a '73 BMW 2002 but keep in mind there were two offered that year. One Bosch unit had an internal regulator and one an external. You want an electronic replacement for the external regulator which originally had points. I used a Niehoff since they are made in USA and are actually tested after manufacture. They are about $29 and available at Kragen as well as many other places. They should be so tough in this use that you would need to have a short and fry one to break it. The reason I’m changing my regulator is to try to pick up a bit more changing voltage. I run short trips with the headlight on all the time and after a month or so my battery needs a change. The stock regulator gave me a max of 13 volts and I’d like to get at least 13.5 or 14 out of it. |
|||||
 |
Your regulator may be located in a black box or under the fuel tank, even perhaps in the sidecar depending on the sense of humor of your builder. Color codes often mean nothing on a Chang so don’t count on that. Read all the regulator articles in the Toolbox before starting. (Click here for one of them.) | ||||
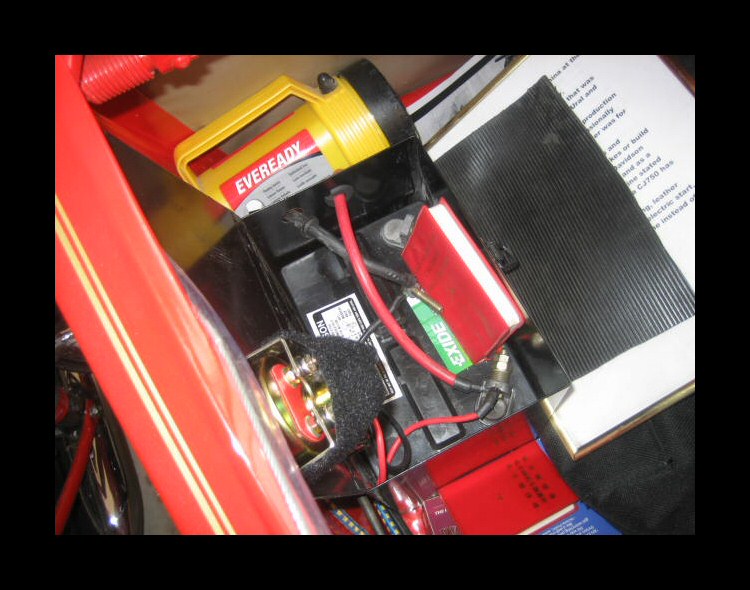 |
Disconnect your battery for safety. I pull the ground as sparks are less likely and you can see I put a copy of Chairman Mao’s Red Book in there to keep the ground from touching the post. The chairman serves the people once again. | ||||
| On my bike the electronics are under the tank so first read the remove the tank article. | |||||
|
|||||
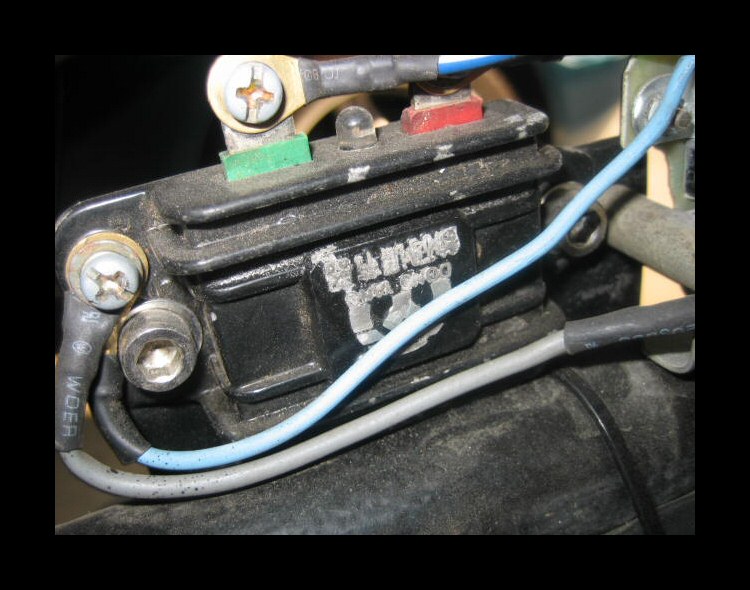 |
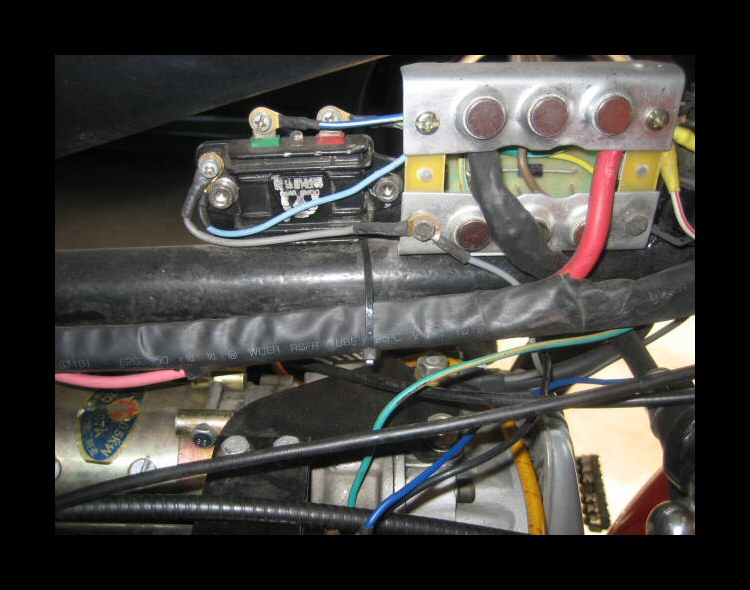
As you can see my regulator is a small black unit nicely mounted with two screws to the frame. On my bike the red and green were indicated by a small tab on each input. You can see the tabs in the picture. Since the diode board is next to my regulator you can also see where it goes to double check. Your bike may have an old style points regulator but the wiring is basically the same. | ||||
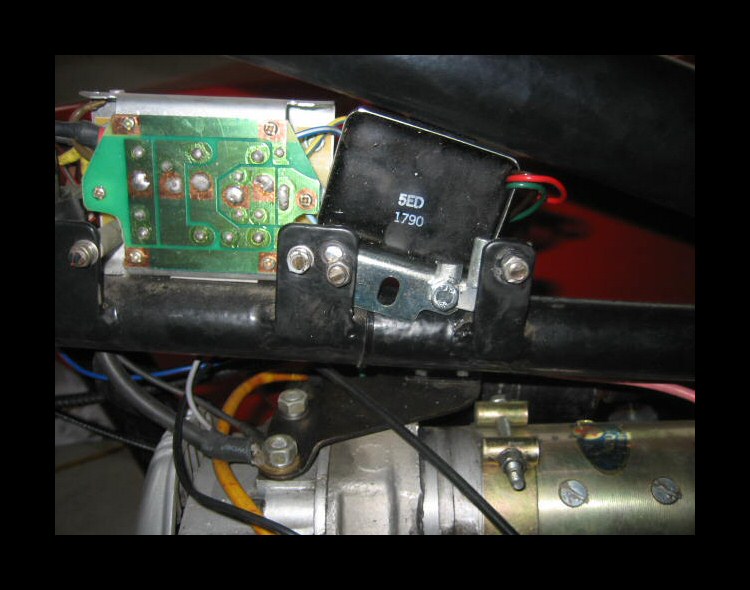 |
In order to get clearance I had to mount the new regulator on an angle. Once I had a basic mounting spot I determined how long to cut my wires. | ||||
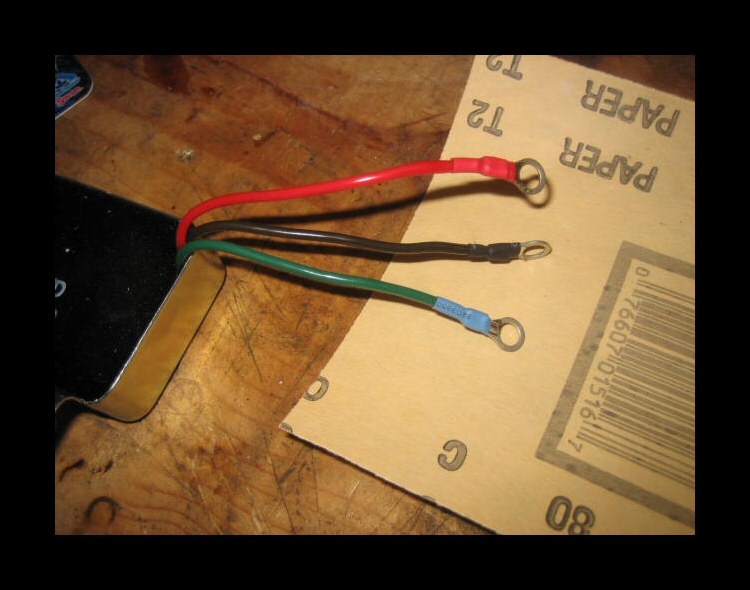 |
Cut off the regulator connector wires and add your choice of terminals. I wanted to be able to reinstall the stock regulator easily so I used ring terminals. I did not have shrink wrap in green so I used blue for that wire. The other two are soldered and shrink wrapped in the correct color. | ||||
| Next I mounted the regulator on one screw and Locktited it. | |||||
The end result for me was to gain a half volt output. This should not hurt the windings and may make a difference in how long my battery lasts between charges. |
|||||