| CJ750 toolbox | |||||
| Bart Sanders installs wheel bearings... the proper way. | |||||
 1 |
 2 |
 3 |
 4 |
 5 |
|
| "Simple components, but when being put
together in the wrong way..., well, our Chinese friends
did. Result: clicking noises inside the bearings when the
inner rings are rotated. (Well, forced to rotate that
is.) Using the axle and turning with quite some force,
the rings start to rotate. One can feel the balls falling
from one pit into the next one, click, click. All four of
my (new!) wheels show the same problem. The wheels do
rotate, but considerable amounts of energy go into these
bearings. These bearings will not last long after being
mistreated during assembly. What a pity. All the wheels
have new FYB brand bearings, but they are now only good
for the scrap bin. I can only assume, but it is likely
that during assembly the main pressing force was applied
via the inner rings using hard blows with big hammers.
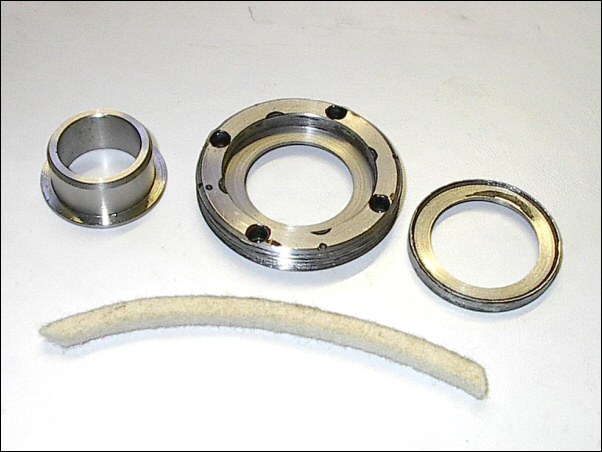
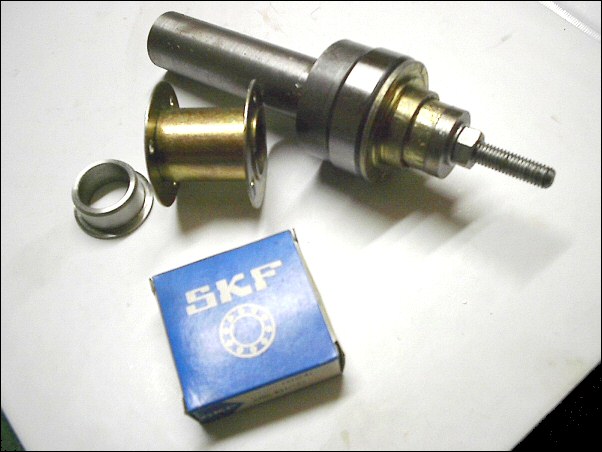
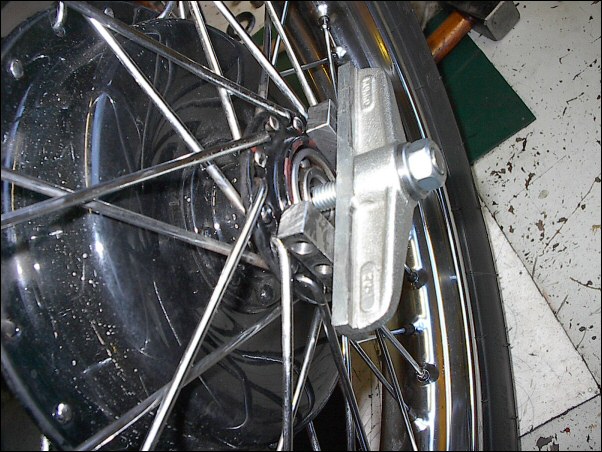
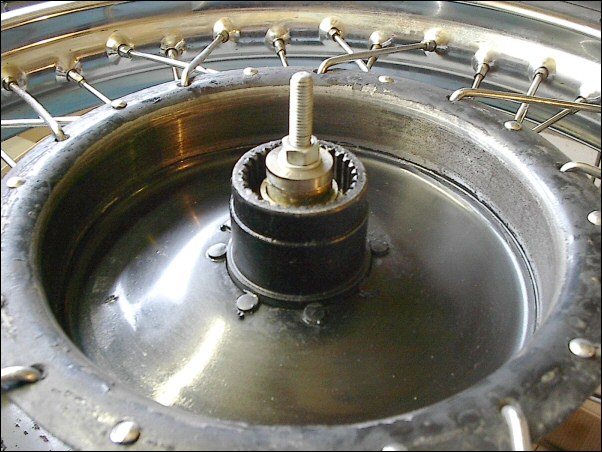
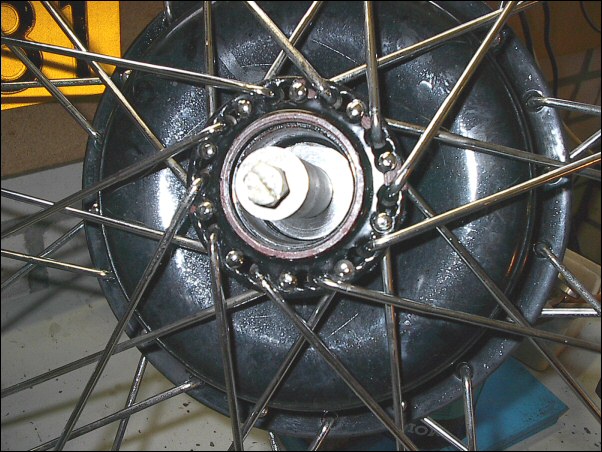
Wrong! Disassembly procedure: Now that the bearings are candidates for the scrap bin or at best for decorating your chimney, you can use brute force to get them out. See pictures 3 and 4 Use a piece of 10mm thread, two nuts, a stable pressure ring against the inner spacer, two distance keepers and a stable bridge (may be a 10mm steel plate as well) and lock everything up. Start applying pressure and if nothing moves, really tighten the nuts and hit the inner end of the thread with a big steel hammer. Now the bearings will move two at a time. Repeat until only turning one nut (fixing the other one) keeps one moving the bearings out. Take out all parts including the big inner spacer—the one with the large flanges holding lots of grease. Buy new 6204 bearings. The best are the two-sided sealed bearings (6204-2RS) Assembly procedure: When assembled in this construction, the press force must be applied to the outer ring of the ball bearing. You need a simple tool which leaves the inner ring free while making contact with the outer ring. You may use the inner ring to hold the tool together, but only for that. See pictures 2 and 5. Start with the inner ball bearing, the one closest to the brake. Grease the whole bearing inner-case so that rust has no chance. Use temperature as a tool. Put the tool with the ball bearing inside a plastic bag and put it in a freezer (-18°C) for a couple of hours. Use a hot air blower and heat up the bearing-case from the inside up to the point where a bit of water just starts to boil. (Mind the paintwork!) Work quickly and you can insert the frozen bearing (plus the extra rings and bushes belonging to the inner side) without any force. The whole thing falls into place. A tick with the plastic hammer on top of the tool and the inner ball bearing is at its position. Take out the tool and use the same procedure for the outer ball bearing. Here it's more easy. After putting in the spacer and having the temperatures right, you can drop in the outer bearing. If it stops on its way, use the pressure tool. Apply pressure via the outer ring and it will jump to its final position. Very important: At the final stage, when the outer bearing is reaching its final position, do not apply too much force! If you do, the inner ring will have to pick up that force via the big inner flanged spacer and will be put under permanent axial force which we wanted to avoid in the first place! If done correctly, the inner rings can be rotated by using your fingertip and these bearing will outlive the rest of the bike. Felt ring seal: In my bike one of the four feltring assemblies showed a worn out felt ring. Replacement is easy (use 5x5mm felt which you can buy per meter for a few cents). See picture 1. |
|||||