 |
Making your own duckboards |
 |
Looks like something's missing here.
Duckboards really dress up the sidecar, especially if
they're well-made. Unfortunately, some of the ones coming
from China these days are a bit on the cheesy side. I
looked around the Internet and found a couple vendors
offering duckboards for over $100 a set. Screw that. |
.gif) |
I spent less than $20 on material, and got
enough steel for three sets. The steel is 1" x
1/8" and sold in 12' lengths, so that's what I got.
The wood is oak, 1-1/4 x 3/4". Everything I needed
was ripped from a single 6" x 6' plank. |
.gif) |
Start by making bend and cut marks, based on
the measurements you carefully made. (14-1/4" from
front edge to first bend, 4" bend-to-bend, then
11" from second bend to aft edge.) Overall length of
the two steel straps is 29-1/2". |
.gif) |
Cut to length. |
.gif) |
Make your initial bends as marked, easily
done in a vice, and without any need for heat. |
.gif) |
To get uniform curved bends, you'll need a
jig of some kind. You could even use a small tree if you
had to. I used an old glass-pack muffler clamped in a
vice. |
.gif) |
There's your curved bends. |
.gif) |
The straps are flattened out slightly to
facilitate the following steps. |
.gif) |
Mark where your holes need to be. Here's
where it gets interesting. I used an existing set of
boards as a pattern and found it was constructed using a
combination of metric and SAE measurements. Working
forward, measure 4cm from the first bend. That marks the
centerline of your board. From there, make four more sets
of marks at 7cm intervals. |
| Working rearward, measure 2cm from the
second bend. Make a total of four sets of marks at 7cm
intervals starting at that point. These will mark the
centerlines of the remaining boards. |
.gif) |
Centerpunch for drilling. |
.gif) |
I like to drill pilot holes, but it's not
really necessary. |
.gif) |
I used a 1/4" bit for the real holes. |
.gif) |
Clean up the burrs, sharp edges and whatnot,
then prep for priming. |
.gif) |
Primed and ready for paint. |
.gif) |
Painted and ready for wood. For this job,
any decent quality aerosol paint is adequate. |
 |
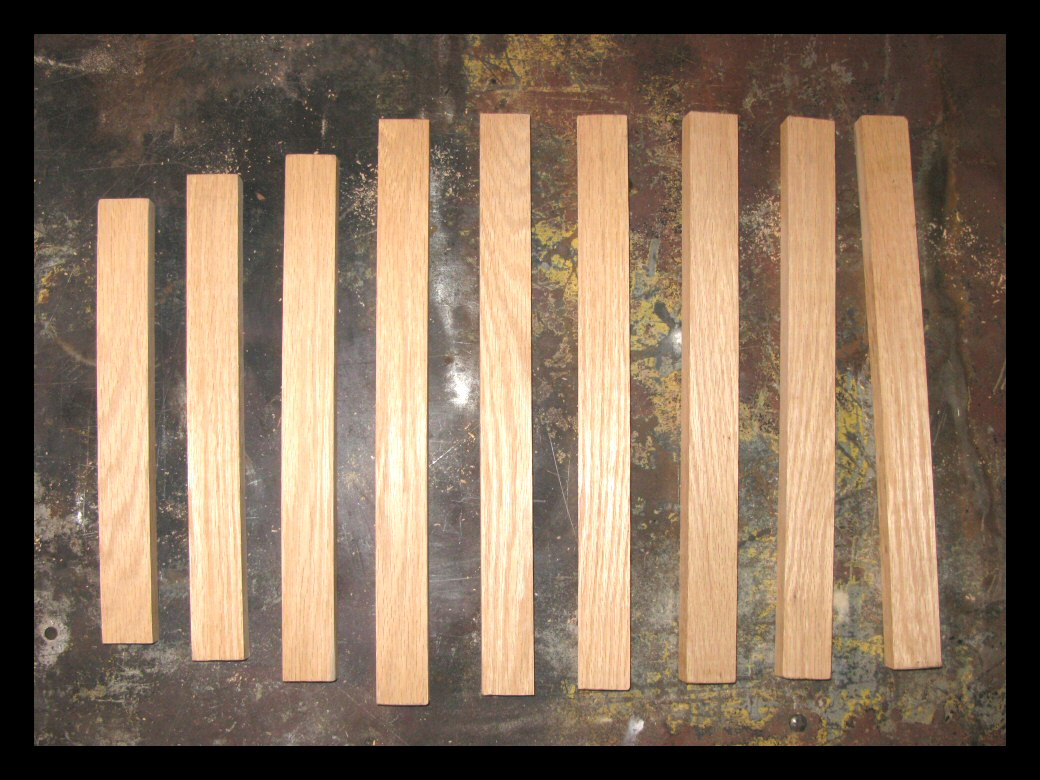
While the paint dries, cut your wood into
the following lengths: one 11", one 12", one
13" and six 14-1/5". |
 |
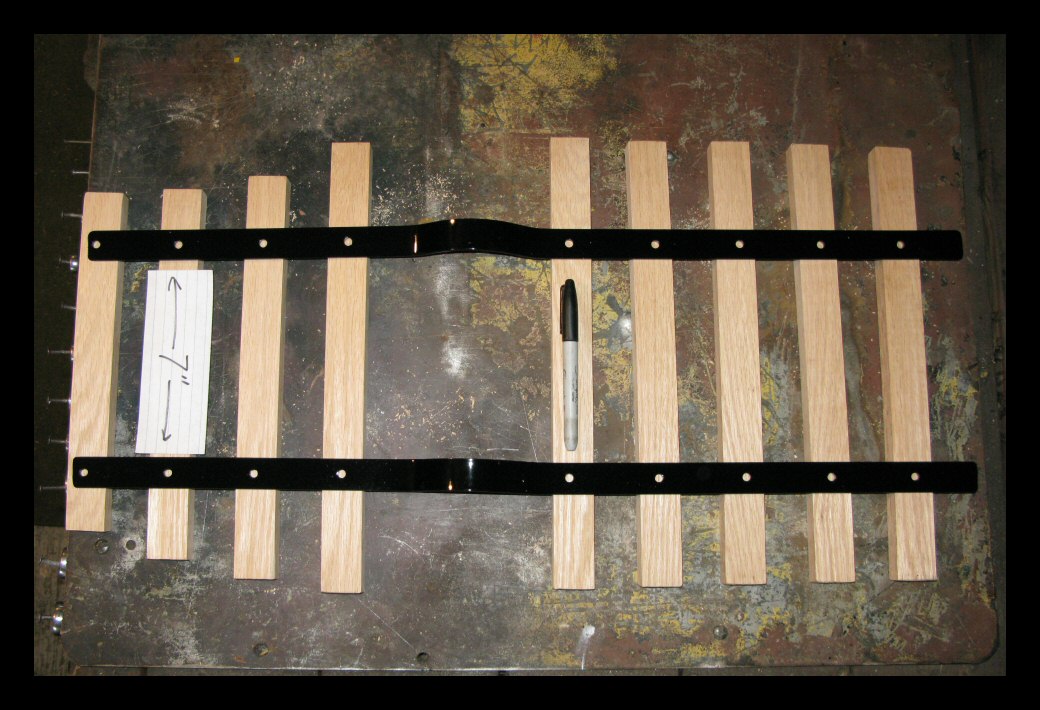
To mark the wood for drilling, lay the
straps over the wood. They should be spaced with 7"
between the inside edges. Take your time and get it
spot-on. You're going to mark the wood through the holes
you drilled in the straps. Keep everything as perfectly
aligned as possible while you do this. |
 |
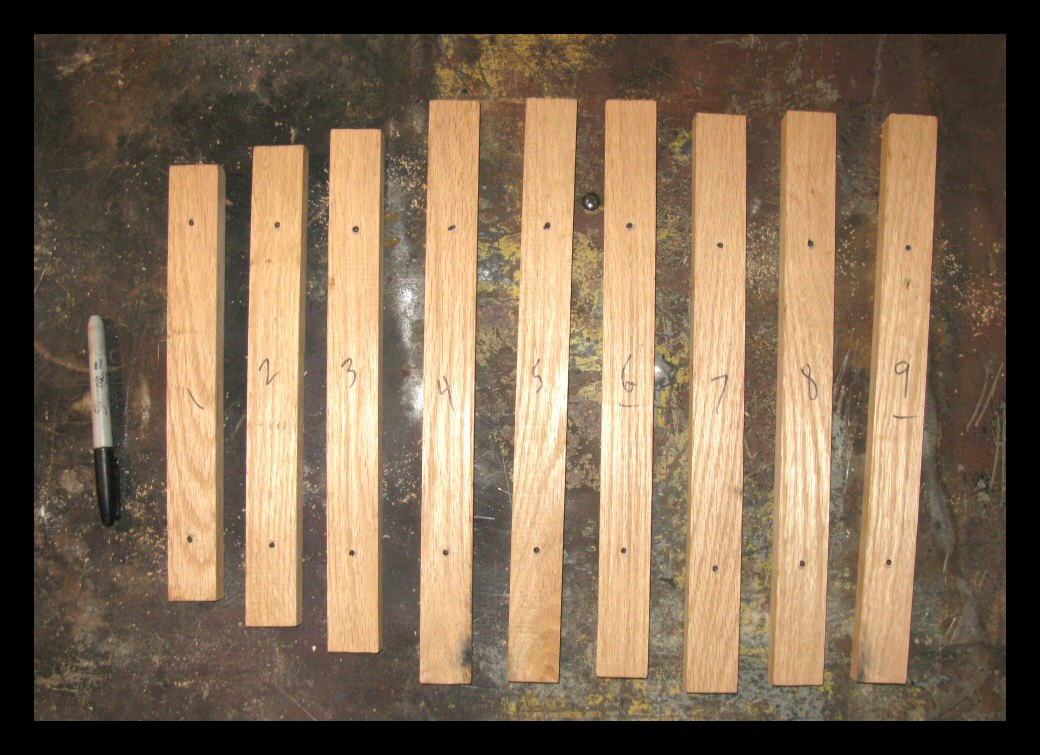
There, marked. Call me anal, but I also
centerpunched the wood before drilling. These holes have
to be in the correct locations, so why take a chance? For
drilling, I used a 1/8" bit with exactly 1/2"
protruding from the chuck. You don't want to go all the
way through the wood. Also be sure to drill on the crappy
side of the wood since it will be face down in the
sidecar. |
 |
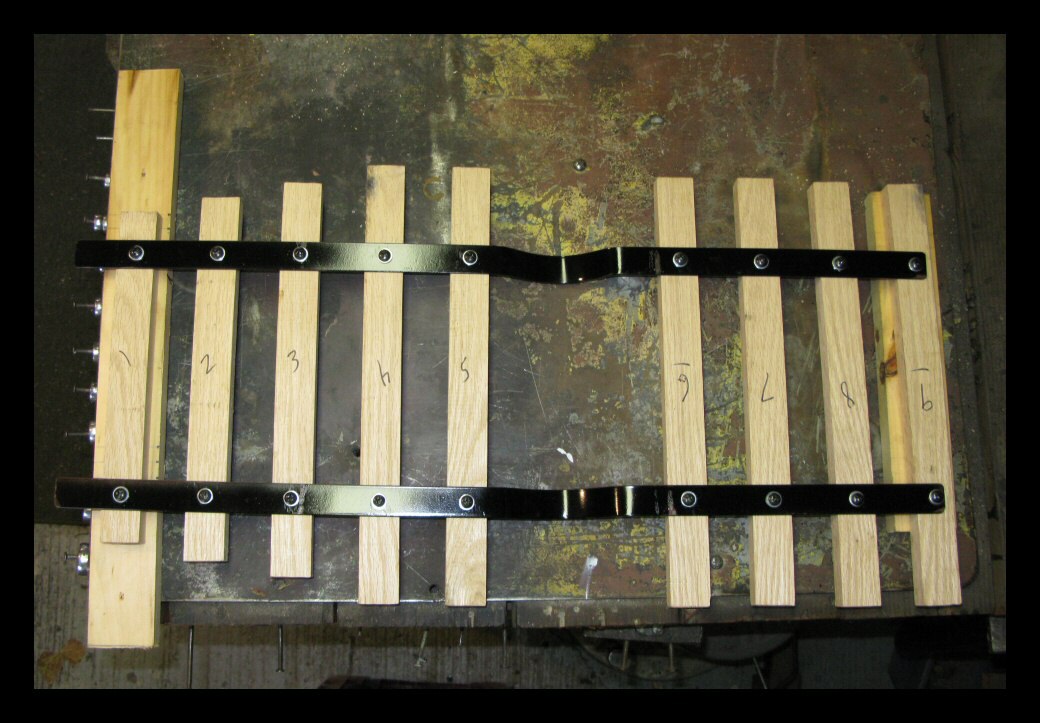
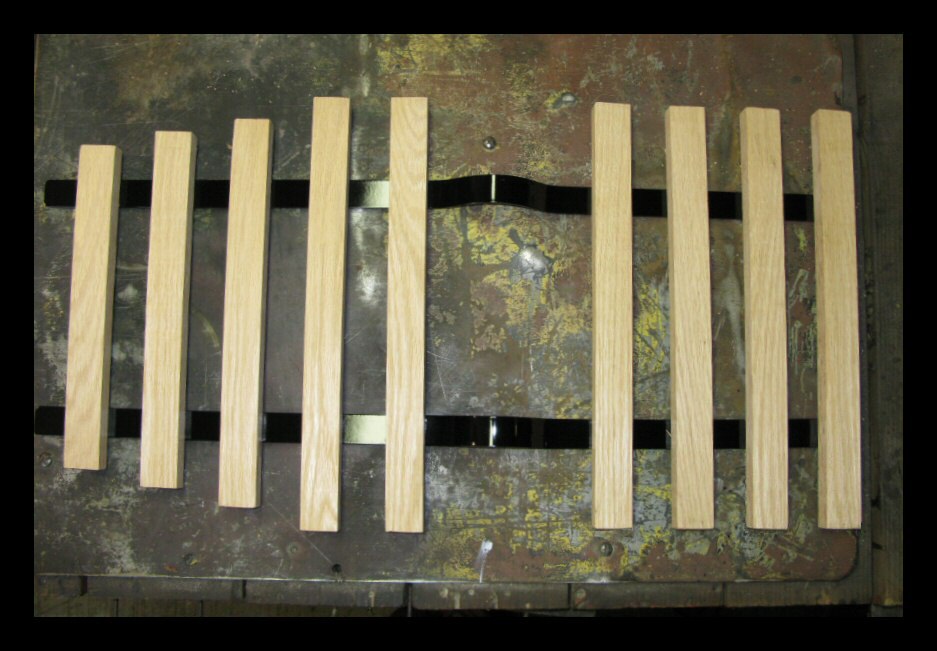
Pan head screws with washers. I used
3/4" screws. The washers were just a little extra
insurance against the screws trying to poke out the other
side, or at least making little bulges. In reality, they
probably didn't make much difference. |
 |
Done. |
 |
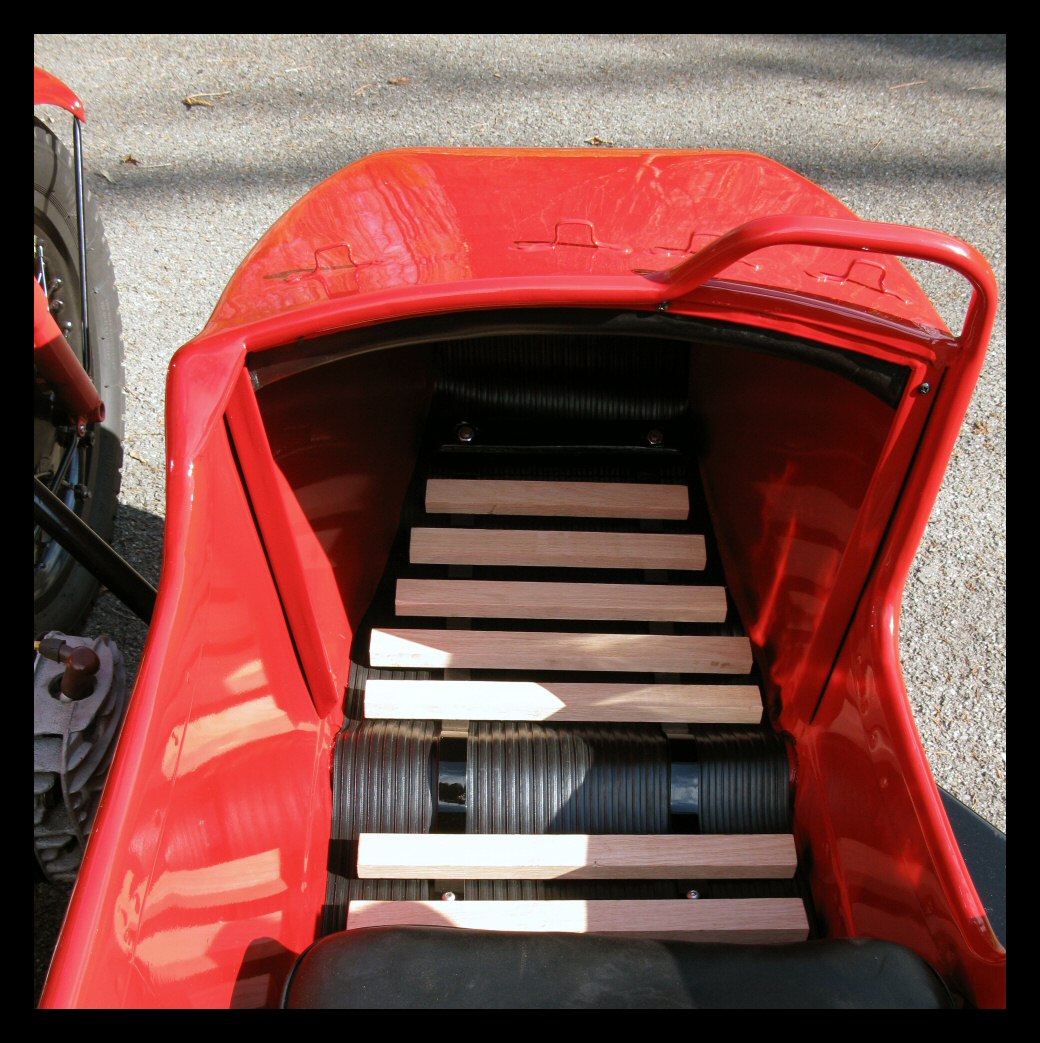
The toeboard bolts need to be loosened in
order to tuck a half inch or so of the straps underneath
the toeboard. With the duckboards in the sidecar, I can
locate and drill two more holes for securing the them to
the floor. (I'm probably the only person who does this.) |
 |
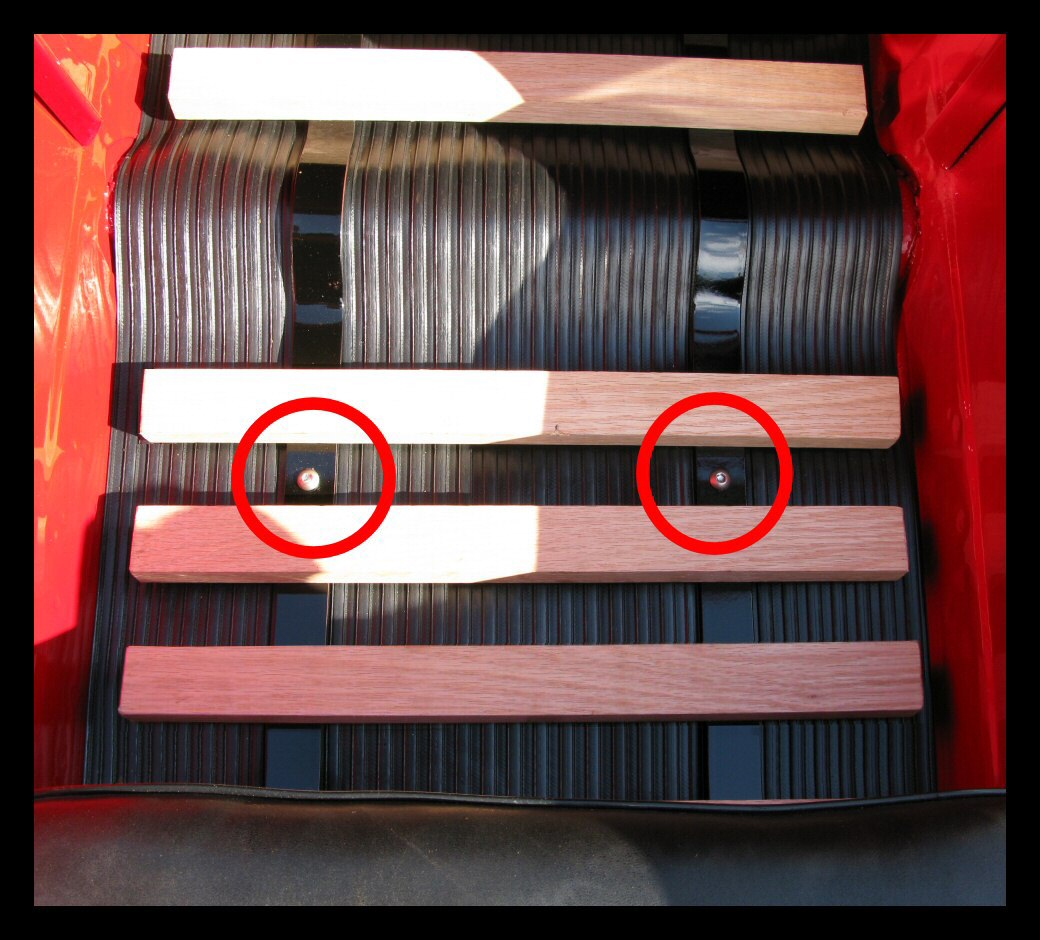
And here you can see the afore-mentioned
screws. They're actually allen head bolts with nylock
nuts underneath the sidecar.. |
 |
|
|
|
|
|

.jpg)
.jpg)
.jpg)
.jpg)
.jpg)
.jpg)
.jpg)
.jpg)
.jpg)
.jpg)
.jpg)
.jpg)
.jpg)
.jpg)