| CJ750 toolbox | |||||
| Decoking a sidevalve by Steve
Christo Part of the maintenance schedule for the CJ750 includes “removal of deposited carbon” or decoking the combustion chamber. The manual suggests decoking at 1000km, 2000km and every 6000km. The coke that they are referring to is the crust and crud that builds up in there as a byproduct of combustion. If your bike is running way rich and/or you’re burning a lot of oil, these build ups can be fairly substantial and can affect the performance of your engine. In extreme cases the coke and carbon will continue to glow after the spark and cause the fuel to ignite at inappropriate times. A lot of us like to run on the rich side to keep the temperature down, exacerbating the problem. Even the best tuned CJ engines will develop small amounts of coke simply because of the cooler spots in the combustion chamber inherent in the design. Decoking the flathead CJs, (M1 and M1M) is a simple procedure. |
|||||
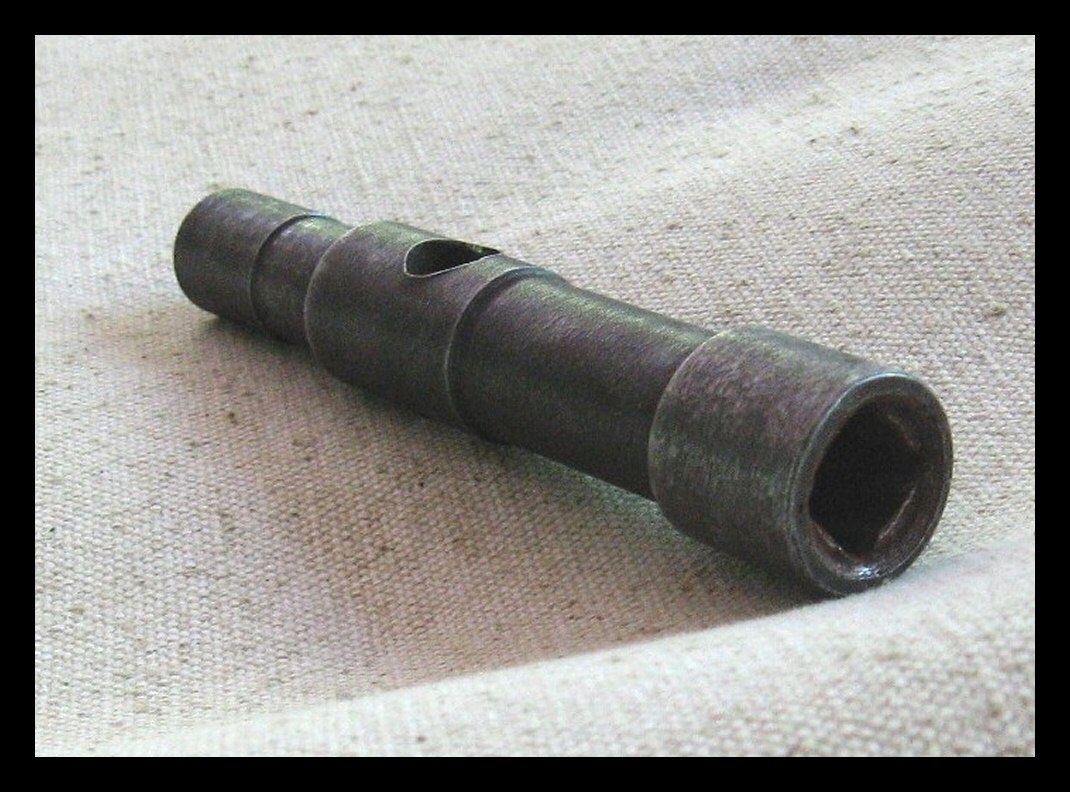 |
First remove your spark plug cables and spark plugs. The head bolts come off next. You’ll need the square socket that should have been provided with your bike. If you don’t have one, then I suggest you get the PLA tool kit from LRM. | ||||
| It contains all the special tools needed to do maintenance on CJs. Be careful not to damage the contacting surfaces as the aluminum head can be scratched easily. | |||||
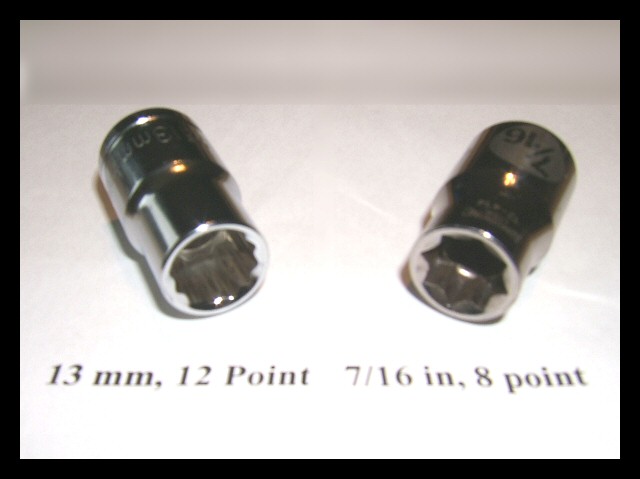 |
Gary Morgan points out that if you don't have the special square socket, you can get by using a 12-point 13mm or 8-point 7/16" socket instead. | ||||
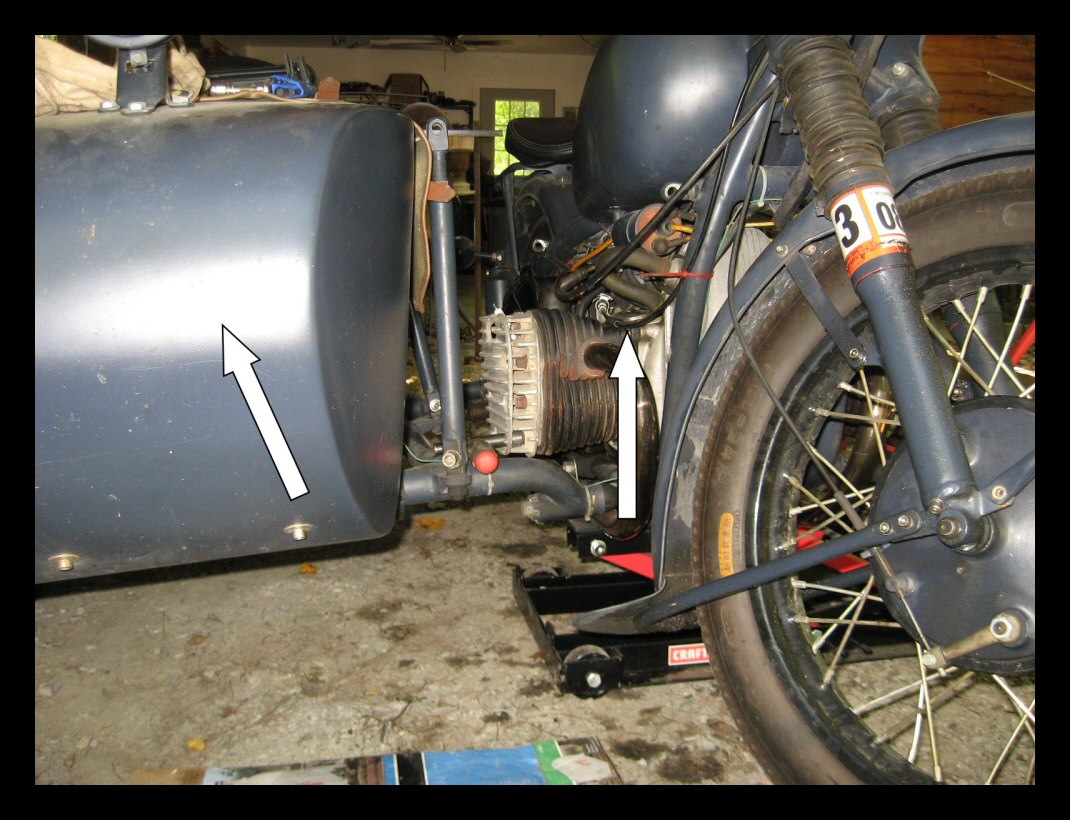 |
Access to the right cylinder head is difficult with the sidecar mounted. Detach the sidecar struts at the top and leave the ball attachments in place. There is no need to tamper with any of the adjustments. Jack the bike up until the bottom of the head clears the sidecar frame and the sidecar will rotate out of the way leaving room to get the head off easily. | ||||
| If you're not using a motorcycle jack then make sure the bike won't tip when you lift it. | |||||
 |
Crank the kickstarter till the valves are seated and stuff a rag into the cylinder. Use a brass wire or plastic brush to remove as much of the buildup on the combustion chamber surfaces as possible. I follow that up with a scrubbing using a 3M abrasive pad and naptha or paint thinner on the combustion and contact surfaces. | ||||
| Even the most difficult scale can be scraped off with a piece of wood or plastic. If you have to resort to steel then be careful not scratch anything. If you’re planning to reuse a copper gasket then clean it and scuff it up with 400 grit or finer paper. | |||||
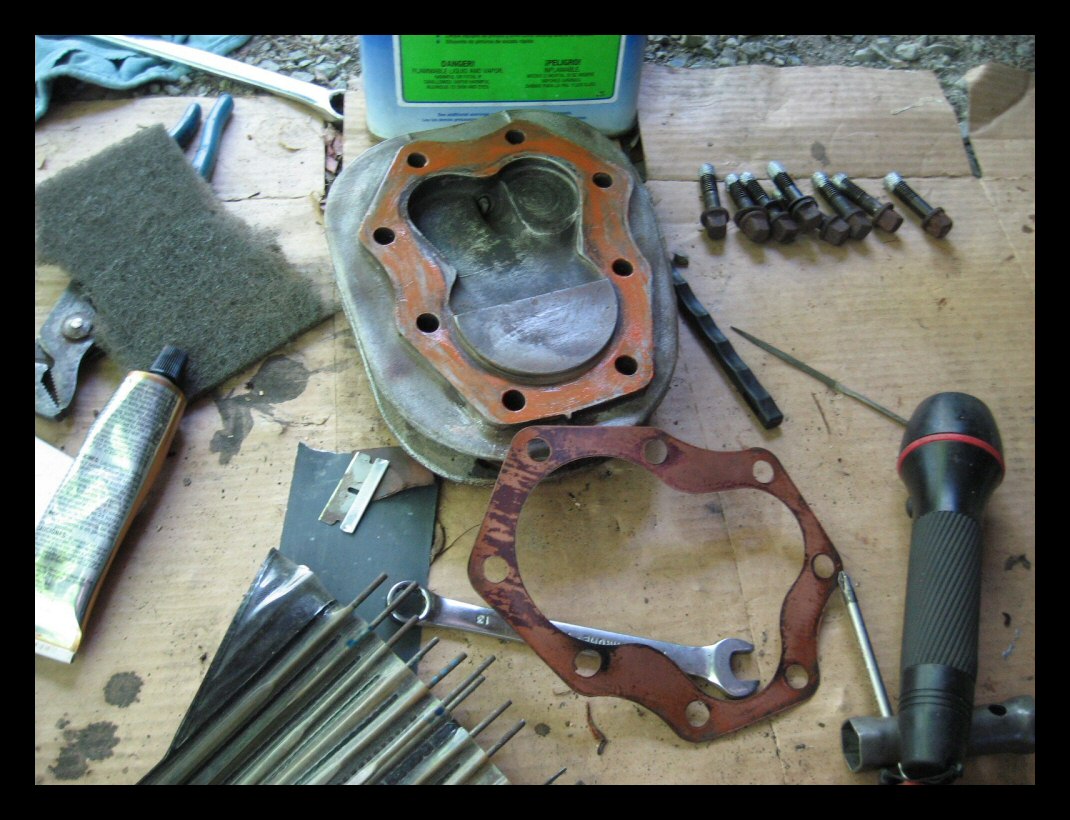 |
Clean up any damaged thread on the head bolts and apply a high temperature anti-sieze compound to the threads. If the threads are too badly damaged you should get new bolts. I didn’t have new copper gaskets for this job so I reused the old ones. | ||||
| Fred Balany suggested using a THIN layer of high temperature copper/RTV gasket sealant on the head and cylinder contacting surfaces to assist with the seal and it worked great. It even solved a gasket leak problem that I had (until I can get the heads machined and get new copper gaskets). | |||||
 |
Re-install the heads and hand-tighten all of the bolts. Start tightening at the middle of one side, then do the middle of the other side (but not directly opposite), then one next to the first one, then the opposite one diagonal on the other side, etc. Repeat the sequence, tightening a little each time until you have 21.4 - 24.4 ft lbs (29 - 33 Nm) of torque. | ||||
| The sequence that I use is shown in the photograph. Other people might suggest a slightly different pattern but the idea is generally the same. This one works for me. I torqued everything cold. Some people will torque it cold then run it to operating temperature and re-torque it. Cold worked fine on this job. Here’s a link to some good head bolt tightening information …http://www.aa1car.com/library/2004/us70480.htm... If you’re using the copper/RTV gasket sealer, then let it cure for 24 hours before turning over the engine. If you must crank it before that, then make sure the spark plugs are removed to avoid blowing out the sealant. | |||||