 |
Tech notes from Steve
Christo |
 |
 |
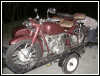
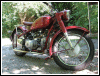
Steve's solo OHV. |
|
|
 |
My first CJ is my “workhorse”, a
12V flat head that I use to get me to work on good days
and to run errands around the county. I owned a 6V
flattie for a while but had to give it up to a friend who
appreciates simple, robust engineering as much as I do.
It’s so much fun riding and maintaining these beasts
that I decided that I needed to add another CJ to my
(hopefully) permanent collection. |
 |
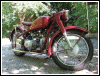
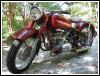
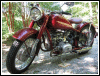
Without thinking, I bought another one. Went
up to PA to pick up a red OHV Chang from Greg who brought
it back from China where he works occasionally. The bike
was built by Luke who had done a first
class job on the brightwork. Couldn’t count the
number of thumbs-up I got from motorists on my way back
to VA. I wanted to ride this one solo for a while to see
what all the OHV guys were talking about on the forum. |
 |
I prefer not to use machine tools unless
absolutely necessary. I’m no Luddite but more and
more I see the expensive, unwarranted uses of higher
technology in situations where simpler solutions are more
appropriate. With that in mind, I armed myself with a few
simple hand tools, some experience with two other CJs and
a wisdom gleaned from the CJ forums and set to work. (I
did, however, let myself use an electric hand drill on
this go around!) |
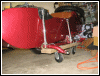 |
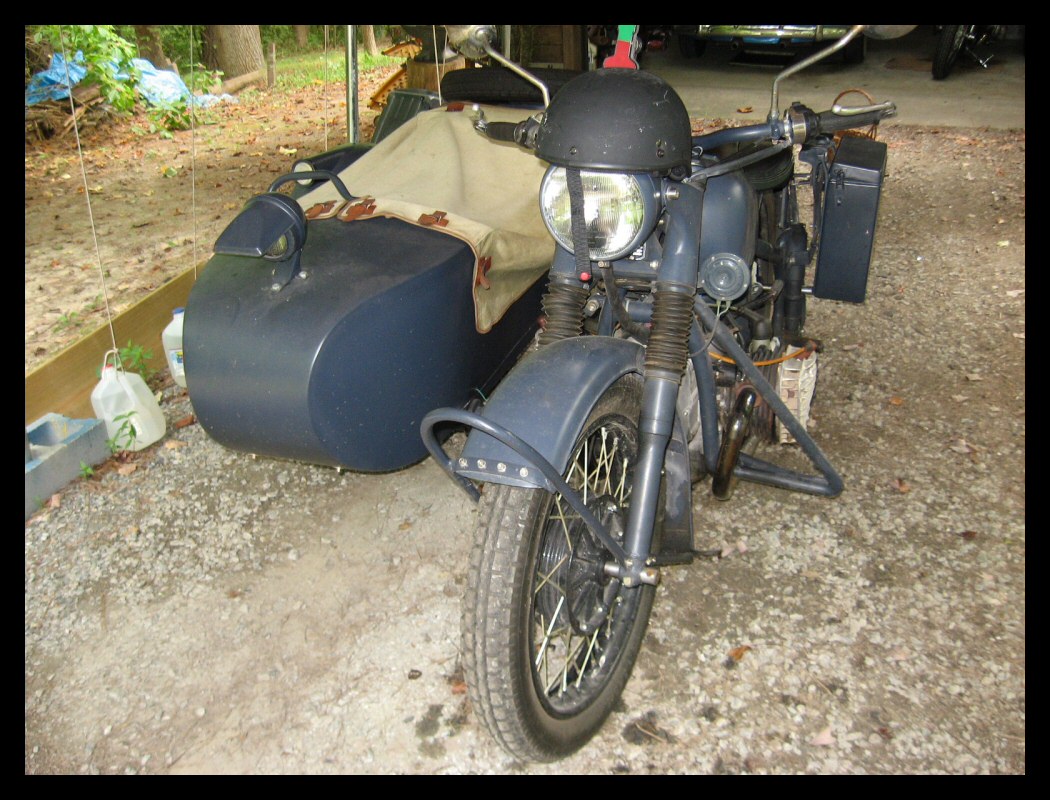
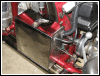
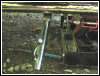
The first job was to remove the sidecar and
make it portable. A scrap 2x6 board, a couple of U-bolts
and two 5” casters (rear fixed and front swiveled)
was all it took. Had to cut the “+” cable that
went to the sidecar-mounted battery. Decided to make the
cut near to where the battery box would be. A locking
connector was already in place for the sidecar lights.
The negative cable was simply unbolted from the
transmission housing. |
 |
Once the sidecar was out of the way, I took
off the passenger seat to give it a lower look. The next
step was to install a battery box. Greg gave me one that
was already chromed but no mounting holes. Mounted the
bottom to the passenger foot peg mount and the top to the
fender with a nice stainless steel tube for a stand-off
to keep it from wobbling too much. |
 |
The battery is wedged in with foam. The only
thing left to do for this installation was to make up
some cable and fit the box with rubber grommets. The
disconnect to switch from sidecar battery to bike battery
is a ¼” bolt isolated from the frame with some zip
loom. |
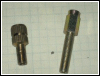 |
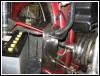
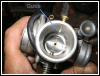
The bike is fitted with two Chinese
“Mikuni” carburetors. One of the throttle
adjusting bolts on top was broken. I replaced the
adjusters on both carbs with parts from a “conQuest
Control Cable Master Kit”. Part #390, adjusting
bolt, 6mm dia. X 0.75mm thread pitch. Thread length =
1¼” (32mm). Overall length = 1-5/8” (41mm). |
 |
Had to drill out the I.D. of the threaded
portion to fit the ball end of the cable. The top had to
be drilled out a little to fit the elbow. Using the
conQuest part turned out to be a good move since this
adjuster gives me more adjusting length without
interfering with the slide. I think you can order these
parts in packages of 10 from the company and they’re
pretty inexpensive. |
|
conQuest Products Co., 28090 Missouri Trail,
Perris, CA 92570, 1-800-346-3150 (customer service) |
 |
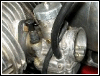
The right side carburetor slide was twisting
and sticking open because the guide had fallen out.
Looked around the shop for “just the right”
material to make another one. Found a brass #12 wood
screw that fit the bill. The shank would be a press fit
into the carb. A little cold forging on the vice and some
filing and sawing had the slide working nicely in about
20 minutes. |
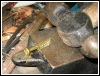 |
The shank was tapped in and sawed flush with
the body with the keyed end sticking into the carburetor
body about 2mm. Both carbs were running way rich so I let
the needles on the main jets down a notch (with one more
notch left for adjustment). It’s still running
pretty rich but runs cooler as a result. Balanced and
adjusted the carbs by ear and am getting great response
throughout the range. And, those baffled straight pipes
make it sound sooo good! |
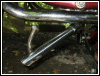 |
Next stop is the kickstand. It looked like
the stop had worn down to the point where it would almost
go all the way forward. |
 |
Cold forged some wedge shaped shims from
1/8” (3mm) steel rod to fit and bent them over to
keep from falling out. Sits rock solid now. |
 |
Changed all of the fluids. Used straight 60
weight Valvoline Racing Oil in the crankcase, ½ and ½
NAPA GL4/5 and synthetic Royal Purple 75W-90 in the
transmission and straight Royal Purple in the final
drive. Took her on the road for a test drive and it
exceeded all of my expectations. |
 |
Loving the low center of gravity and mighty
throttle response. I might have to keep this baby. Oh,
did I mention that those straight pipes sound really
really good? The only thing left on my list is to add now
is 4.00” tires and to change all the bulb sockets
and bulbs to easily obtainable American and European
types. |
 |
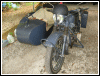
Here she is tucked in for the night after a
long ride on beautiful sunny fall day in Virginia. Snug
as a bug in a rug. Ahhh. |
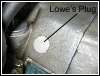 |
Side note: I had lost the plug that covered
the hole for the timing marks on the flywheel on my M1M.
Found these at Lowe’s (American building supply
chain) in the hardware section. “Nylon Hole
Plug”, Hilman, 5/8 inch, part # 881285. They’re
available in white or black and come two to a pack.
It’s a very snug fit and handles the heat with no
problem. This one’s been on there for a couple of
months. |
 |
|
|
|
|
|